Rainbowcore Hypernova/Yellow

From Mizuumi Wiki
Jump to navigation Jump to search
Intro

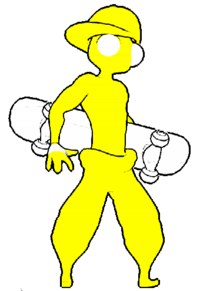
Yellow is the speedy rushdown character of Rainbowcore Hypernova, sporting tons of normals and specials that fling them across the screen at high speeds and the best base mobility the game has to offer. Much of Yellow's gameplan relies on getting in and staying in, repeating mixups and pressure with things like their crossup dash, jump cancel strings, and a midair low that can be mixed in with crossups and double overheads. It's hard 'not' to open people up with Yellow, especially with meter in play. This comes with the amazing 623A/B, powerful and fast DP's that allow Yellow to reversal out of a situation and take their momentum back.

This strong offense and defense combine to make Yellow a momentum heavy snowball character, turning stray hits into damage and resets that churn out wins fast. In turn however, they struggle hard in neutral. Many characters present in RCHN have huge, fast buttons, or strong projectile zoning options. Yellow has to avoid the minefield in most of their matchups, using smart movement (and the occasional guess) to force themselves in.

If you love rushdown gameplay, mixing opponents in a scary blender, and cool skateboarding references, Yellow is worth a shot.

RCHN Yellow Name.PNG

RCHN Yellow Idle.png
Pros Cons
  • Mobility: Yellow is second to none in speed. A much faster walkspeed, a unique airdash, and plenty of fast and momentum carrying normals let Yellow fly through neutral.
  • DP: Yellow's 623A/B DP's are fast reversals that do huge damage, even acting as your most useful combo ender.
  • Mixup: With both an overhead and a low, both of which can be done in the air, a chainable launcher, and a fast crossup dash, Yellow forces strike mixups at all times on offense.
  • Neutral: Yellow lacks many strong anti-projectile options, and lacks the buttons to contest in neutral vs the rest of the cast. Zoning is an uphill battle.
  • Combos: While optimized combos exist, Rainbowcore's DI system and some difficult execution make them fairly rare. The average Yellow combo doesn't hurt much or lead to a knockdown, even with meter.

Normals

5A
Damage Guard First Active Active Recovery On Hit On Block
20 Mid 2 - - -8 -11

5A.


5B
Damage Guard First Active Active Recovery On Hit On Block
20 Mid 2 - - -8 -11

5B.


2A
Damage Guard First Active Active Recovery On Hit On Block
20 Mid 2 - - -8 -11

2A.


2B
Damage Guard First Active Active Recovery On Hit On Block
20 Mid 2 - - -8 -11

2B.


j.A
Damage Guard First Active Active Recovery On Hit On Block
20 Mid 2 - - -8 -11

j.A.


j.B
Damage Guard First Active Active Recovery On Hit On Block
20 Mid 2 - - -8 -11

j.B.

Command Normals

6A
Damage Guard First Active Active Recovery On Hit On Block
20 Mid 2 - - -8 -11

6A.


6B
Damage Guard First Active Active Recovery On Hit On Block
20 Mid 2 - - -8 -11

6B.


j.2A
Damage Guard First Active Active Recovery On Hit On Block
20 Mid 2 - - -8 -11

j.2A.


j.2B
Damage Guard First Active Active Recovery On Hit On Block
20 Mid 2 - - -8 -11

j.2B.

Special Moves

236A/B
Damage Guard First Active Active Recovery On Hit On Block
20 Mid 2 - - -8 -11

Rail Grind.


623A/B
Damage Guard First Active Active Recovery On Hit On Block
20 Mid 2 - - -8 -11

Uppercut.


214A/B
Damage Guard First Active Active Recovery On Hit On Block
20 Mid 2 - - -8 -11

Darkslide.

Super

632146B
Damage Guard First Active Active Recovery On Hit On Block
20 Mid 2 - - -8 -11

Super.


General
Controls
HUD
System
FAQ
Characters
Red
Orange
Yellow
Green
Blue
Indigo
Violet