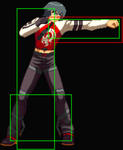
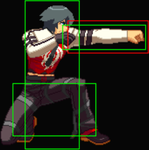
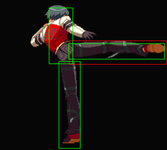
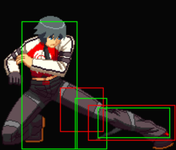
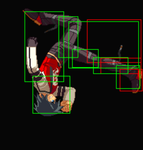
User:Crimefighter
N.E.X.T. sandbox chode dumping ground Flick Club sandbox
Extra Move Selection
Click to expand
623K
M31st Gata = Gale (Hayate)
623K |
|---|
4/6BD
1st Gata - 43rd Shiki = Falcon (Hayabusa) 4BD/6BD (air OK) 4BD 4BD 2BD 2BD 6BD 6BD 8BD 8BD 5BD 5BD
|
|---|
236236K
91st Gata = Saint's Arrow (Koushi)
236236K |
|---|
236236P
81st Gata = Jupiter (Raijin)
236236P |
|---|
Recommended Sets
Lupinus pretty much never wants to take two specials for her Extra Moves. Though their usages vary, both of her super moves are good enough to merit carrying one of them into any given matchup because of her high conversion rate for Exceed combos using either. Between Hayabusa and Hayate, Hayabusa generally sees more use since Lupinus has strong enough corner carry that it's possible to make good use of it in most matchups. However, as stated earlier, matchups where she needs a meterless reversal may warrant taking Hayate instead. It's largely up to you.
Hayabusa and Raijin: While you lose some more options for air control since you're not carrying Koushi, this gives you a reversal with a bit more range plus the absurd mixup/corner conversion potential that wallcling can enforce. You'll have to get used to routing at midscreen for Raijin loops and you may not like needing meter for a reversal, but if you can work around those limitations this set works well.
Hayabusa and Koushi: This is sort of the inverse of the above selection, trading some ground coverage for a better command of the air and retaining wallcling tech. However, it's easier to use Koushi to set up for damage and some degree of corner carry--so long as you can catch out an opponent in the air or put them there.
Hayate and Koushi: When you absolutely need a grounded meterless reversal but need to control the air as well, this is the set you want. Hayate's Exceed potential combined with Koushi's positioning and damage means that setting up high-damage situations is a lot less demanding than getting Raijin spacing correct. The main downside to this set is the loss of wallcling, limiting some of your more obnoxious pressure to Claymore setups only.
ground moves
| Move | Startup | Block Adv | Guard | Cancel | CH Properties |
Notes |
|---|---|---|---|---|---|---|
| 5A | - | - | HL | Yes | - | Lorem ipsum dolor sit amet, consectetur adipiscing elit. Etiam convallis ac elit in vehicula. Etiam porttitor est eget nibh volutpat, id vehicula diam pellentesque. Donec in lorem rutrum, rutrum enim ut, congue turpis. Donec eu est aliquet, convallis mauris vel, ultricies nisl. Fusce et est sed eros maximus convallis. Mauris tempus malesuada augue, ut varius enim convallis id. Pellentesque vitae enim aliquet, efficitur turpis sed, vestibulum lectus. Sed pellentesque auctor lectus. Nullam ac tincidunt est. |
| 2A | - | - | HL | Yes | - |
Easier to read in edit view by writing on a new line |
| 5B | - | - | HL | Yes | - | put words here |
| 2B | - | - | L | Yes | - | put words here |
| cl.C | - | - | HL | Yes | Stagger | put words here |
| 5C | - | - | HL | No | Stagger | put words here |
| 2C | - | - | HL | Yes | Stagger | put words here |
| cl.D | - | - | HL | Yes | Stagger | put words here |
| 5D | - | - | HL | No | Stagger | put words here |
| 2D | - | - | L | No | Launch | put words here |
Air moves
| j.A | Startup | Block Adv | Guard | Cancel | CH Properties |
|---|---|---|---|---|---|
| - | - | H | Yes | - | |
|
Lorem ipsum dolor sit amet, consectetur adipiscing elit. Etiam convallis ac elit in vehicula. Etiam porttitor est eget nibh volutpat, id vehicula diam pellentesque. Donec in lorem rutrum, rutrum enim ut, congue turpis. Donec eu est aliquet, convallis mauris vel, ultricies nisl. Fusce et est sed eros maximus convallis. Mauris tempus malesuada augue, ut varius enim convallis id. Pellentesque vitae enim aliquet, efficitur turpis sed, vestibulum lectus. Sed pellentesque auctor lectus. Nullam ac tincidunt est. | |||||
| j.B | Startup | Block Adv | Guard | Cancel | CH Properties |
| - | - | H | Yes | - | |
| put words here | |||||
| j.C | Startup | Block Adv | Guard | Cancel | CH Properties |
| - | - | H | Yes | Stagger | |
| put words here | |||||
| j.D | Startup | Block Adv | Guard | Cancel | CH Properties |
| - | - | H | Yes | Stagger | |
| put words here | |||||
special moves
| 236P | Version | Startup | Block Adv | Guard | Cancel | CH Properties |
|---|---|---|---|---|---|---|
| A | - | - | H | Yes | - | |
|
Lorem ipsum dolor sit amet, consectetur adipiscing elit. Etiam convallis ac elit in vehicula. Etiam porttitor est eget nibh volutpat, id vehicula diam pellentesque. Donec in lorem rutrum, rutrum enim ut, congue turpis. Donec eu est aliquet, convallis mauris vel, ultricies nisl. Fusce et est sed eros maximus convallis. Mauris tempus malesuada augue, ut varius enim convallis id. Pellentesque vitae enim aliquet, efficitur turpis sed, vestibulum lectus. Sed pellentesque auctor lectus. Nullam ac tincidunt est. | ||||||
| C | - | - | H | Yes | - | |
| Text. | ||||||
| 236K | Startup | Block Adv | Guard | Cancel | CH Properties | |
| B version | ||||||
| - | - | H | Yes | - | ||
| put words here | ||||||
| D version | ||||||
| - | - | H | Yes | - | ||
| put words here | ||||||
notation
7   8   9    The numeric directional input assumes that the player
  \ | /    is facing right and corresponds to the number formation
4 - 5 - 6  on a keyboard's numpad. So in application, this makes 4
  / | \    act as "back", 5 - "neutral", 6 - "forward", and so on.
1   2   3  All further directional notation follows this template.
- bold text - indicates that the text is part of a combo
- ABCD - indicates the button to be pressed, A, B, C, or D. when grouped together such as AB or A+B it means to press the buttons together.
- lowercase words - indicates that whatever described is not literal inputs. Usually a note such as "delay" or a system mechanic such as "exceed"
- cl. - stands for "close", indicates the version of the move that you get when close to the opponent
- f. - stands for "far", indicates the version of the move that you get when away from the opponent. If neither cl nor f is specified then it is either unimportant to combo or both work
- j. - stands for "jump", indicates the move must be done in the air
- cs - stands for "chaos shift" done by pressing A+B during a super
- ec - stands for "exceed cancel" done by pressing B+C
- > - indicates the next move in the combo. Assume it's a cancel unless otherwise noted
- ~ - indicates a followup to a move
- [X] - indicates an input should be held
- ]X[ - indicates an input should be released
- (X) - if X is just a number it indicates how many hits of a multi-hit move should connect. If X is more notation in indicates an optional part of the combo, usually an extension with super
- regular text - indicates that the text is not part of a combo, when following after bold text it's usually an explanation of the combo or notes about execution.
