Story
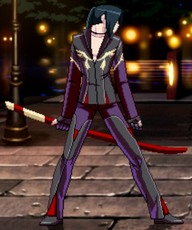
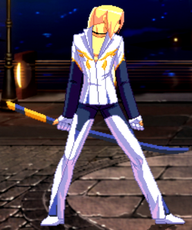
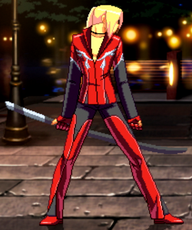
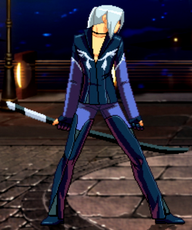
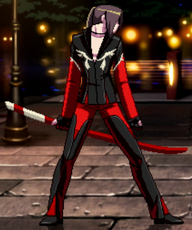
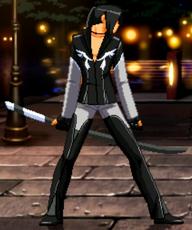
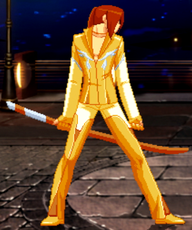
Vein
『ヴェイン』
A war orphan who's sister left him during the war when they were children. Vein has never forgiven his cowardly sister for abandoning him, forcing him to live a hard life out on the street. Discarding his past, Vein has reinvented himself as a new, stronger, edgier being and plans to use the unlimited power of the Chaos Code to put an end to all the phonies that surround him.
Playstyle
Health: 30000
Stun: 90
Vein's ground fireball sticks around for a really long time which lets him set it up to meaty and then be free to either cover escape options or commit to a mix-up attempt. The rest of his toolset is fairly well rounded, ex teleport is a good anti-zoning tool, his DP works as a reversal, extra move options for a command grab or air fireball give him access to good mix-ups and space control. He also has good meter gain to fuel fairly high damage ex move combos as well as highly damaging exceeds.
Mobility (Run vs Step)
Run: Best choice for Vein overall, lets you do short dashes which makes his spacing alot stronger, dashing jump ins, maximum damage and meter gain combos, and midscreen to corner exceed/chaos shift combos.
Step: Vein's normals aren't exactly that fast, doesn't really improve his mixup game much since he already has a teleport and he doesn't get much off of throws, and he has to spend at least 1 stock to get any decent damage off of command throw which he can easily setup tick throws for with run.
All of Vein's extra moves are generally good utility to have, there isn't a lot of synergy between the moves, it's more about deciding which of the 4 you want.
Scorching Purple is a really good space control move. It has great angles for an air fireball.
Infernal Devotion is a command grab that seals movement options which gives you unblockable setups. You can also use it to option select parry attempts.
Fatal Finale is a counter super that can be used as a reversal, but it's main utility is that for 2 bars you can combo into it and it does a lot of damage. Vein doesn't need this for damaging combos but it gives him different routes.
Guilty Darkness is a setup super that puts a trap on the ground that erupts with hands if the opponent gets close. It's incredibly hard to deal with while it's out and if your opponent gets stuck air blocking it you can unblockable them for free.
Move List
Click on a header to expand that section of the movelist
Normal Moves
Normal Moves
5A
5A
|
| Damage
|
Stun
|
Guard
|
Startup
|
Active
|
Recovery
|
Frame Advantage (block)
|
Cancelable
|
Counterhit Properties
|
| -
|
-
|
High/Low
|
7f
|
-
|
-
|
+3
|
Yes
|
-
|
Short range jab, whiffs on crouchers, go to move when it comes to catching air techs since 6A is a bit slow, not that reliable though but good if you have them blocking in air already so stuff like j.B>5A is really good.
|
|
2A
2A
|
| Damage
|
Stun
|
Guard
|
Startup
|
Active
|
Recovery
|
Frame Advantage (block)
|
Cancelable
|
Counterhit Properties
|
| -
|
-
|
High/Low
|
6f
|
-
|
-
|
+4
|
Yes
|
-
|
Pretty good range crouching jab, also his fastest startup normal and fast recovery making it one of his best pressure tool.
|
|
5B
5B
|
| Damage
|
Stun
|
Guard
|
Startup
|
Active
|
Recovery
|
Frame Advantage (block)
|
Cancelable
|
Counterhit Properties
|
| -
|
-
|
Low
|
8f
|
-
|
-
|
+0
|
Yes
|
-
|
Standing low kick. Rather slow startup, recovery, and a mediocre hitbox(reach is slightly longer than 2A). 2b is the low to use.
|
|
2B
2B
|
| Damage
|
Stun
|
Guard
|
Startup
|
Active
|
Recovery
|
Frame Advantage (block)
|
Cancelable
|
Counterhit Properties
|
| -
|
-
|
Low
|
8f
|
-
|
-
|
+4
|
Yes
|
-
|
Crouching low kick, links into 2A on hit and can be used for tick throws or pressure reset.
|
|
cl.C
cl.C
|
| Damage
|
Stun
|
Guard
|
Startup
|
Active
|
Recovery
|
Frame Advantage (block)
|
Cancelable
|
Counterhit Properties
|
| -
|
-
|
High/Low
|
10f
|
-
|
-
|
-6
|
Yes
|
-
|
Short range hook, high damage normal with alot of knockback on block. Gattles into 5D, 2D, and 6A, mainly used for combos and possibly fuzzy j.B if blocked high.
|
|
5C
5C
|
| Damage
|
Stun
|
Guard
|
Startup
|
Active
|
Recovery
|
Frame Advantage (block)
|
Cancelable
|
Counterhit Properties
|
| -
|
-
|
High/Low
|
14f
|
-
|
-
|
-7
|
Yes
|
-
|
Mid range slash. Furthest reaching cancelable normal, very useful for combos.
|
|
2C
2C
|
| Damage
|
Stun
|
Guard
|
Startup
|
Active
|
Recovery
|
Frame Advantage (block)
|
Cancelable
|
Counterhit Properties
|
| -
|
-
|
High/Low
|
11f
|
-
|
-
|
-1
|
Yes
|
-
|
Two crouching slashes, 1st hit has about the same reach as 2B, pretty quick startup and decent recovery. Quite a bit of knockback on hit so use this for proper spacing when going for 2D knockdown into fireball oki.
|
|
5D
5D
|
| Damage
|
Stun
|
Guard
|
Startup
|
Active
|
Recovery
|
Frame Advantage (block)
|
Cancelable
|
Counterhit Properties
|
| -
|
-
|
High/Low
|
10f
|
-
|
-
|
-3
|
First hit only
|
-
|
1st hit is a kick with pretty fast startup, 2nd hit is a long range forward kick with a great hitbox. 2nd hit blows back on hit and is air techable, 1st hit can cancel into 6A for damage combos.
|
|
2D
2D
|
| Damage
|
Stun
|
Guard
|
Startup
|
Active
|
Recovery
|
Frame Advantage (block)
|
Cancelable
|
Counterhit Properties
|
| -
|
-
|
Low
|
12f
|
-
|
-
|
-8
|
No
|
-
|
Vein moves forward a bit and sweeps with both feet, long reach but slow startup and recovery. Knockdown only on ground hit, gives you enough time to set fireball oki but be wary because they can roll through it on wakeup.
|
|
j.A
j.A
|
| Damage
|
Stun
|
Guard
|
Startup
|
Active
|
Recovery
|
Frame Advantage (block)
|
Cancelable
|
Counterhit Properties
|
| -
|
-
|
High
|
6f
|
-
|
-
|
-
|
Yes
|
-
|
Quick startup short jab that cover up and forward area, is active for quite long.
|
|
j.B
j.B
|
| Damage
|
Stun
|
Guard
|
Startup
|
Active
|
Recovery
|
Frame Advantage (block)
|
Cancelable
|
Counterhit Properties
|
| -
|
-
|
High
|
8f
|
-
|
-
|
-
|
Yes
|
-
|
Pretty quick startup diagonal downward kick, very good jump in move and possibly used for instant overheads.
|
|
j.C
j.C
|
| Damage
|
Stun
|
Guard
|
Startup
|
Active
|
Recovery
|
Frame Advantage (block)
|
Cancelable
|
Counterhit Properties
|
| -
|
-
|
High
|
12f
|
-
|
-
|
-
|
Yes
|
-
|
Kinda slow slash that hits around him, hits behind him also so you can use it for crossups, but has to hit a bit late for you to combo off it.
|
|
j.D
j.D
|
| Damage
|
Stun
|
Guard
|
Startup
|
Active
|
Recovery
|
Frame Advantage (block)
|
Cancelable
|
Counterhit Properties
|
| -
|
-
|
High
|
10f
|
-
|
-
|
-
|
Yes
|
-
|
Faster than j.C and hits down and forward area, has long reach so it's pretty good air to ground.
|
|
Command Moves
Command Moves
6A
Palm Strike
|
| Damage
|
Stun
|
Guard
|
Startup
|
Active
|
Recovery
|
Frame Advantage (block)
|
Cancelable
|
Counterhit Properties
|
| -
|
-
|
High/Low
|
12f
|
-
|
-
|
-11
|
Yes
|
-
|
Vein reaches up for an anti-air.
|
|
5CC
Surface Slash
|
| Damage
|
Stun
|
Guard
|
Startup
|
Active
|
Recovery
|
Frame Advantage (block)
|
Cancelable
|
Counterhit Properties
|
| -
|
-
|
High/Low
|
14f
|
-
|
-
|
-20
|
No
|
Wallbounce
|
Can be whiff canceled into from f.5c by hitting c again.
|
|
6C
Surface Slash
|
| Damage
|
Stun
|
Guard
|
Startup
|
Active
|
Recovery
|
Frame Advantage (block)
|
Cancelable
|
Counterhit Properties
|
| -
|
-
|
High/Low
|
14f
|
-
|
-
|
-20
|
Yes
|
Wallbounce
|
Same thing as 5CC, but on it's own
|
|
j.C4C
Moon Light
|
| Damage
|
Stun
|
Guard
|
Startup
|
Active
|
Recovery
|
Frame Advantage (block)
|
Cancelable
|
Counterhit Properties
|
| -
|
-
|
High
|
-
|
-
|
-
|
-
|
Yes
|
-
|
Comes out on hit or guard only
|
|
Universal Mechanics
Universal Mechanics
Throw
Throw
5/6AC
|
| Damage
|
Stun
|
Guard
|
Startup
|
Active
|
Recovery
|
Frame Advantage (block)
|
Cancelable
|
Counterhit Properties
|
| -
|
-
|
Throw
|
5f
|
-
|
-
|
-
|
No
|
-
|
|
|
|
Guard Break
Guard Break
6CD
|
| Damage
|
Stun
|
Guard
|
Startup
|
Active
|
Recovery
|
Frame Advantage (block)
|
Cancelable
|
Counterhit Properties
|
| -
|
-
|
Guard Break
|
38f
|
-
|
-
|
-
|
No
|
-
|
Guard Break. Vein has good range on his guard break and because his extra move command grab seals specials, rolls, and backdashses, he can setup a pseudo-unblockable situation where the opponent must either have a longer range normal or time a parry/trade.
|
|
C+D
Tactical Guard
CD
|
| Damage
|
Stun
|
Guard
|
Startup
|
Active
|
Recovery
|
Frame Advantage (block)
|
Cancelable
|
Counterhit Properties
|
| -
|
-
|
High/Low
|
-
|
-
|
-
|
-
|
No
|
-
|
|
|
|
A+B
Roll
CD
|
| Damage
|
Stun
|
Guard
|
Startup
|
Active
|
Recovery
|
Frame Advantage (block)
|
Cancelable
|
Counterhit Properties
|
| -
|
-
|
High/Low
|
33f
|
-
|
-
|
-
|
No
|
-
|
|
|
|
Special Moves
Special Moves
236P
Demon Slaughter
236P
|
| Version
|
Damage
|
Stun
|
Guard
|
Startup
|
Active
|
Recovery
|
Frame Advantage (block)
|
Cancelable
|
Counterhit Properties
|
| A
|
-
|
-
|
High/Low
|
15f
|
-
|
-
|
-12
|
-
|
-
|
A dash followed by a series of slashes that causes a hard knockdown on the final hit. 2 hits. Has a decent startup as it can combo from any normal.
|
| Version
|
Damage
|
Stun
|
Guard
|
Startup
|
Active
|
Recovery
|
Frame Advantage (block)
|
Cancelable
|
Counterhit Properties
|
| C
|
-
|
-
|
High/Low
|
24f
|
-
|
-
|
-23
|
-
|
-
|
Dash goes further than A version and is 4 hits. Soft knockdown on final hit. Slower startup than A version. Basic meterless combo option.
|
| Version
|
Damage
|
Stun
|
Guard
|
Startup
|
Active
|
Recovery
|
Frame Advantage (block)
|
Cancelable
|
Counterhit Properties
|
| EX
|
-
|
-
|
High/Low
|
17f
|
-
|
-
|
-11
|
-
|
-
|
A series of slashes that will cross the screen. 4 hits. Launches on final hit. Startup is about the same as A version. This is one of your basic launchers for air combos.
|
|
623P
Heavenly Enchantment
623P
|
| Version
|
Damage
|
Stun
|
Guard
|
Startup
|
Active
|
Recovery
|
Frame Advantage (block)
|
Cancelable
|
Counterhit Properties
|
| A
|
-
|
-
|
High/Low
|
5f
|
-
|
-
|
-25
|
-
|
-
|
Fairly standard Dragon Punch. Hits once and launches but can be teched on normal hit. It can be blocked in the air but still has some anti-air utility under the right circumstances. Used in conjunction with 236+B/D, it can discourage air-dashes and build meter. Also used in Exceed loops.
|
| Version
|
Damage
|
Stun
|
Guard
|
Startup
|
Active
|
Recovery
|
Frame Advantage (block)
|
Cancelable
|
Counterhit Properties
|
| C
|
-
|
-
|
High/Low
|
20f
|
-
|
-
|
-35
|
-
|
-
|
Turning hit followed by a rising slash. Like Setsuna's strong DP in LB2. Has more invun than the A version Hits twice on the ground and twice in the air, which makes the first two hits air unblockable. No use as an AA, but does slightly more damage than 236C in combos. It can be supercancelled on the first and second hit. Wallbounces into knockdown on hit.
|
| Version
|
Damage
|
Stun
|
Guard
|
Startup
|
Active
|
Recovery
|
Frame Advantage (block)
|
Cancelable
|
Counterhit Properties
|
| EX
|
-
|
-
|
High/Low
|
4f
|
-
|
-
|
-21
|
-
|
-
|
A fast DP that travels further forward than the A version, hits twice (if you're close enough), and can cause wallbounce.
|
|
236K
Lightning Insanity
236K
|
| Version
|
Damage
|
Stun
|
Guard
|
Startup
|
Active
|
Recovery
|
Frame Advantage (block)
|
Cancelable
|
Counterhit Properties
|
| B
|
-
|
-
|
High/Low
|
49f
|
-
|
-
|
-
|
-
|
-
|
Grounded fireball. Hits roughly 2 character lengths away from Vein. Upon inputting the fireball, it appears then becomes active about half a second later, hitting 3 times. It also blocks most projectiles. The move is also cancellable into B or D teleport. Very useful for preventing zoning and oki.
|
| Version
|
Damage
|
Stun
|
Guard
|
Startup
|
Active
|
Recovery
|
Frame Advantage (block)
|
Cancelable
|
Counterhit Properties
|
| D
|
-
|
-
|
High/Low
|
49f
|
-
|
-
|
-
|
-
|
-
|
Grounded fireball. Hits roughly 3 and a half character lengths away from Vein. Upon inputting the fireball, it appears then becomes active about half a second later, hitting 3 times. It also blocks most projectiles. The move is also cancellable into B or D teleport. Very useful for preventing zoning and oki.
|
| Version
|
Damage
|
Stun
|
Guard
|
Startup
|
Active
|
Recovery
|
Frame Advantage (block)
|
Cancelable
|
Counterhit Properties
|
| EX
|
-
|
-
|
High/Low
|
40f
|
-
|
-
|
-
|
-
|
-
|
Grounded fireball. The ex ver. tracks the opponent unless they are completely fullscreen away. Hits 3 times, and is cancellable into teleport. Good for oki and pressuring a passive opponent.
|
|
214K
Illusive Darkness
214K
|
| Version
|
Damage
|
Stun
|
Guard
|
Startup
|
Active
|
Recovery
|
Frame Advantage (block)
|
Cancelable
|
Counterhit Properties
|
| B
|
-
|
-
|
High/Low
|
32f
|
-
|
-
|
-
|
-
|
-
|
Vein's teleport. The B version goes the exact distance of the D fireball. The move is not invuln, so be careful as you can get hit out of it. Despite that, it's a great all around tool due to the fact that you can cancel his teleport into this.
|
| Version
|
Damage
|
Stun
|
Guard
|
Startup
|
Active
|
Recovery
|
Frame Advantage (block)
|
Cancelable
|
Counterhit Properties
|
| D
|
-
|
-
|
High/Low
|
34f
|
-
|
-
|
-
|
-
|
-
|
Vein's teleport. The D version goes almost fullscreen. Not invuln, but still useful in a variety of situations due to the fact that it can be done out of his fireball.
|
| Version
|
Damage
|
Stun
|
Guard
|
Startup
|
Active
|
Recovery
|
Frame Advantage (block)
|
Cancelable
|
Counterhit Properties
|
| EX
|
-
|
-
|
High/Low
|
11f
|
-
|
-
|
-12
|
-
|
-
|
Ex teleport is one of Vein's best moves. Hits almost fullscreen, low profiles many projectiles, and leads to a combo as long as you hit them from a certain distance. This move can be used to punish people not being very careful from across the screen, as it's near instant. It's punishable, but you can space it to be safe if careful. If you have the meter to use it, they should be on watch. Make them scared of this move.
|
|
Extra Special Moves
j236P
Scorching Purple
j.236P
|
| Damage
|
Stun
|
Guard
|
Startup
|
Active
|
Recovery
|
Frame Advantage (block)
|
Cancelable
|
Counterhit Properties
|
| -
|
-
|
High/Low
|
-13f
|
-
|
-
|
-
|
-
|
-
|
An air fireball. A version goes downwards diagonally, while C version goes horizontal. Picking this gives you a fast way to keep people in check from about midscreen distance, makes many of your confirms easier as you can just end buttons in fireball to be in a good situation, and also lets you have access to the ... 6a(1) > sj.b > j.236a combo ender (only works on a standing opponent). An okay choice for an extra special, but the pit and the command grab are honestly more worth it unless you need the extra space control for specific matchups.
|
|
63214P
Infernal Devotion
63214P
|
| Version
|
Damage
|
Stun
|
Guard
|
Startup
|
Active
|
Recovery
|
Frame Advantage (block)
|
Cancelable
|
Counterhit Properties
|
| A
|
-
|
-
|
High/Low
|
14f
|
-
|
-
|
-
|
-
|
-
|
| C
|
-
|
-
|
High/Low
|
11f
|
-
|
-
|
-
|
-
|
-
|
Vein's command grab. The A version is a comboable, untechable throw that causes damage and soft knockdown. The C version of the throw is faster, does a little damage, and puts a special status effect on the opponent. While they are flashing, they lose access to walking, backdash, step, jumping, specials, rolling, and supers. They can still run but they don't move anywhere, Celia and Cthylla's runs don't move them off the ground, but they do retain throw invun. In addition, they do not get pushed back when you hit them, so if you hit them you can link light normals into themselves to build meter until the effect wears off. This selectable special adds a lot to Vein's mixup game, and it's possible to get a pseudo-unblockable from a successful C command throw.
|
|
Ultimate Chaos Moves
Ultimate Chaos Moves
236236P
Grievous Madness
236236P
|
| Damage
|
Stun
|
Guard
|
Startup
|
Active
|
Recovery
|
Frame Advantage (block)
|
Cancelable
|
Counterhit Properties
|
| -
|
-
|
High/Low
|
-
|
-
|
-
|
-
|
-
|
-
|
Vein slashes his sword in an upwards crescent that hits the entire area above him. This super has a lot of invinicibility, comes out very quickly, and is quite hard to punish. This is a fantastic reversal super to call out any crossup attempts that would normally make your dp whiff. On hit the move wallbounces, but with the recovery it has you will still need to cancel to get a combo.
|
|
2141236P
Saka Manji Raikoou Ha
2141236P
|
| Damage
|
Stun
|
Guard
|
Startup
|
Active
|
Recovery
|
Frame Advantage (block)
|
Cancelable
|
Counterhit Properties
|
| -
|
-
|
High/Low
|
-
|
-
|
-
|
-
|
-
|
-
|
Vein sends out a shockwave about two and a half character lengths away from him that pulls the opponent toward him on hit. On block, the opponent stays in place and you recover fairly fast, so it's advantage but not really worth it for a full meter. The move is also lacks a good use in neutral because what it does is done better by EX teleport. Overall, a good move for combos and resets into unblockable, but not much else.
|
|
Extra Ultimate Chaos Moves
214214P
Fatal Finale
214214P
|
| Damage
|
Stun
|
Guard
|
Startup
|
Active
|
Recovery
|
Frame Advantage (block)
|
Cancelable
|
Counterhit Properties
|
| -
|
-
|
High/Low
|
-
|
-
|
-
|
-
|
-
|
-
|
A reversal super that issens the opponent twice, then throws them behind Vein and will wallbounce near the corner. It will catch all types of strike attacks (high, low, mid) and even supers, but it will not work against projectiles. A failed attempt will put you in counter-hit state. One of the most interesting properties of this move is that it will activate during a super cancel as long as you are slightly closer than throw distance and the opponent is still standing.
|
|
236236K
Guilty Darkness
236236K
|
| Damage
|
Stun
|
Guard
|
Startup
|
Active
|
Recovery
|
Frame Advantage (block)
|
Cancelable
|
Counterhit Properties
|
| -
|
-
|
High/Low
|
-
|
-
|
-
|
-
|
-
|
-
|
Vein lays a trap on the ground and if the opponent gets near a bunch of hands fly out and either hit them or keep them in blockstun. Light version stays put, heavy version moves in on the opponent. Good for oki or just for shutting off part of the screen. Both versions hit 12 times
|
|
Destruction Chaos
Destruction Chaos
2363214AC
Lunatic Butterfly
2363214AC
|
| Damage
|
Stun
|
Guard
|
Startup
|
Active
|
Recovery
|
Frame Advantage (block)
|
Cancelable
|
Counterhit Properties
|
| -
|
-
|
High/Low
|
-
|
-
|
-
|
-
|
No
|
-
|
Level 3. Very fast, so you can use it to punish somethings or after a 236A on hit. Not really worth the meter cost most of the time but if it kills it was optimal.
|
|
Combos
There is an archieve of the old combo section here. Those were for vanilla PS3 and most likely don't work in the PS4 version, but some of them might and lots of the concepts remain the same.
While all these start off of jump-ins your starter largely doesn't matter, as long as you can find a way to confirm into the route you should be good
IAD j.B > j.D > 2A > 2B > 5C > 236AC > IAD j.B > j.D > super jump > j.B> j.C > j.D > land > 5A > jump > j.A > j.B > j.D > double jump > j.B > j.D
Midscreen (easy) tip:make sure you forward jump when you IAD, spacing on that part of the combo is a lil specific or else j.c or j.d will whiff
IAD j.B > j.D > 2A > 2B > 5C > 236AC > IAD j.B > j.D > super jump > j.B > j.C > j.D > land > 5A > jump > j.A > j.B > j.C > double jump > j.B > j.C > j.4C
Midscreen to corner (easy) will also work when starting in the corner if you neutral double jump for the combo ender, it puts you at this spacing to put down a stationary puddle (236236b). Even though they airtech, its a very good situation in your favor. Worth a bar.
IAD j.B > j.D > 2A > 2B > 5C > 214BD > 2B > cl.C > 6A > sjc > j.C > j.D > land > 6A > sjc > j.A > j.B > j.C > land > 623AC > 2A > 5D(1) > sjc > j.C > j.D > land > 5A > jump > j.A > j.B > j.C > double jump > j.B > j.C > j.4C
Midscreen rejump
tip: delay the f.5c cancel into 214bd
IAD j.B > j.D > 2A > 2B > 5C > 214BD > 2A > 5D(1) > sjc > j.C > j.D > land > 6A > j.C > j.D > land 5A > jump > j.A > j.B > j.C > double jump > j.B > j.C > j.4C > 236236P
Corner double rejump Difficult combo, but worth it in stun and damage. Same concept as the easy corner combo in regards to the puddle oki at the end
CH 6A > otg 2B > cl.C > 6A > sjc > j.C > j.D > 5A > jump > j.A > j.B > j.C > land > 623AC
otg route This is possible to do midscreen but incredibly inconsistent. Running start helps. The j.abc ex dp ender after 5a works for all of his other corner combos as well, it's the knockdown ender. It's usefulness varies depending on character and current meter.
Throw into the corner > 214BD > 5C > sjc > j.C > j.D > land > 5A > jump > j.A > j.B > j.C > double jump > j.B > j.C > j.4C > 236C
Corner Throw Combo Combo off throw in the corner using 214BD. It doesn't do a lot of damage and that meter may be better used for 236BD oki or a metered confirm after meterless oki. However, it can be a way to end a round off throw if need be.
Exceed Combo Routes
IAD j.B > j.D > 2A > 2B > 5B > 5C > 236C > Exceed(B+C) > 5C > 623AC(1) > 236236C > Chaos Shift(A+B) > 236B > 236236A > 623AC(1) > 236236C > Chaos Shift > 623A > 236236A > small dash > 5B > 5D(1) > sjc > j.C > j.D > land > 5A > jump > j.A > j.B > j.C > double jump > j.B > j.C > j.4C > j.236C
Near Corner Exceed Route Veins most damaging exceed route. Can be done as long as you are 1/4th of the screen away from the corner at the end of 236C. As usual, the inputs for your specials can be used as a short cut for super inputs (623AC 236C results in ex dp > super). Make sure you do the ex dp late after the initial side switch to let them fall more. If they are too high you will not be able to do the final 623A > 236236A.
IAD j.B > j.D > 2A > 2B > 5B > 5C > 236C > Exceed(B+C) > 5C > 623AC(1) > 236236A > run > 5B > 5C > 623AC(1) > 236236C > Chaos Shift(A+B) > 236B > 236236A > Chaos Shift > slight walk back > 5B > 5C > sjc > j.C > j.D > land > 5A > jump > j.A > j.B > j.C > double jump > j.B > j.C > j.4C > 236C
Half Screen Exceed Route Veins half screen exceed route. It does less damage than the corner route but allows you to deal a lot of damage as long as 236C ends half screen or closer to the corner. The important part that differs from the corner route is Chaos Shifting the 3rd 236236 so that you can walk back and keep them in the corner for the ender.
2A > 2B > 5B > 5C > 236C > Exceed(B+C) > 5C > 214BD > 236236A > run > 5B > 5C > 623AC(1) > 236236A > Chaos Shift(A+B) > slight walk back > 5B > 5C > sjc > j.C > j.D > land > 5A > jump > j.A > j.B > j.C > double jump > j.B > j.C > j.4C > 236C
Full Screen Exceed Route Does less than the half screen or corner routes but allows you to confirm into big damage off a defensive mash/abare in the corner. The important part in this combo is to make sure you delay the 236236A until after you cross through to the other side with 214BD.
unblockable
63214c command throw disables their walking, running, rolling, specials, and supers. all they can do is parry and mash normals. If executed correctly, a well timed fireball into unblockable is inescapable. In addition, when in the debuffed state of the command throw, they don't get pushed back on hit. you can link some extra light normals for meter.
Colors
- Console Versions: You can hold R1 button while selecting a character to get an alternative color.
- Arcade Version: You can hold START button while selecting a character to get an alternative color.

