Verdict Guilty/Minso: Difference between revisions

From Mizuumi Wiki
Jump to navigation Jump to search
(Added motions for specials on pad)
Line 265: Line 265:
|image=VG-MinsoTaserHigh.png
|image=VG-MinsoTaserHigh.png
|name=Taser High
|name=Taser High
|input=66C
|input=Keyboard: 66C<br>Pad: 236C
|data=
|data=
   {{AttackData-VG
   {{AttackData-VG
Line 284: Line 284:
|image=VG-MinsoTaserLow.png
|image=VG-MinsoTaserLow.png
|name=Taser Low
|name=Taser Low
|input=66A
|input=Keyboard: 66A<br>Pad: 236A
|data=
|data=
   {{AttackData-VG
   {{AttackData-VG

Revision as of 02:38, 7 February 2023

Minso Minso.png
VG-MinsoVS.png
Ammo Capacity 3
Reload Time 51 frames
Throw Handcuffs
Playstyle Rushdown
Setplay

Introduction

Minso is a Cop character with great normals, mix-ups and BC-safe okizeme, although she relies on landing a knockdown in order to truly shine.


Strengths Weaknesses
  • Good Neutral: Minso's pokes are longer than average. This makes Minso's neutral better than average, especially when combined with 66A
  • Outstanding Okizeme: Minso's okizeme is one of the best in the game, at least because it's BC-safe. It also loops into itself on hit
  • Great Mix: Minso's c.B/D coupled with her crouching normals makes for a very deadly 50/50 at close range; even more so during okizeme
  • Charlie: Minso's dog, Charlie, is the most versatile move in the game. His unrivaled utility allows Minso to get very creative with how she uses him
  • Needs the Knockdown: Minso is at her strongest when she's next to her opponent during okizeme. While her pokes are great, overreliance on them can very easily make her lose the round
  • Below-average Defense: Minso's main BC options are either slow (AAB) or unorthodox (Charlie), thus limiting the options she can block punish
  • Awkward Air Normals: While not bad by any means, Minso's air normals can feel awkward to use, especially as jump-ins


Move List

Normal Attacks

5A
VG-Minso5A.png
Damage Guard Startup Active Recovery On Hit On Block Ammo
60 Mid 2 - - - +1 -

Stubby punch that whiffs on crouchers. Outclassed by 5C.

5B
VG-Minso5B.png
Damage Guard Startup Active Recovery On Hit On Block Ammo
60 Mid 3 - - - -1 -

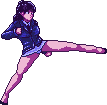
Minso's main poke due to its reach and frame data. Also her only standing normal that hits crouchers.

5C
VG-Minso5C.png
Damage Guard Startup Active Recovery On Hit On Block Ammo
80 Mid 2 - - - -1 -

Close range anti-air that works the same as 5A, except it does slightly more damage in exchange of being minus (which doesn't matter). Works best when CS'd.

5D
VG-Minso5D.png
Damage Guard Startup Active Recovery On Hit On Block Ammo
80 Mid 3 - - - -3 -

Really good anti-air, especially when CS'd.


AA
VG-MinsoAA.png
Damage Guard Startup Active Recovery On Hit On Block Ammo
80 Mid 1 - - - +14 -

Only used to go into AAB. Otherwise worthless.

AAB
VG-MinsoAAB.png
Budget roll
Budget roll
Damage Guard Startup Active Recovery On Hit On Block Ammo
160 Mid 1 - - Launch - -

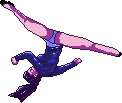
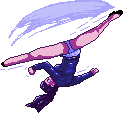
Key move. It works well as a combo ender (or filler), a BC option and even as an approaching tool when CS'd. Just make sure the opponent doesn't block it.


c.A/C
VG-MinsoClosePunch.png
Damage Guard Startup Active Recovery On Hit On Block Ammo
60 Mid 2 - - - +8 -

Universal unexploitable plus frames.

c.B/D
VG-MinsoCloseKick.png
The only standing overhead in the entire game
Damage Guard Startup Active Recovery On Hit On Block Ammo
80 High 2 - - - +2 -

The only proximity normal in the game that hits crouchers. It also does wonders up close since it hits overhead, and can be used in conjunction with her crouching normals in order to perform 50/50s.


2A
VG-Minso2A.png
Damage Guard Startup Active Recovery On Hit On Block Ammo
80 Low 2 - - - +1 -

Mainly used in mix-ups, forming a 50/50 with Minso's c.B/D.

2C
VG-Minso2C.png
Damage Guard Startup Active Recovery On Hit On Block Ammo
80 Low 2 - - - +1 -

Same as 2A, except with a different animation. Use whichever one you want

2B/D
VG-Minso2Kick.png
Damage Guard Startup Active Recovery On Hit On Block Ammo
80 Low 3 - - - -2 -

Minso's other poke, it's also her largest normal. While it does more damage than 5B, it's also slightly more commital since 2B/D has more recovery.


j.A/C
VG-MinsojPunch.png
Damage Guard Startup Active Recovery On Hit On Block Ammo
80 High 1 - - - ~ -

Can be used as an IOH, but it only leads into something in the corner. Mostly strong as an air-to-air.

  • Can be used for cross-ups
j.B/D
VG-MinsojKick.png
Damage Guard Startup Active Recovery On Hit On Block Ammo
80 High 3 - - - ~ -

While it doesn't look like it, this is Minso's jump-in. It can also be used an on IOH, but it only works at a specific distance

  • Cannot be used for cross-ups


Special Attacks

Taser High
Keyboard: 66C
Pad: 236C
VG-MinsoTaserHigh.png
Damage Guard Startup Active Recovery On Hit On Block Ammo
240 Unblockable 9 - - Launch - 1

Very strong, forward-advancing anti-air despite not CSable since it covers around half the screen. Not much use outside of that.

Taser Low
Keyboard: 66A
Pad: 236A
VG-MinsoTaserLow.png
Damage Guard Startup Active Recovery On Hit On Block Ammo
240 Unblockable 17 - - Launch - 1

A godsend of a move. It allows Minso to quickly approach while also punishing projectile at the right distance. The best part is that it's entirely unblockable AND grants a knockdown, letting Minso run offense very easily. Since it's an unblockable OTG, 66A also allows Minso to bypass the game's combo limit and perform longer combos than almost everyone else. Its only downsides are its super high startup (slowest move in the game) and the fact that its locked behind ammo, so Minso can't spam it all day long (it also makes it a rather subpar BC option). One of the best moves in the entire game.

  • Can be cancelled into Charlie on hit
Charlie
]A[
VG-MinsoCharlie.png
What the dog doing? Pretty much everything.
Damage Guard Startup Active Recovery On Hit On Block Ammo
100 Low 10 - Total 12 Launch - -

Minso calls her dog (Charlie), who will then run at very high speed through the screen.

Character-defining, extremely versatile move that can be used in a myriad of ways. It can be used for dealing with zoning, covering Minso's approaches, BCing, enforcing mix-ups at close range... You name it, Charlie can probably do it. However, it's mostly useful during okizeme, where he can protect Minso from BCs, giving her a second chance at mixing the opponent up should they guess right once. This isn't all Charlie is useful for, though: he can also be used in conjunction with c.B/D to create an unblockable setup which will knock the opponent down on hit, looping Minso's okizeme.

Charlie's utility doesn't stop there, so don't hesitate to be creative with him!

  • Charlie will not disappear when hit by another projectile. However, he also won't destroy projectiles on contact
Panty Shot
j.]D[
VG-MinsoPantyShot.png
Damage Guard Startup Active Recovery On Hit On Block Ammo
220 High 6 - - Launch ~ -

Basically a powered-up j.B/D. Used similarly to j.B/D, except instead of being used as an IOH it knocks the opponent down on hit

  • Can hit cross-up, but it's very janky


Universal Moves

Grab
VG-MinsoGrab.png
The only command grab in the entire game
Damage Guard Startup Active Recovery On Hit On Block Ammo
140 - 2 - - Launch - -

Standard Cop throw that is buffed by the fact that it's on Minso. If she somehow lands it, she's dealing at least 50% damage and puts you in her signature okizeme. Applies handcuffs on hit

  • Does 120 damage against an already cuffed opponent


Strategy

Combos

Midscreen

  • 5B > AAB > 66A > Charlie (460 damage)
Poke combo that leads into Charlie oki. Does decent damage for a poke confirm
  • 2C/c.K, 2C/c.K > AAB > 66A > Charlie (720/800 damage)
Close range combo. Usually done after BCing with AA. Leads into Charlie oki
  • (Charlie comes out), {empty hop 5B}/{walk c.B/D} > (Charlie hits) > AAB > 66A > Charlie (560/580 damage)
Combo for when Charlie is used in neutral. c.B/D is the ideal followup (especially at close range), but jumping is easier to land (and better if a projectile is on the screen). Leads into Charlie oki
  • Throw, walk c.B/D, [microwalk c.B/D]*5 > AAB > 66A, Charlie (1120 damage)
Max damage combo, and a ToD if HP was set on 1000. Easier to land than most throw combos.


Corner

  • 2B/2D, microwalk 5B > AAB > 66A > Charlie (540 damage)
Corner BnB. Also leads into Charlie oki.
  • Charlie, c.K > 66A > Charlie (420 damage)
Charlie hit conversion. Leads to less damage than midscreen due to this game's combo rules in the corner, but it still leads to Charlie oki.


Anti-Air

  • 5C/5D > AAB > 66A > Charlie (480 damage)
Anti-air combo. Leads into Charlie oki.
  • 5C > Throw
Throw confirm.


General
FAQ
Controls
HUD
System
Changelog
Characters
Gun
Gyeong
Hyuk
Jae
Minso
Reese
Si'u
Yohan