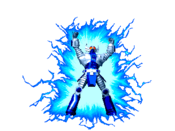
Avengers in Galactic Storm/Shatterax

From Mizuumi Wiki
Jump to navigation Jump to search

Story

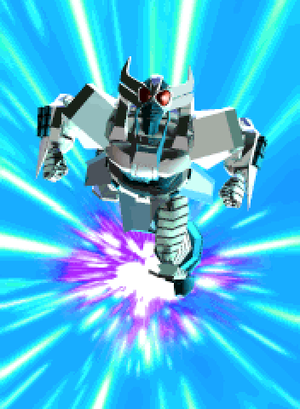
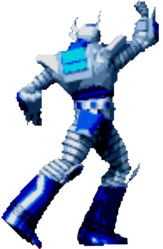
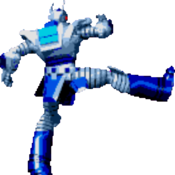
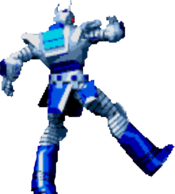
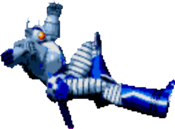
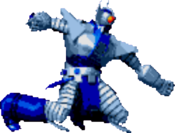
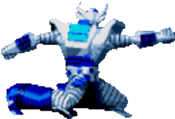
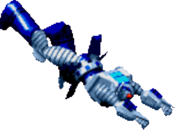
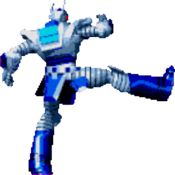
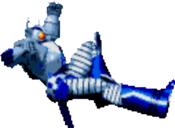
Not much is known about Roco-Bai prior to his conversion into the cyborg Shatterax, other than his fanatical devotion to the Kree Empire like many of his brethren. But his joining of the Kree's Starforce during the events of Operation: Galactic Storm has given him quite the chance to make a name for himself against Earth's Mightiest Heroes...

Gameplay

One of the four normally playable Kree characters in Avengers in Galactic Storm, Shatterax's ideal game-plan is to pester the opponent from afar. Already aided by a stellar fireball in Destruction Beam, this goal is further aided by get-off-me tools in Death Charge and Insane Blast, and even further rewarded if he can land a Space Pack on his opponent, wherein they'll be trapped in the pack while Shatterax has time to setup.


Strengths Weaknesses
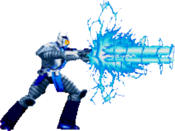
  • Oppressive fireball zoning thanks to 236P (Destruction Beam), which is only further exacerbated when paired with beam or projectile assists, like Iron Man, or especially Ultimus.
  • A fireball he can frequently fire off in the A Version of Destruction Beam also means plenty of opportunity for frequent meter gain. This can allow him to potentially regain the meter spent for an assist, especially Ultimus, by the time it's left the screen.
  • Great get-off-me tools and a fully invincible backdash with no recovery.
  • His hover allowing him to stall in the air can provide with some nasty mixups or okizeme, or even just normally wait out things he really doesn't want to deal with, like the opponent's assist.
  • Lack of reliable anti-airs means he has poor answers to shorthop pressure.
  • Unable to shorthop.
  • Tied for slowest walk in the game under technicality, outright IS the slowest walk thanks to how it works in cycles, similarly to Sentinel's walk in COTA. While he has other, faster means of travel, this can still serve as an occasional nuisance to overcome.
Shatterax

Moveset

Normal Moves

Standing Normals

5A
Shatterax far 5A.png
Damage Guard Startup Active Recovery Hit Adv Block Adv Cancel
? Mid ? ? ? ? ? ?

Description goes here.

cl.5A
Shatterax cl 5A.png
Damage Guard Startup Active Recovery Hit Adv Block Adv Cancel
? Mid ? ? ? ? ? ?

Description goes here.

5B
Shatterax far 5B.png
Damage Guard Startup Active Recovery Hit Adv Block Adv Cancel
? Mid ? ? ? ? ? ?

Description goes here.

cl.5B
Shatterax cl 5B.png
Damage Guard Startup Active Recovery Hit Adv Block Adv Cancel
? Mid ? ? ? ? ? Special, Super, Assist

Description goes here.

5C
Shatterax far 5C.png
Damage Guard Startup Active Recovery Hit Adv Block Adv Cancel
? Mid ? ? ? ? ? ?

Description goes here.

cl.5C
Shatterax cl 5C.png
Damage Guard Startup Active Recovery Hit Adv Block Adv Cancel
? Low ? ? ? ? ? Special, Super, Assist, cl.B, cl.D

Description goes here.

5D
Shatterax far 5D.png
Damage Guard Startup Active Recovery Hit Adv Block Adv Cancel
? Mid ? ? ? ? ? None

Description goes here.

cl.5D
Shatterax cl 5D.png
Damage Guard Startup Active Recovery Hit Adv Block Adv Cancel
? Mid ? ? ? ? ? None

Description goes here.

Crouching Normals

2A
Shatterax 2A.png
Damage Guard Startup Active Recovery Hit Adv Block Adv Cancel
? Low ? ? ? ? ? None

Description goes here.

2B
Shatterax 2B.png
Damage Guard Startup Active Recovery Hit Adv Block Adv Cancel
? Low ? ? ? ? ? None

Description goes here.

2C
Shatterax 2C.png
Damage Guard Startup Active Recovery Hit Adv Block Adv Cancel
? Low ? ? ? ? ? None

Description goes here.

2D
Shatterax 2D.png
Damage Guard Startup Active Recovery Hit Adv Block Adv Cancel
? Low ? ? ? ? ? None

Description goes here.

Aerial Normals

j.8A
Shatterax j 8A-9A.png
Damage Guard Startup Active Recovery Hit Adv Block Adv Cancel
? Overhead ? ? ? ? ? ?

Description Goes Here

j.7/9A
Shatterax j 8A-9A.png
Damage Guard Startup Active Recovery Hit Adv Block Adv Cancel
? Overhead ? ? ? ? ? None

Description Goes Here

j.8B
Shatterax j 8B-9B.png
Damage Guard Startup Active Recovery Hit Adv Block Adv Cancel
? Overhead ? ? ? ? ? None

Description Goes Here

j.7/9B
Shatterax j 8B-9B.png
Damage Guard Startup Active Recovery Hit Adv Block Adv Cancel
? Overhead ? ? ? ? ? None

Description Goes Here

j.8C
Shatterax j 8C.png
Damage Guard Startup Active Recovery Hit Adv Block Adv Cancel
? Overhead ? ? ? ? ? None

Description Goes Here

j.7/9C
Shatterax j 9C.png
Damage Guard Startup Active Recovery Hit Adv Block Adv Cancel
? Overhead ? ? ? ? ? None

Description Goes Here

j.8D
Shatterax j 8D.png
Damage Guard Startup Active Recovery Hit Adv Block Adv Cancel
? Overhead ? ? ? ? ? None

Description Goes Here

j.7/9D
Shatterax j 9D.png
Damage Guard Startup Active Recovery Hit Adv Block Adv Cancel
? Overhead ? ? ? ? ? None

Typically the normal of choice to use for your oki nonsense out of his hover.

Special Moves

Destruction Beam
236P
Shatterax 236A-B.png
236P
236P
Version Damage Guard Startup Active Recovery Hit Adv Block Adv Cancel
236A ? Mid ? ? ? ? ? None

Projectile is slower than the B version, but faster startup usually means this one is preferred in fireball wars or situations where using the B version would result in you being punished.

Version Damage Guard Startup Active Recovery Hit Adv Block Adv Cancel
236B ? Mid ? ? ? ? ? None

Projectile is much faster than the A version, but noticeably longer startup can result in you getting punished in situations where using the A version wouldn't. Still has its places, but requires more caution in use than than the A version.

Death Charge
623P
Shatterax 623A-B.png
623P
623P
Version Damage Guard Startup Active Recovery Hit Adv Block Adv Cancel
623A ? Mid ? ? ? ? ? None

Description Goes Here

Version Damage Guard Startup Active Recovery Hit Adv Block Adv Cancel
623B ? Mid ? ? ? ? ? None

Description Goes Here

Insane Blast
j.236P
Shatterax j 236A-B.png
Version Damage Guard Startup Active Recovery Hit Adv Block Adv Cancel
j.236A ? ? ? ? ? ? ? ?

Description goes here.

Version Damage Guard Startup Active Recovery Hit Adv Block Adv Cancel
j.236B ? ? ? ? ? ? ? ?

Description goes here.

Space Pack
214P
Shatterax 214A-B(1).png
Shatterax 214A-B(2).png
Version Damage Guard Startup Active Recovery Hit Adv Block Adv Cancel
214A ? Mid ? ? ? ? ? None

Description goes here.

Version Damage Guard Startup Active Recovery Hit Adv Block Adv Cancel
214B ? Mid ? ? ? ? ? None

Description goes here.

ULTIMATE ATTACK

236KK
Shatterax Ultimate Attack (1).png
Damage Guard Startup Active Recovery Hit Adv Block Adv Cancel
? ? ? ? ? ? ? None

Consumes Both Super Gauges

Combos

Infinites

Combo Starters

BNB Combos

Other Combos

j.D cl.C xx 214B

Sets up a glitch balloon.

cl.C cl.B cl.C xx 214A

Corner setup into glitch balloon.

Strategy

General Gameplan

Okizeme & Setups

General
Controls
HUD
System
Assist Strategy
FAQ
Characters
Captain America
Black Knight
Thunderstrike
Crystal
Dr. Minerva
Shatterax
Korath
Supremor
Galen Kor