Minamo "Nyamo" Kurosawa, is the gym teacher of Osaka, Koyomi, Tomo, Chiyo, Sakaki, and Kagura, the six main protagonists of the anime. Minamo is a high school friend and rival of Yukari Tanizaki; Yukari relentlessly insults and freeloads from Nyamo, but Nyamo gets her digs in, too.
Overview
Playstyle
Nyamo is a flashy rushdown character that uses her movement and large normals to get in on the opponent.
Pick if you like
Avoid if you dislike
Rekkas - All of Nyamo's moves have a follow-up of some kind, even her DP.
Large normals - Nyamo is tall, so her normals have pretty long reach. Most notably 2C having the most range out of any normal in the game.
Great Movement - she has a very good jump arc (sharing a similar one to Kamineko's), and a decently fast run. She's the only character in the game that can run back rather than have a back dash, which isn't great for her defense but it helps a lot with moving around the screen. She also gets a wall jump which is a little more niche but it can help her mix up her air movement.
Good corner carry - her rekka makes her travel halfway across the screen every time it hits, making it very easy to take someone to the corner.
Great pressure - being a fast character with a lot of ways to cancel moves into other moves, she can really blend people when she gets advantage.
Big - Nyamo's juggling animation makes her fall very wide, making a lot of combos easier or enabling specific routes.
Coffee - Nyamo loves coffee and as such, virtually all of her moves are named after a blend of coffee.
The King of Fighters - While most characters in this game rip-off or take inspiration from KOF, Nyamo has the most King of Fighters DNA in her by a wide margin.
Character Traits
Unique Attributes
Nyamo can run back. She doesn't get a traditional backdash, instead she can run back.
This is very good for her movement, she can really just jump all around the screen.
It doesn't stop there. During her a forward or backwards run, Nyamo can press A+B or B+C to perform one of two unique attacks.
Nyamo can wall jump. By pressing 46 near a wall in the air, she can jump very far off the wall.
Nyamo can air grab The only character with an air grab not locked behind a special move, Nyamo can throw a nearby opponent in the air by holding up and pressing C (j8C).
Outburst
Nyamo's outburst slows down time. The opponent is at her mercy since they're so slow, allowing Nyamo to get a pretty easy mix-up.
Slowed down time allows for some funny routes.
Nyamo's Outburst duration is much shorter than other characters'.
Move Descriptions
Normals
Standing Normals
5A
5A
Damage
Startup
Active
Recovery
Guard
Cancel
Adv Hit
Adv Block
Invul
4
-
-
-
Mid
-
-
-
-
Fast and reaches decently far in front of her for a 5A.
5B
5B
Version
Damage
Startup
Active
Recovery
Guard
Cancel
Adv Hit
Adv Block
Invul
5B
6
-
-
-
Mid
-
-
-
-
Pretty far reaching kick to the shin.
Can be followed up into 6B for a pretty ambiguous low hit.
5B~6B Guatemala
8
-
-
-
Low
-
-
-
-
Second hit for 5B, hits low.
5C
5C
Damage
Startup
Active
Recovery
Guard
Cancel
Adv Hit
Adv Block
Invul
8
-
-
-
Mid
-
-
-
-
Big upward kick
Combo filler.
Crouching Normals
2A
2A
Damage
Startup
Active
Recovery
Guard
Cancel
Adv Hit
Adv Block
Invul
4
-
-
-
Low
-
-
-
-
Really stubby uppercut.
Surprisingly hits low.
2B
2B
Damage
Startup
Active
Recovery
Guard
Cancel
Adv Hit
Adv Block
Invul
6
-
-
-
Low
-
-
-
-
Really basic low kick.
Reaches pretty far and hits pretty fast, very good poke.
2C
2C
Damage
Startup
Active
Recovery
Guard
Cancel
Adv Hit
Adv Block
Invul
8
-
-
-
Low
-
-
-
-
2-hit sweep, first hit leaves the opponent standing while the second sweeps them.
Farthest reaching normal in the game.
Jumping Normals
j.A
j.A
Damage
Startup
Active
Recovery
Guard
Cancel
Adv Hit
Adv Block
Invul
4
-
-
-
High
-
-
-
-
Knee kick.
Hits fast and hits on both sides. Cross-up button.
j.B
j.B
Damage
Startup
Active
Recovery
Guard
Cancel
Adv Hit
Adv Block
Invul
6
-
-
-
High
-
-
-
-
Punches pretty far downward.
Has a really high amount of hitstun so it's very good for combos.
j.C
j.C
Damage
Startup
Active
Recovery
Guard
Cancel
Adv Hit
Adv Block
Invul
7
-
-
-
High
-
-
-
-
Big air kick, great air-to-air.
Command Normals
Top Speed
Top Speed A+B while running
Damage
Startup
Active
Recovery
Guard
Cancel
Adv Hit
Adv Block
Invul
2
-
-
-
Mid
-
-
-
-
Command dash, goes through the opponent.
Staggers the opponent on hit.
Guatemala Antigua
Guatemala Antigua B+C while running
Damage
Startup
Active
Recovery
Guard
Cancel
Adv Hit
Adv Block
Invul
12
-
-
-
Mid
-
-
-
-
Acts like a normal and puts Nyamo into the air, meaning it can start 8C loops.
Toraja Karoshi
Toraja Karoshi 4B
Damage
Startup
Active
Recovery
Guard
Cancel
Adv Hit
Adv Block
Invul
4
-
-
-
Mid
-
-
-
-
Rising kick, good for ending combos or starting 8C loops in the corner.
Lifting
Lifting 6A
Version
Damage
Startup
Active
Recovery
Guard
Cancel
Adv Hit
Adv Block
Invul
6A Lifting
10
-
-
-
Mid
-
-
-
-
Starts kicking a ball
Can continue kicking by pressing A at the right time.
Extremely high recovery if you mistime a kick.
6A~5C Shoot
10
-
-
-
Mid
-
-
-
-
Kicks the ball away.
Nyamo's only projectile.
The kick itself does NOT have a hitbox
it's possible to whiff kicking the ball entirely by mistiming the button.
Kilimanjaro
Kilimanjaro j.8C
Damage
Startup
Active
Recovery
Guard
Cancel
Adv Hit
Adv Block
Invul
10
-
-
-
Throw
-
-
-
-
Air grab.
Can be comboed after if Nyamo is low enough to the ground.
Side switches.
Universal Mechanics
Throw
Throw 6/4C (Next To Opponent)
Damage
Startup
Active
Recovery
Guard
Cancel
Adv Hit
Adv Block
Invul
10
-
-
-
Throw
-
-
-
-
Nyamo flips around and kicks the opponent's back.
Side switches (you have to press 4C to keep same side and 6C to side switch).
Skylab
Skylab j.236D~AABBC~(A/B/C)
Version
Damage
Startup
Active
Recovery
Guard
Cancel
Adv Hit
Adv Block
Invul
A Ender
42
-
-
-
High
-
-
-
-
Nyamo kicks the opponent up with her and then in front of her, wall bouncing.
Reaches extremely far, viable air-to-air option.
Doesn't work in the corner.
Version
Damage
Startup
Active
Recovery
Guard
Cancel
Adv Hit
Adv Block
Invul
B Ender
44
-
-
-
High
-
-
-
-
Nyamo kicks the opponent up with her and then behind her, wall bouncing.
Version
Damage
Startup
Active
Recovery
Guard
Cancel
Adv Hit
Adv Block
Invul
C Ender
42
-
-
-
High
-
-
-
-
Nyamo kicks the opponent up with her and then down, ground bouncing.
Slash Beat
Slash Beat 5D~ABAAB~(C/D)
Version
Damage
Startup
Active
Recovery
Guard
Cancel
Adv Hit
Adv Block
Invul
C Ender
42
-
-
-
Mid
-
-
-
-
Basic ground Slash Beat. Punches the opponent into the ground, bouncing them up for a combo.
Version
Damage
Startup
Active
Recovery
Guard
Cancel
Adv Hit
Adv Block
Invul
D Ender
47
-
-
-
-
-
-
-
-
Basic sky Slash Beat. Launches the opponent into the air and can continue with Skylab.
Crash Attack
Crash Attack 236D
Damage
Startup
Active
Recovery
Guard
Cancel
Adv Hit
Adv Block
Invul
6
-
-
-
Guard Break (first hit)
Unblockable (second hit)
-
-
-
-
Very slow, unblockable at the second hit rather than breaking guard.
Guard Push
Guard Push 6D while blocking
Damage
Startup
Active
Recovery
Guard
Cancel
Adv Hit
Adv Block
Invul
5
-
-
-
Unblockable
-
-
-
-
Big kick.
Notably reaches a bit far as it uses Nyamo's 5C animation.
Specials
Grounded Specials
New Crop
New Crop 236A
Damage
Startup
Active
Recovery
Guard
Cancel
Adv Hit
Adv Block
Invul
7
-
-
-
Mid
-
-
-
-
Rekka starter, has a lot of pushback on hit and block, making it completely safe on block.
Burst Crop
Burst Crop 236A~236B
Damage
Startup
Active
Recovery
Guard
Cancel
Adv Hit
Adv Block
Invul
6
-
-
-
Mid
-
-
-
-
Moves Nyamo extremely far forward.
Has pretty long recovery so it'd probably be worth stylish canceling this move if it whiffs.
Old Crop
Old Crop 236A~236B~236C
Damage
Startup
Active
Recovery
Guard
Cancel
Adv Hit
Adv Block
Invul
19
-
-
-
Mid
-
-
-
-
Launches the opponent up.
Very unsafe on block, ends crop rekka.
Can only be done if every other hit of the rekka lands.
Arabica
Arabica 214B
Damage
Startup
Active
Recovery
Guard
Cancel
Adv Hit
Adv Block
Invul
6
-
-
-
Low
-
-
-
-
Another rekka starter.
Sliding low, can be spaced to be safe on block or linked into mediums.
Used in some character specific infinites.
Robusta
Robusta 214B~8B
Damage
Startup
Active
Recovery
Guard
Cancel
Adv Hit
Adv Block
Invul
4
-
-
-
Mid
-
-
-
-
Launches the opponent up.
Very minus on block, adds a gap between 8B and 9B.
Coffea liberica
Coffea liberica 214B~8B~9B
Damage
Startup
Active
Recovery
Guard
Cancel
Adv Hit
Adv Block
Invul
6
-
-
-
Mid
-
-
-
-
Wall bounces.
Looks like an overhead but it hits mid.
Safe on block and low crushes.
Sumatra Peaberry
Sumatra Peaberry 63214C
Damage
Startup
Active
Recovery
Guard
Cancel
Adv Hit
Adv Block
Invul
8
-
-
-
High
-
-
-
-
Both hits hit overhead
Ludicrously fast, advancing overhead.
Can't be comboed from without meter.
Mocha
Mocha 623C
Damage
Startup
Active
Recovery
Guard
Cancel
Adv Hit
Adv Block
Invul
8
-
-
-
Mid
-
-
-
-
DP, hits twice making it good for clashes.
Dashes pretty far forward as well.
Matari
Matari 623C~8C
Damage
Startup
Active
Recovery
Guard
Cancel
Adv Hit
Adv Block
Invul
14
-
-
-
High
-
-
-
-
Power dunk, because of course the DP has follow-ups too.
Harari
Harari 623C~2B
Damage
Startup
Active
Recovery
Guard
Cancel
Adv Hit
Adv Block
Invul
6
-
-
-
High
-
-
-
-
Axe kick, tends to whiff.
Supers
Level 1
Prime Washed
Prime Washed 2363214C
Damage
Startup
Active
Recovery
Guard
Cancel
Adv Hit
Adv Block
Invul
49
-
-
-
Mid
-
-
-
-
Cool looking rush super.
Best super on the ground.
High Mountain
High Mountain 214214C (Air OK)
Damage
Startup
Active
Recovery
Guard
Cancel
Adv Hit
Adv Block
Invul
36
-
-
-
Mid
-
-
-
-
Reversal super.
Lowest damage, tends to drop at the end of combos.
Don't use this to end combos.
Blue Mountain
Blue Mountain j.236236C
Damage
Startup
Active
Recovery
Guard
Cancel
Adv Hit
Adv Block
Invul
60
-
-
-
Mid
-
-
-
-
Main combo ending super.
Can be a bit tricky to cancel into after 4B but it's definitely worth getting down as this is her highest damage super.
Looks cool.
Outburst
17 No Tsume
17 No Tsume 632146C (While In Outburst)
Damage
Startup
Active
Recovery
Guard
Cancel
Adv Hit
Adv Block
Invul
75
-
-
-
Unblockable
-
-
-
-
Bionic arm super.
Pretty low damage compared to other Outburst supers.
Strategy
Combos
Colors
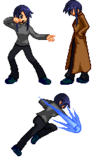
Palette 1, used by selecting Nyamo with the light button.
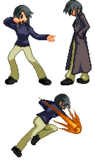
Palette 2, used by selecting Nyamo with the Stylish button.