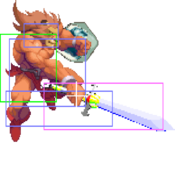
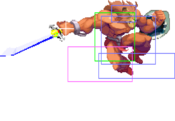
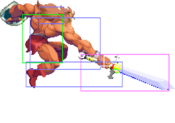
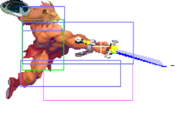
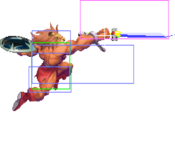
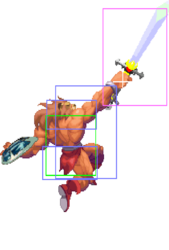
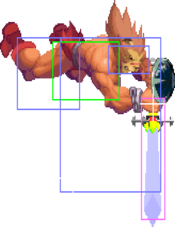
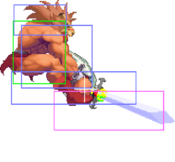
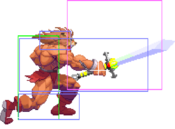
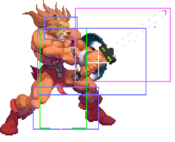
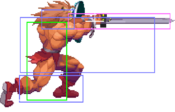
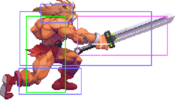
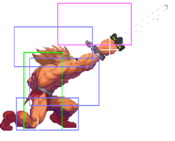
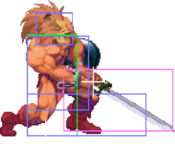
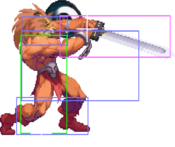
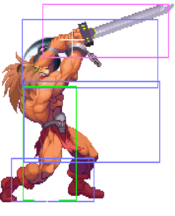
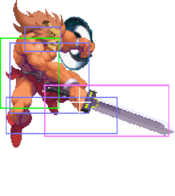
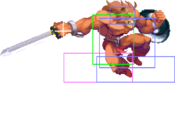
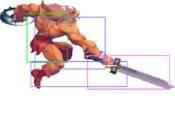
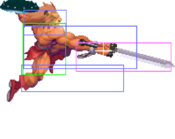
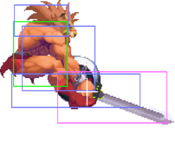
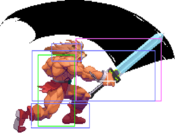
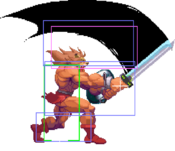
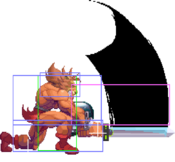
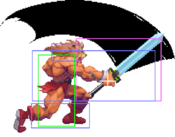
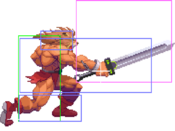
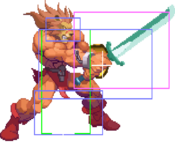
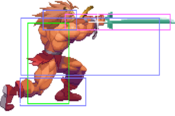
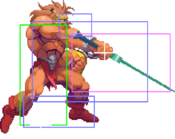
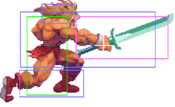
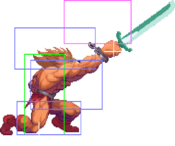
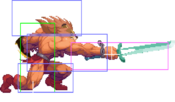
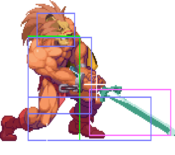
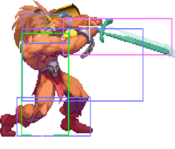
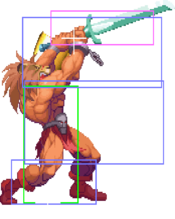
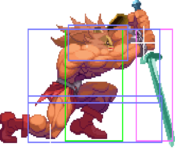
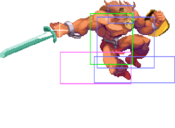
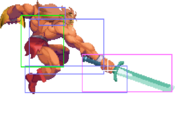
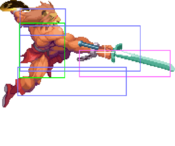
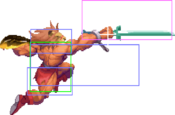
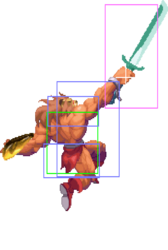
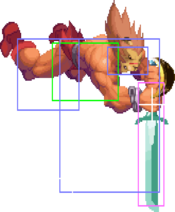
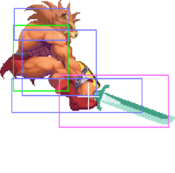
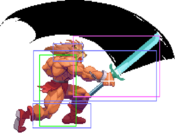
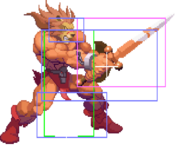
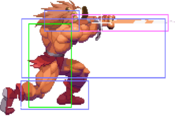
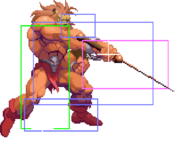
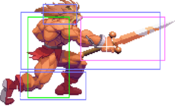
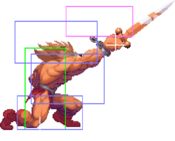
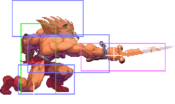
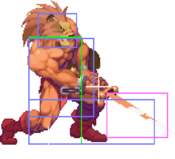
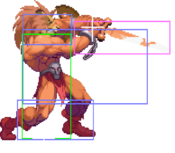
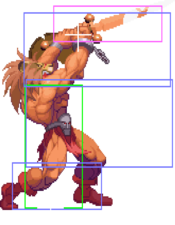
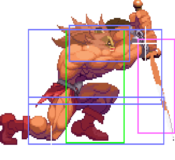
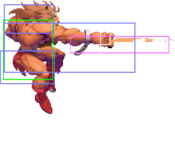
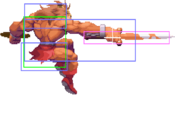
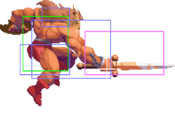
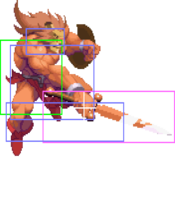
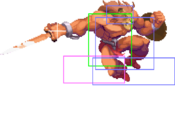
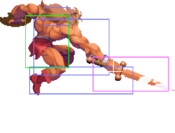
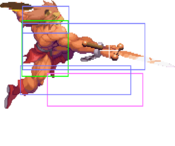
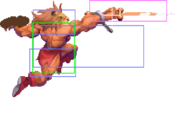
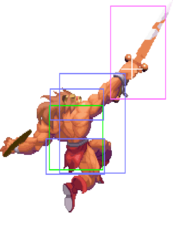
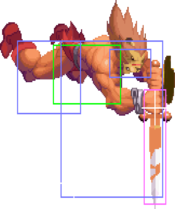
Red Earth/War-Zard/Leo/Extra Weapons

From Mizuumi Wiki
Jump to navigation Jump to search

Normal Moves

1
RE Leo 1 Diamond.png
Damage Guard Duration Startup Active Recovery Hit Adv Block Adv UG Adv Special Cancel
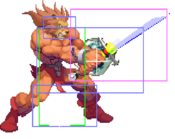
12-15 Mid 26 (9-2-15) 10 2 15 -6 -7 -7 (+8) Yes

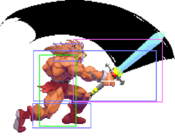
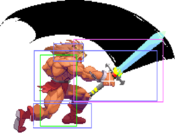
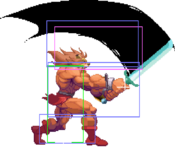
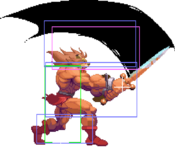
Leo steps forward, striking with a vertical slash. It not only possesses a tall hitbox, but is super and special cancellable. Useful for not only anti-airs, but for blockstrings on an airborne opponent, leading to an extension dependent on orb count and distance.

2
RE Leo 2 Diamond.png
Can be ducked.
Can be ducked.
Damage Guard Duration Startup Active Recovery Hit Adv Block Adv UG Adv Special Cancel
13-16 Mid 36 (12-4-20) 13 4 20 -7 -8 -8 (+7) Super only

Honestly one of his weaker normals. The range is nice, and super cancelling is too, but most of the time 1 or cr.1 is the safer and better option. Use in fringe cases.

3
RE Leo 3 Diamond.png
Staggers Kenji.
Staggers Kenji.
RE Leo 3 3 Diamond.png
3 followup.
3 followup.
Version Damage Guard Duration Startup Active Recovery Hit Adv Block Adv UG Adv Special Cancel
3 14-17 Mid 34 (13-3-18) 14 3 18 -1 (+4) -6 -6 (+9) No

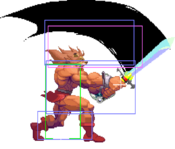
Leo swings horizontally once again, but with a twist. In exchange for cancel ability and some range, Leo can chain into a second slash. The meat to it is that this followup is optional, as well as highly delayable. A good check option, especially if the opponent likes to jump or Ultimate Guard. Great conditioning tool, just mind the range is a bit short.

3 > 3 14-17 Mid 62 (41-2-19) 42 [minimum] 2 19 HKD -2 -2 (+13) No

Will guard crush if the first 3 was blocked, allowing you to confirm into Hercules Rush at certain ranges.

cr.1
RE Leo Crouch 1 Diamond.png
Damage Guard Duration Startup Active Recovery Hit Adv Block Adv UG Adv Special Cancel
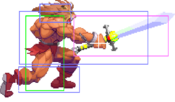
12-15 Low 27 (8-4-15) 9 4 15 -8 -9 -9 (+6) Yes

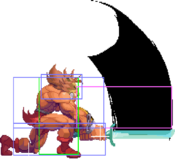
Off the bat, the range of this thing is huge. Pokes as far if not slightly less than cr.5, which is nothing to scoff at. On top of this, it's super and special cancellable, leading to some dangerous footsies if he has orbs. Be wary of a lightning orb Leo. Only drawback is that it's minus on hit or block, and as such is best cancelled into something, namely his dp.1. Even so, one can use it to bait an Ultimate Guard, and cancel into 360. Also owns the high praise of being Leo's only cancellable low. Definitely one to experiment with.

cr.2
RE Leo Crouch 2 First Diamond.png
RE Leo Crouch 2 Second Diamond.png
Two hits. First hit can be ducked.
Damage Guard Duration Startup Active Recovery Hit Adv Block Adv UG Adv Special Cancel
17-22 Mid 44 (13-6-25) 14 3/3 25 -12 -13 -13 (+2) No

Leo swings low to the ground. While weak as a poke, it's surprisingly decent as an anti-air, hits twice, and is fairly good at keeping a cornered opponent locked down. Wouldn't advise using too often, but certainly a tool to remember.

cr.3
RE Leo Crouch 3 First Diamond.png
RE Leo Crouch 3 Second Diamond.png
RE Leo Crouch 3 Third Diamond.png
Damage Guard Duration Startup Active Recovery Hit Adv Block Adv UG Adv Special Cancel
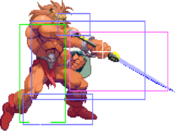
14-17 Mid 41 (8-6-27) 9 2/2/2 27 Launch -22 -22 (-7) No

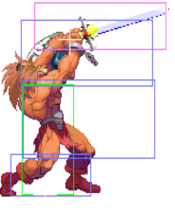
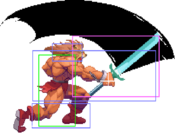
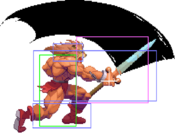
Slashing upwards in a pose not unbefitting of a Master of the Universe, cr.3 is a decent anti-air option due to it's wide hitbox when Leo's arm is fully extended, also causing a juggle state on hit that can be extended on a ground connect, but be warned: This move has absolutely ABYSMAL frame data if whiffed/blocked. Very committal, swing with this move and you better mean it.

cr.4
RE Leo Crouch 4 Diamond.png
Damage Guard Duration Startup Active Recovery Hit Adv Block Adv UG Adv Special Cancel
11-14 Mid 34 (8-6-20) 9 6 20 -15 -16 -16 (-1) No

Most attacks in Red Earth are well designed, and have distinctive uses that make them at least somewhat viable in some situations. This however, is the exception that proves the rule. There is no reason to press this button. Ever. Its angle is pitiful, its damage is mediocre, you can't cancel from it and to top it off its not even a low, AND is mega minus even on hit. Assuming you LIKE having a health bar, DO, NOT, PRESS, THIS, BUTTON!

cr.5
RE Leo Crouch 5 Diamond.png
"The Son"
"The Son"
Damage Guard Duration Startup Active Recovery Hit Adv Block Adv UG Adv Special Cancel
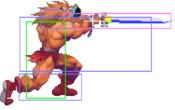
12-15 Mid 32 (7-4-21) 8 4 21 -9 -10 -10 (+5) No

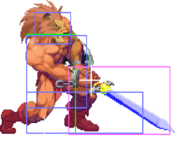
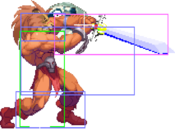
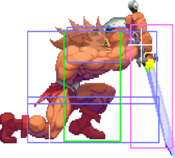
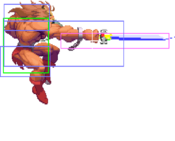
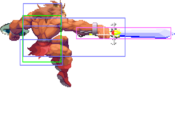
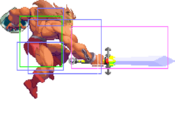
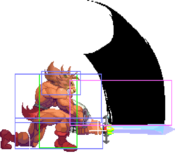
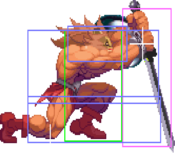
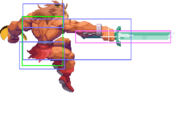
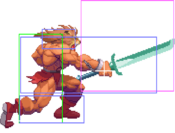
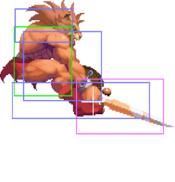
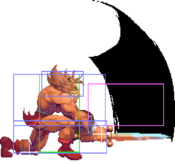
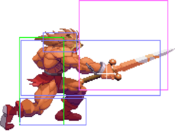
A classic normal among Leo mains, Leo stabs outward, plain and simple. The most obvious benefit of this move is that it's GIGANTIC, seriously covers a good 2/3 of horizontal screen give or take, while also being a low, COMMANDING the opponent be ready for it. Pushes the opponent a decent bit back, meaning at max range it can be difficult, if not almost impossible to be punished meterless. Be wary however, this godlike range comes at a cost. A good chunk of Leos sword is also classified as a hurtbox, and the move is also pretty minus on contact, -9 on hit and -10 if blocked, meaning an ill spaced poke can be punished by everyone to some extent. A good button, make no mistake. But one that's weaknesses must be properly respected.

cr.6
RE Leo Crouch 6 Diamond.png
RE Leo Crouch 6 6 Diamond.png
6 followup.
6 followup.
Version Damage Guard Duration Startup Active Recovery Hit Adv Block Adv UG Adv Special Cancel
cr.6 12-15 Low 30 (11-3-16) 12 3 16 HKD 0 0 (+15) No
cr.6 > 6 13-16 Low 66 (33-3-30) 34 [minimum] 3 30 HKD -14 -14 (+1) No

Similar to cr.1 and cr.5 in that it reaches pretty far, the main distinction of this button is twofold. For one, it's Leo's designated sweep, meaning it can be pretty good for closing the distance when connected. Second, completely safe, making it an actually decent button to throw out against a grounded opponent. It also helps that it can actually be cancelled into a followup with the same input, making it an ambiguous button the opponent will think twice about disrespecting. However, due to this a savvy opponent can Ultimate Guard the second swing, and punish accordingly if you're too predictable.

j.1
RE Leo Jump 1 Diamond.png
Version Damage Guard Duration Startup Active Recovery Hit Adv Block Adv UG Adv Special Cancel
j.1 12-15 High Varies 6 2 Until landing +15 [maximum] +15 [maximum] +15 (+30) [maximum] No
sj.1 12-15 High 27 (5-2-20) 6 2 20 +15 [maximum] +15 [maximum] +15 (+30) [maximum] No

Comes out fairly quickly. However, its only real weakness is that it doesn't really have much of a use outside of poking an opponent at weird angles. As an air to air tool, it's mostly outclassed by j.3 in basically every metric that matters

j.2
RE Leo Jump 2 Diamond.png
Version Damage Guard Duration Startup Active Recovery Hit Adv Block Adv UG Adv Special Cancel
j.2 12-15 High Varies 9 3 Until landing +16 [maximum] +15 [maximum] +15 (+30) [maximum] No
sj.2 12-15 High 33 (8-3-22) 9 3 22 +16 [maximum] +15 [maximum] +15 (+30) [maximum] No

Reaches slightly further than j.1, but is also 3 frames slower. In regards to an air to air situation, j.3 is generally a safer, and thus more appealing button to press in that scenario.

j.3
RE Leo Jump 3 Diamond.png
Staggers Kenji.
Staggers Kenji.
Version Damage Guard Duration Startup Active Recovery Hit Adv Block Adv UG Adv Special Cancel
j.3 13-16 High Varies 6 2 Until landing +20 (+27) [maximum] +15 [maximum] +15 (+30) [maximum] No
sj.3 13-16 High 28 (5-2-21) 6 2 21 +20 (+27) [maximum] +15 [maximum] +15 (+30) [maximum] No

Definitely Leos best air to air button, as well as an acceptable jump in option. Comes out just as fast as j.1, but has the benefit of his hurtbox being substantially more squashed, and thus more difficult to trade with for the opponent, alongside the actual hitbox being fairly disjointed from it.

j.4
RE Leo Jump 4 First Diamond.png
RE Leo Jump 4 Second Diamond.png
Version Damage Guard Duration Startup Active Recovery Hit Adv Block Adv UG Adv Special Cancel
j.4 12-15 High Varies 9 2/3 Until landing +15 [maximum] +15 [maximum] +15 (+30) [maximum] No
sj.4 12-15 High 29 (8-5-16) 9 2/3 16 +15 [maximum] +15 [maximum] +15 (+30) [maximum] No

To be blunt, one of Leo's best normals, and one you should press often. Its hitbox is excellent, in that it is really wide underneath him, serving not only as his most reliable cross up button, but making it just a solid button to press while the opponent is beneath you to keep them pinned. Does enough hitstun to comfortably link into his cancellable normals, making it his most consistent jump in tool as well.

j.5
RE Leo Jump 5 Diamond.png
"The Holy Spirit"
"The Holy Spirit"
Version Damage Guard Duration Startup Active Recovery Hit Adv Block Adv UG Adv Special Cancel
j.5 12-15 High Varies 10 14 Until landing +16 [maximum] +15 [maximum] +15 (+30) [maximum] No
sj.5 12-15 High 32 (9-14-9) 10 14 9 +16 [maximum] +15 [maximum] +15 (+30) [maximum] No

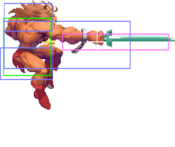
A great neutral tool as it's active for 14 frames, and covers a good distance in front and below Leo. Incredibly useful for controlling space and challenging your opponents escape options. Be warned however, as Ice Super and characters with a DP can hit you out of it if you perform it too close, so don't lean on it. Excellent normal, hard to go wrong.

j.6
RE Leo Jump 6 First Diamond.png
RE Leo Jump 6 Second Diamond.png
Staggers Kenji (+27).
Version Damage Guard Duration Startup Active Recovery Hit Adv Block Adv UG Adv Special Cancel
j.6 12-15 high Varies 9 2/2 Until landing +20 (+27) [maximum] +15 [maximum] +15 (+30) [maximum] No
sj.6 12-15 high 34 (8-4-22) 9 2/2 22 +20 (+27) [maximum] +15 [maximum] +15 (+30) [maximum] No

High utility normal right here. Comes out fairly quick, and has 2 hitboxes (only hits once however), one that hits fairly low, and one that reaches higher in front of him. Definitely Leo's strongest jump-in, and pretty decent for guard break strings in the corner.

Command Normals

j.u+2
RE Leo Jump U 2 Diamond.png
Version Damage Guard Duration Startup Active Recovery Hit Adv Block Adv UG Adv Special Cancel
j.u+2 13-16 Unknown Varies 11 3 Until landing N/A N/A N/A No
sj.u+2 13-16 Unknown 22 (10-3-9) 11 3 9 N/A N/A N/A No

Much and such the same sort of story as j.2, only Leo reaches upwards. The angle is somewhat niche in utility, but is pretty good at hitting a retreating Kenji out of the sky, so still worth using.

j.d+5
RE Leo Jump D 5 First Diamond.png
RE Leo Jump D 5 Second Diamond.png
RE Leo Jump D 5 Third Diamond.png
Version Damage Guard Duration Startup Active Recovery Hit Adv Block Adv UG Adv Special Cancel
j.d+5 12-15 High Varies 9 22 Until landing +16 [maximum] +15 [maximum] +15 (+30) [maximum] No
sj.d+5 12-15 High 42 (8-22-12) 9 22 12 +16 [maximum] +15 [maximum] +15 (+30) [maximum] No

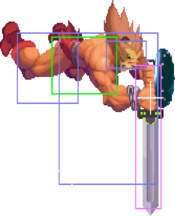
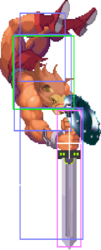
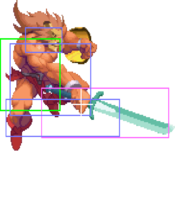
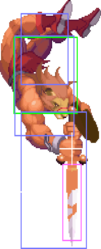
Leo stabs directly downwards, using the same animation as his pursuit. Pretty good as a fast overhead (or at least, what Leo would consider fast) and is a solidly ambiguous option on opponents wakeup. Worth using if for nothing else than it's deceptively long active frames, and it's ability to muck with people as they get up.

j.d+6
RE Leo Jump D 6 Diamond.png
Staggers Kenji.
Staggers Kenji.
Version Damage Guard Duration Startup Active Recovery Hit Adv Block Adv UG Adv Special Cancel
j.d+6 12-15 High Varies 13 2 Until landing +20 (+27) [maximum] +15 [maximum] +15 (+30) [maximum] No
sj.d+6 12-15 High 31 (12-2-17) 13 2 17 +20 (+27) [maximum] +15 [maximum] +15 (+30) [maximum] No

Quite possibly Leo's strangest move. He swings his sword vertically, and yet the actual attack itself is awkwardly angled more below and in front of him. Deceptively stubby, but still decent as a jump in as it's somewhat disjointed.

Special Moves

Chronos Rush
QCF+1/2/3
LEVEL 1
LEVEL 1
RE Leo QCF 123 Diamond.png

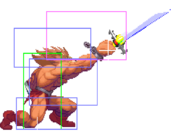
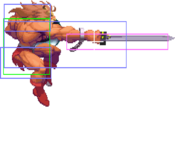
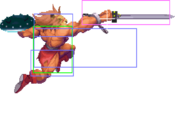
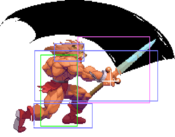
Leo charges forward, crashing his shoulder into the opponent, following up with a vertical swing. While he's running with his sword raised, he's immune to projectiles allowing you to close the distance on zoners if timed well. Each version goes further the stronger the button used. However, it also becomes more unsafe as well as slower the higher the strength. This makes the light/medium version more useful for confirms from weaker normals, primarily his standing light normals. General rule of thumb, 4 goes into light and medium, and 5 goes into medium and heavy. Heavy is too slow to combo from 4, and light doesn't travel far enough to combo from 5.


Version Damage Guard Duration Startup Active Recovery Hit Adv Block Adv UG Adv Special Cancel
1 24-30 Mid 54 (8-[20]-26) 9 9/4 26 HKD -7 -7 (+8) Yes

Two hits. Shortest run distance.

2 31-39 Mid 65 (10-[24]-31) 11 9/4 31 HKD -12 -12 (+3) Yes

Three hits. Medium run distance.

3 37-47 Mid 78 (12-[28]-38) 13 9/4 38 HKD -19 -19 (-4) Yes

Four hits. Farthest run distance.

Mars Slash
DP+1/2/3
LEVEL 1
LEVEL 1
RE Leo DP 123 First Diamond.png
RE Leo DP 123 Second Diamond.png
2 hits. First hit can be ducked.

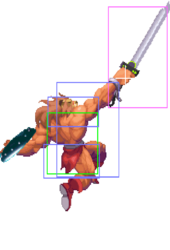
Leo's primary invincible attack, Mars Slash boasts a healthy amount of invincibility starting on frame 6 for all versions while also serving as his premier air guard crush ender. Can also be used as a chip kill option, the only downside being its cumbersome startup, and the fact the hitbox is deceptively low as well as moves him quite a bit forward, making it a worse anti-air than you would expect.


Version Damage Guard Duration Startup Active Recovery Hit Adv Block Adv UG Adv Special Cancel
1 21-27 Mid 46 (17-6-23) 18 3/3 23 HKD -3 -3 (+12) Yes

12 frames of invincibility starting on frame 6.

2 21-27 Mid 51 (18-6-27) 19 3/3 27 HKD -7 -7 (+8) Yes

13 frames of invincibility starting on frame 6.

3 21-27 Mid 58 (24-4-30) 25 2/2 30 HKD -9 -9 (+6) Yes

19 frames of invincibility starting on frame 6.

Achilles Rush
QCF+4/5/6
LEVEL 8
LEVEL 8
RE Leo QCF 456 Diamond.png

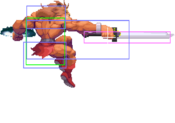
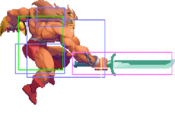
Nearly the same attack as Chronos Rush with the main distinction being that it ends low and reaches very far, making it an intimidating move to poke with and extend combos. It gives substantially better oki as well, but gives up some corner carry. It also touts one of the strangest quirks in the game, as the heavy version seems to mistakenly have the recovery of the light version, making it far safer than it should be. With all of these factors considered, heavy Achilles Rush is your go-to combo ender, as it essentially outclasses Chronos Rush.


Version Damage Guard Duration Startup Active Recovery Hit Adv Block Adv UG Adv Special Cancel
4 24-30 Mid; Low 54 (8-[20]-26) 9 9/4 26 HKD -7 -7 (+8) Yes

Two hits. Shortest run distance.

5 31-39 Mid; Low 65 (10-[24]-31) 11 9/4 31 HKD -12 -12 (+3) Yes

Three hits. Medium run distance.

6 37-47 Mid; Low 66 (12-[28]-26) 13 9/4 26 HKD -7 -7 (+8) Yes

Four hits. Farthest run distance.

Super Moves

Hercules Rush
QCFQCF+1/2/3
LEVEL 1
LEVEL 1
RE Leo QCFQCF 123 Fifth Diamond.png
Seven hits. Invincible for the entire startup. 4 frame gap between charge hitbox and sword swing hitbox. Invincible for the entire gap.
Damage Guard Duration Startup Active Recovery Hit Adv Block Adv UG Adv Special Cancel
39-50 Mid TBD TBD 19/4 41 HKD -22 -22 (-7) Yes

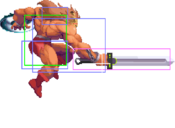
Leo's go-to super. Think of Chronos Rush on steroids. An invincible reversal that does a respectable amount of damage on hit, and can even lead in to devastating touch of stuns on some characters from a well placed j.6. However, it harbors two main faults. First, the recovery is huge, and the multiple hits mean this move is just begging to be Ultimate Guarded when blocked. Secondly, despite the followup swing seemingly being huge, the hitbox is surprisingly low, meaning it'll whiff on an airborne opponent more than it won't, making it a dangerous move to use on an enemy in the air. Quite powerful, but should not be used lightly.

Universal Mechanics

Ultimate Counter
R.QCB+1/2/3 or R.QCB+4/5/6
RE Leo GC Punch Diamond.png
Punch version. Staggers Kenji.
RE Leo GC Kick Diamond.png
Kick version.
Kick version.
Version Damage Guard Duration Startup Active Recovery Hit Adv Block Adv UG Adv Special Cancel
Punch 3 UB 22 (0-6-16) 0 6 16 +1 (+5) UB +1 (+16) No

The punch version has him swing his sword akin to the end of Chronos Rush, and it hits a bit higher than it to boot, making it a decent response to air attacks. You can even extend with an Ice Super if your opponent is higher enough as you do it. Not amazing on a ground connect, so should mostly be used for airborne attackers.

Kick 14-17 Low 30 (0-6-24) 0 6 24 HKD -12 -11 (+4) No

Kick UC has Leo swing as he does during Achilles Rush, making this thing humungous for a grounded Ultimate Counter. It also trips the enemy on hit, making getting in much easier. However, its fault is that it hits extremely low, and thus practically never hits an airborne opponent outside of some fringe cases. Regardless, it's one of the best UC's in the game.

Pursuit
U+4/5/6
RE Leo Pursuit Diamond.png
Damage Guard Duration Startup Active Recovery Hit Adv Block Adv UG Adv Special Cancel
- - - - - - - - - -

This is easily the worst pursuit in the game. You will often end up punishable on hit if you end up using this move. You have to use it in very specific situations after specific attacks with correct timing in order to connect the hit and not end up punishable. The problem comes from the size of the hitbox; if you pursuit too early, the hitbox will hit much sooner than it was meant to, making you very minus. Thankfully Kenji likes to stay on the ground for a long period of time, so there are more options for pursuit to work in that matchup. The definitive use of Leo's pursuit is for the "final blow". If the opponent has very low health, and you know that the pursuit will connect and also finish the job, go for it.

1
RE Leo 1 Steel.png
Damage Guard Duration Startup Active Recovery Hit Adv Block Adv UG Adv Special Cancel
12-15 Mid 26 (9-2-15) 10 2 15 -6 -7 -7 (+8) Yes

Leo steps forward, striking with a vertical slash. It not only possesses a tall hitbox, but is super and special cancellable. Useful for not only anti-airs, but for blockstrings on an airborne opponent, leading to an extension dependent on orb count and distance.

2
RE Leo 2 Steel.png
Can be ducked.
Can be ducked.
Damage Guard Duration Startup Active Recovery Hit Adv Block Adv UG Adv Special Cancel
13-16 Mid 36 (12-4-20) 13 4 20 -7 -8 -8 (+7) Super only

Honestly one of his weaker normals. The range is nice, and super cancelling is too, but most of the time 1 or cr.1 is the safer and better option. Use in fringe cases.

3
RE Leo 3 Steel.png
Staggers Kenji.
Staggers Kenji.
RE Leo 3 3 Steel.png
3 followup.
3 followup.
Version Damage Guard Duration Startup Active Recovery Hit Adv Block Adv UG Adv Special Cancel
3 14-17 Mid 34 (13-3-18) 14 3 18 -1 (+4) -6 -6 (+9) No

Leo swings horizontally once again, but with a twist. In exchange for cancel ability and some range, Leo can chain into a second slash. The meat to it is that this followup is optional, as well as highly delayable. A good check option, especially if the opponent likes to jump or Ultimate Guard. Great conditioning tool, just mind the range is a bit short.

3 > 3 14-17 Mid 62 (41-2-19) 42 [minimum] 2 19 HKD -2 -2 (+13) No

Will guard crush if the first 3 was blocked, allowing you to confirm into Hercules Rush at certain ranges.

cr.1
RE Leo Crouch 1 Steel.png
Damage Guard Duration Startup Active Recovery Hit Adv Block Adv UG Adv Special Cancel
12-15 Low 27 (8-4-15) 9 4 15 -8 -9 -9 (+6) Yes

Off the bat, the range of this thing is huge. Pokes as far if not slightly less than cr.5, which is nothing to scoff at. On top of this, it's super and special cancellable, leading to some dangerous footsies if he has orbs. Be wary of a lightning orb Leo. Only drawback is that it's minus on hit or block, and as such is best cancelled into something, namely his dp.1. Even so, one can use it to bait an Ultimate Guard, and cancel into 360. Also owns the high praise of being Leo's only cancellable low. Definitely one to experiment with.

cr.2
RE Leo Crouch 2 First Steel.png
RE Leo Crouch 2 Second Steel.png
Two hits. First hit can be ducked.
Damage Guard Duration Startup Active Recovery Hit Adv Block Adv UG Adv Special Cancel
17-22 Mid 44 (13-6-25) 14 3/3 25 -12 -13 -13 (+2) No

Leo swings low to the ground. While weak as a poke, it's surprisingly decent as an anti-air, hits twice, and is fairly good at keeping a cornered opponent locked down. Wouldn't advise using too often, but certainly a tool to remember.

cr.3
RE Leo Crouch 3 First Steel.png
RE Leo Crouch 3 Second Steel.png
RE Leo Crouch 3 Third Steel.png
Damage Guard Duration Startup Active Recovery Hit Adv Block Adv UG Adv Special Cancel
14-17 Mid 41 (8-6-27) 9 2/2/2 27 Launch -22 -22 (-7) No

Slashing upwards in a pose not unbefitting of a Master of the Universe, cr.3 is a decent anti-air option due to it's wide hitbox when Leo's arm is fully extended, also causing a juggle state on hit that can be extended on a ground connect, but be warned: This move has absolutely ABYSMAL frame data if whiffed/blocked. Very committal, swing with this move and you better mean it.

cr.4
RE Leo Crouch 4 Steel.png
Damage Guard Duration Startup Active Recovery Hit Adv Block Adv UG Adv Special Cancel
11-14 Mid 34 (8-6-20) 9 6 20 -15 -16 -16 (-1) No

Most attacks in Red Earth are well designed, and have distinctive uses that make them at least somewhat viable in some situations. This however, is the exception that proves the rule. There is no reason to press this button. Ever. Its angle is pitiful, its damage is mediocre, you can't cancel from it and to top it off its not even a low, AND is mega minus even on hit. Assuming you LIKE having a health bar, DO, NOT, PRESS, THIS, BUTTON!

cr.5
RE Leo Crouch 5 Steel.png
"The Son"
"The Son"
Damage Guard Duration Startup Active Recovery Hit Adv Block Adv UG Adv Special Cancel
12-15 Mid 32 (7-4-21) 8 4 21 -9 -10 -10 (+5) No

A classic normal among Leo mains, Leo stabs outward, plain and simple. The most obvious benefit of this move is that it's GIGANTIC, seriously covers a good 2/3 of horizontal screen give or take, while also being a low, COMMANDING the opponent be ready for it. Pushes the opponent a decent bit back, meaning at max range it can be difficult, if not almost impossible to be punished meterless. Be wary however, this godlike range comes at a cost. A good chunk of Leos sword is also classified as a hurtbox, and the move is also pretty minus on contact, -9 on hit and -10 if blocked, meaning an ill spaced poke can be punished by everyone to some extent. A good button, make no mistake. But one that's weaknesses must be properly respected.

cr.6
RE Leo Crouch 6 Steel.png
RE Leo Crouch 6 6 Steel.png
6 followup.
6 followup.
Version Damage Guard Duration Startup Active Recovery Hit Adv Block Adv UG Adv Special Cancel
cr.6 12-15 Low 30 (11-3-16) 12 3 16 HKD 0 0 (+15) No
cr.6 > 6 13-16 Low 66 (33-3-30) 34 [minimum] 3 30 HKD -14 -14 (+1) No

Similar to cr.1 and cr.5 in that it reaches pretty far, the main distinction of this button is twofold. For one, it's Leo's designated sweep, meaning it can be pretty good for closing the distance when connected. Second, completely safe, making it an actually decent button to throw out against a grounded opponent. It also helps that it can actually be cancelled into a followup with the same input, making it an ambiguous button the opponent will think twice about disrespecting. However, due to this a savvy opponent can Ultimate Guard the second swing, and punish accordingly if you're too predictable.

j.1
RE Leo Jump 1 Steel.png
Version Damage Guard Duration Startup Active Recovery Hit Adv Block Adv UG Adv Special Cancel
j.1 12-15 High Varies 6 2 Until landing +15 [maximum] +15 [maximum] +15 (+30) [maximum] No
sj.1 12-15 High 27 (5-2-20) 6 2 20 +15 [maximum] +15 [maximum] +15 (+30) [maximum] No

Comes out fairly quickly. However, its only real weakness is that it doesn't really have much of a use outside of poking an opponent at weird angles. As an air to air tool, it's mostly outclassed by j.3 in basically every metric that matters

j.2
RE Leo Jump 2 Steel.png
Version Damage Guard Duration Startup Active Recovery Hit Adv Block Adv UG Adv Special Cancel
j.2 12-15 High Varies 9 3 Until landing +16 [maximum] +15 [maximum] +15 (+30) [maximum] No
sj.2 12-15 High 33 (8-3-22) 9 3 22 +16 [maximum] +15 [maximum] +15 (+30) [maximum] No

Reaches slightly further than j.1, but is also 3 frames slower. In regards to an air to air situation, j.3 is generally a safer, and thus more appealing button to press in that scenario.

j.3
RE Leo Jump 3 Steel.png
Staggers Kenji.
Staggers Kenji.
Version Damage Guard Duration Startup Active Recovery Hit Adv Block Adv UG Adv Special Cancel
j.3 13-16 High Varies 6 2 Until landing +20 (+27) [maximum] +15 [maximum] +15 (+30) [maximum] No
sj.3 13-16 High 28 (5-2-21) 6 2 21 +20 (+27) [maximum] +15 [maximum] +15 (+30) [maximum] No

Definitely Leos best air to air button, as well as an acceptable jump in option. Comes out just as fast as j.1, but has the benefit of his hurtbox being substantially more squashed, and thus more difficult to trade with for the opponent, alongside the actual hitbox being fairly disjointed from it.

j.4
RE Leo Jump 4 First Steel.png
RE Leo Jump 4 Second Steel.png
Version Damage Guard Duration Startup Active Recovery Hit Adv Block Adv UG Adv Special Cancel
j.4 12-15 High Varies 9 2/3 Until landing +15 [maximum] +15 [maximum] +15 (+30) [maximum] No
sj.4 12-15 High 29 (8-5-16) 9 2/3 16 +15 [maximum] +15 [maximum] +15 (+30) [maximum] No

To be blunt, one of Leo's best normals, and one you should press often. Its hitbox is excellent, in that it is really wide underneath him, serving not only as his most reliable cross up button, but making it just a solid button to press while the opponent is beneath you to keep them pinned. Does enough hitstun to comfortably link into his cancellable normals, making it his most consistent jump in tool as well.

j.5
RE Leo Jump 5 Steel.png
"The Holy Spirit"
"The Holy Spirit"
Version Damage Guard Duration Startup Active Recovery Hit Adv Block Adv UG Adv Special Cancel
j.5 12-15 High Varies 10 14 Until landing +16 [maximum] +15 [maximum] +15 (+30) [maximum] No
sj.5 12-15 High 32 (9-14-9) 10 14 9 +16 [maximum] +15 [maximum] +15 (+30) [maximum] No

A great neutral tool as it's active for 14 frames, and covers a good distance in front and below Leo. Incredibly useful for controlling space and challenging your opponents escape options. Be warned however, as Ice Super and characters with a DP can hit you out of it if you perform it too close, so don't lean on it. Excellent normal, hard to go wrong.

j.6
RE Leo Jump 6 First Steel.png
RE Leo Jump 6 Second Steel.png
Staggers Kenji (+27).
Version Damage Guard Duration Startup Active Recovery Hit Adv Block Adv UG Adv Special Cancel
j.6 12-15 high Varies 9 2/2 Until landing +20 (+27) [maximum] +15 [maximum] +15 (+30) [maximum] No
sj.6 12-15 high 34 (8-4-22) 9 2/2 22 +20 (+27) [maximum] +15 [maximum] +15 (+30) [maximum] No

High utility normal right here. Comes out fairly quick, and has 2 hitboxes (only hits once however), one that hits fairly low, and one that reaches higher in front of him. Definitely Leo's strongest jump-in, and pretty decent for guard break strings in the corner.

Command Normals
j.u+2
RE Leo Jump U 2 Steel.png
Version Damage Guard Duration Startup Active Recovery Hit Adv Block Adv UG Adv Special Cancel
j.u+2 13-16 Unknown Varies 11 3 Until landing N/A N/A N/A No
sj.u+2 13-16 Unknown 22 (10-3-9) 11 3 9 N/A N/A N/A No

Much and such the same sort of story as j.2, only Leo reaches upwards. The angle is somewhat niche in utility, but is pretty good at hitting a retreating Kenji out of the sky, so still worth using.

j.d+5
RE Leo Jump D 5 First Steel.png
RE Leo Jump D 5 Second Steel.png
RE Leo Jump D 5 Third Steel.png
Version Damage Guard Duration Startup Active Recovery Hit Adv Block Adv UG Adv Special Cancel
j.d+5 12-15 High Varies 9 22 Until landing +16 [maximum] +15 [maximum] +15 (+30) [maximum] No
sj.d+5 12-15 High 42 (8-22-12) 9 22 12 +16 [maximum] +15 [maximum] +15 (+30) [maximum] No

Leo stabs directly downwards, using the same animation as his pursuit. Pretty good as a fast overhead (or at least, what Leo would consider fast) and is a solidly ambiguous option on opponents wakeup. Worth using if for nothing else than it's deceptively long active frames, and it's ability to muck with people as they get up.

j.d+6
RE Leo Jump D 6 Steel.png
Staggers Kenji.
Staggers Kenji.
Version Damage Guard Duration Startup Active Recovery Hit Adv Block Adv UG Adv Special Cancel
j.d+6 12-15 High Varies 13 2 Until landing +20 (+27) [maximum] +15 [maximum] +15 (+30) [maximum] No
sj.d+6 12-15 High 31 (12-2-17) 13 2 17 +20 (+27) [maximum] +15 [maximum] +15 (+30) [maximum] No

Quite possibly Leo's strangest move. He swings his sword vertically, and yet the actual attack itself is awkwardly angled more below and in front of him. Deceptively stubby, but still decent as a jump in as it's somewhat disjointed.

Special Moves
Chronos Rush
QCF+1/2/3
LEVEL 1
LEVEL 1
RE Leo QCF 123 Steel.png

Leo charges forward, crashing his shoulder into the opponent, following up with a vertical swing. While he's running with his sword raised, he's immune to projectiles allowing you to close the distance on zoners if timed well. Each version goes further the stronger the button used. However, it also becomes more unsafe as well as slower the higher the strength. This makes the light/medium version more useful for confirms from weaker normals, primarily his standing light normals. General rule of thumb, 4 goes into light and medium, and 5 goes into medium and heavy. Heavy is too slow to combo from 4, and light doesn't travel far enough to combo from 5.


Version Damage Guard Duration Startup Active Recovery Hit Adv Block Adv UG Adv Special Cancel
1 24-30 Mid 54 (8-[20]-26) 9 9/4 26 HKD -7 -7 (+8) Yes

Two hits. Shortest run distance.

2 31-39 Mid 65 (10-[24]-31) 11 9/4 31 HKD -12 -12 (+3) Yes

Three hits. Medium run distance.

3 37-47 Mid 78 (12-[28]-38) 13 9/4 38 HKD -19 -19 (-4) Yes

Four hits. Farthest run distance.

Mars Slash
DP+1/2/3
LEVEL 1
LEVEL 1
RE Leo DP 123 First Steel.png
RE Leo DP 123 Second Steel.png
2 hits. First hit can be ducked.

Leo's primary invincible attack, Mars Slash boasts a healthy amount of invincibility starting on frame 6 for all versions while also serving as his premier air guard crush ender. Can also be used as a chip kill option, the only downside being its cumbersome startup, and the fact the hitbox is deceptively low as well as moves him quite a bit forward, making it a worse anti-air than you would expect.


Version Damage Guard Duration Startup Active Recovery Hit Adv Block Adv UG Adv Special Cancel
1 21-27 Mid 46 (17-6-23) 18 3/3 23 HKD -3 -3 (+12) Yes

12 frames of invincibility starting on frame 6.

2 21-27 Mid 51 (18-6-27) 19 3/3 27 HKD -7 -7 (+8) Yes

13 frames of invincibility starting on frame 6.

3 21-27 Mid 58 (24-4-30) 25 2/2 30 HKD -9 -9 (+6) Yes

19 frames of invincibility starting on frame 6.

Achilles Rush
QCF+4/5/6
LEVEL 8
LEVEL 8
RE Leo QCF 456 Steel.png

Nearly the same attack as Chronos Rush with the main distinction being that it ends low and reaches very far, making it an intimidating move to poke with and extend combos. It gives substantially better oki as well, but gives up some corner carry. It also touts one of the strangest quirks in the game, as the heavy version seems to mistakenly have the recovery of the light version, making it far safer than it should be. With all of these factors considered, heavy Achilles Rush is your go-to combo ender, as it essentially outclasses Chronos Rush.


Version Damage Guard Duration Startup Active Recovery Hit Adv Block Adv UG Adv Special Cancel
4 24-30 Mid; Low 54 (8-[20]-26) 9 9/4 26 HKD -7 -7 (+8) Yes

Two hits. Shortest run distance.

5 31-39 Mid; Low 65 (10-[24]-31) 11 9/4 31 HKD -12 -12 (+3) Yes

Three hits. Medium run distance.

6 37-47 Mid; Low 66 (12-[28]-26) 13 9/4 26 HKD -7 -7 (+8) Yes

Four hits. Farthest run distance.

Super Moves
Hercules Rush
QCFQCF+1/2/3
LEVEL 1
LEVEL 1
RE Leo QCFQCF 123 Fifth Steel.png
Seven hits. Invincible for the entire startup. 4 frame gap between charge hitbox and sword swing hitbox. Invincible for the entire gap.
Damage Guard Duration Startup Active Recovery Hit Adv Block Adv UG Adv Special Cancel
39-50 Mid TBD TBD 19/4 41 HKD -22 -22 (-7) Yes

Leo's go-to super. Think of Chronos Rush on steroids. An invincible reversal that does a respectable amount of damage on hit, and can even lead in to devastating touch of stuns on some characters from a well placed j.6. However, it harbors two main faults. First, the recovery is huge, and the multiple hits mean this move is just begging to be Ultimate Guarded when blocked. Secondly, despite the followup swing seemingly being huge, the hitbox is surprisingly low, meaning it'll whiff on an airborne opponent more than it won't, making it a dangerous move to use on an enemy in the air. Quite powerful, but should not be used lightly.

Universal Mechanics
Ultimate Counter
R.QCB+1/2/3
RE Leo GC Punch Steel.png
Staggers Kenji.
Staggers Kenji.
Damage Guard Duration Startup Active Recovery Hit Adv Block Adv UG Adv Special Cancel
3 UB 22 (0-6-16) 0 6 16 +1 (+5) UB +1 (+16) No

The punch version has him swing his sword akin to the end of Chronos Rush, and it hits a bit higher than it to boot, making it a decent response to air attacks. You can even extend with an Ice Super if your opponent is higher enough as you do it. Not amazing on a ground connect, so should mostly be used for airborne attackers.

Pursuit
U+4/5/6
RE Leo Pursuit Steel.png
Damage Guard Duration Startup Active Recovery Hit Adv Block Adv UG Adv Special Cancel
- - - - - - - - - -

This is easily the worst pursuit in the game. You will often end up punishable on hit if you end up using this move. You have to use it in very specific situations after specific attacks with correct timing in order to connect the hit and not end up punishable. The problem comes from the size of the hitbox; if you pursuit too early, the hitbox will hit much sooner than it was meant to, making you very minus. Thankfully Kenji likes to stay on the ground for a long period of time, so there are more options for pursuit to work in that matchup. The definitive use of Leo's pursuit is for the "final blow". If the opponent has very low health, and you know that the pursuit will connect and also finish the job, go for it.

1
RE Leo 1 Bronze.png
Damage Guard Duration Startup Active Recovery Hit Adv Block Adv UG Adv Special Cancel
12-15 Mid 26 (9-2-15) 10 2 15 -6 -7 -7 (+8) Yes

Leo steps forward, striking with a vertical slash. It not only possesses a tall hitbox, but is super and special cancellable. Useful for not only anti-airs, but for blockstrings on an airborne opponent, leading to an extension dependent on orb count and distance.

2
RE Leo 2 Bronze.png
Can be ducked.
Can be ducked.
Damage Guard Duration Startup Active Recovery Hit Adv Block Adv UG Adv Special Cancel
13-16 Mid 36 (12-4-20) 13 4 20 -7 -8 -8 (+7) Super only

Honestly one of his weaker normals. The range is nice, and super cancelling is too, but most of the time 1 or cr.1 is the safer and better option. Use in fringe cases.

3
RE Leo 3 Bronze.png
Staggers Kenji.
Staggers Kenji.
RE Leo 3 3 Bronze.png
3 followup.
3 followup.
Version Damage Guard Duration Startup Active Recovery Hit Adv Block Adv UG Adv Special Cancel
3 14-17 Mid 34 (13-3-18) 14 3 18 -1 (+4) -6 -6 (+9) No

Leo swings horizontally once again, but with a twist. In exchange for cancel ability and some range, Leo can chain into a second slash. The meat to it is that this followup is optional, as well as highly delayable. A good check option, especially if the opponent likes to jump or Ultimate Guard. Great conditioning tool, just mind the range is a bit short.

3 > 3 14-17 Mid 62 (41-2-19) 42 [minimum] 2 19 HKD -2 -2 (+13) No

Will guard crush if the first 3 was blocked, allowing you to confirm into Hercules Rush at certain ranges.

cr.1
RE Leo Crouch 1 Bronze.png
Damage Guard Duration Startup Active Recovery Hit Adv Block Adv UG Adv Special Cancel
12-15 Low 27 (8-4-15) 9 4 15 -8 -9 -9 (+6) Yes

Off the bat, the range of this thing is huge. Pokes as far if not slightly less than cr.5, which is nothing to scoff at. On top of this, it's super and special cancellable, leading to some dangerous footsies if he has orbs. Be wary of a lightning orb Leo. Only drawback is that it's minus on hit or block, and as such is best cancelled into something, namely his dp.1. Even so, one can use it to bait an Ultimate Guard, and cancel into 360. Also owns the high praise of being Leo's only cancellable low. Definitely one to experiment with.

cr.2
RE Leo Crouch 2 First Bronze.png
RE Leo Crouch 2 Second Bronze.png
Two hits. First hit can be ducked.
Damage Guard Duration Startup Active Recovery Hit Adv Block Adv UG Adv Special Cancel
17-22 Mid 44 (13-6-25) 14 3/3 25 -12 -13 -13 (+2) No

Leo swings low to the ground. While weak as a poke, it's surprisingly decent as an anti-air, hits twice, and is fairly good at keeping a cornered opponent locked down. Wouldn't advise using too often, but certainly a tool to remember.

cr.3
RE Leo Crouch 3 First Bronze.png
RE Leo Crouch 3 Second Bronze.png
RE Leo Crouch 3 Third Bronze.png
Damage Guard Duration Startup Active Recovery Hit Adv Block Adv UG Adv Special Cancel
14-17 Mid 41 (8-6-27) 9 2/2/2 27 Launch -22 -22 (-7) No

Slashing upwards in a pose not unbefitting of a Master of the Universe, cr.3 is a decent anti-air option due to it's wide hitbox when Leo's arm is fully extended, also causing a juggle state on hit that can be extended on a ground connect, but be warned: This move has absolutely ABYSMAL frame data if whiffed/blocked. Very committal, swing with this move and you better mean it.

cr.4
RE Leo Crouch 4 Bronze.png
Damage Guard Duration Startup Active Recovery Hit Adv Block Adv UG Adv Special Cancel
11-14 Mid 34 (8-6-20) 9 6 20 -15 -16 -16 (-1) No

Most attacks in Red Earth are well designed, and have distinctive uses that make them at least somewhat viable in some situations. This however, is the exception that proves the rule. There is no reason to press this button. Ever. Its angle is pitiful, its damage is mediocre, you can't cancel from it and to top it off its not even a low, AND is mega minus even on hit. Assuming you LIKE having a health bar, DO, NOT, PRESS, THIS, BUTTON!

cr.5
RE Leo Crouch 5 Bronze.png
"The Son"
"The Son"
Damage Guard Duration Startup Active Recovery Hit Adv Block Adv UG Adv Special Cancel
12-15 Mid 32 (7-4-21) 8 4 21 -9 -10 -10 (+5) No

A classic normal among Leo mains, Leo stabs outward, plain and simple. The most obvious benefit of this move is that it's GIGANTIC, seriously covers a good 2/3 of horizontal screen give or take, while also being a low, COMMANDING the opponent be ready for it. Pushes the opponent a decent bit back, meaning at max range it can be difficult, if not almost impossible to be punished meterless. Be wary however, this godlike range comes at a cost. A good chunk of Leos sword is also classified as a hurtbox, and the move is also pretty minus on contact, -9 on hit and -10 if blocked, meaning an ill spaced poke can be punished by everyone to some extent. A good button, make no mistake. But one that's weaknesses must be properly respected.

cr.6
RE Leo Crouch 6 Bronze.png
RE Leo Crouch 6 6 Bronze.png
6 followup.
6 followup.
Version Damage Guard Duration Startup Active Recovery Hit Adv Block Adv UG Adv Special Cancel
cr.6 12-15 Low 30 (11-3-16) 12 3 16 HKD 0 0 (+15) No
cr.6 > 6 13-16 Low 66 (33-3-30) 34 [minimum] 3 30 HKD -14 -14 (+1) No

Similar to cr.1 and cr.5 in that it reaches pretty far, the main distinction of this button is twofold. For one, it's Leo's designated sweep, meaning it can be pretty good for closing the distance when connected. Second, completely safe, making it an actually decent button to throw out against a grounded opponent. It also helps that it can actually be cancelled into a followup with the same input, making it an ambiguous button the opponent will think twice about disrespecting. However, due to this a savvy opponent can Ultimate Guard the second swing, and punish accordingly if you're too predictable.

j.1
RE Leo Jump 1 Bronze.png
Version Damage Guard Duration Startup Active Recovery Hit Adv Block Adv UG Adv Special Cancel
j.1 12-15 High Varies 6 2 Until landing +15 [maximum] +15 [maximum] +15 (+30) [maximum] No
sj.1 12-15 High 27 (5-2-20) 6 2 20 +15 [maximum] +15 [maximum] +15 (+30) [maximum] No

Comes out fairly quickly. However, its only real weakness is that it doesn't really have much of a use outside of poking an opponent at weird angles. As an air to air tool, it's mostly outclassed by j.3 in basically every metric that matters

j.2
RE Leo Jump 2 Bronze.png
Version Damage Guard Duration Startup Active Recovery Hit Adv Block Adv UG Adv Special Cancel
j.2 12-15 High Varies 9 3 Until landing +16 [maximum] +15 [maximum] +15 (+30) [maximum] No
sj.2 12-15 High 33 (8-3-22) 9 3 22 +16 [maximum] +15 [maximum] +15 (+30) [maximum] No

Reaches slightly further than j.1, but is also 3 frames slower. In regards to an air to air situation, j.3 is generally a safer, and thus more appealing button to press in that scenario.

j.3
RE Leo Jump 3 Bronze.png
Staggers Kenji.
Staggers Kenji.
Version Damage Guard Duration Startup Active Recovery Hit Adv Block Adv UG Adv Special Cancel
j.3 13-16 High Varies 6 2 Until landing +20 (+27) [maximum] +15 [maximum] +15 (+30) [maximum] No
sj.3 13-16 High 28 (5-2-21) 6 2 21 +20 (+27) [maximum] +15 [maximum] +15 (+30) [maximum] No

Definitely Leos best air to air button, as well as an acceptable jump in option. Comes out just as fast as j.1, but has the benefit of his hurtbox being substantially more squashed, and thus more difficult to trade with for the opponent, alongside the actual hitbox being fairly disjointed from it.

j.4
RE Leo Jump 4 First Bronze.png
RE Leo Jump 4 Second Bronze.png
Version Damage Guard Duration Startup Active Recovery Hit Adv Block Adv UG Adv Special Cancel
j.4 12-15 High Varies 9 2/3 Until landing +15 [maximum] +15 [maximum] +15 (+30) [maximum] No
sj.4 12-15 High 29 (8-5-16) 9 2/3 16 +15 [maximum] +15 [maximum] +15 (+30) [maximum] No

To be blunt, one of Leo's best normals, and one you should press often. Its hitbox is excellent, in that it is really wide underneath him, serving not only as his most reliable cross up button, but making it just a solid button to press while the opponent is beneath you to keep them pinned. Does enough hitstun to comfortably link into his cancellable normals, making it his most consistent jump in tool as well.

j.5
RE Leo Jump 5 Bronze.png
"The Holy Spirit"
"The Holy Spirit"
Version Damage Guard Duration Startup Active Recovery Hit Adv Block Adv UG Adv Special Cancel
j.5 12-15 High Varies 10 14 Until landing +16 [maximum] +15 [maximum] +15 (+30) [maximum] No
sj.5 12-15 High 32 (9-14-9) 10 14 9 +16 [maximum] +15 [maximum] +15 (+30) [maximum] No

A great neutral tool as it's active for 14 frames, and covers a good distance in front and below Leo. Incredibly useful for controlling space and challenging your opponents escape options. Be warned however, as Ice Super and characters with a DP can hit you out of it if you perform it too close, so don't lean on it. Excellent normal, hard to go wrong.

j.6
RE Leo Jump 6 First Bronze.png
RE Leo Jump 6 Second Bronze.png
Staggers Kenji (+27).
Version Damage Guard Duration Startup Active Recovery Hit Adv Block Adv UG Adv Special Cancel
j.6 12-15 high Varies 9 2/2 Until landing +20 (+27) [maximum] +15 [maximum] +15 (+30) [maximum] No
sj.6 12-15 high 34 (8-4-22) 9 2/2 22 +20 (+27) [maximum] +15 [maximum] +15 (+30) [maximum] No

High utility normal right here. Comes out fairly quick, and has 2 hitboxes (only hits once however), one that hits fairly low, and one that reaches higher in front of him. Definitely Leo's strongest jump-in, and pretty decent for guard break strings in the corner.

Command Normals
j.u+2
RE Leo Jump U 2 Bronze.png
Version Damage Guard Duration Startup Active Recovery Hit Adv Block Adv UG Adv Special Cancel
j.u+2 13-16 Unknown Varies 11 3 Until landing N/A N/A N/A No
sj.u+2 13-16 Unknown 22 (10-3-9) 11 3 9 N/A N/A N/A No

Much and such the same sort of story as j.2, only Leo reaches upwards. The angle is somewhat niche in utility, but is pretty good at hitting a retreating Kenji out of the sky, so still worth using.

j.d+5
RE Leo Jump D 5 First Bronze.png
RE Leo Jump D 5 Second Bronze.png
RE Leo Jump D 5 Third Bronze.png
Version Damage Guard Duration Startup Active Recovery Hit Adv Block Adv UG Adv Special Cancel
j.d+5 12-15 High Varies 9 22 Until landing +16 [maximum] +15 [maximum] +15 (+30) [maximum] No
sj.d+5 12-15 High 42 (8-22-12) 9 22 12 +16 [maximum] +15 [maximum] +15 (+30) [maximum] No

Leo stabs directly downwards, using the same animation as his pursuit. Pretty good as a fast overhead (or at least, what Leo would consider fast) and is a solidly ambiguous option on opponents wakeup. Worth using if for nothing else than it's deceptively long active frames, and it's ability to muck with people as they get up.

j.d+6
RE Leo Jump D 6 Bronze.png
Staggers Kenji.
Staggers Kenji.
Version Damage Guard Duration Startup Active Recovery Hit Adv Block Adv UG Adv Special Cancel
j.d+6 12-15 High Varies 13 2 Until landing +20 (+27) [maximum] +15 [maximum] +15 (+30) [maximum] No
sj.d+6 12-15 High 31 (12-2-17) 13 2 17 +20 (+27) [maximum] +15 [maximum] +15 (+30) [maximum] No

Quite possibly Leo's strangest move. He swings his sword vertically, and yet the actual attack itself is awkwardly angled more below and in front of him. Deceptively stubby, but still decent as a jump in as it's somewhat disjointed.

Special Moves
Chronos Rush
QCF+1/2/3
LEVEL 1
LEVEL 1
RE Leo QCF 123 Bronze.png

Leo charges forward, crashing his shoulder into the opponent, following up with a vertical swing. While he's running with his sword raised, he's immune to projectiles allowing you to close the distance on zoners if timed well. Each version goes further the stronger the button used. However, it also becomes more unsafe as well as slower the higher the strength. This makes the light/medium version more useful for confirms from weaker normals, primarily his standing light normals. General rule of thumb, 4 goes into light and medium, and 5 goes into medium and heavy. Heavy is too slow to combo from 4, and light doesn't travel far enough to combo from 5.


Version Damage Guard Duration Startup Active Recovery Hit Adv Block Adv UG Adv Special Cancel
1 24-30 Mid 54 (8-[20]-26) 9 9/4 26 HKD -7 -7 (+8) Yes

Two hits. Shortest run distance.

2 31-39 Mid 65 (10-[24]-31) 11 9/4 31 HKD -12 -12 (+3) Yes

Three hits. Medium run distance.

3 37-47 Mid 78 (12-[28]-38) 13 9/4 38 HKD -19 -19 (-4) Yes

Four hits. Farthest run distance.

Mars Slash
DP+1/2/3
LEVEL 1
LEVEL 1
RE Leo DP 123 First Bronze.png
RE Leo DP 123 Second Bronze.png
2 hits. First hit can be ducked.

Leo's primary invincible attack, Mars Slash boasts a healthy amount of invincibility starting on frame 6 for all versions while also serving as his premier air guard crush ender. Can also be used as a chip kill option, the only downside being its cumbersome startup, and the fact the hitbox is deceptively low as well as moves him quite a bit forward, making it a worse anti-air than you would expect.


Version Damage Guard Duration Startup Active Recovery Hit Adv Block Adv UG Adv Special Cancel
1 21-27 Mid 46 (17-6-23) 18 3/3 23 HKD -3 -3 (+12) Yes

12 frames of invincibility starting on frame 6.

2 21-27 Mid 51 (18-6-27) 19 3/3 27 HKD -7 -7 (+8) Yes

13 frames of invincibility starting on frame 6.

3 21-27 Mid 58 (24-4-30) 25 2/2 30 HKD -9 -9 (+6) Yes

19 frames of invincibility starting on frame 6.

Achilles Rush
QCF+4/5/6
LEVEL 8
LEVEL 8
RE Leo QCF 456 Bronze.png

Nearly the same attack as Chronos Rush with the main distinction being that it ends low and reaches very far, making it an intimidating move to poke with and extend combos. It gives substantially better oki as well, but gives up some corner carry. It also touts one of the strangest quirks in the game, as the heavy version seems to mistakenly have the recovery of the light version, making it far safer than it should be. With all of these factors considered, heavy Achilles Rush is your go-to combo ender, as it essentially outclasses Chronos Rush.


Version Damage Guard Duration Startup Active Recovery Hit Adv Block Adv UG Adv Special Cancel
4 24-30 Mid; Low 54 (8-[20]-26) 9 9/4 26 HKD -7 -7 (+8) Yes

Two hits. Shortest run distance.

5 31-39 Mid; Low 65 (10-[24]-31) 11 9/4 31 HKD -12 -12 (+3) Yes

Three hits. Medium run distance.

6 37-47 Mid; Low 66 (12-[28]-26) 13 9/4 26 HKD -7 -7 (+8) Yes

Four hits. Farthest run distance.

Super Moves
Hercules Rush
QCFQCF+1/2/3
LEVEL 1
LEVEL 1
RE Leo QCFQCF 123 Fifth Bronze.png
Seven hits. Invincible for the entire startup. 4 frame gap between charge hitbox and sword swing hitbox. Invincible for the entire gap.
Damage Guard Duration Startup Active Recovery Hit Adv Block Adv UG Adv Special Cancel
39-50 Mid TBD TBD 19/4 41 HKD -22 -22 (-7) Yes

Leo's go-to super. Think of Chronos Rush on steroids. An invincible reversal that does a respectable amount of damage on hit, and can even lead in to devastating touch of stuns on some characters from a well placed j.6. However, it harbors two main faults. First, the recovery is huge, and the multiple hits mean this move is just begging to be Ultimate Guarded when blocked. Secondly, despite the followup swing seemingly being huge, the hitbox is surprisingly low, meaning it'll whiff on an airborne opponent more than it won't, making it a dangerous move to use on an enemy in the air. Quite powerful, but should not be used lightly.

Universal Mechanics
Ultimate Counter
R.QCB+1/2/3
RE Leo GC Punch Bronze.png
Staggers Kenji.
Staggers Kenji.
Damage Guard Duration Startup Active Recovery Hit Adv Block Adv UG Adv Special Cancel
3 UB 22 (0-6-16) 0 6 16 +1 (+5) UB +1 (+16) No

The punch version has him swing his sword akin to the end of Chronos Rush, and it hits a bit higher than it to boot, making it a decent response to air attacks. You can even extend with an Ice Super if your opponent is higher enough as you do it. Not amazing on a ground connect, so should mostly be used for airborne attackers.

Pursuit
U+4/5/6
RE Leo Pursuit Bronze.png
Damage Guard Duration Startup Active Recovery Hit Adv Block Adv UG Adv Special Cancel
- - - - - - - - - -

This is easily the worst pursuit in the game. You will often end up punishable on hit if you end up using this move. You have to use it in very specific situations after specific attacks with correct timing in order to connect the hit and not end up punishable. The problem comes from the size of the hitbox; if you pursuit too early, the hitbox will hit much sooner than it was meant to, making you very minus. Thankfully Kenji likes to stay on the ground for a long period of time, so there are more options for pursuit to work in that matchup. The definitive use of Leo's pursuit is for the "final blow". If the opponent has very low health, and you know that the pursuit will connect and also finish the job, go for it.

1
RE Leo 1 Old.png
Damage Guard Duration Startup Active Recovery Hit Adv Block Adv UG Adv Special Cancel
12-15 Mid 26 (9-2-15) 10 2 15 -6 -7 -7 (+8) Yes

Leo steps forward, striking with a vertical slash. It not only possesses a tall hitbox, but is super and special cancellable. Useful for not only anti-airs, but for blockstrings on an airborne opponent, leading to an extension dependent on orb count and distance.

2
RE Leo 2 Old.png
Can be ducked.
Can be ducked.
Damage Guard Duration Startup Active Recovery Hit Adv Block Adv UG Adv Special Cancel
13-16 Mid 36 (12-4-20) 13 4 20 -7 -8 -8 (+7) Super only

Honestly one of his weaker normals. The range is nice, and super cancelling is too, but most of the time 1 or cr.1 is the safer and better option. Use in fringe cases.

3
RE Leo 3 Old.png
Staggers Kenji.
Staggers Kenji.
RE Leo 3 3 Old.png
3 followup.
3 followup.
Version Damage Guard Duration Startup Active Recovery Hit Adv Block Adv UG Adv Special Cancel
3 14-17 Mid 34 (13-3-18) 14 3 18 -1 (+4) -6 -6 (+9) No

Leo swings horizontally once again, but with a twist. In exchange for cancel ability and some range, Leo can chain into a second slash. The meat to it is that this followup is optional, as well as highly delayable. A good check option, especially if the opponent likes to jump or Ultimate Guard. Great conditioning tool, just mind the range is a bit short.

3 > 3 14-17 Mid 62 (41-2-19) 42 [minimum] 2 19 HKD -2 -2 (+13) No

Will guard crush if the first 3 was blocked, allowing you to confirm into Hercules Rush at certain ranges.

cr.1
RE Leo Crouch 1 Old.png
Damage Guard Duration Startup Active Recovery Hit Adv Block Adv UG Adv Special Cancel
12-15 Low 27 (8-4-15) 9 4 15 -8 -9 -9 (+6) Yes

Off the bat, the range of this thing is huge. Pokes as far if not slightly less than cr.5, which is nothing to scoff at. On top of this, it's super and special cancellable, leading to some dangerous footsies if he has orbs. Be wary of a lightning orb Leo. Only drawback is that it's minus on hit or block, and as such is best cancelled into something, namely his dp.1. Even so, one can use it to bait an Ultimate Guard, and cancel into 360. Also owns the high praise of being Leo's only cancellable low. Definitely one to experiment with.

cr.2
RE Leo Crouch 2 First Old.png
RE Leo Crouch 2 Second Old.png
Two hits. First hit can be ducked.
Damage Guard Duration Startup Active Recovery Hit Adv Block Adv UG Adv Special Cancel
17-22 Mid 44 (13-6-25) 14 3/3 25 -12 -13 -13 (+2) No

Leo swings low to the ground. While weak as a poke, it's surprisingly decent as an anti-air, hits twice, and is fairly good at keeping a cornered opponent locked down. Wouldn't advise using too often, but certainly a tool to remember.

cr.3
RE Leo Crouch 3 First Old.png
RE Leo Crouch 3 Second Old.png
RE Leo Crouch 3 Third Old.png
Damage Guard Duration Startup Active Recovery Hit Adv Block Adv UG Adv Special Cancel
14-17 Mid 41 (8-6-27) 9 2/2/2 27 Launch -22 -22 (-7) No

Slashing upwards in a pose not unbefitting of a Master of the Universe, cr.3 is a decent anti-air option due to it's wide hitbox when Leo's arm is fully extended, also causing a juggle state on hit that can be extended on a ground connect, but be warned: This move has absolutely ABYSMAL frame data if whiffed/blocked. Very committal, swing with this move and you better mean it.

cr.4
RE Leo Crouch 4 Old.png
Damage Guard Duration Startup Active Recovery Hit Adv Block Adv UG Adv Special Cancel
11-14 Mid 34 (8-6-20) 9 6 20 -15 -16 -16 (-1) No

Most attacks in Red Earth are well designed, and have distinctive uses that make them at least somewhat viable in some situations. This however, is the exception that proves the rule. There is no reason to press this button. Ever. Its angle is pitiful, its damage is mediocre, you can't cancel from it and to top it off its not even a low, AND is mega minus even on hit. Assuming you LIKE having a health bar, DO, NOT, PRESS, THIS, BUTTON!

cr.5
RE Leo Crouch 5 Old.png
"The Son"
"The Son"
Damage Guard Duration Startup Active Recovery Hit Adv Block Adv UG Adv Special Cancel
12-15 Mid 32 (7-4-21) 8 4 21 -9 -10 -10 (+5) No

A classic normal among Leo mains, Leo stabs outward, plain and simple. The most obvious benefit of this move is that it's GIGANTIC, seriously covers a good 2/3 of horizontal screen give or take, while also being a low, COMMANDING the opponent be ready for it. Pushes the opponent a decent bit back, meaning at max range it can be difficult, if not almost impossible to be punished meterless. Be wary however, this godlike range comes at a cost. A good chunk of Leos sword is also classified as a hurtbox, and the move is also pretty minus on contact, -9 on hit and -10 if blocked, meaning an ill spaced poke can be punished by everyone to some extent. A good button, make no mistake. But one that's weaknesses must be properly respected.

cr.6
RE Leo Crouch 6 Old.png
RE Leo Crouch 6 6 Old.png
6 followup.
6 followup.
Version Damage Guard Duration Startup Active Recovery Hit Adv Block Adv UG Adv Special Cancel
cr.6 12-15 Low 30 (11-3-16) 12 3 16 HKD 0 0 (+15) No
cr.6 > 6 13-16 Low 66 (33-3-30) 34 [minimum] 3 30 HKD -14 -14 (+1) No

Similar to cr.1 and cr.5 in that it reaches pretty far, the main distinction of this button is twofold. For one, it's Leo's designated sweep, meaning it can be pretty good for closing the distance when connected. Second, completely safe, making it an actually decent button to throw out against a grounded opponent. It also helps that it can actually be cancelled into a followup with the same input, making it an ambiguous button the opponent will think twice about disrespecting. However, due to this a savvy opponent can Ultimate Guard the second swing, and punish accordingly if you're too predictable.

j.1
RE Leo Jump 1 Old.png
Version Damage Guard Duration Startup Active Recovery Hit Adv Block Adv UG Adv Special Cancel
j.1 12-15 High Varies 6 2 Until landing +15 [maximum] +15 [maximum] +15 (+30) [maximum] No
sj.1 12-15 High 27 (5-2-20) 6 2 20 +15 [maximum] +15 [maximum] +15 (+30) [maximum] No

Comes out fairly quickly. However, its only real weakness is that it doesn't really have much of a use outside of poking an opponent at weird angles. As an air to air tool, it's mostly outclassed by j.3 in basically every metric that matters

j.2
RE Leo Jump 2 Old.png
Version Damage Guard Duration Startup Active Recovery Hit Adv Block Adv UG Adv Special Cancel
j.2 12-15 High Varies 9 3 Until landing +16 [maximum] +15 [maximum] +15 (+30) [maximum] No
sj.2 12-15 High 33 (8-3-22) 9 3 22 +16 [maximum] +15 [maximum] +15 (+30) [maximum] No

Reaches slightly further than j.1, but is also 3 frames slower. In regards to an air to air situation, j.3 is generally a safer, and thus more appealing button to press in that scenario.

j.3
RE Leo Jump 3 Old.png
Staggers Kenji.
Staggers Kenji.
Version Damage Guard Duration Startup Active Recovery Hit Adv Block Adv UG Adv Special Cancel
j.3 13-16 High Varies 6 2 Until landing +20 (+27) [maximum] +15 [maximum] +15 (+30) [maximum] No
sj.3 13-16 High 28 (5-2-21) 6 2 21 +20 (+27) [maximum] +15 [maximum] +15 (+30) [maximum] No

Definitely Leos best air to air button, as well as an acceptable jump in option. Comes out just as fast as j.1, but has the benefit of his hurtbox being substantially more squashed, and thus more difficult to trade with for the opponent, alongside the actual hitbox being fairly disjointed from it.

j.4
RE Leo Jump 4 First Old.png
RE Leo Jump 4 Second Old.png
Version Damage Guard Duration Startup Active Recovery Hit Adv Block Adv UG Adv Special Cancel
j.4 12-15 High Varies 9 2/3 Until landing +15 [maximum] +15 [maximum] +15 (+30) [maximum] No
sj.4 12-15 High 29 (8-5-16) 9 2/3 16 +15 [maximum] +15 [maximum] +15 (+30) [maximum] No

To be blunt, one of Leo's best normals, and one you should press often. Its hitbox is excellent, in that it is really wide underneath him, serving not only as his most reliable cross up button, but making it just a solid button to press while the opponent is beneath you to keep them pinned. Does enough hitstun to comfortably link into his cancellable normals, making it his most consistent jump in tool as well.

j.5
RE Leo Jump 5 Old.png
"The Holy Spirit"
"The Holy Spirit"
Version Damage Guard Duration Startup Active Recovery Hit Adv Block Adv UG Adv Special Cancel
j.5 12-15 High Varies 10 14 Until landing +16 [maximum] +15 [maximum] +15 (+30) [maximum] No
sj.5 12-15 High 32 (9-14-9) 10 14 9 +16 [maximum] +15 [maximum] +15 (+30) [maximum] No

A great neutral tool as it's active for 14 frames, and covers a good distance in front and below Leo. Incredibly useful for controlling space and challenging your opponents escape options. Be warned however, as Ice Super and characters with a DP can hit you out of it if you perform it too close, so don't lean on it. Excellent normal, hard to go wrong.

j.6
RE Leo Jump 6 First Old.png
RE Leo Jump 6 Second Old.png
Staggers Kenji (+27).
Version Damage Guard Duration Startup Active Recovery Hit Adv Block Adv UG Adv Special Cancel
j.6 12-15 high Varies 9 2/2 Until landing +20 (+27) [maximum] +15 [maximum] +15 (+30) [maximum] No
sj.6 12-15 high 34 (8-4-22) 9 2/2 22 +20 (+27) [maximum] +15 [maximum] +15 (+30) [maximum] No

High utility normal right here. Comes out fairly quick, and has 2 hitboxes (only hits once however), one that hits fairly low, and one that reaches higher in front of him. Definitely Leo's strongest jump-in, and pretty decent for guard break strings in the corner.

Command Normals
j.u+2
RE Leo Jump U 2 Old.png
Version Damage Guard Duration Startup Active Recovery Hit Adv Block Adv UG Adv Special Cancel
j.u+2 13-16 Unknown Varies 11 3 Until landing N/A N/A N/A No
sj.u+2 13-16 Unknown 22 (10-3-9) 11 3 9 N/A N/A N/A No

Much and such the same sort of story as j.2, only Leo reaches upwards. The angle is somewhat niche in utility, but is pretty good at hitting a retreating Kenji out of the sky, so still worth using.

j.d+5
RE Leo Jump D 5 First Old.png
RE Leo Jump D 5 Second Old.png
RE Leo Jump D 5 Third Old.png
Version Damage Guard Duration Startup Active Recovery Hit Adv Block Adv UG Adv Special Cancel
j.d+5 12-15 High Varies 9 22 Until landing +16 [maximum] +15 [maximum] +15 (+30) [maximum] No
sj.d+5 12-15 High 42 (8-22-12) 9 22 12 +16 [maximum] +15 [maximum] +15 (+30) [maximum] No

Leo stabs directly downwards, using the same animation as his pursuit. Pretty good as a fast overhead (or at least, what Leo would consider fast) and is a solidly ambiguous option on opponents wakeup. Worth using if for nothing else than it's deceptively long active frames, and it's ability to muck with people as they get up.

j.d+6
RE Leo Jump D 6 Old.png
Staggers Kenji.
Staggers Kenji.
Version Damage Guard Duration Startup Active Recovery Hit Adv Block Adv UG Adv Special Cancel
j.d+6 12-15 High Varies 13 2 Until landing +20 (+27) [maximum] +15 [maximum] +15 (+30) [maximum] No
sj.d+6 12-15 High 31 (12-2-17) 13 2 17 +20 (+27) [maximum] +15 [maximum] +15 (+30) [maximum] No

Quite possibly Leo's strangest move. He swings his sword vertically, and yet the actual attack itself is awkwardly angled more below and in front of him. Deceptively stubby, but still decent as a jump in as it's somewhat disjointed.

Special Moves
Chronos Rush
QCF+1/2/3
LEVEL 1
LEVEL 1
RE Leo QCF 123 Old.png

Leo charges forward, crashing his shoulder into the opponent, following up with a vertical swing. While he's running with his sword raised, he's immune to projectiles allowing you to close the distance on zoners if timed well. Each version goes further the stronger the button used. However, it also becomes more unsafe as well as slower the higher the strength. This makes the light/medium version more useful for confirms from weaker normals, primarily his standing light normals. General rule of thumb, 4 goes into light and medium, and 5 goes into medium and heavy. Heavy is too slow to combo from 4, and light doesn't travel far enough to combo from 5.


Version Damage Guard Duration Startup Active Recovery Hit Adv Block Adv UG Adv Special Cancel
1 24-30 Mid 54 (8-[20]-26) 9 9/4 26 HKD -7 -7 (+8) Yes

Two hits. Shortest run distance.

2 31-39 Mid 65 (10-[24]-31) 11 9/4 31 HKD -12 -12 (+3) Yes

Three hits. Medium run distance.

3 37-47 Mid 78 (12-[28]-38) 13 9/4 38 HKD -19 -19 (-4) Yes

Four hits. Farthest run distance.

Mars Slash
DP+1/2/3
LEVEL 1
LEVEL 1
RE Leo DP 123 First Old.png
RE Leo DP 123 Second Old.png
2 hits. First hit can be ducked.

Leo's primary invincible attack, Mars Slash boasts a healthy amount of invincibility starting on frame 6 for all versions while also serving as his premier air guard crush ender. Can also be used as a chip kill option, the only downside being its cumbersome startup, and the fact the hitbox is deceptively low as well as moves him quite a bit forward, making it a worse anti-air than you would expect.


Version Damage Guard Duration Startup Active Recovery Hit Adv Block Adv UG Adv Special Cancel
1 21-27 Mid 46 (17-6-23) 18 3/3 23 HKD -3 -3 (+12) Yes

12 frames of invincibility starting on frame 6.

2 21-27 Mid 51 (18-6-27) 19 3/3 27 HKD -7 -7 (+8) Yes

13 frames of invincibility starting on frame 6.

3 21-27 Mid 58 (24-4-30) 25 2/2 30 HKD -9 -9 (+6) Yes

19 frames of invincibility starting on frame 6.

Super Moves
Hercules Rush
QCFQCF+1/2/3
LEVEL 1
LEVEL 1
RE Leo QCFQCF 123 Fifth Old.png
Seven hits. Invincible for the entire startup. 4 frame gap between charge hitbox and sword swing hitbox. Invincible for the entire gap.
Damage Guard Duration Startup Active Recovery Hit Adv Block Adv UG Adv Special Cancel
39-50 Mid TBD TBD 19/4 41 HKD -22 -22 (-7) Yes

Leo's go-to super. Think of Chronos Rush on steroids. An invincible reversal that does a respectable amount of damage on hit, and can even lead in to devastating touch of stuns on some characters from a well placed j.6. However, it harbors two main faults. First, the recovery is huge, and the multiple hits mean this move is just begging to be Ultimate Guarded when blocked. Secondly, despite the followup swing seemingly being huge, the hitbox is surprisingly low, meaning it'll whiff on an airborne opponent more than it won't, making it a dangerous move to use on an enemy in the air. Quite powerful, but should not be used lightly.

Universal Mechanics
Ultimate Counter
R.QCB+1/2/3
RE Leo GC Punch Old.png
Staggers Kenji.
Staggers Kenji.
Damage Guard Duration Startup Active Recovery Hit Adv Block Adv UG Adv Special Cancel
3 UB 22 (0-6-16) 0 6 16 +1 (+5) UB +1 (+16) No

The punch version has him swing his sword akin to the end of Chronos Rush, and it hits a bit higher than it to boot, making it a decent response to air attacks. You can even extend with an Ice Super if your opponent is higher enough as you do it. Not amazing on a ground connect, so should mostly be used for airborne attackers.

Pursuit
U+4/5/6
RE Leo Pursuit Old.png
Damage Guard Duration Startup Active Recovery Hit Adv Block Adv UG Adv Special Cancel
- - - - - - - - - -

This is easily the worst pursuit in the game. You will often end up punishable on hit if you end up using this move. You have to use it in very specific situations after specific attacks with correct timing in order to connect the hit and not end up punishable. The problem comes from the size of the hitbox; if you pursuit too early, the hitbox will hit much sooner than it was meant to, making you very minus. Thankfully Kenji likes to stay on the ground for a long period of time, so there are more options for pursuit to work in that matchup. The definitive use of Leo's pursuit is for the "final blow". If the opponent has very low health, and you know that the pursuit will connect and also finish the job, go for it.


General
FAQ
Controls ⁄ System
HUD
Characters
Tessa
Leo
Mai Ling
Kenji