Chaos Code/NSC/Celia II Kai: Difference between revisions
No edit summary |
|||
| (119 intermediate revisions by 9 users not shown) | |||
| Line 1: | Line 1: | ||
[[image:profile- | [[image:profile-celia2kai.png|180px|right|]] | ||
{{TOClimit|2}} | |||
= | == Story == | ||
'''Celia II Kai''' <br /> '''『セリアII改』''' | |||
Celia II (Kai to her friends) was created to guard the Chaos Code, but really all she wants to do is unblockable people. Unfortunately, she got a bit beat up and had to get a refit with worse parts, so she's not as strong as she used to be. She's pretty mad because her unblockable costs 3 meters and can be rolled on reaction. | |||
''' | == Playstyle== | ||
'''Health:''' 28000<br /> '''Stun:''' 70 | |||
Celia II Kai (just called Kai to avoid confusion with her boss form "Celia II") is a relatively versatile character, with low risk options that lead to high reward. She doesn't have a meterless reversal, and lacks a solid grounded, anti-air but more than makes up for it with dominating air buttons and some very high reward metered reversals. | |||
=== Mobility (Run vs. Step) === | |||
'''Run''': Standard run. Cancelable into buttons or superjumps. The most common choice for Kai. | |||
'''Step''': Standard hop. Kai can do some alright tic grabs with it. She'll also build meter faster. | |||
''' | == Extra Move Selection == | ||
Tricky Vision is a very good reversal. Kai doesn't ''need'' it because EX barrier is also a very good reversal, but both reversals are good for different reasons, so it's still very much worth taking. | |||
Core of Death is a command grab, which is good for mix-ups and resets, and also for combos since 6A pulls in and lets you combo into the grab. | |||
Vanishing Pressure is a command grab so you could use it for mix-ups, but the more notable thing is that it resets the screen position to the center, giving you a consistent followup combo. | |||
''' | Burning Gaze doesn't have much not obvious about it. It's very simple to combo into but doesn't give much extra utility. | ||
=== Recommended Sets === | |||
Any Combination of Core of Death, Tricky Vision, and Vanishing Pressure is good since all of the moves themselves are good and none of them overlap in use very much. Beam Super is not especially useful but if you find that you can't convert hits into exceed or waffle iron very well, Beam Super might be better for easy confirms into decent damage. | |||
====Tricky Vision & Core of Death==== | |||
Gives Kai a lot of extra utility, and if you're planning on using Exceed combos you probably wont have much use for the extra supers, so you're better off taking these. | |||
= | ====Core of Death and Vanishing Pressure==== | ||
Gives Kai a lot of extra combo routes. Waffle Iron combos are a good outlet for meter if you don't want to save for exceed. | |||
==Normal Moves== | == Move List == | ||
''Click on a header to expand that section of the movelist'' | |||
<div class="mw-collapsible mw-collapsed"> | |||
<div class="mw-collapsible-toggle" style="float: none;"><center><font size="4"><b>Normal Moves</b></font></center> <div align=right></div></div> | |||
<div class="mw-collapsible-content"> | |||
===<font style="visibility:hidden" size="0">Normal Moves</font>=== | |||
====== <font style="visibility:hidden" size="0">5A</font> ====== | |||
{{MoveData | |||
|image=CC_C2_5A.gif | |||
|caption= | |||
|name=5A | |||
|data= | |||
{{AttackData-CC | |||
|damage= | |||
|guard=High/Low | |||
|startup=7f | |||
|active=- | |||
|recovery=- | |||
|frameadv=+1 | |||
|cancelable=Yes | |||
|chprop=- | |||
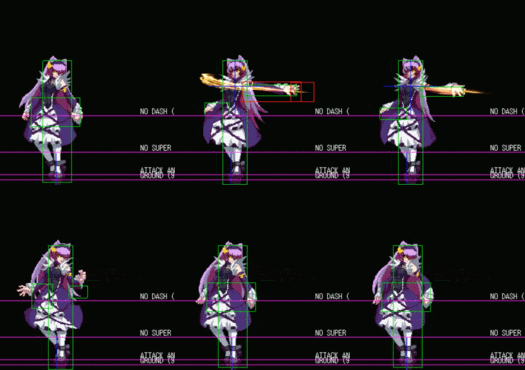
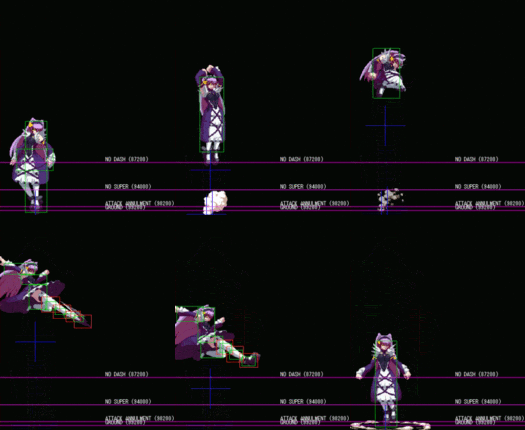
|description=Short ranged poke. Can be staggered and links into itself. Misses an opponent who is crouching, unless you hit them with a normal prior to it. Not the best anti-air due to its hitbox (hits lower than Kai's face), however it is useful after doing an air string to force the opponent to eat your air unblockable 5A into 5C hitconfirm. | |||
}} | |||
}} | |||
====== <font style="visibility:hidden" size="0">2A</font> ====== | |||
{{MoveData | |||
|image=CC_C2_2A.gif | |||
|caption= | |||
|name=2A | |||
|data= | |||
{{AttackData-CC | |||
|damage= | |||
|guard=Low | |||
|startup=7f | |||
|active=- | |||
|recovery=- | |||
|frameadv=+1 | |||
|cancelable=Yes | |||
|chprop=- | |||
|description=Kai's hand turns into a drill and bores into the enemy's feet. Hits 2 times (the first hit is low, the second is a mid) and can be linked into itself if it hits very late. Can be chained into 2D for a knockdown as a small hitconfirm if you're outta range for something else. This move is less plus on block than 2b, however its active frames is longer than 2b, making it easier to time your normals for oki. If an opponent is also upbacking your pressure, 2a (1hit) chained to 2b as a blockstring will catch them. With 2a's long hitbox it can be chained into 2D even at max range. | |||
}} | |||
}} | |||
====== <font style="visibility:hidden" size="0">5B</font> ====== | |||
{{MoveData | |||
|image=CC_C2_5B.gif | |||
|caption= | |||
|name=5B | |||
|data= | |||
{{AttackData-CC | |||
|damage= | |||
|guard=High/Low | |||
|startup=7f | |||
|active=- | |||
|recovery=- | |||
|frameadv=-4 | |||
|cancelable=Yes | |||
|chprop=- | |||
|description=Kai's dress pokes out. Less range than 2B, so not as good as 2A for poking. Has a higher hitbox than 2B, making it whiff on opponent's in a really low otg state, however, 5b when it does hit as an otg, raises the opponent into the air higher and pushes you farther away (useful for spacing specific timing on exceed combos). | |||
}} | |||
}} | |||
====== <font style="visibility:hidden" size="0">2B</font> ====== | |||
{{MoveData | |||
|image=CC_C2_2B.gif | |||
|caption= | |||
|name=2B | |||
|data= | |||
{{AttackData-CC | |||
|damage= | |||
|guard=Low | |||
|startup=6f | |||
|active=- | |||
|recovery=- | |||
|frameadv=+2 | |||
|cancelable=Yes | |||
|chprop=- | |||
|description=Kai throws out a kick towards the ankle. Low with slightly less range than 2A. | |||
}} | |||
}} | |||
====== <font style="visibility:hidden" size="0">cl.C</font> ====== | |||
{{MoveData | |||
|image=CC_C2_clC.gif | |||
|caption= | |||
|name=cl.C | |||
|data= | |||
{{AttackData-CC | |||
|damage= | |||
|guard=High/Low | |||
|startup=9f | |||
|active=- | |||
|recovery=- | |||
|frameadv=-5 | |||
|cancelable=Yes | |||
|chprop=Stagger | |||
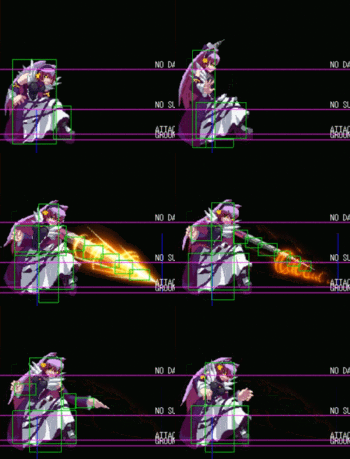
|description=A short ranged upwards swipe. Trades with a lot of stuff when used as an anti-air, but still probably her best meterless option. Her hurtbox lowers when using this move (lower than her standing hurtbox), so getting used to timing this to stuff people above you can be important. | |||
}} | |||
}} | |||
====== <font style="visibility:hidden" size="0">5C</font> ====== | |||
{{MoveData | |||
|image=CC_C2_5C.gif | |||
|caption= | |||
|name=5C | |||
|data= | |||
{{AttackData-CC | |||
|damage= | |||
|guard=High/Low | |||
|startup=14f | |||
|active=- | |||
|recovery=- | |||
|frameadv=-7 | |||
|cancelable=Yes | |||
|chprop=Stagger | |||
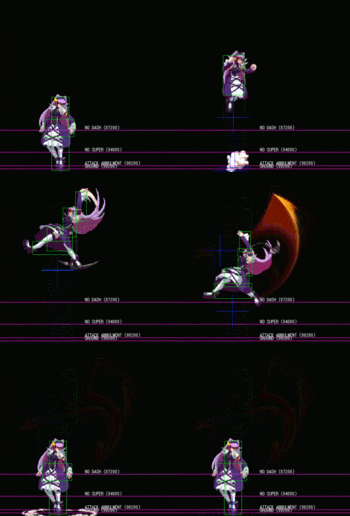
|description=Kai attacks with a Mid ranged buzzsaw swipe downwards. Hits from about 2 character lengths. Moves forward a little. | |||
}} | |||
}} | |||
====== <font style="visibility:hidden" size="0">2C</font> ====== | |||
{{MoveData | |||
|image=CC_C2_2C.gif | |||
|caption= | |||
|name=2C | |||
|data= | |||
{{AttackData-CC | |||
|damage= | |||
|guard=High/Low | |||
|startup=19f | |||
|active=- | |||
|recovery=- | |||
|frameadv=-3 | |||
|cancelable=Yes | |||
|chprop=Stagger | |||
|description=A cannon fired from Kai's mouth. Hits about 2 character lengths. Can be chained from 2a and 2b if very close. This move pushes the opponent far away when they are in an otgable state, but helps regulate height specific combos such as 2b2c in the corner to help for easy rejump combos. | |||
}} | |||
}} | |||
====== <font style="visibility:hidden" size="0">5D</font> ====== | |||
{{MoveData | |||
|image=CC_C2_5D.gif | |||
|caption= | |||
|name=5D | |||
|data= | |||
{{AttackData-CC | |||
|damage= | |||
|guard=High/Low | |||
|startup=9f | |||
|active=- | |||
|recovery=- | |||
|frameadv=-3 | |||
|cancelable=No | |||
|chprop=Launch | |||
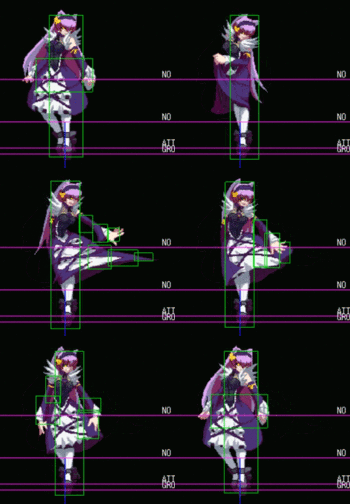
|description=An axe rotates around Kai's entire body. Moves her forward some, hits for about 2 character lengths, vacuums in on hit (but not on block). Doesn't deter cross-ups, the hitbox is only in the front of Kai. It's not cancelable, but you can link off it with D command grab. | |||
}} | |||
}} | |||
====== <font style="visibility:hidden" size="0">2D</font> ====== | |||
{{MoveData | |||
|image=CC_C2_2D.gif | |||
|caption= | |||
|name=2D | |||
|data= | |||
{{AttackData-CC | |||
|damage= | |||
|guard=High/Low | |||
|startup=12f | |||
|active=- | |||
|recovery=- | |||
|frameadv=-4 | |||
|cancelable=No | |||
|chprop=Launch | |||
|description=Kai's leg turns into a saw and extends. Hits low, causes knockdown. You can pick up for a combo on Counter Hit. | |||
}} | |||
}} | |||
====== <font style="visibility:hidden" size="0">j.A</font> ====== | |||
{{MoveData | |||
|image=CC_C2_j.A.gif | |||
|caption= | |||
|name=j.A | |||
|data= | |||
{{AttackData-CC | |||
|damage= | |||
|guard=High | |||
|startup=5f | |||
|active=- | |||
|recovery=- | |||
|frameadv= | |||
|cancelable= | |||
|chprop= | |||
|description=Kai's hand turns into a drill, just like her 2A. Very Good ranged air to air that hits twice and is easily confirmable. Because the hitbox is very high this isn't a great jump-in, but instant air dash jump A into low or throw can make opponents second guess themselves. | |||
}} | |||
}} | |||
====== <font style="visibility:hidden" size="0">j.B</font> ====== | |||
{{MoveData | |||
|image=CC_C2_j.B.gif | |||
|caption= | |||
|name=j.B | |||
|data= | |||
{{AttackData-CC | |||
|damage= | |||
|guard=High | |||
|startup=6f | |||
|active=- | |||
|recovery=- | |||
|frameadv= | |||
|cancelable= | |||
|chprop= | |||
|description= Kai kicks downwards whilst in the air. Not as good an air to air or jump-in as J.A and J.C respectively. It's main use is to hit while rising in situations where j.C will whiff, as well as a good normal use for a tick throw after an instant air dash. Also at instant air dash height, can be chained into jump C to do a double overhead as you descend. | |||
}} | |||
}} | |||
====== <font style="visibility:hidden" size="0">j.C</font> ====== | |||
{{MoveData | |||
|image=CC_C2_j.C.gif | |||
|caption= | |||
|name=j.C | |||
|data= | |||
{{AttackData-CC | |||
|damage= | |||
|guard=High | |||
|startup=9f | |||
|active=- | |||
|recovery=- | |||
|frameadv= | |||
|cancelable=Yes | |||
|chprop=Stagger | |||
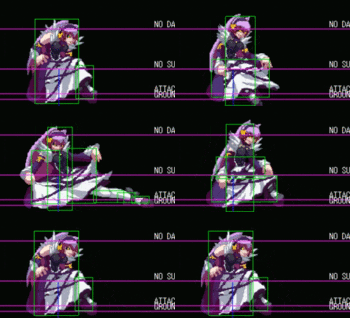
|description=Kai's scythe slashes upwards making for an alright air-to-air and a really good jump in. It's best use is in air footsies battles where it often out-prioritizes other normals. When jump C lands really deep on an opponent who is blocking, you can immediately j.C again to instant overhead them them if they blocked the first j.C standing. Has less blockstun than jump D (normally) unless done at very specific low heights. | |||
}} | |||
}} | |||
====== <font style="visibility:hidden" size="0">j.D</font> ====== | |||
{{MoveData | |||
|image=CC_C2_j.D.gif | |||
|caption= | |||
|name=j.D | |||
|data= | |||
{{AttackData-CC | |||
|damage= | |||
|guard=High | |||
|startup=8f | |||
|active=- | |||
|recovery=- | |||
|frameadv= | |||
|cancelable=Yes | |||
|chprop=Stagger | |||
|description=Kai's scythe twirls about her waist, glowing red. Mainly used for AD cross-ups as the hitbox is all around her. Not as good as J.A as an air-to-air, but a good jump-in and a good move to come down with after an air tech. Hitbox is only at her waist, so when using it in rejump combos, use her waist as a guideline to know when to hit with it. If you hit with this low enough you can do Kai's level 3 when you land and unblockable your opponent. | |||
}} | |||
}} | |||
</div> | |||
</div> | |||
<div class="mw-collapsible mw-collapsed"> | |||
<div class="mw-collapsible-toggle" style="float: none;"><center><font size="4"><b>Command Moves</b></font></center> <div align=right></div></div> | |||
<div class="mw-collapsible-content"> | |||
===<font style="visibility:hidden" size="0">Command Moves</font>=== | |||
====== <font style="visibility:hidden" size="0">6A</font> ====== | |||
{{MoveData | |||
|image=CC_C2_6A.gif | |||
|name=6A | |||
|data= | |||
{{AttackData-CC | |||
|damage= | |||
|guard=High/Low | |||
|startup=12f | |||
|active=- | |||
|recovery=- | |||
|frameadv=-3 | |||
|cancelable=Yes | |||
|chprop=- | |||
|description= | |||
Kai's hand becomes a bigger drill and hits three times. Vacuums in on the first hit, then pushes away. All hits are cancelable. | |||
}} | |||
}} | |||
</div> | |||
</div> | |||
<div class="mw-collapsible mw-collapsed"> | |||
<div class="mw-collapsible-toggle" style="float: none;"><center><font size="4"><b>Universal Mechanics</b></font></center> <div align=right></div></div> | |||
<div class="mw-collapsible-content"> | |||
===<font style="visibility:hidden" size="0">Universal Mechanics</font>=== | |||
====== <font style="visibility:hidden" size="0">Throw</font> ====== | |||
{{MoveData | |||
|image=CC_C2_AC.gif | |||
doesn't | |caption= | ||
|name=Throw | |||
|input= 4/5/6AC | |||
|data= | |||
{{AttackData-CC | |||
|damage=3800 | |||
|guard=Throw | |||
|startup=5f | |||
|active=- | |||
|recovery=- | |||
|frameadv= | |||
|cancelable=No | |||
|chprop= | |||
|description=Regular throw. Pushes the opponent relatively far away. Kai can combo off this. Although she doesn't get much midscreen, you can at the very least turn it into a soft knockdown if you want and let your opponent tech roll themselves closer to the corner. | |||
}} | |||
}} | |||
====== <font style="visibility:hidden" size="0">Guard Break</font> ====== | |||
{{MoveData | |||
|image=CC_C2_6CD.gif | |||
|caption= | |||
|name=Guard Break | |||
|input = 6BD | |||
|data= | |||
{{AttackData-CC | |||
|damage= | |||
|guard=Unblockable | |||
|startup=36f | |||
|active=- | |||
|recovery=- | |||
|frameadv= | |||
|cancelable=No | |||
|chprop=- | |||
|description= | |||
Kai's unblockable attack. | |||
}} | |||
}} | |||
====== <font style="visibility:hidden" size="0">Roll</font> ====== | |||
{{MoveData | |||
|image=CC_C2_AB.gif | |||
|caption= | |||
|name=Roll | |||
|input=AB | |||
|data= | |||
{{AttackData-CC | |||
|damage= | |||
|guard=- | |||
|startup=33f | |||
|active=- | |||
|recovery=- | |||
|frameadv= | |||
|cancelable=No | |||
|chprop=- | |||
|description=Roll | |||
}} | |||
}} | |||
====== <font style="visibility:hidden" size="0">Tactical Guard</font> ====== | |||
{{MoveData | |||
|image=CC_C2_CD.gif | |||
|caption= | |||
|name=Tactical Guard | |||
|input=CD | |||
|data= | |||
{{AttackData-CC | |||
|damage= | |||
|guard=High/low | |||
|startup= | |||
|active=- | |||
|recovery=- | |||
|frameadv= | |||
|cancelable=No | |||
|chprop=- | |||
|description=Parry | |||
}} | |||
}} | |||
</div> | |||
</div> | |||
<div class="mw-collapsible mw-collapsed"> | |||
<div class="mw-collapsible-toggle" style="float: none;"><center><font size="4"><b>Special Moves</b></font></center> <div align=right></div></div> | |||
<div class="mw-collapsible-content"> | |||
===<font style="visibility:hidden" size="0">-Special Moves</font>=== | |||
====== <font style="visibility:hidden" size="0">236P</font> ====== | |||
{{MoveData | |||
|image=CC_C2_236A.gif | |||
|image2=CC_C2_236C.gif | |||
|image3=CC_C2_236AC.gif | |||
|name= Raging Tomahawk | |||
|input = 236P | |||
|data= | |||
{{AttackData-CC | |||
|version=A | |||
|damage= | |||
|guard=High/Low | |||
|startup=12f | |||
|active=- | |||
|recovery=- | |||
|frameadv=- | |||
|cancelable=No | |||
|chprop=- | |||
|description= Kai flings one Tomahawk across the screen at a medium speed. Recovers decently on block due to push-back. | |||
}} | |||
{{AttackData-CC | |||
|header=no | |||
|version=C | |||
|damage= | |||
|guard=High/Low | |||
|startup=24f | |||
|active=- | |||
|recovery=- | |||
|frameadv=- | |||
|cancelable=No | |||
|chprop=- | |||
|description=Kai flings two Tomahawks instead of one. Start up is longer, blades seem to be a bit faster. Plus on block when done point blank. | |||
}} | |||
{{AttackData-CC | |||
|header=no | |||
|version=EX | |||
|damage= | |||
|guard=High/Low | |||
|startup=14f | |||
|active=- | |||
|recovery=- | |||
|frameadv=- | |||
|cancelable=No | |||
|chprop=- | |||
|description= One giant tomahawk is thrown at a 35 degree angle. Start up is very quick, can be done in the corner to keep pressure as it's plus on block. | |||
}} | |||
}} | |||
| | ====== <font style="visibility:hidden" size="0">623P</font> ====== | ||
| | {{MoveData | ||
|image=CC_C2_623A.gif | |||
|image2=CC_C2_623C.gif | |||
|image3=CC_C2_623AC.gif | |||
|caption= <div class="mw-collapsible mw-collapsed"><br> | |||
[[File:CC_C2_j623A.gif|center|175x250px]] </div> | |||
|caption2= <div class="mw-collapsible mw-collapsed"><br> | |||
[[File:CC_C2_j623C.gif|center|175x250px]] </div> | |||
|caption3= <div class="mw-collapsible mw-collapsed"><br> | |||
[[File:CC_C2_j623AC.gif|center|175x250px]] </div> | |||
|name= Deadly Spark | |||
|input = 623P<br />expand for air hitbox | |||
|data= | |||
{{AttackData-CC | |||
|version=A | |||
|damage= | |||
|guard=High/Low | |||
|startup=10f | |||
|active=- | |||
|recovery=- | |||
|frameadv=-19 | |||
|cancelable=No | |||
|chprop=Float}} | |||
{{AttackData-CC | |||
|version=A (air) | |||
|header=no | |||
|damage= | |||
|guard=High/Low | |||
|startup=10f | |||
|active=- | |||
|recovery=- | |||
|frameadv=- | |||
|cancelable=No | |||
|chprop=Float | |||
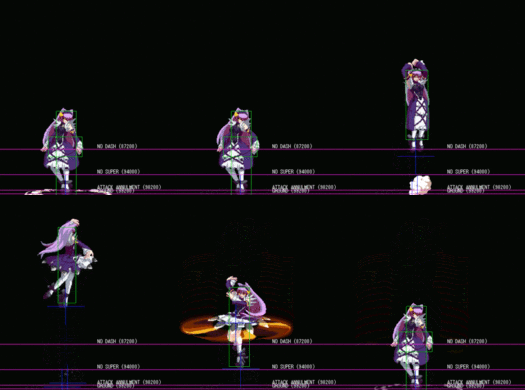
|description= Kai spins around horizontally on fire, similar to Bison's psycho crusher. Useful as a combo ender. Ground hitbox is smaller than air version. | |||
}} | |||
{{AttackData-CC | |||
|header=no | |||
|version=C | |||
|damage= | |||
|guard=High/Low | |||
|startup=17f | |||
|active=- | |||
|recovery=- | |||
|frameadv=-17 | |||
|cancelable=No | |||
|chprop=Float}}{{AttackData-CC | |||
|header=no | |||
|version=C (air) | |||
|damage= | |||
|guard=High/Low | |||
|startup=12f | |||
|active=- | |||
|recovery=- | |||
|frameadv=- | |||
|cancelable=No | |||
|chprop=Float | |||
|description= Kai spins about 3/4th screen, crossing the enemy (On block) up if they are within this distance. More damage. | |||
}} | |||
{{AttackData-CC | |||
|header=no | |||
|version=EX | |||
|damage= | |||
|guard=High/Low | |||
|startup=5f | |||
|active=- | |||
|recovery=- | |||
|frameadv=-11 | |||
|cancelable=No | |||
|chprop=Float}}{{AttackData-CC | |||
|header=no | |||
|version=EX (air) | |||
|damage= | |||
|guard=High/Low | |||
|startup=4f | |||
|active=- | |||
|recovery=- | |||
|frameadv=- | |||
|cancelable=No | |||
|chprop=Float | |||
|description=Kai spins horizontally and turns purple instead of red, shooting towards the opponent. Very fast start-up and recovery. After the startup of the animation, Kai's hurtbox is extremely small, allowing her to weave through projectiles if spaced well vertically. | |||
}} | |||
}} | |||
====== <font style="visibility:hidden" size="0">214P</font> ====== | |||
{{MoveData | |||
|image=CC_C2_214A.gif | |||
|image2=CC_C2_214C.gif | |||
|image3=CC_C2_214AC.gif | |||
|caption= <div class="mw-collapsible mw-collapsed"><br> | |||
[[File:CC_C2_j214A.gif|center|175x250px]] </div> | |||
|caption2= <div class="mw-collapsible mw-collapsed"><br> | |||
[[File:CC_C2_j214C.gif|center|175x250px]] </div> | |||
|caption3= <div class="mw-collapsible mw-collapsed"><br> | |||
[[File:CC_C2_j214AC.gif|center|175x250px]] </div> | |||
|name= Hell's Configuration | |||
|input = 214P <br />expand for air hitbox | |||
|data= | |||
{{AttackData-CC | |||
|version=A | |||
|damage= | |||
|guard=High | |||
|startup=27f | |||
|active=- | |||
|recovery=- | |||
|frameadv=-4 | |||
|cancelable=No | |||
|chprop=Groundbounce}} | |||
{{AttackData-CC | |||
|header=no | |||
|version=A (air) | |||
|damage= | |||
|guard=High | |||
|startup=21f | |||
|active=- | |||
|recovery=- | |||
|frameadv=- | |||
|cancelable=No | |||
|chprop=Groundbounce | |||
|description=Kai hops off the ground and forward a third of the screen, bringing down her scythe along the way. | |||
}} | |||
{{AttackData-CC | |||
|header=no | |||
|version=C | |||
|damage= | |||
|guard=High | |||
|startup=28f | |||
|active=- | |||
|recovery=- | |||
|frameadv=-3 | |||
|cancelable=No | |||
|chprop=-}} {{AttackData-CC | |||
|header=no | |||
|version=C (air) | |||
|damage= | |||
|guard=High | |||
|startup=21f | |||
|active=- | |||
|recovery=- | |||
|frameadv=- | |||
|cancelable=No | |||
|chprop=- | |||
|description=Kai hops off the ground about a half screen distance, bring down her scythe in the meantime. Causes an OTGable knockdown. | |||
}} | |||
{{AttackData-CC | |||
|header=no | |||
|version=EX | |||
|damage= | |||
|guard=High | |||
|startup=7f | |||
|active=- | |||
|recovery=- | |||
|frameadv=-3 | |||
|cancelable=No | |||
|chprop=-}}{{AttackData-CC | |||
|header=no | |||
|version=EX (air) | |||
|damage= | |||
|guard=High | |||
|startup=7f | |||
|active=- | |||
|recovery=- | |||
|frameadv=- | |||
|cancelable=No | |||
|chprop=- | |||
|description= Kai hops about a half screen, covered in flames. Hits on the way up for combos and causes an OTGable knockdown. It's also invincible making it a potential reversal, although it's rather slow for a DP. When using this version in the air, it does not have otgable properties. Typically after landing, the EX version in the air, whiffed 2D as they land allows for a 2A meaty or 623B command throw mixup. | |||
}} | |||
}} | |||
====== <font style="visibility:hidden" size="0">214K</font> ====== | |||
{{MoveData | |||
|image=CC_C2_214B.gif | |||
|image2=CC_C2_214D.gif | |||
|image3=CC_C2_214BD.gif | |||
|name= Tragic Disparity | |||
|input = 214K | |||
|data= | |||
{{AttackData-CC | |||
|version=B | |||
|damage= | |||
|guard=High/Low | |||
|startup=17f | |||
|active=- | |||
|recovery=- | |||
|frameadv=-19 | |||
|cancelable=No | |||
|chprop=- | |||
|description= Kai surrounds herself with a green force field. Reflects projectiles. Can be used as an anti-air but it's very punishable on block/whiff | |||
}} | |||
{{AttackData-CC | |||
|header=no | |||
|version=D | |||
|damage= | |||
|guard=High/Low | |||
|startup=21f | |||
|active=- | |||
|recovery=- | |||
|frameadv=-17 | |||
|cancelable=No | |||
|chprop=- | |||
|description= Kai surrounds herself with an orange force field. Absorbs projectiles. Used in corner combos because of the wall slam effect | |||
}} | |||
{{AttackData-CC | |||
|header=no | |||
|version=EX | |||
|damage= | |||
|guard=High/Low | |||
|startup=17f | |||
|active=- | |||
|recovery=- | |||
|frameadv=-13 | |||
|cancelable=No | |||
|chprop=Wallbounce | |||
|description= Kai surrounds herself with a purple force field. Reflects projectiles. Only version of the move that is invulnerable on startup and on CH it causes a giant wall bounce that's easy to confirm from. It's in counter hit state even during recovery so try not to have it whiff or get blocked. | |||
}} | |||
}} | |||
</div> | |||
</div> | |||
<div class="mw-collapsible mw-collapsed"> | |||
<div class="mw-collapsible-toggle" style="float: none;"><center><font size="4"><b>Extra Special Moves</b></font></center> <div align=right></div></div> | |||
<div class="mw-collapsible-content"> | |||
===<font style="visibility:hidden" size="0">-Extra Specials</font>=== | |||
====== <font style="visibility:hidden" size="0">623KK/421KK</font> ====== | |||
{{MoveData | |||
|image=CC_C2_623KK.gif | |||
|caption=Without followup | |||
|image2=CC_C2_623KK4KK.gif | |||
|caption2=With followup | |||
|name= Tricky Vision | |||
|input = 623BD or 421BD | |||
|data= | |||
{{AttackData-CC | |||
|version=623 | |||
|damage= | |||
|guard=N/A | |||
|startup=- | |||
|active=- | |||
|recovery=- | |||
|frameadv=- | |||
|cancelable=No | |||
|chprop=- | |||
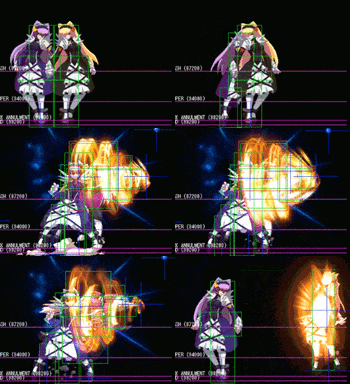
|description= Kai turns into pixels and teleports forward. Has invincibility frames for the duration of the teleport, but has recovery at the end. Can be followed up with a second teleport using 6BD or 4BD. | |||
}} | |||
{{AttackData-CC | |||
|header=no | |||
|version=421 | |||
|damage= | |||
|guard=N/A | |||
|startup=- | |||
|active=- | |||
|recovery=- | |||
|frameadv=- | |||
|cancelable=No | |||
|chprop=- | |||
|description=Kai turns into pixels and teleports backward. Has invincibility frames for the duration of the teleport, but has recovery at the end. Can be followed up with a second teleport using 6BD or 4BD. | |||
}} | |||
}} | |||
====== <font style="visibility:hidden" size="0">632146K</font> ====== | |||
{{MoveData | |||
|image=CC_C2_632146K.gif | |||
|caption= | |||
|name= Core of Death | |||
|input = 632146K | |||
|data= | |||
{{AttackData-CC | |||
|version=B | |||
|damage= | |||
|guard=Command Grab | |||
|startup=6f | |||
|active=- | |||
|recovery=- | |||
|frameadv= | |||
|cancelable=Yes | |||
|chprop=- | |||
|description= Kai grabs the opponent and blows them into the air in front of her. The B version launches the opponent to the moon for a combo. | |||
}} | |||
{{AttackData-CC | |||
|header=no | |||
|version=D | |||
|damage= | |||
|guard=Command Grab | |||
|startup=3f | |||
|active=- | |||
|recovery=- | |||
|frameadv=-- | |||
|cancelable=No | |||
|chprop=- | |||
|description=The D version is way faster than the B version (can link off of 5D) but blows the opponent too far away for a combo midscreen but wall slams in the corner | |||
}} | |||
}} | |||
</div> | |||
</div> | |||
<div class="mw-collapsible mw-collapsed"> | |||
<div class="mw-collapsible-toggle" style="float: none;"><center><font size="4"><b>Ultimate Chaos Moves</b></font></center> <div align=right></div></div> | |||
<div class="mw-collapsible-content"> | |||
===<font style="visibility:hidden" size="0">-Ultimate Chaos</font>=== | |||
====== <font style="visibility:hidden" size="0">214214P</font> ====== | |||
{{MoveData | |||
|image=CC_C2_214214P.gif | |||
|caption= | |||
|name= Cruel Ascension | |||
|input = 214214P | |||
|data= | |||
{{AttackData-CC | |||
|damage= | |||
|guard=High/Low | |||
|startup=- | |||
|active=- | |||
|recovery=- | |||
|frameadv=- | |||
|cancelable=No | |||
|chprop=- | |||
|description= Kai forms a giant tornado up in the sky made of flames. The opponent is send flying through the air. Decent damage, fast start-up and potential as a reversal. Works well in exceed combos. | |||
}} | |||
}} | |||
|- | ====== <font style="visibility:hidden" size="0">236236K</font> ====== | ||
|} | {{MoveData | ||
|image=CC_C2_236236B.gif | |||
|image2=CC_C2_236236D.gif | |||
|name= Refusal Missile | |||
|input = 236236K | |||
|data= | |||
{{AttackData-CC | |||
|damage= | |||
|guard=High/Low | |||
|startup= | |||
|active=- | |||
|recovery=- | |||
|frameadv= | |||
|cancelable=No | |||
|chprop=- | |||
|description= Kai fires a missile from her chest, which on contact causes the opponent to pop into the air, unable to act until they hit the ground. B version fires right in front of her and D version fires exactly halfscreen distance in front of her. | |||
}} | |||
}} | |||
</div> | |||
</div> | |||
== | <div class="mw-collapsible mw-collapsed"> | ||
<div class="mw-collapsible-toggle" style="float: none;"><center><font size="4"><b>Extra Ultimate Chaos Moves</b></font></center> <div align=right></div></div> | |||
<div class="mw-collapsible-content"> | |||
===<font style="visibility:hidden" size="0">-Extra Ultimate Chaos</font>=== | |||
====== <font style="visibility:hidden" size="0">236236P</font> ====== | |||
{{MoveData | |||
|image=CC_C2_236236A.gif | |||
|image2=CC_C2_236236C.gif | |||
|image3=CC_C2_j236236A.gif | |||
|caption= | |||
|name= Burning Gaze | |||
|input = 236236P | |||
|data= | |||
{{AttackData-CC | |||
|damage= | |||
|guard=High/Low | |||
|startup= | |||
|active=- | |||
|recovery=- | |||
|frameadv= | |||
|cancelable=No | |||
|chprop=- | |||
|description= Kai fires a green laser fullscreen, can be used to end combos, works well as a super cancel. | |||
}} | |||
}} | |||
====== <font style="visibility:hidden" size="0">6321463214K</font> ====== | |||
{{MoveData | |||
|image=CC_C2_6321463214K.gif | |||
|caption= | |||
|name= Vanishing Pressure | |||
|input = 6321463214K | |||
|data= | |||
{{AttackData-CC | |||
|damage= | |||
|guard=Command Grab/High/Low | |||
|startup= | |||
|active=- | |||
|recovery=- | |||
|frameadv= | |||
|cancelable=No | |||
|chprop=- | |||
|description= Super command grab. Launches the opponent to the moon (if they get killed by the grab they'll actually never fall down). To combo off it, whiff 5A by holding it down once you see the light disappear from her gauntlets to kill frames, then confirm with cl.C. Comboable (can link off of 5D even) and on whiff the clap becomes a hit for some reason, so even if they jump out they might just get hit. | |||
}} | |||
}} | |||
</div> | |||
</div> | |||
== | <div class="mw-collapsible mw-collapsed"> | ||
<div class="mw-collapsible-toggle" style="float: none;"><center><font size="4"><b>Destruction Chaos</b></font></center> <div align=right></div></div> | |||
<div class="mw-collapsible-content"> | |||
===<font style="visibility:hidden" size="0">-Destruction Chaos</font>=== | |||
====== <font style="visibility:hidden" size="0">2363214A+C</font> ====== | |||
{{MoveData | |||
|image=CC_C2_2363214AC.gif | |||
|caption= | |||
|name= Seperation.KAI | |||
|input = 2363214AC | |||
|data= | |||
{{AttackData-CC | |||
|damage= | |||
|guard=Unblockable | |||
|startup= | |||
|active=- | |||
|recovery=- | |||
|frameadv= | |||
|cancelable=No | |||
|chprop=- | |||
|description= Kai creates gigantic sword and swings it at the enemy. The Destruction Chaos is both invulnerable and unblockable. It costs three bars and takes out 50% of the opponents health on hit. You can actually blockstring into this, although it'll lower the damage substantially. One of the most useful level 3s since it can lead to checkmate situations. The hitbox of this move is so gigantic, it covers about 75% of the screen horizontally, so as a way to finish off your opponent throwing projectiles on reaction, this can work. | |||
}} | |||
}} | |||
</div> | |||
</div> | |||
== Strategy == | |||
===Neutral=== | |||
Tomahawk - Generally 236A is safer, you can use it to put some pressure on an opponent who wants to sit full screen. Mix it up with double Tomahawk but be careful since the extra recovery can kill you. Against zoning characters double Tomahawk is extremely helpful since it can kill an opponent's projectile with the first Tomahawk, then punish with the second. Big tomahawk works well as a deterrent to jumping since it takes up roughly the entire screen. | |||
J.A - Because Kai's anti-airs are generally lacking you want to spend as much time putting pressure on as you can. J.A is your main tool to shut down an opponent that's trying to meet you in the air. | |||
J.C/J.D- Once you've established some fear you can go for j.C or j.D as an overhead. J.D is better against a grounded opponent since it'll cross-up, but j.C has a better air-to-air hitbox in case you're worried about that. | |||
5C/2A - both have great range and are cancelable, these are great normals to use to get some pressure started if you want to stay grounded. 5C can anti-air in some situations and generally has the better hitbox, although obviously 2A is much faster. 2C also has a pretty good hitbox and all give a lot of hitstun on counter. | |||
Tragic Disparity - You can use this to nullify/reflect projectiles on reaction. The EX version will give you huge damage on counterhit, but all versions are very punishable so you don't want to go into this outside of reactions too much. | |||
== Combos == | |||
Kai's main goal during combos is to lead into her 632146B, which gives a huge knock up that allows her to follow up in multiple ways including a corner carry sequence as well as a side switch one. Doing a string into 6A and cancelling the first hit into 632146B helps her as the first hit of 6A vaccums the opponent in. If Kai can't land the 632146B, because of a longer range confirm or due to too many initial hits, she has to either settle for 5D > 632146D or spend meter with 236236B or 214AC to get a follow up combo. | |||
Kai has two common combo enders, cl.C > sjc > j.C > j.D > 623C is interchangeable with j.A > j.C > j.D > double jump > j.B > j.C > j.D > 214AC for most combos. | |||
===Meterless=== | |||
'''5A > 5B > cl.C > 5D > 632146D''' | |||
[https://youtu.be/PXVMH9GTXVI basic bnb] combo in case they're too far for the 6A (1) > 632146B to connect | |||
'''5A > 5B > cl.C > 6A (1) > 632146B > dash > sidewap > 214D > 214C > cl.C > 214D > 2B > cl.C > sjc > j.B > j.C > j.D > land > cl.C > sjc > j.C > j.D > j.623C''' | |||
[https://youtu.be/wgVFsBjSfXw midscreen-to-corner combo], works at about match start distance | |||
'''5A > 5B > cl.C > 6A (1) > 632146B > roll > 214C > cl.C > 214D > 2B > cl.C > sjc > j.B > j.C > j.D > land > cl.C > sjc > j.C > j.D > j.623C''' | |||
[https://youtu.be/s00GI665D2U corner and near-corner combo] for when you don't know if the if the dash sideswap 214D will wallsplat low enough; if your back is to the corner (or close to it) you can [https://youtu.be/fiZXn67lMv0 replace the roll with a sideswap dash], if you do so, omit the cl.C > 214D. | |||
'''5A > 5B > cl.C > 5D > 632146D > dashjump > j.B > j.C > j.D > land > cl.C > sjc > j.C > j.D > 623C''' | |||
[https://youtu.be/DtD9Z89FmWc really hard] near-corner followup for the 632146D command grab, requires very specific timing and spacing that makes it very hard | |||
'''throw > 5B > 623A''' | |||
[https://youtu.be/tPe6DLpB--o midscreen throw combo] | |||
'''throw > 2B > cl.C > sjc > j.B > j.C > j.D > land > cl.C > sjc > j.C > j.D > 623C''' | |||
[https://youtu.be/urb_Sk-BxtE video] corner and near-corner throw combo, if you're right next to the corner you can replace 2B > cl.C with cl.C > 6A (1) for extra damage | |||
'''(air opponent) 5A > (cl.C) > sjc > j.B > j.C > j.D > land > cl.C > sjc > j.C > j.D > 623C''' | |||
[https://youtu.be/usgA5lN14EQ guard-break combo] against upbacking opponent, you can add a cl.C before the first jump if the 5A lands very close to the ground | |||
'''(counter-hit) 2D > dash > 2B > cl.C > sjc > j.B > j.C > j.D > cl.C > j.C > j.D > 623C''' | |||
[https://youtu.be/jGIIHTqJRws counterhit 2D conversion], you can roll to side swap if they're close enough | |||
===EX Combos=== | |||
'''5A > 5B > cl.C > 6A (1) > 214AC > cl.C > 214D > 2B > 5C > sjc > j.B > j.C > j.D > land > jump > j.A > j.C > j.D > double jump > j.B > j.C > j.D > j.214AC''' | |||
B | |||
[https://youtu.be/9pV3kLLmqn0 Corner rejump BnB] | |||
'''5A > 5B > cl.C > 6A (1) > 632146B > roll > 214C > microdash > 2B > 2C > sjc > j.B > j.C > j.D > land > jump > j.A > j.C > j.D > double jump > j.A > j.C > j.D > 214AC''' | |||
[https://youtu.be/XYyKQvkxXgs BnB off command grab without sidewap] | |||
'''5A > 5B > cl.C > 6A (1) > 632146B > dash > side swap > 214D > 214C > micro dash > 2B > 2C > 214AC > 6A(1) > 214D > 2B > 214AC > 6A > 214D > 2B > 5C >sjc > j.B > j.C > j.D > land > jump > j.A > j.C > j.D > double jump > j.B > j.C > j.D > j.214AC''' | |||
[https://youtu.be/MA-NAjsLBzo BnB off of command grab] with side swap. You can keep [https://youtu.be/lD7z0H8rR3c looping that ex overhead bit] as long as you have meter | |||
'''5A > 5B > cl.C > 5D > 632146D > 214AC > 6A (1) > 214D > 2B > cl.C > sjc > j.B > j.C > j.D > land > jump > j.A > j.C > j.D > double jump > j.A > j.C > j.D > 214AC''' | |||
[https://youtu.be/xNsE5vTBIUQ Corner conversion] for when the 632146D lands very close to the corner | |||
'''5A > 5B > cl.C > 6A (1) > 214AC > dash > 5B > cl.C > sjc > j.B > j.C > j.D > land > jump > j.C > j.D > 623C''' | |||
[https://youtu.be/othTYaRkJnI Metered midscreen conversion] for when you're too far to 632146B and not close enough to the corner | |||
'''(Counter-Hit) 214BD > wait > microdash > airdash > j.D > cl.C > sjc > j.B > j.C > j.D > land > cl.C > sjc > j.C > j.D > 623C''' | |||
[https://youtu.be/kCnr5UdJmck Counterhit EX Barrier combo] for reversal and scramble situations, you have to delay the first dash a bit otherwise they won't bounce in the corner | |||
===Super Combos=== | |||
'''5A > 5B > cl.C > 6A (1) > 236236B > dash > cl.C > sjc > j.B > j.C > j.D > land > cl.C > sjc > j.C > j.D > 623C''' | |||
[https://youtu.be/athxm1p8P3I Midscreen conversion with missile super] for when you're too far for 632146B and not close enough to the corner | |||
'''5A > 5B > cl.C > 6A (1) > 236236B > 214C > dash > 2B > cl.C > sjc > j.B > j.C > j.D > land > cl.C > sjc > j.C > j.D > 623C''' | |||
[https://youtu.be/m9BwtX1VePE Midscreen to corner conversion with missile super] for when you're too far for 632146B, works from about match round start distance | |||
''' | '''5A > 5B > cl.C > 6A (1) > 236236B > 214C > 236236D > cl.C > sjc > j.B > j.C > j.D > land > cl.C > sjc > j.C > j.D > 623C''' | ||
[https://youtu.be/R7S_MRkU7Q8 Double super] midscreen conversion when far from corner | |||
===Exceed=== | |||
'''5A > 5B > cl.C > 6A (1) > 632146B > roll > 214C > microdash > 2B > 2C > sjc > j.B > j.C > j.D > land > cl.C > sjc > j.C > j.D > j.623C > exceed > j.214C > cl.C > 2D > 214B > 214214A > chaos shift > air dash back > j.B(whiff) > 236A > 236236D > 214B > 214214A > microdash > 5B > sjc > j.B > j.C > j.D > land > jump > j.A > j.C > j.D > double jump > j.A > j.C > j.D > j.623C''' | |||
Confirm off of command grab into exceed. Works from about match start distance. The bit before the first j.623 is an alternative | |||
'''5A > 5B > cl.C > 5D > 632146D > exceed > 236A > 236236D > 236A > 236236D > 236A > 236236D > 236A > 236236D > 214C > microdash > 2B > cl.C > sjc > j.B > j.C > j.D > cl.C > sjc > j.C > j.D > j.623C''' | |||
midscreen confirm into exceed off of command grab | |||
'''2B > 5C > sjc > j.C > exceed > air dash towards > j.C > j.D > 5D > 214B > 236236D > 214B > 236236D > 236A > 236236D > 236A > 236236D > 214C > microdash > 2B > cl.C > sjc > j.B > j.C > j.D > land > jump > j.A > j.C > j.D > double jump > j.A > j.C > j.D > j.623C''' | |||
confirm into exceed that avoids any extra moves | |||
''' | == Colors == | ||
* '''Console Versions''': You can hold R1 button while selecting a character to get an alternative color. | |||
* '''Arcade Version''': You can hold START button while selecting a character to get an alternative color. | |||
{{ColorGallery | filePrefix=CeliaII | textHeights=3.2em | colors= | |||
{{ColorGallery/Color|A| text= A Button }} | |||
{{ColorGallery/Color|B| text= B Button }} | |||
{{ColorGallery/Color|C| text= C Button }} | |||
{{ColorGallery/Color|D| text= D Button<hr>{{Small|Metallic}} }} | |||
}} | |||
{{ColorGallery | filePrefix=CeliaII | textHeights=3.2em | colors= | |||
{{ColorGallery/Color|SA| text= R1 + A Button }} | |||
{{ColorGallery/Color|SB| text= R1 + B Button<hr>{{Small|Drossel von Flügel<hr>(Fireball)}} }} | |||
{{ColorGallery/Color|SC| text= R1 + C Button<hr>{{Small|Yuyuko Saigyouji<hr>(Touhou Project)}} }} | |||
{{ColorGallery/Color|SD| text= R1 + D Button }} | |||
}} | |||
{{Navbox-CC}} | |||
[[Category: Chaos Code]] | |||
[[Category:Kai]] | |||
[ | |||
[ | |||
Latest revision as of 15:57, 29 April 2023
Story
Celia II Kai
『セリアII改』
Celia II (Kai to her friends) was created to guard the Chaos Code, but really all she wants to do is unblockable people. Unfortunately, she got a bit beat up and had to get a refit with worse parts, so she's not as strong as she used to be. She's pretty mad because her unblockable costs 3 meters and can be rolled on reaction.
Playstyle
Health: 28000
Stun: 70
Celia II Kai (just called Kai to avoid confusion with her boss form "Celia II") is a relatively versatile character, with low risk options that lead to high reward. She doesn't have a meterless reversal, and lacks a solid grounded, anti-air but more than makes up for it with dominating air buttons and some very high reward metered reversals.
Mobility (Run vs. Step)
Run: Standard run. Cancelable into buttons or superjumps. The most common choice for Kai.
Step: Standard hop. Kai can do some alright tic grabs with it. She'll also build meter faster.
Extra Move Selection
Tricky Vision is a very good reversal. Kai doesn't need it because EX barrier is also a very good reversal, but both reversals are good for different reasons, so it's still very much worth taking.
Core of Death is a command grab, which is good for mix-ups and resets, and also for combos since 6A pulls in and lets you combo into the grab.
Vanishing Pressure is a command grab so you could use it for mix-ups, but the more notable thing is that it resets the screen position to the center, giving you a consistent followup combo.
Burning Gaze doesn't have much not obvious about it. It's very simple to combo into but doesn't give much extra utility.
Recommended Sets
Any Combination of Core of Death, Tricky Vision, and Vanishing Pressure is good since all of the moves themselves are good and none of them overlap in use very much. Beam Super is not especially useful but if you find that you can't convert hits into exceed or waffle iron very well, Beam Super might be better for easy confirms into decent damage.
Tricky Vision & Core of Death
Gives Kai a lot of extra utility, and if you're planning on using Exceed combos you probably wont have much use for the extra supers, so you're better off taking these.
Core of Death and Vanishing Pressure
Gives Kai a lot of extra combo routes. Waffle Iron combos are a good outlet for meter if you don't want to save for exceed.
Move List
Click on a header to expand that section of the movelist
Universal Mechanics
Throw
Throw
4/5/6AC |
|---|
Guard Break
Guard Break
6BD |
|---|
Roll
Roll
AB |
|---|
Tactical Guard
Tactical Guard
CD |
|---|
-Extra Specials
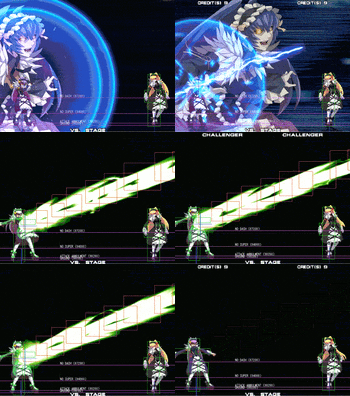
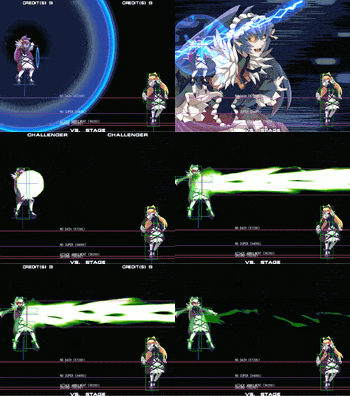
623KK/421KK
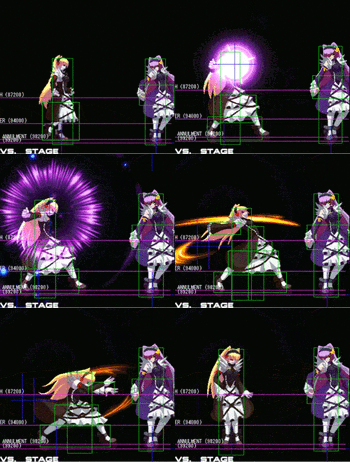
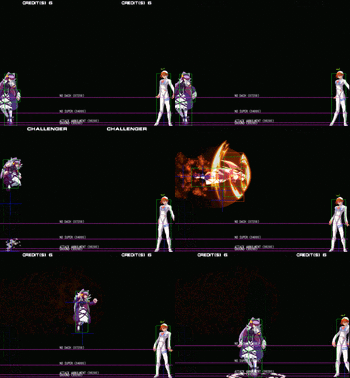
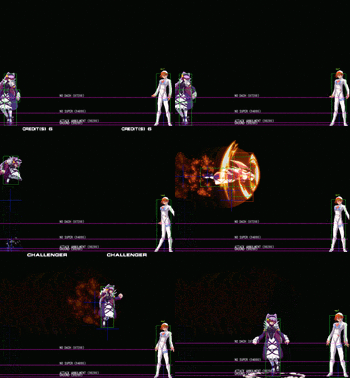
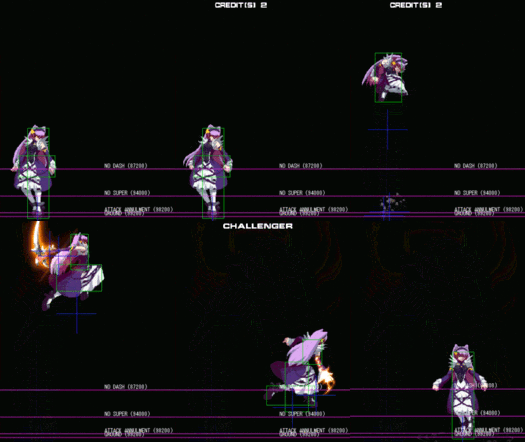
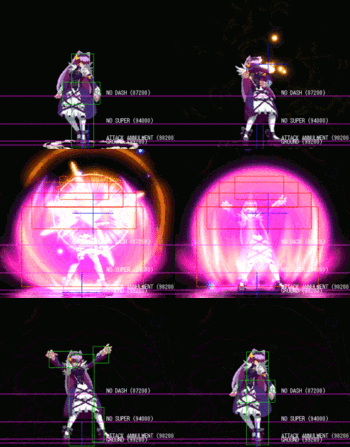
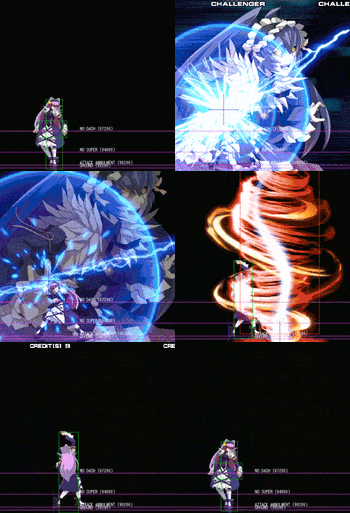
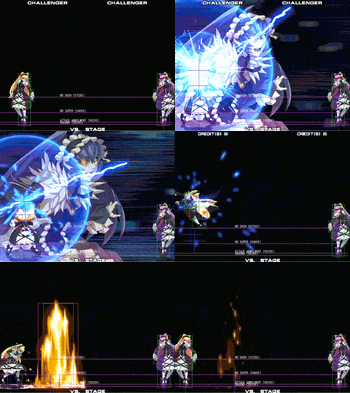
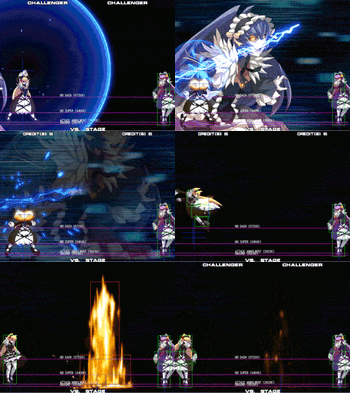
Tricky Vision 623BD or 421BD Without followup Without followup With followup With followup
|
|---|
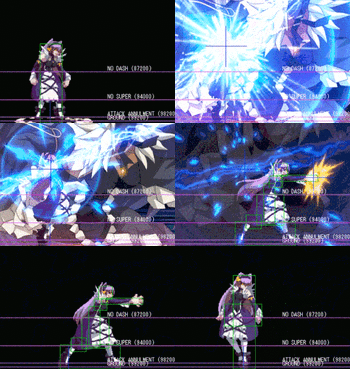
632146K
Core of Death
632146K |
|---|
Strategy
Neutral
Tomahawk - Generally 236A is safer, you can use it to put some pressure on an opponent who wants to sit full screen. Mix it up with double Tomahawk but be careful since the extra recovery can kill you. Against zoning characters double Tomahawk is extremely helpful since it can kill an opponent's projectile with the first Tomahawk, then punish with the second. Big tomahawk works well as a deterrent to jumping since it takes up roughly the entire screen.
J.A - Because Kai's anti-airs are generally lacking you want to spend as much time putting pressure on as you can. J.A is your main tool to shut down an opponent that's trying to meet you in the air.
J.C/J.D- Once you've established some fear you can go for j.C or j.D as an overhead. J.D is better against a grounded opponent since it'll cross-up, but j.C has a better air-to-air hitbox in case you're worried about that.
5C/2A - both have great range and are cancelable, these are great normals to use to get some pressure started if you want to stay grounded. 5C can anti-air in some situations and generally has the better hitbox, although obviously 2A is much faster. 2C also has a pretty good hitbox and all give a lot of hitstun on counter.
Tragic Disparity - You can use this to nullify/reflect projectiles on reaction. The EX version will give you huge damage on counterhit, but all versions are very punishable so you don't want to go into this outside of reactions too much.
Combos
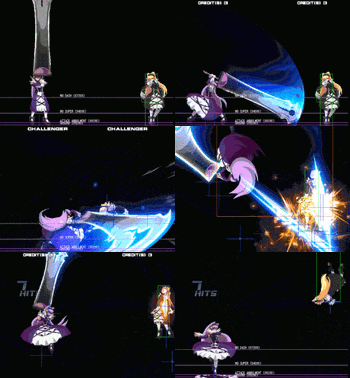
Kai's main goal during combos is to lead into her 632146B, which gives a huge knock up that allows her to follow up in multiple ways including a corner carry sequence as well as a side switch one. Doing a string into 6A and cancelling the first hit into 632146B helps her as the first hit of 6A vaccums the opponent in. If Kai can't land the 632146B, because of a longer range confirm or due to too many initial hits, she has to either settle for 5D > 632146D or spend meter with 236236B or 214AC to get a follow up combo.
Kai has two common combo enders, cl.C > sjc > j.C > j.D > 623C is interchangeable with j.A > j.C > j.D > double jump > j.B > j.C > j.D > 214AC for most combos.
Meterless
5A > 5B > cl.C > 5D > 632146D
basic bnb combo in case they're too far for the 6A (1) > 632146B to connect
5A > 5B > cl.C > 6A (1) > 632146B > dash > sidewap > 214D > 214C > cl.C > 214D > 2B > cl.C > sjc > j.B > j.C > j.D > land > cl.C > sjc > j.C > j.D > j.623C
midscreen-to-corner combo, works at about match start distance
5A > 5B > cl.C > 6A (1) > 632146B > roll > 214C > cl.C > 214D > 2B > cl.C > sjc > j.B > j.C > j.D > land > cl.C > sjc > j.C > j.D > j.623C
corner and near-corner combo for when you don't know if the if the dash sideswap 214D will wallsplat low enough; if your back is to the corner (or close to it) you can replace the roll with a sideswap dash, if you do so, omit the cl.C > 214D.
5A > 5B > cl.C > 5D > 632146D > dashjump > j.B > j.C > j.D > land > cl.C > sjc > j.C > j.D > 623C
really hard near-corner followup for the 632146D command grab, requires very specific timing and spacing that makes it very hard
throw > 5B > 623A
throw > 2B > cl.C > sjc > j.B > j.C > j.D > land > cl.C > sjc > j.C > j.D > 623C
video corner and near-corner throw combo, if you're right next to the corner you can replace 2B > cl.C with cl.C > 6A (1) for extra damage
(air opponent) 5A > (cl.C) > sjc > j.B > j.C > j.D > land > cl.C > sjc > j.C > j.D > 623C
guard-break combo against upbacking opponent, you can add a cl.C before the first jump if the 5A lands very close to the ground
(counter-hit) 2D > dash > 2B > cl.C > sjc > j.B > j.C > j.D > cl.C > j.C > j.D > 623C
counterhit 2D conversion, you can roll to side swap if they're close enough
EX Combos
5A > 5B > cl.C > 6A (1) > 214AC > cl.C > 214D > 2B > 5C > sjc > j.B > j.C > j.D > land > jump > j.A > j.C > j.D > double jump > j.B > j.C > j.D > j.214AC
5A > 5B > cl.C > 6A (1) > 632146B > roll > 214C > microdash > 2B > 2C > sjc > j.B > j.C > j.D > land > jump > j.A > j.C > j.D > double jump > j.A > j.C > j.D > 214AC
BnB off command grab without sidewap
5A > 5B > cl.C > 6A (1) > 632146B > dash > side swap > 214D > 214C > micro dash > 2B > 2C > 214AC > 6A(1) > 214D > 2B > 214AC > 6A > 214D > 2B > 5C >sjc > j.B > j.C > j.D > land > jump > j.A > j.C > j.D > double jump > j.B > j.C > j.D > j.214AC
BnB off of command grab with side swap. You can keep looping that ex overhead bit as long as you have meter
5A > 5B > cl.C > 5D > 632146D > 214AC > 6A (1) > 214D > 2B > cl.C > sjc > j.B > j.C > j.D > land > jump > j.A > j.C > j.D > double jump > j.A > j.C > j.D > 214AC
Corner conversion for when the 632146D lands very close to the corner
5A > 5B > cl.C > 6A (1) > 214AC > dash > 5B > cl.C > sjc > j.B > j.C > j.D > land > jump > j.C > j.D > 623C
Metered midscreen conversion for when you're too far to 632146B and not close enough to the corner
(Counter-Hit) 214BD > wait > microdash > airdash > j.D > cl.C > sjc > j.B > j.C > j.D > land > cl.C > sjc > j.C > j.D > 623C
Counterhit EX Barrier combo for reversal and scramble situations, you have to delay the first dash a bit otherwise they won't bounce in the corner
Super Combos
5A > 5B > cl.C > 6A (1) > 236236B > dash > cl.C > sjc > j.B > j.C > j.D > land > cl.C > sjc > j.C > j.D > 623C
Midscreen conversion with missile super for when you're too far for 632146B and not close enough to the corner
5A > 5B > cl.C > 6A (1) > 236236B > 214C > dash > 2B > cl.C > sjc > j.B > j.C > j.D > land > cl.C > sjc > j.C > j.D > 623C
Midscreen to corner conversion with missile super for when you're too far for 632146B, works from about match round start distance
5A > 5B > cl.C > 6A (1) > 236236B > 214C > 236236D > cl.C > sjc > j.B > j.C > j.D > land > cl.C > sjc > j.C > j.D > 623C
Double super midscreen conversion when far from corner
Exceed
5A > 5B > cl.C > 6A (1) > 632146B > roll > 214C > microdash > 2B > 2C > sjc > j.B > j.C > j.D > land > cl.C > sjc > j.C > j.D > j.623C > exceed > j.214C > cl.C > 2D > 214B > 214214A > chaos shift > air dash back > j.B(whiff) > 236A > 236236D > 214B > 214214A > microdash > 5B > sjc > j.B > j.C > j.D > land > jump > j.A > j.C > j.D > double jump > j.A > j.C > j.D > j.623C
Confirm off of command grab into exceed. Works from about match start distance. The bit before the first j.623 is an alternative
5A > 5B > cl.C > 5D > 632146D > exceed > 236A > 236236D > 236A > 236236D > 236A > 236236D > 236A > 236236D > 214C > microdash > 2B > cl.C > sjc > j.B > j.C > j.D > cl.C > sjc > j.C > j.D > j.623C
midscreen confirm into exceed off of command grab
2B > 5C > sjc > j.C > exceed > air dash towards > j.C > j.D > 5D > 214B > 236236D > 214B > 236236D > 236A > 236236D > 236A > 236236D > 214C > microdash > 2B > cl.C > sjc > j.B > j.C > j.D > land > jump > j.A > j.C > j.D > double jump > j.A > j.C > j.D > j.623C
confirm into exceed that avoids any extra moves
Colors
- Console Versions: You can hold R1 button while selecting a character to get an alternative color.
- Arcade Version: You can hold START button while selecting a character to get an alternative color.
Drossel von Flügel
(Fireball)
Yuyuko Saigyouji
(Touhou Project)

