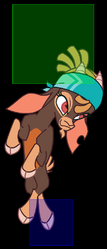
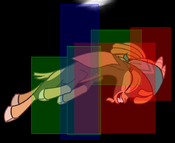
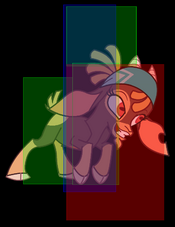
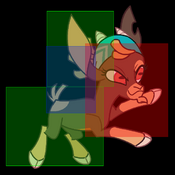
Them's Fightin' Herds/Shanty: Difference between revisions
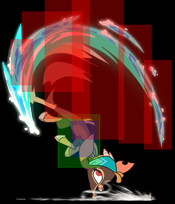
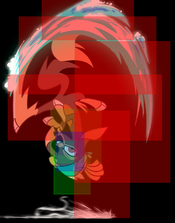
No edit summary |
mNo edit summary |
||
| (64 intermediate revisions by 10 users not shown) | |||
| Line 43: | Line 43: | ||
{{ProConTable | {{ProConTable | ||
|pros= | |pros= | ||
*'''Strong Mixups:''' With fast short hop options, looping fuzzies, and | *'''Strong Mixups:''' With fast short hop options, looping fuzzies, quick crossups, and a Level 1 Super that gives her a workable HKD, Shanty has extremely strong ways to overload your opponents' mental stack. | ||
*'''Fast Movement:''' Having an extremely fast dash and run stance, Shanty can make up for lackluster pokes with incredible speed | *'''Fast Movement:''' Having an extremely fast dash and run stance, Shanty can make up for her lackluster pokes with incredible speed. | ||
*'''High Damage:''' With good meterless options such as TK Cutlass B, Gangway!, and Broadside, Shanty has an incredibly high damage ceiling with the right routes | *'''High Damage:''' With good meterless options such as TK Cutlass B, Gangway!, and Broadside, Shanty has an incredibly high damage ceiling with the right routes. | ||
*'''Magic Gain & Usage:''' Shanty gains magic over time, and has very safe ways of gaining magic, {{clr|12|22[A]}} enders being the most common. This is important as magic makes her better in almost every way, with much higher damage and more pressure options. | |||
*'''Magic Gain & Usage:''' Shanty has very safe ways of gaining magic, 22[A] enders being the most common. This is important as magic makes her better in almost every way, with higher damage, | *'''Meter Denial:''' Shanty doesn't build the opponent a lot of meter, while not needing a lot of meter herself. | ||
*'''Sticky Pressure:''' With 2B sliding forward as much as it does, as well as having numerous safe pressure resets and a strong microdash, it can be extremely difficult to get Shanty off of you, even with strong system mechanics such as pushblock | *'''Sticky Pressure:''' With {{clr|13|2B}} sliding forward as much as it does, as well as having numerous safe pressure resets and a strong microdash, it can be extremely difficult to get Shanty off of you, even with strong system mechanics such as pushblock. | ||
|cons= | |cons= | ||
*'''Low Health:''' Shanty is tied with [[Them's Fightin' Herds/Tianhuo|Tianhuo]] and [[Them's Fightin' Herds/Pom|Pom]] for the lowest health in the game, meaning she can | *'''Fundamental Neutral:''' Shanty lacks any sort of strong poking game, "neutral skip", or air mobility, relying on her grounded mobility, counterpokes, and slippery hurtboxes to win neutral interactions. | ||
*'''Bad Defense:''' With a short jab and | *'''Low Health:''' Shanty is tied with [[Them's Fightin' Herds/Tianhuo|Tianhuo]] and [[Them's Fightin' Herds/Pom|Pom]] for the lowest health in the game, meaning she can't afford to make as many mistakes as the rest of the cast. | ||
*''' | *'''Bad Defense:''' With a short (albeit very active) jab and a -71 metered reversal, Shanty's defense is very lacking. | ||
*'''Limited Chains:''' Shanty is the only character in the game who cannot cancel her {{clr|13|5B}} into {{clr|13|2B}}, which limits her blockstring and combo potential. | |||
}} | |||
==Movement== | |||
<!--Many characters have unique mechanics, like Pom's air movement. Add that information here--> | |||
'''Walk''': Shanty is tied with Arizona for the fastest walk speeds, walking forward and backward at 7 hu/frame and 5 hu/frame respectively. | |||
'''Dashes''': Like everyone else, Shanty can dash on the ground. Shanty's dashes are very fast on their own, and her wavedash is very good. | |||
'''Shorthop''': In addition to a regular jump, Shanty can perform a shorthop to stay closer to the ground, but cannot block during it. Shanty's jump and shorthop are also tied with Arizona for the longest arcs of each kind respectively. | |||
'''Run Stance''': Shanty's Run Stance gives her exceptionally quick forwards and backwards movement, at the cost of not being able to block. It also gives her access to helm. | |||
''' | |||
''' | '''Wall Cling''': Shanty's Wall Cling lets her grab onto a wall and jump to the other. It also gives her access to helm. | ||
''' | '''Helm''': Helm is a special type of jump, unique in that Shanty's jump angle isn't set, letting her move more freely in the air than other characters might. You can use helm by pressing {{clr|14|C}} or 9 while in Wall Cling, or by pressing any upwards direction in Run Stance. | ||
==Command List== | |||
===Normal Moves=== | |||
---- | |||
====Standing Normals==== | |||
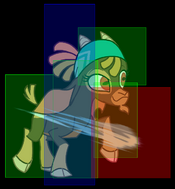
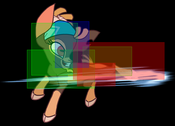
====== <font style="visibility:hidden" size="0">5A</font> ====== | ====== <font style="visibility:hidden" size="0">5A</font> ====== | ||
{{MoveData | {{MoveData | ||
|image=TFH_Shanty_5A.png | |image=TFH_Shanty_5A.png | ||
|hitbox=TFH_Shanty_5A_hb.png | |||
|caption=Why is it active for 8 frames | |caption=Why is it active for 8 frames | ||
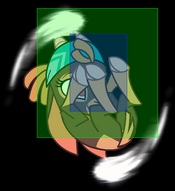
|name={{clr|12|5A}} | |name={{clr|12|5A}} | ||
| Line 75: | Line 86: | ||
{{AttackData-TFH | {{AttackData-TFH | ||
|damage=30 | |damage=30 | ||
|guard= | |guard=Mid | ||
|properties=Chains into Self | |||
|startup=5 | |startup=5 | ||
|active=8 | |active=8 | ||
|recovery=11 | |recovery=11 | ||
|advHit=1 | |advHit=1 | ||
|advBlock=-2 | |advBlock={{clr|15|-2}} | ||
| | |firstJD=0 | ||
| | |baseJD=15 | ||
|description=Has the most active frames of any {{clr|12|5A}} in the game. Your fastest normal, useful for quick punishes or abare | |JDG=0.83 | ||
|description=Has the most active frames of any {{clr|12|5A}} in the game, but lacks the range to punish backdashes outside of the corner. Your fastest normal, useful for quick punishes or abare, assuming the opponent is in range. | |||
}} | }} | ||
}} | }} | ||
| Line 110: | Line 103: | ||
{{MoveData | {{MoveData | ||
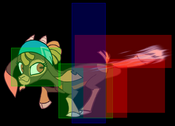
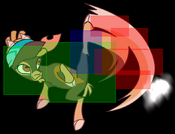
|image=TFH_Shanty_5B.png | |image=TFH_Shanty_5B.png | ||
|hitbox=TFH_Shanty_5B_hb.png | |||
|caption= | |caption= | ||
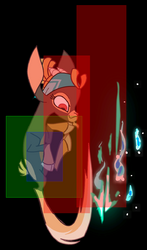
|name={{clr|13|5B}} | |name={{clr|13|5B}} | ||
| Line 115: | Line 109: | ||
{{AttackData-TFH | {{AttackData-TFH | ||
|damage=90 | |damage=90 | ||
|guard= | |guard=Mid | ||
|properties=No 2B Chain | |||
|startup=9 | |startup=9 | ||
|active=5 | |active=5 | ||
|recovery=17 | |recovery=17 | ||
|advHit=1 | |advHit=1 | ||
|advBlock=-2 | |advBlock={{clr|15|-2}} | ||
| | |firstJD=-30 | ||
| | |baseJD=30 | ||
|description= | |JDG=0.95 | ||
|description= | |||
* +3 on block when stancelled | |||
A decently useful poke and punish starter thanks to the forward movement and disjoint during active frames. Uniquely, this cannot chain into {{clr|13|2B}} like most other {{clr|13|5B}}'s can, limiting your offense and confirm potential afterwards. Can combo into 236B on counterhit, giving it good conversions as a long distance whiff punish | |||
}} | }} | ||
}} | }} | ||
| Line 130: | Line 128: | ||
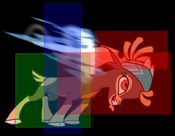
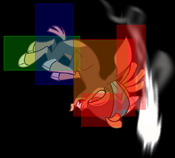
{{MoveData | {{MoveData | ||
|image=TFH_Shanty_5C.png | |image=TFH_Shanty_5C.png | ||
|hitbox=TFH_Shanty_5C_hb.png | |||
|caption=Bonk! | |caption=Bonk! | ||
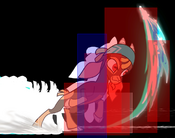
|name={{clr|14|5C}} | |name={{clr|14|5C}} | ||
| Line 135: | Line 134: | ||
{{AttackData-TFH | {{AttackData-TFH | ||
|damage=175 | |damage=175 | ||
|guard= | |guard=Mid | ||
|startup=12 | |startup=12 | ||
|active=6 | |active=6 | ||
|recovery=21 | |recovery=21 | ||
|advHit=-2 | |advHit=-2 | ||
|advBlock=-6 | |advBlock={{clr|12|-6}} | ||
| | |firstJD=-55 | ||
| | |baseJD=45 | ||
|description=Similar to {{clr|13|5B}}, moving forward with a notable disjoint during the active frames. | |JDG=0.97 | ||
|description= | |||
* +4 on block when stancelled | |||
Similar to {{clr|13|5B}}, moving forward with a notable disjoint during the active frames. Very high first hit damage, making it your most attractive C combo starter. It also naturally combos to {{clr|13|236B}} on grounded hit, which is nice when you're not in range for a {{clr|14|3C}} to connect. | |||
}} | }} | ||
}} | }} | ||
====Crouching Normals==== | |||
====== <font style="visibility:hidden" size="0">2A</font> ====== | ====== <font style="visibility:hidden" size="0">2A</font> ====== | ||
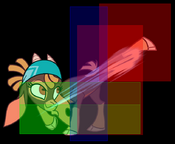
{{MoveData | {{MoveData | ||
|image=TFH_Shanty_2A.png | |image=TFH_Shanty_2A.png | ||
|hitbox=TFH_Shanty_2A_hb.png | |||
|caption= | |caption= | ||
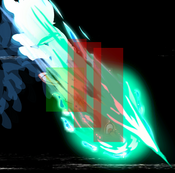
|name={{clr|12|2A}} | |name={{clr|12|2A}} | ||
| Line 155: | Line 160: | ||
{{AttackData-TFH | {{AttackData-TFH | ||
|damage=35 | |damage=35 | ||
|guard= | |guard=Low | ||
|properties=Chains into Self | |||
|startup=6 | |startup=6 | ||
|active=5 | |active=5 | ||
|recovery=13 | |recovery=13 | ||
|advHit=1 | |advHit=1 | ||
|advBlock=-1 | |advBlock={{clr|15|-1}} | ||
| | |firstJD=0 | ||
| | |baseJD=15 | ||
|description=Hits further than the animation implies. Does more damage and hits much further than {{clr|12|5A}}, while also being a low. The tradeoff? Less active frames and slightly longer startup. | |JDG=0.83 | ||
|description=Hits further than the animation implies. Does more damage and hits much further than {{clr|12|5A}}, while also being a low. The tradeoff? Less active frames and slightly longer startup. Good for mashing at ranges where {{clr|12|5A}} will whiff, and as a low commitment poke. | |||
}} | }} | ||
}} | }} | ||
| Line 170: | Line 177: | ||
{{MoveData | {{MoveData | ||
|image=TFH_Shanty_2B.png | |image=TFH_Shanty_2B.png | ||
|hitbox=TFH_Shanty_2B_hb.png | |||
|caption=Skrrrt | |caption=Skrrrt | ||
|name={{clr|13|2B}} | |name={{clr|13|2B}} | ||
| Line 175: | Line 183: | ||
{{AttackData-TFH | {{AttackData-TFH | ||
|damage=85 | |damage=85 | ||
|guard= | |guard=Low | ||
|startup=9 | |startup=9 | ||
|active=9 | |active=9 | ||
|recovery=15 | |recovery=15 | ||
|advHit=-3 | |advHit=-3 | ||
|advBlock=-6 | |advBlock={{clr|12|-6}} | ||
| | |firstJD=-20 | ||
| | |baseJD=40 | ||
|description= | |JDG=0.95 | ||
|description= | |||
* +1 on block when stancelled | |||
One of Shanty's strongest buttons. A fast and low profile slide that can be spaced to be safe, or cancel into various normals or specials, including {{clr|12|6A}} for rebeat pressure. The low profile allows it to evade under tons of moves and high hitting projectiles, making it hard for zoners to push Shanty away when she's in {{clr|13|2B}} range. It's even a niche anti-air for good reward in some cases! | |||
}} | }} | ||
}} | }} | ||
| Line 190: | Line 201: | ||
{{MoveData | {{MoveData | ||
|image=TFH_Shanty_2C.png | |image=TFH_Shanty_2C.png | ||
|hitbox=TFH_Shanty_2C_hb.png | |||
|caption= | |caption= | ||
|name={{clr|14|2C}} | |name={{clr|14|2C}} | ||
| Line 195: | Line 207: | ||
{{AttackData-TFH | {{AttackData-TFH | ||
|damage=145 | |damage=145 | ||
|guard= | |guard=Low | ||
|properties=Chains into 5C<br>Hard Knockdown | |||
|startup=12 | |startup=12 | ||
|active=8 | |active=8 | ||
|recovery=24 | |recovery=24 | ||
|advHit=HKD | |advHit=25 (HKD) | ||
|advBlock=-9 | |advBlock={{clr|13|-9}} | ||
| | |firstJD=-50 | ||
| | |baseJD=50 | ||
|description=As with all of Shanty's lows, hits farther than the animation implies. Has massive disjoint during active frames, and can cancel into | |JDG=0.97 | ||
|description= | |||
* +6 on block when stancelled | |||
As with all of Shanty's lows, hits farther than the animation implies. Has a massive disjoint during its last few active frames, and can cancel into 5C if 5C has not been used in your chain yet. This is one of your longest range normals, mixed with huge forward movement as well, making it strong for converting far hits and whiff punishes. It's also your most attractive normal to stancel, leaving you at +2 without much distance from your opponent, making it easy to press offense with magic. | |||
It also has strong use as a combo ender, especially when cancelled to {{clr|12|22A}}, and if your close enough, you can set up a have the second charge hit meaty for easy plus frames and tons of magic. | |||
}} | }} | ||
}} | }} | ||
====== | ====Jumping Normals==== | ||
====== <font style="visibility:hidden" size="0">j.A</font> ====== | ====== <font style="visibility:hidden" size="0">j.A</font> ====== | ||
{{MoveData | {{MoveData | ||
|image=TFH_Shanty_jA.png | |image=TFH_Shanty_jA.png | ||
|hitbox=TFH_Shanty_jA_hb.png | |||
|caption="An affront to nature." | |caption="An affront to nature." | ||
|name={{clr|12|j.A}} | |name={{clr|12|j.A}} | ||
| Line 258: | Line 236: | ||
{{AttackData-TFH | {{AttackData-TFH | ||
|damage=45 | |damage=45 | ||
|guard= | |guard=High | ||
|startup=6 | |startup=6 | ||
|active=5 | |active=5 | ||
|recovery=9 | |recovery=9 | ||
|advHit= | |advHit=8 ~ 21 | ||
|advBlock= | |advBlock=3 ~ 16 | ||
| | |firstJD=-50 (Grounded)<br>-85 (Airborne) | ||
| | |baseJD=65 (Grounded)<br>30 (Airborne) | ||
|JDG=0.90 | |||
| | |description=Extremely quick air normal with surprising range. Very useful fuzzy normal from shorthops, and can chain into {{clr|13|j.B}} for a confirm or double overhead. It's also Shanty's easiest way to hit crossup, which is a powerful mixup when shorthopping over crouching opponents. The horizontal range and speed also makes for a decent air-to-air, though the sweeping hitbox of {{clr|13|j.B}} can be better for that. | ||
|description=Extremely quick air normal with surprising range. | |||
}} | }} | ||
}} | }} | ||
| Line 275: | Line 252: | ||
{{MoveData | {{MoveData | ||
|image=TFH_Shanty_jB.png | |image=TFH_Shanty_jB.png | ||
|hitbox=TFH_Shanty_jB_hb.png | |||
|caption= | |caption= | ||
|name={{clr|13|j.B}} | |name={{clr|13|j.B}} | ||
| Line 280: | Line 258: | ||
{{AttackData-TFH | {{AttackData-TFH | ||
|damage=85 | |damage=85 | ||
|guard= | |guard=High | ||
|properties=Vacuum on Hit/Block | |||
|startup=10 | |startup=10 | ||
|active=9 | |active=9 | ||
|recovery=10 | |recovery=10 | ||
|advHit= | |advHit=10 ~ 28 | ||
|advBlock= | |advBlock=0 ~ 18 | ||
| | |firstJD=-90 (Grounded)<br>-120 (Airborne) | ||
| | |baseJD=70 (Grounded)<br>40 (Airborne) | ||
|JDG=0.95 | |||
| | |description= | ||
|description=Hits above Shanty. | Hits above Shanty. Always combos from {{clr|12|j.A}}, even during a shorthop. Enough hitstun to link back into {{clr|12|j.A}} during juggles, allowing for tons of damage and corner carry. Very useful in shorthop mixups as well, as the vacuum allows you to set up tricky crossups. | ||
}} | }} | ||
}} | }} | ||
| Line 297: | Line 276: | ||
{{MoveData | {{MoveData | ||
|image=TFH_Shanty_jC.png | |image=TFH_Shanty_jC.png | ||
|hitbox=TFH_Shanty_jC_hb.png | |||
|caption= | |caption= | ||
|name={{clr|14|j.C}} | |name={{clr|14|j.C}} | ||
| Line 302: | Line 282: | ||
{{AttackData-TFH | {{AttackData-TFH | ||
|damage=130 | |damage=130 | ||
|guard= | |guard=High | ||
|properties=Bounce (Air Only) | |||
|startup=20 | |startup=20 | ||
|active=7 | |active=7 | ||
|recovery=11 | |recovery=11 | ||
|advHit= | |advHit=13 ~ 30 | ||
|advBlock= | |advBlock=-4 ~ 13 | ||
| | |firstJD=-100 (Grounded)<br>-120 (Airborne) | ||
| | |baseJD=100 (Grounded)<br>80 (Airborne) | ||
|JDG=0.97 | |||
| | |description= | ||
|description=Big damage air normal. | * Groundbounce on air hit | ||
* Can hit crossup late into the active frames | |||
Big damage air normal. Shanty's best normal for reducing juggle decay. This normal makes for your general purpose heavy jump-in, and your main overhead when done out of a hop. If done as early as possible out of a hop, it's a very fast and high reward overhead that leaves you plus enough on block to run another mixup. It's also a strong combo piece, as the groundbounce allows for easy followups, usually into a {{clr|15|5C}}. | |||
}} | }} | ||
}} | }} | ||
== | ====Command Normals==== | ||
====== <font style="visibility:hidden" size="0"> | |||
====== <font style="visibility:hidden" size="0">6A</font> ====== | |||
{{MoveData | {{MoveData | ||
|image= | |image=TFH_Shanty_6A.png | ||
| | |hitbox=TFH_Shanty_6A_hb.png | ||
|caption=Talk to the hoof | |||
| | |name={{clr|12|6A}} | ||
|name | |||
|data= | |data= | ||
{{AttackData-TFH | {{AttackData-TFH | ||
|damage=85 | |||
|damage= | |guard=Mid | ||
|guard= | |properties=Forces Stand<br>Jump-Cancellable on Hit | ||
|startup=8 | |||
| | |||
|startup= | |||
|active=6 | |active=6 | ||
|recovery= | |recovery=22 | ||
|advHit= | |advHit=-9 | ||
|advBlock= | |advBlock={{clr|12|-6}} (Grounded)<br>{{clr|14|-13}} (Airborne) | ||
|firstJD=40 | |||
|baseJD=55 | |||
|JDG=0.83 | |||
|description= | |||
* +5 on block when stancelled | |||
| | * Upper body invuln starting frame 1 | ||
| | Universal anti-air. A decent normal for Shanty, as the upper body invuln and slight forward movement allows you to slip under things, though {{clr|13|2B}} tends to be better at this. Outside of anti-air, Shanty's {{clr|12|6A}} is also quite useful in pressure and combos. The aforementioned forward movement makes it great for rebeat pressure into her B normals, which is important to circumvent her inability to cancel her B normals into eachother. It's also +1 when stancelled, allowing you to go back into A normals to reset pressure. | ||
| | |||
| | |||
}} | }} | ||
}} | }} | ||
====== <font style="visibility:hidden" size="0"> | ====== <font style="visibility:hidden" size="0">4/6C</font> ====== | ||
{{MoveData | {{MoveData | ||
|image= | |image=TFH_Shanty_Bulkhead.png | ||
| | |hitbox=TFH_Shanty_6C_hb_1.png | ||
| | |hitbox2=TFH_Shanty_6C_hb_2.png | ||
|caption2= | |caption2=Throw out a low, I dare you. | ||
|name=Bulkhead | |||
|input={{clr|14|4}}/{{clr|14|6C}} | |||
|name= | |||
|input={{clr| | |||
|data= | |data= | ||
{{AttackData-TFH | {{AttackData-TFH | ||
| | |damage=155 | ||
| | |guard=High | ||
| | |properties=Stagger | ||
|startup= | |startup=29 | ||
|active=14 | |active=14 | ||
|recovery= | |recovery=12 | ||
|advHit= | |advHit=55 (Stagger) | ||
|advBlock= | |advBlock={{clr|14|-12}} | ||
|firstJD=85 | |||
|baseJD=85 | |||
|JDG=0.90 | |||
|description= | |||
* Can hold button to feint the attack (31f) | |||
| | * Extreme high profile from frames 5-26. | ||
| | * Can whiff-cancel to Run Stance from frames 1-23. | ||
| | A fairly fast overhead that staggers on hit. The epitome of high risk and high reward. Bulkhead is a versatile command normal with a few different potential uses, but it's primarily a surprise overhead Shanty can use during offense. The extreme high profile is great for calling out mashers for high reward, and is even high enough to dodge most {{clr|12|5A}}'s (with the exceptions of Velvet and Texas). This makes it scary to mash on Shanty even when she has no magic. This is even stronger when done with {{clr|14|4C}}, as Shanty naturally moves out of the way of other normals, though its easier to interrupt her coming back in. | ||
| | |||
Holding the C button allows you to feint this normal without sacrificing the high profile. This has a ton of uses: going over things in neutral, feinting into a low on offense, disengaging from opponents with {{clr|14|4[C]}}, and faking it by cancelling into {{clr|15|5D}}. Keep in mind however, none of this is exactly safe. You don't maintain the high profile into active frames, meaning a delayed mash will always win. You can also be punished by B normals and some C normals if this gets blocked as well, making it especially unsafe if you use it too predictably. Mix up how you use this normal to maximize its potential. | |||
}} | }} | ||
}} | }} | ||
== | ====== <font style="visibility:hidden" size="0">3C</font> ====== | ||
{{MoveData | {{MoveData | ||
|image= | |image=TFH_Shanty_3C.png | ||
|caption= | |hitbox=TFH_Shanty_3C_hb.png | ||
|name= | |caption= | ||
| | |name={{clr|14|3C}} | ||
|data= | |data= | ||
{{AttackData-TFH | {{AttackData-TFH | ||
|damage= | |damage=150 | ||
|guard= | |guard=Mid | ||
| | |properties=Jump-Cancellable on Hit | ||
| | |startup=15 | ||
| | |active=4 | ||
| | |recovery=27 | ||
| | |hitstun=26 (pre-JDmax)<br>24 (post-JDmax) | ||
| | |advHit=Launch | ||
| | |advBlock={{clr|14|-15}} | ||
|firstJD=-70 (Grounded)<br>-35 (Airborne) | |||
|baseJD=30 (Grounded)<br>65 (Airborne) | |||
|JDG=0.83 | |||
|description=Universal launcher. Fast and moves forward quite a bit, but will still fall out at max-range confirms. Shanty can be a bit reliant on this for her max damage combos, but like any launcher, it's massively unsafe. Ensure you landed the hit before going into this. | |||
{{ | |||
| | |||
| | |||
| | |||
| | |||
| | |||
|description= | |||
}} | }} | ||
}} | }} | ||
==Throws== | ===Throws=== | ||
---- | |||
====== <font style="visibility:hidden" size="0">Forward Throw</font> ====== | ====== <font style="visibility:hidden" size="0">Forward Throw</font> ====== | ||
{{MoveData | {{MoveData | ||
|image=TFH_Shanty_FT.png | |image=TFH_Shanty_FT.png | ||
|hitbox=TFH_Shanty_T_hb.png | |||
|caption=Heave ho! | |caption=Heave ho! | ||
|name=Forward Throw | |name=Forward Throw | ||
| Line 497: | Line 395: | ||
|damage=400 | |damage=400 | ||
|guard=Throw | |guard=Throw | ||
|properties=Tumble<br>Damage Scaled to 50% | |||
|startup=6 | |startup=6 | ||
|active=3 | |active=3 | ||
|recovery=23 | |recovery=23 | ||
|advHit=Tumble | |advHit=17 (Tumble) | ||
|advBlock= | |advBlock= | ||
| | |firstJD= | ||
| | |baseJD= | ||
|description= | |description= | ||
* Consumes groundbounce on use | |||
Shanty's throw is a very important part of her mixup game, especially in the corner. Midscreen it can't be converted into any damage, though you can safely use {{clr|12|22A}} to generate magic. When the opponent is in the corner however, Shanty can pick up with various normals into much higher damage, making it a scary option. While Shanty's strike mixup is plenty already, properly representing throws is what makes it truly terrifying. | |||
}} | }} | ||
}} | }} | ||
| Line 511: | Line 412: | ||
{{MoveData | {{MoveData | ||
|image=TFH_Shanty_BT.png | |image=TFH_Shanty_BT.png | ||
|hitbox=TFH_Shanty_T_hb.png | |||
|caption=Heave-Ho! | |caption=Heave-Ho! | ||
|name=Back Throw | |name=Back Throw | ||
| Line 518: | Line 420: | ||
|damage=400 | |damage=400 | ||
|guard=Throw | |guard=Throw | ||
|properties=Hard Knockdown<br>Damage Scaled to 50% | |||
|startup=6 | |startup=6 | ||
|active=3 | |active=3 | ||
|recovery=23 | |recovery=23 | ||
|advHit=HKD | |advHit=47 (HKD) | ||
|advBlock= | |advBlock= | ||
| | |firstJD= | ||
| | |baseJD= | ||
|description= | |description= | ||
Shanty tosses the opponent high and behind her. Generally more advantageous midscreen in terms of okizeme, though it also has no combo potential outside of the corner. If Shanty throws the opponent into the corner however, she can pick up with various normals into a combo. You can also omit the combo and simply jump into the corner and {{clr|14|j.C}}, which will steal the corner for a surprise crossup. | |||
}} | }} | ||
}} | }} | ||
| Line 532: | Line 436: | ||
{{MoveData | {{MoveData | ||
|image=TFH_Shanty_AT.png | |image=TFH_Shanty_AT.png | ||
|hitbox=TFH_Shanty_AT_hb.png | |||
|caption= | |caption= | ||
|name=Air Throw | |name=Air Throw | ||
| Line 539: | Line 444: | ||
|damage=300 | |damage=300 | ||
|guard=Throw | |guard=Throw | ||
|properties=Bounce | |||
|startup=8 | |startup=8 | ||
|active=3 | |active=3 | ||
| Line 544: | Line 450: | ||
|advHit=Bounce | |advHit=Bounce | ||
|advBlock= | |advBlock= | ||
| | |firstJD= | ||
| | |baseJD= | ||
|description= | |description= | ||
* Consumes groundbounce on use | |||
Shanty mostly uses air throw as a way of discouraging people from jumping out of pressure, or as a very occassional reset tool after an air tech. Similar to Paprika's airthrow, followups depend on your height. From a high connect, falling with {{clr|13|j.B}} seems most consistent. If closer to the ground, landing and using {{clr|12|5A}} or {{clr|13|5B}} works. | |||
}} | }} | ||
}} | }} | ||
==Magic== | ===Special Moves=== | ||
---- | |||
====== <font style="visibility:hidden" size="0">Special Name 1</font> ====== | |||
{{MoveData | |||
|image=TFH_Shanty_236A.png | |||
|hitbox=TFH_Shanty_236A_hb.png | |||
|caption=236A | |||
|image2=TFH_Shanty_236B.png | |||
|hitbox2=TFH_Shanty_236B_hb.png | |||
|caption2=236B | |||
|image3=TFH_Shanty_236C.png | |||
|hitbox3=TFH_Shanty_236C_hb.png | |||
|caption3=236C | |||
|name=Cutlass | |||
|input={{clr|12|236A}}/{{clr|13|B}}/{{clr|14|C}} | |||
|data= | |||
{{AttackData-TFH | |||
|version=A | |||
|damage=140<br>(70 Chip) | |||
|guard=Mid | |||
|properties=Hard Knockdown | |||
|startup=13 | |||
|active=7 | |||
|recovery=20 | |||
|advHit=37 (HKD) | |||
|advBlock={{clr|12|-5}} | |||
|firstJD=100 | |||
|baseJD=100 | |||
|JDG=0.97 | |||
|description= | |||
* Becomes -2 when blocked crouching | |||
Shanty slices forward in a wide arc. Fairly safe combo and blockstring ender, and a surprisingly fast disjointed poke in neutral. On hit with any version of Cutlass, you can cancel into any magic special for followups with stance or potential mixups with a wallcling setup. | |||
}} | |||
{{AttackData-TFH | |||
|header=no | |||
|version=B | |||
|damage=240<br>(95 Chip) | |||
|guard=Mid | |||
|properties=Hard Knockdown<br>No Collision (Crouching Only) | |||
|startup=24 | |||
|active=6 | |||
|recovery=27 | |||
|advHit=45 (HKD) | |||
|advBlock={{clr|13|-11}} | |||
|firstJD=150 | |||
|baseJD=150 | |||
|JDG=0.90 | |||
|description= | |||
* Can cross up on crouching opponents at certain spacings | |||
Very useful high-damage combo special. Combos easily from {{clr|14|5C}}, and can combo from {{clr|14|3C}} if TK'd into, with both routes allowing for links afterwards. | |||
}} | |||
{{AttackData-TFH | |||
|header=no | |||
|version=C | |||
|damage=250<br>(100 Chip) | |||
|guard=Mid | |||
|properties=Hard Knockdown<br>No Collision<br>Projectile-Invulnerable (1-51) | |||
|startup=34 | |||
|active=9 | |||
|recovery=24 | |||
|advHit=53 (HKD) | |||
|advBlock={{clr|13|-11}} | |||
|firstJD=80 | |||
|baseJD=80 | |||
|JDG=0.90 | |||
|description= | |||
* Projectile invuln | |||
* Can cross up at certain spacings | |||
A slower version of {{clr|13|236B}} that crosses up more often and has hefty projectile invincibility. One of Shanty's best anti-zoning tools, and a way to cross opponents up in the middle of a string. Very rarely can be used in combos, most notably after an Avast! for a high damage ender or extender. It comes with some hefty risk, as it's both unsafe on block and easily interrupted by most buttons, so be wary of using it too often. | |||
}} | |||
}} | |||
====== <font style="visibility:hidden" size="0">Special Name 1</font> ====== | |||
{{MoveData | |||
|image=TFH_Shanty_Ay.png | |||
|hitbox=TFH_Shanty_22A_hb_1.png | |||
|caption= | |||
|image2=TFH_Shanty_Aye.png | |||
|hitbox2=TFH_Shanty_22A_hb_2.png | |||
|caption2= | |||
|image3=TFH_Shanty_Yarrr.png | |||
|hitbox3=TFH_Shanty_22A_hb_3.png | |||
|caption3= | |||
|name=Parley | |||
|input={{clr|12|22A}} | |||
|data= | |||
{{AttackData-TFH | |||
|version=Ay! | |||
|damage=100 | |||
|guard=Mid | |||
|properties=Projectile<br>Armor Break | |||
|startup=25 | |||
|active=14 | |||
|recovery=10 | |||
|advHit=1 | |||
|advBlock={{clr|14|-12}} | |||
|firstJD=50 | |||
|baseJD=50 | |||
|JDG=0.97 | |||
|description= | |||
*Charges 1 magic stock. | |||
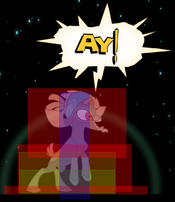
Shanty quickly shouts an "Ay!". The shockwave counts as a projectile, and will break other projectiles/lose to projectile-invuln moves. Your fastest way to generate a quick bar of magic in neutral. Opponents will expect Shanty to approach in most situations, so a quick {{clr|12|22A}} will usually go unpunished if you aren't predictable with using it. If you are predictable, an opponent can easily dashblock and punish it as it is unsafe. | |||
}} | |||
{{AttackData-TFH | |||
|header=no | |||
|version=Aye! | |||
|damage=125 | |||
|guard=Mid | |||
|properties=Projectile<br>Armor Break | |||
|startup=41 | |||
|active=20 | |||
|recovery=4 | |||
|advHit=Launch | |||
|advBlock={{clr|12|-7}} | |||
|firstJD=70 | |||
|baseJD=70 | |||
|JDG=0.97 | |||
|description= | |||
* Charges 2 magic stocks | |||
* Requires 27-38 frames of charging | |||
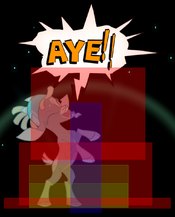
This version has the highest damage, most active frames, the least recovery frames, and is the safest on block. Can be done meaty after certain HKDs to be plus on block, and after certain SKDs to be plus after whiffing, making it a very reliable way to build magic. The shockwave counts as a projectile, and will break other projectiles/lose to projectile-invuln moves. | |||
}} | |||
{{AttackData-TFH | |||
|header=no | |||
|version=Yarrr! | |||
|damage=110 | |||
|guard=Mid | |||
|properties=Projectile<br>Armor Break<br>Stagger | |||
|startup=52 | |||
|active=14 | |||
|recovery=20 | |||
|advHit=36 (Stagger) | |||
|advBlock={{clr|14|-12}} | |||
|firstJD=90 | |||
|baseJD=90 | |||
|JDG=0.97 | |||
|description= | |||
* Charges 3 magic stocks | |||
* Requires 39+ frames of charging | |||
Staggers the opponent if it hits. The shockwave counts as a projectile, and will break other projectiles/lose to projectile-invuln moves. Very rarely used, as the hefty startup time makes it much more reactable in neutral, and {{clr|12|22{A} }} is much more valuable on offense. You can use this after very plus knockdowns to gain tons of magic, though this usually kills any chance of pressure afterwards in exchange. | |||
}} | |||
}} | |||
===Magic=== | |||
---- | |||
<!--Insert Magic System information--> | <!--Insert Magic System information--> | ||
Shanty's magic slowly builds over time, and she can obtain more with Parley, to a maximum of 6 stocks. She can spend it to enter her Wall Cling and Run stances, and use certain options within the stances. | Shanty's magic slowly builds over time, and she can obtain more with Parley, to a maximum of 6 stocks. She can spend it to enter her Wall Cling and Run stances, and use certain options within the stances. | ||
====== <font style="visibility:hidden" size="0"> | ====== <font style="visibility:hidden" size="0">D</font> ====== | ||
{{MoveData | {{MoveData | ||
|image=TFH_Shanty_5D.png | |image=TFH_Shanty_5D.png | ||
|hitbox=TFH_Shanty_5D_hb.png | |||
|caption=This is where the fun begins. | |caption=This is where the fun begins. | ||
|name=Run Stance (Enter/Exit) | |name=Run Stance (Enter/Exit) | ||
|input={{clr|15| | |input={{clr|15|D}} | ||
|data= | |data= | ||
{{AttackData-TFH | {{AttackData-TFH | ||
|damage= | |damage= | ||
|guard= | |guard= | ||
|startup= | |startup=6 | ||
|active=4-46 | |active=4-46 | ||
|recovery= | |recovery=6 | ||
|advHit= | |advHit= | ||
|advBlock= | |advBlock= | ||
| | |firstJD= | ||
| | |baseJD= | ||
|description= | |description= | ||
* Very low profile frame 1 | |||
* Followups available after frame 6 | |||
* Fastest stance exit is 16f | |||
* Top run speed forward is 24 hu/frame, backward is 17 hu/frame | |||
The core part of Shanty's gameplan. {{clr|15|D}} activates Run Stance, a highly mobile stance with a ton of potential for mixups, combos, and neutral. The immediate low profile allows Shanty to duck under tons of things on reaction, basically anything that doesn't hit exactly on the floor, making it scary for the opponent to use high pokes or projectiles. | |||
Shanty can manually exit the stance by holding 2 or pressing {{clr|15|D}} again. When done as fast as possible, this makes the total stance animation last 16f. This is useful to cancel certain moves for combo potential, and more importantly canceling {{clr|12|6A}} and {{clr|14|2C}} for plus frames. This is referred to as a {{clr|14|Stancel}}, and is one of Shanty's most potent tools on offense, as it allows her to safely generate plus frames. Stancelling by holding 2 is usually preferred over double tapping, as it ensures you get the fastest stancel possible. | |||
Run stance also gives her access to her run. Holding 6 or 4 will make Shanty start running forwards or backwards, with a very small windup before she reaches full speed. Run can be canceled into any stance followup, though if not canceled, Shanty will have a skidding animation before returning to stance idle. Her low-profile hurtbox also gains more height, though it is still somewhat shorter than her normal hurtbox. | |||
Holding 7/8/9 during Run will enter Helm, a unique jump that can be controlled midair. | |||
}} | }} | ||
}} | }} | ||
{{MoveData | {{MoveData | ||
|image=TFH_Shanty_Keelhaul.png | |image=TFH_Shanty_Keelhaul.png | ||
|hitbox=TFH_Shanty_5DA_hb.png | |||
|caption=Skrrrt ver. 2 | |caption=Skrrrt ver. 2 | ||
|name=Keelhaul | |name=Keelhaul | ||
|input={{clr|15| | |input={{clr|15|D}}~{{clr|12|A}} | ||
|data= | |data= | ||
{{AttackData-TFH | {{AttackData-TFH | ||
|damage=90 | |damage=90<br>(90 Chip) | ||
|guard= | |guard=Low | ||
|properties=Hard Knockdown | |||
|startup=13 | |startup=13 | ||
|active=12 | |active=12 | ||
|recovery=13 | |recovery=13 | ||
|advHit= | |advHit=46 (HKD) | ||
|advBlock=-5 | |advBlock={{clr|12|-5}} | ||
| | |firstJD=60 | ||
| | |baseJD=60 | ||
|description= | |JDG=0.95 | ||
|description= | |||
* Vacuums on grounded hits | |||
* Cancels into other magic tools on hit | |||
A fast advancing low out of run. Your surprise tool in neutral, especially to catch opponents backdashing or walking backwards. Can be very useful in combos, though midscreen followups are limited without spending another bar of magic to cancel back into run stance. When this hits a grounded opponent, it will vacuum towards Shanty, guaranteeing a followup combo. This can also sideswap if you hit it very close. | |||
}} | }} | ||
}} | }} | ||
{{MoveData | {{MoveData | ||
|image=TFH_Shanty_Broadside.png | |image=TFH_Shanty_Broadside.png | ||
|caption=Pray to | |hitbox=TFH_Shanty_5DB_hb.png | ||
|caption=Pray to God you didn’t mash on this. | |||
|name=Broadside | |name=Broadside | ||
|input={{clr|15| | |input={{clr|15|D}}~{{clr|13|B}} | ||
|data= | |data= | ||
{{AttackData-TFH | {{AttackData-TFH | ||
|damage=210 | |damage=210<br>(110 Chip) | ||
|guard= | |guard=Mid | ||
|properties=Wallstick | |||
|startup=10 | |startup=10 | ||
|active=12 | |active=12 | ||
|recovery=19 | |recovery=19 | ||
|advHit=Wallstick | |advHit=Wallstick | ||
|advBlock=-2 | |advBlock={{clr|15|-2}} | ||
| | |firstJD=35 | ||
| | |baseJD=35 | ||
|description=High-damage charging headbutt | |JDG=0.97 | ||
|description= | |||
* Wallsticks on hit | |||
* Cancels into other magic tools on hit | |||
High-damage charging headbutt. Can cancel into {{clr|14|22C}} to get a midscreen wallstick, although this slightly depends on screen position. | |||
Due to having many active frames, and a very short hurtbox, this can serve well as an anti-air when in stance, with the downside of having limited followups. | |||
Functions well on block as both a pressure reset and a frametrap option, due to its large amount of active frames, good frame advantage, and high damage. | |||
}} | }} | ||
}} | }} | ||
{{MoveData | {{MoveData | ||
|image=TFH_Shanty_Gangway.png | |image=TFH_Shanty_Gangway.png | ||
| | |hitbox=TFH_Shanty_5DC_hb_1.png | ||
|hitbox2=TFH_Shanty_5DC_hb_2.png | |||
|caption2=Zoning? In my ungulate game? | |||
|name=Gangway! | |name=Gangway! | ||
|input={{clr|15| | |input={{clr|15|D}}~{{clr|14|C}} | ||
|data= | |data= | ||
{{AttackData-TFH | {{AttackData-TFH | ||
|damage=70[x2], 210 | |damage=70 [x2], 210<br>(30 [x2], 50 Chip) | ||
|guard= | |guard=High\ | ||
|properties=Bounce<br>Projectile-Invulnerable (1-35) | |||
|startup=15 | |startup=15 | ||
|active=18 | |active=18 | ||
|recovery=21 | |recovery=21 | ||
|advHit=Bounce | |advHit=Bounce | ||
|advBlock=-6 | |advBlock={{clr|12|-6}} | ||
| | |firstJD=35,35,90 | ||
| | |baseJD=35,35,90 | ||
|description= | |JDG=0.97 [x3] | ||
|description= | |||
* Consumes groundbounce | |||
* Projectile invuln frame 1, high profile frame 5 | |||
* Hits grounded opponents on frame 30, hits standing Texas and Stronghoof on the first active frame | |||
The overhead compliment to run stance. This comes with hefty amounts of projectile invuln and high profile, allowing it to bait options that would normally beat the other two stance followups such as delayed mashing and reversals. It also makes for a high-damage combo piece, especially near the end of a combo thanks to the very high minimum damage. It's useful for catching jumps, as it hits high into the air. | |||
}} | }} | ||
}} | }} | ||
| Line 634: | Line 720: | ||
{{MoveData | {{MoveData | ||
|image=TFH_Shanty_Wallcling.png | |image=TFH_Shanty_Wallcling.png | ||
|hitbox=TFH_Shanty_22B_hb.png | |||
|caption= Does whatever a spider-goat does. | |caption= Does whatever a spider-goat does. | ||
|name=Wallcling | |name=Wallcling | ||
| Line 646: | Line 733: | ||
|advHit= | |advHit= | ||
|advBlock= | |advBlock= | ||
| | |firstJD= | ||
| | |baseJD= | ||
|description=Grounded startup is 11f, airborne travel time varies between 17 and 22f | |description= | ||
* Grounded startup is 11f, airborne travel time varies between 17 and 22f | |||
* Will create walls midscreen, allowing for use in combos and pressure at any time | |||
* Actionable on the 2nd frame after reaching the wall | |||
Shanty jumps to one of the walls of the screen. {{clr|13|22B}} jumps to the wall behind her, {{clr|14|22C}} jumps to the one in front of her. While Wallcling is a bit more limited than Run in terms of her two stances, it has utility in long combos and corner mixups, especially since Shanty immediately makes a corner midscreen. Holding 8 or 2 will run Shanty up and down the wall, and if you hold 2 all the way to the floor, Shanty will land on the ground with 15 recovery frames. Pressing {{clr|15|D}} will make Shanty quickly swap to the other wall, which is good for evading punishment. | |||
Wallcling costs 1 bar of magic to activate, and will continuously drain magic while Shanty is on the wall, making it a somewhat costly option. However, high damage Shanty combos will frequently use wallcling after a {{clr|13|236B}} thanks to the high hitstun, or {{clr|15|5D}}~{{clr|13|B}} wallstick. Shanty cannot block during wallcling however, making usage of it during offense risky. | |||
Pressing {{clr|14|C}} while in wallcling will cause Shanty to enter "Helm". | Pressing {{clr|14|C}} while in wallcling will cause Shanty to enter "Helm". | ||
| Line 655: | Line 748: | ||
{{MoveData | {{MoveData | ||
|image=TFH_Shanty_w8A.png | |image=TFH_Shanty_w8A.png | ||
|hitbox=TFH_Shanty_w8A_hb.png | |||
|caption=w.8A (the bing) | |caption=w.8A (the bing) | ||
|image2=TFH_Shanty_wA.png | |image2=TFH_Shanty_wA.png | ||
|hitbox2=TFH_Shanty_w5A_hb.png | |||
|caption2=w.5A (the bang) | |caption2=w.5A (the bang) | ||
|image3=TFH_Shanty_w2A.png | |image3=TFH_Shanty_w2A.png | ||
|hitbox3=TFH_Shanty_w2A_hb.png | |||
|caption3=w.2A (the bong) | |caption3=w.2A (the bong) | ||
|name=Wallcling Attack | |name=Wallcling Attack | ||
| Line 666: | Line 762: | ||
|version=8A | |version=8A | ||
|damage=110 | |damage=110 | ||
|guard= | |guard=High | ||
|startup=11 | |startup=11 | ||
|active=9 | |active=9 | ||
| Line 672: | Line 768: | ||
|advHit=Launch | |advHit=Launch | ||
|advBlock= | |advBlock= | ||
| | |firstJD=115 (Grounded)<br>60 (Airborne) | ||
| | |baseJD=115 (Grounded)<br>60 (Airborne) | ||
|JDG=0.97 | |||
| | |description= | ||
|description= | * Vacuums and launches | ||
Shanty kicks upward, sucking the opponent closer to the wall. The key to extending with wallcling, as it cancels into other followups, allowing for extensive juggles even at high JD. | |||
}} | }} | ||
{{AttackData-TFH | {{AttackData-TFH | ||
|version=5A | |version=5A | ||
|damage=145 | |damage=145 | ||
|guard= | |guard=High | ||
|startup=8 | |startup=8 | ||
|active=8 | |active=8 | ||
| Line 687: | Line 784: | ||
|advHit=Launch | |advHit=Launch | ||
|advBlock= | |advBlock= | ||
| | |firstJD=90 (Grounded)<br>50 (Airborne) | ||
| | |baseJD=90 (Grounded)<br>50 (Airborne) | ||
|JDG=0.97 | |||
| | |description= | ||
|description=Launches full screen horizontally. | * Fastest wallcling normal | ||
Launches full screen horizontally. Mostly useful as a fast option out of wallcling, though converting can be hard since it launches far away. Shanty can swap walls and extend combos with this, though these routes are mostly just for fun. | |||
}} | }} | ||
{{AttackData-TFH | {{AttackData-TFH | ||
|version=2A | |version=2A | ||
|damage=250 | |damage=250 | ||
|guard= | |guard=High | ||
|properties=Bounce | |||
|startup=9 | |startup=9 | ||
|active=7 | |active=7 | ||
| Line 702: | Line 801: | ||
|advHit=Bounce | |advHit=Bounce | ||
|advBlock= | |advBlock= | ||
| | |firstJD=90 (Grounded)<br>50 (Airborne) | ||
| | |baseJD=90 (Grounded)<br>50 (Airborne) | ||
|JDG=0.97 | |||
| | |description= | ||
|description= | * Consumes ground bounce | ||
Your best normal for mixups out of wallcling, since it won't whiff crouchers. Wallcling mix is still very risky, but mixing between this and a crossup {{clr|13|w.B}} is the general goal. This is also important to wallcling juggles, as it spikes the opponent down on air hit and groundbounces for easy followups. If you hit it high enough, you can cancel back into {{clr|12|w.8A}} to avoid spending a groundbounce. | |||
}} | }} | ||
}} | }} | ||
{{MoveData | {{MoveData | ||
|image=TFH_Shanty_Harpoon.png | |image=TFH_Shanty_Harpoon.png | ||
|hitbox=TFH_Shanty_wB_hb.png | |||
|caption= | |caption= | ||
|name=Harpoon | |name=Harpoon | ||
| Line 717: | Line 818: | ||
{{AttackData-TFH | {{AttackData-TFH | ||
|damage=155 | |damage=155 | ||
|guard= | |guard=High | ||
|properties=Hard Knockdown | |||
|startup=14 | |startup=14 | ||
|active=8 | |active=8 | ||
|recovery=26 | |recovery=26 | ||
|advHit= | |advHit=61 (HKD) | ||
|advBlock=-8 to -4 | |advBlock={{clr|13|-8}} to {{clr|15|-4}} | ||
| | |firstJD=190 (Grounded)<br>150 (Airborne) | ||
| | |baseJD=190 (Grounded)<br>150 (Airborne) | ||
|JDG=0.90 | |||
| | |description= | ||
|description= | * Can cross up | ||
A great tool for extending combos off the wall. Does very high damage, and launches far up, allowing for damaging followup potential. It can also cross up on opponents close to the corner, who may be blocking the wrong way expecting a {{clr|12|w.2A}}. It pays for this by being fairly unsafe at most heights, and adding a ton of JD. | |||
}} | }} | ||
}} | }} | ||
{{MoveData | {{MoveData | ||
|image=TFH_Shanty_wD.png | |image=TFH_Shanty_wD.png | ||
|hitbox=TFH_Shanty_wD_hb.png | |||
|caption= NYOOM | |caption= NYOOM | ||
|name=Change Walls | |name=Change Walls | ||
| Line 744: | Line 848: | ||
|advHit= | |advHit= | ||
|advBlock= | |advBlock= | ||
| | |firstJD= | ||
| | |baseJD= | ||
|description=Spends 1 magic to jump to the opposite wall. | |description= | ||
*Spends 1 magic to jump to the opposite wall | |||
{{clr|15|w.D}} doesn't really come up often except when trying to evade punishment for a wallcling you may have messed up. It can also be used in gimmicky baits, as a burst mobility option to quickly get from one corner to the other, and in certain combos to extend after {{clr|12|w.5A}}. | |||
}} | }} | ||
}} | }} | ||
| Line 753: | Line 859: | ||
{{MoveData | {{MoveData | ||
|image=TFH_Shanty_Helm.png | |image=TFH_Shanty_Helm.png | ||
|hitbox=TFH_Shanty_wC_hb.png | |||
|caption=A demon flip in looks only. | |caption=A demon flip in looks only. | ||
|name=Helm | |name=Helm | ||
| Line 765: | Line 872: | ||
|advHit= | |advHit= | ||
|advBlock= | |advBlock= | ||
| | |firstJD= | ||
| | |baseJD= | ||
|description=Shanty flips through the air, and can be controlled left/right to influence her trajectory, allowing for ambiguous left right mixups into Breaker. | |description= | ||
* Recovery is upon landing | |||
Shanty flips through the air, and can be controlled left/right to influence her trajectory, allowing for ambiguous left right mixups into Breaker. Alone, this is a fairly useful mobility tool that makes for some really hard to block overheads out of Run stance. Helm out of Wallcling is usually a combo extender utilizing Breaker, though it can be used to add even more layers to Wallcling mixups by faking crossups. Will put an airborne opponent in a lot of blockstun, although the opponent will exit blockstun when they land. | |||
}} | }} | ||
}} | }} | ||
{{MoveData | {{MoveData | ||
|image=TFH_Shanty_Breaker.png | |image=TFH_Shanty_Breaker.png | ||
|hitbox=TFH_Shanty_wCX_hb.png | |||
|caption= I dont even know what side this hit on. | |caption= I dont even know what side this hit on. | ||
|name=Breaker | |name=Breaker | ||
| Line 778: | Line 888: | ||
{{AttackData-TFH | {{AttackData-TFH | ||
|damage=110 | |damage=110 | ||
|guard= | |guard=High | ||
|properties=Hard Knockdown (Air Only) | |||
|startup=16 | |startup=16 | ||
|active=2+ | |active=2+ | ||
|recovery=9 | |recovery=9 | ||
|advHit=6 to 10, HKD on Airborne | |advHit=6 to 10, HKD on Airborne | ||
|advBlock=-8 to -4 | |advBlock={{clr|13|-8}} to {{clr|15|-4}} | ||
| | |firstJD=45 | ||
| | |baseJD=45 | ||
|description= | |JDG= | ||
|description=A fast overhead out of Helm that will hit very ambiguously on either side of the opponent. It must be done fairly low to combo from, and when done from high up it can be challenged or even punished. It gives a ton of hitstun on air hit, allowing for further combos. Like many of Shanty's mixups, it can be interrupted on the way up or anti-aired, so ensure you mix it in properly with all of her other tools. | |||
}} | }} | ||
}} | }} | ||
== | ===Super=== | ||
---- | |||
====Level 1==== | |||
{{MoveData | |||
|image=FHT_Character_Super.png | |||
|hitbox=TFH_Shanty_236XX_hb_1.png | |||
|hitbox2=TFH_Shanty_236XX_hb_2.png | |||
|caption2=Cannon ball/crash/splash! | |||
|name=Cannonball | |||
|input=236XX | |||
|data= | |||
{{AttackData-TFH | |||
|damage=270, 410<br>(90 [x2] Chip) | |||
|guard=Mid, High | |||
|properties=Invulnerable (1-28)<br>Forced HKD | |||
|startup=2+3 | |||
|active=12(15)8 | |||
|recovery=83 | |||
|advHit=14 (HKD) | |||
|advBlock={{clr|14|-71}} | |||
|firstJD=0 | |||
|baseJD=0 | |||
|description= | |||
* Fully invincible for the first 28 frames | |||
* Second hit hits overhead | |||
Shanty's super puts the opponent in HKD, even during Max JD, with enough advantage to meaty with a low or a throw. This makes it a solid ender for long combos to ensure you can have both damage and okizeme, though it isn't Shanty's premiere combo ender by any means. This is also your primary reversal, making it an important tool on defense. The fast startup and surprising range help with catching multiple setups, but being a massive -71 means you'll eat the highest damage combo your opponent can do for getting this blocked. | |||
}} | |||
}} | |||
====Level 2 (Follow Up)==== | |||
{{MoveData | |||
|image=TFH_Shanty_SuperFollowUp.png | |||
|caption=That's it! Avast! | |||
|name=Avast! | |||
|input=214XX | |||
|data= | |||
{{AttackData-TFH | |||
|damage=15 [x3], 90 | |||
|guard= | |||
|properties=Stagger | |||
|startup=60 | |||
|active=1(7)1(8)1(27)1 | |||
|recovery=47 | |||
|advHit=81/54 (Stagger) | |||
|advBlock= | |||
|firstJD=0 | |||
|baseJD=0 | |||
|description= | |||
* Must be cancelled BEFORE the second hit of Cannonball | |||
Install that regenerates three magic stocks on hit, and increases magic regeneration for a period of time. Staggers on hit, preventing you from combo'ing after if you've used {{clr|14|4/6C}} in your route. A very strong comeback tool, as it essentially removes Shanty's reliance on Parley for magic, allowing you to stancel much more frequently and abuse her various movement tools. Combos in Avast! are also much more damaging, as Shanty is able to use magic extenders more and juggle during wallcling longer. | |||
Unlike most other staggers, the opponent will not be sent into SKD after the stagger ends in Max JD, giving you the chance to perform a reset even after a full combo. | |||
}} | |||
}} | |||
=== | ====Level 3==== | ||
{{MoveData | |||
|image=TFH_Shanty_Level3.png | |||
|hitbox=TFH_Shanty_63214XX_hb.png | |||
|image2=TFH_Shanty_Level3_Finish.png | |||
|name=Durian Drop | |||
|input=63214XX | |||
|data= | |||
{{AttackData-TFH | |||
|damage=175 [x8], 1350 | |||
|guard=Grab | |||
|properties=Invulnerable (1-29) | |||
|startup=9+4 | |||
|active=16 | |||
|recovery=67 | |||
|advHit=0 | |||
|advBlock= | |||
|firstJD=0 | |||
|baseJD=0 | |||
|description= | |||
* Invincible for 30 frames | |||
* Can be jumped after super freeze | |||
An advancing invincible grab. Can be jumped on reaction to the screen freezing, and only combos from the stagger caused by {{clr|14|4/6C}} or {{clr|12|22[A]}}, which holds it back a lot in comparison to her other supers. You'll mostly find success with this by using it to bait mashing, or as a defensive option, as it is still a very high damage invincible super. Shanty can make the opponent react on defense in a ton of different ways, so ensure your opponent isn't going to jump before you risk one of these. | |||
}} | |||
}} | |||
=== | ====Cross-Canter==== | ||
=== | {{MoveData | ||
|image=TFH_Shanty_CC.png | |||
|hitbox= | |||
|name=Cross-Canter | |||
|input=6XX (While Blocking) | |||
|data= | |||
{{AttackData-TFH | |||
|damage=80 (Recoverable Health) | |||
|guard=Mid | |||
|properties=Strike-Invulnerable (f1-16)<br>Autoguard (f17-25) | |||
|startup=23 | |||
|active=9 | |||
|recovery=54 | |||
|hitstop=- | |||
|hitstun=- | |||
|advHit=0 (HKD) | |||
|blockstop=5 | |||
|blockstun=13 | |||
|advBlock={{clr|14|-49}} | |||
|firstJD=0 | |||
|baseJD=0 | |||
|JDG=1 | |||
|description=In exchange for 1/2 a bar of super meter, cross-canter interrupts your blockstun with a strike-invulnerable counterattack. Leads to a hard knockdown on hit with no frame advantage, resetting both opponents to neutral at a medium distance apart. The user will also be locked out of gaining super meter for 5 seconds, stacking up to 10 seconds if cross-canter is used repeatedly. | |||
This can be a strong option to escape pressure, but don't overdo it - it can be thrown during startup and is extremely punishable on block or whiff. | |||
}} | |||
}} | |||
==Colors== | ==Colors== | ||
<!--Check file prefix and add the color name in the text parameter.--> | <!--Check file prefix and add the color name in the text parameter.--> | ||
{{ColorGallery | filePrefix=TFH-Shanty-| colors= | {{ColorGallery | filePrefix=TFH-Shanty-| colors= | ||
{{ColorGallery/Color|1| text= Shanty}} | {{ColorGallery/Color|1| text= Shanty ( {{clr|12|A}} ) }} | ||
{{ColorGallery/Color|2| text= Ditty}} | {{ColorGallery/Color|2| text= Ditty ( {{clr|13|B}} ) }} | ||
{{ColorGallery/Color|3| text= What Shall We Do}} | {{ColorGallery/Color|3| text= What Shall We Do ( {{clr|14|C}} ) }} | ||
{{ColorGallery/Color|4| text= D'ja Make Er?}} | {{ColorGallery/Color|4| text= D'ja Make Er? ( {{clr|15|D}} ) }} | ||
{{ColorGallery/Color|5| text= And a Bottle of Rum}} | {{ColorGallery/Color|5| text= And a Bottle of Rum (TU) }} | ||
{{ColorGallery/Color|6| text= Fizzy Lemon}} | {{ColorGallery/Color|6| text= Fizzy Lemon (VC) }} | ||
{{ColorGallery/Color|7| text= Emerald Splash}} | {{ColorGallery/Color|7| text= Emerald Splash ( {{clr|12|A}}+{{clr|13|B}}+{{clr|14|C}} ) }} | ||
{{ColorGallery/Color|8| text= Wild Wave}} | {{ColorGallery/Color|8| text= Wild Wave ( {{clr|15|D}}+TU+VC) }} | ||
{{ColorGallery/Color|9| text= Akerbeltz}} | {{ColorGallery/Color|9| text= Akerbeltz ( {{clr|12|A}}+{{clr|15|D}} ) }} | ||
<!--Teal Suede, the Tennis Shoes palette, goes here, I think. Or it should go ''somewhere''.--> | <!--Teal Suede, the Tennis Shoes palette, goes here, I think. Or it should go ''somewhere''.--> | ||
{{ColorGallery/Color|10| text= Goatmom}} | {{ColorGallery/Color|10| text= Goatmom ( {{clr|12|A}}+{{clr|13|B}}+{{clr|15|D}} ) }} | ||
{{ColorGallery/Color|11| text= Shout of Sea}} | {{ColorGallery/Color|11| text= Shout of Sea ( {{clr|14|C}}+{{clr|15|D}} ) }} | ||
{{ColorGallery/Color|12| text= Lightning Rival}} | {{ColorGallery/Color|12| text= Lightning Rival ( {{clr|12|A}}+{{clr|14|C}}+{{clr|15|D}} ) }} | ||
{{ColorGallery/Color|13| text= Jellyfish Pirate}} | {{ColorGallery/Color|13| text= Jellyfish Pirate ( {{clr|13|B}}+{{clr|14|C}}+{{clr|15|D}} ) }} | ||
{{ColorGallery/Color|14| text= Grass Pelt}} | {{ColorGallery/Color|14| text= Grass Pelt ( {{clr|12|A}}+{{clr|13|B}}+{{clr|14|C}}+{{clr|15|D}} ) }} | ||
{{ColorGallery/Color|15| text= I'm So Sorry}} | {{ColorGallery/Color|15| text= I'm So Sorry ( {{clr|12|A}}+{{clr|13|B}} ) }} | ||
{{ColorGallery/Color|16| text= Miracle Courtier}} | {{ColorGallery/Color|16| text= Miracle Courtier ( {{clr|12|A}}+TU) }} | ||
{{ColorGallery/Color|17| text= Dangerous Hoofwear}} | {{ColorGallery/Color|17| text= Dangerous Hoofwear ( {{clr|13|B}}+TU) }} | ||
{{ColorGallery/Color|18| text= Island Villager}} | {{ColorGallery/Color|18| text= Island Villager ( {{clr|12|A}}+{{clr|13|B}}+TU) }} | ||
{{ColorGallery/Color|19| text= Super Bleat Kid}} | {{ColorGallery/Color|19| text= Super Bleat Kid ( {{clr|14|C}}+TU) }} | ||
{{ColorGallery/Color|20| text= Who We Are}} | {{ColorGallery/Color|20| text= Who We Are ( {{clr|12|A}}+{{clr|14|C}}+TU) }} | ||
{{ColorGallery/Color|21| text= Hooligan Punk}} | {{ColorGallery/Color|21| text= Hooligan Punk ( {{clr|13|B}}+{{clr|14|C}}+TU) }} | ||
{{ColorGallery/Color|22| text= Baaah, Avast!}} | {{ColorGallery/Color|22| text= Baaah, Avast! ( {{clr|12|A}}+{{clr|13|B}}+{{clr|14|C}}+TU) }} | ||
{{ColorGallery/Color|23| text= Donut Steele}} | {{ColorGallery/Color|23| text= Donut Steele ( {{clr|15|D}}+TU) }} | ||
{{ColorGallery/Color|24| text= Surf's Up}} | {{ColorGallery/Color|24| text= Surf's Up ( {{clr|12|A}}+{{clr|15|D}}+TU) }} | ||
{{ColorGallery/Color|25| text= Insolated}} | {{ColorGallery/Color|25| text= Insolated ( {{clr|13|B}}+{{clr|15|D}}+TU) }} | ||
{{ColorGallery/Color| | {{ColorGallery/Color|28| text= Shakalaka Bam ( {{clr|12|A}}+{{clr|13|B}}+{{clr|15|D}}+TU) }} | ||
{{ColorGallery/Color| | {{ColorGallery/Color|29| text= Dark Prince ( {{clr|14|C}}+{{clr|15|D}}+TU) }} | ||
{{ColorGallery/Color| | {{ColorGallery/Color|30| text= Captain ( {{clr|12|A}}+{{clr|14|C}}+{{clr|15|D}}+TU) }} | ||
{{ColorGallery/Color| | {{ColorGallery/Color|31| text= Graffiti Gyal ( {{clr|13|B}}+{{clr|14|C}}+{{clr|15|D}}+TU) }} | ||
{{ColorGallery/Color| | {{ColorGallery/Color|26| text= KLR:D ( {{clr|12|A}}+{{clr|13|B}}+{{clr|14|C}}+{{clr|15|D}}+TU) }} | ||
{{ColorGallery/Color| | {{ColorGallery/Color|27| text= 28 Ays Later ( {{clr|13|B}}+{{clr|14|C}} ) }} | ||
{{ColorGallery/Color|32| text= Miki Miki}} | {{ColorGallery/Color|32| text= Miki Miki (?) }} | ||
{{ColorGallery/Color|33| text= Night of Fire (?) }} | |||
}} | }} | ||
Latest revision as of 05:58, 13 April 2024
| Shanty | |
|---|---|
| Species: | Goat |
| Playstyle: | Stance, Rushdown |
| HP: | 4800 |
| Meter Size: | 360 |
| Movement Options: | Short Hop, Wall-Cling, Run |
| Voice Actor: | Afi Ekulona |
| Stage(s): | The Capricorn |
Character Profile
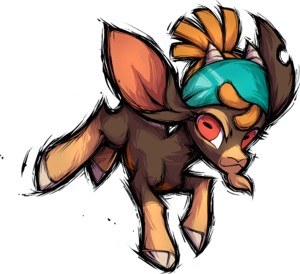
It is well known among the creatures of Foenum that when a goat sets her eye on something, it’s only a matter of time before she gets it.
Shanty, named after a song with no title, was taken in by notorious pirate captain Bravura after being orphaned at a very young age. She studied the ways of salt and sail, instilled with the belief that the only ones who make it in life are those brave enough to fight to the last.
For Shanty to earn a place as a true member of her pirate crew, she has to prove her worth. And it isn’t enough to meet the bar, Shanty aims to blow it out of the water. That means stealing the most valuable treasure in the world: which just so happens to be the Prophet’s Key! Only one who’s worthy? It’s gonna be Shanty![1]
Gameplay
Shanty is a rushdown/stance character. She has incredibly strong pressure and mix, and can utilize grab baits very well. She has a very fast dash speed, and multiple projectile invulnerable moves, allowing her to deal with zoning attempts well. Her already good pressure is made much stronger with magic, as that gives her access to stance cancels (stancels), which can give you + frames on certain moves. Being a stance character, it is incredibly important to keep magic stocks high, and with her passive magic gain being incredibly slow, she is heavily reliant on using Parlay (22A) to gain magic.
| Strengths | Weaknesses |
|---|---|
|
|
Movement
Walk: Shanty is tied with Arizona for the fastest walk speeds, walking forward and backward at 7 hu/frame and 5 hu/frame respectively.
Dashes: Like everyone else, Shanty can dash on the ground. Shanty's dashes are very fast on their own, and her wavedash is very good.
Shorthop: In addition to a regular jump, Shanty can perform a shorthop to stay closer to the ground, but cannot block during it. Shanty's jump and shorthop are also tied with Arizona for the longest arcs of each kind respectively.
Run Stance: Shanty's Run Stance gives her exceptionally quick forwards and backwards movement, at the cost of not being able to block. It also gives her access to helm.
Wall Cling: Shanty's Wall Cling lets her grab onto a wall and jump to the other. It also gives her access to helm.
Helm: Helm is a special type of jump, unique in that Shanty's jump angle isn't set, letting her move more freely in the air than other characters might. You can use helm by pressing C or 9 while in Wall Cling, or by pressing any upwards direction in Run Stance.
Command List
Normal Moves
Standing Normals
5A
5A Why is it active for 8 frames Why is it active for 8 frames
|
|
|---|---|
Toggle Hitboxes Toggle Hitboxes
|
5B
5B
|
|
|---|---|
Toggle Hitboxes Toggle Hitboxes
|
5C
5C Bonk! Bonk!
|
|
|---|---|
Toggle Hitboxes Toggle Hitboxes
|
Crouching Normals
2A
2A
|
|
|---|---|
Toggle Hitboxes Toggle Hitboxes
|
2B
2B Skrrrt Skrrrt
|
|
|---|---|
Toggle Hitboxes Toggle Hitboxes
|
2C
2C
|
|
|---|---|
Toggle Hitboxes Toggle Hitboxes
|
Jumping Normals
j.A
j.A "An affront to nature." "An affront to nature."
|
|
|---|---|
Toggle Hitboxes Toggle Hitboxes
|
j.B
j.B
|
|
|---|---|
Toggle Hitboxes Toggle Hitboxes
|
j.C
j.C
|
|
|---|---|
Toggle Hitboxes Toggle Hitboxes
|
Command Normals
6A
6A Talk to the hoof Talk to the hoof
|
|
|---|---|
Toggle Hitboxes Toggle Hitboxes
|
4/6C
Bulkhead 4/6C Throw out a low, I dare you. Throw out a low, I dare you.
|
|
|---|---|
Toggle Hitboxes Toggle Hitboxes
|
3C
3C
|
|
|---|---|
Toggle Hitboxes Toggle Hitboxes
|
Throws
Forward Throw
Forward Throw B+C / 6B+C Heave ho! Heave ho!
|
|
|---|---|
Toggle Hitboxes Toggle Hitboxes
|
Back Throw
Back Throw 4B+C Heave-Ho! Heave-Ho!
|
|
|---|---|
Toggle Hitboxes Toggle Hitboxes
|
Air Throw
Air Throw
j.B+C |
|
|---|---|
Toggle Hitboxes Toggle Hitboxes
|
Special Moves
Special Name 1
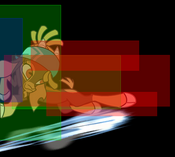
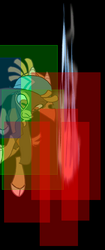
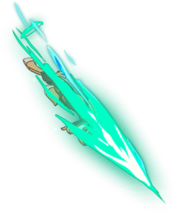
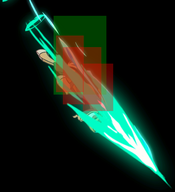
Cutlass 236A/B/C 236A 236A 236B 236B 236C 236C
|
|
|---|---|
Toggle Hitboxes Toggle Hitboxes
|
Special Name 1
Parley
22A |
|
|---|---|
Toggle Hitboxes Toggle Hitboxes
|
Magic
Shanty's magic slowly builds over time, and she can obtain more with Parley, to a maximum of 6 stocks. She can spend it to enter her Wall Cling and Run stances, and use certain options within the stances.
D
Run Stance (Enter/Exit) D This is where the fun begins. This is where the fun begins.
|
|
|---|---|
Toggle Hitboxes Toggle Hitboxes
|
Keelhaul D~A Skrrrt ver. 2 Skrrrt ver. 2
|
|
|---|---|
Toggle Hitboxes Toggle Hitboxes
|
Broadside D~B Pray to God you didn’t mash on this. Pray to God you didn’t mash on this.
|
|
|---|---|
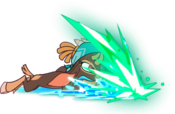
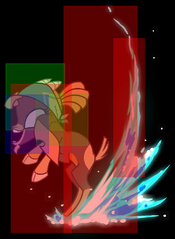
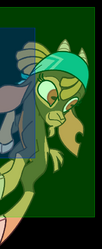
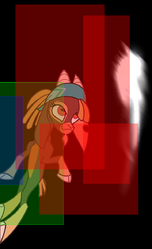
Toggle Hitboxes Toggle Hitboxes
|
Gangway! D~C Zoning? In my ungulate game? Zoning? In my ungulate game?
|
|
|---|---|
Toggle Hitboxes Toggle Hitboxes
|
WallCling
Wallcling 22B/C Does whatever a spider-goat does. Does whatever a spider-goat does.
|
|
|---|---|
Toggle Hitboxes Toggle Hitboxes
|
Wallcling Attack Wallcling 8/5/2A w.8A (the bing) w.8A (the bing) w.5A (the bang) w.5A (the bang) w.2A (the bong) w.2A (the bong)
|
|
|---|---|
Toggle Hitboxes Toggle Hitboxes
|
Harpoon
Wallcling B |
|
|---|---|
Toggle Hitboxes Toggle Hitboxes
|
Change Walls Wallcling D NYOOM NYOOM
|
|
|---|---|
Toggle Hitboxes Toggle Hitboxes
|
Helm Breaker
Helm Run 7/8/9, Wallcling 9/C A demon flip in looks only. A demon flip in looks only.
|
|
|---|---|
Toggle Hitboxes Toggle Hitboxes
|
Breaker Helm A/B/C I dont even know what side this hit on. I dont even know what side this hit on.
|
|
|---|---|
Toggle Hitboxes Toggle Hitboxes
|
Super
Level 1
Cannonball 236XX Cannon ball/crash/splash! Cannon ball/crash/splash!
|
|
|---|---|
Toggle Hitboxes Toggle Hitboxes
|
Level 2 (Follow Up)
Avast! 214XX That's it! Avast! That's it! Avast!
|
|---|
Level 3
Durian Drop
63214XX |
|
|---|---|
Toggle Hitboxes Toggle Hitboxes
|
Cross-Canter
Cross-Canter
6XX (While Blocking) |
|---|
Colors
