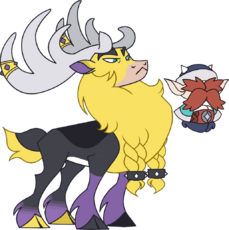
Them's Fightin' Herds/Stronghoof: Difference between revisions
(→Super) |
m (→Magic) |
||
| (246 intermediate revisions by 7 users not shown) | |||
| Line 16: | Line 16: | ||
|- | |- | ||
|'''Meter Size''': | |'''Meter Size''': | ||
| | |360 | ||
|- | |- | ||
|'''Movement Options''': | |'''Movement Options''': | ||
| Line 41: | Line 41: | ||
{{ProConTable | {{ProConTable | ||
|pros= | |pros= | ||
*''' | *'''Large Normals:''' Stronghoof has many large, disjointed normals, great for making the opponent commit more on an approach. | ||
*'''High Damage:''' With | *'''High Damage:''' With magic, Stronghoof has ample tools to convert almost any hit into a full combo that makes frequent use of his hard-hitting special moves, racking up tons of damage. | ||
*'''Setplay Nightmare:''' Stronghoof's | *'''Setplay Nightmare:''' Stronghoof's setplay is extremely potent, with Vetr's attacks being able to back up his grounded overhead and command grab, maintaining his advantage. | ||
*'''Auto-Guard:''' {{clr|14|236C}}'s Auto-Guard property gives | *'''Auto-Guard:''' {{clr|14|236C}}'s Auto-Guard property gives Stronghoof unique options, and Vetr's 236C making opponents respect nearly all offense makes having a shield available a constant threat. | ||
*''' | *'''Slippery Movement:''' Ice Slick and Slide make a normally slow character surprisingly mobile, able to approach while crouch blocking and slide out of the opponents range on a whiff. | ||
|cons= | |cons= | ||
*'''Magic | *'''Magic Dependent:''' Stronghoof's offensive pressure and combos both become significantly weaker without access to magic. | ||
*''' | *'''Large Hurtbox:''' Stronghoof is the tallest character in the cast, making him vulnerable to fuzzies that no other character has to hold. | ||
*'''Poor Approach:''' Slow movement and a lack of long-range threats make it difficult for Stronghoof to approach, especially versus a zoner. | |||
*'''Easy to Overwhelm:''' With a relatively slow anti-air, unusually vulnerable backdash, and lack of any invincible reversals without spending 3 bars of meter, opponents don't have too much to be scared of when running pressure on Stronghoof. | |||
}} | }} | ||
| Line 55: | Line 57: | ||
==Movement== | ==Movement== | ||
<!--Many characters have unique mechanics, like Pom's air movement. Add that information here--> | <!--Many characters have unique mechanics, like Pom's air movement. Add that information here--> | ||
'''Walk''': | '''Walk''': Stronghoof has the slowest walk speed in the game, the same both forward and backward. | ||
'''Dashes''': Stronghoof's forward dash is | '''Dashes''': Stronghoof's forward dash is fairly normal. His backdash travels the furthest out of any, but also lasts much longer than usual. Unlike Texas's, this extended backdash does not have additional invulnerability frames either, so it can leave him quite vulnerable. | ||
'''Slide''': Like Velvet, Stronghoof can slide across the floor after a dash by holding down. Stronghoof can block during this slide, even while sliding forward. | '''Slide''': Like Velvet, Stronghoof can slide across the floor after a dash by holding down. Stronghoof can block during this slide, even while sliding forward. | ||
'''Slick''': While Stronghoof is on an ice slick, he can move forward and backward a short distance while doing an attack, giving some moves unexpectedly longer ranges. | '''Slick''': While Stronghoof is on an ice slick, he can move forward and backward a short distance while doing an attack, giving some moves unexpectedly longer ranges. | ||
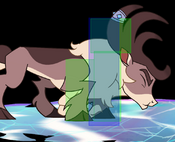
'''Slick Slide''': Dashing over an ice slick and holding the direction allows Stronghoof to do a goofy-looking glide across the ice. | '''Slick Slide''': Dashing over an ice slick and holding the direction allows Stronghoof to do a goofy-looking glide across the ice. | ||
'''Jump''': Stronghoof has no special kinds of jumps, and is tied with Velvet for the shortest standard jump arc. | |||
==Command List== | ==Command List== | ||
===Normal Moves=== | ===Normal Moves=== | ||
====== <font style="visibility:hidden" size="0">5A</font> ====== | ---- | ||
====Standing Normals==== | |||
====== <font style="visibility:hidden; display:none;" size="0">5A</font> ====== | |||
{{MoveData | {{MoveData | ||
|image=TFH_Stronghoof_5A.png | |image=TFH_Stronghoof_5A.png | ||
|hitbox=TFH_Stronghoof_5A_hb.png | |||
|caption= | |caption= | ||
|name=5A | |name={{clr|12|5A}} | ||
|data= | |data= | ||
{{AttackData-TFH | {{AttackData-TFH | ||
|damage=35 | |damage=35 | ||
|guard=Mid | |guard=Mid | ||
|properties=Chains into Self | |||
|startup=5 | |startup=5 | ||
|active=4 | |active=4 | ||
|recovery=14 | |recovery=14 | ||
|hitstop=7 | |||
|hitstun=18 | |||
|airHitstun=16 | |||
|advHit=+1 | |advHit=+1 | ||
|advBlock=-3 | |airAdvHit={{clr|15|-1}} | ||
| | |blockstop=7 | ||
| | |blockstun=14 | ||
|description= | |airBlockstun=19 | ||
|advBlock={{clr|15|-3}} | |||
|airAdvBlock=+2 | |||
|firstJD=0 | |||
|baseJD=15 | |||
|JDG=0.83 | |||
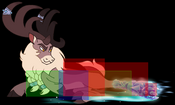
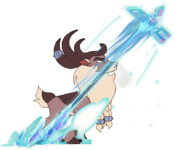
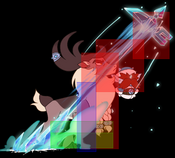
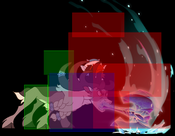
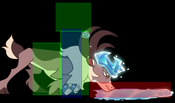
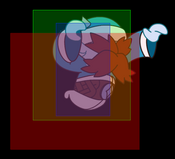
|description=Disjointed jab with decent range. Stronghoof's fastest normal, making it good for quick punishes. While not as much as Velvet's, this move's hitbox does reach higher than most standard {{clr|12|5A}}s, giving is some utility as an alternative anti-air. | |||
}} | }} | ||
}} | }} | ||
====== <font style="visibility:hidden | |||
====== <font style="visibility:hidden; display:none;" size="0">5B</font> ====== | |||
{{MoveData | {{MoveData | ||
|image=TFH_Stronghoof_5B.png | |image=TFH_Stronghoof_5B.png | ||
|hitbox=TFH_Stronghoof_5B_hb.png | |||
|caption= | |caption= | ||
|name=5B | |name={{clr|13|5B}} | ||
|data= | |data= | ||
{{AttackData-TFH | {{AttackData-TFH | ||
|damage=90 | |damage=90 | ||
|guard=Mid | |guard=Mid | ||
|startup= | |startup=10 | ||
|active=6 | |active=6 | ||
|recovery=16 | |recovery=16 | ||
|hitstop=10 | |||
|hitstun=22 | |||
|advHit=+1 | |advHit=+1 | ||
|advBlock=-2 | |blockstop=10 | ||
| | |blockstun=19 | ||
| | |airBlockstun=25 | ||
|description=Large and fast hammer swing. Being a frame | |advBlock={{clr|15|-2}} | ||
|airAdvBlock=+4 | |||
|firstJD=-30 | |||
|baseJD=30 | |||
|JDG=0.97 | |||
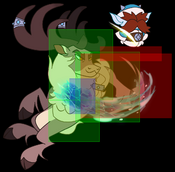
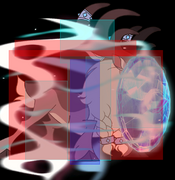
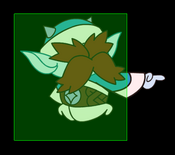
|description=Large and fast hammer swing. Being a disjointed, large, frame 10 normal, it makes an excellent neutral poke. Whiffs on crouchers at max range. | |||
}} | }} | ||
}} | }} | ||
====== <font style="visibility:hidden" size="0">5C</font> ====== | |||
======<font style="visibility:hidden; display:none;" size="0">5C</font> ====== | |||
{{MoveData | {{MoveData | ||
|image=TFH_Stronghoof_5C.png | |image=TFH_Stronghoof_5C.png | ||
|hitbox=TFH_Stronghoof_5C_hb.png | |||
|caption= | |caption= | ||
|name=5C | |name={{clr|14|5C}} | ||
|data= | |data= | ||
{{AttackData-TFH | {{AttackData-TFH | ||
| Line 136: | Line 146: | ||
|active=9 | |active=9 | ||
|recovery=25 | |recovery=25 | ||
|advHit=-5 | |hitstop=14 | ||
|advBlock=-8 | |hitstun=28 | ||
| | |airHitstun=34 | ||
| | |advHit={{clr|12|-5}} | ||
|airAdvHit=+1 | |||
|blockstop=14 | |||
|blockstun=25 | |||
|airBlockstun=37 | |||
|advBlock={{clr|13|-8}} | |||
|airAdvBlock=+4 | |||
|firstJD=-35 | |||
|baseJD=65 | |||
|JDG=0.97 | |||
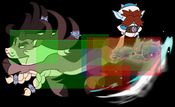
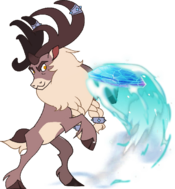
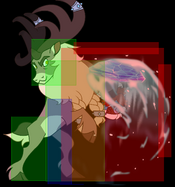
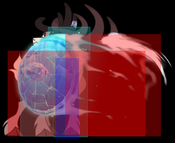
|description=Slower, but reaches further and hits a lot harder than {{clr|13|5B}}. {{clr|14|5C}} is likely where a good chunk of your damage is going to come from during your magicless combos, and is a pivotal combo extender during your magic-inclusive combos. Also has a large disjointed hitbox above Stronghoof, making it a situational/accidental anti-air. | |description=Slower, but reaches further and hits a lot harder than {{clr|13|5B}}. {{clr|14|5C}} is likely where a good chunk of your damage is going to come from during your magicless combos, and is a pivotal combo extender during your magic-inclusive combos. Also has a large disjointed hitbox above Stronghoof, making it a situational/accidental anti-air. | ||
}} | }} | ||
}} | }} | ||
====== <font style="visibility:hidden" size="0">2A</font> ====== | |||
====Crouching Normals==== | |||
====== <font style="visibility:hidden; display:none;" size="0">2A</font> ====== | |||
{{MoveData | {{MoveData | ||
|image=TFH_Stronghoof_2A.png | |image=TFH_Stronghoof_2A.png | ||
|hitbox=TFH_Stronghoof_2A_hb.png | |||
|caption= | |caption= | ||
|name=2A | |name={{clr|12|2A}} | ||
|data= | |data= | ||
{{AttackData-TFH | {{AttackData-TFH | ||
|damage=25 | |damage=25 | ||
|guard=Low | |guard=Low | ||
|properties=Chains into Self | |||
|startup=6 | |startup=6 | ||
|active=6 | |active=6 | ||
|recovery=14 | |recovery=14 | ||
|advHit=-2 | |hitstop=7 | ||
|advBlock=-3 | |hitstun=17 | ||
| | |airHitstun=16 | ||
| | |advHit={{clr|15|-2}} | ||
|description=Stronghoof's fastest low. Stubby by Stronghoof standards, but still largely disjointed. | |airAdvHit={{clr|15|-3}} | ||
|blockstop=7 | |||
|blockstun=16 | |||
|airBlockstun=19 | |||
|advBlock={{clr|15|-3}} | |||
|airAdvBlock=0 | |||
|firstJD=0 | |||
|baseJD=15 | |||
|JDG=0.83 | |||
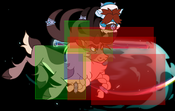
|description=Stronghoof's fastest low. Stubby by Stronghoof standards, but still largely disjointed. Extremely active, making it useful for Okizeme. | |||
}} | }} | ||
}} | }} | ||
====== <font style="visibility:hidden" size="0">2B</font> ====== | |||
======<font style="visibility:hidden; display:none;" size="0">2B</font> ====== | |||
{{MoveData | {{MoveData | ||
|image=TFH_Stronghoof_2B.png | |image=TFH_Stronghoof_2B.png | ||
|hitbox=TFH_Stronghoof_2B_hb.png | |||
|caption= | |caption= | ||
|name=2B | |name={{clr|13|2B}} | ||
|data= | |data= | ||
{{AttackData-TFH | {{AttackData-TFH | ||
|damage=90 | |damage=90 | ||
|guard=Low | |guard=Low | ||
|properties=Chains into 5B | |||
|startup=11 | |startup=11 | ||
|active=5 | |active=5 | ||
|recovery=16 | |recovery=16 | ||
|hitstop=9 | |||
|hitstun=22 | |||
|airHitstun=20 | |||
|advHit=+2 | |advHit=+2 | ||
|advBlock=-5 | |airAdvHit=0 | ||
| | |blockstop=9 | ||
| | |blockstun=15 | ||
|description=Large, low-hitting hammer swing. Much more range than {{clr|12|2A}}, giving it better poke potential when used in conjunction with Stronghoof's slide. Hitbox hits slightly above Stronghoof's hurtbox, making it a situational anti-air. | |airBlockstun=23 | ||
|advBlock={{clr|12|-5}} | |||
|airAdvBlock=+3 | |||
|firstJD=-10 | |||
|baseJD=50 | |||
|JDG=0.95 | |||
|description=Large, low-hitting hammer swing. Much more range than {{clr|12|2A}}, giving it better poke potential when used in conjunction with Stronghoof's slide. Hitbox hits slightly above Stronghoof's hurtbox, making it a situational anti-air. Naturally frametraps when cancelled into {{clr|14|5C}} on block. | |||
}} | }} | ||
}} | }} | ||
====== <font style="visibility:hidden" size="0">2C</font> ====== | |||
======<font style="visibility:hidden; display:none;" size="0">2C</font> ====== | |||
{{MoveData | {{MoveData | ||
|image=TFH_Stronghoof_2C.png | |image=TFH_Stronghoof_2C.png | ||
|hitbox=TFH_Stronghoof_2C_hb.png | |||
|caption= | |caption= | ||
|name=2C | |name={{clr|14|2C}} | ||
|data= | |data= | ||
{{AttackData-TFH | {{AttackData-TFH | ||
|damage=170 | |damage=170 | ||
|guard=Low | |guard=Low | ||
|properties=Hard Knockdown<br>Chains into 5C | |||
|startup=15 | |startup=15 | ||
|active=10 | |active=10 | ||
|recovery=27 | |recovery=27 | ||
|advHit= | |hitstop=11 | ||
|advBlock=-13 | |hitstun=Until Knockdown | ||
| | |advHit=≥+15 (HKD) | ||
| | |blockstop=11 | ||
|description=Quick, sliding sweep that sends Stronghoof forward a small amount. Hitbox hits slightly above Stronghoof's hurtbox, making it a situational anti-air. | |blockstun=23 | ||
|airBlockstun=36 | |||
|advBlock={{clr|14|-13}} | |||
|airAdvBlock=0 | |||
|firstJD=-45 | |||
|baseJD=55 | |||
|JDG=0.97 | |||
|description=Quick, sliding sweep that sends Stronghoof forward a small amount. Hitbox hits slightly above Stronghoof's hurtbox, making it a situational anti-air. Like Velvet, Stronghoof can also cancel this move into {{clr|14|5C}} if it has not been used yet in the string. | |||
}} | }} | ||
}} | }} | ||
====== <font style="visibility:hidden" size="0">j.A</font> ====== | ====Jumping Normals==== | ||
====== <font style="visibility:hidden; display:none;" size="0">j.A</font> ====== | |||
{{MoveData | {{MoveData | ||
|image=TFH_Stronghoof_jA.png | |image=TFH_Stronghoof_jA.png | ||
|hitbox=TFH_Stronghoof_jA_hb.png | |||
|caption= | |caption= | ||
|name=j.A | |name={{clr|12|j.A}} | ||
|data= | |data= | ||
{{AttackData-TFH | {{AttackData-TFH | ||
|damage= | |damage=30 | ||
|guard=High | |guard=High | ||
|startup=10 | |startup=10 | ||
|active=5 | |active=5 | ||
|recovery=12 | |recovery=12 | ||
|advHit= | |hitstop=10 | ||
|advBlock= | |hitstun=21 | ||
| | |airHitstun=27 | ||
| | |advHit=+5 ~ +21 | ||
|description=Quick little air swipe. | |airAdvHit=+11 ~ +27 | ||
|blockstop=10 | |||
|blockstun=15 | |||
|advBlock={{clr|15|-1}} ~ +15 | |||
|firstJD=0 | |||
|airFirstJD=-60 | |||
|baseJD=65 | |||
|airBaseJD=55 | |||
|JDG=0.90 | |||
|description=Quick little air swipe. Generally outshined by his other air normals in range and utility, but it is Stronghoof's fastest available air to air and instant overhead on tall hurtboxes. Sends opponents at a downward trajectory, hurting its usefulness in combos - although you'd likely not be using it in them anyway. | |||
}} | }} | ||
}} | }} | ||
====== <font style="visibility:hidden" size="0">j.B</font> ====== | |||
====== <font style="visibility:hidden; display:none;" size="0">j.B</font> ====== | |||
{{MoveData | {{MoveData | ||
|image=TFH_Stronghoof_jB.png | |image=TFH_Stronghoof_jB.png | ||
|hitbox=TFH_Stronghoof_jB_hb.png | |||
|caption= | |caption= | ||
|name=j.B | |name={{clr|13|j.B}} | ||
|data= | |data= | ||
{{AttackData-TFH | {{AttackData-TFH | ||
|damage= | |damage=120 | ||
|guard=High | |guard=High | ||
|startup=12 | |startup=12 | ||
|active=10 | |active=10 | ||
|recovery=9 | |recovery=9 | ||
|advHit= | |hitstop=14 | ||
|advBlock= | |hitstun=28 | ||
| | |airHitstun=38 | ||
| | |advHit=+4 ~ +22 | ||
|description= | |airAdvHit=+14 ~ +32 | ||
|blockstop=14 | |||
|blockstun=14 | |||
|advBlock={{clr|15|-4}} ~ +14 | |||
|firstJD=-51 | |||
|airFirstJD=-66 | |||
|baseJD=109 | |||
|airBaseJD=94 | |||
|JDG=0.97 | |||
|description=Very large air normal. Fairly good for jump-ins despite lacking a disjoint. Land cancels further from the ground than most air normals, creating some potential for tricky high/lows on descent, or sudden crossups with the use of {{clr|15|Wind}}. | |||
With good timing, this move can be linked into itself on airborne hit - possibly useful if you're too far away for a wallbounce and want to avoid using magic to reel the opponent back in from a {{clr|14|j.C}}. | |||
}} | }} | ||
}} | }} | ||
====== <font style="visibility:hidden" size="0">j.C</font> ====== | |||
======<font style="visibility:hidden; display:none;" size="0">j.C</font> ====== | |||
{{MoveData | {{MoveData | ||
|image=TFH_Stronghoof_jC.png | |image=TFH_Stronghoof_jC.png | ||
|hitbox=TFH_Stronghoof_jC_hb.png | |||
|caption= | |caption= | ||
|name=j.C | |name={{clr|14|j.C}} | ||
|data= | |data= | ||
{{AttackData-TFH | {{AttackData-TFH | ||
|damage= | |damage=140 | ||
|guard=High | |guard=High | ||
|properties=Wallbounce (Air Only) | |||
|startup=19 | |startup=19 | ||
|active=6 | |active=6 | ||
|recovery=16 | |recovery=16 | ||
|advHit= | |hitstop=18 | ||
|advBlock= | |hitstun=30 | ||
| | |airHitstun=Until Knockdown | ||
| | |advHit=+9 ~ +30 | ||
|description={{clr|13| | |airAdvHit=Wallbounce and/or SKD | ||
|blockstop=18 | |||
|blockstun=19 | |||
|advBlock={{clr|15|-2}} ~ +19 | |||
|firstJD=-60 | |||
|airFirstJD=-120 | |||
|baseJD=140 | |||
|airBaseJD=80 | |||
|JDG=0.97 | |||
|description=Very large and fully disjointed air normal. Generally Stronghoof's best jump-in normal. In contrast to his jB, Stronghoof can fall deceptively close to the ground before land cancelling, which may throw off some opponents anticipating a low. Descending hits also usually leave him very plus on block. | |||
Wallbounces on hit, making it good for corner extensions. | |||
}} | |||
}} | |||
====Command Normals==== | |||
====== <font style="visibility:hidden; display:none;" size="0">6A</font> ====== | |||
{{MoveData | |||
|image=TFH_Stronghoof_6A.png | |||
|hitbox=TFH_Stronghoof_6A_hb.png | |||
|caption= | |||
|name={{clr|12|6A}} | |||
|data= | |||
{{AttackData-TFH | |||
|damage=70 | |||
|guard=Mid | |||
|properties=Forces Stand<br>Jump-Cancellable on Hit | |||
|startup=13 | |||
|active=8 | |||
|recovery=30 | |||
|hitstop=11 | |||
|airHitstop=11 (Stronghoof) / 17 (Opp.) | |||
|hitstun=18 | |||
|airHitstun=32 | |||
|advHit=-19 | |||
|airAdvHit=+1 | |||
|blockstop=11 | |||
|blockstun=21 | |||
|airBlockstun=13 | |||
|advBlock={{clr|14|-16}} | |||
|airAdvBlock={{clr|14|-24}} | |||
|firstJD=50 | |||
|baseJD=65 | |||
|JDG=0.83 | |||
|description=Universal anti-air. Very large coverage, but also very slow for a 6A, making it a great anti-air callout from midrange, but less effective as a "get off me" tool, and very dangerous to whiff. | |||
}} | |||
}} | |||
====== <font style="visibility:hidden; display:none;" size="0">3C</font> ====== | |||
{{MoveData | |||
|image=TFH_Stronghoof_3C.png | |||
|hitbox=TFH_Stronghoof_3C_hb.png | |||
|caption= | |||
|name={{clr|14|3C}} | |||
|data= | |||
{{AttackData-TFH | |||
|damage=130 | |||
|guard=Mid | |||
|properties=Jump-Cancellable on Hit | |||
|startup=15 | |||
|active=5 | |||
|recovery=38 | |||
|hitstop=15 | |||
|hitstun=26 (pre-JDmax)<br>24 (post-JDmax) | |||
|advHit=-16 | |||
|blockstop=15 | |||
|blockstun=17 | |||
|advBlock={{clr|14|-25}} | |||
|firstJD=-70 | |||
|airFirstJD=-45 | |||
|baseJD=30 | |||
|airBaseJD=65 | |||
|JDG=0.83 | |||
|description= Universal launcher. Has a lot more range than your average {{clr|14|3C}}, and moves Stronghoof forward a great deal, allowing for easier pick-ups. And in typical {{clr|14|3C}} fashion, is insanely minus on block. | |||
}} | |||
}} | |||
===Throws=== | |||
---- | |||
====== <font style="visibility:hidden; display:none;" size="0">Forward Throw</font> ====== | |||
{{MoveData | |||
|image=TFH_Stronghoof_FT.png | |||
|hitbox=TFH_Stronghoof_T_hb.png | |||
|caption= | |||
|name=Forward Throw | |||
|input= {{clr|13|B}}+{{clr|14|C}} / {{clr|13|6B}}+{{clr|14|C}} | |||
|data= | |||
{{AttackData-TFH | |||
|damage=200, 300 | |||
|guard=Throw | |||
|properties=Hard Knockdown | |||
|startup=6 | |||
|active=3 | |||
|recovery=23 | |||
|hitstop=- | |||
|hitstun=- | |||
|advHit=+3 (HKD) | |||
|blockstop=- | |||
|blockstun=- | |||
|advBlock=- | |||
|firstJD=50 | |||
|baseJD=50 | |||
|JDG=- | |||
|description=Can go into a full combo with 8[D] or Vetr 236A/B. | |||
}} | |||
}} | |||
====== <font style="visibility:hidden; display:none;" size="0">Back Throw</font> ====== | |||
{{MoveData | |||
|image=TFH_Stronghoof_BT.png | |||
|hitbox=TFH_Stronghoof_T_hb.png | |||
|caption= | |||
|name=Back Throw | |||
|input={{clr|13|4B}}+{{clr|14|C}} | |||
|data= | |||
{{AttackData-TFH | |||
|damage=200, 300 | |||
|guard=Throw | |||
|properties=Hard Knockdown | |||
|startup=6 | |||
|active=3 | |||
|recovery=23 | |||
|hitstop=- | |||
|hitstun=- | |||
|advHit=+3 (HKD) | |||
|blockstop=- | |||
|blockstun=- | |||
|advBlock=- | |||
|firstJD=50 | |||
|baseJD=50 | |||
|JDG=- | |||
|description=Can go into a full combo with 8[D] or Vetr 236A/B. | |||
}} | |||
}} | |||
====== <font style="visibility:hidden; display:none;" size="0">Air Throw</font> ====== | |||
{{MoveData | |||
|image=TFH_Stronghoof_AT.png | |||
|hitbox=TFH_Stronghoof_AT_hb.png | |||
|caption= | |||
|name=Air Throw | |||
|input= {{clr|13|j.B}}+{{clr|14|C}} | |||
|data= | |||
{{AttackData-TFH | |||
|damage=75, 75 | |||
|guard=Throw | |||
|properties=Hard Knockdown | |||
|startup=8 | |||
|active=3 | |||
|recovery=9 | |||
|hitstop=- | |||
|hitstun=- | |||
|advHit=+24 ~ +35 (HKD) | |||
|blockstop=- | |||
|blockstun=- | |||
|advBlock=- | |||
|firstJD=0 | |||
|baseJD=0 | |||
|JDG=- | |||
|description=Can go into a full combo with 8[D] or Vetr 236A/B. | |||
}} | }} | ||
}} | }} | ||
===Special Moves=== | ===Special Moves=== | ||
====== <font style="visibility:hidden" size="0"> | ---- | ||
====== <font style="visibility:hidden; display:none;" size="0">.</font> ====== | |||
{{MoveData | {{MoveData | ||
|image=TFH_Stronghoof_236A.png | |image=TFH_Stronghoof_236A.png | ||
|caption=Warhammer | |hitbox=TFH_Stronghoof_236A_hb.png | ||
|caption={{clr|12|Warhammer}} | |||
|image2=TFH_Stronghoof_236B.png | |image2=TFH_Stronghoof_236B.png | ||
|caption2=Battleaxe | |hitbox2=TFH_Stronghoof_236B_hb.png | ||
|caption2={{clr|13|Battleaxe}} | |||
|image3=TFH_Stronghoof_236C.png | |image3=TFH_Stronghoof_236C.png | ||
| | |hitbox3=TFH_Stronghoof_236C_hb_1.png | ||
|hitbox4=TFH_Stronghoof_236C_hb_2.png | |||
|caption4={{clr|14|Shield}} | |||
|name=Arsenal | |name=Arsenal | ||
|input= | |input=236{{clr|12|A/}}{{clr|13|B}}/{{clr|14|C}} | ||
|data= | |data= | ||
{{AttackData-TFH | {{AttackData-TFH | ||
|version=A | |version=A | ||
|damage= | |damage=120<br>(150 Chip) | ||
|guard= | |guard=Mid | ||
|startup= | |properties=Wallbounce | ||
|active= | |startup=22 | ||
|recovery= | |active=6 | ||
|advHit= | |recovery=22 | ||
|advBlock=-20 | |hitstop=20 | ||
| | |hitstun=Until Knockdown | ||
| | |advHit=Wallbounce | ||
|description= | |blockstop=20 | ||
|blockstun=7 | |||
|advBlock={{clr|14|-20}} | |||
|firstJD=120 | |||
|baseJD=120 | |||
|JDG=0.83 | |||
|description=Sets up Vetr's 236A, making it a good combo ender. | |||
The weapon will not be set up for future use if Stronghoof is hit during recovery. This also applies to 236B and 236C. | |||
}} | }} | ||
{{AttackData-TFH | {{AttackData-TFH | ||
|header=no | |header=no | ||
|version=B | |version=B | ||
|damage= | |damage=200<br>(150 Chip) | ||
|guard= | |guard=High | ||
|startup= | |properties=Bounce | ||
|active= | |startup=28 | ||
|recovery= | |active=7 | ||
|advHit= | |recovery=24 | ||
|advBlock=-21 | |hitstop=10 | ||
| | |hitstun=Varies | ||
| | |advHit=Bounce | ||
|description= | |blockstop=10 | ||
|blockstun=9 | |||
|advBlock={{clr|14|-21}} | |||
|firstJD=160 | |||
|baseJD=160 | |||
|JDG=0.95 | |||
|description=Slow overhead, that can be made plus with Vetr 236A or 5D. Breaks ice slick, creating 4-8 ice shards. The shards can interrupt the groundbounce and prevent it from being used up if the opponent is sufficiently far off the ground when hit. | |||
Note that despite shattering slick, {{clr|13|236B}} is not made safe by the shards, as its blockstun is so short that the opponent can crouch before the shards become active and avoid them entirely. | |||
}} | }} | ||
{{AttackData-TFH | {{AttackData-TFH | ||
|header=no | |header=no | ||
|version=C | |version=C | ||
|damage= | |damage=100, 270<br>(150, 180 Chip) | ||
|guard= | |guard=Mid | ||
|startup= | |properties=Tumble<br>High Autoguard (9-66) | ||
|active= | |startup=15 | ||
|recovery= | |active=28 (20) 4 | ||
|advHit= | |recovery=32 | ||
|advBlock=-23 | |hitstop=8, 16 | ||
| | |hitstun=48, Until Knockdown | ||
| | |advHit=Tumble | ||
|description= | |blockstop=8, 16 | ||
|blockstun=12, 12 | |||
|advBlock={{clr|14|-23}} | |||
|firstJD=70, 100 | |||
|baseJD=70, 100 | |||
|JDG=0.97 [x2] | |||
|description=Will autoblock mids and overheads, allowing it to be used in neutral as a high-risk callout. Great combo piece due to its massive damage and setting up a followup Vetr 236C. | |||
}} | }} | ||
}} | }} | ||
====== <font style="visibility:hidden; display:none;" size="0">Special Name 1</font> ====== | |||
{{MoveData | {{MoveData | ||
|image=TFH_Stronghoof_214X.png | |image=TFH_Stronghoof_214X.png | ||
|hitbox=TFH_Stronghoof_214X_hb.png | |||
|caption= | |caption= | ||
|name=Hoofstrong Hoist | |name=Hoofstrong Hoist | ||
| Line 342: | Line 594: | ||
{{AttackData-TFH | {{AttackData-TFH | ||
|version= | |version= | ||
|damage= | |damage=100 | ||
|guard= | |guard=Command Grab | ||
|startup= | |properties=Damage Scaled to 80% | ||
|active= | |startup=21 | ||
|recovery= | |active=2 | ||
|advHit= | |recovery=48 | ||
|advBlock= | |hitstop=- | ||
| | |hitstun=Until Knockdown | ||
| | |advHit=SKD | ||
|description= | |blockstop=- | ||
|blockstun=- | |||
|advBlock=N/A | |||
|firstJD=-150 | |||
|baseJD=-150 | |||
|JDG=- | |||
|description=Fast command grab, great for mixups. Reduces a lot of JD when it hits, and gives a large amount of meter. Automatically frametraps from {{clr|13|5B}}. Also shares a very similar range with {{clr|14|2C}}, which can be delayed slightly to catch opponents trying to fuzzy jump out of a hoist. | |||
Hoist will not connect on the normally strike-invulnerable but throw-vulnerable portion of techrolls. | |||
If Hoist is interrupted by Vetr's {{clr|15|5[D]}} before the launch, the usual damage scaling will not be applied, and the next hit will receive first-hit bonus damage. | |||
}} | }} | ||
}} | }} | ||
====== <font style="visibility:hidden; display:none;" size="0">Special Name 1</font> ====== | |||
{{MoveData | {{MoveData | ||
|image=TFH_Stronghoof_22X.png | |image=TFH_Stronghoof_22X.png | ||
|hitbox=TFH_Stronghoof_22X_hb.png | |||
|caption= | |caption= | ||
|name=Ice Crusher | |name=Ice Crusher | ||
| Line 364: | Line 627: | ||
{{AttackData-TFH | {{AttackData-TFH | ||
|version= | |version= | ||
|damage= | |damage=200 | ||
|guard= | |guard=Mid | ||
|startup= | |properties=Armor Break<br>Hard Knockdown | ||
|active= | |startup=20 | ||
|recovery= | |active=3 | ||
|advHit= | |recovery=30 | ||
|advBlock= | |hitstop=12 | ||
| | |hitstun=Until Knockdown | ||
| | |advHit=+40 (HKD) | ||
|description= | |blockstop=12 | ||
|blockstun=29 | |||
|advBlock={{clr|15|-3}} | |||
|firstJD=50 | |||
|baseJD=50 | |||
|JDG=0.97 | |||
|description=Hard knockdown tool, destroys weapons and ice slick when not cancelled. Unlike most other specials, does not deal any chip damage on block. | |||
Somewhat counter-intuitively, doing Ice Crusher with slick on the ground can actually make it unsafe on block, due to the very short blockstun from ice shards. | |||
}} | }} | ||
}} | }} | ||
===Super=== | ===Magic=== | ||
---- | |||
<!--Insert Magic System information--> | |||
Stronghoof mostly uses magic via the assistance of his winter sprite partner, Vetr, who can act completely independently of whatever Stronghoof himself is doing, outside of Super. Vetr's Arsenal-related abilities have a short recovery period during which he can't perform another until he returns to Stronghoof's side - so he cannot, for example, use Battleaxe and then immediately combo into Warhammer, if both are already planted*. | |||
Stronghoof passively regenerates 1 bar of magic about every 5.5 seconds. Magic can also be restored by successfully landing Arsenal attacks, either with Stronghoof or with Vetr's followups. Stronghoof's attacks restore about 1/5 of a magic bar per hit, while Vetr's restore about 1/3. Using Vetr's abilities will however cause a short delay before passive regen begins again. | |||
During certain moves, Vetr also has his own separate hurtbox, and if hit by an attack when he is vulnerable, he will be knocked to the ground and disappear for approximately 3 seconds, during which Stronghoof will be unable to use Vetr's abilities. | |||
<nowiki>*</nowiki><font size=1>There is a bug where Vetr can be activated twice at the same time, specifically with Shield and either one of Warhammer and Battleaxe. It's difficult to set up on purpose and explain exactly why it happens, but if you see two Vetrs using Arsenal at the same time, this is probably what happened. It doesn't have much practical use and is mostly just a waste of magic.</font> | |||
====== <font style="visibility:hidden; display:none;" size="0">5D</font> ====== | |||
{{MoveData | {{MoveData | ||
|image= | |image=TFH_Stronghoof_22D.png | ||
|hitbox=TFH_Stronghoof_22D_hb.png | |||
|hitbox2=TFH_Stronghoof_22D_Shards_hb.png | |||
|caption= | |caption= | ||
|name= | |name=Ice Slick | ||
|input= | |input={{clr|15|22D}} | ||
|data= | |data= | ||
{{AttackData-TFH | {{AttackData-TFH | ||
|damage= | |damage=80 per Ice Shard<br>(30 Chip per Ice Shard) | ||
|guard= | |guard=Mid | ||
|startup= | |properties=Projectile | ||
|active= | |startup=13 | ||
|recovery= | |active=''~900'' | ||
| | |recovery=23-33 | ||
| | |hitstop=''21'' | ||
| | |hitstun=''14'' | ||
| | |advHit=''+35'' | ||
| | |blockstop=''5'' | ||
|blockstun=''7'' | |||
|advBlock=''+12'' | |||
|firstJD=10 per Ice Shard | |||
|baseJD=10 per Ice Shard | |||
| | |JDG=0.97 | ||
| | |description=The longer you hold, the larger the ice slick placed. 4-8 ice shards will appear on Ice Slick breaking, depending on its size. Costs 1 magic regardless of slick size. | ||
If Stronghoof is hit during startup, no slick will be created. But it will still remain on stage if he is hit during recovery. | |||
Summoned ice shards become active starting with the middle and moving outward, at the earliest the 14th frame after slick was shattered. By this time, they have traveled above the height of a standard crouching hurtbox. | |||
| | |||
| | [Likely a Bug] When Ice Slick is used to cancel out of another move, a subsequent 22X or {{clr|13|236B}} will shatter slick and create ice shards regardless of where the slick was actually placed on the stage. | ||
| | |||
}} | }} | ||
}} | }} | ||
====== <font style="visibility:hidden; display:none;" size="0">5D</font> ====== | |||
====== <font style="visibility:hidden" size="0"> | |||
{{MoveData | {{MoveData | ||
|image= | |image=TFH_Stronghoof_Vetr236A.png | ||
|caption= | |hitbox=TFH_Stronghoof_Vetr236A_hb.png | ||
|name= | |caption=Warhammer | ||
|input= B | |image2=TFH_Stronghoof_Vetr236B.png | ||
|hitbox2=TFH_Stronghoof_Vetr236B_hb_1.png | |||
|hitbox3=TFH_Stronghoof_Vetr236B_hb_2.png | |||
|caption3=Battleaxe | |||
|image4=TFH_Stronghoof_Vetr236C.png | |||
|hitbox4=TFH_Stronghoof_Vetr236C_hb.png | |||
|caption4=Shield | |||
|name=Arsenal (Followup Strike) | |||
|input=236{{clr|12|A}}/{{clr|13|B}}/{{clr|14|C}} | |||
|data= | |data= | ||
{{ | {{AttackData2-TFH | ||
|damage= | |version=A | ||
|guard= | |damage=120<br>(150 Chip) | ||
|startup= | |guard=Mid | ||
|active= | |properties=Projectile | ||
|recovery= | |startup=19 | ||
|advHit= | |active=10 | ||
|advBlock= | |recovery=92 | ||
| | |hitstop=''21'' | ||
| | |hitstun=''30'' | ||
|description= | |advHit=''+51'' | ||
|blockstop=''21'' | |||
|blockstun=''15'' | |||
|advBlock=''+36'' | |||
|firstJD=120 | |||
|baseJD=120 | |||
|JDG=0.97 | |||
|description=Very fast, very large poke. Good combo fodder, great neutral tool. Unlike other projectiles or puppet attacks, Stronghoof's position is not affected when this move is pushblocked. Costs 1 bar of magic to use. | |||
}} | }} | ||
{{AttackData2-TFH | |||
=== | |header=no | ||
|version=B | |||
| | |damage=90, 120<br>(150 Chip) | ||
| | |guard=Mid | ||
| | |properties=Projectile | ||
| | |startup=12 | ||
| | |active=6 | ||
|recovery=68 | |||
| | |hitstop=''21'' | ||
| | |hitstun=''55'' | ||
| | |advHit=''+76'' | ||
| | |blockstop=''21'' | ||
| | |blockstun=''15'' | ||
| | |advBlock=''+36'' | ||
| | |firstJD=80 | ||
| | |baseJD=80 | ||
| | |JDG=0.97 | ||
|description= | |description=Extremely large hitboxes that cover around, above, and behind the axe. Useful for keeping the opponent in blockstun after whiffing 214X, or them blocking 236A. Also immune to being pushblocked like v236A. Costs 1 bar of magic to use. | ||
}} | }} | ||
{{AttackData2-TFH | |||
=== | |header=no | ||
|version=C | |||
| | |damage=N/A | ||
| | |guard=N/A | ||
| | |properties=Autoguard | ||
| | |startup=24 | ||
| | |active=174 | ||
|recovery=56 | |||
| | |hitstop=- | ||
| | |hitstun=- | ||
| | |advHit=- | ||
| | |blockstop=- | ||
| | |blockstun=- | ||
| | |advBlock=- | ||
| | |firstJD=- | ||
| | |baseJD=- | ||
| | |JDG=- | ||
|description= | |description=Will guard Stronghoof from any strikes (not throws or command grabs) which come into contact with it, including those that would normally cross up. Costs 1 bar of magic to use. | ||
}} | }} | ||
}} | }} | ||
====== <font style="visibility:hidden; display:none;" size="0">5D</font> ====== | |||
====== <font style="visibility:hidden" size="0">5D</font> ====== | |||
{{MoveData | {{MoveData | ||
|image=TFH_Stronghoof_5D.png | |image=TFH_Stronghoof_5D.png | ||
|hitbox=TFH_Stronghoof_5D_hb.png | |||
|caption=Uncharged | |caption=Uncharged | ||
|image2=TFH_Stronghoof_5D_Hold.png | |image2=TFH_Stronghoof_5D_Hold.png | ||
|hitbox2=TFH_Stronghoof_5Dcharged_hb.png | |||
|caption2=Fully Charged | |caption2=Fully Charged | ||
|name=Lariat | |name=Lariat | ||
|input=5D | |input={{clr|15|5D}} | ||
|data= | |data= | ||
{{AttackData-TFH | {{AttackData-TFH | ||
|version=5D | |version=5D | ||
|damage= | |damage=200 | ||
|guard= | |guard=Mid | ||
|startup= | |properties=Projectile | ||
|active= | |startup=23 | ||
|recovery= | |active=14 | ||
|advHit= | |recovery=16 | ||
|advBlock= | |hitstop=''15'' | ||
| | |hitstun=''28'' | ||
| | |airHitstun=''34'' | ||
|description= | |advHit=''+43'' | ||
|airAdvHit=''+49'' | |||
|blockstop=''15'' | |||
|blockstun=''25'' | |||
|airBlockstun=''37'' | |||
|advBlock=''+40'' | |||
|airAdvBlock=''+52'' | |||
|firstJD=65 | |||
|baseJD=65 | |||
|JDG=1 | |||
|description=Whiffs on crouchers. Costs 2 magic. Does not deal chip damage on block. | |||
}} | }} | ||
{{AttackData-TFH | {{AttackData-TFH | ||
|version=5[D] | |version=5[D] | ||
|damage= | |damage=80, 60 | ||
|guard= | |guard=Mid | ||
|startup= | |properties=Projectile<br>Stagger | ||
|active= | |startup=45 | ||
|recovery= | |active=64 | ||
|advHit= | |recovery=42 | ||
|advBlock= | |hitstop=- | ||
| | |hitstun=Stagger | ||
| | |advHit=''+109 (Stagger)'' | ||
|description= | |blockstop=''1'' | ||
|blockstun=''14'' | |||
|advBlock=''+15'' | |||
|firstJD=0 | |||
|baseJD=0 | |||
|JDG=1 | |||
|description=Staggers on hit. Whiffs on crouchers. Costs 2 magic. Does not deal chip damage on block. | |||
}} | }} | ||
}} | }} | ||
====== <font style="visibility:hidden; display:none;" size="0">.</font> ====== | |||
{{MoveData | {{MoveData | ||
|image= | |image=TFH_Stronghoof_6D.png | ||
| | |hitbox=TFH_Stronghoof_6D_hb.png | ||
|caption= | |||
| | |name=Winter Wind | ||
| | |input={{clr|15|6/2/4/8D}} | ||
| | |||
| | |||
| | |||
|data= | |data= | ||
{{AttackData-TFH | {{AttackData-TFH | ||
|damage= | |damage= | ||
|guard= | |guard= | ||
|startup= | |startup= | ||
|active= | |active= | ||
|recovery= | |recovery=≥31 | ||
|advHit= | |hitstop=- | ||
|advBlock= | |hitstun=- | ||
| | |advHit=- | ||
| | |blockstop=- | ||
|description= | |blockstun=- | ||
|advBlock=- | |||
|firstJD=- | |||
|baseJD=~1.25 JD / frame | |||
|JDG=1 | |||
|description=Pushes the opponent in the direction used. The maximum velocity of its effect is relatively low, but the opponent accelerates/decelerates fairly quickly, so it's most efficiently used in short bursts. Costs 1 bar of magic for about every 30 frames used. Also won't activate if initiated when Stronghoof has less than 1 full bar of magic. | |||
Using wind will also disable passive magic regeneration for about 3 seconds. | |||
The exact mechanics by which Winter Wind operates are a bit complex and different depending on which direction of wind is used. | |||
*Horizontal wind ({{clr|15|4D and 6D}}) will immediately begin extending the opponent's hitstun (if they are in it) upon activation and continue while held. They will be given additional horizontal momentum in the chosen direction. If they are in a juggle state, they will also get a little of bit of extra momentum in whatever direction they were traveling already. So, when affected by horizontal wind, an opponent that was rising will stay airborne for slightly longer, while an opponent that was falling will fall slightly faster. JD also begins being added immediately on activation. | |||
*Vertical wind ({{clr|15|8D and 2D}}) will also extend the opponent's hitstun while held, but it has a momentary delay before this effect actually occurs (about 15-20 frames). If the opponent is airborne, they will be given additional upward or downward momentum while maintaining any other momentum they had. The movement effect doesn't seem to be as delayed in the same way that the extended hitstun is. These effects combined can cause a poorly timed burst of {{clr|15|8D}} to allow an opponent an opportunity to air tech out of hitstun where they would have otherwise hit the ground. On the upside, JD only starts to be added after the delay, so a short burst of {{clr|15|8D}} can be used for juggling purposes without adding any extra JD. | |||
*For all directions of wind, these "adding" effects (both to hitstun and momentum) are the strongest during the first frames of activation and become weaker the longer wind is held. The effects also have a hard maximum regardless of how long wind is held - an opponent can only be given so much speed before hitting "terminal velocity," and only so much additional hitstun before they would still recover in the same time. | |||
}} | }} | ||
}} | |||
===Super=== | |||
---- | |||
====Level 1==== | |||
{{MoveData | |||
|image=FHT_Stronghoof_Super.png | |||
|hitbox=TFH_Stronghoof_236XX_hb.png | |||
|caption= | |||
|name=Hailstorm | |||
|input=236XX | |||
|data= | |||
{{AttackData-TFH | {{AttackData-TFH | ||
| | |damage=200, 100, 80, 60, 80, 60, 80, 60, 80, 60, 200, 400 | ||
| | |guard=Mid | ||
| | |properties=Invulnerable (1-6)<br>Forced HKD<br>Projectile | ||
| | |startup=6+2 | ||
| | |active=''28'' | ||
| | |recovery=≥77 | ||
| | |hitstop=- | ||
|advHit= | |hitstun=- | ||
|advBlock= | |advHit=+19 (HKD) | ||
| | |blockstop=''20'' | ||
| | |blockstun=''11'' | ||
|description= | |advBlock=''{{clr|14|-46}}'' | ||
|firstJD=0 | |||
|baseJD=0 | |||
|JDG=1 | |||
|description=Has invuln before the superflash, but none after. Unlike most supers, the first hit doesn't break armor, so Stronghoof is still vulnerable if an opponent armors through it and hits him before the second hit connects. It also deals no chip damage on block. | |||
Vetr's forward rush has no hurtbox, so he will go straight through normal hitboxes - however, his hitbox will get eaten by any projectile or puppet with a hurtbox between him and the target, ending the attack and leaving Stronghoof standing idly and completely defenseless. There is also travel time to consider - the move is active starting on frame 8, but it can take up to as long as 26 frames to actually reach the opponent if they're at fullscreen distance. | |||
For a multitude of aforementioned reasons, it's probably not wise to use this move on wakeup or in neutral unless you're really desperate. | |||
}} | |||
}} | |||
====Level 2 (Follow Up)==== | |||
{{MoveData | |||
|image=TFH_Stronghoof_SuperFollowUp.png | |||
|caption= | |||
|name=Ice Fjord | |||
|input=214XX | |||
|data= | |||
{{AttackData-TFH | {{AttackData-TFH | ||
| | |damage=- | ||
| | |guard=- | ||
| | |startup=- | ||
| | |active=- | ||
| | |recovery=59 | ||
| | |hitstop=180 | ||
| | |hitstun=80 | ||
|advHit= | |advHit=+260 | ||
|advBlock= | |blockstop=- | ||
| | |blockstun=- | ||
| | |advBlock=- | ||
|description= | |firstJD=- | ||
|baseJD=- | |||
|JDG=- | |||
|description=Summons ice slick over the entire stage, which can be shattered repeatedly without disappearing until the timer runs out. | |||
Most commonly used to tack on extra damage after Level 1, which can be done most efficiently by looping 22X and {{clr|15|4D}} or {{clr|15|8D}} at high JD. | |||
}} | }} | ||
}} | }} | ||
====Level 3==== | |||
{{MoveData | {{MoveData | ||
|image= | |image=Stronghoof_lvl3_1.png | ||
|hitbox=TFH_Stronghoof_63214XX_hb.png | |||
|caption= | |caption= | ||
|name= | |image2=Stronghoof_lvl3_2.png | ||
|input= | |caption1= | ||
|image3=Stronghoof_lvl3_3.png | |||
|name=Yggdrasil | |||
|input=63214XX | |||
|data= | |data= | ||
{{AttackData-TFH | {{AttackData-TFH | ||
|damage= | |damage=400, 1700<br>(60 Chip) | ||
|guard= | |guard=Low | ||
|startup= | |properties=Invulnerable (1-38)<br>Forced HKD | ||
|active= | |startup=8+7 | ||
|recovery= | |active=10 | ||
|advHit= | |recovery=64 | ||
|advBlock= | |hitstop=- | ||
| | |hitstun=- | ||
| | |advHit=0 (HKD) | ||
|description= | |blockstop=12 | ||
|blockstun=27 | |||
|advBlock={{clr|14|-46}} | |||
|firstJD=0 | |||
|baseJD=0 | |||
|JDG=1 | |||
|description=Fully invulnerable throughout active frames. This is Stronghoof's only truly legitimate reversal option, and comes at a hefty price. | |||
}} | }} | ||
}} | }} | ||
====Cross-Canter==== | |||
{{MoveData | |||
|image=TFH_Stronghoof_CC.png | |||
|hitbox= | |||
|name=Cross-Canter | |||
|input=6XX (While Blocking) | |||
|data= | |||
{{AttackData-TFH | |||
|damage=80 (Recoverable Health) | |||
|guard=Mid | |||
|properties=Strike-Invulnerable (f1-16)<br>Autoguard (f17-25) | |||
|startup=23 | |||
|active=9 | |||
|recovery=54 | |||
|hitstop=- | |||
|hitstun=- | |||
|advHit=0 (HKD) | |||
|blockstop=5 | |||
|blockstun=13 | |||
|advBlock={{clr|14|-49}} | |||
|firstJD=0 | |||
|baseJD=0 | |||
|JDG=1 | |||
|description=In exchange for 1/2 a bar of super meter, cross-canter interrupts your blockstun with a strike-invulnerable counterattack. Leads to a hard knockdown on hit with no frame advantage, resetting both opponents to neutral at a medium distance apart. The user will also be locked out of gaining super meter for 5 seconds, stacking up to 10 seconds if cross-canter is used repeatedly. | |||
This can be a strong option to escape pressure, but don't overdo it - it can be thrown during startup and is extremely punishable on block or whiff. | |||
}} | |||
}} | |||
===Taunt=== | |||
---- | |||
{{MoveData | {{MoveData | ||
|image= | |image=TFH_Stronghoof_Taunt.png | ||
|caption= | |caption=''You're nothing more than a marshmallow.'' | ||
|name= | |name=Taunt | ||
|input= | |input=2222222 | ||
|data= | |data= | ||
{{AttackData-TFH | {{AttackData-TFH | ||
|damage= | |damage=0 | ||
|guard= | |guard=- | ||
|startup= | |properties=Cancellable | ||
|active= | |startup=0 | ||
|recovery= | |active=160 | ||
|advHit= | |recovery=0 | ||
|advBlock= | |hitstop=- | ||
| | |hitstun=- | ||
| | |advHit=- | ||
|description= | |blockstop=- | ||
|blockstun=- | |||
|advBlock=- | |||
|firstJD=- | |||
|baseJD=- | |||
|JDG=- | |||
|description=Uniquely, Stronghoof's taunt actually does something other than irritating your opponent. For the duration of the taunt, Vetr will harmlessly absorb any hitbox that makes contact with his hurtbox, as long as it hits him before Stronghoof. This applies mostly to projectiles, but also some attacks that increase in range as they come out. | |||
}} | }} | ||
}} | }} | ||
==Colors== | ==Colors== | ||
<!--Check file prefix and add the color name in the text parameter.--> | |||
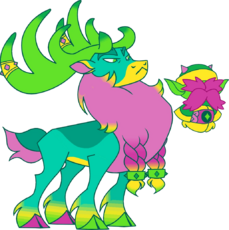
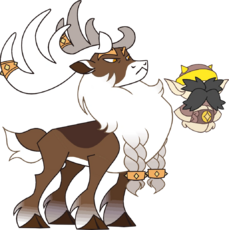
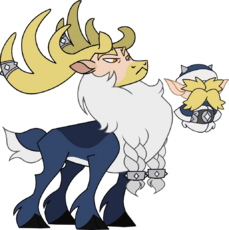
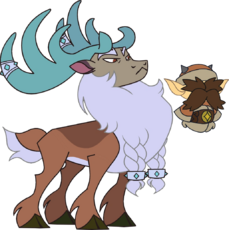
{{ColorGallery | filePrefix=TFH-Stronghoof-| colors= | |||
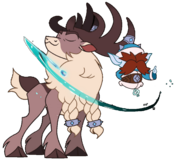
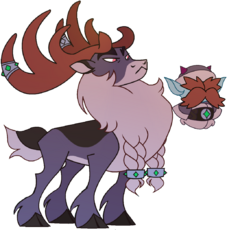
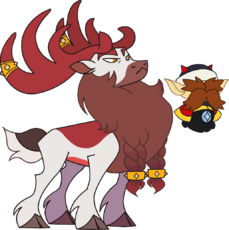
{{ColorGallery/Color|1| text= Stronghoof ( {{clr|12|A}} ) }} | |||
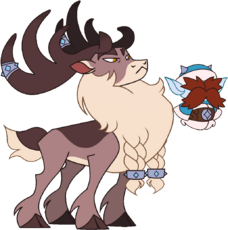
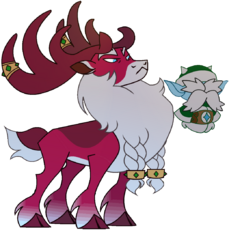
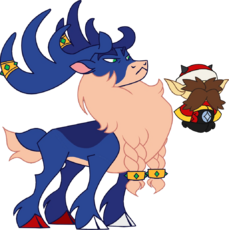
{{ColorGallery/Color|2| text= Old Buck Stronghoof ( {{clr|13|B}} ) }} | |||
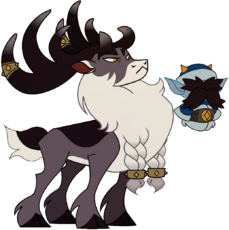
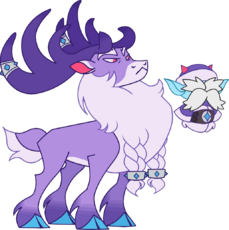
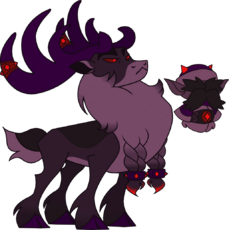
{{ColorGallery/Color|3| text= Shield Maiden ( {{clr|14|C}} ) }} | |||
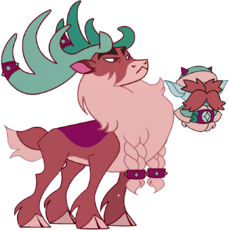
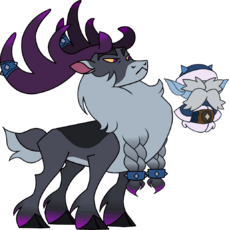
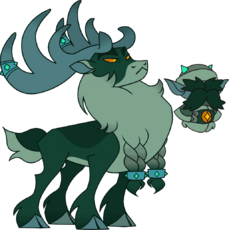
{{ColorGallery/Color|4| text= Matchmaker ( {{clr|15|D}} ) }} | |||
{{ColorGallery/Color|5| text= The Big Guy (TU) }} | |||
{{ColorGallery/Color|6| text= Violaceous (VC) }} | |||
{{ColorGallery/Color|7| text= Knight of Rot ( {{clr|12|A}}+{{clr|13|B}}+{{clr|14|C}} ) }} | |||
{{ColorGallery/Color|8| text= Beautiful Style ( {{clr|15|D}}+TU+VC) }} | |||
{{ColorGallery/Color|9| text= Winter Buck ( {{clr|12|A}}+{{clr|15|D}} ) }} | |||
{{ColorGallery/Color|10| text= Alchemist ( {{clr|13|B}}+{{clr|15|D}} ) }} | |||
{{ColorGallery/Color|11| text= Forest God ( {{clr|12|A}}+{{clr|13|B}}+{{clr|15|D}} ) }} | |||
{{ColorGallery/Color|12| text= Warrior God ( {{clr|14|C}}+{{clr|15|D}} ) }} | |||
{{ColorGallery/Color|13| text= Strongest Dad Alive ( {{clr|12|A}}+{{clr|14|C}}+{{clr|15|D}} ) }} | |||
{{ColorGallery/Color|14| text= RGNRK ( {{clr|13|B}}+{{clr|14|C}}+{{clr|15|D}} ) }} | |||
{{ColorGallery/Color|15| text= Helheim ( {{clr|13|B}}+{{clr|14|C}} ) }} | |||
{{ColorGallery/Color|16| text= Jouenkobu (?) }} | |||
}} | |||
==Links== | ==Links== | ||
{{TFH}} | {{TFH}} | ||
Latest revision as of 16:54, 20 June 2024
| Stronghoof | |
|---|---|
| Species: | Reindeer |
| Playstyle: | Mid-Range, Setplay |
| HP: | 5280 |
| Meter Size: | 360 |
| Movement Options: | Slide |
| Voice Actor: | Chris Sabat |
| Stage(s): | Reine Ramparts |
Profile
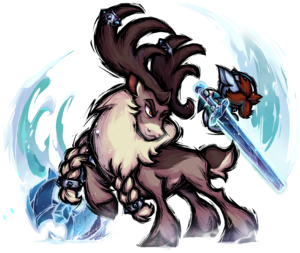
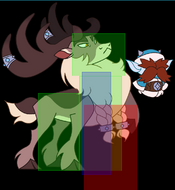
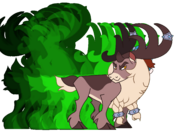
Hoofstrong Legacy The Hoofstrong family is one of the oldest, proudest legacies in Reine City, renowned for their heroic history and steadfast protection of the capital. The name “Stronghoof” is a title that replaces one’s given name. It’s granted to a hero who has achieved many great victories for Reine City against pirates, smugglers, ne’er-do-wells, and rival nations such as Huoshan.
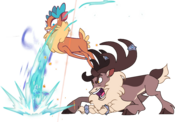
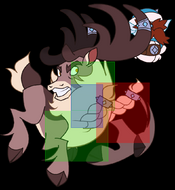
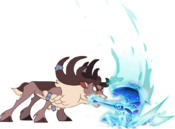
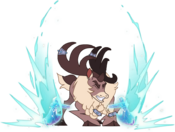
Stronghoof and his Winter Sprite Vetr fight alongside one another, bonded by a powerful sense of brotherhood. Their combined magic and might command wind, ice, and an arsenal of conjured weaponry to take down all who dare to oppose them.
As Jarl of Reine City, Stronghoof is both a warrior and statesman, responsible for overcoming Reine City’s toughest obstacles, both home and abroad. With the current predator crisis, that might include keeping the other Champions of Foenum occupied while his daughter Velvet (the true Champion, of course) searches for the Prophet’s Key.
Gameplay
| Strengths | Weaknesses |
|---|---|
|
|
Gameplan
Movement
Walk: Stronghoof has the slowest walk speed in the game, the same both forward and backward.
Dashes: Stronghoof's forward dash is fairly normal. His backdash travels the furthest out of any, but also lasts much longer than usual. Unlike Texas's, this extended backdash does not have additional invulnerability frames either, so it can leave him quite vulnerable.
Slide: Like Velvet, Stronghoof can slide across the floor after a dash by holding down. Stronghoof can block during this slide, even while sliding forward.
Slick: While Stronghoof is on an ice slick, he can move forward and backward a short distance while doing an attack, giving some moves unexpectedly longer ranges.
Slick Slide: Dashing over an ice slick and holding the direction allows Stronghoof to do a goofy-looking glide across the ice.
Jump: Stronghoof has no special kinds of jumps, and is tied with Velvet for the shortest standard jump arc.
Command List
Normal Moves
Standing Normals
5A
5A
|
|
|---|---|
Toggle Hitboxes Toggle Hitboxes
|
5B
5B
|
|
|---|---|
Toggle Hitboxes Toggle Hitboxes
|
5C
5C
|
|
|---|---|
Toggle Hitboxes Toggle Hitboxes
|
Crouching Normals
2A
2A
|
|
|---|---|
Toggle Hitboxes Toggle Hitboxes
|
2B
2B
|
|
|---|---|
Toggle Hitboxes Toggle Hitboxes
|
2C
2C
|
|
|---|---|
Toggle Hitboxes Toggle Hitboxes
|
Jumping Normals
j.A
j.A
|
|
|---|---|
Toggle Hitboxes Toggle Hitboxes
|
j.B
j.B
|
|
|---|---|
Toggle Hitboxes Toggle Hitboxes
|
j.C
j.C
|
|
|---|---|
Toggle Hitboxes Toggle Hitboxes
|
Command Normals
6A
6A
|
|
|---|---|
Toggle Hitboxes Toggle Hitboxes
|
3C
3C
|
|
|---|---|
Toggle Hitboxes Toggle Hitboxes
|
Throws
Forward Throw
Forward Throw
B+C / 6B+C |
|
|---|---|
Toggle Hitboxes Toggle Hitboxes
|
Back Throw
Back Throw
4B+C |
|
|---|---|
Toggle Hitboxes Toggle Hitboxes
|
Air Throw
Air Throw
j.B+C |
|
|---|---|
Toggle Hitboxes Toggle Hitboxes
|
Special Moves
.
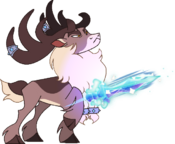
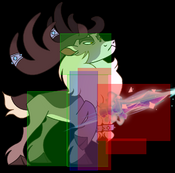
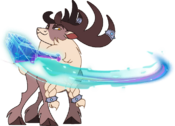
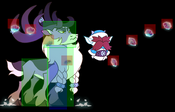
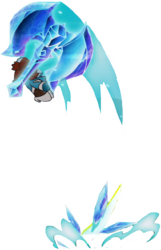
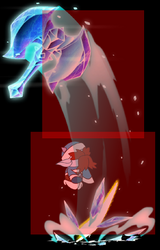
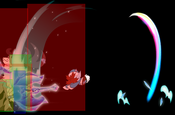
Arsenal 236A/B/C Warhammer Warhammer Battleaxe Battleaxe Shield Shield
|
|
|---|---|
Toggle Hitboxes Toggle Hitboxes
|
Special Name 1
Hoofstrong Hoist
214X |
|
|---|---|
Toggle Hitboxes Toggle Hitboxes
|
Special Name 1
Ice Crusher
22X |
|
|---|---|
Toggle Hitboxes Toggle Hitboxes
|
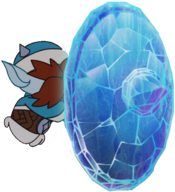
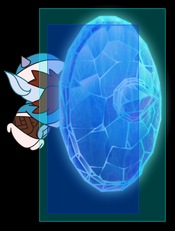
Magic
Stronghoof mostly uses magic via the assistance of his winter sprite partner, Vetr, who can act completely independently of whatever Stronghoof himself is doing, outside of Super. Vetr's Arsenal-related abilities have a short recovery period during which he can't perform another until he returns to Stronghoof's side - so he cannot, for example, use Battleaxe and then immediately combo into Warhammer, if both are already planted*.
Stronghoof passively regenerates 1 bar of magic about every 5.5 seconds. Magic can also be restored by successfully landing Arsenal attacks, either with Stronghoof or with Vetr's followups. Stronghoof's attacks restore about 1/5 of a magic bar per hit, while Vetr's restore about 1/3. Using Vetr's abilities will however cause a short delay before passive regen begins again.
During certain moves, Vetr also has his own separate hurtbox, and if hit by an attack when he is vulnerable, he will be knocked to the ground and disappear for approximately 3 seconds, during which Stronghoof will be unable to use Vetr's abilities.
*There is a bug where Vetr can be activated twice at the same time, specifically with Shield and either one of Warhammer and Battleaxe. It's difficult to set up on purpose and explain exactly why it happens, but if you see two Vetrs using Arsenal at the same time, this is probably what happened. It doesn't have much practical use and is mostly just a waste of magic.
5D
Ice Slick
22D |
|
|---|---|
Toggle Hitboxes Toggle Hitboxes
|
5D
Arsenal (Followup Strike) 236A/B/C Warhammer Warhammer Battleaxe Battleaxe Shield Shield
|
|
|---|---|
Toggle Hitboxes Toggle Hitboxes
|
5D
Lariat 5D Uncharged Uncharged Fully Charged Fully Charged
|
|
|---|---|
Toggle Hitboxes Toggle Hitboxes
|
.
Winter Wind
6/2/4/8D |
|
|---|---|
Toggle Hitboxes Toggle Hitboxes
|
Super
Level 1
Hailstorm
236XX |
|
|---|---|
Toggle Hitboxes Toggle Hitboxes
|
Level 2 (Follow Up)
Ice Fjord
214XX |
|---|
Level 3
Yggdrasil
63214XX |
|
|---|---|
Toggle Hitboxes Toggle Hitboxes
|
Cross-Canter
Cross-Canter
6XX (While Blocking) |
|---|
Taunt
Taunt 2222222 You're nothing more than a marshmallow. You're nothing more than a marshmallow.
|
|---|
