Ring of Destruction: Slam Masters II/King Rasta Mon: Difference between revisions
(Rasta info layout done, pending hitbox images and frame data past 66HP) |
m (Layout changes + now displays properly on dark mode) |
||
| Line 17: | Line 17: | ||
=== Far Standing Normals === | === Far Standing Normals === | ||
<br> | <br> | ||
{| border="1" cellspacing="0" style=" | {| border="1" cellspacing="0" style="" | ||
| colspan="6" style=" | | colspan="6" style="" | '''5LP | Far Standing Light Punch''' | ||
|- | |- | ||
| align="center" style=" | | align="center" style="" | Damage || align="center" style="" | '''?''' || align="center" rowspan="6" | 1f<br>[[File:RingDest_Rasta_5LP_1.png]] || align="center" rowspan="6" | 4f<br>[[File:RingDest_Rasta_5LP_2.png]] || align="center" rowspan="6" | 10f<br>[[File:RingDest_Rasta_5LP_3.png]] | ||
|- style=" | |- style="" | ||
| align="center" | Hit Advantage || align="center" | -1 | | align="center" | Hit Advantage || align="center" | -1 | ||
|- style=" | |- style="" | ||
| align="center" | Block Advantage || align="center" | -4 | | align="center" | Block Advantage || align="center" | -4 | ||
|- style=" | |- style="" | ||
| align="center" | Chain Cancel || align="center" | Yes | | align="center" | Chain Cancel || align="center" | Yes | ||
|- style=" | |- style="" | ||
| align="center" | Special Cancel || align="center" | Yes | | align="center" | Special Cancel || align="center" | Yes | ||
|- style=" | |- style="" | ||
| align="center" | Run Cancel || align="center" | Yes | | align="center" | Run Cancel || align="center" | Yes | ||
|- | |- | ||
| align="center" colspan="2" |Start/Active/Recovery Frames|| align="center" | 3 || align="center" style=" | | align="center" colspan="2" |Start/Active/Recovery Frames|| align="center" | 3 || align="center" style=""| '''6'''|| align="center" colspan="2" | 9 | ||
|- | |- | ||
| width="1" colspan="6" style=" | | width="1" colspan="6" style=""| | ||
A fast sideways chop with decent range. Good active frames, but unsafe unless you cancel it. | A fast sideways chop with decent range. Good active frames, but unsafe unless you cancel it. | ||
| Line 42: | Line 42: | ||
{| border="1" cellspacing="0" style=" | {| border="1" cellspacing="0" style="" | ||
| colspan="7" style=" | | colspan="7" style="" | '''5HP | Far Standing Heavy Punch''' | ||
|- | |- | ||
| align="center" style=" | | align="center" style="" | Damage || align="center" style="" | '''?''' || align="center" rowspan="6" | 1f<br>[[File:RingDest_Rasta_5HP_1.png]] || align="center" rowspan="6" | 3f<br>[[File:RingDest_Rasta_5HP_2.png]] || align="center" rowspan="6" | 9f<br>[[File:RingDest_Rasta_5HP_3.png]] || align="center" rowspan="6" | 12f<br>[[File:RingDest_Rasta_5HP_4.png]] || align="center" rowspan="6" | 24f<br>[[File:RingDest_Rasta_5HP_5.png]] | ||
|- style=" | |- style="" | ||
| align="center" | Hit Advantage || align="center" | -4 | | align="center" | Hit Advantage || align="center" | -4 | ||
|- style=" | |- style="" | ||
| align="center" | Block Advantage || align="center" | -9 | | align="center" | Block Advantage || align="center" | -9 | ||
|- style=" | |- style="" | ||
| align="center" | Chain Cancel || align="center" | No | | align="center" | Chain Cancel || align="center" | No | ||
|- style=" | |- style="" | ||
| align="center" | Special Cancel || align="center" | No | | align="center" | Special Cancel || align="center" | No | ||
|- style=" | |- style="" | ||
| align="center" | Run Cancel || align="center" | No | | align="center" | Run Cancel || align="center" | No | ||
|- | |- | ||
| align="center" colspan="2" |Start/Active/Recovery Frames|| align="center" colspan="2" | 8 || align="center" style=" | | align="center" colspan="2" |Start/Active/Recovery Frames|| align="center" colspan="2" | 8 || align="center" style=""| '''3'''|| align="center" colspan="2" | 19 | ||
|- | |- | ||
| width="1" colspan="7" style=" | | width="1" colspan="7" style=""| | ||
A downward chop with good range. Average active frames, but it's not cancelable and pretty unsafe. | A downward chop with good range. Average active frames, but it's not cancelable and pretty unsafe. | ||
| Line 65: | Line 65: | ||
{| border="1" cellspacing="0" style=" | {| border="1" cellspacing="0" style="" | ||
| colspan="7" style=" | | colspan="7" style="" | '''5LK | Far Standing Light Kick''' | ||
|- | |- | ||
| align="center" style=" | | align="center" style="" | Damage || align="center" style="" | '''?''' || align="center" rowspan="6" | 1f<br>[[File:RingDest_Rasta_5LK_1.png]] || align="center" rowspan="6" | 5f<br>[[File:RingDest_Rasta_5LK_2.png]] || align="center" rowspan="6" | 6f<br>[[File:RingDest_Rasta_5LK_3.png]] || align="center" rowspan="6" | 10f<br>[[File:RingDest_Rasta_5LK_1.png]] || align="center" rowspan="6" | 14f<br>[[File:RingDest_Rasta_5LK_5.png]] | ||
|- style=" | |- style="" | ||
| align="center" | Hit Advantage || align="center" | +1 | | align="center" | Hit Advantage || align="center" | +1 | ||
|- style=" | |- style="" | ||
| align="center" | Block Advantage || align="center" | -2 | | align="center" | Block Advantage || align="center" | -2 | ||
|- style=" | |- style="" | ||
| align="center" | Chain Cancel || align="center" | Yes | | align="center" | Chain Cancel || align="center" | Yes | ||
|- style=" | |- style="" | ||
| align="center" | Special Cancel || align="center" | Yes | | align="center" | Special Cancel || align="center" | Yes | ||
|- style=" | |- style="" | ||
| align="center" | Run Cancel || align="center" | Yes | | align="center" | Run Cancel || align="center" | Yes | ||
|- | |- | ||
| align="center" colspan="2" |Start/Active/Recovery Frames|| align="center" | 4 || align="center" style=" | | align="center" colspan="2" |Start/Active/Recovery Frames|| align="center" | 4 || align="center" style=""| '''1'''|| align="center" colspan="3" | 12 | ||
|- | |- | ||
| width="1" colspan="7" style=" | | width="1" colspan="7" style=""| | ||
An upward kick with only one active frame, so it’s not the stop sign it looks like. Also does little damage, so it's not really worth using in combos. | An upward kick with only one active frame, so it’s not the stop sign it looks like. Also does little damage, so it's not really worth using in combos. | ||
| Line 90: | Line 90: | ||
{| border="1" cellspacing="0" style=" | {| border="1" cellspacing="0" style="" | ||
| colspan="7" style=" | | colspan="7" style="" | '''5HK | Far Standing Heavy Kick''' | ||
|- | |- | ||
| align="center" style=" | | align="center" style="" | Damage || align="center" style="" | '''?''' || align="center" rowspan="6" | 1f<br>[[File:RingDest_Rasta_5LK_5.png]] || align="center" rowspan="6" | 6f<br>[[File:RingDest_Rasta_5HK_2.png]] || align="center" rowspan="6" | 8f<br>[[File:RingDest_Rasta_5HK_3.png]] || align="center" rowspan="6" | 16f<br>[[File:RingDest_Rasta_5HK_4.png]] || align="center" rowspan="6" | 21f<br>[[File:RingDest_Rasta_5LK_5.png]] | ||
|- style=" | |- style="" | ||
| align="center" | Hit Advantage || align="center" | +1 | | align="center" | Hit Advantage || align="center" | +1 | ||
|- style=" | |- style="" | ||
| align="center" | Block Advantage || align="center" | -4 | | align="center" | Block Advantage || align="center" | -4 | ||
|- style=" | |- style="" | ||
| align="center" | Chain Cancel || align="center" | No | | align="center" | Chain Cancel || align="center" | No | ||
|- style=" | |- style="" | ||
| align="center" | Special Cancel || align="center" | No | | align="center" | Special Cancel || align="center" | No | ||
|- style=" | |- style="" | ||
| align="center" | Run Cancel || align="center" | No | | align="center" | Run Cancel || align="center" | No | ||
|- | |- | ||
| align="center" colspan="2" |Start/Active/Recovery Frames|| align="center" colspan="2" | 7 || align="center" style=" | | align="center" colspan="2" |Start/Active/Recovery Frames|| align="center" colspan="2" | 7 || align="center" style=""| '''8'''|| align="center" colspan="2" | 9 | ||
|- | |- | ||
| width="1" colspan="7" style=" | | width="1" colspan="7" style=""| | ||
A straight kick with great range and active frames. Throw this out sometimes, but be aware that his upper leg is still vulnerable. | A straight kick with great range and active frames. Throw this out sometimes, but be aware that his upper leg is still vulnerable. | ||
| Line 116: | Line 116: | ||
=== Near Standing Normals === | === Near Standing Normals === | ||
<br> | <br> | ||
{| border="1" cellspacing="0" style=" | {| border="1" cellspacing="0" style="" | ||
| colspan="6" style=" | | colspan="6" style="" | '''n.5LP | Near Standing Light Punch''' | ||
|- | |- | ||
| align="center" style=" | | align="center" style="" | Damage || align="center" style="" | '''?''' || align="center" rowspan="6" | 1f<br>[[File:RingDest_Rasta_n5LP_1.png]] || align="center" rowspan="6" | 3f<br>[[File:RingDest_Rasta_n5LP_2.png]] || align="center" rowspan="6" | 7f<br>[[File:RingDest_Rasta_n5LP_1.png]] | ||
|- style=" | |- style="" | ||
| align="center" | Hit Advantage || align="center" | +6 | | align="center" | Hit Advantage || align="center" | +6 | ||
|- style=" | |- style="" | ||
| align="center" | Block Advantage || align="center" | +3 | | align="center" | Block Advantage || align="center" | +3 | ||
|- style=" | |- style="" | ||
| align="center" | Chain Cancel || align="center" | Yes | | align="center" | Chain Cancel || align="center" | Yes | ||
|- style=" | |- style="" | ||
| align="center" | Special Cancel || align="center" | Yes | | align="center" | Special Cancel || align="center" | Yes | ||
|- style=" | |- style="" | ||
| align="center" | Run Cancel || align="center" | Yes | | align="center" | Run Cancel || align="center" | Yes | ||
|- | |- | ||
| align="center" colspan="2" |Start/Active/Recovery Frames|| align="center" | 2 || align="center" style=" | | align="center" colspan="2" |Start/Active/Recovery Frames|| align="center" | 2 || align="center" style=""| '''4'''|| align="center" colspan="2" | 7 | ||
|- | |- | ||
| width="1" colspan="6" style=" | | width="1" colspan="6" style=""| | ||
A Palm strike with fast startup and good active frames. One of your all-around best buttons. | A Palm strike with fast startup and good active frames. One of your all-around best buttons. | ||
| Line 141: | Line 141: | ||
{| border="1" cellspacing="0" style=" | {| border="1" cellspacing="0" style="" | ||
| colspan="7" style=" | | colspan="7" style="" | '''n.5HP | Near Standing Heavy Punch''' | ||
|- | |- | ||
| align="center" style=" | | align="center" style="" | Damage || align="center" style="" | '''?/?''' || align="center" rowspan="6" | 1f<br>[[File:RingDest_Rasta_n5HP_1.png]] || align="center" rowspan="6" | 3f<br>[[File:RingDest_Rasta_n5HP_2.png]] || align="center" rowspan="6" | 6f<br>[[File:RingDest_Rasta_n5HP_3.png]] || align="center" rowspan="6" | 14f<br>[[File:RingDest_Rasta_n5HP_4.png]] || align="center" rowspan="6" | 19f<br>[[File:RingDest_Rasta_n5HP_5.png]] | ||
|- style=" | |- style="" | ||
| align="center" | Hit Advantage || align="center" | -4/-1 | | align="center" | Hit Advantage || align="center" | -4/-1 | ||
|- style=" | |- style="" | ||
| align="center" | Block Advantage || align="center" | -9/-6 | | align="center" | Block Advantage || align="center" | -9/-6 | ||
|- style=" | |- style="" | ||
| align="center" | Chain Cancel || align="center" | No/No | | align="center" | Chain Cancel || align="center" | No/No | ||
|- style=" | |- style="" | ||
| align="center" | Special Cancel || align="center" | Yes/Yes | | align="center" | Special Cancel || align="center" | Yes/Yes | ||
|- style=" | |- style="" | ||
| align="center" | Run Cancel || align="center" | No/No | | align="center" | Run Cancel || align="center" | No/No | ||
|- | |- | ||
| align="center" colspan="2" |Start/Active/Recovery Frames|| align="center" | 2 || align="center" style=" | | align="center" colspan="2" |Start/Active/Recovery Frames|| align="center" | 2 || align="center" style=""| '''3'''|| align="center" style=""| '''8'''|| align="center" colspan="2" | 11 | ||
|- | |- | ||
| width="1" colspan="7" style=" | | width="1" colspan="7" style=""| | ||
Table-flip that hits twice, and shares its animation with 2HP. Cancelable but only combos into grab or 46HP. You could also go for a crossup with rage 28HP. | Table-flip that hits twice, and shares its animation with 2HP. Cancelable but only combos into grab or 46HP. You could also go for a crossup with rage 28HP. | ||
| Line 164: | Line 164: | ||
{| border="1" cellspacing="0" style=" | {| border="1" cellspacing="0" style="" | ||
| colspan="7" style=" | | colspan="7" style="" | '''n.5LK | Near Standing Light Kick''' | ||
|- | |- | ||
| align="center" style=" | | align="center" style="" | Damage || align="center" style="" | '''?''' || align="center" rowspan="6" | 1f<br>[[File:RingDest_Rasta_5LK_1.png]] || align="center" rowspan="6" | 5f<br>[[File:RingDest_Rasta_5LK_2.png]] || align="center" rowspan="6" | 6f<br>[[File:RingDest_Rasta_5LK_3.png]] || align="center" rowspan="6" | 10f<br>[[File:RingDest_Rasta_5LK_1.png]] || align="center" rowspan="6" | 14f<br>[[File:RingDest_Rasta_5LK_5.png]] | ||
|- style=" | |- style="" | ||
| align="center" | Hit Advantage || align="center" | +3 | | align="center" | Hit Advantage || align="center" | +3 | ||
|- style=" | |- style="" | ||
| align="center" | Block Advantage || align="center" | 0 | | align="center" | Block Advantage || align="center" | 0 | ||
|- style=" | |- style="" | ||
| align="center" | Chain Cancel || align="center" | Yes | | align="center" | Chain Cancel || align="center" | Yes | ||
|- style=" | |- style="" | ||
| align="center" | Special Cancel || align="center" | Yes | | align="center" | Special Cancel || align="center" | Yes | ||
|- style=" | |- style="" | ||
| align="center" | Run Cancel || align="center" | Yes | | align="center" | Run Cancel || align="center" | Yes | ||
|- | |- | ||
| align="center" colspan="2" |Start/Active/Recovery Frames|| align="center" | 4 || align="center" style=" | | align="center" colspan="2" |Start/Active/Recovery Frames|| align="center" | 4 || align="center" style=""| '''1'''|| align="center" colspan="3" | 12 | ||
|- | |- | ||
| width="1" colspan="7" style=" | | width="1" colspan="7" style=""| | ||
Nearly identical to far 5LK, but has better frame advantage by 2 frames. Still not recommended due to poor damage. | Nearly identical to far 5LK, but has better frame advantage by 2 frames. Still not recommended due to poor damage. | ||
| Line 189: | Line 189: | ||
{| border="1" cellspacing="0" style=" | {| border="1" cellspacing="0" style="" | ||
| colspan="7" style=" | | colspan="7" style="" | '''n.5HK | Near Standing Heavy Kick''' | ||
|- | |- | ||
| align="center" style=" | | align="center" style="" | Damage || align="center" style="" | '''?''' || align="center" rowspan="6" | 1f<br>[[File:RingDest_Rasta_5LK_5.png]] || align="center" rowspan="6" | 5f<br>[[File:RingDest_Rasta_5HK_2.png]] || align="center" rowspan="6" | 7f<br>[[File:RingDest_Rasta_5HK_3.png]] || align="center" rowspan="6" | 13f<br>[[File:RingDest_Rasta_5HK_4.png]] || align="center" rowspan="6" | 17f<br>[[File:RingDest_Rasta_5LK_5.png]] | ||
|- style=" | |- style="" | ||
| align="center" | Hit Advantage || align="center" | +4 | | align="center" | Hit Advantage || align="center" | +4 | ||
|- style=" | |- style="" | ||
| align="center" | Block Advantage || align="center" | -1 | | align="center" | Block Advantage || align="center" | -1 | ||
|- style=" | |- style="" | ||
| align="center" | Chain Cancel || align="center" | No | | align="center" | Chain Cancel || align="center" | No | ||
|- style=" | |- style="" | ||
| align="center" | Special Cancel || align="center" | No | | align="center" | Special Cancel || align="center" | No | ||
|- style=" | |- style="" | ||
| align="center" | Run Cancel || align="center" | No | | align="center" | Run Cancel || align="center" | No | ||
|- | |- | ||
| align="center" colspan="2" |Start/Active/Recovery Frames|| align="center" colspan="2" | 6 || align="center" style=" | | align="center" colspan="2" |Start/Active/Recovery Frames|| align="center" colspan="2" | 6 || align="center" style=""| '''6'''|| align="center" colspan="2" | 8 | ||
|- | |- | ||
| width="1" colspan="7" style=" | | width="1" colspan="7" style=""| | ||
It's 5HK but faster overall, and with better frame advantage to ''boot''. | It's 5HK but faster overall, and with better frame advantage to ''boot''. | ||
| Line 213: | Line 213: | ||
=== Crouching Normals === | === Crouching Normals === | ||
<br> | <br> | ||
{| border="1" cellspacing="0" style=" | {| border="1" cellspacing="0" style="" | ||
| colspan="6" style=" | | colspan="6" style="" | '''2LP | Crouching Light Punch''' | ||
|- | |- | ||
| align="center" style=" | | align="center" style="" | Damage || align="center" style="" | '''?''' || align="center" rowspan="6" | 1f<br>[[File:RingDest_Rasta_2LP_1.png]] || align="center" rowspan="6" | 3f<br>[[File:RingDest_Rasta_2LP_2.png]] || align="center" rowspan="6" | 7f<br>[[File:RingDest_Rasta_2LP_1.png]] | ||
|- style=" | |- style="" | ||
| align="center" | Hit Advantage || align="center" | +6 | | align="center" | Hit Advantage || align="center" | +6 | ||
|- style=" | |- style="" | ||
| align="center" | Block Advantage || align="center" | +3 | | align="center" | Block Advantage || align="center" | +3 | ||
|- style=" | |- style="" | ||
| align="center" | Chain Cancel || align="center" | Yes | | align="center" | Chain Cancel || align="center" | Yes | ||
|- style=" | |- style="" | ||
| align="center" | Special Cancel || align="center" | Yes | | align="center" | Special Cancel || align="center" | Yes | ||
|- style=" | |- style="" | ||
| align="center" | Run Cancel || align="center" | Yes | | align="center" | Run Cancel || align="center" | Yes | ||
|- | |- | ||
| align="center" colspan="2" |Start/Active/Recovery Frames|| align="center" | 2 || align="center" style=" | | align="center" colspan="2" |Start/Active/Recovery Frames|| align="center" | 2 || align="center" style=""| '''4'''|| align="center" colspan="2" | 7 | ||
|- | |- | ||
| width="1" colspan="6" style=" | | width="1" colspan="6" style=""| | ||
A quick claw at their shins. Oddly doesn't have as much range as it looks, but is still one of Rasta's longest normals because he leans forward. | A quick claw at their shins. Oddly doesn't have as much range as it looks, but is still one of Rasta's longest normals because he leans forward. | ||
| Line 238: | Line 238: | ||
{| border="1" cellspacing="0" style=" | {| border="1" cellspacing="0" style="" | ||
| colspan="8" style=" | | colspan="8" style="" | '''2HP | Crouching Heavy Punch''' | ||
|- | |- | ||
| align="center" style=" | | align="center" style="" | Damage || align="center" style="" | '''?/?''' || align="center" rowspan="6" | 1f<br>[[File:RingDest_Rasta_2HP_1.png]] || align="center" rowspan="6" | 3f<br>[[File:RingDest_Rasta_2HP_2.png]] || align="center" rowspan="6" | 5f<br>[[File:RingDest_Rasta_2HP_3.png]] || align="center" rowspan="6" | 13f<br>[[File:RingDest_Rasta_2HP_4.png]] || align="center" rowspan="6" | 19f<br>[[File:RingDest_Rasta_2HP_5.png]] || align="center" rowspan="6" | 25f<br>[[File:RingDest_Rasta_2HP_6.png]] | ||
|- style=" | |- style="" | ||
| align="center" | Hit Advantage || align="center" | -11/-9 | | align="center" | Hit Advantage || align="center" | -11/-9 | ||
|- style=" | |- style="" | ||
| align="center" | Block Advantage || align="center" | -16/-14 | | align="center" | Block Advantage || align="center" | -16/-14 | ||
|- style=" | |- style="" | ||
| align="center" | Chain Cancel || align="center" | No/No | | align="center" | Chain Cancel || align="center" | No/No | ||
|- style=" | |- style="" | ||
| align="center" | Special Cancel || align="center" | Yes/Yes | | align="center" | Special Cancel || align="center" | Yes/Yes | ||
|- style=" | |- style="" | ||
| align="center" | Run Cancel || align="center" | No/No | | align="center" | Run Cancel || align="center" | No/No | ||
|- | |- | ||
| align="center" colspan="2" |Start/Active/Recovery Frames|| align="center" | 2 || align="center" style=" | | align="center" colspan="2" |Start/Active/Recovery Frames|| align="center" | 2 || align="center" style=""| '''2'''|| align="center" style=""| '''8'''|| align="center" colspan="3" | 19 | ||
|- | |- | ||
| width="1" colspan="8" style=" | | width="1" colspan="8" style=""| | ||
Table-flip that hits twice, and shares its animation with n.5HP. Cancelable but only combos into grab or 46HP. You could also go for a crossup with rage 28HP. | Table-flip that hits twice, and shares its animation with n.5HP. Cancelable but only combos into grab or 46HP. You could also go for a crossup with rage 28HP. | ||
| Line 263: | Line 263: | ||
{| border="1" cellspacing="0" style=" | {| border="1" cellspacing="0" style="" | ||
| colspan="8" style=" | | colspan="8" style="" | '''2LK | Crouching Light Kick''' | ||
|- | |- | ||
| align="center" style=" | | align="center" style="" | Damage || align="center" style="" | '''?''' || align="center" rowspan="6" | 1f<br>[[File:RingDest_Rasta_2LK_1.png]] || align="center" rowspan="6" | 5f<br>[[File:RingDest_Rasta_2LK_2.png]] || align="center" rowspan="6" | 9, 11, 13f<br>[[File:RingDest_Rasta_2LK_3.png]] || align="center" rowspan="6" | 10, 12, 14f<br>[[File:RingDest_Rasta_2LK_4.png]] || align="center" rowspan="6" | 15f<br>[[File:RingDest_Rasta_2LK_2.png]] || align="center" rowspan="6" | 19f<br>[[File:RingDest_Rasta_2LK_1.png]] | ||
|- style=" | |- style="" | ||
| align="center" | Hit Advantage || align="center" | -1 | | align="center" | Hit Advantage || align="center" | -1 | ||
|- style=" | |- style="" | ||
| align="center" | Block Advantage || align="center" | -4 | | align="center" | Block Advantage || align="center" | -4 | ||
|- style=" | |- style="" | ||
| align="center" | Chain Cancel || align="center" | No | | align="center" | Chain Cancel || align="center" | No | ||
|- style=" | |- style="" | ||
| align="center" | Special Cancel || align="center" | No | | align="center" | Special Cancel || align="center" | No | ||
|- style=" | |- style="" | ||
| align="center" | Run Cancel || align="center" | No | | align="center" | Run Cancel || align="center" | No | ||
|- | |- | ||
| align="center" colspan="2" |Start/Active/Recovery Frames|| align="center" colspan="2" | 8 || align="center" colspan="2" style=" | | align="center" colspan="2" |Start/Active/Recovery Frames|| align="center" colspan="2" | 8 || align="center" colspan="2" style=""| '''6'''|| align="center" colspan="2" | 8 | ||
|- | |- | ||
| width="1" colspan="8" style=" | | width="1" colspan="8" style=""| | ||
An upward kick with strange hitboxes. Works as a far anti-air, but not useful against grounded opponents. | An upward kick with strange hitboxes. Works as a far anti-air, but not useful against grounded opponents. | ||
| Line 286: | Line 286: | ||
{| border="1" cellspacing="0" style=" | {| border="1" cellspacing="0" style="" | ||
| colspan="8" style=" | | colspan="8" style="" | '''2HK | Crouching Heavy Kick''' | ||
|- | |- | ||
| align="center" style=" | | align="center" style="" | Damage || align="center" style="" | '''?''' || align="center" rowspan="6" | 1f<br>[[File:RingDest_Rasta_2HK_1.png]] || align="center" rowspan="6" | 4f<br>[[File:RingDest_Rasta_2HK_2.png]] || align="center" rowspan="6" | 8f<br>[[File:RingDest_Rasta_2HK_3.png]] || align="center" rowspan="6" | 16f<br>[[File:RingDest_Rasta_2HK_4.png]] || align="center" rowspan="6" | 18f<br>[[File:RingDest_Rasta_2HK_5.png]] || align="center" rowspan="6" | 26f<br>[[File:RingDest_Rasta_2HK_1.png]] | ||
|- style=" | |- style="" | ||
| align="center" | Hit Advantage || align="center" | KD | | align="center" | Hit Advantage || align="center" | KD | ||
|- style=" | |- style="" | ||
| align="center" | Block Advantage || align="center" | -12 | | align="center" | Block Advantage || align="center" | -12 | ||
|- style=" | |- style="" | ||
| align="center" | Chain Cancel || align="center" | No | | align="center" | Chain Cancel || align="center" | No | ||
|- style=" | |- style="" | ||
| align="center" | Special Cancel || align="center" | No | | align="center" | Special Cancel || align="center" | No | ||
|- style=" | |- style="" | ||
| align="center" | Run Cancel || align="center" | No | | align="center" | Run Cancel || align="center" | No | ||
|- | |- | ||
| align="center" colspan="2" |Start/Active/Recovery Frames|| align="center" colspan="2" | 7 || align="center" style=" | | align="center" colspan="2" |Start/Active/Recovery Frames|| align="center" colspan="2" | 7 || align="center" style=""| '''8'''|| align="center" colspan="3" | 17 | ||
|- | |- | ||
| width="1" colspan="8" style=" | | width="1" colspan="8" style=""| | ||
A standard sweep, Rasta's longest-reaching normal. Can be used to punish the odd move your jabs can't reach, or to end chains. | A standard sweep, Rasta's longest-reaching normal. Can be used to punish the odd move your jabs can't reach, or to end chains. | ||
| Line 313: | Line 313: | ||
=== Running Normals === | === Running Normals === | ||
<br> | <br> | ||
{| border="1" cellspacing="0" style=" | {| border="1" cellspacing="0" style="" | ||
| colspan="7" style=" | | colspan="7" style="" | '''66LP | Running Light Punch''' | ||
|- | |- | ||
| align="center" style=" | | align="center" style="" | Damage || align="center" style="" | '''?/?''' || align="center" rowspan="6" | 1f<br>[[File:RingDest_Rasta_66LP_1.png]] || align="center" rowspan="6" | 4f<br>[[File:RingDest_Rasta_66LP_2.png]] || align="center" rowspan="6" | 12f<br>[[File:RingDest_Rasta_66LP_3.png]] || align="center" rowspan="6" | 20f<br>[[File:RingDest_Rasta_66LP_4.png]] || align="center" rowspan="6" | 24f<br>[[File:RingDest_Rasta_66LP_5.png]] | ||
|- style=" | |- style="" | ||
| align="center" | Hit Advantage || align="center" | -10/KD | | align="center" | Hit Advantage || align="center" | -10/KD | ||
|- style=" | |- style="" | ||
| align="center" | Block Advantage || align="center" | -13/-5 | | align="center" | Block Advantage || align="center" | -13/-5 | ||
|- style=" | |- style="" | ||
| align="center" | Chain Cancel || align="center" | No/No | | align="center" | Chain Cancel || align="center" | No/No | ||
|- style=" | |- style="" | ||
| align="center" | Special Cancel || align="center" | No/No | | align="center" | Special Cancel || align="center" | No/No | ||
|- style=" | |- style="" | ||
| align="center" | Run Cancel || align="center" | No/No | | align="center" | Run Cancel || align="center" | No/No | ||
|- | |- | ||
| align="center" colspan="2" |Start/Active/Recovery Frames|| align="center" | 3 || align="center" style=" | | align="center" colspan="2" |Start/Active/Recovery Frames|| align="center" | 3 || align="center" style=""| '''8'''|| align="center" style=""| '''8'''|| align="center" colspan="2" | 10 | ||
|- | |- | ||
| width="1" colspan="7" style=" | | width="1" colspan="7" style=""| | ||
Rasta raises his elbows for 2 hits. Slightly more damaging than sweep for ending chains. Worth throwing out since it’s safe if it connects late. | Rasta raises his elbows for 2 hits. Slightly more damaging than sweep for ending chains. Worth throwing out since it’s safe if it connects late. | ||
| Line 337: | Line 337: | ||
|} | |} | ||
{| border="1" cellspacing="0" style=" | |||
| colspan="6" style=" | {| border="1" cellspacing="0" style="" | ||
| colspan="6" style="" | '''66HP | Running Heavy Punch''' | |||
|- | |- | ||
| align="center" style=" | | align="center" style="" | Damage || align="center" style="" | '''?''' || align="center" rowspan="6" | 1f<br>[[File:RingDest_Rasta_66HP_1.png]] || align="center" rowspan="6" | 6f<br>[[File:RingDest_Rasta_66HP_2.png]] || align="center" rowspan="6" | 18f<br>[[File:RingDest_Rasta_66HP_3.png]] | ||
|- style=" | |- style="" | ||
| align="center" | Hit Advantage || align="center" | KD | | align="center" | Hit Advantage || align="center" | KD | ||
|- style=" | |- style="" | ||
| align="center" | Block Advantage || align="center" | -2 | | align="center" | Block Advantage || align="center" | -2 | ||
|- style=" | |- style="" | ||
| align="center" | Chain Cancel || align="center" | No | | align="center" | Chain Cancel || align="center" | No | ||
|- style=" | |- style="" | ||
| align="center" | Special Cancel || align="center" | No | | align="center" | Special Cancel || align="center" | No | ||
|- style=" | |- style="" | ||
| align="center" | Run Cancel || align="center" | No | | align="center" | Run Cancel || align="center" | No | ||
|- | |- | ||
| align="center" colspan="2" |Start/Active/Recovery Frames|| align="center" | 5 || align="center" style=" | | align="center" colspan="2" |Start/Active/Recovery Frames|| align="center" | 5 || align="center" style=""| '''12'''|| align="center" colspan="2" | 12 | ||
|- | |- | ||
| width="1" colspan="6" style=" | | width="1" colspan="6" style=""| | ||
Your standard-issue clothesline attack. Use after an irish whip, or throw is out since it's safe. | Your standard-issue clothesline attack. Use after an irish whip, or throw is out since it's safe. | ||
| Line 362: | Line 362: | ||
|} | |} | ||
66LK | Running Light Kick | {| border="1" cellspacing="0" style="" | ||
| colspan="6" style="" | '''66LK | Running Light Kick''' | |||
|- | |||
| align="center" style="" | Damage || align="center" style="" | '''?''' || align="center" rowspan="6" | 1f<br>[[File:RingDest_Rasta_66LK_1.png]] || align="center" rowspan="6" | 3f<br>[[File:RingDest_Rasta_66LK_2.png]] || align="center" rowspan="6" | 13f<br>[[File:RingDest_Rasta_66LK_3.png]] || align="center" rowspan="6" | 21f<br>[[File:RingDest_Rasta_66LK_4.png]] | |||
|- style="" | |||
| align="center" | Hit Advantage || align="center" | -3 | |||
|- style="" | |||
| align="center" | Block Advantage || align="center" | -10 | |||
|- style="" | |||
| align="center" | Chain Cancel || align="center" | No | |||
|- style="" | |||
| align="center" | Special Cancel || align="center" | No | |||
|- style="" | |||
| align="center" | Run Cancel || align="center" | No | |||
|- | |||
| align="center" colspan="2" |Start/Active/Recovery Frames|| align="center" | 2 || align="center" style=""| '''10'''|| align="center" colspan="2" | 11 | |||
|- | |||
| width="1" colspan="6" style=""| | |||
Rasta sticks out his leg really far, like 5LK but with reasonable active frames.<br> | Rasta sticks out his leg really far, like 5LK but with reasonable active frames.<br> | ||
Unfortunately this isn’t cancelable and doesn’t link even if you land it meaty. | Unfortunately this isn’t cancelable and doesn’t link even if you land it meaty. | ||
|} | |||
An awesome slide for your kit. Keeps people guessing when you start running after knocking them down. | {| border="1" cellspacing="0" style="" | ||
| colspan="7" style="" | '''66HK | Running Heavy Kick''' | |||
|- | |||
| align="center" style="" | Damage || align="center" style="" | '''?''' || align="center" rowspan="6" | 1f<br>[[File:RingDest_Rasta_66HK_1.png]] || align="center" rowspan="6" | 6f<br>[[File:RingDest_Rasta_66HK_2.png]] || align="center" rowspan="6" | 21f<br>[[File:RingDest_Rasta_66HK_3.png]] || align="center" rowspan="6" | 26f<br>[[File:RingDest_Rasta_66HK_4.png]] || align="center" rowspan="6" | 30f<br>[[File:RingDest_Rasta_66HK_5.png]] | |||
|- style="" | |||
| align="center" | Hit Advantage || align="center" | KD | |||
|- style="" | |||
| align="center" | Block Advantage || align="center" | -16 | |||
|- style="" | |||
| align="center" | Chain Cancel || align="center" | No | |||
|- style="" | |||
| align="center" | Special Cancel || align="center" | No | |||
|- style="" | |||
| align="center" | Run Cancel || align="center" | No | |||
|- | |||
| align="center" colspan="2" |Start/Active/Recovery Frames|| align="center" | 5 || align="center" style=""| '''15'''|| align="center" colspan="3" | 14 | |||
|- | |||
| width="1" colspan="7" style=""| | |||
An awesome slide for your kit. Keeps people guessing when you start running after knocking them down. | |||
|} | |||
| Line 377: | Line 413: | ||
==== Diagonal Jump Normals ==== | ==== Diagonal Jump Normals ==== | ||
'''Under Construction''' | |||
An elbow attack that hits solidly in front of you. No hurtbox on the legs plus horizontal range makes this a good jump-in. Active until you land. | {| border="0" cellspacing="5" width="100%" | ||
| width="" style=";"|''' <font size = "3">j.LP | Jumping Light Punch</font> ''' | |||
* '''(Properties)''' - Must be blocked high | |||
* '''(Description)''' - An elbow attack that hits solidly in front of you. No hurtbox on the legs plus horizontal range makes this a good jump-in. Active until you land. | |||
j. | |- | ||
| width="" |''' <font size = "3">j.8HP | Neutral Jumping Heavy Punch</font> ''' | |||
* '''(Properties)''' - Must be blocked high | |||
* '''(Description)''' - Down-angled punch with a great hitbox. You’re probably going to be running around a lot so you won’t find a lot of time to use this. Maybe it’s a good defensive option. | |||
|- | |||
| width="" style=";"|''' <font size = "3">j.8LK | Neutral Jumping Light Kick</font> ''' | |||
* '''(Properties)''' - Must be blocked high | |||
* '''(Description)''' - Jumping knee attack that has a small hitbox just below Rasta, and can cross up. Active until you land. | |||
j. | |- | ||
| width="" |''' <font size = "3">j.HK | Jumping Heavy Kick</font> ''' | |||
* '''(Properties)''' - Must be blocked high | |||
* '''(Description)''' - A butt drop that crosses up very easily. Has a decent hitbox in front and it stays active until you land. | |||
|} | |||
==== Neutral Jump Normals ==== | ==== Neutral Jump Normals ==== | ||
j.8LP | Neutral Jumping Light Punch | {| border="0" cellspacing="5" width="100%" | ||
| width="" style=";"|''' <font size = "3">j.8LP | Neutral Jumping Light Punch</font> ''' | |||
* '''(Properties)''' - Must be blocked high | |||
* '''(Description)''' - Identical to j.LP | |||
Identical to j. | |- | ||
| width="" |''' <font size = "3">j.8HP | Neutral Jumping Heavy Punch</font> ''' | |||
* '''(Properties)''' - Must be blocked high | |||
* '''(Description)''' - Identical to j.HP, with slightly more active frames | |||
j. | |- | ||
| width="" style=";"|''' <font size = "3">j.8LK | Neutral Jumping Light Kick</font> ''' | |||
* '''(Properties)''' - Must be blocked high | |||
* '''(Description)''' - Identical to j.LK | |||
|- | |||
| width="" |''' <font size = "3">j.8HK | Neutral Jumping Heavy Kick</font> ''' | |||
* '''(Properties)''' - Must be blocked high | |||
* '''(Description)''' - Rasta’s butt drop. The neutral jump version has a slightly better hitbox in front. | |||
|} | |||
=== Running Jump Normals === | === Running Jump Normals === | ||
Looks just like j.LP, but has an autocombo where the second hit looks like j.HP.<br> | {| border="0" cellspacing="5" width="100%" | ||
| width="" style=";"|''' <font size = "3">66j.LP | Running Jump Light Punch</font> ''' | |||
* '''(Properties)''' - Must be blocked high, knockdown only on aerial opponents | |||
* '''(Description)''' - Looks just like j.LP, but has an autocombo where the second hit looks like j.HP.<br> | |||
Both hits juggle aerial opponents, knocking down. Otherwise, it won't knock down.<br> | Both hits juggle aerial opponents, knocking down. Otherwise, it won't knock down.<br> | ||
Good for checking their ability to block, and the second hit generally makes it safe even if they block it early. | Good for checking their ability to block, and the second hit generally makes it safe even if they block it early. | ||
66j.HP | Running Jump Heavy Punch | |- | ||
| width="" |''' <font size = "3">66j.HP | Running Jump Heavy Punch</font> ''' | |||
The flying bulldog. A weird move that basically only hits on crossup and has short active frames.<br> | * '''(Properties)''' - Must be blocked high, knockdown | ||
* '''(Description)''' - The flying bulldog. A weird move that basically only hits on crossup and has short active frames.<br> | |||
Deals great damage sort of like an ST air throw, and it feels just as satisfying. | Deals great damage sort of like an ST air throw, and it feels just as satisfying. | ||
66j.LK | Running Jump Light Kick | |- | ||
| width="" style=";"|''' <font size = "3">66j.LK | Running Jump Light Kick</font> ''' | |||
* '''(Properties)''' - Must be blocked high, knockdown only on aerial opponents | |||
* '''(Description)''' - Has a smaller hitbox than j.LK, and knocks down if it hits an aerial opponent. Besides that, it’s identical. | |||
|- | |||
| width="" |''' <font size = "3">66j.HK | Running Jump Heavy Kick</font> ''' | |||
* '''(Properties)''' - Must be blocked high, knockdown | |||
* '''(Description)''' - Flying butt that always knocks down, active until you land as usual.<br> | |||
Welcome to Slam Masters 2, say hello to the mat for me. | |||
|} | |||
== Throws and Other == | == Throws and Other == | ||
=== Throws === | === Throws === | ||
''' | {| border="0" cellspacing="5" width="100%" | ||
| width="" style=";"|''' <font size = "3">G | Grab</font> ''' | |||
* '''(Description)''' - 8 startup, 1 active, 15 recovery. Average grab. | |||
|- | |||
| width="" |''' <font size = "3"> G (after grab, standing opponent) | Backdrop</font> ''' | |||
* '''(Description)''' - Your standard throw, which notably side-swaps if you want to corner them at the moment. | |||
|- | |||
| width="" style=";"|''' <font size = "3">G (after grab, crouching opponent) | Face Chew</font> ''' | |||
* '''(Description)''' - Like holds in SF2, this is your better grab. Unlike in SF2, this knocks down once it ends. Mashable.<br> | |||
After the hold ends, Rasta airborne and can put out a normal but this doesn’t seem useful. | |||
|- | |||
| width="" |''' <font size = "3"> 28G (after grab) | Hurricane Stomp</font> ''' | |||
* '''(Description)''' - Decent damage for a super, but it leaves you with a lot of frame advantage. You can move before they hit the ground after bouncing and start getting up. | |||
From here you get to set up all sorts of tricks, like meaty 66HK/66j.HK, Monkey Help, or ambiguous ball crossups. <br> | |||
Rasta super slam grants +53 frame advantage, and holding G for super grants +68 frame advantage.<br> | |||
The actual throw pushes you back during the animation. This puts you nearly full screen normally, close to 3/4 on a cornered opponent, and less than half if you’re cornered. | |||
|} | |||
=== Movement === | === Movement === | ||
| Line 467: | Line 541: | ||
== Special Moves == | == Special Moves == | ||
Two different monkey assists which form a large part of Rasta’s offense. The monkey you call takes a while to get into place, and needs to basically stop in front of your opponent to attack. If they run around the ring too long looking for that chance, the monkey returns to its corner. | {| border="0" cellspacing="5" width="100%" | ||
| width="" style=";"|''' <font size = "3">G | Grab</font> ''' | |||
* '''(Description)''' - 8 startup, 1 active, 15 recovery. Average grab. | |||
|- | |||
| width="" |''' <font size = "3"> G (after grab, standing opponent) | Backdrop</font> ''' | |||
* '''(Description)''' - Your standard throw, which notably side-swaps if you want to corner them at the moment. | |||
|- | |||
| width="" style=";"|''' <font size = "3">G (after grab, crouching opponent) | Face Chew</font> ''' | |||
* '''(Description)''' - Like holds in SF2, this is your better grab. Unlike in SF2, this knocks down once it ends. Mashable.<br> | |||
After the hold ends, Rasta airborne and can put out a normal but this doesn’t seem useful. | |||
|- | |||
| width="" |''' <font size = "3"> 28G (after grab) | Hurricane Stomp</font> ''' | |||
* '''(Description)''' - Decent damage for a super, but it leaves you with a lot of frame advantage. You can move before they hit the ground after bouncing and start getting up. | |||
|} | |||
{| border="0" cellspacing="5" width="100%" | |||
| width="" style=";"|''' <font size = "3">236P | Monkey Help</font> ''' | |||
* '''(Properties)''' - Assist, 236LP must be blocked low, 236HP causes a juggle | |||
* '''(Description)''' Two different monkey assists which form a large part of Rasta’s offense. The monkey you call takes a while to get into place, and needs to basically stop in front of your opponent to attack.<br> | |||
If they run around the ring too long looking for that chance, the monkey returns to its corner. | |||
The monkey can also be hit when it starts attacking. You can even hit both it and Rasta!<br> | The monkey can also be hit when it starts attacking. You can even hit both it and Rasta!<br> | ||
The animation for calling a monkey is always 56 total frames.<br> | The animation for calling a monkey is always 56 total frames.<br> | ||
'''236LP:''' The rolling monkey. This is what you want to use most of the time. Hits low, so you have hard-to-block or unblockable setups with this. Since the game emphasizes high/low, side, and throw mixups, people respect the low monkey.<br> | |||
Does not juggle, instead ending combos as soon as it hits. | Does not juggle, instead ending combos as soon as it hits. | ||
'''236HP:''' The jumping monkey. Despite appearances, you can unfortunately block it low. On the plus side, the monkey can jump over low normals to score you a knockdown.<br> | |||
Hit causes a juggle, allowing you to follow up with other specials if you time it right. | Hit causes a juggle, allowing you to follow up with other specials if you time it right. | ||
46P | Jungle Panic | |- | ||
| width="" |''' <font size = "3">46P | Jungle Panic</font> ''' | |||
Rasta flails his arms and stomps his feet at the opponent. Unfortunately, this is unsafe on hit. It does solid damage and can hit behind Rasta, though, so maybe you can get someone off you like that.<br> | * '''(Description)''' - Rasta flails his arms and stomps his feet at the opponent. Unfortunately, this is unsafe on hit. It does solid damage and can hit behind Rasta, though, so maybe you can get someone off you like that.<br> | ||
It is possible to extend a combo into monkeys, since Jungle Panic lasts a long time and doesn’t knock down, but that's niche at best. | It is possible to extend a combo into monkeys, since Jungle Panic lasts a long time and doesn’t knock down, but that's niche at best. | ||
28P | Wild Tackle | |- | ||
| width="" style=";"|''' <font size = "3">28P | Wild Tackle</font> ''' | |||
Rasta’s take on Blanka ball, which travels in a wide arc and bounces you away on hit. This move gets powered up in rage, with 28HP hitting up to 3 times and bouncing on the third hit. It can also cross up after a knockdown, especially ambiguous in the corner.<br> | * '''(Description)''' - Rasta’s take on Blanka ball, which travels in a wide arc and bounces you away on hit. This move gets powered up in rage, with 28HP hitting up to 3 times and bouncing on the third hit. It can also cross up after a knockdown, especially ambiguous in the corner.<br> | ||
Your go-to when you want to get out of a bad situation. If it doesn’t hit them, you’ll at least create space for yourself. | Your go-to when you want to get out of a bad situation. If it doesn’t hit them, you’ll at least create space for yourself. | ||
28K | Jungle Climb | |- | ||
| width="" |''' <font size = "3">28K | Jungle Climb</font> ''' | |||
A funny move that’s not quite a flash kick. Hits multiple times and knocks down, quick startup and makes you airborne. The light version can be deceptively hard to punish. It isn’t invincible, but it still knocks down on trade.<br> | * '''(Description)''' - A funny move that’s not quite a flash kick. Hits multiple times and knocks down, quick startup and makes you airborne. The light version can be deceptively hard to punish. It isn’t invincible, but it still knocks down on trade.<br> | ||
You can combo into this from 5/2LP and 5LK, but that’s about it. | You can combo into this from 5/2LP and 5LK, but that’s about it. | ||
|} | |||
Revision as of 00:40, 8 September 2020
Introduction
Mon, you gots no rhythm and you fight like a girlie.
What would a Capcom character be without stereotypes?
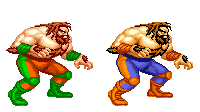
The walking embodiment of a random chimp event, King Rasta Mon is canonically illiterate. He relies on his monkey manager Freak to do the boring work for him.
While he has a shorter grab range than most characters, Rasta can depend on his speed and ambiguous cross-ups to get in and make opponents guess. His specials are awkward to use or niche, outside of 236LP and 28P. Monkey assists keep your opponents locked down and can open up big rewards if you time it right.
Normal Moves
Far Standing Normals
| 5LP | Far Standing Light Punch | |||||
| Damage | ? | 1f File:RingDest Rasta 5LP 1.png |
4f |
10f File:RingDest Rasta 5LP 3.png | |
| Hit Advantage | -1 | ||||
| Block Advantage | -4 | ||||
| Chain Cancel | Yes | ||||
| Special Cancel | Yes | ||||
| Run Cancel | Yes | ||||
| Start/Active/Recovery Frames | 3 | 6 | 9 | ||
|
A fast sideways chop with decent range. Good active frames, but unsafe unless you cancel it. Chain starting on frame 13. | |||||
| 5HP | Far Standing Heavy Punch | ||||||
| Damage | ? | 1f File:RingDest Rasta 5HP 1.png |
3f File:RingDest Rasta 5HP 2.png |
9f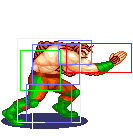 |
12f File:RingDest Rasta 5HP 4.png |
24f File:RingDest Rasta 5HP 5.png |
| Hit Advantage | -4 | |||||
| Block Advantage | -9 | |||||
| Chain Cancel | No | |||||
| Special Cancel | No | |||||
| Run Cancel | No | |||||
| Start/Active/Recovery Frames | 8 | 3 | 19 | |||
|
A downward chop with good range. Average active frames, but it's not cancelable and pretty unsafe. | ||||||
| 5LK | Far Standing Light Kick | ||||||
| Damage | ? | 1f File:RingDest Rasta 5LK 1.png |
5f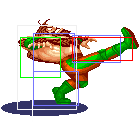 |
6f File:RingDest Rasta 5LK 3.png |
10f File:RingDest Rasta 5LK 1.png |
14f File:RingDest Rasta 5LK 5.png |
| Hit Advantage | +1 | |||||
| Block Advantage | -2 | |||||
| Chain Cancel | Yes | |||||
| Special Cancel | Yes | |||||
| Run Cancel | Yes | |||||
| Start/Active/Recovery Frames | 4 | 1 | 12 | |||
|
An upward kick with only one active frame, so it’s not the stop sign it looks like. Also does little damage, so it's not really worth using in combos. Chain starting on frame 14. | ||||||
| 5HK | Far Standing Heavy Kick | ||||||
| Damage | ? | 1f File:RingDest Rasta 5LK 5.png |
6f File:RingDest Rasta 5HK 2.png |
8f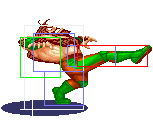 |
16f File:RingDest Rasta 5HK 4.png |
21f File:RingDest Rasta 5LK 5.png |
| Hit Advantage | +1 | |||||
| Block Advantage | -4 | |||||
| Chain Cancel | No | |||||
| Special Cancel | No | |||||
| Run Cancel | No | |||||
| Start/Active/Recovery Frames | 7 | 8 | 9 | |||
|
A straight kick with great range and active frames. Throw this out sometimes, but be aware that his upper leg is still vulnerable. You can actually link off this when used as a meaty, but that's better done with n.5HK. | ||||||
Near Standing Normals
| n.5LP | Near Standing Light Punch | |||||
| Damage | ? | 1f File:RingDest Rasta n5LP 1.png |
3f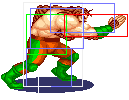 |
7f File:RingDest Rasta n5LP 1.png | |
| Hit Advantage | +6 | ||||
| Block Advantage | +3 | ||||
| Chain Cancel | Yes | ||||
| Special Cancel | Yes | ||||
| Run Cancel | Yes | ||||
| Start/Active/Recovery Frames | 2 | 4 | 7 | ||
|
A Palm strike with fast startup and good active frames. One of your all-around best buttons. Chain starting on frame 7. | |||||
| n.5HP | Near Standing Heavy Punch | ||||||
| Damage | ?/? | 1f |
3f |
6f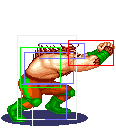 |
14f File:RingDest Rasta n5HP 4.png |
19f File:RingDest Rasta n5HP 5.png |
| Hit Advantage | -4/-1 | |||||
| Block Advantage | -9/-6 | |||||
| Chain Cancel | No/No | |||||
| Special Cancel | Yes/Yes | |||||
| Run Cancel | No/No | |||||
| Start/Active/Recovery Frames | 2 | 3 | 8 | 11 | ||
|
Table-flip that hits twice, and shares its animation with 2HP. Cancelable but only combos into grab or 46HP. You could also go for a crossup with rage 28HP. | ||||||
| n.5LK | Near Standing Light Kick | ||||||
| Damage | ? | 1f File:RingDest Rasta 5LK 1.png |
5f |
6f File:RingDest Rasta 5LK 3.png |
10f File:RingDest Rasta 5LK 1.png |
14f File:RingDest Rasta 5LK 5.png |
| Hit Advantage | +3 | |||||
| Block Advantage | 0 | |||||
| Chain Cancel | Yes | |||||
| Special Cancel | Yes | |||||
| Run Cancel | Yes | |||||
| Start/Active/Recovery Frames | 4 | 1 | 12 | |||
|
Nearly identical to far 5LK, but has better frame advantage by 2 frames. Still not recommended due to poor damage. Chain starting on frame 14. | ||||||
| n.5HK | Near Standing Heavy Kick | ||||||
| Damage | ? | 1f File:RingDest Rasta 5LK 5.png |
5f File:RingDest Rasta 5HK 2.png |
7f |
13f File:RingDest Rasta 5HK 4.png |
17f File:RingDest Rasta 5LK 5.png |
| Hit Advantage | +4 | |||||
| Block Advantage | -1 | |||||
| Chain Cancel | No | |||||
| Special Cancel | No | |||||
| Run Cancel | No | |||||
| Start/Active/Recovery Frames | 6 | 6 | 8 | |||
|
It's 5HK but faster overall, and with better frame advantage to boot. | ||||||
Crouching Normals
| 2LP | Crouching Light Punch | |||||
| Damage | ? | 1f File:RingDest Rasta 2LP 1.png |
3f |
7f File:RingDest Rasta 2LP 1.png | |
| Hit Advantage | +6 | ||||
| Block Advantage | +3 | ||||
| Chain Cancel | Yes | ||||
| Special Cancel | Yes | ||||
| Run Cancel | Yes | ||||
| Start/Active/Recovery Frames | 2 | 4 | 7 | ||
|
A quick claw at their shins. Oddly doesn't have as much range as it looks, but is still one of Rasta's longest normals because he leans forward. Chain starting on frame 7. | |||||
| 2HP | Crouching Heavy Punch | |||||||
| Damage | ?/? | 1f |
3f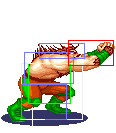 |
5f |
13f File:RingDest Rasta 2HP 4.png |
19f File:RingDest Rasta 2HP 5.png |
25f File:RingDest Rasta 2HP 6.png |
| Hit Advantage | -11/-9 | ||||||
| Block Advantage | -16/-14 | ||||||
| Chain Cancel | No/No | ||||||
| Special Cancel | Yes/Yes | ||||||
| Run Cancel | No/No | ||||||
| Start/Active/Recovery Frames | 2 | 2 | 8 | 19 | |||
|
Table-flip that hits twice, and shares its animation with n.5HP. Cancelable but only combos into grab or 46HP. You could also go for a crossup with rage 28HP. For whatever reason, this has much worse recovery than n.5HP. This makes it not really worth using. | |||||||
| 2HK | Crouching Heavy Kick | |||||||
| Damage | ? | 1f File:RingDest Rasta 2HK 1.png |
4f File:RingDest Rasta 2HK 2.png |
8f |
16f File:RingDest Rasta 2HK 4.png |
18f File:RingDest Rasta 2HK 5.png |
26f File:RingDest Rasta 2HK 1.png |
| Hit Advantage | KD | ||||||
| Block Advantage | -12 | ||||||
| Chain Cancel | No | ||||||
| Special Cancel | No | ||||||
| Run Cancel | No | ||||||
| Start/Active/Recovery Frames | 7 | 8 | 17 | ||||
|
A standard sweep, Rasta's longest-reaching normal. Can be used to punish the odd move your jabs can't reach, or to end chains. Must be blocked low. | |||||||
Running Normals
| 66LP | Running Light Punch | ||||||
| Damage | ?/? | 1f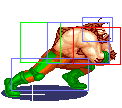 |
4f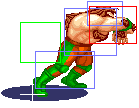 |
12f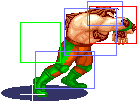 |
20f File:RingDest Rasta 66LP 4.png |
24f File:RingDest Rasta 66LP 5.png |
| Hit Advantage | -10/KD | |||||
| Block Advantage | -13/-5 | |||||
| Chain Cancel | No/No | |||||
| Special Cancel | No/No | |||||
| Run Cancel | No/No | |||||
| Start/Active/Recovery Frames | 3 | 8 | 8 | 10 | ||
|
Rasta raises his elbows for 2 hits. Slightly more damaging than sweep for ending chains. Worth throwing out since it’s safe if it connects late. Only the second hit knocks down, though hit 1 juggles and it's rare both hits don’t connect. | ||||||
| 66HP | Running Heavy Punch | |||||
| Damage | ? | 1f File:RingDest Rasta 66HP 1.png |
6f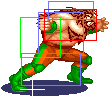 |
18f File:RingDest Rasta 66HP 3.png | |
| Hit Advantage | KD | ||||
| Block Advantage | -2 | ||||
| Chain Cancel | No | ||||
| Special Cancel | No | ||||
| Run Cancel | No | ||||
| Start/Active/Recovery Frames | 5 | 12 | 12 | ||
|
Your standard-issue clothesline attack. Use after an irish whip, or throw is out since it's safe. Interestingly, you can't properly meaty with this. On hit it skips to recovery, so it'll always have the same advantage. | |||||
| 66LK | Running Light Kick | |||||
| Damage | ? | 1f File:RingDest Rasta 66LK 1.png |
3f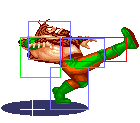 |
13f File:RingDest Rasta 66LK 3.png |
21f File:RingDest Rasta 66LK 4.png |
| Hit Advantage | -3 | ||||
| Block Advantage | -10 | ||||
| Chain Cancel | No | ||||
| Special Cancel | No | ||||
| Run Cancel | No | ||||
| Start/Active/Recovery Frames | 2 | 10 | 11 | ||
|
Rasta sticks out his leg really far, like 5LK but with reasonable active frames. | |||||
| 66HK | Running Heavy Kick | ||||||
| Damage | ? | 1f File:RingDest Rasta 66HK 1.png |
6f |
21f File:RingDest Rasta 66HK 3.png |
26f File:RingDest Rasta 66HK 4.png |
30f File:RingDest Rasta 66HK 5.png |
| Hit Advantage | KD | |||||
| Block Advantage | -16 | |||||
| Chain Cancel | No | |||||
| Special Cancel | No | |||||
| Run Cancel | No | |||||
| Start/Active/Recovery Frames | 5 | 15 | 14 | |||
|
An awesome slide for your kit. Keeps people guessing when you start running after knocking them down. | ||||||
Jumping Normals
Diagonal Jump Normals
Under Construction
j.LP | Jumping Light Punch
|
j.8HP | Neutral Jumping Heavy Punch
|
j.8LK | Neutral Jumping Light Kick
|
j.HK | Jumping Heavy Kick
|
Neutral Jump Normals
j.8LP | Neutral Jumping Light Punch
|
j.8HP | Neutral Jumping Heavy Punch
|
j.8LK | Neutral Jumping Light Kick
|
j.8HK | Neutral Jumping Heavy Kick
|
Running Jump Normals
66j.LP | Running Jump Light Punch
Both hits juggle aerial opponents, knocking down. Otherwise, it won't knock down. |
66j.HP | Running Jump Heavy Punch
Deals great damage sort of like an ST air throw, and it feels just as satisfying. |
66j.LK | Running Jump Light Kick
|
66j.HK | Running Jump Heavy Kick
Welcome to Slam Masters 2, say hello to the mat for me. |
Throws and Other
Throws
G | Grab
|
G (after grab, standing opponent) | Backdrop
|
G (after grab, crouching opponent) | Face Chew
After the hold ends, Rasta airborne and can put out a normal but this doesn’t seem useful. |
28G (after grab) | Hurricane Stomp
From here you get to set up all sorts of tricks, like meaty 66HK/66j.HK, Monkey Help, or ambiguous ball crossups. |
Movement
Standing: Filler Text.
Crouching: Filler Text.
Walk (Forward): Filler Text.
Walk (Back): Filler Text.
Run: Filler Text.
Jump (Forward/Back): Great jump arc. Very fast and highly obnoxious.
Jump (Neutral): Great jump arc. Very fast and highly obnoxious.
Taunt: 43 frames total.
Special Moves
G | Grab
|
G (after grab, standing opponent) | Backdrop
|
G (after grab, crouching opponent) | Face Chew
After the hold ends, Rasta airborne and can put out a normal but this doesn’t seem useful. |
28G (after grab) | Hurricane Stomp
|
236P | Monkey Help
If they run around the ring too long looking for that chance, the monkey returns to its corner. The monkey can also be hit when it starts attacking. You can even hit both it and Rasta! 236LP: The rolling monkey. This is what you want to use most of the time. Hits low, so you have hard-to-block or unblockable setups with this. Since the game emphasizes high/low, side, and throw mixups, people respect the low monkey. 236HP: The jumping monkey. Despite appearances, you can unfortunately block it low. On the plus side, the monkey can jump over low normals to score you a knockdown. |
46P | Jungle Panic
It is possible to extend a combo into monkeys, since Jungle Panic lasts a long time and doesn’t knock down, but that's niche at best. |
28P | Wild Tackle
Your go-to when you want to get out of a bad situation. If it doesn’t hit them, you’ll at least create space for yourself. |
28K | Jungle Climb
You can combo into this from 5/2LP and 5LK, but that’s about it. |
Strategies
Combos
Terminology
- > = next move is a chain or run cancel
- >> = next move is a link
- xx = next move is a special cancel
Basic Combos
- n.5LP/2LP > 2LP xx G
- A basic chain into grab. You can always go for a super slam, but it's also techable
- n.5LP/2LP > 2LP xx 2HK/66LP
- Ending with sweep is much easier, but 66LP does more damage. Both knock down, which is good.
- 2LP > 2LP > 2LP > 2HK/66LP
- Point blank, you can connect 2LP 3 times. From further out you might get only 1 or 2 before ending.
- n.5HP/2HP xx G
- You can combo hit 2 of n.5HP/2HP into grab even outside of the corner, although it's hard (maybe character-specific?). You can always cancel hit 1, too.
Jump-In Combos
- j.HK > 2LP xx G
- Same as the first combo above, but with a jump-in starter.
Other Combos
- n.5HP xx 46HP (236A hits) >> 28HK
- The holy combo that invents an actual use for 46P. Demonstrated here.
