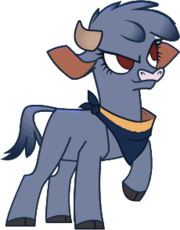
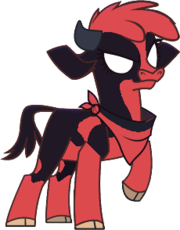
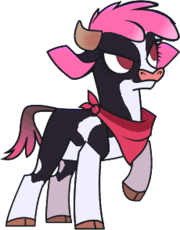
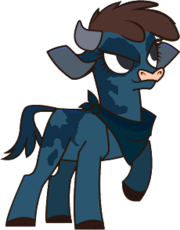
|
|
| Line 706: |
Line 706: |
| Arizona thrives on the mixup game. Here are some important moves that allow you to mix your opponent up. Remember that these only work if Juggle Decay is not maxed out. | | Arizona thrives on the mixup game. Here are some important moves that allow you to mix your opponent up. Remember that these only work if Juggle Decay is not maxed out. |
|
| |
|
| -2C: Easy to use combo ender, leaves you +32, giving you plenty of time to go for a crossup/shorthop/dashup low/dashup throw/whatever you want.
| | *2C: Easy to use combo ender, leaves you +32, giving you plenty of time to go for a crossup/shorthop/dashup low/dashup throw/whatever you want. |
|
| |
|
| -2D: Another good combo ender, usually used after a 236B or 236C. This one leaves you further than 2C, but you can still cross the opponent up with dash jC from that range. Be aware that it switches sides on connect.
| | *2D: Another good combo ender, usually used after a 236B or 236C. This one leaves you further than 2C, but you can still cross the opponent up with dash jC from that range. Be aware that it switches sides on connect. |
|
| |
|
| -5D: Restands the opponent and allows a reset. You're not quite + enough to safely go for a shorthop/6B, as the opponent can 5A to interrupt.
| | *5D: Restands the opponent and allows a reset. You're not quite + enough to safely go for a shorthop/6B, as the opponent can 5A to interrupt. |
|
| |
|
| -6A: Forces the opponent to stand and jump cancels. You can do this after a 5D to better cover your reset.
| | *6A: Forces the opponent to stand and jump cancels. You can do this after a 5D to better cover your reset. |
|
| |
|
| -Throw: It's possible to combo into throw after 5D, though the opponent can tech it if they're paying attention. Throw has decent damage and oki while adding nothing to the JD bar.
| | *Throw: It's possible to combo into throw after 5D, though the opponent can tech it if they're paying attention. Throw has decent damage and oki while adding nothing to the JD bar. |
|
| |
|
| -236A: On a grounded opponent, it leaves the opponent close to you and leaves you +5. Many people don't expect a reset here.
| | *236A: On a grounded opponent, it leaves the opponent close to you and leaves you +5. Many people don't expect a reset here. |
|
| |
|
| ====More Resources==== | | ====More Resources==== |
| Line 723: |
Line 723: |
|
| |
|
| More difficult, optimized Arizona routes with damage numbers: https://docs.google.com/spreadsheets/d/1EDUOAf8N3j_IRVIw9SaigzV4Ydk7ClBVGr9v5_JxWG4/edit?usp=sharing | | More difficult, optimized Arizona routes with damage numbers: https://docs.google.com/spreadsheets/d/1EDUOAf8N3j_IRVIw9SaigzV4Ydk7ClBVGr9v5_JxWG4/edit?usp=sharing |
|
| |
|
| |
|
| ==Frame Data== | | ==Frame Data== |
| Arizona
|
| Species:
|
Cow
|
| Playstyle:
|
Rushdown, Grounded
|
| HP:
|
5350
|
| Meter Size:
|
180
|
| Movement Options:
|
Short Hop, Superjump, Forward Run, Magic Dash
|
| Voice Actor:
|
Tara Strong
|
| Stage(s):
|
Sunset Prairie, Peaceful Homestead
|
Profile
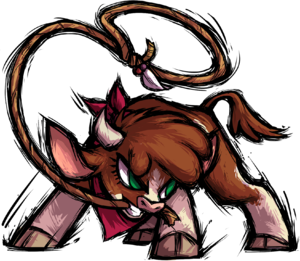
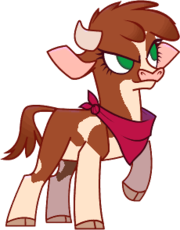
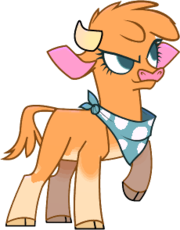
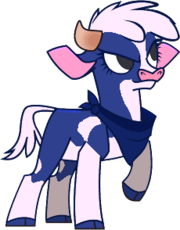
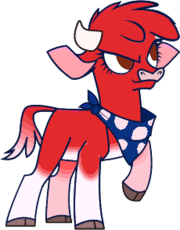
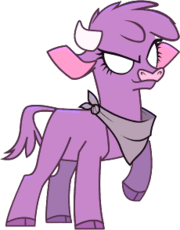
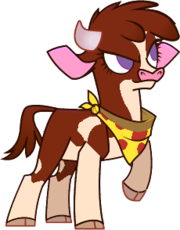
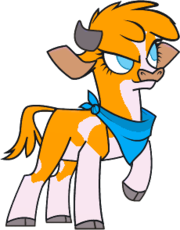
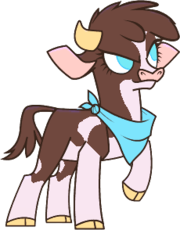
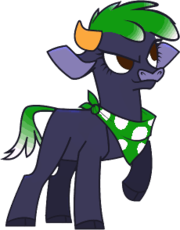
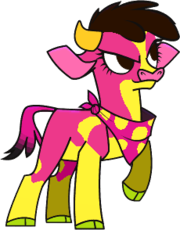
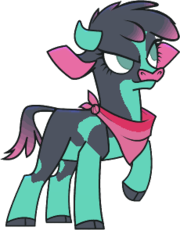
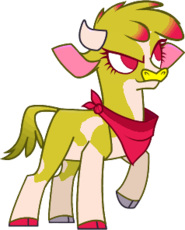
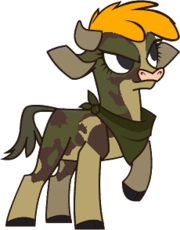
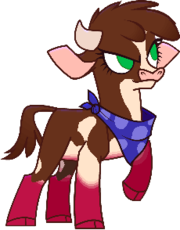
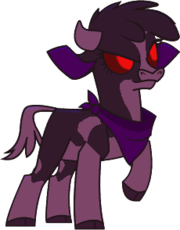
Prarie born 'n raised, Arizona is the youngest daughter of Texas and Mineesota, Head Bull and Cow of her cattlekind clan.
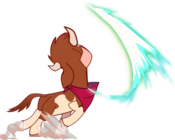
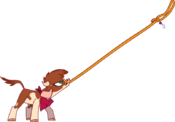
Despite her small size, she's incredibly strong. Though lacking in experience, she's undeterred by obstacles. Many older folks underestimate Arizona, but few are more dependable or trustworthy. When called to action, her powerful headbucks and quaking stomps send opponents flying, then she reels 'em back in with her trusty lasso.
Arizona was the only one among cattlekind with courage enough to answer the Council's call in search of Foenum's Champion, knowing full well what dangers she faced. Thrust into the wider outside world, Arizona tries to make sense of it all (or decides not to care) while she charges headfirst into the fray. [1]
Gameplan
A character with great close-range normals and mixup potential, who uses more committal mid-range options to drag her opponents into the blender. Her magic system utilizes lassos to grab opponents from midrange or maneuver opponents mid-combo. Each successful lasso builds a magic stock, which allows her to use magic options to bolster her combos, defense, and neutral. Once she's built enough resources through her mixup game, she can unleash powerful combos with her Level 2 Super, which is the only move that refunds Juggle Decay mid-combo.
Normal Moves
5A
5A
|
| Base Damage
|
Guard
|
Properties
|
Startup
|
Active
|
Recovery
|
|
Hitstop
|
Hitstun
|
Adv. on Hit
|
Blockstop
|
Blockstun
|
Adv. on Block
|
First Hit Juggle Decay
|
Base Juggle Decay
|
JDG Multiplier
|
| 35
|
HL
|
-
|
5
|
5
|
14
|
vs. Grounded
|
|
|
1
|
|
|
-1
|
|
|
|
| vs. Airborne
|
Your fastest normal. Not the best range, but its speed makes it useful in up-close scenarios, such as challenging strings or quick punishes.
|
|
6A
6A Your best friend. Your best friend.
|
| Base Damage
|
Guard
|
Properties
|
Startup
|
Active
|
Recovery
|
|
Hitstop
|
Hitstun
|
Adv. on Hit
|
Blockstop
|
Blockstun
|
Adv. on Block
|
First Hit Juggle Decay
|
Base Juggle Decay
|
JDG Multiplier
|
| 90
|
HL
|
-
|
8
|
5
|
24
|
vs. Grounded
|
|
|
-10
|
|
|
-7
|
|
|
|
| vs. Airborne
|
Arizona's only reliable anti-air, and a good one at that. Works very well in conjunction with her mid-range tools, and is necessary for certain matchups. Jump cancels on hit, allowing for sneaky resets. One of Arizona's best normals, so learn to use it well.
|
|
5B
5B
|
| Base Damage
|
Guard
|
Properties
|
Startup
|
Active
|
Recovery
|
|
Hitstop
|
Hitstun
|
Adv. on Hit
|
Blockstop
|
Blockstun
|
Adv. on Block
|
First Hit Juggle Decay
|
Base Juggle Decay
|
JDG Multiplier
|
| 100
|
HL
|
-
|
8
|
5
|
17
|
vs. Grounded
|
|
|
1
|
|
|
-2
|
|
|
|
| vs. Airborne
|
Good punish starter and combo filler. Can also be used to reset blockstrings, being only -2.
|
|
6B
6B The People's Elbow The People's Elbow
|
| Base Damage
|
Guard
|
Properties
|
Startup
|
Active
|
Recovery
|
|
Hitstop
|
Hitstun
|
Adv. on Hit
|
Blockstop
|
Blockstun
|
Adv. on Block
|
First Hit Juggle Decay
|
Base Juggle Decay
|
JDG Multiplier
|
| 185
|
H
|
-
|
24
|
5
|
26
|
vs. Grounded
|
|
|
Bounce
|
|
|
-10
|
|
|
|
| vs. Airborne
|
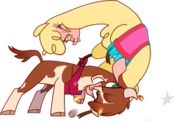
Airborne on frame 10, can high-profile many lower-hitting normals. Uses a groundbounce, even on a grounded opponent. Can be cancelled into from any normal besides 3C, making it great for up-close mixups, especially considering how many lows Arizona has. It's unsafe on block though, so don't overdo it.
|
|
5C
5C Meaty! Meaty!
|
| Base Damage
|
Guard
|
Properties
|
Startup
|
Active
|
Recovery
|
|
Hitstop
|
Hitstun
|
Adv. on Hit
|
Blockstop
|
Blockstun
|
Adv. on Block
|
First Hit Juggle Decay
|
Base Juggle Decay
|
JDG Multiplier
|
| 175
|
HL
|
-
|
12
|
10
|
15
|
vs. Grounded
|
|
|
0
|
|
|
-4
|
|
|
|
| vs. Airborne
|
Can be made extremely + on hit/block if used meaty. Strong punish starter, and has a small disjoint on the first two active frames.
|
|
2A
2A
|
| Base Damage
|
Guard
|
Properties
|
Startup
|
Active
|
Recovery
|
|
Hitstop
|
Hitstun
|
Adv. on Hit
|
Blockstop
|
Blockstun
|
Adv. on Block
|
First Hit Juggle Decay
|
Base Juggle Decay
|
JDG Multiplier
|
| 30
|
L
|
-
|
6
|
5
|
13
|
vs. Grounded
|
|
|
1
|
|
|
-1
|
|
|
|
| vs. Airborne
|
The first of many lows. This is Arizona's fastest low normal. It can be cancelled into itself or 5A once per string. It has very low damage for a combo starter, but it also an incredibly safe confirm starter due to being only -1.
|
|
2B
2B
|
| Base Damage
|
Guard
|
Properties
|
Startup
|
Active
|
Recovery
|
|
Hitstop
|
Hitstun
|
Adv. on Hit
|
Blockstop
|
Blockstun
|
Adv. on Block
|
First Hit Juggle Decay
|
Base Juggle Decay
|
JDG Multiplier
|
| 90
|
L
|
-
|
8
|
5
|
15
|
vs. Grounded
|
|
|
1
|
|
|
-2
|
|
|
|
| vs. Airborne
|
Arizona's second low. It moves Arizona forward a bit, and has good framedata overall. It reaches further than 5B while having the same startup, making it more reliable in iffy punish scenarios. Has a very minor disjoint, but it's generally outclassed by other character's ground pokes.
|
|
2C
2C
|
| Base Damage
|
Guard
|
Properties
|
Startup
|
Active
|
Recovery
|
|
Hitstop
|
Hitstun
|
Adv. on Hit
|
Blockstop
|
Blockstun
|
Adv. on Block
|
First Hit Juggle Decay
|
Base Juggle Decay
|
JDG Multiplier
|
| 140
|
L
|
-
|
13
|
8
|
24
|
vs. Grounded
|
|
|
HKD +32
|
|
|
-9
|
|
|
|
| vs. Airborne
|
Arizona's slowest and most unsafe normal (not counting 3C). It's her longest range normal, has many active frames, is very disjointed, hits low, and leads to a HKD when JD is not maxed out. It's very useful in combos, both as filler and as an ender.
|
|
3C
3C
|
| Base Damage
|
Guard
|
Properties
|
Startup
|
Active
|
Recovery
|
|
Hitstop
|
Hitstun
|
Adv. on Hit
|
Blockstop
|
Blockstun
|
Adv. on Block
|
First Hit Juggle Decay
|
Base Juggle Decay
|
JDG Multiplier
|
| 160
|
HL
|
-
|
11
|
3
|
30
|
vs. Grounded
|
|
|
Launch
|
|
|
-17
|
|
|
|
| vs. Airborne
|
Probably Arizona's worst normal. Horrible on block, whiffs on crouchers, and doesn't lead to many good combo routes without some tricky execution. Never do this on block or in neutral.
|
|
j.A
j.A
|
| Base Damage
|
Guard
|
Properties
|
Startup
|
Active
|
Recovery
|
|
Hitstop
|
Hitstun
|
Adv. on Hit
|
Blockstop
|
Blockstun
|
Adv. on Block
|
First Hit Juggle Decay
|
Base Juggle Decay
|
JDG Multiplier
|
| 45
|
H
|
-
|
6
|
1
|
13
|
vs. Grounded
|
|
|
|
|
|
|
|
|
|
| vs. Airborne
|
Arizona's quickest air normal, hitting in front and slightly under her. It moves her hurtbox up a bit, and therefore can be done extremely low to the ground. Its speed also makes it ideal for fuzzy guard scenarios, if you can convince your opponent to not pushblock. Its biggest downside is the fact that it only has a single active frame, making it less than ideal for air-to-air scenarios.
|
|
j.B
j.B
|
| Base Damage
|
Guard
|
Properties
|
Startup
|
Active
|
Recovery
|
|
Hitstop
|
Hitstun
|
Adv. on Hit
|
Blockstop
|
Blockstun
|
Adv. on Block
|
First Hit Juggle Decay
|
Base Juggle Decay
|
JDG Multiplier
|
| 110
|
H
|
-
|
10
|
5
|
14
|
vs. Grounded
|
|
|
|
|
|
|
|
|
|
| vs. Airborne
|
Good horizontal reach. Not good as a jump-in, due to not hitting underneath Arizona at all. It is best used in conjunction with shorthops, effectively as a mid-range poke. Otherwise, works great in combos and as an air-to-air.
|
|
j.C
j.C Crossup: The Normal Crossup: The Normal
|
| Base Damage
|
Guard
|
Properties
|
Startup
|
Active
|
Recovery
|
|
Hitstop
|
Hitstun
|
Adv. on Hit
|
Blockstop
|
Blockstun
|
Adv. on Block
|
First Hit Juggle Decay
|
Base Juggle Decay
|
JDG Multiplier
|
| 80, 100
|
H
|
-
|
19
|
1(5)3
|
8
|
vs. Grounded
|
|
|
|
|
|
|
|
|
|
| vs. Airborne
|
The definitive Arizona normal. A slow, two-hit air normal with a huge variety of uses. When used on an airborne opponent, it causes a groundbounce. It hits below her, making it her best jump-in. It works ridiculously well as a crossup. When used with shorthops, it becomes a decently quick overhead that leads to pressure on block and some of her longer combos on hit. It can work as an air-to-air when used with superjump. Overall, this is one of her best moves.
|
|
Special Moves
Headbuck
Headbuck
236A/B/C 236A 236A 236B 236B 236C 236C
|
| Base Damage
|
Guard
|
Properties
|
Startup
|
Active
|
Recovery
|
|
Hitstop
|
Hitstun
|
Adv. on Hit
|
Blockstop
|
Blockstun
|
Adv. on Block
|
First Hit Juggle Decay
|
Base Juggle Decay
|
JDG Multiplier
|
| 160
|
HL
|
-
|
12
|
5
|
15
|
vs. Grounded
|
|
|
5
|
|
|
-9
|
|
|
|
| vs. Airborne
|
Whiffs crouchers, cancels into 236B or 236C.
|
| 230
|
HL
|
-
|
17
|
5
|
15
|
vs. Grounded
|
|
|
KD
|
|
|
-11
|
|
|
|
| vs. Airborne
|
Whiffs on crouchers. It can sometimes work as an incidental anti-air. Can easily combo into 5D.
|
| 290
|
HL
|
-
|
21
|
5
|
22
|
vs. Grounded
|
|
|
Tumble
|
|
|
-14
|
|
|
|
| vs. Airborne
|
Does high damage and leaves the opponent in a tumble state. The tumble counts as a groundbounce. Mostly used as a combo extender, especially in the corner.
|
|
Stomp
Stomp
22A/B/C 22A 22A 22B 22B 22C 22C
|
| Base Damage
|
Guard
|
Properties
|
Startup
|
Active
|
Recovery
|
|
Hitstop
|
Hitstun
|
Adv. on Hit
|
Blockstop
|
Blockstun
|
Adv. on Block
|
First Hit Juggle Decay
|
Base Juggle Decay
|
JDG Multiplier
|
| 40,70
|
L
|
-
|
10
|
2,5
|
18
|
vs. Grounded
|
|
|
KD
|
|
|
-7
|
|
|
|
| vs. Airborne
|
All non-magic stomps have two hitboxes. One comes out faster and will only hit up-close, grounded opponents. The second hitbox is the mid-range shockwave. which comes out 2 frames after the initial close hitbox. Arizona's 22A can be cancelled into 22B or 22C, and any of her stomps can cancel into her headbucks (236X).
22A is the quickest stomp, but has the shortest range. It's relatively safe at only -7, and can be very difficult to punish, especially if spaced.
|
| 80,120
|
L
|
-
|
15
|
2,5
|
18
|
vs. Grounded
|
|
|
KD
|
|
|
-9
|
|
|
|
| vs. Airborne
|
Not as useful in combos as the other two stomps, and strikes a middle ground of speed and range.
|
| 150,150
|
L
|
-
|
18
|
2,5
|
19
|
vs. Grounded
|
|
|
KD
|
|
|
-11
|
|
|
|
| vs. Airborne
|
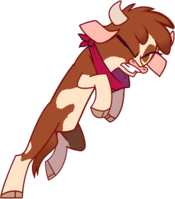
Pops the opponent up a decent amount, allowing for combos. All stomps are jump-cancellable, but 22C utilizes this the most. Cancels into ropes or headbutts as well.
|
|
Super
Trample
236XX Y'all in for a... Y'all in for a... Tramplin'! Tramplin'!
|
| Base Damage
|
Guard
|
Properties
|
Startup
|
Active
|
Recovery
|
|
Hitstop
|
Hitstun
|
Adv. on Hit
|
Blockstop
|
Blockstun
|
Adv. on Block
|
First Hit Juggle Decay
|
Base Juggle Decay
|
JDG Multiplier
|
| 770
|
HL
|
-
|
3
|
30
|
113
|
vs. Grounded
|
|
|
HKD +19
|
|
|
-49
|
|
|
|
| vs. Airborne
|
The single fastest, highest first-hit damage, most unsafe move in the game. Has invincibility for the first 10 frames, and infinite armor frames 11-32. It loses damage the longer it's active. Not good as a combo ender, due to suffering heavily from scaling and having terrible oki. A very scary reversal, leading to high damage with two bars.
|
|
Follow Up
Rebound
214XX Roundabout... Roundabout... Rodeo! Rodeo!
|
| Base Damage
|
Guard
|
Properties
|
Startup
|
Active
|
Recovery
|
|
Hitstop
|
Hitstun
|
Adv. on Hit
|
Blockstop
|
Blockstun
|
Adv. on Block
|
First Hit Juggle Decay
|
Base Juggle Decay
|
JDG Multiplier
|
| 250
|
HL
|
-
|
64
|
11
|
22
|
vs. Grounded
|
|
|
|
|
|
|
|
|
|
| vs. Airborne
|
Refunds 240 JD, and allows for followups afterwards. Can only be cancelled into from 236XX on hit. The JD refund is very useful for combo extensions, as well as resets or setups. The most common followups are Dash 4D/5D or Magic Dash.
|
|
Throws
Forward Throw
Forward Throw
B+C / 6B+C
|
| Base Damage
|
Guard
|
Properties
|
Startup
|
Active
|
Recovery
|
|
Hitstop
|
Hitstun
|
Adv. on Hit
|
Blockstop
|
Blockstun
|
Adv. on Block
|
First Hit Juggle Decay
|
Base Juggle Decay
|
JDG Multiplier
|
| 50,50,340
|
Throw
|
-
|
6
|
1
|
18
|
vs. Grounded
|
|
|
HKD +22
|
|
|
|
|
|
|
| vs. Airborne
|
The only throw that is impossible to combo from, making it the weakest damage-wise. However, it still grants a close-range HKD, giving it its own utility.
|
|
Back Throw
Back Throw
4B+C
|
| Base Damage
|
Guard
|
Properties
|
Startup
|
Active
|
Recovery
|
|
Hitstop
|
Hitstun
|
Adv. on Hit
|
Blockstop
|
Blockstun
|
Adv. on Block
|
First Hit Juggle Decay
|
Base Juggle Decay
|
JDG Multiplier
|
| 50,50,340
|
Throw
|
-
|
6
|
1
|
18
|
vs. Grounded
|
|
|
HKD +35
|
|
|
|
|
|
|
| vs. Airborne
|
The only differences between this and her forward throw are the distance it leaves the opponent and the frame advantage afterwards. This one throws the opponent much further away.
|
|
Air Throw
Air Throw
j.B+C
|
| Base Damage
|
Guard
|
Properties
|
Startup
|
Active
|
Recovery
|
|
Hitstop
|
Hitstun
|
Adv. on Hit
|
Blockstop
|
Blockstun
|
Adv. on Block
|
First Hit Juggle Decay
|
Base Juggle Decay
|
JDG Multiplier
|
| 300
|
Throw
|
-
|
8
|
3
|
13
|
vs. Grounded
|
|
|
HKD +17
|
|
|
|
|
|
|
| vs. Airborne
|
Brings the opponent straight down and leaves them in a HKD situation. No combos possible.
|
|
Magic
Arizona can use magic for a wide variety of uses. She has a maximum of 3 stacks of mana, but can only obtain it by lassoing opponents.
5D
Lasso 5D 5D 2D 2D 4D 4D
|
| Base Damage
|
Guard
|
Properties
|
Startup
|
Active
|
Recovery
|
|
Hitstop
|
Hitstun
|
Adv. on Hit
|
Blockstop
|
Blockstun
|
Adv. on Block
|
First Hit Juggle Decay
|
Base Juggle Decay
|
JDG Multiplier
|
| -
|
UNB
|
-
|
20
|
1
|
25
|
vs. Grounded
|
|
|
Stagger +16
|
|
|
|
|
|
|
| vs. Airborne
|
Causes a stagger on hit. Only hits grounded, standing opponents in neutral. Can catch airborne opponents if they are being combo'd. Forces 20% extra scaling on the rest of the combo. Grants one magic stock on hit. Useful as a combo extender and as a reset tool. Be aware that if JD is maxed, the stagger becomes unusable for resets.
|
| 150
|
UNB
|
-
|
20
|
1
|
25
|
vs. Grounded
|
|
|
HKD +32
|
|
|
|
|
|
|
| vs. Airborne
|
Switches sides and leaves the opponent in a HKD. Can hit grounded opponents in neutral, even if they are crouching. Does not allow a combo afterwards, making it relatively unrewarding on hit compared to her other lassos. Grants one magic stock on hit.
|
| 100
|
UNB
|
-
|
20
|
1
|
25
|
vs. Grounded
|
|
|
Bounce
|
|
|
|
|
|
|
| vs. Airborne
|
Only hits airborne opponents. Useful as a callout on midrange jumps or as a pickup after a ranged stomp. Switches sides and uses a groundbounce. Forces 20% extra scaling on the rest of the combo. Grants one magic stock on hit.
|
|
Magic Specials
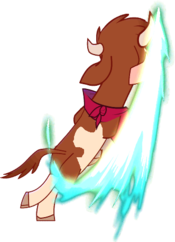
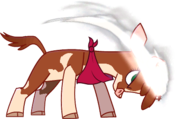
Magic Specials Magic Headbuck - 236D Magic Headbuck - 236D Magic Stomp - 22D Magic Stomp - 22D Magic Dash Magic Dash Counter Counter
|
| Base Damage
|
Guard
|
Properties
|
Startup
|
Active
|
Recovery
|
|
Hitstop
|
Hitstun
|
Adv. on Hit
|
Blockstop
|
Blockstun
|
Adv. on Block
|
First Hit Juggle Decay
|
Base Juggle Decay
|
JDG Multiplier
|
| 210
|
HL
|
-
|
10
|
5
|
22
|
vs. Grounded
|
|
|
Wallstick
|
|
|
-14
|
|
|
|
| vs. Airborne
|
Has one hit of armor, starting at frame 1. Costs one magic. Moves very quickly and has good range. Wallsticks the opponent, allowing for followups, especially in the corner. Its frame one armor is useful for punishing certain strings, though it loses to throws, multihit moves, and moves that recover fast enough for the opponent to block.
|
| 35
|
Unblockable
|
-
|
34
|
2
|
35
|
vs. Grounded
|
|
|
Launch
|
|
|
|
|
|
|
| vs. Airborne
|
Fullscreen unblockable that costs 2 Magic. Can be jump-cancelled on hit, allowing for a followup from any distance. Can be useful as a surprise opener up close.
|
| -
|
-
|
-
|
-
|
-
|
29
|
vs. Grounded
|
|
|
|
|
|
|
|
|
|
| vs. Airborne
|
Uses 1 Magic. Projectile invincible dash that can side switch. Has a low hurtbox, but can still be hit if you're not careful. Training mode says it's 45 frames, but it's effectively 29 if you count for the slowdown effect. Its main uses are corner escapes and easy followups from Level 2 super.
|
| -
|
-
|
-
|
1
|
15
|
25
|
vs. Grounded
|
|
|
|
|
|
|
|
|
|
| vs. Airborne
|
Uses 1 Magic. Counters any non-super strike or projectile during the first 15 frames. Vulnerable to throws.
|
| 400
|
HL
|
-
|
33
|
9
|
4
|
vs. Grounded
|
|
|
KD
|
|
|
1
|
|
|
|
| vs. Airborne
|
If hit during the 15 frames of counter state, Arizona lashes out with a powerful counterattack. She has an all-guard state while attacking, meaning she can't take normal damage, only chip damage. She can be thrown out of this followup, though doing so is difficult. This move can never benefit from counterhit damage bonus. It launches the opponent on hit, allowing for a followup juggle. On block, it's +1, giving Arizona a slight advantage to start pressure with.
|
|
Combos
Them's Fightin' Herds allows for a lot of creativity with your combos, and it's difficult to provide a list of BnBs because of how the Juggle Decay system works. For now, these are the important things to note about Arizona's combos.
General BnB
If you want a generally applicable route that works in most scenarios regardless of starter, consider this route:
- (Starter) > 5C > 22A > 22C > Shorthop Forward > j.B > 5B > 5C > 22A > 22C > 236A > 236C > 2D
The above route and alternate versions of it can be seen here. This route works without consideration of the Juggle Decay system, and thus you'll miss out on the benefits of playing around the JD system.
Combo States
Arizona has access to Groundbounces, a Wallstick, and a Stagger. Each of these is only allowed once per combo. You can have one bounce, one stagger, and one stick per combo. Attempting to do a second will usually leave the opponent in a soft knockdown.
Arizona has several Groundbounces to worry about. They are the following:
-6B (Even if used on a grounded opponent, it will eat your groundbounce.)
-j.C (Only the second hit, and only on airborne opponents.)
-4D (Also switches sides.)
-236C (The tumble state counts as a groundbounce.)
This means that you can only have one of these per combo, unless you plan on ending the combo with a second one. You must be mindful of this, or else you may prematurely end a combo unexpectedly and be punished for trying to continue it.
It's much easier to remember her stagger and wallstick. Her stagger is 5D (Neutral Lasso), and her wallstick is 236D (Magic Headbuck). The stagger can be used to restand opponents and is great as a reset tool. The wallstick is pretty much only used as a combo extender.
Juggle Decay
Juggle Decay is the little bar underneath your opponent's health bar that fills up as you combo them. When it fills up, a few key things happen. Your opponent will automatically become airborne, meaning standing resets are no longer possible. They will become heavier as the combo continues, and will build more meter per hit than you. Staggers will end earlier, and any move (except super) that Hard Knockdowns the opponent will instead give a Soft Knockdown, which removes the possibility of guaranteed oki/setups.
This is important for Arizona because it heavily influences the way her combos work. She is one of the characters that has to care the most about Juggle Decay, due to how useful resets and HKDs are for her.
Basic Routes
- 5A 5B 5C 3C (Jump Cancel) j.A j.B j.C, 5A 5B 5C - Known as the Magic Series, this is the "universal" combo route that is shown in every character's command list. It's only listed here because it shows that you can use jC to extend combos, but overall this combo is not recommended at all. It does pretty bad damage, it's inconsistent with the way jC hits, and it teaches bad habits, such as using 3C. The only purpose this combo serves is if you can't perform special moves at all. Otherwise the next combo is much better for beginners.
- (Normals) 5C 22A 22C 236A 236C 2D - BnB combo/ender. This ender is probably the best route if you're just starting off or if you don't know where to take a combo. It makes use of Arizona's specials cancelling into each other, it gives you a magic stock, and more often than not it ends in a Hard Knockdown depending on how many normals you use before 5C. Cancelling into 22A is far safer on block than 3C, and if you realize the opponent is blocking, you can stop there. Most people are bad at punishing 22A, especially with the threat of frametrapping into 22C, so you can generally end there safely. Remember that 236C cannot tumble the opponent if you've already used a bounce, which is most important to remember after 6B. If you're unsure, do 236B instead of 236C.
- (Normals) 2C 236B 5D - This route makes use of the 5D stagger. You can end the combo here for a reset, or combine it with the above route for a decently damaging combo that gives you two magic. If you use both in one combo, you probably won't be getting a HKD.
- (Normals) 2C 22C j.B - You can do this a couple times in one combo. It's a pretty decent route, though nailing the timing of 2C 22C can be difficult. Doing 22A 22C is easier, though less efficient in terms of JD and damage.
- 3C (Jump Cancel) j.B j.A j.B - One of the only routes to use 3C. The main purpose of this is to extend a combo pre-JD without using your groundbounce. The timing differs depending on if you used 2C before the 3C or not.
Corner
- 236C 2B 2C 22B 236B - It's much easier to use 236C as a combo extender in the corner. If the opponent is cornered, try to save your groundbounce for this ender to increase your damage.
- 3C j.C (Backdash) 5B 5C 2C 5D - You can also do this after 236C. It's one of the only ways to land a rope on a cornered opponent.
- 22C 236B 5A - You can link 5A after 236B in the corner, which can help add some damage.
- 236D - Very easy tool to use in the corner for extensions.
Super
Don't end with Level 1 Super unless it will kill. It does very low damage at the end of combos, and is not worth the meter usually. Save your meter for Level 2. You can extend after a Level 2 with the following techniques:
- Dash into 4D/5D - The easiest extender. Don't use these if you already used them before the Super. (You probably shouldn't use ropes before super anyway, because ropes lower the damage for the rest of your combo.)
- Magic Dash - Moves you to the perfect position to catch the opponent with some normals.
- Forward Dash - Very tricky to time, but with good dashing and timing, you can link normals without needing to use Magic Dash.
Hard Knockdowns/Resets
Arizona thrives on the mixup game. Here are some important moves that allow you to mix your opponent up. Remember that these only work if Juggle Decay is not maxed out.
- 2C: Easy to use combo ender, leaves you +32, giving you plenty of time to go for a crossup/shorthop/dashup low/dashup throw/whatever you want.
- 2D: Another good combo ender, usually used after a 236B or 236C. This one leaves you further than 2C, but you can still cross the opponent up with dash jC from that range. Be aware that it switches sides on connect.
- 5D: Restands the opponent and allows a reset. You're not quite + enough to safely go for a shorthop/6B, as the opponent can 5A to interrupt.
- 6A: Forces the opponent to stand and jump cancels. You can do this after a 5D to better cover your reset.
- Throw: It's possible to combo into throw after 5D, though the opponent can tech it if they're paying attention. Throw has decent damage and oki while adding nothing to the JD bar.
- 236A: On a grounded opponent, it leaves the opponent close to you and leaves you +5. Many people don't expect a reset here.
More Resources
Candel's Arizona Guide (Comes with combo files for practicing different routes.): https://docs.google.com/document/d/1gN2awIxSJEmhTGsmoNF8Xw9P76Hiu_CReVFHNKM40QM/edit?usp=sharing
More difficult, optimized Arizona routes with damage numbers: https://docs.google.com/spreadsheets/d/1EDUOAf8N3j_IRVIw9SaigzV4Ydk7ClBVGr9v5_JxWG4/edit?usp=sharing
Frame Data
Detailed Frame Data
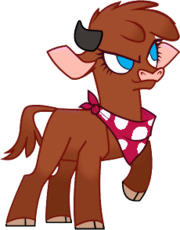
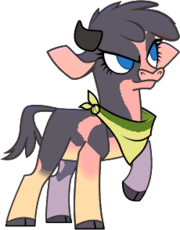
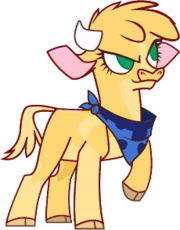
Colors
| General
|
|
| Characters
|
|
| Predators
|
|
| Events
|
|
