Them's Fightin' Herds/Oleander: Difference between revisions

From Mizuumi Wiki
Jump to navigation Jump to search
m (→‎Normal Moves: Added 6B move, no data yet)
No edit summary
Line 186: Line 186:
  |guard=HL
  |guard=HL
  |startup=8
  |startup=8
  |active=6
  |active=10
  |recovery=16
  |recovery=12
  |advHit=1
  |advHit=1
  |advBlock=-6
  |advBlock=-6

Revision as of 18:07, 25 March 2021

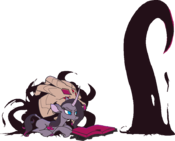
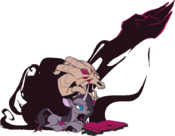
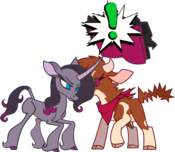
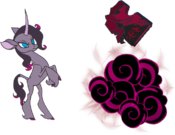
Oleander 2.png
Oleander
Species: Unicorn
Playstyle: All-Rounder
HP: 5100
Meter Size: 210
Movement Options: Back/Forward Dash, Double Jump, Teleport,
Voice Actor: Alexa Kahn
Stage(s): The Woodlands

Profile

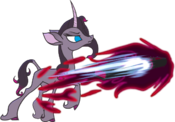
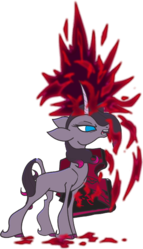
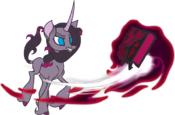
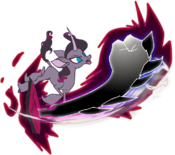
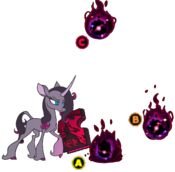
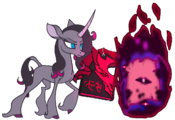
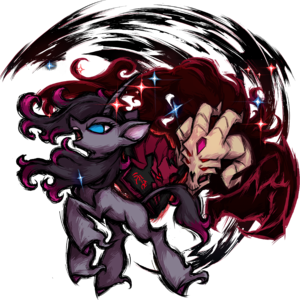
Oleander, the great granddaughter of Divine Oracle Amaryllis, sensed the return of Predator-kind 13 years before the first actual sighting. Her masters in the Order of the Horn saw no need to take action, as always, urging her to trust that the power of Light Magic would keep Foenum safe.

Frustrated and desperate, she took matters upon herself. She began studying from a book of Dark Magic and eventually forged a pact with the demon trapped inside it. The evidence of her blasphemous act manifested over time as her coat began to turn a darker shade. Despite condemnation from those around her, Oleander is determined to prove that Dark Magic can be used to do good.

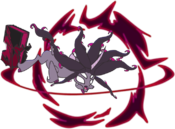
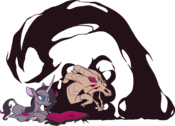
With the aid of her demonic companion FHTNG TH§ ¿NSP§KBL? (Fred for short), Oleander may steal energy from her opponents, eventually amassing enough to temporarily loosen Fred’s bindings so he may fight alongside her. But can she really control Fred, or will she discover the reason for his imprisonment after it’s already too late…? [1]

Gameplan

Oleander is a balanced character with access to a variety of movement and offensive tools. Her double jump and teleports give her good mobility, while her fireballs and far-reaching normals give her multiple approach and attack options.

Using magic, Oleander can set traps (214X) to extend combos, control space, or as part of your okizeme game (though with ground rolls as a wakeup option this may not be a strong option in general). Magic can also be used to create a powered up fireball (236D), and to access offensive teleports (22A, 22B, and 22D). Therefore generating and managing magic is key to playing Oleander effectively as having access to these powerful moves lets her reach her full potential.

Unleash her devastating level 1 beam for extra damage, or summon her demonic book-dwelling pet (more commonly knows as "Fred") to add even more devastating attacks to her arsenal.

These tools, complemented by some standard close-range lows (2A, 2C), overhead (6C), and throws, make Oleander a quite versatile character that will allow for a wide range of playstyles.

Pressure


While pressuring a blocking opponent, 2C can be cancelled into 236X to push them out of punish range where you can resume fireball pressure, or threaten with a dash in 5B or a j.C.

5B > 6C is your overhead mixup and is also a frame trap. However be aware that 6C can be punished on block.

Teleports (22A and 22B) can be cancelled into from just about any normal attack as a means to move in and start a new pressure string. However be very aware that the opponent can easily jab you out of the startup and punish you if they are able to predict it.

An interesting property of traps (214X) is that they can be cancelled into from fireballs (236X). This has the potential for some gimmicks such as 5A > 5B > 5C > 236B > 214A, which sets a trap just in front of the opponent - if they move in for a counter attack after blocking the fireball, you may be able to land a counterhit from the trap.

Okizeme


Not an okizeme setup per se, but sweep (2C) is a perfect time to safely hit 5D to generate a Magic stock (2C gatlings into 5D making it safe).

On hard knockdown from a 2C, a trap (214A) can be set for the opponent to wake up into.

In situations where the opponent is able to ground tech roll, there is potential to use these traps to cover at least some options. For example, 3C > j.A > j.B > j.2C > j.214A will drop a trap on top of the opponent, forcing them to either roll, or wake up in place and deal with the trap.

Matchups

Tianhuo

Because Tianhuo is going to try to stay in close range and keep up pressure, you will have much less opportunity to safely generate Magic with 5D / j.D. Instead, focus on good defensive play to keep Tianhuo out using 6A, j.C, 236X, and j.236X. 22D is also useful here as Tianhuo is less likely to be playing defensively and thus more likely to be caught by these.

Because Tianhuo's gameplan relies heavily on movement, you will want to make heavy use of j.C to control air space. Use 6A to shut down Tianhuo's jump-in attacks when possible, or also 5B and 5C to threaten the space in front of you. 214X can also be used to control space, though you will likely have less opportunity to generate Magic with Tianhuo moving in on you - so make them count. Simple 236X > 214X combos can push Tianhuo away from you while setting a trap to make it tough for her to get back in.

Velvet

Oleander can use 236X / j.236X to play her own ranged game against Velvet's while generating stocks of magic with 5D and j.D. j.D can be especially useful for its unique movement to help avoid Velvet's ranged attacks. Your goal at long range should be to avoid Velvet's ranged attacks while generating Magic, but eventually you want to move in to start a mid to close-range offensive. Teleports can be used to close the distance of course, but the Magic is probably better saved for other offensive tools; therefore, practicing moving in the old-fashioned way with patience and space-threatening normals (j.C, 2C, etc.) is important.

22B can be useful for intercepting Velvet if she tries to escape the corner back to midscreen.

Be mindful of Velvet's Magic Ice Eruption which has invincible startup when pressuring her in the corner.

Normal Moves

5A
5A
TFH Oleander 5A.png
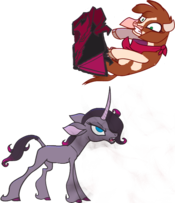
"This book hits back!"
Base Damage Guard Properties Startup Active Recovery   Hitstop Hitstun Adv. on Hit Blockstop Blockstun Adv. on Block First Hit Juggle Decay Base Juggle Decay JDG Multiplier
25 HL - 5 5 13 vs. Grounded 2 -2
vs. Airborne

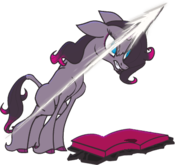
One of the best normals in the game. Disjointed, long-range, 5 frame startup, leads to combos, very potent after forward dashes. Very good normal for controlling the ground.

2A
2A
TFH Oleander 2A.png
She's not reading. She's judging you, silently.
Base Damage Guard Properties Startup Active Recovery   Hitstop Hitstun Adv. on Hit Blockstop Blockstun Adv. on Block First Hit Juggle Decay Base Juggle Decay JDG Multiplier
20 L - 6 3 15 vs. Grounded 0 -2
vs. Airborne

Not as long range as 5A, but it hits low. This is what you'll usually be pressuring with when point-blank.

6A
6A
TFH Oleander 6A.png
Base Damage Guard Properties Startup Active Recovery   Hitstop Hitstun Adv. on Hit Blockstop Blockstun Adv. on Block First Hit Juggle Decay Base Juggle Decay JDG Multiplier
90 HL - 8 5 24 vs. Grounded -10 -7
vs. Airborne

High vertical reach, not as good horizontally. Has a crouching hurtbox starting from frame 1, and is tied for fastest 6A in the game.

6B
6B
TFH Oleander 6B.png
Base Damage Guard Properties Startup Active Recovery   Hitstop Hitstun Adv. on Hit Blockstop Blockstun Adv. on Block First Hit Juggle Decay Base Juggle Decay JDG Multiplier
- L - - - - vs. Grounded
vs. Airborne

Low sweeping attack.

5B
5B
TFH Oleander 5B.png
Take a look.
Take a look.
Base Damage Guard Properties Startup Active Recovery   Hitstop Hitstun Adv. on Hit Blockstop Blockstun Adv. on Block First Hit Juggle Decay Base Juggle Decay JDG Multiplier
70 HL - 11 4 19 vs. Grounded 2 -5
vs. Airborne

Longer range than 5A, but twice the startup. Does low pushback in grounded combos, making it more ideal than 2B in terms of keeping the opponent close enough for a launcher. Doesn't knock the opponent up that high in juggles, so be wary when using it on airborne opponents. Otherwise, a respectable poke.

2B
2B
TFH Oleander 2B.png
Its in a book.
Its in a book.
Base Damage Guard Properties Startup Active Recovery   Hitstop Hitstun Adv. on Hit Blockstop Blockstun Adv. on Block First Hit Juggle Decay Base Juggle Decay JDG Multiplier
110 HL - 8 10 12 vs. Grounded 1 -6
vs. Airborne

Not a low. Good punish starter and anti-air. It hits further horizontally than 6A while hitting at the same speed, and can also tag opponents who are going over your head, though it lacks the crouching hurtbox of 6A.

5C
5C
TFH Oleander 5C.png
Reading Painbow.
Reading Painbow.
Base Damage Guard Properties Startup Active Recovery   Hitstop Hitstun Adv. on Hit Blockstop Blockstun Adv. on Block First Hit Juggle Decay Base Juggle Decay JDG Multiplier
140 HL - 15 8 17 vs. Grounded 0 -6
vs. Airborne

Very slow, but covers a lot of space both horizontally and vertically. Does high damage as a combo starter or as a preemptive anti-air/anti-approach tool.

2C
2C
TFH Oleander 2C.png
Base Damage Guard Properties Startup Active Recovery   Hitstop Hitstun Adv. on Hit Blockstop Blockstun Adv. on Block First Hit Juggle Decay Base Juggle Decay JDG Multiplier
120 L - 15 9 19 vs. Grounded HKD +36 -12
vs. Airborne

Causes hard knockdown. Useful as a way to make sure your opponents are blocking low at midrange.

3C
3C
TFH Oleander 3C.png
Base Damage Guard Properties Startup Active Recovery   Hitstop Hitstun Adv. on Hit Blockstop Blockstun Adv. on Block First Hit Juggle Decay Base Juggle Decay JDG Multiplier
140 HL - 17 5 29 vs. Grounded Launch -17
vs. Airborne

Universal launcher, good vertical reach. Jump-cancels on hit, very unsafe on block.

6C
6C
TFH Oleander 6C.png
Base Damage Guard Properties Startup Active Recovery   Hitstop Hitstun Adv. on Hit Blockstop Blockstun Adv. on Block First Hit Juggle Decay Base Juggle Decay JDG Multiplier
20,80 H - 23 6 20 vs. Grounded 6 -11
vs. Airborne

Causes groundbounce on airborne opponents. Cancels into specials only on hit. Links into 5A on hit. Has very good range and can be hard to punish when spaced.

j.A
jA
TFH Oleander jA.png
Base Damage Guard Properties Startup Active Recovery   Hitstop Hitstun Adv. on Hit Blockstop Blockstun Adv. on Block First Hit Juggle Decay Base Juggle Decay JDG Multiplier
50 H - 8 4 11 vs. Grounded
vs. Airborne

Not the best normal for air-to-ground situations, though its low blockstun may allow for tickthrows. It mostly works well as a quick air-to-air.

j.B
jB
TFH Oleander jB.png
Base Damage Guard Properties Startup Active Recovery   Hitstop Hitstun Adv. on Hit Blockstop Blockstun Adv. on Block First Hit Juggle Decay Base Juggle Decay JDG Multiplier
70 H - 12 3 17 vs. Grounded
vs. Airborne

A very good jump-in normal. Raises Oleander's hurtbox very high up, while hitting far down with a disjointed hitbox. Can cross up in some situations.

j.C
jC
TFH Oleander jC.png
Here comes the giant fist!
Base Damage Guard Properties Startup Active Recovery   Hitstop Hitstun Adv. on Hit Blockstop Blockstun Adv. on Block First Hit Juggle Decay Base Juggle Decay JDG Multiplier
180 H - 14 4 17 vs. Grounded
vs. Airborne

Very high damage jump normal, very good at controlling air space, and works very well in juggles. Can cross up in some situations.

j.2C
j2C
TFH Oleander j2C.png
An older version of this move was not fine.
Base Damage Guard Properties Startup Active Recovery   Hitstop Hitstun Adv. on Hit Blockstop Blockstun Adv. on Block First Hit Juggle Decay Base Juggle Decay JDG Multiplier
225 H - 16 6 16 vs. Grounded Groundbounce
vs. Airborne

Causes groundbounce, even on grounded opponents. Big disjointed hitbox all around Oleander, and alters Oleander's jump arc slightly. Hits standing opponents quickly, which means you may catch some 6A attempts or whiff punish grounded opponents. Can also control air space relatively well.

Special Moves

Shadow Spark
Shadow Spark
236A/B/C
TFH Oleander 236A.png
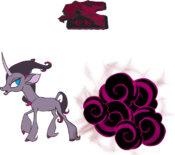
Chuck some plasma!
Chuck some plasma!
Base Damage Guard Properties Startup Active Recovery   Hitstop Hitstun Adv. on Hit Blockstop Blockstun Adv. on Block First Hit Juggle Decay Base Juggle Decay JDG Multiplier
125 HL - 15 - 34 vs. Grounded -1 -2
vs. Airborne

Slow grounded fireball, can't be ducked by opponents. Some characters can low profile through it, or have projectile invulnerability. Can cancel into teleports on whiff. Using slow fireballs may help you approach, giving you more time to follow behind it.

125 HL - 15 - 34 vs. Grounded -1 -2
vs. Airborne

Mid-speed version.

125 HL - 15 - 34 vs. Grounded -1 -2
vs. Airborne

Fastest version. Can catch opponents by surprise, as opposed to the slower versions, but don't give as much of an opportunity to follow behind.

125 HL - 15 - 34 vs. Grounded -9 -9
vs. Airborne

Jumping versions of Oleander's fireballs. You can have one air spark and one ground spark onscreen at one time. Airborne sparks cannot hit crouching opponents, but can be jump cancelled on whiff, making them extremely safe to throw out there. You can throw an air spark, then jump backwards to retreat, jump backwards and read to get magic, or jump forward to get pressure, and the opponent only has a 14 frame window to hit you before you can block. These are arguably more useful than grounded sparks, being much harder to punish and effectively controlling space despite being crouchable.


Teleport
Teleport
22C
TFH Oleander 22A.png
C, Uses No Magic
C, Uses No Magic
Base Damage Guard Properties Startup Active Recovery   Hitstop Hitstun Adv. on Hit Blockstop Blockstun Adv. on Block First Hit Juggle Decay Base Juggle Decay JDG Multiplier
N/A - - 4 17,2 15 vs. Grounded
vs. Airborne

Away! Does not cost magic when used grounded. All other teleports cost magic and can be found in the Magic section. The first set of "active" frames refer to the times in which Oleander is "in transit", being completely invulnerable, while the second set refers to frames where Oleander is invincible to everything except grabs.

Super

Shadow Blast
236XX
TFH Oleander Super.png
Base Damage Guard Properties Startup Active Recovery   Hitstop Hitstun Adv. on Hit Blockstop Blockstun Adv. on Block First Hit Juggle Decay Base Juggle Decay JDG Multiplier
26x31, 250 HL - 9+3 37 91 vs. Grounded HKD +8 -21
vs. Airborne

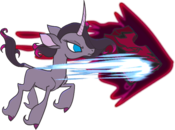
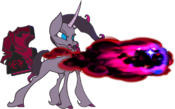
Full-screen laser beam of death. Can be used to end combos, but it's usually better to save meter for Fred. Its speed and range makes it difficult to avoid if the opponent is whiffing a move or a backdash.

Follow Up

Hi Fred!
214XX
TFH Oleander SuperFollowUp.png
"I'm a friend on the other side!"
Base Damage Guard Properties Startup Active Recovery   Hitstop Hitstun Adv. on Hit Blockstop Blockstun Adv. on Block First Hit Juggle Decay Base Juggle Decay JDG Multiplier
50 HL - 5 1 45 vs. Grounded Wallstick
vs. Airborne

Summons Fred, a puppet that is commanded with various D commands and lasts about 20 seconds. Fred's attacks will happen separately from Oleander, making it possible to attack while blocking or make unsafe moves safe with his commands.

4D
4D
TFH Oleander 4D.png
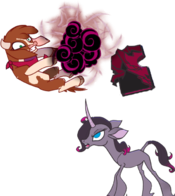
Here comes THE GIANT FIST!
Base Damage Guard Properties Startup Active Recovery   Hitstop Hitstun Adv. on Hit Blockstop Blockstun Adv. on Block First Hit Juggle Decay Base Juggle Decay JDG Multiplier
180 HL - 45 6 58 vs. Grounded Launch
vs. Airborne

Fred punches the opponent in the back by using a portal. Doesn't cross up unless Oleander teleports behind the opponent.

230 HL - 61 6 58 vs. Grounded Launch
vs. Airborne

More damage than uncharged. Can be used to pick up from some moves, such as Oleander's level 1 super.

1D
1D
TFH Oleander 1D.png
"Die!"
"Die!"
Base Damage Guard Properties Startup Active Recovery   Hitstop Hitstun Adv. on Hit Blockstop Blockstun Adv. on Block First Hit Juggle Decay Base Juggle Decay JDG Multiplier
60 HL - 22 6 36 vs. Grounded Launch
vs. Airborne

Quick backwards swipe, hits close to Oleander. Useful in combos and maintaining pressure, and has short blockstun, making it tough for the opponent to pushblock.

60,60 HL - 33 12 36 vs. Grounded Launch
vs. Airborne

Hits twice, locking opponents down for a bit longer.

2D
2D
TFH Oleander 2D.png
"Yes... YEEESSS!"
"Yes... YEEESSS!"
Base Damage Guard Properties Startup Active Recovery   Hitstop Hitstun Adv. on Hit Blockstop Blockstun Adv. on Block First Hit Juggle Decay Base Juggle Decay JDG Multiplier
60,90 HL - 26 6 25 vs. Grounded Launch
vs. Airborne

Can't hit grounded opponents. Drags the opponent downwards, resulting in a soft knockdown if Oleander does not hit them before they land.

170 HL - 42 6 25 vs. Grounded Bounce
vs. Airborne

Instead of simply knocking the opponent down, this version results in a groundbounce, giving Oleander more time to follow up.

3D
3D
TFH Oleander 3D.png
"Phenomenal cosmic power!"
Base Damage Guard Properties Startup Active Recovery   Hitstop Hitstun Adv. on Hit Blockstop Blockstun Adv. on Block First Hit Juggle Decay Base Juggle Decay JDG Multiplier
40,90,110 HL - 27 2(1)1(1)15 42 vs. Grounded Launch
vs. Airborne

Another upwards-hitting move similar to 2D. This version is a multi-hit blast that can lock the opponent down in midair or juggle them in combos. Can't hit grounded opponents.

40,90,110,150 HL - 42 2(1)1(1)15 42 vs. Grounded Launch
vs. Airborne

The multi-hit blast gains a fourth, more powerful hit.

6D
6D
TFH Oleander 6D.png
[evil laughter]
[evil laughter]
Base Damage Guard Properties Startup Active Recovery   Hitstop Hitstun Adv. on Hit Blockstop Blockstun Adv. on Block First Hit Juggle Decay Base Juggle Decay JDG Multiplier
50,130 HL - 36 5(1)3 44 vs. Grounded Launch
vs. Airborne

Long-range swipe forward. Hits twice, but the first hit only works up close.

50,160 HL - 52 5(1)3 44 vs. Grounded Wallbounce
vs. Airborne

Bounces opponents off the wall when near the corner, which can be useful in combos.

Throws

Forward Throw
Forward Throw
B+C / 6B+C
TFH Oleander FT1.png
"You're mine!"
"You're mine!"
TFH Oleander FT2.png
Fred: "Delicious!"
Fred: "Delicious!"
TFH Oleander FT3.png
Yeet the cow.
Yeet the cow.
Base Damage Guard Properties Startup Active Recovery   Hitstop Hitstun Adv. on Hit Blockstop Blockstun Adv. on Block First Hit Juggle Decay Base Juggle Decay JDG Multiplier
100 Throw - 6 1 18 vs. Grounded Wallbounce
vs. Airborne

Oleander gains one stock of Magic and drains some of her opponent's meter. Oleander seems to gain the same amount of meter even if her opponent has no meter. Uses up your wallbounce. Can link afterwards near the corner, or use 22D to pick up at full screen.

Back Throw
Back Throw
4B+C
TFH Oleander FT1.png
1
1
TFH Oleander BT2.png
2
2
TFH Oleander BT3.png
3
3
Base Damage Guard Properties Startup Active Recovery   Hitstop Hitstun Adv. on Hit Blockstop Blockstun Adv. on Block First Hit Juggle Decay Base Juggle Decay JDG Multiplier
100 Throw - 6 1 18 vs. Grounded Wallbounce
vs. Airborne

Oleander gains one stock of Magic and drains some of her opponent's meter. Oleander seems to gain the same amount of meter even if her opponent has no meter. Uses up your wallbounce. Can link afterwards near the corner, or use 22D to pick up at full screen.

Air Throw
Air Throw
jB+C
TFH Oleander AT1.png
1
1
TFH Oleander AT2.png
2
2
TFH Oleander AT3.png
3
3
Base Damage Guard Properties Startup Active Recovery   Hitstop Hitstun Adv. on Hit Blockstop Blockstun Adv. on Block First Hit Juggle Decay Base Juggle Decay JDG Multiplier
100 Throw - 8 3 13 vs. Grounded HKD +45
vs. Airborne

Oleander gains one stock of Magic and drains some of her opponent's meter. Oleander seems to gain the same amount of meter even if her opponent has no meter.

Magic

Oleander can use magic for a wide variety of uses, ranging from teleports to traps to projectiles. She has a maximum mana of 3 stacks, and regenerates it by reading her possessed book.

5D
Read
5D
TFH Oleander 5D.png
"Got it!"
"Got it!"
Base Damage Guard Properties Startup Active Recovery   Hitstop Hitstun Adv. on Hit Blockstop Blockstun Adv. on Block First Hit Juggle Decay Base Juggle Decay JDG Multiplier
- - - 48 - 2 vs. Grounded
vs. Airborne

Provides Oleander with a magic stock on frame 48. Can be held to gain more magic stocks, though this can be very risky due to how long Oleander takes to read. If Oleander has full magic already, the read only takes 35 frames and builds Oleander super meter instead of magic meter.

Magic Spark
Magic Spark
236D
TFH Oleander 236D.png
Magic Spark, 236D
Uses Up to 3 Magic
Magic Spark, 236D
Uses Up to 3 Magic
Base Damage Guard Properties Startup Active Recovery   Hitstop Hitstun Adv. on Hit Blockstop Blockstun Adv. on Block First Hit Juggle Decay Base Juggle Decay JDG Multiplier
90 HL - 9 - 29 vs. Grounded Launch -3
vs. Airborne

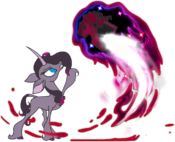
A faster, bigger fireball than usual. This fireball can be used even if a ground spark and air spark are already onscreen. On hit, it will steal some super meter from the opponent and knock them down.

125 HL - 9 - 29 vs. Grounded Wallstick 1
vs. Airborne

Faster and bigger than the 1 magic version. Knocks the opponent back at moderate speed, resulting in a wall-stick if they're close enough to the corner or edge of the screen. Steals more meter than the 1 magic version.

200 HL - 9 - 29 vs. Grounded Wallstick 6
vs. Airborne

Extremely fast, large, steals 'lots' of meter, knocks the opponent back at high speeds and sticks them to the wall. Breaks after hitting multiple projectiles.


Chapter Trap
Magic Trap
214A/B/C/D
TFH Oleander 214A.png
214A/B/C, Uses 1 Magic
TFH Oleander 214D.png
214D, Uses 3 Magic
214D, Uses 3 Magic
Base Damage Guard Properties Startup Active Recovery   Hitstop Hitstun Adv. on Hit Blockstop Blockstun Adv. on Block First Hit Juggle Decay Base Juggle Decay JDG Multiplier
175 HL - 19 300 15 vs. Grounded 34 2
vs. Airborne

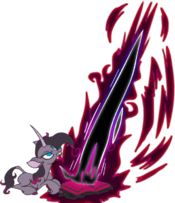
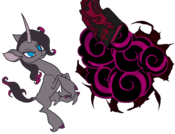
Chapter Trap released downwards. Steals meter on hit and results in a lot of hitstun. Can be destroyed by any attack.

175 HL - 19 300 15 vs. Grounded 34 2
vs. Airborne

Chapter Trap released forwards before falling. Essentially a longer-ranged version of the A version.

175 HL - 19 300 15 vs. Grounded 34 2
vs. Airborne

Chapter Trap released upwards before falling. Essentially a vertical version of the A version, used to cover air space.

85,85,? Mid - 36 773 33 vs. Grounded 44 41
vs. Airborne

A huge chapter trap that lasts over 13 seconds. Steals a ton of meter on hit, and will persist even if Oleander takes damage. Can block two projectiles before being destroyed.

Teleport
Teleport
22A/B/C/D
TFH Oleander 22A.png
22A/B/C, Uses 1 Magic
TFH Oleander 22D.png
22D, Uses 1 Magic
22D, Uses 1 Magic
Base Damage Guard Properties Startup Active Recovery   Hitstop Hitstun Adv. on Hit Blockstop Blockstun Adv. on Block First Hit Juggle Decay Base Juggle Decay JDG Multiplier
N/A - - 4 17,5 10 vs. Grounded
vs. Airborne

A teleports in front, B teleports behind. The first set of "active" frames refer to the times in which Oleander is "in transit", being completely invulnerable, while the second set refers to frames where Oleander is invincible to everything except grabs.

N/A - - 4 17,2 2 vs. Grounded
vs. Airborne

When done in the air, these teleports have shorter recovery.

N/A - - 4 17,2 15 vs. Grounded
vs. Airborne

Away! Costs magic when used in the air.

190 HL - 25 8 30 vs. Grounded Launch -9
vs. Airborne

Fully invuln during startup and active frames. Tracks the opponent, and leads to combos if the opponent is airborne. Rather slow and unsafe on block, so use it sparingly as a reversal.


Combos

Notation

A note on notation: common anime fighter notation denotes consecutive normal attacks as 5A > 5B > 5C. In order to condense some combos, these may be shortened to 5ABC. As another example, j.B > j.C may be shortened to j.BC. Two buttons pressed together will always be denoted with a +, as in 236A+B.

General BnB

If you want a generally applicable route that works in most scenarios regardless of starter, consider this route:

  • (Starter) > 5B > 3C > Jump Cancel > j.B > j.C > Double Jump > j.B > j.C > 2B > 2C > 3C > Jump Cancel > j.C > Double Jump > j.C > j.2C > 2B > 2C > 5D

The above route and alternate versions of it can be seen here. This route works without consideration of the Juggle Decay system, and thus you'll miss out on the benefits of playing around the JD system in the long run. This combo is fine if you're starting out and don't want to go too in-depth on combo optimization and JD.

Basics

Starter
  • 5ABC > 3C > j.ABC > 5ABC > 236C
- Basic Magic Series with Shadow Spark ender.
  • 5ABC > 2C > 3C > j.ABC > 5B > 2C
- Basic Magic Series with sweep ender and hard knockdown. When building combos, pay attention to the Juggle Decay meter below the opponent's health bar. If this fills up before the combo ends, the opponent will be able to ground tech. For example, try this same combo with a 5A before the last 5B > 2C and note how you no longer get a hard knockdown.
Juggles
  • 5ABC > 3C j.ABC > 5B > 3C > j.ABC > 5B > 2C
- Extending combos with j.C air enders.
  • 5ABC > 3C > j.ABC > jump cancel > j.ABC > 5ABC > 2C
- Extending combos with double jump. Oleander has the ability to double jump, which allows for building extended combos by jump cancelling in the air. If you have trouble connecting with the second j.ABC, try delaying very slightly between the 3C and j.ABC to allow the opponent to gain the proper height.
  • 5ABC > 3C > j.AB > j.2C > 5ABC > 236C
- Extending combos with j.2C. Oleander has a command normal, j.2C, which allows her to put the opponent in a ground bounce combo state. Pay special attention to Oleander's position relative to the opponent after this move. In this particular combo, you are most likely to end up on the other side of the opponent after the j.2C.
  • 5ABC > 3C > j.ABC > jump cancel > j.AB > j.2C > 5BC > 2C
- Another variation of a j.2C combo, this time extending the number of hits before j.2C which pushes the opponent further back making it less likely to switch sides. Try experimenting with different combo routes to get used to what spacing will cause j.2C to switch position with the opponents.
Jumping Normals
  • j.A (or j.B) > 2A > ...
- From either a jump-in, or an aerial teleport (j.22A or j.22B). Basic high-low string, to either start pressure, go for a tick throw, overhead (6C), etc. Remember that 2B does NOT hit low, so you must rely on 2A and 2C for your low mixups. Also note that j.B can cross-up, though the hitbox for this is very small.
  • j.C > 5B > 5C > ...
- Because of the great range of Oleander's normals, you can cover your jump-ins with j.C's large hitbox and continue ground pressure with 5B and 5C's equally good range.
Throws
  • (in corner) Throw > 5ABC > 3C > j.ABC > 5ABC > 236C
- Throws can lead into a full combo in the corner
  • Throw > 22D > 5A > ...
- Midscreen, throws can be converted into full combo using 22D. However the window to do this is extremely difficult - not only is the window to connect 22D short, but it also must connect before the opponent drops too low in order to give the proper height for the following 5A to connect.

Advanced

Overhead
  • 6C
- Oleander's overhead can ONLY be cancelled into special moves on hit, and therefore it is unsafe on block (the exception to this is if Fred is out - 6C can gatling into his moves, making it safe).
  • 6C > 214X > ...
- An easy way to extend a successful 6C hit into full combo, but costs 1 Magic
  • 6C > 5A > ...
- The more difficult way to extend via a 2-frame link.
Anti-Air and Air-to-Air
  • (on jumping opponent) 6A > jump cancel > ...
- Like the rest of the cast, Oleander's 6A is jump cancellable into full air combo.
  • (on jumping opponent) j.C > j.2C > ...
- Scoring a full combo from an air-to-air j.C is an important part of making the opponent respect your air coverage.
  • (on jumping opponent) 22D > 5A > ...
- 22D is very height-dependent. If the opponent is too low, or standing, when 22D hits, they will hit the ground before you are able to recover and link with the 2A.
Magic Trap
  • 2A > 5ABC > 214B > 66 > 5ABC > 2C
- Basic combo extension using Magic Trap; costs 1 Magic
  • (on blocking opponent) 5ABC > 236C > 214A
- Demonstrates the unique property of 214X which is it can be cancelled into from 236X. This particular combo, for example, is useful for pushing back an aggressive opponent, and setting a trap in front of them to control that space.
  • (in corner) 5ABC > 2C > 214D (or delay, 214A)
- Demonstrates setting up a Magic Trap on top of knocked down opponent as part of your okizeme game.
  • (in corner) 5ABC > 3C > j.AB > j.2C > j.214A
- Demonstration of a similar setup from the air. Because j.2C results in a soft knockdown, this setup is not quite as strong (since the opponent can forward tech).

Examples

Midscreen (Ground Start)

  • 5ABC > 3C > j.ABC > 5A > 3C > j.ABC > 5A > 236A (735 damage)
  • 5ABC > 3C > j.AB > j.2C > 5ABC > 236A (691 damage, side switch)
  • 5AB > 2B > 5C > 3C > j.AB > j.2C > 5ABC > 236C (727 damage)
  • 5B > 2C > 3C > j.ABC > 5ABC > 236C (788 damage)
  • 5B > 2C > 3C > j.ABC > jump cancel > j.AB > j.2C > 5BC > 236C (881 damage)
  • 5A > 5B > 5C > 3C > j.ABC > Double Jump > j.ABC > Dash > 2B > 5C > 2C > 3C > jC > Double Jump > jC > j2C > 2B > 2C > 5D (1100 damage, +1 Magic) (Can do 236XX instead of 5D for more damage)
  • 2AA > 5BC > 2C > 3C > j.C > j.2C > 5C > 2C (672 damage, hard knockdown)
  • 2AA > 5BC > 3C > j.AB > j.2C > 5ABC > 2C (619 damage, hard knockdown, side switch)

Midscreen (Jump-In Start)

  • j.A > 2A > 5B > 2C > 3C > j.c > j.A > j.B > j.C > 5B > 2C (531 damage, hard knockdown)
  • j.B > 2A > 5A > 5B > 5C > 3C > j.A > j.B > j.C > jump cancel > j.A > j.B > j.2C > 5B > 5C > 236C (820 damage) > 236A+B (1348 damage)
  • j.C > 5C > 2C > 3C > j.C > j.2C > 6A > j.BC > 5A > 2C (1238 damage, hard knockdown)
  • j.C > 5C > 3C > j.AB > j.2C > 6A > j.BC > 5A > 2C (1102 damage, hard knockdown, side switch)
  • j.C > 5C > 2C > 3C > j.C > j.2C > 6A > j.BC > 5ABC > 236C (1316 damage) > j.236A+B (1844 damage)
  • j.C > 5C > 2C > 3C > j.C > j.2C > 5C > 3C > j.C > jump cancel > j.C > j.236C (1350 damage) > j.236A+B (1878 damage)
  • j.C > 5C > 3C > j.AB > j.2C > 6A > j.BC > 5ABC > 236C (1180 damage, side switch) > 236A+B (1708 damage)

Overhead

  • 6C > 214A > 5B > 2C > 3C > j.A > j.B > j.C > 5B > 2C (662 damage, hard knockdown)
  • 6C > 214A > 5B > 2C > 3C > j.A > j.B > j.C > 5B > 236C (670 damage) > 236A+B (1198 damage)
  • 6C > 5A > 5C > 3C > j.ABC > j.ABC > Dash > 2B > 5C > 2C > 3C > j.C > j.C > j.2C > 2B > 2C > 5D (1050 damage, +1 Magic)

Anti-Air

  • 6A > j.ABC > 5ABC > 3C > j.AB > j.2C > 5B > 236C (909 damage)
  • j.C > j.2C > 5ABC > 3C > j.ABC > 5BC > 236C (1159 damage)

Throw Combos

  • Throw > 22D > 5ABC > 3C > j.ACBC > 5ABC > 236C (434 damage, 1 Magic)
  • Throw > 22D > 5ABC > 3C > j.ACBC > 5B > 2C (402 damage, hard knockdown, 1 Magic)

Corner

  • 5ABC > 3C > j.ABC > 5B > 3C > j.ABC > j.2C > 5C > 236C (895 damage) > 236A+B (1423 damage)
  • Throw > 5ABC > 3C > j.ABC > 5B > 3C > j.ABC > j.2C > 5C > 236C (508 damage)
  • Throw > 5ABC > 3C > j.ABC > 5B > 2C (334 damage, hard knockdown) > 214D (oki setup, 1 Magic)
  • 3C > j.AB > j.2C > j.214A (soft knockdown oki setup)

Fred Combos

  • 6C > 6D (overhead is no longer unsafe :O)
  • 4D > 5C > 3C > j.C > j.2C > 5ABC > 236C (1051 damage)
  • (corner) 5ABC > 2C > 6D > j.ABC > 5B > 2C > 6D > 5C > 236C (784 damage)
  • (corner) 5ABC > 2C > 6D > 5B > 5C > 2C > 3C > 2D > j.C > j.2C > 6D > 5B > 2C (951 damage)

General
Controls
FAQ
Glossary
HUD
Links
System
Characters
Arizona
Oleander
Paprika
Pom
Tianhuo
Velvet
Shanty
Texas
Stronghoof
Nidra
Baihe
Predators
Huggles
Events