|
|
| Line 88: |
Line 88: |
| {{MoveData | | {{MoveData |
| |image=TFH_Pom_6A.png | | |image=TFH_Pom_6A.png |
| |caption= | | |caption=show off the pomp |
| |name=6A | | |name=6A |
| |data= | | |data= |
Revision as of 17:34, 28 April 2022
| Pom
|
| Species:
|
Sheep
|
| Playstyle:
|
Puppet (Summoning)
|
| HP:
|
4800
|
| Meter Size:
|
195
|
| Movement Options:
|
Air Dash, Float, Command Dash
|
| Voice Actor:
|
Allie Moreno
|
| Stage(s):
|
Baaah, Sleepy Baaah
|
Character Profile
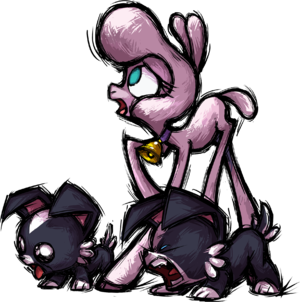
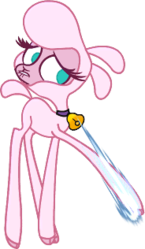
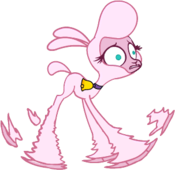
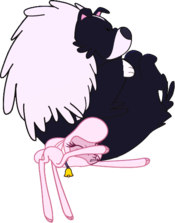
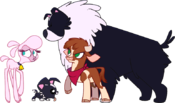
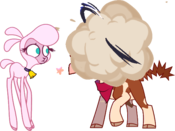
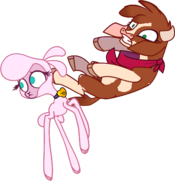
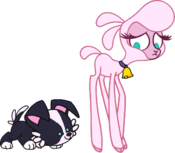
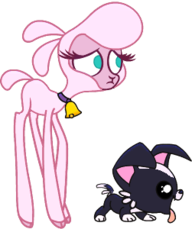
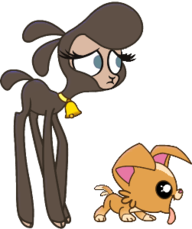
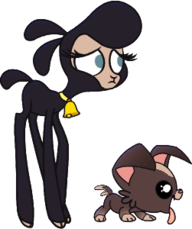
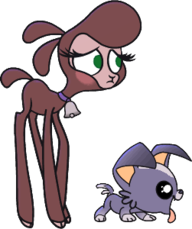
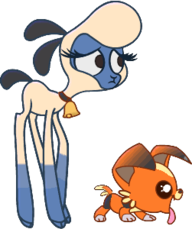
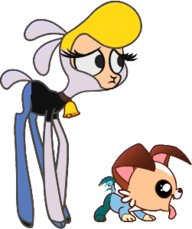
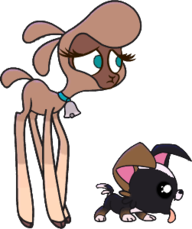
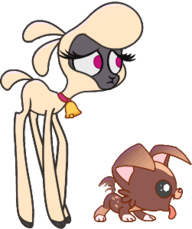
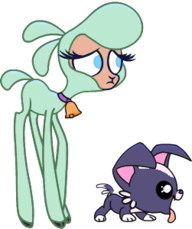
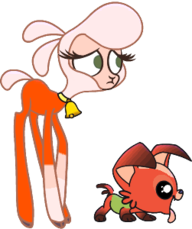
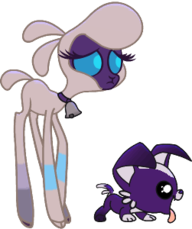
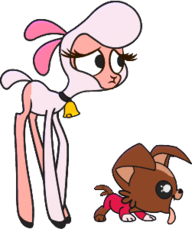
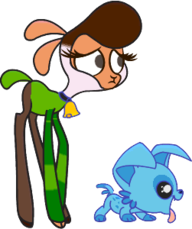
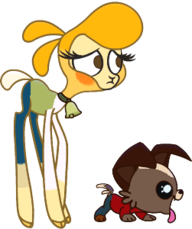
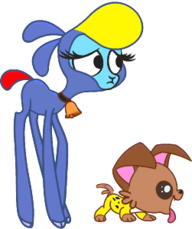
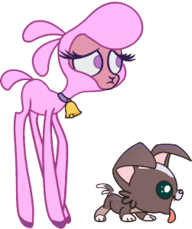
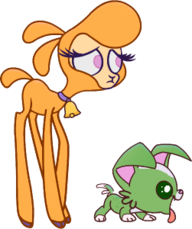
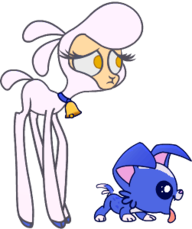
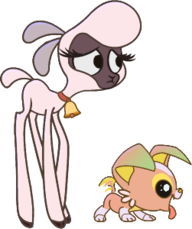
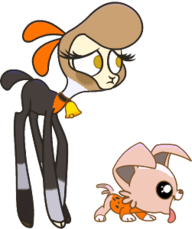
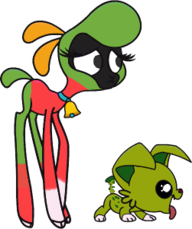
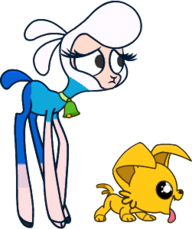
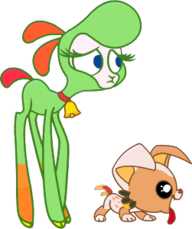
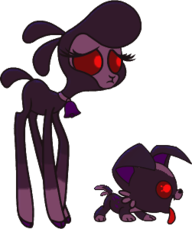
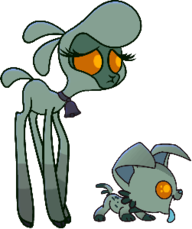
Pom is a slender ewe lamb with off-white wool tinted with pink. Her face is a muted, pale magenta, with turquoise eyes and a small muzzle. She wears a golden bell on a purple collar, and the bell is used to command and control her dogs. During battle, she usually shakes in fear (and the bell shakes and sounds along with her). Most of her attack animations consist of her reluctantly kicking with her hooves, flailing her legs in a panic, or preventing her pup Woof from getting caught up in the battle. Pom makes it clear that she would rather not fight anyone at all but fully intends to at least make an effort to progress in her mission. Pom is extremely insecure in her fighting abilities and sees herself as weak.
Gameplan
Pom is TFH’s resident Puppet (or should we say pup-pet) Character.
Potential Sections: When to call dogs, Set play, pressure, etc.
Movement Options
6- Middling-speed forward walk
4- Fast backwards walk.
66 - Forward Run, can be crouch canceled.
44 - Back dash
j.66 / j.44 - Short Air dash, can be canceled into float
j.7/8/9 - Float, can float out of jump, air dash, or air normal. Moves faster backwards than forwards.
Normal Moves
5A
5A
|
| Base Damage
|
Guard
|
Properties
|
Startup
|
Active
|
Recovery
|
|
Hitstop
|
Hitstun
|
Adv. on Hit
|
Blockstop
|
Blockstun
|
Adv. on Block
|
First Hit Juggle Decay
|
Base Juggle Decay
|
JDG Multiplier
|
| 35
|
L
|
-
|
5
|
4
|
15
|
vs. Grounded
|
|
|
-1
|
|
|
-3
|
|
|
|
| vs. Airborne
|
5A is Pom's fastest normal at 5 frames and a low; however, its short range can make it unsuitable for punishing some moves, or for throwing out as abare. It often catch people trying to stand block because it's a quick standing low.
|
|
2A
2A
|
| Base Damage
|
Guard
|
Properties
|
Startup
|
Active
|
Recovery
|
|
Hitstop
|
Hitstun
|
Adv. on Hit
|
Blockstop
|
Blockstun
|
Adv. on Block
|
First Hit Juggle Decay
|
Base Juggle Decay
|
JDG Multiplier
|
| 30
|
L
|
-
|
6
|
5
|
14
|
vs. Grounded
|
|
|
-1
|
|
|
-4
|
|
|
|
| vs. Airborne
|
A basic 2A. Hits low, longer range than 5A, but 1 frame extra of startup.
|
|
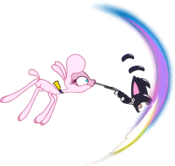
6A
6A show off the pomp show off the pomp
|
| Base Damage
|
Guard
|
Properties
|
Startup
|
Active
|
Recovery
|
|
Hitstop
|
Hitstun
|
Adv. on Hit
|
Blockstop
|
Blockstun
|
Adv. on Block
|
First Hit Juggle Decay
|
Base Juggle Decay
|
JDG Multiplier
|
| 90
|
M
|
-
|
8
|
3
|
24
|
vs. Grounded
|
|
|
-8
|
|
|
-5
|
|
|
|
| vs. Airborne
|
A standard anti air, that can also be used as combo or blockstring filler. Invincible from the legs up from frame one. Jump cancelable on hit. Be wary of input overlap with [4]6A.
|
|
5B
5B bAAHH bAAHH
|
| Base Damage
|
Guard
|
Properties
|
Startup
|
Active
|
Recovery
|
|
Hitstop
|
Hitstun
|
Adv. on Hit
|
Blockstop
|
Blockstun
|
Adv. on Block
|
First Hit Juggle Decay
|
Base Juggle Decay
|
JDG Multiplier
|
| 85
|
M
|
-
|
9
|
5
|
19
|
vs. Grounded
|
|
|
2
|
|
|
-6
|
|
|
|
| vs. Airborne
|
Pom swipes her arms upward. Mostly combo and blockstring filler, as it does little that 2B isn't equal or better at.
|
|
2B
2B
|
| Base Damage
|
Guard
|
Properties
|
Startup
|
Active
|
Recovery
|
|
Hitstop
|
Hitstun
|
Adv. on Hit
|
Blockstop
|
Blockstun
|
Adv. on Block
|
First Hit Juggle Decay
|
Base Juggle Decay
|
JDG Multiplier
|
| 100
|
M
|
-
|
8
|
5
|
19
|
vs. Grounded
|
|
|
0
|
|
|
-6
|
|
|
|
| vs. Airborne
|
Your new best friend. With a great hitbox, a paper thin hurtbox, good startup, and the ability to convert into a combo after hitting this in almost any situation, you will be using this move a lot. It doesn't reach nearly as high as 6A, so be careful not to do it too early, or get caught by a character that can change their jump arc. Jump cancelable on hit.
|
|
5C
5C
|
| Base Damage
|
Guard
|
Properties
|
Startup
|
Active
|
Recovery
|
|
Hitstop
|
Hitstun
|
Adv. on Hit
|
Blockstop
|
Blockstun
|
Adv. on Block
|
First Hit Juggle Decay
|
Base Juggle Decay
|
JDG Multiplier
|
| 160
|
M
|
-
|
13
|
5
|
34
|
vs. Grounded
|
|
|
-10
|
|
|
-12
|
|
|
|
| vs. Airborne
|
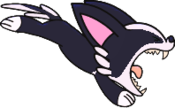
A long range dog bite. It hits from far away and is very unsafe to whiff. It has the longest blockstun of any of Pom's cancelable grounded normals, making it a useful normal to cancel into 236A at the end of a blockstring(-3).
|
|
2C
2C
|
| Base Damage
|
Guard
|
Properties
|
Startup
|
Active
|
Recovery
|
|
Hitstop
|
Hitstun
|
Adv. on Hit
|
Blockstop
|
Blockstun
|
Adv. on Block
|
First Hit Juggle Decay
|
Base Juggle Decay
|
JDG Multiplier
|
| 140
|
L
|
-
|
16
|
5
|
31
|
vs. Grounded
|
|
|
HKD 28
|
|
|
-16
|
|
|
|
| vs. Airborne
|
A long range sweep. Dangerous to whiff, just like 5C. Inflicts hard knock down if it hits while the JDG bar is not full.
|
|
3C
3C Big Mouth Strikes Again Big Mouth Strikes Again
|
| Base Damage
|
Guard
|
Properties
|
Startup
|
Active
|
Recovery
|
|
Hitstop
|
Hitstun
|
Adv. on Hit
|
Blockstop
|
Blockstun
|
Adv. on Block
|
First Hit Juggle Decay
|
Base Juggle Decay
|
JDG Multiplier
|
| 130
|
M
|
-
|
17
|
7
|
32
|
vs. Grounded
|
|
|
Launch
|
|
|
-21
|
|
|
|
| vs. Airborne
|
Her launcher. Very long horizontal range, but connecting with it at the farther ranges can make it difficult to convert, unless in the corner. Very unsafe and not cancellable on block, so only use it if you know it will hit.
|
|
j.A
j.A
|
| Base Damage
|
Guard
|
Properties
|
Startup
|
Active
|
Recovery
|
|
Hitstop
|
Hitstun
|
Adv. on Hit
|
Blockstop
|
Blockstun
|
Adv. on Block
|
First Hit Juggle Decay
|
Base Juggle Decay
|
JDG Multiplier
|
| 60
|
H
|
-
|
8
|
5
|
12
|
vs. Grounded
|
|
|
|
|
|
|
|
|
|
| vs. Airborne
|
A quick air to air attack. It cannot hit crouching opponents, but is often used after a 3C to continue the combo.
|
|
j.B
j.B
|
| Base Damage
|
Guard
|
Properties
|
Startup
|
Active
|
Recovery
|
|
Hitstop
|
Hitstun
|
Adv. on Hit
|
Blockstop
|
Blockstun
|
Adv. on Block
|
First Hit Juggle Decay
|
Base Juggle Decay
|
JDG Multiplier
|
| 30[x3], 100
|
H
|
-
|
12
|
9
|
19
|
vs. Grounded
|
|
|
|
|
|
|
|
|
|
| vs. Airborne
|
A 4-hit downward attack with a strong cross-up hitbox. Pom's fastest jumping attack that can generally be used to attack air to ground. The first 3 hits deal very little hitstun, so try to let all 4 hits connect before cancelling it if you plan on doing a combo afterwards. IAD jB hits crouchers on frame 28.
|
|
j.C
j.C
|
| Base Damage
|
Guard
|
Properties
|
Startup
|
Active
|
Recovery
|
|
Hitstop
|
Hitstun
|
Adv. on Hit
|
Blockstop
|
Blockstun
|
Adv. on Block
|
First Hit Juggle Decay
|
Base Juggle Decay
|
JDG Multiplier
|
| 160
|
H
|
-
|
18
|
21
|
20
|
vs. Grounded
|
|
|
|
|
|
|
|
|
|
| vs. Airborne
|
Your new second best friend. A huge, long range attack, that arcs forward and down as it travels. Pom's hitbox is slightly extended during it, but it's still a very powerful tool for controlling neutral. Causes ground bounce when it connects on an airborne opponent, which be used to summon dogs mid-combo.
|
|
Special Moves
Sheep Herding
Sheep Herding
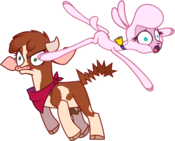
[4]6A/B Run! Run! ouch... ouch...
|
| Base Damage
|
Guard
|
Properties
|
Startup
|
Active
|
Recovery
|
|
Hitstop
|
Hitstun
|
Adv. on Hit
|
Blockstop
|
Blockstun
|
Adv. on Block
|
First Hit Juggle Decay
|
Base Juggle Decay
|
JDG Multiplier
|
| -
|
-
|
-
|
28
|
-
|
14
|
vs. Grounded
|
|
|
|
|
|
|
|
|
|
| vs. Airborne
|
A short and quick command dash, that is strike invulnerable during "start up", but can be thrown. Can be used as a reversal to beat meaty attacks, but will lose to an opponent who throws expecting the dash. When Pom is on the ground in recover, she can't be thrown, but can be hit.
|
| -
|
-
|
-
|
36
|
-
|
14
|
vs. Grounded
|
|
|
|
|
|
|
|
|
|
| vs. Airborne
|
A longer range, but slower overall command dash. It too is strike invulnerable, and throwable. Its longer travel distance can make it more difficult to punish in some cases, but its longer active frames and recovery can make it easier to punish in others. Often helpful for escaping the corner. When Pom is on the ground in recovery, she can't be thrown, but can be hit.
Both versions can be canceled into super.
|
|
Bark!
Bark!
[4]6C Ruff Ruff Ruff Ruff
|
| Base Damage
|
Guard
|
Properties
|
Startup
|
Active
|
Recovery
|
|
Hitstop
|
Hitstun
|
Adv. on Hit
|
Blockstop
|
Blockstun
|
Adv. on Block
|
First Hit Juggle Decay
|
Base Juggle Decay
|
JDG Multiplier
|
| 60
|
M
|
-
|
11
|
9
|
29
|
vs. Grounded
|
|
|
Stagger 30
|
|
|
-18
|
|
|
|
| vs. Airborne
|
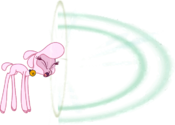
Pom barks loudly, creating a large hitbox in front of her. Pretty fast startup for how big it is, but it's very minus on block, so be careful about just throwing it out. Causes stagger on hit, which can combo into her super, even when the JD bar is full. It can be cancelled into specials on hit, but not on block. It can also be canceled into super on block, hit, or even whiff.
|
|
Super
Stampede!
236XX If you can change yer fate would ye? If you can change yer fate would ye?
|
| Base Damage
|
Guard
|
Properties
|
Startup
|
Active
|
Recovery
|
|
Hitstop
|
Hitstun
|
Adv. on Hit
|
Blockstop
|
Blockstun
|
Adv. on Block
|
First Hit Juggle Decay
|
Base Juggle Decay
|
JDG Multiplier
|
| 20[x9], 30[x6], 420
|
M
|
-
|
4+1
|
175+
|
49
|
vs. Grounded
|
|
|
Launch
|
|
|
Variable
|
|
|
|
| vs. Airborne
|
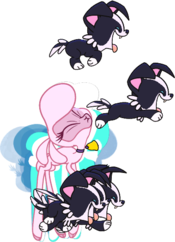
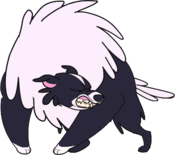
A level 1 super where Pom uses her bell to summon a horde of dogs to run over her opponent, with the Big Papa dog finishing it off for big damage. Pom recovers long before the super completes, so it is easy to combo out of, and can be used to make certain normals safe when you don't have dogs available to do that for you. Certain supers can blast straight through all the dogs (Like Velvet's, Oleander's, and Arizona's if she uses level 2), so be careful how you use it against opponents with meter.
|
|
Follow Up
Big Papa
214XX Dad on em. Dad on em.
|
| Base Damage
|
Guard
|
Properties
|
Startup
|
Active
|
Recovery
|
|
Hitstop
|
Hitstun
|
Adv. on Hit
|
Blockstop
|
Blockstun
|
Adv. on Block
|
First Hit Juggle Decay
|
Base Juggle Decay
|
JDG Multiplier
|
| -
|
-
|
-
|
-
|
-
|
-
|
vs. Grounded
|
|
|
|
|
|
|
|
|
|
| vs. Airborne
|
Brings out Big Papa as a summon with 4 uses, instead of having him hit as part of the level 1. This super must be performed after Big Papa is on screen, but before he connects with the opponent, meaning you will miss out on some of the damage of the level 1 by summoning him.
|
| Base Damage
|
Guard
|
Properties
|
Startup
|
Active
|
Recovery
|
|
Hitstop
|
Hitstun
|
Adv. on Hit
|
Blockstop
|
Blockstun
|
Adv. on Block
|
First Hit Juggle Decay
|
Base Juggle Decay
|
JDG Multiplier
|
| 100 + 250
|
M
|
-
|
34
|
9(79)12
|
6
|
vs. Grounded
|
|
|
~85,~115
|
|
|
|
|
|
|
| vs. Airborne
|
1/3+D is a 2 part attack similar to Mama's, but these are more spaced out, with a pause between them. Has one hit of armor as well as very high hitstun on both hits, allowing for any manner of set up.
|
| 360
|
M
|
-
|
84
|
9
|
37
|
vs. Grounded
|
|
|
Tumble
|
|
|
|
|
|
|
| vs. Airborne
|
4/6+D cause him to do a bark attack with a big hitbox, that causes tumble on hit. The startup of this attack is not armored, and while he will still lose uses upon being hit, he will still attempt to go through with the attack.
|
| 40
|
M
|
-
|
29
|
9
|
15
|
vs. Grounded
|
|
|
Stagger, 70
|
|
|
|
|
|
|
| vs. Airborne
|
7/9+D cause him to perform a quick anti-air bite that staggers on hit. Has one hit of armor. Synergizes with Mama 7/9D.
|
|
Throws
Forward Throw
Forward Throw
B+C / 6B+C "Down, boy!" "Down, boy!"
|
| Base Damage
|
Guard
|
Properties
|
Startup
|
Active
|
Recovery
|
|
Hitstop
|
Hitstun
|
Adv. on Hit
|
Blockstop
|
Blockstun
|
Adv. on Block
|
First Hit Juggle Decay
|
Base Juggle Decay
|
JDG Multiplier
|
| 100[x4] + 200
|
Throw
|
-
|
6
|
1
|
18
|
vs. Grounded
|
|
|
Tumble
|
|
|
|
|
|
|
| vs. Airborne
|
One of Pom's puppies latches onto the opponent, and bites them several times before Pom yanks him back. Launches the opponent forward and away. You can convert this into a full combo, but it is difficult to do unless you have your opponent in the corner, or dogs to help convert.
|
|
Back Throw
Back Throw
4B+C
|
| Base Damage
|
Guard
|
Properties
|
Startup
|
Active
|
Recovery
|
|
Hitstop
|
Hitstun
|
Adv. on Hit
|
Blockstop
|
Blockstun
|
Adv. on Block
|
First Hit Juggle Decay
|
Base Juggle Decay
|
JDG Multiplier
|
| 100[x4] + 200
|
Throw
|
-
|
6
|
1
|
18
|
vs. Grounded
|
|
|
Tumble
|
|
|
|
|
|
|
| vs. Airborne
|
Same as the forward throw, but the opponent is launched behind Pom instead. It is much easier to convert this into a combo without the use of dogs or the corner.
|
|
Air Throw
Air Throw
j.B+C
|
| Base Damage
|
Guard
|
Properties
|
Startup
|
Active
|
Recovery
|
|
Hitstop
|
Hitstun
|
Adv. on Hit
|
Blockstop
|
Blockstun
|
Adv. on Block
|
First Hit Juggle Decay
|
Base Juggle Decay
|
JDG Multiplier
|
| 300
|
Throw
|
-
|
8
|
3
|
13
|
vs. Grounded
|
|
|
HKD 29+
|
|
|
|
|
|
|
| vs. Airborne
|
Pom grabs the opponent, flinging them behind her, and herself forward. You need the help of previously summoned dogs to convert this into a combo.
|
|
Magic
Pom starts each round with her Magic gauge, which holds 3 stocks, completely filled. She uses magic stocks to call her pups and then a direction + the magic button (D) will cause the pups to do different attacks. Each pup and dog takes a different amount of magic to call. You can have any combination of dogs summoned, as long as the total adds up to no more than 3. They can be activated during other moves and can be activated using negative edge (when you do a command while releasing a button instead of pushing it).
You can command dogs during Cross Canter like being in neutral, but you can't connect off of Cross Canter.
Dog Controls
Dog Controls
| Command
|
Input
|
Action
|
| Rally
|
DD
|
Calls pups to where Pom is standing. Cannot be used while Pom is in hitstun. Can be used when in blockstun and while teching.
|
| Move Dog
|
[D] + 4/6
|
Moves pups left or right depending on the direction held. Can be done at any time, but dogs move slower while Pom is in hitstun. Can move a specific dog by holding D and A/B.
|
| Dismiss Dog
|
22A/B/C/D
|
Dismisses dogs on the screen. A/B/C dismiss specific dogs. D dismisses all. Can be used at any time.
|
| Negative Edge Activation
|
Release D while holding a direction.
|
Allows you to move and then immediately activate dog. Cannot be used while Pom is in blockstun/hitstun. Can attack with a specific dog by holding D and A/B, and release D.
|
| Attack
|
Direction + D (see moves below for specifics)
|
Can be done during other moves. Cannot be used while Pom is in blockstun/hitstun.
|
Digging Pup
Digging Pup
236A Uses 1 Magic Uses 1 Magic Dirt... Everywhere... Dirt... Everywhere...
|
| Base Damage
|
Guard
|
Properties
|
Startup
|
Active
|
Recovery
|
|
Hitstop
|
Hitstun
|
Adv. on Hit
|
Blockstop
|
Blockstun
|
Adv. on Block
|
First Hit Juggle Decay
|
Base Juggle Decay
|
JDG Multiplier
|
| -
|
-
|
-
|
62
|
-
|
29
|
vs. Grounded
|
|
|
|
|
|
|
|
|
|
| vs. Airborne
|
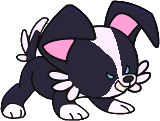
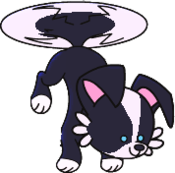
Start up is how long the dog takes to become actionable, recovery is how long until Pom can act. Summons a stationary dog in front of Pom that has one attack and can be used/hit once before going away. Uses 1 magic.
|
| 15 + 20 + 25 + 95
|
M
|
-
|
43
|
4(4)4
|
2
|
vs. Grounded
|
|
|
|
|
|
|
|
|
|
| vs. Airborne
|
4-hit multihit move with a deceptively good hitbox. Very good for locking the opponent down on wakeup or after blockstrings, but not very good in combos.
|
|
Digging Pup, Following
Digging Pup, Following
214A Uses 1 Magic Uses 1 Magic
|
| Base Damage
|
Guard
|
Properties
|
Startup
|
Active
|
Recovery
|
|
Hitstop
|
Hitstun
|
Adv. on Hit
|
Blockstop
|
Blockstun
|
Adv. on Block
|
First Hit Juggle Decay
|
Base Juggle Decay
|
JDG Multiplier
|
| -
|
-
|
-
|
56
|
-
|
29
|
vs. Grounded
|
|
|
|
|
|
|
|
|
|
| vs. Airborne
|
Start up is how long the dog takes to become actionable, recovery is how long until Pom can act. Digging Pup, Following is the same as regular digging pup, except they follow behind Pom wherever she goes! Uses 1 magic.
|
| 15 + 20 + 25 + 95
|
M
|
-
|
43
|
4(4)4
|
29
|
vs. Grounded
|
|
|
|
|
|
|
|
|
|
| vs. Airborne
|
Dog moves forward before doing the multi-hit digger attack. Very good to use at the end of blockstrings to keep pressure up, or make space.
|
| 15 + 20 + 25 + 95
|
M
|
-
|
43
|
4(4)4
|
29
|
vs. Grounded
|
|
|
|
|
|
|
|
|
|
| vs. Airborne
|
Dog stays still before doing the multi-hit digger attack.
|
|
Growly Pup
Growly Pup
236B Uses 2 Magic Uses 2 Magic 6D 6D 3D 3D
|
| Base Damage
|
Guard
|
Properties
|
Startup
|
Active
|
Recovery
|
|
Hitstop
|
Hitstun
|
Adv. on Hit
|
Blockstop
|
Blockstun
|
Adv. on Block
|
First Hit Juggle Decay
|
Base Juggle Decay
|
JDG Multiplier
|
| -
|
-
|
-
|
60
|
-
|
32
|
vs. Grounded
|
|
|
|
|
|
|
|
|
|
| vs. Airborne
|
Summons a stationary dog that has two different attacks and can be used/hit twice before going away. Uses two magic.
|
| 175
|
M
|
-
|
24
|
3
|
28
|
vs. Grounded
|
|
|
|
|
|
|
|
|
|
| vs. Airborne
|
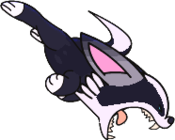
Dog lunges forward with a high damage + high hitstun attack. Good for high damage combos, even in midscreen. Not that good for blockstrings due to its relatively low blockstun.
|
| 115
|
L
|
-
|
17
|
12
|
23
|
vs. Grounded
|
|
|
|
|
|
|
|
|
|
| vs. Airborne
|
Dog lunges close to the ground with a fast, low-hitting attack. The opponent loses their footing on hit, making them airborne. This is an extremely important tool for Poms mixup game.
|
|
Pilot Pup
Pilot Pup
214B Uses 2 Magic Uses 2 Magic 6D 6D 3D 3D
|
| Base Damage
|
Guard
|
Properties
|
Startup
|
Active
|
Recovery
|
|
Hitstop
|
Hitstun
|
Adv. on Hit
|
Blockstop
|
Blockstun
|
Adv. on Block
|
First Hit Juggle Decay
|
Base Juggle Decay
|
JDG Multiplier
|
| -
|
-
|
-
|
90
|
-
|
32
|
vs. Grounded
|
|
|
|
|
|
|
|
|
|
| vs. Airborne
|
Summons a mobile dog that starts above Pom, but very quickly starts following after the opponent in the air. Has two different attacks, and can be used/hit twice before going away. Uses two magic.
|
| 150
|
-
|
-
|
24
|
10
|
10
|
vs. Grounded
|
|
|
|
|
|
|
|
|
|
| vs. Airborne
|
Dog swoops forward with an attack that does decent damage and has decent hitstun. Good for decent damage while also getting good corner carry.
|
| 155
|
H
|
-
|
28
|
12
|
29
|
vs. Grounded
|
|
|
Tumble
|
|
|
|
|
|
|
| vs. Airborne
|
Dog Swoops down onto the opponents head with an overhead attack. This can be a very good option for mixups. Causes a Tumble on hit, making it somewhat difficult to confirm off of if 3D.
|
|
Big Momma
Big Momma
236C Uses 3 Magic Uses 3 Magic 3D 3D 6D 6D 9D 9D
|
| Base Damage
|
Guard
|
Properties
|
Startup
|
Active
|
Recovery
|
|
Hitstop
|
Hitstun
|
Adv. on Hit
|
Blockstop
|
Blockstun
|
Adv. on Block
|
First Hit Juggle Decay
|
Base Juggle Decay
|
JDG Multiplier
|
| -
|
-
|
-
|
105
|
-
|
38
|
vs. Grounded
|
|
|
|
|
|
|
|
|
|
| vs. Airborne
|
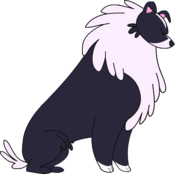
Summons a large stationary dog in front of Pom that has three different attacks and can be used/hit three times before going away. Uses 3 magic.
|
| 50,75,125
|
-
|
-
|
55
|
12(18)6,12
|
18
|
vs. Grounded
|
|
|
Launch
|
|
|
|
|
|
|
| vs. Airborne
|
After a sizable delay, the dog attacks with a 3-hit move that launches the opponent into the air. The first hit pulls the opponent towards Momma, allowing for some sneaky cross up setups. The first hit also has very little blockstun, allowing for even sneakier tick throw setups. Has 1 armor.
|
| 360
|
-
|
-
|
0,?
|
67,9
|
60,36
|
vs. Grounded
|
|
|
Wall Stick
|
|
|
|
|
|
|
| vs. Airborne
|
Big Momma immediately prepares for a counter attack. If the dog is hit at almost any point during this, she will unleash a very high damaging attack that blows the opponent away with a wall stick. Like all dog attacks, the attack immediately stops if Pom is also hit. Is considered to be blocking during the counter.
|
| 660
|
-
|
-
|
84
|
10
|
20
|
vs. Grounded
|
|
|
Launch
|
|
|
|
|
|
|
| vs. Airborne
|
After a very large windup, Big Momma lunges forward with a command grab. Causes a very high launch, that is not technically a groundbounce. Has 1 armor.
|
|
Combos
Combos with Pom can vary a lot, depending on what dogs, if any, you have out, as well as if you want to prioritize damage, meter gain, or oki.
The Basics
- Starter
-
- 5A > 5B > 2B > 5C > 3C > jump cancel > j.A > j.B > j.C
- - If there's one thing I would say to practice first, its this. It may just be her ground chain into her air chain, but it also leads to her main way to combo into dog summons, which leads to high damage/good oki.
- J.B Loops
-
- Vs airborne opponent > 2B > IAD > j.B > land > repeat
- Vs airborne opponent > 2B > jump cancel > j.B > air dash/float > j.B > land > repeat
- - Also important to know, these are useful if you're looking to build meter, or just for dogless filler/corner carry in combos. These are also interchangeable.
- Enders
-
- At max JD > 5B > 2B > 6A > 5B > 2B > 5C > (2C) > [4]6C > 236XX > summon dogs
- - For when you want to go for damage, this is generally what you will do. The 2C can be included when JDG isn't too high.
- At <=280 JD > 5B > 5C > 2C > summon dog
- - For when you want to go for oki, 2C causes a hard knockdown, and canceling into summon lets you recover faster.
The Advanceds
- Starter
-
- 5A > 5B > 2B > 5C > 3C > jump cancel > slight delay > j.A > j.B > slight delay > j.C > land > (236B > 5B > etc)
- 5A > 5B > 2B > 5C > 3C > jump cancel > slight delay > j.A > air dash/forward float > j.A > j.C > land > (236B > 5B > etc)
- - Probably one of the most important things to learn about comboing with Pom is the fact that she can use j.C groundbounce to summon bitey mid-combo, and use him for either oki, or damage. The second version uses less JD, but is ultimately less damage.
- Digger
-
- With Digger out, vs grounded opponent > 5C~6D > 236B/214B > Bitey/Airbud Combo
- With Digger out, vs airborne opponent > 6D~2B > 236B/214B > Bitey/Airbud Combo
- - Better ways to summon Bitey/Airbud mid-combo if you have digger ready.
- Bitey
-
- After starter > 236B > 5B > 5C > 2C > [4]6AD > Bitey hits > 2B > 5C > 2C > [4]6A~D > Bitey hits > 5B > 2B > 6A > 5B > 2B > 5C > 2C > [4]6C > 236XX
- - My go-to BNB for damage, after a certain input-leniency change /salt. Works as long as JD is not max for at least the first bitey hit.
- After starter > 236B > (dash) > 5B > 5C > 2C > summon digger
- - For when you want to go for a HKD instead of damage.
- With Bitey out, vs grounded opponent > 5C > 6D > dash > (5B) > (2B) > 5C > (2C) > 6D > dash > ender
- - Very high damage start, you may have to add the 5B/2B/2C if the opponent is too close to bitey.
- Airbud
-
- After starter > 214B > dash > 5B > 2B > IAD > j.B > 6D > Airbud hits > land > 5B > 2B > IAD > 6D > Airbud hits > land > 5B > 2B > 6A > 5B > 2B > 5C > [4]6C > 236XX
- - If you want to combo into Airbud instead of Bitey for some reason.
- After starter > 214B > (dash) > 5B > 5C > 2C > summon digger
- - For when you want to go for a HKD instead of damage.
- With Airbud out > (2C/5C/3C) > 3D > Airbud hits > dash > delay > 2B > IAD > 6D > Airbud hits > j.B loops > ender
- - Confirm from Airbud groundbounce that uses up the charges as fast as possible in order to be ready to summon again for the ender.
- With Airbud out > (2C/5C/3C) > 3D > Airbud hits > dash > delay > 2B > 214AD > Airbud hits > (dash under side swap) > 2B > j.B loops > Ender
- - Similar to above, but with the option to side swap, and a follower digger summon thrown in.
- Momma
-
- After starter > 236C > 5A > 2B > 2C > [4]6A > 3D/9D
- - Very strong mom setup, 3D can be timed to be meaty, or 9D can be used for a tick grab setup.
Example Combos
- 5A > 5B > 2B > 5C > 3C > jump cancel > slight delay > j.A > j.B > j.C > land > 236B > dash > 5B > 5C > 2C > 236A
- - My go-to HKD combo, leads to any number of dirty mixups.
- 5A > 5B > 2B > 5C > 3C > jump cancel > slight delay > j.A > j.B > j.C > land > 236B > 5B > 5C > 2C > [4]6AD > Bitey hits > 2B > 5C > 2C > [4]6A~D > Bitey hits > 5B > 2B > 6A > 5B > 2B > 5C > 2C > [4]6C > 236XX
- - My go-to damage combo, you can pick up off of the super for even more damage as well.
Colors
Links
Detailed Frame Data
| General
|
|
| Characters
|
|
| Predators
|
|
| Events
|
|
