Avengers in Galactic Storm/Dr. Minerva: Difference between revisions
No edit summary |
No edit summary |
||
| Line 19: | Line 19: | ||
*No grounded overhead and a mediocre throw limits mixup options | *No grounded overhead and a mediocre throw limits mixup options | ||
}} | }} | ||
==Introduction== | |||
Greatest caffeine aficionado in the Kree Empire. | |||
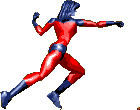
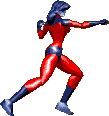
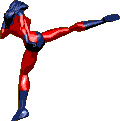
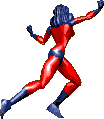
Minerva is one of the four selectable Kree characters you can play as in Avengers in Galactic Storm. She's a glass cannon, having low health and stun but in return having some of the highest damage and stun output in the game. She's got a wide range of conversions into huge damage, and can easily kill off of one mistake. Minerva also boasts some of the strongest mobility in the game, with unique features like a wall jump and her drill kicks. She's also the only character with cancellable crouching normals (with the possible exception of Crystal's 2C 2D chain). | |||
Though Minerva struggles when at a life deficit, she can easily turn the tide of the matchup when given the oppurtunity. Though a bit of a strange character at first glance, she's pretty simple at her core and can prove to be very effective taking advantage of her great framedata, damage, and mobility. Minerva's the character for you if you want to cheap out rounds, get big rewards off of assist hits, and abuse DRILL KICKS!! | |||
==Moveset== | ==Moveset== | ||
Revision as of 17:57, 31 May 2022
| Strengths | Weaknesses |
|---|---|
|
|
Introduction
Greatest caffeine aficionado in the Kree Empire.
Minerva is one of the four selectable Kree characters you can play as in Avengers in Galactic Storm. She's a glass cannon, having low health and stun but in return having some of the highest damage and stun output in the game. She's got a wide range of conversions into huge damage, and can easily kill off of one mistake. Minerva also boasts some of the strongest mobility in the game, with unique features like a wall jump and her drill kicks. She's also the only character with cancellable crouching normals (with the possible exception of Crystal's 2C 2D chain).
Though Minerva struggles when at a life deficit, she can easily turn the tide of the matchup when given the oppurtunity. Though a bit of a strange character at first glance, she's pretty simple at her core and can prove to be very effective taking advantage of her great framedata, damage, and mobility. Minerva's the character for you if you want to cheap out rounds, get big rewards off of assist hits, and abuse DRILL KICKS!!
Moveset
Normal Moves
Standing Normals
5A
|
|---|
cl.A
|
|---|
5B
|
|---|
cl.B
|
|---|
cl.C
|
|---|
5C
|
|---|
5D
|
|---|
cl.D
|
|---|
Crouching Normals
2A
|
|---|
2B
|
|---|
2C
|
|---|
2D
|
|---|
Aerial Normals
j.A
|
|---|
j.B
|
|---|
j.C
|
|---|
j.D
|
|---|
Special Moves
Mar-Vell Rage 236K 236K 236K 236K~236K 236K~236K 236K~236K~236K 236K~236K~236K
|
|---|
Mar-Vell Surge
236P |
|---|
Mar-Vell Surge (Air)
j.236P |
|---|
Mar-Vell Knee
623K |
|---|
Mar-Vell Driver
63214B |
|---|
Sky Drill
j.236K |
|---|
ULTIMATE ATTACK
236KK
|
|---|
Combos
Infinites
5A microwalk 5A microwalk 5A...
Jab infinite.
5B microwalk 5B microwalk 5B…
Another one-button infinite.
cl.C microwalk cl.C microwalk cl.C…
Another one button-infinite.
Combo Starters
2A > 2A: solid, consistent combo starter. You can do 3 2As vs. some opponents when close.
2C > 2C: another good low starter, but doesn’t work on everyone (mainly drops on Shatterax).
cl.C > cl.D: high damage combo starter that leads into almost anything.
2A > 2A > 5B: Slightly tight, but leads into 5B, which could potentially start a touch of death.
cl.C > cl.A microwalk cl.C > cl.D: Starter off of Minerva's lesser used cl.C cl.A chain.
BNB Combos
2A > 2A xx 236B xx 63214B
2C > 2C xx 236B xx 63214B
High damage confirm, can do up to 40% on many characters.
2A > 2A xx 236D~236D~236D
2C > 2C xx 236D~236D~236D
Doesn’t do as much damage as a Mar-Vell Surge ender, but does significantly more stun. Keep in mind that this doesn’t work on crouching B.Knight, Cap, Minerva, and Crystal.
2A > 2A > 2A xx 236D~236D~236D
Touch of stun on some characters.
cl.C > cl.D > 5B xx 236D~236D~236D
Universal touch of stun combo.
Other Combos
j.236B xx j.236D
Touch of stun on all characters except Supremor. Won’t work at lower heights.
cl.C > cl.D > j.236D
A combo that can be done on some characters by TKing (2369D motion) a Sky Drill. Works most consistently on Crystal/Minerva. Also possible on a couple others like Cap, but requires a very precisely TK'd drill.
2A 2B j.236A xx j.236C
Touch of stun on Shatterax and Korath. The timing for the TK surge is tricky. Also works on Crystal and Minerva, but the surge will stun the opponent, not the drill kick.
2A 2B(1) xx Sentry j.236B xx j.236D
Fun touch of stun on Supremor. Only works midscreen or if you're cornered.
Strategy
General Gameplan
Mobility
Minerva has some of the best mobility in the game. Her walkspeed is very fast, so she can move on the ground quite easily.
Minerva's forward dash has low profile for a short duration, it's possible to go under fireballs with it. The timing can be pretty tight, but her forward dash being crouch/jump cancellable on any frame makes it a fairly low commitment option.
2D is also a good choice for low profile, but beware that it is rather unsafe on block. It's a very important normal for dealing with fireball zoning.
Learning to short hop with Minerva is definitely worth it, as she doesn't have a grounded overhead. short hop j.A and j.D are good choices for quick overheads.
Minerva's walljump is done by pressing 4 while in the air next to a wall, which makes her cling onto it. You jump off by pressing 6, any button, or she'll automatically jump off after a while if you don't do anything. The main use for the walljump is for escaping the corner. If you see an opening, often a grab attempt, jump onto the wall and jump off. Maybe do a j.236A if you really want to make some distance.
Beware that this won't always work out, the opening might not be big enough for you to safely escape or you might get read. Don't attempt it too recklessly.
Another use for the walljump, mainly against Shatterax, is using it to go over projectiles. If an opponent calls Ultimus from fullscreen for example, if you have time you can cling to the wall and stay over the projectiles to avoid chip damage. The jump off may also give space to approach. Of course, this also comes with risk, Shatterax does have options like his psycho crusher to punish you.
Assist Strategy
Ultimus
Can't go wrong with Ultimus. Solid defensive assist, and Ultimus' projectiles can help you deal with zoning. On some characters, it's possible to convert off of a defensive Ultimus into an unblockable by jumping over them. They can get hit by Ultimus' leaving hitbox which is unblockable, then you can juggle a knee which is sometimes unblockable. Most consistent on slow wakeup and tall characters such as Supremor.
A video showing an Ultimus unblockable setup can be found here.
Notation for this particular setup is:
Call Ultimus, TK j.236D, jump over opponent, Ultimus exit hits unblockable, 623D
Ronan
Ronan is a good defensive assist due to its speed and (mostly) reliable homing. He also does a lot of stun on hit, so it's possible to get some cheap stuns with him.
Sentry
Probably Minerva's best assist pick. Sentry's fast, goes fullscreen, and launches the opponent. However, the best thing about Sentry is the followup juggle you can get. Minerva can pretty reliably get a 236B or j.236B, and sometimes the j.236B can be cancelled into j.236D to add to the juggle. This juggle does about 30% on all characters and builds some meter back, so landing Sentry is very rewarding.
Att-Lass
Definitely a threatening assist, as it instantly stuns the opponent, but is probably the worst assist defense-wise. Keep in mind when you play with Att-Lass you may not hit the opponent too often. If you can combo into it or catch the opponent overextending, though, Att-Lass can definitely be worth it.
Okizeme & Setups
Minerva generally doesn't get a lot from okizeme due to her weak mixups, but continuing pressure after the knockdown can be good. If you want to mix your opponent, your best bet might be a 2A/short hop j.A high/low mixup, but it is possible to react to the overhead. If you're not going for a mixup, cl.C cl.D is a good meaty. Going for a throw isn't really worth it unless you're absolutely sure it'll work. Minerva doesn't really have throw setups, and her throw is one of the weaker ones in the game, not doing much damage and not letting you apply pressure afterwards.
Matchups
Captain America
Tough matchup. Watch out for tackle and st.D, as getting hit by those moves pretty much ends the round. It's possible to counterpoke raw tackles with 2D. It's a fairly high commitment, but it works. Tackle's also punishable on block, so take advantage of that. It's a very bad idea to drill kick in this matchup; Cap can almost always punish it on block or ON HIT.
Cap's zoning is also pretty tough. If you can read minds, it's possible to go over low shield with 236A/B, but this is generally a super risky maneuver. Generally you'll just jump over the fireballs, maybe even short hop them if your timing's good.
If Cap has an assist or super on hand, it's probably best you respect him and try to bait him into wasting meter. Vision is pretty much instant, Giant Man is very threatening as Cap's followup juggle can melt half of your health, Iron Man and Thor you don't have to be as afraid of but be aware. Thor in particular might force you to give up the corner, which enables Cap to do his zoning. For his super, it's definitely something you must avoid at all costs. As you'd expect, it does absurd damage, not to mention that Cap can follow it up.
Black Knight
While a good matchup for Minerva, Black Knight has a few annoying aspects. His crouching hitbox is painfully hard to hit consistently, as sometimes cl.D or even 2A will whiff on him. 2C is one of your most consistent normals when fighting against Knight.
Black Knight is capable of doing a lot of damage to you by linking a ton of 2As, so don't get reckless just because you have the upper hand in damage. All of Knight's specials are quite punishable on block, and one punish is all you'll need to end the round.
Knight might try to do a crossup j.2B vortex on you. While tricky to deal with, once you guess right and block one of the j.2Bs, you can punish it. Due to Knight's weird hurtboxes, 2C is probably the most consistent move you can use to punish j.2B.
DP is one of Knight's stronger tools. You can't really jump at him because of it. He might also do a wakeup DP sometimes, so keep an eye out for that. 2D is another good normal of Knight's that can beat out some of your options. It's generally best to wait for Knight to slip up, as the unsafety of his specials (and some of his normals) allows for strong punishes that'll easily turn the tide of the match in your favor.
Thunderstrike
You can duck Thunderstrike's fireball, but he can still zone with thunderbolt, thunderwave, and Thor. Often, it's best to just block it until you build meter for an assist that'll allow you to interrupt his zoning and approach. Lifelead's important in this matchup, as Thunderstrike's chip damage won't be enough to make it up if he's at a big life deficit.
Thunderstrike's pressure is slightly weakened by your crouching hurtbox, as it causes his cl.B to whiff. If Thunderstrike corners you, chances are he'll try to go for a throw loop, which is very very bad. Avoid it like the plague. You can do so by jumping, doing abare jabs, or if it's absolutely necessary, just getting hit.
You can punish thunderwave when close via 2C.
Crystal
Dr. Minerva
Shatterax
2D or even a well-timed 2C can allow you to go under Shatterax's fireballs.
Use Sentry in this matchup, it's pretty much your only hope to interrupt Shatterax's zoning.
Korath
Supremor
Important note about Supremor; he has a sort of weird pushbox that can sometimes interfere with your proximity normals. Instead of doing cl.C cl.D, just do cl.D. A lot of the time, cl.C will come out as 5C instead, which is not ideal. This most commonly happens when he's stunned or on wakeup.
Supremor's pressure is very threatening. Reacting to his short hops is very difficult, tentacle can catch mashing and jumping, and Death Ray could get you caught in a throw setup. Keeping yourself out of the blender is the key to this matchup. Tentacle can definitely be an issue, as it will shut down any jumpin attempts or catch you on the ground if you aren't blocking. However, it's insanely punishable on block/whiff. Take advantage of that. Conditioning Supremor to make him attempt tentacle less can help a lot, your jumpins can be effective versus him. 5D is a pretty good poke in this matchup. 2D is also good.
If you get caught up in Supremor's pressure, don't risk interrupting it. Try your best to block his short hops. An assist can give you a way out; remember that blocking gives you meter. You can't always escape throw setups, but if you think he's going to attempt one, jump or abare 2A can work to stop it if the setup isn't inescapable. When you're cornered, that's when Supremor will be at his most threatening. Generally you can escape by jumping out, but beware of Supremor's tentacle snatching you out of the air and putting you back where you started.
This matchup is certainly doable, as your damage can match his and your superior mobility can be tough for Supremor to deal with. Sentry is definitely the best pick in this matchup, as getting the j.236B xx j.236D setup is very consistent on Supremor. If Supremor's zoning you out or building meter with Death Ray, 2D can go under it.
As mentioned in the assist strategy section, Supremor is particularly vunerable to some unblockable setups.


