| Shanty
|
| Species:
|
Goat
|
| Playstyle:
|
Stance, Rushdown
|
| HP:
|
4800
|
| Meter Size:
|
180
|
| Movement Options:
|
Short Hop, Wall-Cling, Run
|
| Voice Actor:
|
Afi Ekulona
|
| Stage(s):
|
The Capricorn
|
Profile
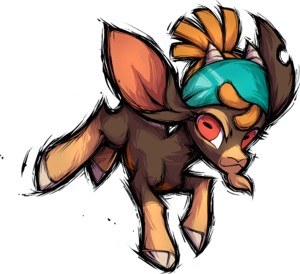
It is well known among the creatures of Foenum that when a goat sets her eye on something, it’s only a matter of time before she gets it.
Shanty, named after a song with no title, was taken in by notorious pirate captain Bravura after being orphaned at a very young age. She studied the ways of salt and sail, instilled with the belief that the only ones who make it in life are those brave enough to fight to the last.
For Shanty to earn a place as a true member of her pirate crew, she has to prove her worth. And it isn’t enough to meet the bar, Shanty aims to blow it out of the water. That means stealing the most valuable treasure in the world: which just so happens to be the Prophet’s Key! Only one who’s worthy? It’s gonna be Shanty![1]
Gameplan
Shanty is highly agile, with a couple of methods for getting behind, under, or over her opponents. Some of her abilities are projectile invulnerable too (5D~C, 236C), allowing her to get through zoning attempts.
Being a stance character, magic stocks are important to have to keep all of her movement and attack options open. Shanty has 6 magic stocks, but they regenerate quite slow, so it is critical to use Parley (22A) when one has the chance.
Movement Options
Jump: Shanty can perform both regular jumps and shorthops.
Forward and Backdash: Shanty can dash both forwards and backwards, like any other character.
Run: Shanty can run forward or backward, but only after entering her run stance (1 magic).
Wall-Cling: Ability unique to Shanty. Activated with 22B or 22C, and requires 2 magic. Press D while in wall-cling to leap to the other side (1 magic), or press any direction away from the wall to jump off.
Normal Moves
5A
5A Why is it active for 8 frames Why is it active for 8 frames
|
| Base Damage
|
Guard
|
Properties
|
Startup
|
Active
|
Recovery
|
|
Hitstop
|
Hitstun
|
Adv. on Hit
|
Blockstop
|
Blockstun
|
Adv. on Block
|
First Hit Juggle Decay
|
Base Juggle Decay
|
JDG Multiplier
|
| 30
|
HL
|
-
|
5
|
8
|
11
|
vs. Grounded
|
|
|
1
|
|
|
-2
|
|
|
|
| vs. Airborne
|
Has the most active frames of any 5A in the game. Your fastest normal, useful for quick punishes or abare.
|
|
6A
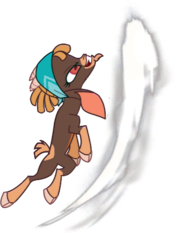
6A Talk to the hoof Talk to the hoof
|
| Base Damage
|
Guard
|
Properties
|
Startup
|
Active
|
Recovery
|
|
Hitstop
|
Hitstun
|
Adv. on Hit
|
Blockstop
|
Blockstun
|
Adv. on Block
|
First Hit Juggle Decay
|
Base Juggle Decay
|
JDG Multiplier
|
| 85
|
HL
|
-
|
8
|
6
|
22
|
vs. Grounded
|
|
|
-9
|
|
|
-6
|
|
|
|
| vs. Airborne
|
Universal anti-air. Shanty's has poor vertical range, but good horizontal range and forward movement, making it very useful in rebeat blockstrings.
|
|
5B
5B
|
| Base Damage
|
Guard
|
Properties
|
Startup
|
Active
|
Recovery
|
|
Hitstop
|
Hitstun
|
Adv. on Hit
|
Blockstop
|
Blockstun
|
Adv. on Block
|
First Hit Juggle Decay
|
Base Juggle Decay
|
JDG Multiplier
|
| 90
|
HL
|
-
|
9
|
5
|
17
|
vs. Grounded
|
|
|
1
|
|
|
-2
|
|
|
|
| vs. Airborne
|
Possible counterpoke that moves forward slightly and is disjointed during the active frames.
|
|
5C
5C Bonk! Bonk!
|
| Base Damage
|
Guard
|
Properties
|
Startup
|
Active
|
Recovery
|
|
Hitstop
|
Hitstun
|
Adv. on Hit
|
Blockstop
|
Blockstun
|
Adv. on Block
|
First Hit Juggle Decay
|
Base Juggle Decay
|
JDG Multiplier
|
| 175
|
HL
|
-
|
12
|
6
|
21
|
vs. Grounded
|
|
|
-2
|
|
|
-6
|
|
|
|
| vs. Airborne
|
Similar to 5B, moving forward with a notable disjoint during the active frames. Does massive first-hit damage, especially on counterhit.
|
|
2A
2A
|
| Base Damage
|
Guard
|
Properties
|
Startup
|
Active
|
Recovery
|
|
Hitstop
|
Hitstun
|
Adv. on Hit
|
Blockstop
|
Blockstun
|
Adv. on Block
|
First Hit Juggle Decay
|
Base Juggle Decay
|
JDG Multiplier
|
| 35
|
L
|
-
|
6
|
5
|
13
|
vs. Grounded
|
|
|
1
|
|
|
-1
|
|
|
|
| vs. Airborne
|
Hits further than the animation implies. Does more damage and hits much further than 5A, while also being a low. The tradeoff? Less active frames and slightly longer startup.
|
|
2B
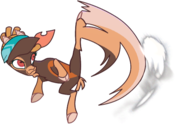
2B Skrrrt Skrrrt
|
| Base Damage
|
Guard
|
Properties
|
Startup
|
Active
|
Recovery
|
|
Hitstop
|
Hitstun
|
Adv. on Hit
|
Blockstop
|
Blockstun
|
Adv. on Block
|
First Hit Juggle Decay
|
Base Juggle Decay
|
JDG Multiplier
|
| 85
|
L
|
-
|
9
|
9
|
15
|
vs. Grounded
|
|
|
-3
|
|
|
-6
|
|
|
|
| vs. Airborne
|
Sliding low with extreme low profile during the active frames. Hits further than the animation implies. Hits surprisingly far in neutral, keeps Shanty in during pressure, rebeats into 6A, can anti air, is +2 if perfectly spaced, this button does it all!
|
|
2C
2C
|
| Base Damage
|
Guard
|
Properties
|
Startup
|
Active
|
Recovery
|
|
Hitstop
|
Hitstun
|
Adv. on Hit
|
Blockstop
|
Blockstun
|
Adv. on Block
|
First Hit Juggle Decay
|
Base Juggle Decay
|
JDG Multiplier
|
| 145
|
L
|
-
|
12
|
8
|
24
|
vs. Grounded
|
|
|
HKD +25
|
|
|
-9
|
|
|
|
| vs. Airborne
|
As with all of Shanty's lows, hits farther than the animation implies. Has massive disjoint during active frames, and can cancel into 5C if 5C has not been used in your chain yet.
|
|
3C
3C
|
| Base Damage
|
Guard
|
Properties
|
Startup
|
Active
|
Recovery
|
|
Hitstop
|
Hitstun
|
Adv. on Hit
|
Blockstop
|
Blockstun
|
Adv. on Block
|
First Hit Juggle Decay
|
Base Juggle Decay
|
JDG Multiplier
|
| 150
|
HL
|
-
|
15
|
4
|
27
|
vs. Grounded
|
|
|
Launch
|
|
|
-15
|
|
|
|
| vs. Airborne
|
Universal launcher. Fast and moves forward quite a bit, but will still fall out at max-range confirms. Useful for many of Shanty's known combos.
|
|
5C
Bulkhead
4/6C Throw out a low, I dare you. Throw out a low, I dare you.
|
| Base Damage
|
Guard
|
Properties
|
Startup
|
Active
|
Recovery
|
|
Hitstop
|
Hitstun
|
Adv. on Hit
|
Blockstop
|
Blockstun
|
Adv. on Block
|
First Hit Juggle Decay
|
Base Juggle Decay
|
JDG Multiplier
|
| 155
|
H
|
-
|
29
|
14
|
12
|
vs. Grounded
|
|
|
Stagger 57
|
|
|
-12
|
|
|
|
| vs. Airborne
|
Overhead that staggers on hit. Can hold button to feint the attack (31f). Extreme high profile from frames 5-26. Can whiff-cancel to Run Stance from frames 1-23.
|
|
j.A
j.A "An affront to nature." "An affront to nature."
|
| Base Damage
|
Guard
|
Properties
|
Startup
|
Active
|
Recovery
|
|
Hitstop
|
Hitstun
|
Adv. on Hit
|
Blockstop
|
Blockstun
|
Adv. on Block
|
First Hit Juggle Decay
|
Base Juggle Decay
|
JDG Multiplier
|
| 45
|
H
|
-
|
6
|
5
|
9
|
vs. Grounded
|
|
|
≤+21
|
|
|
≤+16
|
|
|
|
| vs. Airborne
|
Extremely quick air normal with surprising range. Her fastest overhead when used during a shorthop, leading to ground confirms if chained into j.B. Can hit crossup.
|
|
j.B
j.B
|
| Base Damage
|
Guard
|
Properties
|
Startup
|
Active
|
Recovery
|
|
Hitstop
|
Hitstun
|
Adv. on Hit
|
Blockstop
|
Blockstun
|
Adv. on Block
|
First Hit Juggle Decay
|
Base Juggle Decay
|
JDG Multiplier
|
| 85
|
H
|
-
|
10
|
9
|
10
|
vs. Grounded
|
|
|
≤+28
|
|
|
≤+18
|
|
|
|
| vs. Airborne
|
Hits above Shanty. Vacuums the opponent on hit or block, allowing for very tricky pressure and mixups. Combos from j.A, even during a shorthop, and links back into j.A during high-altitude air combos.
|
|
j.C
j.C
|
| Base Damage
|
Guard
|
Properties
|
Startup
|
Active
|
Recovery
|
|
Hitstop
|
Hitstun
|
Adv. on Hit
|
Blockstop
|
Blockstun
|
Adv. on Block
|
First Hit Juggle Decay
|
Base Juggle Decay
|
JDG Multiplier
|
| 130
|
H
|
-
|
19
|
7
|
11
|
vs. Grounded
|
|
|
≤+30
|
|
|
≤+19
|
|
|
|
| vs. Airborne
|
Big damage air normal. Can hit crossup, and causes a ground bounce on airborne opponents.
|
|
Special Moves
Special Name 1
Cutlass
236A/B/C 236A 236A 236B 236B 236C 236C
|
| Base Damage
|
Guard
|
Properties
|
Startup
|
Active
|
Recovery
|
|
Hitstop
|
Hitstun
|
Adv. on Hit
|
Blockstop
|
Blockstun
|
Adv. on Block
|
First Hit Juggle Decay
|
Base Juggle Decay
|
JDG Multiplier
|
| 140
|
HL
|
-
|
13
|
7
|
20
|
vs. Grounded
|
|
|
Launch/HKD +37
|
|
|
-5
|
|
|
|
| vs. Airborne
|
Forward-moving and slightly disjointed. This move becomes -2 if the opponent crouch-blocks it. Can lead to a HKD on hit.
|
| 240
|
HL
|
-
|
24
|
6
|
27
|
vs. Grounded
|
|
|
Launch/HKD +45
|
|
|
-11
|
|
|
|
| vs. Airborne
|
Very useful high-damage combo special. Combos easily from 5C, and can combo from 3C if TK'd into. Up close, it will cross through opponents who are crouching.
|
| 250
|
HL
|
-
|
34
|
9
|
24
|
vs. Grounded
|
|
|
Launch/HKD +53
|
|
|
-11
|
|
|
|
| vs. Airborne
|
Projectile invincible move that can cross up opponents if close enough. Does not steal the corner. Massive first-hit damage, but very hard to combo into.
|
|
Special Name 1
Parley
22A
|
| Base Damage
|
Guard
|
Properties
|
Startup
|
Active
|
Recovery
|
|
Hitstop
|
Hitstun
|
Adv. on Hit
|
Blockstop
|
Blockstun
|
Adv. on Block
|
First Hit Juggle Decay
|
Base Juggle Decay
|
JDG Multiplier
|
| 100
|
HL
|
-
|
25
|
14
|
10
|
vs. Grounded
|
|
|
1
|
|
|
-12
|
|
|
|
| vs. Airborne
|
Charges 1 magic stock. The shockwave counts as a projectile, and will break other projectiles/lose to projectile-invuln moves.
|
| 125
|
HL
|
-
|
41
|
20
|
4
|
vs. Grounded
|
|
|
Launch
|
|
|
-7
|
|
|
|
| vs. Airborne
|
Charges 2 magic stocks. This version has the highest damage, most active frames, the least recovery frames, and is the safest on block. Can be done meaty after certain HKDs to be plus on block. Requires 27-38 frames of charging. The shockwave counts as a projectile, and will break other projectiles/lose to projectile-invuln moves.
|
| 110
|
HL
|
-
|
52
|
14
|
20
|
vs. Grounded
|
|
|
Stagger 36
|
|
|
-12
|
|
|
|
| vs. Airborne
|
Charges 3 magic stocks. Staggers the opponent if it hits. Requires 39+ frames of charging. The shockwave counts as a projectile, and will break other projectiles/lose to projectile-invuln moves.
|
|
Super
Cannonball
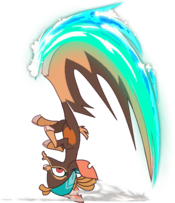
236XX Cannon ball/crash/splash! Cannon ball/crash/splash!
|
| Base Damage
|
Guard
|
Properties
|
Startup
|
Active
|
Recovery
|
|
Hitstop
|
Hitstun
|
Adv. on Hit
|
Blockstop
|
Blockstun
|
Adv. on Block
|
First Hit Juggle Decay
|
Base Juggle Decay
|
JDG Multiplier
|
| -
|
-
|
-
|
-
|
-
|
-
|
vs. Grounded
|
|
|
|
|
|
-71
|
|
|
|
| vs. Airborne
|
Fully invincible until after first attack's active frames.
|
|
Follow Up
Avast!
214XX That's it! Avast! That's it! Avast!
|
| Base Damage
|
Guard
|
Properties
|
Startup
|
Active
|
Recovery
|
|
Hitstop
|
Hitstun
|
Adv. on Hit
|
Blockstop
|
Blockstun
|
Adv. on Block
|
First Hit Juggle Decay
|
Base Juggle Decay
|
JDG Multiplier
|
| -
|
-
|
-
|
-
|
-
|
-
|
vs. Grounded
|
|
|
|
|
|
|
|
|
|
| vs. Airborne
|
Install that regenerates three magic stocks on hit, and increases magic regeneration for a period of time. Causes a stagger.
|
|
Throws
Forward Throw
Forward Throw
B+C / 6B+C Heave ho! Heave ho!
|
| Base Damage
|
Guard
|
Properties
|
Startup
|
Active
|
Recovery
|
|
Hitstop
|
Hitstun
|
Adv. on Hit
|
Blockstop
|
Blockstun
|
Adv. on Block
|
First Hit Juggle Decay
|
Base Juggle Decay
|
JDG Multiplier
|
| 400
|
Throw
|
-
|
6
|
1
|
23
|
vs. Grounded
|
|
|
Tumble
|
|
|
|
|
|
|
| vs. Airborne
|
Can combo dash 5A or 2B in the corner. Can 22A after and still get oki.
|
|
Back Throw
Back Throw
4B+C Heave-Ho! Heave-Ho!
|
| Base Damage
|
Guard
|
Properties
|
Startup
|
Active
|
Recovery
|
|
Hitstop
|
Hitstun
|
Adv. on Hit
|
Blockstop
|
Blockstun
|
Adv. on Block
|
First Hit Juggle Decay
|
Base Juggle Decay
|
JDG Multiplier
|
| 400
|
Throw
|
-
|
6
|
1
|
23
|
vs. Grounded
|
|
|
HKD +47
|
|
|
|
|
|
|
| vs. Airborne
|
Can combo if throwing into the corner. Otherwise leads to a very advantageous HKD.
|
|
Air Throw
Air Throw
j.B+C
|
| Base Damage
|
Guard
|
Properties
|
Startup
|
Active
|
Recovery
|
|
Hitstop
|
Hitstun
|
Adv. on Hit
|
Blockstop
|
Blockstun
|
Adv. on Block
|
First Hit Juggle Decay
|
Base Juggle Decay
|
JDG Multiplier
|
| 300
|
Throw
|
-
|
8
|
3
|
18
|
vs. Grounded
|
|
|
Bounce
|
|
|
|
|
|
|
| vs. Airborne
|
Uses your groundbounce immediately. Like Paprika's airthrow, followups depend on your height. From a high connect, falling with j.B seems most consistent. If closer to the ground, landing and using 5A or 5B works.
|
|
Magic
Shanty's magic slowly builds over time, and she can obtain more with Parley, to a maximum of 6 stocks. She can spend it to enter her Wall Cling and Run stances, and use certain options within the stances.
5D
Run Stance (Enter/Exit)
5D
|
| Base Damage
|
Guard
|
Properties
|
Startup
|
Active
|
Recovery
|
|
Hitstop
|
Hitstun
|
Adv. on Hit
|
Blockstop
|
Blockstun
|
Adv. on Block
|
First Hit Juggle Decay
|
Base Juggle Decay
|
JDG Multiplier
|
| -
|
-
|
-
|
8
|
-
|
-
|
vs. Grounded
|
|
|
|
|
|
|
|
|
|
| vs. Airborne
|
Enters Run Stance, which has an evasive low profile hurtbox on frame 1, and gives her access to different movement and moves on frame 8 after pressing 5D. Shanty can manually exit the stance by holding down or pressing D again, which, when done as fast as possible, makes the stance last 20f at minimum. Shanty can run forwards and backwards, which drains magic, and she cannot block.
|
|
Keelhaul
5D~A Skrrrt ver. 2 Skrrrt ver. 2
|
| Base Damage
|
Guard
|
Properties
|
Startup
|
Active
|
Recovery
|
|
Hitstop
|
Hitstun
|
Adv. on Hit
|
Blockstop
|
Blockstun
|
Adv. on Block
|
First Hit Juggle Decay
|
Base Juggle Decay
|
JDG Multiplier
|
| 90
|
L
|
-
|
13
|
12
|
13
|
vs. Grounded
|
|
|
Launch/HKD +46
|
|
|
-6
|
|
|
|
| vs. Airborne
|
Advancing low that sucks opponents in on grounded hit, allowing side switches. Can be spaced to be safe.
|
|
Broadside
5D~B Pray to god you didn’t mash on this. Pray to god you didn’t mash on this.
|
| Base Damage
|
Guard
|
Properties
|
Startup
|
Active
|
Recovery
|
|
Hitstop
|
Hitstun
|
Adv. on Hit
|
Blockstop
|
Blockstun
|
Adv. on Block
|
First Hit Juggle Decay
|
Base Juggle Decay
|
JDG Multiplier
|
| 210
|
M
|
-
|
10
|
12
|
19
|
vs. Grounded
|
|
|
Wallstick
|
|
|
-5
|
|
|
|
| vs. Airborne
|
High-damage charging headbutt. Wallsticks if opponent hits the wall. Can cancel into 22C to get a midscreen wallstick. Has many active frames and decent disjoint both horizontally and vertically, meaning you can space it to be safe and possibly use it as a panic anti-air if you're in stance.
|
|
Gangway!
5D~C Zoning? In my pony game? Zoning? In my pony game?
|
| Base Damage
|
Guard
|
Properties
|
Startup
|
Active
|
Recovery
|
|
Hitstop
|
Hitstun
|
Adv. on Hit
|
Blockstop
|
Blockstun
|
Adv. on Block
|
First Hit Juggle Decay
|
Base Juggle Decay
|
JDG Multiplier
|
| 70[x2], 210
|
H
|
-
|
15
|
18
|
21
|
vs. Grounded
|
|
|
Bounce
|
|
|
-8
|
|
|
|
| vs. Airborne
|
Multi-hit flip-kick thing. Hits grounded opponents on frame 28. Has projectile invulnerability on frame 1 and high profile starting at frame 5. Can cross up a crouching opponent. Uses up your groundbounce.
|
|
WallCling
Wallcling
22B/C Does whatever a spider-goat does. Does whatever a spider-goat does.
|
| Base Damage
|
Guard
|
Properties
|
Startup
|
Active
|
Recovery
|
|
Hitstop
|
Hitstun
|
Adv. on Hit
|
Blockstop
|
Blockstun
|
Adv. on Block
|
First Hit Juggle Decay
|
Base Juggle Decay
|
JDG Multiplier
|
| -
|
-
|
-
|
11
|
17-22
|
1
|
vs. Grounded
|
|
|
|
|
|
|
|
|
|
| vs. Airborne
|
Grounded startup is 11f, airborne travel time varies between 17 and 22f. Enters Wallcling by spending 1 magic and jumping to the wall. 22B jumps to the wall behind her, 22C jumps to the one in front of her. If midscreen, a wall is created at the camera's bounds. Can run up and down the wall and gives access to a different set of moves. Can act on the 2nd frame after reaching the wall. 15 frames of recovery if you walk to the floor. Magic drains continuously on the wall, Shanty automatically enters Helm if magic runs out. Cannot block in Wallcling.
Pressing C while in wallcling will cause Shanty to enter "Helm".
|
|
Wallcling Attack
Wallcling 8/5/2A w.8A (the bing) w.8A (the bing) w.5A (the bang) w.5A (the bang) w.2A (the bong) w.2A (the bong)
|
| Base Damage
|
Guard
|
Properties
|
Startup
|
Active
|
Recovery
|
|
Hitstop
|
Hitstun
|
Adv. on Hit
|
Blockstop
|
Blockstun
|
Adv. on Block
|
First Hit Juggle Decay
|
Base Juggle Decay
|
JDG Multiplier
|
| 110
|
H
|
-
|
11
|
9
|
18
|
vs. Grounded
|
|
|
Launch
|
|
|
|
|
|
|
| vs. Airborne
|
Launches upward. Cancels into other wallcling followups, but not itself.
|
| Base Damage
|
Guard
|
Properties
|
Startup
|
Active
|
Recovery
|
|
Hitstop
|
Hitstun
|
Adv. on Hit
|
Blockstop
|
Blockstun
|
Adv. on Block
|
First Hit Juggle Decay
|
Base Juggle Decay
|
JDG Multiplier
|
| 145
|
H
|
-
|
8
|
8
|
17
|
vs. Grounded
|
|
|
Launch
|
|
|
|
|
|
|
| vs. Airborne
|
Launches full screen horizontally. Cancels into other wallcling followups, but not itself.
|
| Base Damage
|
Guard
|
Properties
|
Startup
|
Active
|
Recovery
|
|
Hitstop
|
Hitstun
|
Adv. on Hit
|
Blockstop
|
Blockstun
|
Adv. on Block
|
First Hit Juggle Decay
|
Base Juggle Decay
|
JDG Multiplier
|
| 250
|
H
|
-
|
9
|
7
|
10
|
vs. Grounded
|
|
|
Bounce
|
|
|
|
|
|
|
| vs. Airborne
|
Causes a ground bounce. Fastest followup from wallcling that can hit grounded opponents, making it useful for surprise pressure. Cancels into other wallcling followups, but not itself.
|
|
Harpoon
Wallcling B
|
| Base Damage
|
Guard
|
Properties
|
Startup
|
Active
|
Recovery
|
|
Hitstop
|
Hitstun
|
Adv. on Hit
|
Blockstop
|
Blockstun
|
Adv. on Block
|
First Hit Juggle Decay
|
Base Juggle Decay
|
JDG Multiplier
|
| 155
|
H
|
-
|
14
|
8
|
26
|
vs. Grounded
|
|
|
Launch/HKD +61
|
|
|
-8 to -4
|
|
|
|
| vs. Airborne
|
Has very ambiguous crossup properties. Leads to a massive launch on hit, or a HKD if no followup is used.
|
|
Change Walls
Wallcling D NYOOM NYOOM
|
| Base Damage
|
Guard
|
Properties
|
Startup
|
Active
|
Recovery
|
|
Hitstop
|
Hitstun
|
Adv. on Hit
|
Blockstop
|
Blockstun
|
Adv. on Block
|
First Hit Juggle Decay
|
Base Juggle Decay
|
JDG Multiplier
|
| -
|
-
|
-
|
30
|
-
|
0
|
vs. Grounded
|
|
|
|
|
|
|
|
|
|
| vs. Airborne
|
Spends 1 magic to jump to the opposite wall. Does not have any additional recovery upon reaching the other wall.
|
|
Helm Breaker
Helm
Run 7/8/9, Wallcling 9/C speen mk. 2 speen mk. 2
|
| Base Damage
|
Guard
|
Properties
|
Startup
|
Active
|
Recovery
|
|
Hitstop
|
Hitstun
|
Adv. on Hit
|
Blockstop
|
Blockstun
|
Adv. on Block
|
First Hit Juggle Decay
|
Base Juggle Decay
|
JDG Multiplier
|
| -
|
-
|
-
|
-
|
-
|
15
|
vs. Grounded
|
|
|
|
|
|
|
|
|
|
| vs. Airborne
|
Shanty flips through the air, and can be controlled left/right to influence her trajectory, allowing for ambiguous left right mixups into Breaker. Recovery is from when she touches the ground.
|
|
Breaker
Helm A/B/C I dont even know what side this hit on. I dont even know what side this hit on.
|
| Base Damage
|
Guard
|
Properties
|
Startup
|
Active
|
Recovery
|
|
Hitstop
|
Hitstun
|
Adv. on Hit
|
Blockstop
|
Blockstun
|
Adv. on Block
|
First Hit Juggle Decay
|
Base Juggle Decay
|
JDG Multiplier
|
| 110
|
H
|
-
|
16
|
2+
|
9
|
vs. Grounded
|
|
|
Varies
|
|
|
-8 to -4
|
|
|
|
| vs. Airborne
|
Overhead attack from Helm. Grants generous hitstop on aerial connect and roughly +6 to +10 on grounded hit. Unsafe on block if used from high up.
|
|
Combos
Basic Concepts
If you want a simple combo that will nearly always work, consider using:
- (starter) > 2b > 2c > 3c > jA > jB > jC > 5b > 5c > 2c > 236a
If you want a little more meat on your combos, you'll have to look into ways to preserve your groundbounce. One of the easier ways of doing this is with a jB > jA link:
- (starter) > 2b > 2c > 3c > jB > jA > jB > 6a > jB > jC > 5c > 2c > 236a
If you get juggle decay low enough, you can even do multiple loops of it:
- jC > 5b > 5c > 3c > jB > jA > jB > 5b > 5c > 3c > jB > jA > jB > 5b > 5c > 3c > jB > jC > 5b > 5c > 236a
Another way of extending combos is using by run stance. There are many ways of doing this, as shown below.
- 5b > 5c > 236a > 5d~a > 5b > 5c > 236a > 5d~a > 5b > 5c > 236a
- - A basic corner combo, using Keelhaul to keep the opponent in the air. Keep in mind that 5d~a > 5b is a link, so you will need to time your input instead of cancelling it.
- 5b > 5c > 236a > 5d~b > 5b > 5c > 236a > 5d~a > 5b > 5c > 236a
- - Getting a little more advanced, this corner combo uses Broadside to stick the opponent to the wall, giving you more time to link the next attack.
Advanced Concepts
Of course, run stance isnt your only use of magic. You also have wallcling, which can be used to combo the opponent further. This will be notated by a 'w' before the move.
- 5b > 5c > 236a > 5d~b > 22c > w5b > 5b > 5c > 236a
- - By using Broadside to stick the opponent to the wall, you have enough time to grab the wall with 22c and hit them from there.
- 5b > 5c > 236a > 5d~b > 22c > w5a > w5d > w2a > w5b > 5b > 5c > 236a
- - Here we are using w5a to knock the opponent to the other side of the screen, then chasing after them with w5d. However this can be a little tricky depending on the opponents height.
- 5b > 5c > 236a > 5d~b > 22c > w8a > w5c > any attack button > 5b > 5c > 236a
- - In this one, after grabbing the wall we are knocking the opponent upwards with w8a, then jumping off with and stunning them for a short time.
However there is a downside to all of those, being that they cost magic. If you want a high damage way to keep launching them without magic, you'll have to look at TK's.
Here, "TK" means to input a special attack during prejump. This can be done by doing the motion input for the attack before you jump, then timing your button press for right after you press up.
This will be notated with '2369' before the attack.
- 5b > 5c > 3c > 2369b > 5b > 5c > 3c > 2369b > 5b > 5c > 236a
- - With a quick input, you are able to combo 3c into Cutlass B by doing a TK. This is a core concept in most of your higher damage combos.
- 5b > 5c > 3c > 2369b > 5b > 5c > 3c > 2369b > 6a > 5b > 5c > 3c > 2369a
- - If you get enough hits in after Juggle Decay is maxed out, you can even do a TK as an ender!
- 5a > 5b > 5c > 3c > 2369b > 5b > 5c > 3c > 2369b > 5b > 5c > 236a
- - Here we have a worse starter, meaning out Juggle Decay maxes out quicker. This makes it so our TK Cutlass B is a lot harder to do, however it is still possible if you practice enough.
- 5a > 5b > 5c > 3c > 2369b > 5c > 3c > 2369b > 5b > 5c > 236a
- - We can solve this issue by altering the combo slightly, however this does make the link after 2369b harder to input. It's up to you which you prefer.
Now let's throw some magic into the mix!
- 5b > 5c > 3c > 2369b > 5b > 5c > 2c > 3c > 2369b > 5d~c > 5b > 5c > 236a
- - With good spacing and timing, you can combo 2369b into Gangway! to extend your combos with magic. Keep in mind that the followup may be harder depending on how high Gangway! hits.
Remember that you are able to run in run stance, this can lead to some different conversions at the cost of some more magic. This will be notated by 6d/4d, for run forward/run backward.
Keep in mind that you may have to delay the button press after to get the distance you need.
- 5b > 5c > 3c > 2369b > 5b > 5c > 2c > 3c > 2369b > 6d~b > 5d~c > 5b > 5c > 236a
- - Here is a basic demonstration of that. There are several slight delays to get used to, but with practice they will come much more naturally.
You can also combo into wallcling from a TK:
- 5b > 5c > 3c > 2369b > 22b > w2a > w5b > 6a > 5b > 236a
Examples
Here are a few examples of combo's, not all of these are optimal, and some of these can be very difficult, so feel free to mix and match various parts of different combos to find something that feels right for you!
jB jA jB Loops
- 5b > 5c > 2c > 3c > jB > jA > jB > dash > 5c > 2c > 3c > jB > jC > 5c > 2c > 236a (1347 damage)
- 5b > 5c > 2c > 3c > jB > jA > jB > dash > 5c > 2c > 22a (981 damage, +1 magic, hard knockdown)
- jC > 5b > 5c > 3c > jB > jA > jB > dash > 5c > 2c > 3c > jB > jC > 5c > 2c > 236a > 5d~a (1337 damage, -1 magic)
- 5c > 2c > 3c > jB > jA > jB > dash > 5c > 2c > 3c > jB > jA > jB > dash > 5c > 2c > 3c > jB > jC > dash > 5c > 2c > 236a > 236xx (1994 damage, -1 meter)
TK Cutlass B Loops
- 2b > 5c > 3c > 2369b > 5c > 2c > 3c > 2369b > 5c > 2c > 3c > jB > jC > 5c > 2c > 3c > 2369a (1727 damage)
- jC > 5c > 3c > 2369b > 3c > 2369b (1268 damage, hard knockdown)
- 5c > 2c > 3c > 2369b > 5c > 2c > 3c > 2369b > 5c > 2c > 3c > 2369b > 5d~c > 5c > 3c > 2369a (2197 damage, -1 magic)
- 5b > 5c > 3c > 2369b > 5c > 2c > 3c > 2369b > 5c > 2c > 3c > jB > jC > 5c > 2c > 3c > 2369a > 236xx (2015 damage, -1 meter)
Techniques
Shanty has a few empty cancels that are nice,
4C xx 236AB
The only use I found for this was being able to avoid throws in corner and reversal it, but there are stronger options. A prime use, is to step back with the momentum of the 4C, then fly forward with the super.
236C xx 236AB
This is kinda neat, inputting 236C and when Shanty is inside the opponent, input 236AB the same way you did the 236C, Shanty will pass through and the super will be perfectly spaced behind them. Great for anti-Parley or fireballs.
Colors
| General
|
|
| Characters
|
|
| Predators
|
|
| Events
|
|
