Under Night In-Birth/UNI2/Nanase/Starter
 |
Under Construction
|

Disclaimer: This is a community written page and may contain opinions that not all players may agree with. Use at your own discretion.
Notable Moves

5B
This is your poke of choice for when you get in.
2B
This hits low and far, catch them walking back.
5A
Fast poke, great for close-range situations.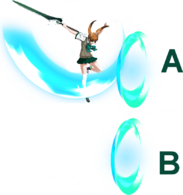
j.236X
Good ol' fireballs!


5B and 2B are very good buttons for poking in the mid-range space. 5B is slightly faster and can catch opponents jumping at you, while 2B hits low and has slightly more range than 5B. If you're far out, take advantage of Nanase's dash speed to put yourself back in range for 5B to threaten your opponent.
j.236X is Nanase's key special move, and one you want to use often. Set j.236B at moments where you think your opponent won't hit you for it, or use j.236A as a more traditional fireball. Jump cancel your buttons to use fireballs, or execute a TK (Tiger Knee) input by performing the 236 motion but ending in 7/8/9 to fireball as soon as you jump.
Some other moves of note:

2C
A sweep move with better range than 2B.
3C
Your ground anti-air button. Jump afterward to combo, or jump back on block.
j.8C
An air normal with head invul. An anti-air air button.
236X
The "Swordcar" as it is known by the community.


- 2C reaches very far, at the cost of high recovery if you whiff.
- 3C is a strong attack with great vertical reach and has invulnerability to most air attacks while active.
- j.8C is a good button for hitting opponents out of the sky and putting Nanase in a good position for a combo.
- Use 236A on occasion for its fast startup and unique follow-ups, but beware its unsafe recovery. 236C can be used to go through and punish projectiles.
Combos
Use buttons like 2C to get opponents off the ground, then jump into the air to combo them. Finally, get a hard knockdown with 214B~B.
| Notation Help | |
|---|---|
| Disclaimer: Combos are written by various writers, so notation may differ slightly from this notation. | |
| X+Y | Buttons "X" and "Y" must be input simultaneously. |
| X/Y | Input "X" or "Y" can be used. |
| dl.X | There should be delay before inputting "X". |
| w.X | Attack "X" should whiff and not hit the opponent. |
| j.X | Button "X" is input while jumping or in the air. |
| dj.X | Button "X" is input after a double jump. |
| jc | Jump cancel the previous action. Usually will be omitted due to being obvious. |
| md.X | Perform a micro-dash before performing "X". |
| TK.X | Indicates the motion "X" is input immediately after leaving the ground. Stands for tiger knee. |
| (X) | Input "X" is optional. Typically the combo will be easier if omitted. |
| [X] | Input "X" is held down. Also can be known as "Increase" or "IC" for short. Depending on the character, this can indicate that this button is held down and not released until indicated by the release notation. |
| ]X[ | Input "X" is released. Will only appear if a button is previously held down. |
| {X} | Button "X" should only be held down briefly to partially charge the attack, instead of the full increased version. |
| X(#) | Attack "X" should only hit # of times. |
| X > Y | Cancel "X" into "Y". |
| X, Y | Link "X" into "Y", allowing "X" to fully recover before "Y". |
| X~Y | This notation has two meanings.
|
| CH | The first attack must be Counter Hit. |
| CS | Perform a Chain Shift, which is performed by inputting D twice. |
| CVO | Perform a Cross Cast Veil Off, which is performed by inputting A+B+C. |
| IW | Perform an Infinite Worth, which is performed by inputting 41236D or A+B+C during CVO. |
| IWEX | Perform an Infinite Worth EXS, which is performed by inputting A+B+C+D. |
| Combo | Damage | Cost | Meter Gain | Location |
|---|---|---|---|---|
| 5A > 5A > 5A > 5A > 5A (> 5A) | 2429 | 0 (200 EXS with optional ender) | 20.54 | Anywhere |
| ||||
| 5A/2A > 2B > 2C > 214B~B | 1792 | 0 | 34.30 | Anywhere |
| ||||
| 5A/2A > 2B > 2C > 5C > j.[C] > j.B~B > j.2C > 2C > 214B~B | 2646 | 0 | 61.08 | Anywhere |
| ||||
If your opponent is too far for 5C to let you continue the combo, try using 236B~C to confirm.
| Combo | Damage | Cost | Meter Gain | Location |
|---|---|---|---|---|
| 5A/2A > 2B > 2C > 236B~C > j.[C] > j.B~B > j.2C > 2C > 5[C] > 214B~B | 2751 | 0 | 67.73 | Anywhere |
| ||||
Use overheads like 66C (Dash C) or Assault and j.B to open up your opponents, then try the above routes.
Stronger buttons like 5B or 3C open up options for combos.
| Combo | Damage | Cost | Meter Gain | Location |
|---|---|---|---|---|
| 5B/2B > 2C > 5[C] > j.[C] > delay j.2[C] > j.236[A] > land > j.A > j.8C > j.B~B > j.2C > 2C > 5[C] > 214B~B | 3239 | 0 | 77.30 | Anywhere |
| ||||
| 3C > j.8C > j.[C] > delay j.2[C] > j.236[A] > land > j.A > j.8C > j.B~B > j.2C > 2C > 5[C] > 214B~B | 3242 | 0 | 73.70 | Anywhere |
| ||||
When you reach the corner, you can use more unique combo tools.
| Combo | Damage | Cost | Meter Gain | Location |
|---|---|---|---|---|
| 5B/2B > 2C > 236B~delay A > 5A > 3C > j.[C] > j.8C > j.B~B > j.2C > 2C > 5[C] > 214B~C | 3260 | 0 | 76.75 | Corner |
| ||||
Round Start
Nanase has strong and fast normals, but that does not mean she easily wins at round start. Against characters with fast advancing moves like Orie and her Divine Thrust, or zoners like Hilda and Merkava, Nanase will need to be a bit more patient. Start with a dashblock (66/6AB and then immediately hold 1) and watch your opponent carefully if they're likely to hit you with a fast move or a long-range attack.
If your opponent is more likely to get up-close and personal with you, then your options open up.
- 5B is a great option against aggressive approaches, as it is fast and covers a big space in front of Nanase.
- Use 2B or 2C if you anticipate them walking back or pressing a slower button.
- 214B is slower but can catch people who choose to go in the air first. If they air block, break their defense with the air-unblockable follow-up attack.
Against opponents who are more cautious, take advantage and start the round by setting a j.236B projectile to augment your neutral.
Neutral
Try to get in range of your 5B and 2B so you can properly threaten your opponent.
When far away, use your fast dash to cover ground quickly. If your opponent is trying to keep away, play patiently and dashblock until you find a chance to press a button and get your turn.
- Nanase's buttons are best at mid-range, so it's recommended to at least be in range for your 5B to connect.
- Use special moves like 214B or j.236A on occasion to try and control your opponent's movement. They are slower than your normals, but can be very useful for repositioning and catching your opponent in awkward spots.
When your opponent tries to go for an air approach, catch them with j.8C or 3C.
If your opponent can't reach you with their attacks or they are knocked down, set a j.236B projectile so you can use that to cover your approach.
- j.236B is slower than Nanase's max dash speed. You could outrun it and use it to go for an aggressive but unsafe approach, or stay behind it to protect you. Your opponent will need to react defensively to the fireball, or make aggressive plays to avoid it and try to attack you.
- If you choose to run ahead of fireball, you can try going for a throw to take advantage of your opponent expecting to block the fireball.
Pressure
Once you can get a knockdown from a combo or a throw, Nanase is in a perfect position to bully mashers. Meaty with buttons like 5B or set a j.236B projectile and see if you can catch your opponent waking up with a reversal.
Blockstrings
Blockstrings are relatively free-form in UNI2 thanks to the Reverse Beat mechanic, so you want to structure your strings such that you can stay safe at the end while being prepared to confirm a potential hit. Some examples:
- 5B > 5C > 2C > whiff 5A/2A
- 5A > 2C > 2B > 5B
- 2B > 2C > 5[C] > FF > j.236B
- 2A > 2A > 2C > 5C > 214B~B
End with an A normal rebeat to reduce your recovery and stay safe at the end of a blockstring. If your blockstring pushes you out, end with a button like 5B to stay safe but also be at a close enough distance that you can still restart pressure with another 5B. If you feel like your opponent is not going to mash during your blockstring, cancel into FF and use j.236B. Alternatively, throw out a special move like 214B~B if you think you can catch them mashing while staying safe afterward.
When executing a blockstring, play around with delaying each button and intentionally ending strings early to try and encourage your opponent to play a more aggressive defense. Condition them this way and you can exploit it later with frame traps, such as 2A > 2C (there is a natural 1f gap even if you cancel as fast as possible.)
Throw and j.236B (Fireball)
Against more patient players you may find yourself pressing buttons to no avail and trying a needlessly risky action to open them up, or even just ending your turn early. Fortunately, Nanase's kit lets her utilize her throw effectively as part of her pressure.
When you set j.236B at a distance from your opponent, you can run ahead of it and throw them before the fireball connects. Typically, opponents may not be ready to tech the throw the first time they experience this situation because Nanase is so fast and they expect the fireball to connect first. From here, you can play around with what to do when your opponent starts expecting the throw to keep catching them off-guard.
Sometimes it's even worth going for throw after making them block a quick normal like 2A. Note however that when you throw opponents while they are still in blockstun, your throw will be a "gold throw." This means the throw tech window will be extended AND a gold-colored spark will appear to indicate that a throw is taking place, giving your opponent time to react and tech. Time your throws carefully, and the damage will add up even without landing combos.
When You Are Knocked Down
Often the best action to take is to simply block on wakeup. If your opponents set up something to keep you blocking, defend patiently and occasionally use Shield (4D/1D) to try and gain GRD and, more importantly, push your opponent away.
Nanase does have two reversals, 623B and 623C. 623B is meterless and covers a good range above her, but does not reach very far horizontally. 623C has greater reach and can also inflict a lot of damage on its own, so it is worth considering if you need the range or want to punish their obvious meaty.
Getting Pressured
- 2A and 5A are your fastest buttons, use them if you want to mash during a gap in pressure.
- Midscreen, use your Backdash to retreat and create some space or use Creeping Edge (3D) to try and evade an attack.
- Both leave you vulnerable after using them, so time them carefully.
- It is not recommended to jump out unless you feel very confident they are going to use a low attack. Normals are all air-unblockable, so jumping carries significant risk.
- If they reset pressure by dashing back in, you can try mashing or prepare for a throw attempt.
- If all else fails, just keep blocking and eventually an opportunity will present itself. No pressure sequence in UNI2 is truly endless.
How to Spend Meter
Use your meter to augment your damage, keep safe at the end of a string, or even to set up for continued pressure.
Ending Combos with Meter
- When you use 214B to end a combo, use j.236C instead of the B/C follow-up to end the combo. You'll add additional damage while still getting a knockdown.
- If you need more damage to end a round, end a combo with 214B~C and use 623C as soon as you land for the most damage.
- You can also go for IW (41236D) if you have the meter for it.
Pressure with Meter
- If you are doing a blockstring and you choose to end with an unsafe special move like 236B~B, use 214C to keep your advantage.
- If you use this midscreen you will likely switch sides, but it is very useful in the corner for continuing pressure.
- You can also use 22C at the end of a string to set up a different situation. While you have less advantage, you can go for a very slightly delayed throw while the disc projectile is active.
- In the air, you can use j.236C to stay safe.
Other Uses of Meter
- If your opponent is throwing a projectile at you, you can react with 236C to punish them. 236C has projectile invul properties and will go through fireballs. In the air, j.214C can be used for the same thing.
- If you are blocking and desperately want to escape, use Guard Thrust to try and knock your opponent away while in blockstun.
- This move has long startup and is easily punishable if your opponent blocks it, so use it carefully.
- Veil Off functions similarly to a reversal when you have at least 100 EXS, but cannot be used if you are in hitstun or blockstun. If you go for it and it hits, you can take advantage of the Veil Off state to turn the tables on your opponent.
Additional Resources
TODO: FIll in