Under Night In-Birth/UNI2/Phonon/Starter
 |
Under Construction
|
This page is meant to serve as an intro to the character. It is not meant to be an exhaustive guide to playing them but rather a general overview to get new players up to speed quickly.
When writing, think of it like putting together a five-minute guide: be quick and concise; focus on the essentials over going too deep into the weeds. Convey only what's needed to understand the basics of the character and start playing. Stick to bullet points or succinct paragraphs. Save the essays and deep-dives for the strategy page. Add extra sections to cover character-specific mechanics as needed, but again: keep it simple.
If you want example, look at Nanase's page.
Notable Moves

5A
Your best close range defensive button
2A
Your fastest low
2C
Long ranged low poke for catching walk backs or starting pressure
4B
One of Phonon's most iconic moves, great mid screen poke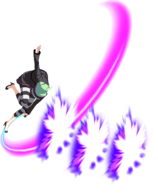
j.236X
Air fireballs with a lot of utility![5[BC] A good preemptive anti-air to catch jump-ins](/images/thumb/0/06/UNI_Phonon_BC.png/271px-UNI_Phonon_BC.png)
5[BC]
A good preemptive anti-air to catch jump-ins


![5[BC] A good preemptive anti-air to catch jump-ins](/w/File:UNI_Phonon_BC.png)
5A and 2A are your fastest buttons and will be your go-to button to press in close range situations. 5A is generally the better defensive button while 2A hits low and is strong in pressure. 2C covers a lot of space and lets you check people for trying to walk backwards. 4B lets you dominate the mid screen range against most of the cast and it's difficult for many characters to challenge you when properly spaced. Phonon generally wants to be poking at her opponents from a safe distance, but not so far away that she's unable to threaten throw. Use the vacuuming and pushback effects of her buttons to keep your opponents in your optimal range.
j236A is an air fireball that covers a very strong angle and acts as a threat that your opponents have to play around on both the ground and the air. j236A will momentarily halt your airborne momentum and then resume it after the animation, so it's most commonly used after the apex of your jump as you're falling. j236B also momentarily halts your airborne momentum but rather than keeping your momentum after the animation, it moves you slightly up and forward and then you begin to fall. j236B is commonly used early in your jump arc as a way to catch people trying to poke out of your pressure with low to the ground moves.
5BC (FF) is a somewhat slow but very active anti-air that can be held to keep it active even longer. While its uses as a reactionary anti-air for things like assaults are somewhat limited, it can be very good for policing people trying to do full jumps at you or stay in the air for too long.
Some other moves of note:
623B
Long range geyser, great for checking movement
236X
Fireball that travels along the ground![j[B] Long air button at a downward angle](/images/thumb/a/a5/UNI_Phonon_j.5B_IC.png/319px-UNI_Phonon_j.5B_IC.png)
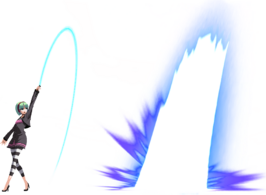
j[B]
Long air button at a downward angle![j[C]/j3[C] Long horizontal air button](/images/thumb/1/10/UNI_Phonon_j.C_IC.png/411px-UNI_Phonon_j.C_IC.png)
j[C]/j3[C]
Long horizontal air button
3C
The full screen low


![j[B] Long air button at a downward angle](/w/File:UNI_Phonon_j.5B_IC.png)
![j[C]/j3[C] Long horizontal air button](/w/File:UNI_Phonon_j.C_IC.png)

- 623B is air unblockable and reaches very high up on the screen making it a good button for checking your opponent's approach if they're in the correct spacing.
- 236A leads to plus frames when spaced in pressure and is a common pressure reset, but can be jumped over if you get predictable with it.
- 236[B] is a fast moving multi-hit charged fireball that can delete single-hit fireballs and then go straight through, great for dealing with other characters' projectiles
- j[B] has a lot of utility both as a pre-emptive retreating button to threaten space when up backing as well as a proactive button to attack opponents on the ground. Easily converts on hit with j3[C].
- j[C] will keep your current air momentum while j3[C] will propel you forwards. Both moves are extremely long and good for covering the airspace in front of you.
- 3C is a nearly full screen low, not quite as broken as it sounds but it can be very good for pre-emptively checking your opponents trying to do things full screen like concentrating or throwing projectiles.
Combos
Basic combos to get started. They shouldn’t be proper BNBs, but something easy for people just picking up the game for the first time. Think something along the lines of the intermediate mission mode routes. Simplify combos as needed
Round start
What this character's options at round start are and how to use them
Neutral
A general overview of how this character approaches neutral
Pressure
A quick overview of pressure and some example blockstrings and moves to safely end on
What to do when knocked down
Defensive options and general tactics to use to counter the opponent’s pressure after a knockdown
How to use meter
How the character uses meter and where (purely for combos, as part of pressure, etc.)