Duels of Fortune/Clyde

From Mizuumi Wiki
Jump to navigation Jump to search
Overview
Overview

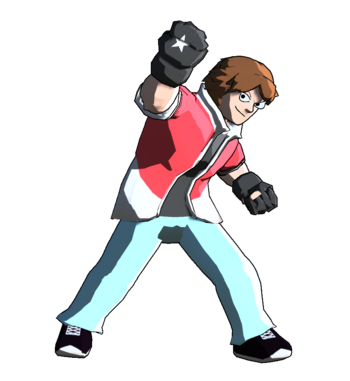
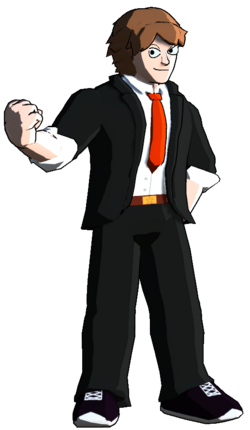
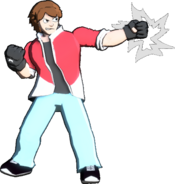
Clyde Brightstar is the main character of Duels of Fortune. While you may be expecting the usual all-rounder shoto, Clyde is THE rushdown character of the game. With his powerful movement, he can get in the opponent's face better than anyone else.

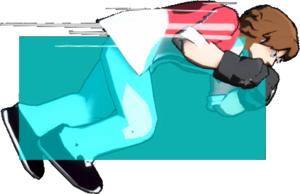
Clyde as a character is defined by his forward dash. Clyde's forward dash, an insanely fast low-profiling side-switching run, is arguably the best movement option in the game. When used well, it's a powerful neutral tool that can control the pace of a match,. This gets all the stronger when you add in his other options in neutral and on offense. His air dash is one of the faster ones in the game, and 664L lets him bait attempts to check his dash. Furthermore, all his hits can convert into lengthy combos that carry the opponent across the screen and into a hard knockdown, leading to his pressure. This pressure is quite potent too. Clyde's buttons are all above average speed wise, letting him perform especially tricky staggers and pressure resets. His forward dash factors in too as an oppressive offense option that allows him to perform a left/right mixup at almost any time in any part of the screen, a tactic especially potent once the opponent starts to fear his frame traps. These aspects all make Clyde a relentless offense machine when he can take the game at his pace.

However, Clyde doesn't always get to run at his pace. In exchange for his amazing movement and frame data, Clyde's normals are on the smaller end with zero disjoints. While 66M and 4H are decent buttons, they have their weaknesses and won't help him contest other characters. He also has one of the worst set of lows in the game, with an 9F 2L and 12F 2M being his only options. Beyond limiting his high/low, it's tough for Clyde to deal with armored moves and chicken blocking on defense. In addition, his combos build a huge amount of burst for the opponent. His biggest flaw by far though is his general need to be in the opponent's face. While he's the best character at getting into that position, against characters like ERROR, Doodle, and Shiverskull, all of whom have strong keepaway and good ways to check his dash, his avenues are limited. He often has to make multiple high risk plays to force his way in. Similarly, if a character has stronger close range than him like Baron, then he may find himself with no easy paths to victory. Still, no character is immune to his unending pressure and unreactable left rights.

Playstyle
Clyde relentlessly rushes in to overwhelm opponents with his fast buttons and left/rights.
Pros Cons
  • Speed Demon - Clyde is the fastest character in the game, particularly with his unique forward dash that can go full screen in the blink of an eye. If that weren't enough it also low profiles and he can do a noncommittal invincible back dash out of it. His air dash and walk speeds are also quite good, allowing him to move across the screen almost better than anyone else.
  • Ruthless Left/Right - Thanks to his forward dash going through opponents, Clyde can do fast left/rights from any part of the screen, which get especially ambiguous after a hard knockdown. It's hard to stay blocking against him forever.
  • Fast Staggers - Clyde's buttons are all faster than average, letting him play an incredibly strong stagger game with a multitude of ways to frame trap and reset his pressure using his normals alone.
  • Stubby Buttons - Clyde is lacking for actual pokes outside 66M. On top of that, none of his buttons are disjointed, the cost he pays for having fast frame data. While this isn't a major issue thanks to his strong movement, it means he can have a hard time poking out of pressure or contesting bigger buttons.
  • Needs to be Belligerent - Clyde has no real options at full or mid screen besides forcing his way in with one of his movement options. He is admittedly very good at this, but against zoners with strong projectiles he can have a difficult time getting his gameplan started. This means he's effectively forced to constantly make high risk decisions in neutral versus some match-ups.
  • Slow Lows - Clyde's fastest low, 2L, is 9 frames. This means he's not good at beating armor or up back during pressure, and also makes his high/low weaker than it otherwise would be.
DoF Clyde Name.png

DoF Clyde profile.png

DoF Clyde Name.png

DoF Clyde profile Boxer.png

DoF Clyde Name.png

DoF Clyde profile Skeleton.png

DoF Clyde Name.png

DoF Clyde profile Renzo.png

DoF Clyde Name.png

DoF Clyde profile Casual Suit.png


Character Properties
Health
24000
Backdash
19F
Unique Movement
Low Profile Side Switching Run Forward Dash
Fastest Attack
5L (5F)
Unique Mechanic: Forward Dash

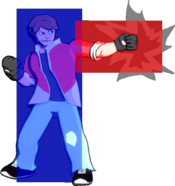
Clyde's forward dash is unique, even compared to other run type dashes. Not only is it the fastest run in the game, but it low profiles and can side switch. As a result, it's probably his most important tool both in neutral and offense. The low profile is almost immediate (frame 2-3 after inputting dash) and while not especially low, it still goes under many projectiles and higher hitting pokes. When he side switches, any normals done will auto-correct to face the opponent, which creates Clyde's powerful left/right mixups. Additionally, Clyde has two unique command normals out of his dash with 4L and 6M. 4L is a partially invincible backdash that lets him bait out a reaction while not having to commit much. 6M is Clyde's biggest button, although it's still not especially big and very dangerous to whiff. These options make challenging his forward dash even scarier and builds up the mental stack. While one can be belligerent with it, making calculated use of his forward dash can allow Clyde to dominate the neutral game.

DoF Clyde Dash Hitbox.png

Character Summary

Move List

Command Normals
4H - Rushing Upper: Low profile, even lower than his dash, forward moving uppercut. Launcher that's good for combos, pressure, and defense.
4L While Dashing - Fake Out: Invincible back dash out of forward dash.
6M While Dashing - Rushing Straight: Large and fast normal exclusive to his dash. Uncancellable on block.
Special Moves
5S - Heat Rush: A short ranged but high damage barrage of strikes ending in a jump cancelable uppercut. Combo filler.
4S (Air OK) - Blazing Combo: Dash punch with three hits. Good for combos and occasionally for rushing in.
4[S] - Blazing Force: Long range but slow charged punch that's plus on block.
2S - Inferno Upper: Fast and good reward anti-air with invuln to air attacks.
j.S - Meteor Slam: Dive punch. Primary combo ender but also a fast overhead that wallbounces in the corner.
Supers
5SP - Eruption Fist: Fast damage super with a large anti-air hitbox. Air unblockable.
2SP - Brightstar Barrage: Clyde teleports behind the opponent to do an invincible strike. Somewhat slow.
2[SP] - Frontal Assault: Clyde teleports in front of the opponent without doing a strike.
Quick combo reference

5L > 5M > 4H > 9jc j.H, land 2M > 2S, land 2M > 5S > 9jc j.S: Easy corner to corner combo.
5L > 5M > 4H > 9jc j.H > j.4S, land 2M > 5S > 9jc j.4S, land 2M > 5H > 5SP: Corner bnb combo.

Normal Moves

5L
DoF Buttons L.png
DoF Clyde 5L.png
DoF Clyde 5L Hitbox.png
Damage Guard Startup Active Recovery Adv Hit Adv Block Properties
800 Mid 5 10 5 +3 -3 -

Fast but short ranged jab with good frame data for pressure. Strong stagger tool and can be used for pressure resets with reverse beat. Also an important abare tool as it's his fastest button. Leads into his usual routing on hit. His fastest option out of dash but 5M and 66M are almost as fast with better reward. Also decent as a last second anti-air.

  • 80% starter proration
Toggle Hitboxes
Toggle Hitboxes
5M
DoF Buttons M.png
Damage Guard Startup Active Recovery Adv Hit Adv Block Properties
1200 Mid 6 6 16 +6 -8 -

Very fast medium that does a boatload of hitstun. Great starter for left right mixups and punishes, especially since it's as fast as a jab. In exhcange, it's heavily lacking in range compared to most mediums.

  • 90% starter proration
Toggle Hitboxes
Toggle Hitboxes
5H
DoF Buttons H.png
Damage Guard Startup Active Recovery Adv Hit Adv Block Properties
1400 Mid 11 6 21 KD -9 Dash Cancelable, Launcher

Relatively fast and quick recovering 5H that's great for frame traps as well as being one of Clyde's best starters. However, it's not great for pressure or neutral due to its stubbiness. Instead this move shines in combos where it's dash cancelable on hit. This lets Clyde turn it into massive damage from any part of the screen and it assists in some routing. Can work as a counterpoke since it'll often trade favorably, but Clyde doesn't do much of a poking game to begin with. Can be used on dash left/rights but its a bit slow for it.

  • 100% starter proration
Toggle Hitboxes
Toggle Hitboxes
2L
DoF Direction Down.pngDoF Buttons L.png
Damage Guard Startup Active Recovery Adv Hit Adv Block Properties
900 Low 9 10 8 +11 -7 OTG

Relatively slow low-hitting light. Clyde's main low for pressure, but as he doesn't do much high low to begin with, it's mostly used for catching jump out attempts. Admittedly, it's not great at this thanks to it's mediocre range and long startup. It's insanely plus on hit allowing for links but those are basically only for style. Absurdly active, making it a great meaty. It can even be safe from some reversals if meatied well enough.

  • 80% starter proration
Toggle Hitboxes
Toggle Hitboxes
2M
DoF Direction Down.pngDoF Buttons M.png
Damage Guard Startup Active Recovery Adv Hit Adv Block Properties
1200 Low 12 9 18 KD -4 OTG

More rewarding but minus low option. Only being a frame slower means you use this just as much during pressure for calling out jumps and walk backs. While not plus, it is at least safe making it an ok spot to end pressure if needed. Has basically no uses in neutral.

  • 90% starter proration
Toggle Hitboxes
Toggle Hitboxes
2H
DoF Direction Down.pngDoF Buttons H.png
Damage Guard Startup Active Recovery Adv Hit Adv Block Properties
1500 Mid 13 6 27 KD -8 Jump Cancelable, Anti-Air Invuln 8-30F, Launcher

Clyde's main anti-air normal. 2H does a lot of damage and gives great combos with good anti-air invuln, but the slow startup means sometimes opponents can land and block it by the time it comes out. Notably it's lacking in horizontal reach, making it not too hard to space around. Good for combos too but a tad unreliable outside the corner.

  • 100% starter proration
Toggle Hitboxes
Toggle Hitboxes
j.L
DoF Direction Up.pngDoF Buttons L.png
Damage Guard Startup Active Recovery Adv Hit Adv Block Properties
800 Mid 5 20 ~ VB VB -

Highly active aerial with a solid hitbox. While the vertical reach is subpar, this is quite a good air to air and can still work as a jump in especially off air dashes. Decent as a crossup too.

  • 80% starter proration
Toggle Hitboxes
Toggle Hitboxes
j.M
DoF Direction Up.pngDoF Buttons M.png
Damage Guard Startup Active Recovery Adv Hit Adv Block Properties
1200 Mid 6 14 ~ VB VB -

Another highly active aerial with a bigger vertical hitbox. Makes for a solid jump in as well as air to air thanks to it hitting decently high up. Launches aerial opponents upwards.

  • 90% starter proration
Toggle Hitboxes
Toggle Hitboxes
j.H
DoF Direction Up.pngDoF Buttons H.png
Damage Guard Startup Active Recovery Adv Hit Adv Block Properties
1500 Overhead 12 8 ~ VB, Ground Bounce VB Ground Bounce on Air Hit

Clyde's j.H has a deceivingly large hitbox, albeit not one particularly suited for jump ins, with it hitting high above him. It also stalls his air momentum in place during its active frames, making jumping in with it even harder. This means it's used almost exclusively for combos, where it gives Clyde a ground bounce on air hit. This is usually worth doing with it's high damage and hitstun, although after one use it's typically not worth using again thanks to the ground bounce limit. It's Clyde's only overhead normal but the odds of someone getting opened overhead by this are astronomically low.

  • 100% starter proration
Toggle Hitboxes
Toggle Hitboxes

Command Normals

Rushing Upper
4H
DoF Direction Left.pngDoF Buttons H.png
Damage Guard Startup Active Recovery Adv Hit Adv Block Properties
1000 Mid 15 8 17 KD -6 Low Profile 4-16F, Jump Cancelable, Launcher

Clyde's 4H has him run towards the opponent in a low profile before launching them with an uppercut. The low profile on 4H is lower than his dash, but not enough for it to make a difference most of the time. Still, this move has a number of uses. An obvious one is as a random option in neutral or on defense. 4H has by far the most range of Clyde's grounded normals thanks to the run up and retains the low profile even into the active frames unlike a normal done from dash, meaning it can beat a lot of options into a very high damage starter. Adding to this that it can be reverse beated to start pressure, and even if reverse beat isn't available, it's surprisingly safe on block.

The ability to reverse beat also makes this central to Clyde's block pressure. Unlike his other heavies, 4H moves him towards the opponent, meaning you can get back in the opponent's face then reverse beat it to continue a sequence.

In combos, 4H is quite the flexible tool. While his other launchers do better damage, they won't always reach from longer hits, while 4H is consistent. Ideally though, you want to use it towards the end of a combo to jump cancel into a j.S ender since it does by far the lowest damage of his launchers.

  • 100% starter proration
Toggle Hitboxes
Toggle Hitboxes
Fake Out
(While Dashing) 4L
DoF Direction Left.pngDoF Buttons L.png
Damage Guard Startup Active Recovery Adv Hit Adv Block Properties
- - - - 21 - - Full Invuln 1-8F

Clyde does a partially invuln backdash out of his forward dash, completely changing his momentum. Very important tool for Clyde's neutral game as it allows him to safely disengage from his dash and potentially bait out attacks from the opponent, creating whiff punish opportunities. 4L can be punished but this typically requires a hard read that isn't worth risking for the opponent. If used after a crossup, Clyde will auto-correct and still backdash away from the opponent.

Toggle Hitboxes
Toggle Hitboxes
Rushing Straight
(While Dashing) 6M
DoF Direction Right.pngDoF Buttons M.png
Damage Guard Startup Active Recovery Adv Hit Adv Block Properties
1400 Mid 8 16 27 KD/WB -33 Wall Bounce

Clyde does a large punch forwards out of his forward dash. 66M is Clyde's second biggest normal after 4H and is much faster than it, in exchange for only being usable out of forward dash. While not disjointed, this move covers a deceiving amount of space thanks to the dash momentum and gives pretty good damage. With proper use it can make contesting Clyde's forward dash more difficult and also serves as a strong whiff punish.

  • 90% starter proration
Toggle Hitboxes
Toggle Hitboxes

Universal Mechanics

Throw
Throw
6H
DoF Direction Right.pngDoF Buttons H.png
Damage Guard Startup Active Recovery Adv Hit Adv Block Properties
2000 Unblockable 10 5 37 KD N/A -

Clyde's throw is fairly typical with 10F startup and a ton of recovery on whiff. On hit, his throw launches the opponent directly upwards before recovering almost immediately. This allows Clyde to easily go into whatever combo he feels like doing, including optimals. Clyde's throw is pretty useful for his mixup as while his left/right is very strong, he can't enforce it mid blockstring. His throw helps here as he can add in tick throws to his stagger game and get huge reward for it.

  • 90% starter proration
Toggle Hitboxes
Toggle Hitboxes
Reversals
Reversal
5R
DoF Buttons Block.png
Damage Guard Startup Active Recovery Adv Hit Adv Block Properties
2000 Mid 17 8 46 Launch -52 Full Invuln 1-31F

Clyde leans back before uppercutting the opponent. Clyde has a decent reversal with a good vertical hitbox. While it's not super great at catching crossups and long distance moves, it works in 90% of the situations you want to use a reversal.

Toggle Hitboxes
Toggle Hitboxes
Wakeup Reversal
5R on Wakeup
DoF Buttons Block.png
Damage Guard Startup Active Recovery Adv Hit Adv Block Properties
2000 Mid 11 13 46 Launch -59 Full Invuln 1-24F

Clyde does a huge uppercut with a massive hitbox on wakeup. Like most wakeup reversals, this is much faster and larger than his regular one, boasting a literal wall of a hitbox. Just watch for safejump setups.

Toggle Hitboxes
Toggle Hitboxes
Burst
Burst
5B
DoF Buttons Burst.png
Damage Guard Startup Active Recovery Adv Hit Adv Block Properties
0 Mid 9 22 5 on Hit, VB on block Launch VB Full Invuln 1-20

Clyde has a typical burst, with a great hitbox to hurtbox ratio.

Toggle Hitboxes
Toggle Hitboxes
Blast Burst
5B During an Attack
DoF Buttons Burst.png
Damage Guard Startup Active Recovery Adv Hit Adv Block Properties
0 Mid 3 24 5 Launch VB Full Invuln 1-31

Clyde makes decent use of Blast Burst. The common spots to use it are 5S or 5SP at the end of a combo, or 5SP near the start of one to keep it burst safe.

Toggle Hitboxes
Toggle Hitboxes

Special Moves

Heat Rush
5S
DoF Buttons S.png
Damage Guard Startup Active Recovery Adv Hit Adv Block Properties
300x4 + 1000 Mid 12 36 40 KD -25 Jump Cancelable, Launcher, OTG

Clyde does a flurry of punches in front of him before ending with an uppercut. This is uniquely one of the only jump cancelable specials in the game, making it an incredibly high damage combo tool. Typically you want to use 5S in a combo as soon as possible for the damage. In addition, its long range allows it to OTG in spots where nothing else can. In terms of neutral use though, this isn't a great move. It can serve as a highly active and rewarding move to throw out to catch dashes or jumps, but it's unreliable at best since it isn't disjointed and more often will get you punished.

  • 90% starter proration
Toggle Hitboxes
Toggle Hitboxes
Blazing Combo
4S (Air OK)
DoF Direction Left.pngDoF Buttons S.png
Damage Guard Startup Active Recovery Adv Hit Adv Block Properties
600x3 Mid 14 ~43 27 KD -23 -

Clyde rushes forward with a 3 punch combo. Another special that's basically only good for combo filler. Clyde's 4S does a great amount of hitstun and can easily lead to his otgs, and unlike his other fillers that are marked as launchers, 4S can be used as many times as you want as long as it doesn't trigger Loop Protection. This makes it essential filler, especially when optimizing. Outside of combos, this move doesn't have much use as forward dash buttons does everything it does but better.

  • 90% starter proration
Toggle Hitboxes
Toggle Hitboxes
Blazing Force
4[S]
DoF Direction Left.png Hold DoF Buttons S.png
Damage Guard Startup Active Recovery Adv Hit Adv Block Properties
1800 Mid 27 7 22 KD +5 Wall Bounce

Clyde charges his fist with fire and flies forward about 2/3 of the screen with a massive punch. Slow to startup but long range plus on block punch. Blazing Force is Clyde's only plus on block option, and while it is fairly committal, its long range allows it to be used from a relatively safe distance. It can both start or reset pressure, and has niche use in combos although its long startup limits most uses there.

  • 90% starter proration
Toggle Hitboxes
Toggle Hitboxes
Inferno Upper
2S
DoF Direction Down.pngDoF Buttons S.png
Damage Guard Startup Active Recovery Adv Hit Adv Block Properties
400x3 + 800 Mid 12 26 8? Wall Bounce -18? Anti-Air Invuln 6-13F?, Wall Bounce, Launcher

Clyde does an upwards fire punch resembling a dp. Unlike a normal DP though, this is only anti-air invuln and Clyde recovers in the air rather than having to fall to the ground. While it has less reward than 2H, Inferno Upper is a faster anti-air and can work better in last second anti-air situations.

For combos, it does quite a bit of damage, and the guaranteed wall bounce means it gives huge corner carry. This is another special you want to incorporate early into combos, usually after 5S. As of 0.6.4, it has lost its ability to OTG making routing into it more limited but still valuable.

  • 90% starter proration
Toggle Hitboxes
Toggle Hitboxes
Meteor Slam
j.S
DoF Direction Up.pngDoF Buttons S.png
Damage Guard Startup Active Recovery Adv Hit Adv Block Properties
1200 + 600 Overhead, Mid 15 VB, 10 30 KD -19 Wall Bounce, HKD, OTG

Clyde stalls in the air slightly before launching down with an explosive punch. Meteor Slam is probably Clyde's most useful special overall. Its primary function though is still as a combo tool. This is Clyde's main combo ender as besides 2SP, it's his only hard knockdown. In addition, the wallbounce does more than just allow for combo extensions. If the wall bounce hasn't been used previously in the combo like from 2S, ending in j.S in the corner makes some space from it, allowing Clyde to do his usual left/rights.

j.S' other main purpose is as Clyde's only viable overhead. When done as early as possible, it's around a 20F overhead. While that's not super fast, it's fast enough to open up people, and it can lead to full combos from any part of the screen. While this should be used sparingly compared to his left/rights and hit/throw, it's a good mixup for closing out sets.

  • 90% starter proration
Toggle Hitboxes
Toggle Hitboxes

Super Move

Eruption Fist
5SP
DoF Buttons Super.png
DoF Clyde 5SP Hitbox.png
Tyrant Rave if it was the scariest anti-air known to man
Damage Guard Startup Active Recovery Adv Hit Adv Block Properties
2000 + 4000 Mid 7 9 47 Wall Bounce -34 Full Invuln 3-10F, Anti-Air Invuln 11-36F, Air Unblockable, OTG

Clyde does a huge uppercut into a followup blast, launching the opponent into the wall. This is Clyde's main combo super and also one of the most terrifying anti-airs in the game. For combos, this is pretty damaging super at 6K raw. It's rarely a bad idea to end combos with it unless you want good oki. If that weren't enough, this move is also capable of linking into itself when wall bounce hasn't been used yet with micro walk. It can also combo into slower OTGs into full combos, but only at very specific parts of the screen that are hard to purposely route into.

Eruption Fist however is just as useful raw. Uniquely, this is the one of the only air unblockable moves in the game. When combined with Clyde's speed, going into the air against him is significantly more dangerous than usual. While it doesn't lead to any followups without Blast Burst, an unburstable 6K is still a lot.

  • 100% starter proration
Toggle Hitboxes
Toggle Hitboxes
Brightstar Barrage/Frontal Assault
2SP/2[SP]
DoF Direction Down.pngDoF Buttons Super.png
Damage Guard Startup Active Recovery Adv Hit Adv Block Properties
1600 + 800x4/- Overhead/- 42/- 13/- 43/41 HKD/- -14/- Full Invuln 29-42/Full Invuln 29-38, HKD/-, OTG/-

Clyde dashes forward and disappears, and depending on whether the button was held, teleports behind the opponent to hit them with a crossup overhead, or reappears in front of the opponent with no attack but less recovery. This super is mostly a gimmick, as it takes a long time for the invuln to start, then even longer for it to hit, and while it's hard to react to on paper, you can tell which direction he's coming from based on how far the camera moves. Ultimate, the best use of this super is to punish more committal long range options like some projectiles. 2SP can combo into 5SP with a small microwalk. Can be comboed into but the only reason to do this is to get a double super while comboing in the corner.

  • 100% starter proration
Toggle Hitboxes
Toggle Hitboxes

Strategy

Neutral

Clyde's neutral game is built almost entirely around using and threatening to use his dash. Clyde doesn't have much in the way of good buttons to poke with, so its better generally to wait for the opponent to act first with him. His good walk speed means he can easily pace around and cover distance without having to commit to more punishable movement options. Once the opponent does commit to something, he can dash in and start his offense in the blink of an eye. Clyde's 66M and 4H have decent range to occasionally poke with, 4H in particular being a way for him to throw out a hitbox without having to leave low profile, but both aren't generally worth using over dash 5L/M.

However, you won't always be able to react to the opponent committing to an action, and especially against stronger zoners like Annie, dashing in may just get you hit. That's where 664L, air dash, and his long jump come into play. 664L lets Clyde safely disengage from his dash, with punishes on it requiring a hard read. With good use of it, you can bait opponents into attempting to check his dash, leaving them open to whiff punishes or at the very least giving Clyde time to dash in and start his pressure. Adding in his air dash can make the mental stack even tougher for the opponent. Clyde's air dash is one of the faster ones and avoids a lot of attacks that would check his dash. This will especially force the opponent to stay on their ties as they try to guess which angle he'll come from next. Long jump (jump out of dash) can also bait things similarly to 664L just to a lesser degree as it won't avoid many higher hitting mids. Still, it'll go over many lows that people will usually try to check Clyde's dash with, and upon a successful read Clyde can land a jump in for big damage. At the same time though, this is one of his more reactable options so be wary.

Clyde also has a strong anti-air game between 2H, 2S, 5SP, and j.L. 2H is your typical anti-air launcher, having solid anti-air invuln and having the usual 100% starter proration. 2S works similarly but with better startup and invuln in exchange for worse reward. 5SP is even more threatening despite giving less damage. 5SP is fast, invuln at frame 3, and most importantly, air unblockable. This means its possible for Clyde to spot the opponent jumping at a distance, dash up to them, and 5SP them before they can do anything about it. They can burst before the super hits but that's a win in its own right. Threatening 5SP anti-air once you have 50 or more meter can add even further to the mental stack and make opponents afraid of jumping, leaving them open to Clyde's approaches.

Clyde's neutral does have its weaknesses though. He has no direct actions to take towards the opponent at fullscreen, instead having to wait for them to commit to something or try to force his way in with one of his movement options. In effect, he's liable to being walked down and against more reactive opponents he may even find himself struggling to create an opening at all. Of course the ways to circumvent this were already described, but its important to remember to keep mixing up what options you take.

Offense

Clyde's offense is very strong and built mainly around staggers and left/rights. Clyde's main pressure button is 5L which is a whopping +7 on block, making it easy for him to reset pressure strings by reverse beating into it. Once you have the 5L pressure going, you can start adding in frame traps with his other buttons, particularly 5M and 4H. 4H in particular moves Clyde back into close range with the opponent, making it easy to gain the space needed for a 5L reverse beat. Once the opponent is respecting you, you can start to add in throws. Clyde's best move for baiting reversals is 5L, so make sure you're reverse beating back into it fairly often. Additionally, if the opponent is really respecting you, you can throw in forward dash crossups. These are very hard to react to and can be quite rewarding so do9n't be afraid to use them in a blockstring.

For okizeme pressure, the obvious option is to go for a left/right with his forward dash. The main buttons you want to use here are 5M or 5H. 5M is fast and a strong combo starter, being able to confirm very easily thanks to its high hitstun. 5H is an alternative option, as it's much slower but potentially much more rewarding thanks to its heavy starter proration. Beyond the left/right though, Clyde has an ok high/low to work with. 2L and 2M, while slow for lows, are still unreactable, and have solid reward. For the high, you can go for tk j.S. While difficult to combo off midscreen, it's quite rewarding and is especially good at opponents expecting a left/right only to get hit by an overhead. Going for meaty throw is always an option too. Additionally, Clyde can do jump crossups with j.L, although there's not usually much reason to go for these unless you're doing a safe jump setup. The most important part though is to keep things varied. While just going for left/rights can be very effective, adding in even more options the opponent will need to worry about will make his offense even scarier.

Defense

Clyde's defense is fairly average. He has a 5F button with his 5L, and while lacking a little in range, it still gets the job done a lot of the time. His reversal is fairly average. Its hitbox is ok and has good vertical range, but it's not too hard to outspace it. It can hit opponents behind him but not consistently either. His reward upon hitting a reversal though can be great, since if he has 50 or more meter, he can dash up into a 5SP as long as the opponent doesn't down tech, which they often won't be ready to do. The same applies to break burst. Beyond these options, his 2H and 2S can both catch airborne pressure moves although you generally want to stick with 2H.

Additional Resources

Developer made character showcase.

Combos

Combo Legend

Numpad Notation

DoF Buttons Up-Left.png DoF Buttons Up.png DoF Buttons Up-Right.png
DoF Buttons Left.png • DoF Buttons Right.png
DoF Buttons Down-Left.png DoF Buttons Down.png DoF Buttons Down-Right.png
 = 
7 8 9
4 5 6
1 2 3
 = 
up-back up up-forward
back neutral forward
down-back down down-forward
  • 236 = DoF Direction Down.pngDoF Direction Down-Right.pngDoF Direction Right.png
  • 214 = DoF Direction Down.pngDoF Direction Down-Left.pngDoF Direction Left.png
  • 63214 = DoF Direction 624.png
  • 46 = DoF Direction Left.pngDoF Direction Right.png
  • 28 = DoF Direction Down.pngDoF Direction Up.png
  • Light: DoF Buttons L.png
  • Medium: DoF Buttons M.png
  • Heavy: DoF Buttons H.png
  • Special: DoF Buttons S.png
  • Super: DoF Buttons Super.png
  • Block/Reversal: DoF Buttons Block.png
  • Burst: DoF Buttons Burst.png
  • Taunt: DoF Buttons Taunt.png
Dash = 66 DoF Direction Right.pngDoF Direction Right.png
j. = Jump DoF Direction Up-Left.png / DoF Direction Up.png / DoF Direction Up-Right.png
dc = Dash Cancel
jc = Jump Cancel
dl. = Delay
[X] = Hold
]X[ = Release
gb = Ground Bounce
wb = Wall Bounce
bb = Blast Burst
tc = Trigger Cancel
SP = Super
[X]*N = Repeat sequence N amount of times.
X(N) = Multi-hit move hits only N times. May be omitted if all hits are used.
(X) = Optional input
OTG = On The Ground
TK = Tiger Knee (doing an air move the moment a jump sends you airborne)
> = Cancel
, = Link
AA = Anti-air
land = Land before doing the next input.


Basic Combos

Easy combos for starting.

Combo Damage Difficulty Meter Spent Position Notes
5L > 5M > 4H > 9jc j.H, land 2M > 2S, land 2M > Ender 4960 Very Easy 0 Midscreen/From Corner

Basic corner to corner combo. Damage is fairly underwhelming but it can lead to strong oki.

5L > 5M > 4H > 9jc j.H > j.4S, land 2M > 5S > 9jc j.4S, land 2M > Ender 6060 Easy 0 Corner

Basic combo showing Clyde's usual corner combo theory.

Advanced Combos

Harder combos that deal more damage or provide some other benefit.

Combo Damage Difficulty Meter Spent Position Notes
66M > 5H > 66 5S > jc Land, OTG 2S, (66) 4S, 2M > 4S, 2M > 4S, 2L > Ender 9210 Medium 0 Midscreen/From Corner

Advanced midscreen combo showcasing some of Clyde's more complex theory such as 5S empty jump, 2S OTGs, and grounded 4S loops. In particular linking into 2L at the end is quite difficult. This uses your wall bounce on 2S so you may need to reconsider what ender to go for.

66M > 5S > jc j.4S, 2M > 4S, 2M > 4S, 2L > 4S, 2L > Ender 8960 Hard 0 Everywhere

Alternative combo to the previous that saves your wall bounce for 150 less damage. This is also the preferred corner route when going for wall bounce oki. Notably this is much harder to hit confirm since you must immediately go into an unsafe special. You can substitute 66M with 5M to make this easier. Additionally, going into j.4S after 5S must be input immediately to land against most of the cast.

2M > 5H > 66 5S > jc Land, OTG 2S, j.4S, land 66 2M > 4S, 2M > 4S, 2L > Ender 9010 Hard 0 Corner/Near Corner

Example of Clyde's corner and near corner damage focused combo theory. Basically the same combo as what you do in midscreen, but with more difficulty added in since to get enough frame advantage to combo into the dash 2M, you need to land a tight j.4S after 2S.

j.S, Micro Walk OTG 5S > jc Land, OTG 2S, (66) 4S, 2M > 4S, 2M > 4S, 2L, 2L > Ender 9550 Medium 0 Midscreen/From Corner

Example of how to combo off j.S overhead outside the corner. The same routing basically applies in the corner but it requires you to side switch after the 5S, although this doesn't really make the combo harder.

2SP, micro walk OTG 5SP/5S > ... 11800/- Medium/Hard 100/50 Everywhere

2SP combos, 5SP is much easier but less rewarding. Try to get the 5S link down, although the 5SP route is still useful for being burst safe.

5SP, micro walk OTG 5SP 14000 Medium 100 Midscreen/From Corner/Near Corner

5SP link into itself. This is quite damaging and a good way to unload 100 meter. Can't be done in the corner.

5SP, micro walk OTG 5S... - Hard 50 Near Corner

At specific spacings not too close but not too far from the corner, you can combo 5SP into 5S into a full route. This is incredibly damaging and is Clyde's optimal starter, but this doesn't come up often for obvious reasons.

c.6H, 5S... - Easy 0 Everywhere

Throw combo starter. Throw combos do a lot of damage so don't be too afraid of going for them.

Enders

Ender damages assume the combo is at max damage scaling.

Combo Damage Difficulty Meter Spent Position Notes
2H > jc j.S 690 Very Easy 0 Everywhere

Basic hard knockdown ender. This is how you'll be ending a lot of basic combos so you can go into Clyde's left/rights. Don't use when you've already used your wall bounce with 2S.

2H > jc j.H > j.S 840 Very Easy 0 Corner

Slight damage optimization for when you've already used your wall bounce in a combo.

5H > 66 5L > 5M > 5H > 5S/5SP 720/4720 Easy 0/50 Corner

Basic damage focused ender. You can't get an hkd from this routing so it's only recommended to do if it'll kill or you're going to use blast burst.

2H > jc j.H > dl j.L > j.H > j.L, land 5L > 5M > 5S/5SP 1030/5010 Very Hard 0/50 Corner

Difficult damage focused ender. This is proabbly as damaging as you can get, so much so that's a bit unnecessary, so only go for it if you're confident in your ability to execute this ender.

Colors

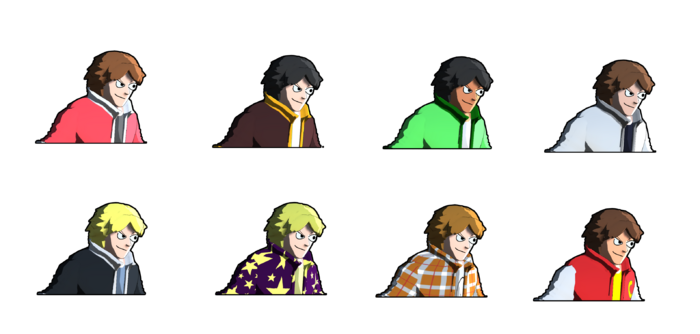
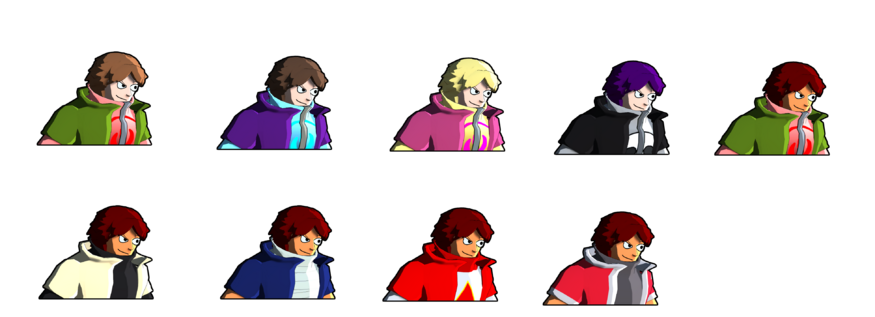
DoF Clyde Jacket Icon.png
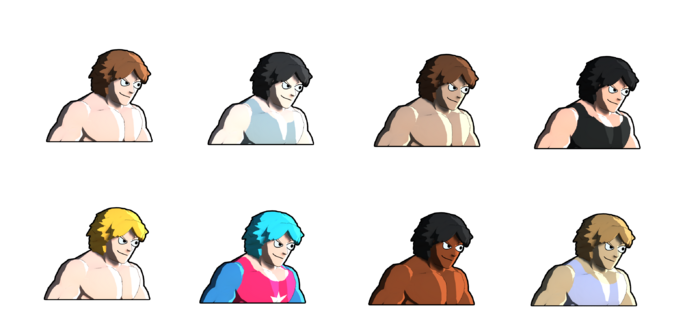
DoF Clyde Boxer Icon.png
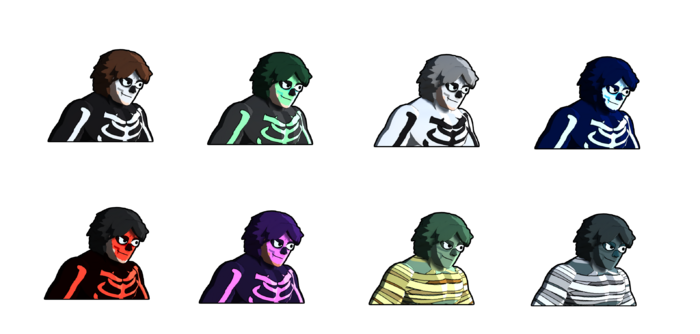
DoF Clyde Skeleton Icon.png
DoF Clyde Renzo Icon.png
DoF Clyde Casual Suit Icon.png

Jacket

DoF Clyde Jacket Colors.png


Boxer

DoF Clyde Boxer Colors.png


Skeleton

DoF Clyde Skeleton Colors.png


Renzo

DoF Clyde Renzo Colors.png


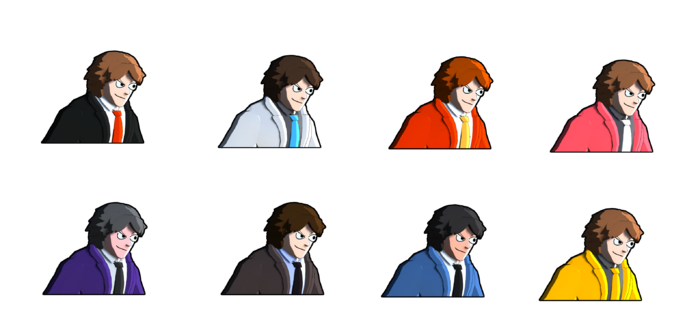
Casual Suit

DoF Clyde Casual Suit Colors.png


Facts

  • Clyde likes to punch things with his fist.
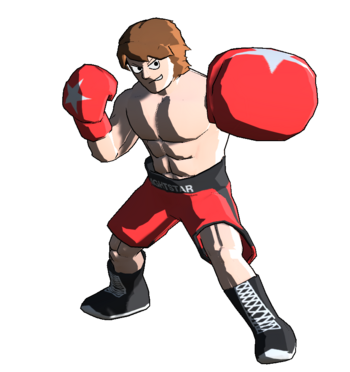
  • During the early stages of development, Clyde was called "Boxer".
  • Clyde's Aspect is called "Flame Jacket". His skin has special glands that let him produce fire! As an added bonus, it also makes him very heat-resistant.
  • Originally, Clyde was designed as a hunter who would fight otherworldly monsters.
  • Clyde's older brother Matthew created the highly successful Buff Boy comic series, known across all of Eagleton.
  • Clyde originally started boxing just to spite his father Baron and prove that he's the "better man". Although it didn't take long for him to start genuinely enjoying it.
  • Clyde's Aspect first manifested while he was trying to help his mom cook garlic bread. Needless to say, the garlic bread was seared to a crisp.


Clyde Wiki Roadmap

93% complete
Page Completed To-do Score

Overview

25/25
Move List 18/25
Strategy 25/25
Combos 25/25

Navigation

General
Getting Started
FAQ
HUD & UI
Updates
Systems
Controls
Offense
Defense
Movement
Game Data
Guy
Shoto
Clyde
Bosses
Baron
Black Heart
Callowman
Ember
Derrick
Annie
ERROR
Sylvan
Lumina
Johnson
Red
Rattlebone
Shiverskull
Doodle