Intro
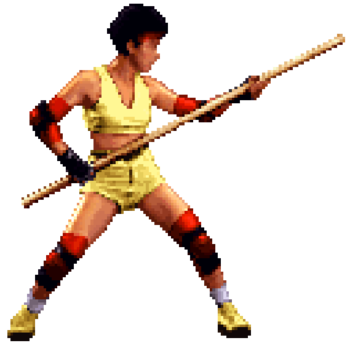
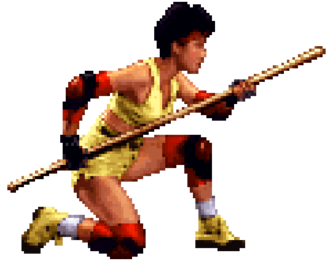
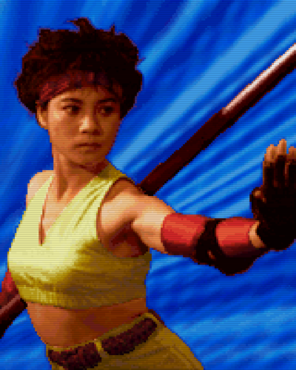
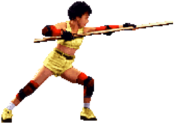
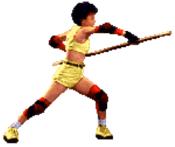
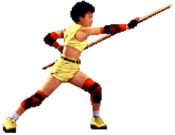
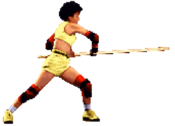
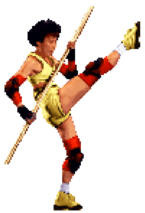
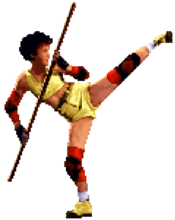
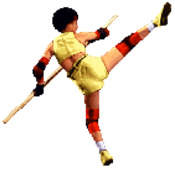
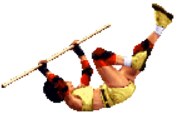
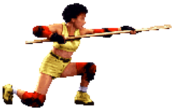
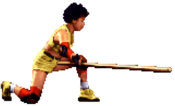
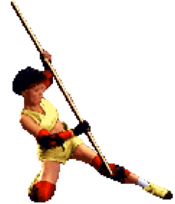
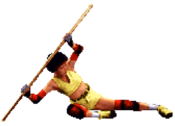
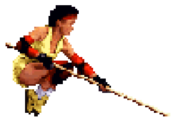
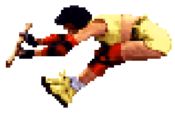
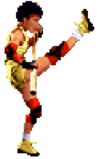
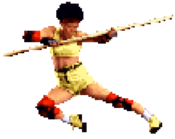
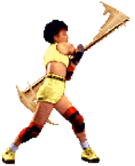
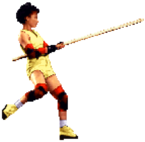
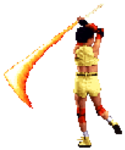
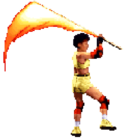
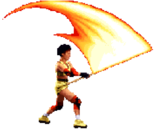
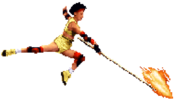
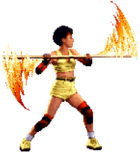
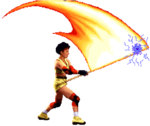
Yeung is a bōjutsu specialist played by Hong Kong actress Yeung Ching-Ching, who had many roles in martial arts films throughout the '80s and '90s.
Yeung uses her bo staff, which features disjointed hitboxes, to keep opponents at bay, while also doing a good job of countering projectile zoning with 2HK Slide and Crow Shot. She has a light and floaty jump with average mobility, requiring a strong ground game to win. After a clean hit, Yeung has an infinite combo that works on everyone but crouching Kim-Maree, making it even more risky for an opponent to advance recklessly.
If an opponent does get in close, her defense is somewhat lacking. She has no invincible moves until her Desperation is active, and even this will whiff on all crouching (and some standing) opponents. Her anti-air game requires good reactions, and can be hard to execute at some ranges. Still, Yeung is considered top tier because of how easily she can prevent opponents from getting into a threatening range.
| Strengths |
Weaknesses
|
- Incredible zoning that forces opponents to take risks in their approach
- Infinite combo with 2LP and Far 5HK that works on nearly every character
- 2HK slide and 236P Crow Shot are great for avoiding projectiles
- Above average throw range
- Short crouching hurtbox allows Yeung to duck under many high attacks
|
- Floaty jump makes it near useless as an approach
- Long-range attacks like 63214P leave her at frame disadvantage, allowing the opponent to move closer
- Anti-airs are either slow (63214P) or require specific proximity range (cl.5HK)
- Desperation attack is not combo-friendly, and generally easy to avoid
|
Character Stats
Prejump Frames: 2
Jump Frames: 52
Backdash Frames: 18 (all invincible)
| Frame Data Info (click to expand)
|
| Damage
|
Base Damage of the attack, not accounting for scaling or opponent's defense value.
Damage for each hit is separated by an asterisk (*)
If there are several hits in a row with identical damage, it will be listed as A x B to save space
--Example: 4*5x3*8 = 4 damage + 5 damage (3 hits) + 8 damage
|
| Stun
|
Stun damage of the attack, not accounting for any scaling (light normals do not have any stun scaling). Throws never deal stun.
Stun damage for each hit is separated by an asterisk (*)
If there are several hits in a row with identical stun, it will be listed as A x B to save space
--Example: 256*128x3*512 = 256 stun + 128 stun (x3 hits) + 512 stun
|
| Guard
|
The way a move must be guarded against.
Throw = Cannot be blocked
Overhead = Must be blocked standing
Low = Must be blocked crouching.
Mid = Can be blocked both standing and crouching.
High = Can be blocked standing, whiffs against crouching.
- Note: In Kung Fu Master, crouching hurtboxes vary significantly between characters, and between offensive crouch/crouch block. For high attacks, specific details about how the move interacts with crouchers will be noted in the description.
|
| Startup
|
The number of frames it takes for a move to become active.
If this value is lower than the opponent's Hit Adv or Block Adv, it can be used to punish that move if it is in range.
If a second value is listed in (parentheses), the move hits later during its active frames (i.e. a 2-hit High attack where the first hit whiffs vs. crouching).
|
| Active
|
The number of frames that an attack's hitbox remains active. The first active frame overlaps with the final startup frame.
Attacks with multiple hits are separated by an asterisk (*) if there is no gap between hits, or by a number in (parentheses) denoting the number of frames between active hitboxes.
--Example 1: 3*5 = 3 active frames (1st hit), 5 active frames (2nd hit)
--Example 2: 2(5)4 = 2 active frames, 5f gap, 4 active frames
For attacks with long, complex sets of active frames, the description will explain the details and the Active column will simply display the total number of active frames.
Attacks with more active frames are more effective as pokes and anti-airs.
|
| Recovery
|
The number of frames that a character cannot act after startup and active frames have passed.
For airborne attacks, recovery may be listed as 'X + Y land', where X+Y is the total recovery and Y is the number of grounded recovery frames (which allows the character to be thrown or punished with a grounded combo).
|
| Hit Adv
|
The frame advantage of an attack on hit. 0 means the attacker and defender recover at the same time.
A positive number means the attacker recovers before the defender.
--Example: A move listed as +4 on Hit may link into a move with 4f Startup.
A negative number means the defender recovers before the attacker, and the attack may be punishable.
--Example: A move listed as -6 on Hit may be punished by a move with 6f Startup, if it is in range.
May also be displayed as a range of values for attacks with significantly different frame advantage when used at different spacing.
--Example: A move with '-5 to 3' advantage on hit can be anywhere from -5 to +3 depending on which active frame hits the opponent.
HKD = Hard Knockdown (opponent lies on the ground for a couple seconds, allowing ample time to set up positioning)
SKD = Soft Knockdown (opponent rises shortly after landing)
|
| Block Adv
|
The frame advantage of an attack on block.
This includes the final Guard Cancel frame (see the 'reversal' section of the Basic System page for more details)
0 means the attacker and defender recover at the same time.
A positive number means the attacker recovers before the defender.
A negative number means the defender recovers before the attacker, and the attack may be punishable.
--Example: A move listed as -6 on Block may be punished by a move with 6f Startup, if it is in range.
Throws cannot be blocked, so the column is left empty in this case.
May also be displayed as a range of values for attacks with significantly different frame advantage when used at different spacing.
--Example: A move with '-5 to 3' advantage on block can be anywhere from -5 to +3 depending on which active frame hits the opponent.
|
| Special Cancel
|
The ability to cancel the animation of a normal attack into a special/super move. Specials cannot be cancelled into supers like in some other games. Command normals can also never be special cancelled.
|
| Attribute
|
Self-chain = Light normal that can be rapidly chained into itself on hit, block, or whiff.
By default, self chains can be input very quickly (after the first active frame, and after hitstop/blockstop if it connects)
- (slow) means the self-chain must be delayed until the move's recovery (all active frames must pass, including residual active frames that occur after hitstop/blockstop)
No-Chain = Normal attack that cannot be chained into another normal
Airborne = Attack puts the user in the air, making them immune to throws, and hits will cause an air reset.
Invincible/Invulnerable = Attack has no hurtbox and cannot be interrupted during these invincibility frames
Mashable = Rapidly input buttons/directions for extra hits. For throws, defender can also mash to reduce damage.
Crossup = Attack must be blocked in the opposite direction if it connects behind the opponent
|
| Hitstun Type
|
This property is noted in the move description when applicable. Against standing opponents, attacks can inflict two types of reeling animations.
They are referred to as High and Mid hitstun because it usually (but not always) correlates with High attacks vs. Mid/Low attacks.
The hitstun reeling animation can affect combo routes due to different hurtbox widths.
Crouching opponents always have the same reeling animation regardless of attack.
|
Damage/Stun is currently unavailable until a training lua script is made.
When describing hitbox interactions, "crouching" means holding down or down/forward, while "crouch blocking" means holding down back.
Hitting a crouching button may further alter a character's hurtbox, but this is not taken into consideration.
Normals
Standing Normals
Close Stand LP
cl.5LP
cl.5LP
|
| Startup
|
Active
|
Recovery
|
Damage
|
Stun
|
| 4
|
5
|
6
|
?
|
?
|
| Hit Adv
|
Block Adv
|
Guard
|
Special Cancel
|
Attribute
|
| +5
|
+1
|
High
|
Y
|
Self-chain (slow)
|
- Whiffs on all crouch blocking characters
- Hits crouching M. Lion if not blocking
- Hitstun Type: High
|
|
Far Stand LP
far.5LP
far.5LP
|
| Startup
|
Active
|
Recovery
|
Damage
|
Stun
|
| 4
|
5
|
6
|
?
|
?
|
| Hit Adv
|
Block Adv
|
Guard
|
Special Cancel
|
Attribute
|
| +5
|
+1
|
High
|
Y
|
Self-chain (slow)
|
- Whiffs on all crouch blocking characters
- Hits crouching Thorsten and M. Lion if not blocking
- Hitstun Type: Mid
|
|
Close Stand HP
cl.5HP
cl.5HP
|
| Startup
|
Active
|
Recovery
|
Damage
|
Stun
|
| 3
|
2(2)9
|
22
|
?
|
?
|
| Hit Adv
|
Block Adv
|
Guard
|
Special Cancel
|
Attribute
|
| -7 (-11)
|
-13 (-17)
|
High/High
|
Y (1st hit)
|
-
|
- vs. crouch: both hits whiff on Lau/Yeung, 2nd hit whiffs on Kim
- vs. crouch block: 1st hit connects on everyone, 2nd hit whiffs on everyone except Kim
- Hitstun Type: Mid/High
|
|
Far Stand HP
far.5HP
far.5HP
|
| Startup
|
Active
|
Recovery
|
Damage
|
Stun
|
| 3 (5)
|
2*10
|
19
|
?
|
?
|
| Hit Adv
|
Block Adv
|
Guard
|
Special Cancel
|
Attribute
|
| -7 (-5)
|
-13 (-11)
|
Mid
|
N
|
-
|
- Better advantage (+ later startup) vs. crouching Lau/Sam, crouch blocking Yeung/Thorsten
- Hitstun Type: Mid
|
|
Close Stand LK
cl.5LK
cl.5LK
|
| Startup
|
Active
|
Recovery
|
Damage
|
Stun
|
| 4
|
5
|
6
|
?
|
?
|
| Hit Adv
|
Block Adv
|
Guard
|
Special Cancel
|
Attribute
|
| +5
|
+1
|
High
|
Y
|
-
|
- Whiffs on all crouch blocking characters
- Hits crouching M. Lion if not blocking
- Hitstun Type: High
|
|
Far Stand LK
far.5LK
far.5LK
|
| Startup
|
Active
|
Recovery
|
Damage
|
Stun
|
| 4
|
5
|
6
|
?
|
?
|
| Hit Adv
|
Block Adv
|
Guard
|
Special Cancel
|
Attribute
|
| +5
|
+1
|
High
|
N
|
-
|
- Whiffs on all crouch blocking characters
- Hits crouching M. Lion if not blocking
- Hitstun Type: High
|
|
Close Stand HK
cl.5HK
cl.5HK
|
| Startup
|
Active
|
Recovery
|
Damage
|
Stun
|
| 5
|
8
|
18
|
?
|
?
|
| Hit Adv
|
Block Adv
|
Guard
|
Special Cancel
|
Attribute
|
| -2
|
-8
|
High
|
N
|
-
|
- Whiffs on all crouching/crouch blocking characters
- Could be a strong anti-air, but its close proximity range makes it difficult to use in this scenario
- Hitstun Type: High
|
|
Far Stand HK
far.5HK
far.5HK
|
| Startup
|
Active
|
Recovery
|
Damage
|
Stun
|
| 5
|
13
|
13
|
?
|
?
|
| Hit Adv
|
Block Adv
|
Guard
|
Special Cancel
|
Attribute
|
| +2 ~ +10
|
-4 ~ +4
|
Mid
|
N
|
Airborne 1-16f
|
- Startup and frame advantage vary based on distance and stand/crouch
- If spaced properly, can lead to an infinite combo against everyone but crouching Kim
- Hitstun Type: Mid
|
|
Crouching Normals
Crouch LP
2LP
2LP
|
| Startup
|
Active
|
Recovery
|
Damage
|
Stun
|
| 4
|
5
|
6
|
?
|
?
|
| Hit Adv
|
Block Adv
|
Guard
|
Special Cancel
|
Attribute
|
| +5
|
+1
|
Mid
|
Y
|
Self-chain (slow)
|
- Good button for its consistency while hitconfirming
- Hitstun Type: Mid
|
|
Crouch HP
2HP
2HP
|
| Startup
|
Active
|
Recovery
|
Damage
|
Stun
|
| 10
|
6
|
21
|
?
|
?
|
| Hit Adv
|
Block Adv
|
Guard
|
Special Cancel
|
Attribute
|
| SKD
|
-9
|
Low
|
N
|
-
|
- Fairly safe poke that knocks down, but can be risky against characters with faster jumps
|
|
Crouch LK
2LK
2LK
|
| Startup
|
Active
|
Recovery
|
Damage
|
Stun
|
| 4
|
5
|
5
|
?
|
?
|
| Hit Adv
|
Block Adv
|
Guard
|
Special Cancel
|
Attribute
|
| +6
|
+2
|
Low
|
Y
|
Self-chain
|
- Best offensive button from close range due to its rapid chain and lower pushback
- Hitstun Type: Mid
|
|
Crouch HK
2HK
2HK
|
| Startup
|
Active
|
Recovery
|
Damage
|
Stun
|
| 10
|
9
|
17
|
?
|
?
|
| Hit Adv
|
Block Adv
|
Guard
|
Special Cancel
|
Attribute
|
| SKD
|
-8 ~ -1
|
Low
|
N
|
No-Chain
|
- Very safe if spaced well, and reliable as a combo ender after ranged light normals
- Strong counter to Lau's fireball, as it low profiles almost immediately
- Does not work against his Desperation projectile
|
|
Air Normals
Jump LP
8LP
8LP
|
| Startup
|
Active
|
Recovery
|
Damage
|
Stun
|
| 7
|
8
|
-
|
?
|
?
|
| Hit Adv
|
Block Adv
|
Guard
|
Special Cancel
|
Attribute
|
| -
|
-
|
Overhead
|
-
|
No-Chain
|
- Whiffs if too close to the opponent
- Can be useful as an air-to-air if the opponent jumps from longer ranges
- Hitstun Type: Mid
|
|
Jump HP
8HP
8HP
|
| Startup
|
Active
|
Recovery
|
Damage
|
Stun
|
| 8
|
8
|
-
|
?
|
?
|
| Hit Adv
|
Block Adv
|
Guard
|
Special Cancel
|
Attribute
|
| -
|
-
|
Overhead
|
-
|
-
|
|
|
|
Diagonal Jump LK
9LK
9LK
|
| Startup
|
Active
|
Recovery
|
Damage
|
Stun
|
| 3
|
until ground
|
-
|
?
|
?
|
| Hit Adv
|
Block Adv
|
Guard
|
Special Cancel
|
Attribute
|
| -
|
-
|
Overhead
|
-
|
-
|
- Hitstun Type: Mid
- Instant Overhead:
- 1f timing vs. crouching M. Lion only
|
|
Neutral Jump LK
8LK
8LK
|
| Startup
|
Active
|
Recovery
|
Damage
|
Stun
|
| 3
|
until ground
|
-
|
?
|
?
|
| Hit Adv
|
Block Adv
|
Guard
|
Special Cancel
|
Attribute
|
| -
|
-
|
Overhead
|
-
|
-
|
|
|
|
Jump HK
8HK
8HK
|
| Startup
|
Active
|
Recovery
|
Damage
|
Stun
|
| 5
|
8
|
-
|
?
|
?
|
| Hit Adv
|
Block Adv
|
Guard
|
Special Cancel
|
Attribute
|
| -
|
-
|
Overhead
|
-
|
Crossup
|
- Generally Yeung's strongest jump-in, consistently chains into j.HP
- Hitstun Type: Mid
- Instant Overhead:
- 2f timing vs. crouch blocking Sam, Kim-Maree (1f at close range)
- 1f timing vs. crouch blocking Yeung, Thorsten, M. Lion, Dragonball, Lau, Admiral (Whiffs at close range)
- 3f timing vs. crouching M. Lion (2f at close range)
- 2f timing vs. crouching Thorsten, Kim-Maree (1f at close range)
- 1f timing vs. crouching Sam, Dragonball, Yeung, Admiral (Whiffs at close range)
|
|
Jump Down+HK (Pogo)
8+2HK
2HK in air
|
| Startup
|
Active
|
Recovery
|
Damage
|
Stun
|
| 3
|
until ground
|
-
|
?
|
?
|
| Hit Adv
|
Block Adv
|
Guard
|
Special Cancel
|
Attribute
|
| -
|
-
|
Overhead
|
-
|
Crossup
|
- Bounces off the opponent on hit or block
- Can chain into itself as many times as it connects, or into other air normals
- While juggles are normally very limited, j.2HK > j.HK > j.HP can work as a situational air-to-air for great damage
- Hitstun Type: Mid
- Instant Overhead:
- 9f timing vs. crouch blocking Kim-Maree
- 8f timing vs. crouch blocking Lau, Yeung, Sam, Thorsten, M. Lion, Admiral
- 7f timing vs. crouch blocking Dragonball
- 6f timing vs. crouch blocking Drunk
- 9f timing vs. crouching Thorsten, M. Lion
- 8f timing vs. crouching Yeung, Kim-Maree, Admiral
- 7f timing vs. crouching Lau, Sam, Drunk, Dragonball
|
|
Throws
HP Throw
HP Throw
close 6HP/4HP
|
| Startup
|
Active
|
Recovery
|
Damage
|
Stun
|
| 1
|
-
|
-
|
?
|
0
|
| Hit Adv
|
Block Adv
|
Guard
|
Special Cancel
|
Attribute
|
| HKD
|
-
|
Throw
|
-
|
-
|
- Gives great positioning and time for followup setups
|
|
Special Moves
Crane Wings (Pole Swing)
63214P
63214P
|
| LP
|
Startup
|
Active
|
Recovery
|
Damage
|
Stun
|
| 5 (9)
|
8 total
|
29
|
?
|
?
|
| Hit Adv
|
Block Adv
|
Guard
|
Special Cancel
|
Attribute
|
| -9
|
-15
|
High/High/Mid
|
-
|
-
|
- HKD vs. airborne opponents
- First hit is behind Yeung, only hitting deep jumps
- Yeung's most consistent anti-air, but must be input somewhat preemptively
|
| HP
|
Startup
|
Active
|
Recovery
|
Damage
|
Stun
|
| 7 (11)
|
9 total
|
34
|
?
|
?
|
| Hit Adv
|
Block Adv
|
Guard
|
Special Cancel
|
Attribute
|
| -15
|
-21
|
High/High/Mid
|
-
|
-
|
- HKD vs. airborne opponents
- First hit is behind Yeung, only hitting deep jumps
- Has significantly more range than the LP version
- This can make it safer despite being more negative on hit/block
- Excellent move against slow characters like Kim-Maree who have few options to get closer
|
|
Priority: above 236P
Crow Shot (Jumping Pole)
236P
236P
|
| LP
|
Startup
|
Active
|
Recovery
|
Damage
|
Stun
|
| 20
|
until ground
|
20
|
?
|
?
|
| Hit Adv
|
Block Adv
|
Guard
|
Special Cancel
|
Attribute
|
| +10
|
-2
|
Mid
|
-
|
Airborne 4f
|
- HKD vs. airborne opponents
- Better frame advantage vs. far ranged or crouching opponents
- Projectile whiffs through opponent if too close
- Can hop over some projectiles, but harder to time
|
| HP
|
Startup
|
Active
|
Recovery
|
Damage
|
Stun
|
| 32
|
until ground
|
24
|
?
|
?
|
| Hit Adv
|
Block Adv
|
Guard
|
Special Cancel
|
Attribute
|
| -2
|
-9
|
Mid
|
-
|
Airborne 4f
|
- HKD vs. airborne opponents
- Better frame advantage vs. far ranged or crouching opponents
- Projectile whiffs through opponent if too close
- Can hop over projectiles
|
|
Priority: below 63214P
Desperation
Bo Assault
63214LP+HP
63214LP+HP
|
| Startup
|
Active
|
Recovery
|
Damage
|
Stun
|
| 13 (25)
|
2(10)34
|
20
|
?
|
?
|
| Hit Adv
|
Block Adv
|
Guard
|
Special Cancel
|
Attribute
|
| HKD
|
-14
|
High/Mid
|
-
|
Invincible 1-14f
|
- First hit (the flip kick) will only connect from very close range against some standing opponents
- If the flip kick connects vs airborne, it won't continue into the followup animation
- The second hit can't be comboed into, making it very hard to land this move
- Relatively hard to punish, but depending on screen position, some characters may back jump on reaction for a punish or free pressure
|
|
Combos
-
Strategy
-
Anti-Airs
Reversals
Matchup Notes
Lau
Yeung
Sam
Thorsten
Kim-Maree
M. Lion
Dragonball Jackie
Drunk Jackie
Admiral Jackie
External Links
General
(Fists of Fire)
|
|
Playable
Characters
|
|
Boss
Characters
|
|
