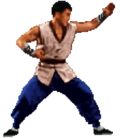
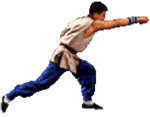
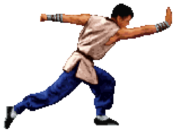
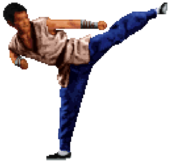
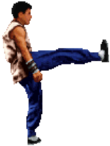
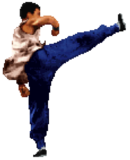
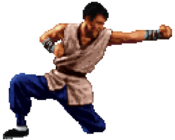
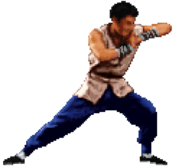
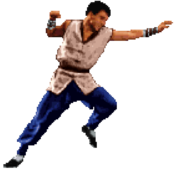
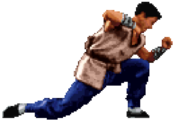
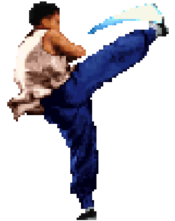
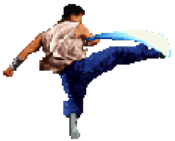
Jackie Chan in Fists of Fire/Sam/KFM

From Mizuumi Wiki
Jump to navigation Jump to search


Oh yeah!

Intro

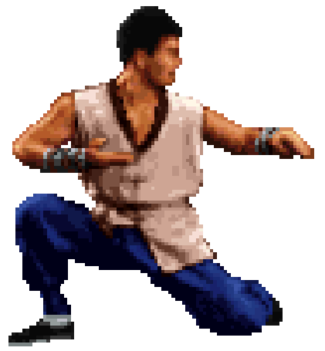
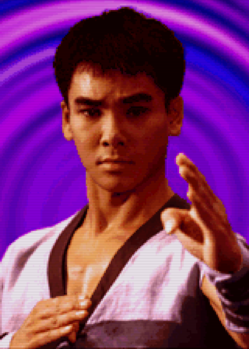
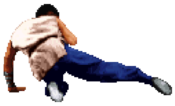
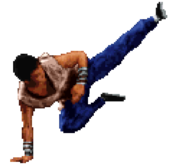
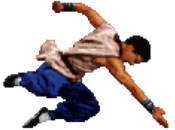
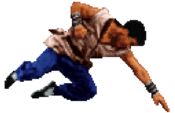
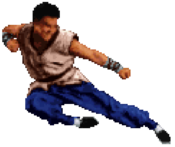
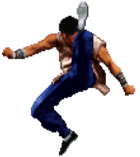
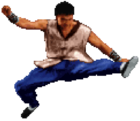
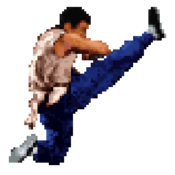
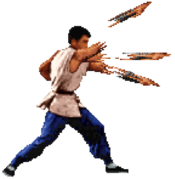
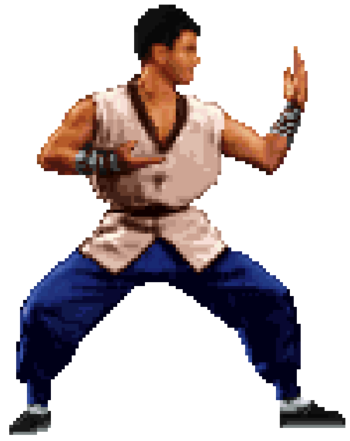
Sam Wong, also known as Ming-Sing Wong, was the coordinator for Jackie Chan's stunt team for several years. He worked with Jackie in films such as The Legend of Drunken Master, Thunderbolt, City Hunter, and more. In Fists of Fire he fights using Kung-Fu.

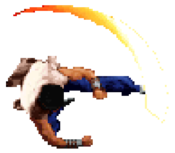
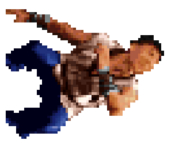
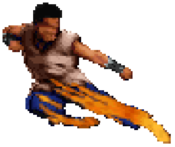
Sam has a rushdown playstyle, using his quick dash to mix up with his advantageous standing LP and throw. He struggles to land significant damage on crouching opponents, which forces him to open up the opponent far more often than most characters in order to win a round. To compound this, his only low is 2LK, which knocks down for very little damage, so even stand blocking against Sam is low-risk. Sam has many moves with character-specific interactions that force him to change his approach in each matchup. Despite all this, he can quickly melt the opponent's life bar if he lands a solid point-blank punish into his Spiral Kicks.


Strengths Weaknesses
  • Great dash speed, allowing him to mix up with 5LP and tick throws
  • High-execution infinite with Dash + 5LP
  • Rekkas can grant safe chip damage against some characters
  • Desperation attack is invincible and strong, making it risky to dash toward Sam when he's at low health
  • Wall jump Divekick can be used predictively against fireballs or as a corner escape
  • Short crouching hurtbox allows Sam to duck under many high attacks
  • Many normals are useless against crouching opponents
  • High pushback on most heavy normals
    • Makes it difficult to get simple, high damage punishes
  • Sam's only low is 2LK, which knocks down for very low damage
    • This makes it very low-risk to backdash against him during blockstrings
  • Lacks a strong mid-ranged punish tool (like a typical 2HK)
  • Anti-air game is fairly weak, leaving Sam susceptible to strong jumps like Lau or Kim
  • Rekkas and Desperation are very inconsistent against crouching opponents, severely limiting his combo potential
  • Thousand Spears is an awful move that can barely hit the opponent in realistic situations
    • The mash input can actually ruin combos with multiple LP presses
  • Floaty jump arc and poor air normals makes his air approach weak
  • Wall jump + Divekick is predictable and very punishable if called out
  • Crouching hurtbox is not short while crouch blocking, causing some moves to be safer than usual against Sam


Character Stats

Prejump Frames: 3
Jump Frames: 44
Wall Jump: 12f sticks to wall
Backdash Frames: 16 (all invincible)


Frame Data Info (click to expand)
Damage Base Damage of the attack, not accounting for scaling or opponent's defense value.
Damage for each hit is separated by an asterisk (*)
If there are several hits in a row with identical damage, it will be listed as A x B to save space
--Example: 4*5x3*8 = 4 damage + 5 damage (3 hits) + 8 damage
Stun Stun damage of the attack, not accounting for any scaling (light normals do not have any stun scaling). Throws never deal stun.
Stun damage for each hit is separated by an asterisk (*)
If there are several hits in a row with identical stun, it will be listed as A x B to save space
--Example: 256*128x3*512 = 256 stun + 128 stun (x3 hits) + 512 stun
Guard The way a move must be guarded against.
Throw = Cannot be blocked
Overhead = Must be blocked standing
Low = Must be blocked crouching.
Mid = Can be blocked both standing and crouching.
High = Can be blocked standing, whiffs against crouching.
  • Note: In Kung Fu Master, crouching hurtboxes vary significantly between characters, and between offensive crouch/crouch block. For high attacks, specific details about how the move interacts with crouchers will be noted in the description.
Startup The number of frames it takes for a move to become active.
If this value is lower than the opponent's Hit Adv or Block Adv, it can be used to punish that move if it is in range.
If a second value is listed in (parentheses), the move hits later during its active frames (i.e. a 2-hit High attack where the first hit whiffs vs. crouching).
Active The number of frames that an attack's hitbox remains active. The first active frame overlaps with the final startup frame.
Attacks with multiple hits are separated by an asterisk (*) if there is no gap between hits, or by a number in (parentheses) denoting the number of frames between active hitboxes.
--Example 1: 3*5 = 3 active frames (1st hit), 5 active frames (2nd hit)
--Example 2: 2(5)4 = 2 active frames, 5f gap, 4 active frames
For attacks with long, complex sets of active frames, the description will explain the details and the Active column will simply display the total number of active frames.
Attacks with more active frames are more effective as pokes and anti-airs.
Recovery The number of frames that a character cannot act after startup and active frames have passed.
For airborne attacks, recovery may be listed as 'X + Y land', where X+Y is the total recovery and Y is the number of grounded recovery frames (which allows the character to be thrown or punished with a grounded combo).
Hit Adv The frame advantage of an attack on hit. 0 means the attacker and defender recover at the same time.
A positive number means the attacker recovers before the defender.
--Example: A move listed as +4 on Hit may link into a move with 4f Startup.
A negative number means the defender recovers before the attacker, and the attack may be punishable.
--Example: A move listed as -6 on Hit may be punished by a move with 6f Startup, if it is in range.
May also be displayed as a range of values for attacks with significantly different frame advantage when used at different spacing.
--Example: A move with '-5 to 3' advantage on hit can be anywhere from -5 to +3 depending on which active frame hits the opponent.
HKD = Hard Knockdown (opponent lies on the ground for a couple seconds, allowing ample time to set up positioning)
SKD = Soft Knockdown (opponent rises shortly after landing)
Block Adv The frame advantage of an attack on block.
This includes the final Guard Cancel frame (see the 'reversal' section of the Basic System page for more details)
0 means the attacker and defender recover at the same time.
A positive number means the attacker recovers before the defender.
A negative number means the defender recovers before the attacker, and the attack may be punishable.
--Example: A move listed as -6 on Block may be punished by a move with 6f Startup, if it is in range.
Throws cannot be blocked, so the column is left empty in this case.
May also be displayed as a range of values for attacks with significantly different frame advantage when used at different spacing.
--Example: A move with '-5 to 3' advantage on block can be anywhere from -5 to +3 depending on which active frame hits the opponent.
Special Cancel The ability to cancel the animation of a normal attack into a special/super move. Specials cannot be cancelled into supers like in some other games. Command normals can also never be special cancelled.
Attribute Self-chain = Light normal that can be rapidly chained into itself on hit, block, or whiff.
By default, self chains can be input very quickly (after the first active frame, and after hitstop/blockstop if it connects)
  • (slow) means the self-chain must be delayed until the move's recovery (all active frames must pass, including residual active frames that occur after hitstop/blockstop)

No-Chain = Normal attack that cannot be chained into another normal
Airborne = Attack puts the user in the air, making them immune to throws, and hits will cause an air reset.
Invincible/Invulnerable = Attack has no hurtbox and cannot be interrupted during these invincibility frames
Mashable = Rapidly input buttons/directions for extra hits. For throws, defender can also mash to reduce damage.
Crossup = Attack must be blocked in the opposite direction if it connects behind the opponent

Hitstun Type This property is noted in the move description when applicable. Against standing opponents, attacks can inflict two types of reeling animations.
They are referred to as High and Mid hitstun because it usually (but not always) correlates with High attacks vs. Mid/Low attacks.
The hitstun reeling animation can affect combo routes due to different hurtbox widths.
Crouching opponents always have the same reeling animation regardless of attack.

Damage/Stun is currently unavailable until a training lua script is made.
When describing hitbox interactions, "crouching" means holding down or down/forward, while "crouch blocking" means holding down back.
Hitting a crouching button may further alter a character's hurtbox, but this is not taken into consideration.


Normals


Standing Normals

Close Stand LP cl.5LP

cl.5LP
KFM Sam Close 5LP.png
Startup Active Recovery Damage Stun
3 4 4 ? ?
Hit Adv Block Adv Guard Special Cancel Attribute
+8 +4 High Y -
  • Whiffs on crouching Lau/Sam
  • Connects on all crouch blocking characters
  • Hitstun Type: Mid


Far Stand LP far.5LP

far.5LP
KFM Sam Far 5LP.png
Startup Active Recovery Damage Stun
3 4 4 ? ?
Hit Adv Block Adv Guard Special Cancel Attribute
+8 +4 High Y -
  • Whiffs on crouching Lau/Sam
  • Connects on all crouch blocking characters
    • At farther ranges, can whiff against crouch blocking Yeung/Thorsten more easily
  • Hitstun Type: Mid


Close Stand HP cl.5HP

cl.5HP
KFM Sam Close 5HP 1.png
KFM Sam Close 5HP 2.png
Startup Active Recovery Damage Stun
4 4(4)8 22 ? ?
Hit Adv Block Adv Guard Special Cancel Attribute
-6 -12 High Y (1st hit) -
  • 1st hit whiffs on all crouching/crouch blocking characters
  • 2nd hit whiffs on crouching Lau/Sam, crouch blocking Thorsten
  • Hitstun Type: High/Mid


Far Stand HP far.5HP

far.5HP
KFM Sam Far 5HP.png
Startup Active Recovery Damage Stun
6 6 22 ? ?
Hit Adv Block Adv Guard Special Cancel Attribute
-4 -10 High Y -
  • Whiffs on crouching Lau/Sam
  • Whiffs on crouch blocking Thorsten (and Yeung, at farther ranges)
  • Not enough hitstun to combo into Desperation or Rekka 2nd hit at mid range
  • Hitstun Type: Mid


Close Stand LK cl.5LK

cl.5LK
KFM Sam Close 5LK.png
Startup Active Recovery Damage Stun
6 6 11 ? ?
Hit Adv Block Adv Guard Special Cancel Attribute
+2 -3 Mid Y -
  • Hitstun Type: Mid


Far Stand LK far.5LK

far.5LK
KFM Sam Far 5LK.png
Startup Active Recovery Damage Stun
4 4 6 ? ?
Hit Adv Block Adv Guard Special Cancel Attribute
+6 +2 High N -
  • Whiffs on all crouch blocking characters
  • Whiffs on all crouching characters except M. Lion and close range Thorsten
  • Hitstun Type: Mid


Close Stand HK cl.5HK

cl.5HK
KFM Sam Close 5HK 1.png
KFM Sam Close 5HK 2.png
Startup Active Recovery Damage Stun
8 (16) 8*4 11 ? ?
Hit Adv Block Adv Guard Special Cancel Attribute
+9 +3 High/Mid N -
  • 1st hit whiffs on all crouching/crouch blocking characters
  • Hitstun Type: High/Mid


Far Stand HK far.5HK

far.5HK
KFM Sam Far 5HK.png
Startup Active Recovery Damage Stun
7 8 17 ? ?
Hit Adv Block Adv Guard Special Cancel Attribute
-1 -7 High N -
  • Whiffs on all crouch blocking characters
  • Whiffs on all crouching characters except M. Lion and close range Thorsten
  • Hitstun Type: High


Crouching Normals

Crouch LP 2LP

2LP
KFM Sam 2LP.png
Startup Active Recovery Damage Stun
3 4 4 ? ?
Hit Adv Block Adv Guard Special Cancel Attribute
+8 +4 Mid Y Self-Chain
  • Best hitconfirm button
  • Hitstun Type: Mid


Crouch HP 2HP

2HP
KFM Sam 2HP.png
Startup Active Recovery Damage Stun
8 6 22 ? ?
Hit Adv Block Adv Guard Special Cancel Attribute
-4 -10 High Y -
  • Whiffs on crouching Lau/Sam
    • At point blank, will whiff through crouching M. Lion
  • Whiffs on crouch blocking Thorsten
  • Hitstun Type: Mid


Crouch LK 2LK

2LK
KFM Sam 2LK.png
Startup Active Recovery Damage Stun
6 6 11 ? ?
Hit Adv Block Adv Guard Special Cancel Attribute
SKD +1 Low Y -
  • Mediocre and unrewarding button, but it's the only option Sam has to stop someone from mashing backdash


Crouch HK 2HK

2HK
KFM Sam 2HK.png
Startup Active Recovery Damage Stun
6 8 24 ? ?
Hit Adv Block Adv Guard Special Cancel Attribute
-8 -14 High N -
  • Too much pushback to be useful even in punishes
  • Can work as an anti-air at some ranges
  • Whiffs against crouching Lau only
  • Hitstun Type: Mid


Air Normals

Jump LP 8LP

8LP
KFM Sam 8LP.png
Startup Active Recovery Damage Stun
3 until ground - ? ?
Hit Adv Block Adv Guard Special Cancel Attribute
- - Overhead - -
  • Hitstun Type: Mid
  • Instant Overhead:
    • 2f timing vs. crouch blocking Sam, Kim-Maree, M. Lion
    • 1f timing vs. crouch blocking Lau, Yeung, Thorsten, Admiral, Dragonball (Whiffs if not point blank)
    • 2f timing vs. crouching Thorsten, M. Lion (1f if too close)
    • 1f timing vs. crouching Yeung, Sam, Kim-Maree, Admiral, Dragonball, Drunk (Whiffs at close range)


Jump HP 8LP

8HP
KFM Sam 8HP.png
Startup Active Recovery Damage Stun
7 10 - ? ?
Hit Adv Block Adv Guard Special Cancel Attribute
- - Overhead - -
  • Hitstun Type: Mid


Diagonal Jump LK 9LK

9LK
KFM Sam 9LK.png
Startup Active Recovery Damage Stun
3 until ground - ? ?
Hit Adv Block Adv Guard Special Cancel Attribute
- - Overhead - Crossup
  • In the corner, can be blocked either direction
  • Hitstun Type: Mid
  • Instant Overhead:
    • 2f timing vs. crouch blocking Sam, Kim-Maree, M. Lion (1f at close range)
    • 1f timing vs. crouch blocking Yeung, Thorsten, Admiral, Lau, Dragonball (Whiffs at point blank, Whiffs if not point blank)
    • 2f timing vs. crouching Thorsten, M. Lion (1f if too close)
    • 1f timing vs. crouching Sam, Kim-Maree, Admiral, Dragonball, Yeung, Drunk (Whiffs at close range)


Neutral Jump LK 8LK

8LK
KFM Sam 8LK.png
Startup Active Recovery Damage Stun
3 until ground - ? ?
Hit Adv Block Adv Guard Special Cancel Attribute
- - Overhead - -
  • Hitstun Type: Mid


Diagonal Jump HK 9HK

9HK
KFM Sam 9HK 1.png
KFM Sam 9HK 2.png
Startup Active Recovery Damage Stun
7 4*10 - ? ?
Hit Adv Block Adv Guard Special Cancel Attribute
- - Overhead - Crossup
  • Can hit twice
  • Very narrow crossup hitbox
  • In the corner, can be blocked either direction
  • Hitstun Type: Mid


Neutral Jump HK 8HK

8HK
KFM Sam 8HK.png
Startup Active Recovery Damage Stun
5 8 - ? ?
Hit Adv Block Adv Guard Special Cancel Attribute
- - Overhead - -
  • Hitstun Type: Mid


Throws


HP Throw HP Throw

close 6HP/4HP
KFM Sam HP Throw 1.png
KFM Sam HP Throw 2.png
Startup Active Recovery Damage Stun
1 - - ? 0
Hit Adv Block Adv Guard Special Cancel Attribute
HKD - Throw - -
  • Because Sam has two throws, he can plink 6HP~6HK (or 4HP~4HK) to increase the timing window for a reversal throw


HK Throw HK Throw

close 6HK/4HK
KFM Sam HK Throw 1.png
KFM Sam HK Throw 2.png
Startup Active Recovery Damage Stun
1 - - ? 0
Hit Adv Block Adv Guard Special Cancel Attribute
HKD - Throw - -
  • Because Sam has two throws, he can plink 6HP~6HK (or 4HP~4HK) to increase the timing window for a reversal throw


Special Moves


Spiral Kick (Rekka)
Note: Any strength of 236K can chain into any other strength (i.e. 236LK > 236HK > 236LK) 236K

236K
KFM Sam 236K 1.png
KFM Sam 236K 2.png
KFM Sam 236K 3.png
236LK (1st) Startup Active Recovery Damage Stun
6 5 14 ? ?
Hit Adv Block Adv Guard Special Cancel Attribute
+5 0 High - -
  • Whiffs on crouching Lau/Sam, crouch blocking Yeung/Thorsten
  • HKD vs airborne opponents
  • Hitstun Type: High
236LK (2nd) Startup Active Recovery Damage Stun
11 5 15 ? ?
Hit Adv Block Adv Guard Special Cancel Attribute
+4 -2 High - -
  • After 1st Rekka whiff: only connects vs. crouching Thorsten/M. Lion, crouch blocking Sam/Kim
  • If 1st Rekka connects: only hits crouching Yeung/Thorsten, whiffs on all crouch blockers
  • HKD vs airborne opponents
  • Hitstun Type: Mid
236LK (3rd) Startup Active Recovery Damage Stun
11 (13) 11 15 ? ?
Hit Adv Block Adv Guard Special Cancel Attribute
HKD -6 (0) Mid - -
  • Better frame adv on block vs. crouching
  • Initial active frames hit behind Sam
  • On crouching hit, only combos vs. Yeung/Thorsten
236HK (1st) Startup Active Recovery Damage Stun
6 6 18 ? ?
Hit Adv Block Adv Guard Special Cancel Attribute
0 -6 High - -
  • Whiffs on crouching Lau/Sam, crouch blocking Yeung/Thorsten
  • HKD vs airborne opponents
  • Hitstun Type: High
236HK (2nd) Startup Active Recovery Damage Stun
11 6 18 ? ?
Hit Adv Block Adv Guard Special Cancel Attribute
0 -6 High - -
  • After 1st Rekka whiff: whiffs on crouching Lau/Sam, crouch blocking Thorsten
  • If 1st Rekka connects vs. crouch/crouch block, 2nd HK Rekka will also connect
  • HKD vs airborne opponents
  • Hitstun Type: Mid
236HK (3rd) Startup Active Recovery Damage Stun
11 (13) 11 19 ? ?
Hit Adv Block Adv Guard Special Cancel Attribute
HKD -10 (-4) Mid - -
  • Better frame adv on block vs. crouching
  • Initial active frames hit behind Sam
  • On crouching hit, only combos vs. Yeung/Thorsten

Priority: N/A

Thousand Spears (Hands)
Note: Active frames are listed as "xx" because they can't be easily measured without a hitbox viewer. For now, "Recovery" includes all active + recovery frames P~P~P~P

P~P~P~P
KFM Sam PPPP.png
LP Startup Active Recovery Damage Stun
5 xx 32 ? ?
Hit Adv Block Adv Guard Special Cancel Attribute
-8 ~ -2 -14 ~ -8 Mid - Mashable
  • HKD vs airborne opponents
  • 6f better frame advantage for each hit that connects
  • When unmashed, there are 3 total hits but only 2 will generally connect on hit or block
    • Mashing adds more hits but none will connect due to pushback
    • If the 3rd hit does connect, it is +4 oH/-2 oB
HP Startup Active Recovery Damage Stun
8 xx 32 ? ?
Hit Adv Block Adv Guard Special Cancel Attribute
-8 ~ 0 -14 ~ -6 Mid - Mashable
  • HKD vs airborne opponents
  • 4f better frame advantage for each hit that connects
  • When unmashed, there are 6 total hits but only 3 will generally connect on hit or block
    • Mashing adds more hits that can connect if performed from very close range
    • If the 6th hit connects, it is +2 oH/-4 oB
  • Fully mashed HP hands from point blank can stun vs. standing Sam/M. Lion

Priority: N/A

Diving Kick 6K (from wall)

6K (from wall)
KFM Sam Wall6HK 1.png
KFM Sam Wall6HK 2.png
LK Startup Active Recovery Damage Stun
12+5 until ground 16 land ? ?
Hit Adv Block Adv Guard Special Cancel Attribute
-9 ~ -13 -15 ~ -19 Mid - -
  • HKD vs airborne opponents
  • Can be somewhat useful against projectiles
HK Startup Active Recovery Damage Stun
12+7 until ground 24 land ? ?
Hit Adv Block Adv Guard Special Cancel Attribute
-12 ~ -16 -18 ~ -22 Mid - -
  • HKD vs airborne opponents
  • Can escape corner if opponent is close to Sam

Priority: N/A


Desperation


Flurry Combination
Note: Active frames are listed as "xx" because they can't be easily measured without a hitbox viewer. For now, "Recovery" includes all active + recovery frames 236LK+HK

236LK+HK
KFM Sam 236K 1.png
KFM Sam 236K 2.png
KFM Sam 236K 3.png
Startup Active Recovery Damage Stun
6 xx 107 ? ?
Hit Adv Block Adv Guard Special Cancel Attribute
HKD -14 (-7 crouch) High x5 - Invincible 1-10f
  • Strong reversal and stun tool if it hits standing opponents, but has very character-specific interactions vs. crouchers
  • (fill in character-specific info from Frame Data sheet, or add a section for this)


Combos

-


Strategy

-

Anti-Airs

  • 2HK - Serviceable anti-air from mid-farther ranges
  • far.5HK - Another far range AA that hits higher up
  • Desperation - Only hits once, but has invincibility and causes HKD so Sam recovers safely

Reversals

  • Desperation - Sam's only invincible attack. Does great damage/stun, but often drops even on hit if the opponent was crouching. Can be useful if you read the opponent's throw however.

Matchup Notes

Lau

  • From close range vs. crouching Lau, Sam can combo into 236LK > 236HK
    • 3rd Rekka won't combo but will connect
    • The first Rekka won't connect vs. crouch unless it's comboed into (i.e. from 2LP/5LP)
  • HK Rekka x3 will connect if Lau is crouch blocking
    • There will be gaps that Lau can interrupt if they know the matchup, and the 3rd hit is punishable if they stand block
  • Desperation will not combo against crouching Lau
    • If Lau just holds straight down, the entire attack whiffs on him and the last hit hops over him
    • vs. crouch block, 2nd/4th hits whiff, and the last hit hops over Lau

Yeung

  • Sam can combo Rekkas vs. crouching Yeung because her hurtbox extends upward during crouching hitstun
    • Be sure to end with HK 3rd Rekka
  • Rekkas generally whiff if she crouch blocks (with the exception of 2nd HK Rekka)
  • Desperation will fully hit crouching Yeung (raw or in a combo)
    • However, it whiffs entirely on crouch block, making it useless for chip

Sam

  • Rekka will not combo against crouching Sam
  • HK Rekkas will connect on crouch block (LK is less consistent due to range)
  • Desperation won't combo on crouching Sam
    • If Sam just holds straight down, the entire attack whiffs on him and the last hit hops over him
    • vs. crouch block, 3rd hit whiffs, allowing opposing Sam to interrupt

Thorsten

  • Rekkas fully connect vs. crouching Thorsten (raw or in a combo)
    • Use HK Rekkas for consistency
  • Rekkas will not connect vs. crouch block, so they aren't useful for chip
  • Desperation will fully hit crouching Thorsten (raw or in a combo)
    • However, the first 4 hits whiff vs. crouch block, making it useless for chip

Kim-Maree

  • vs. crouching, Sam can combo into HK Rekka x2
    • Rekka combo drops on final hit
  • HK Rekkas fully connect vs. crouch block, making it good for chip

M. Lion

  • vs. crouching, Sam can combo into HK Rekka x2
    • Rekka combo drops on final hit
  • HK Rekkas fully connect vs. crouch block, making it good for chip
    • Be careful, as Lion has better punish options than most characters; if he stand blocks the 3rd HK Rekka, he can get a TOD punish

Dragonball Jackie

  • Rekkas are practically useless against crouching, raw or in combos
  • Desperation whiffs completely vs. crouch and crouch block

Drunk Jackie

  • Rekkas are practically useless against crouching, raw or in combos
  • Desperation whiffs completely vs. crouch and crouch block

Admiral Jackie

  • Sam can link HK Rekka after 2LP or 5LP
    • only the first Rekka will combo, but you can continue for chip damage unless they know to interrupt with 623K
  • HK Rekkas fully connect vs. crouch block, making it good for chip
  • Desperation will not combo against crouching Admiral
    • vs. crouch block, 2nd/4th hits whiff, and the last hit hops over Admiral

KFM Sam Idle.png KFM Sam Idle Crouch.png


External Links


General
(Fists of Fire)
FAQ
Controls
HUD
System (Basic)
System (Advanced)
Strategy
Glossary
Community
Fists of Fire
Playable
Characters
Lau (KFM)
Yeung (KFM)
Sam (KFM)
Thorsten (KFM)
Kim-Maree (KFM)
Mysterious Lion (KFM)
Boss
Characters
Spiritual Kung-Fu Jackie (KFM)
Drunken Fist Jackie (KFM)
Admiral Jackie (KFM)