Tough Love Arena/Beef/Strategy
< Tough Love Arena | Beef
Jump to navigation
Jump to search
 |
Under Construction
|
Disclaimer: This is a community written page and may contain opinions that not all players may agree with. Use at your own discretion.
Goals
Beef is well rounded in every aspect, but in general plays well when they can use Lemon to force a response from their opponent. They can play well in neutral, but also can scrap up close if they need to.
Neutral
Beef can generally be a zoner in neutral due to their strong tools for poking/zoning their opponent out.
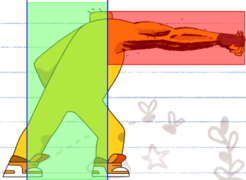
Heavy Punch

- Heavy Punch is a strong neutral tool due to its fast speed and range.
- Heavy Punch can also be hit confirmed into a full combo a solid amount of the time.
- Palm complements Heavy Punch as a poke due to the additional pushback and the ability to have a safe ranged frame trap.
- Uppercut is the alternate follow up that has more reward on hit and is a way for Beef to force themselves in when they have meter.
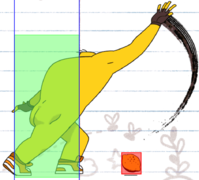
Lemon

- Lemon is a useful zoning tool that Beef can use to force their opponents to approach.
- Indecisive Lemon gives Beef a useful non-committal fakeout tool.
- Lemon combined with RC makes Beef a force to be reckoned with since they can punish a preemptive button the opponent does versus Lemon (typically Jump).
Shimmy
- Having a bar of meter on deck lets Beef get more damage off of their hits, get more corner carry in their combos and gives them access to Lemon > RC as a way to make their zoning better.
- Shimmying is a useful counterpart to poking when you are looking for a committal approach from the opponent.
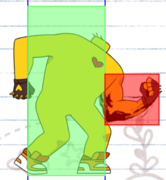
Anti Airs/Jump Punishes
_Hitbox.png)
- Spike is a reliable anti air that gives Beef the least amount of rewards in their array of anti airs.
- Heavy Punch is significantly harder than Spike to anti air on reaction, but nets Beef more damage and oki on hit and can "accidentally" anti air at times. Heavy Punch can also be used as a whiff punish tools versus Jump to net more damage.

- Flex is Beef's fastest and most consistent anti air.
Offense
Block Pressure
5L Starter:
- 5L > 5L is a basic frametrap that can loop into itself as long as Beef is close enough to the opponent.
- 5L > 5H leaves a big gap in between Gutpunch and Heavy Punch but can punish fuzzy mashing and Parries.
- 5L > 5T punishes the opponent being too afraid to mash versus Beef but can get punishes if they do mash.
- 5LS can be a solid mixup to use when your opponent least expects it or if you are outside their 5L range.
5H Starter:
- 5HH when delayed acts like a frametrap that can lead to solid damage meterless if the opponent is mashing. Only use when you have meter to make Uppercut safe or if you have a hard read on the opponent.
- 5HL functions similar to 5HH as a frame trap tool but trades off damage for safety.
- 5H > 5H is useful when the opponent is too afraid to challenge after 5H.
- 5HS is another option that lets Beef get plus frames against a passive opponent but can be counterhit during its startup or avoided on reaction by jumps, Hopkick, and Dash. Can be canceled into Fake Lemon or with RC to bait jumps, Hopkick, and Dash.
Okizeme
Meaties
- 6S is by far Beef's safest meaty option if they are able to make it a safejump.
- 5L is Beef's weakest but most consistent meaty due to its fast speed, raw frame advantage, large active frames, and scaling.
- 5H gives Beef a large amount of reward on hit at the cost of frame advantage on block.
- 5S is one of Beef's strongest meaties due to it being their highest damage starter, how safe it can be with spacing, and that it does chip on block.
- 5T forces a strike throw 50-50.
Sample Meaty Setups
- 5HH > 5H > 5H > 5H: A corner combo that leads to a free safejump or meaty Lemon.
- 5HH > 5H > 5H > 6S > Wait > fast meaty button: A simple corner meaty setup.
- 5HH > RC > Walk > 5HH: A midscreen setup that gives Beef a safejump or a meaty Lemon.
Defense
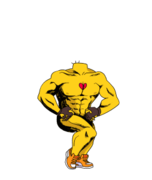
Flex
- Flex is a powerful reversal that nets Onion a ton of meter and a solid chunk of damage. Flex is useful for calling out frame traps (i.e. 5L > 5L) and as a wakeup option. Use with caution however since stagger pressure can blow out Flex entirely. Fuzzying Flex is a useful way of extending the window in which frame traps can be called out..
Gutpunch

- Gutpunch is useful for stuffing out an opponent’s overextensions during their block pressure, if you suspect the opponent will try to grab, or if you want to steal your turn back. Be sure to condition the opponent to not expect mashing first.

Reject

- Reject lets Beef stop the opponent’s block pressure at the cost of one bar of meter. Vary Reject timings to make sure the opponent is not ready for the neutral reset and can't bait out your Reject.

Burst

- Use Burst when you expect the opponent’s combo will kill or if you have a big enough life lead to gain back that meter in no time if you get hit again, otherwise save your meter for Rapid and Reject. Vary your Burst timings to make sure you don’t get hard punished for getting Burst baited.
- Blocking will cause your opponent to eventually push themselves too far away to continue their block pressure. Blocking is useful to bait out overextensions versus opponents who want to keep up the pressure, and with enough conditioning, you can start to mash at certain points during their block pressure.
Counter Strategy
- Don't let them Lemon.
- Beef can struggle more when they can get punished for throwing Lemon by a relatively low risk option.
- Leveraging the threat of an option to keep Beef from throwing Lemon is also an effective way of making approaching them easier.
- Use some stagger pressure.
- Flex is a strong defensive option to use versus frame traps.
- Keeping your pressure both varied and adding stagger pressure will make using Flex much harder on defense and can force Beef to choose more risky options to get out of pressure.