Duels of Fortune/Azutron: Difference between revisions
m (→Overview) |
|||
| Line 26: | Line 26: | ||
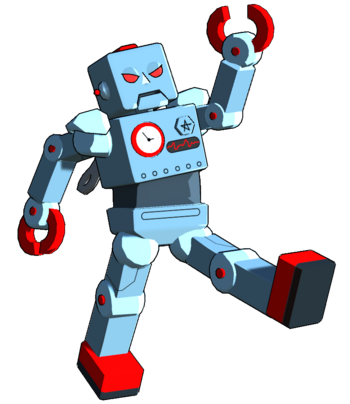
|-|Retro Toy= | |-|Retro Toy= | ||
[[File:DoF_Azutron_Name.png|100px]] <br> | [[File:DoF_Azutron_Name.png|100px]] <br> | ||
[[File: | [[File:DoF_Azutron_profile_Toy.png|350px]] | ||
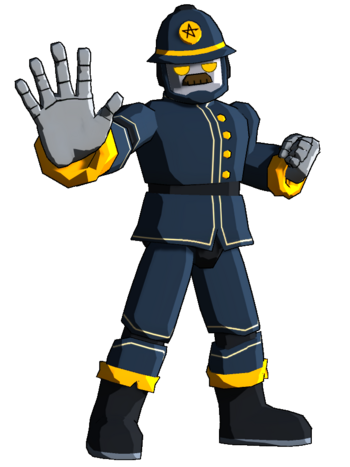
|-|Constable= | |-|Constable= | ||
[[File:DoF_Azutron_Name.png|100px]] <br> | [[File:DoF_Azutron_Name.png|100px]] <br> | ||
Revision as of 01:35, 5 June 2024
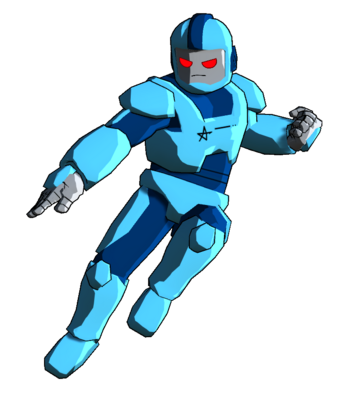
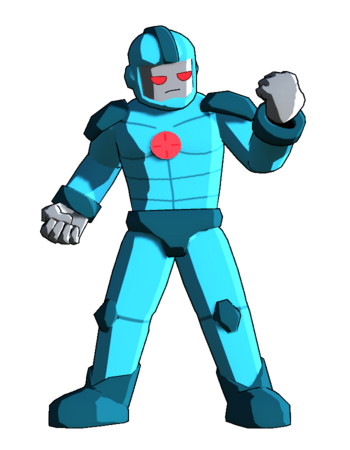
Azutron S-Type is the robotic scout of the multiversal police. As well as enforcing the law, they also enforce one of the most powerful neutral presences in the game as a high speed pixie character, focused on forcing then punishing mistakes from the opponent.
Azutron's main strength is their incredible movement and how that pairs with their punish tools. Azutron's movement speeds are all well above average and is also one of the few characters with a double jump, which when combined with their air dash and fast air drift, gives them a great air game. However, their jump ins and pokes besides 2M are a bit lacking. That's where their specials come in. 5S (Relocate), more often called teleport, is Azutron's character defining special. 5S lets Azutron quickly teleport in one of 8 directions, having invuln mid teleport and creating a plus on block hitbox upon reappearing. On top of that, they retain all air options after using it, allowing for incredibly tricky air movement and anti-air baits. This move alone dictates the pace of the match with Azutron, and while it has a cooldown, extra scaling, and can be countered, it's still incredibly dangerous. Then when you further add 4S (Hot Pursuit), a fast dash slash, 2S (Long Arm of the Law), a huge long range anti-air, j.2S (Under Arrest), a fast divekick, and 5SP (Omega Beam), a fast fullscreen beam, you get one of the most threatening neutral games, as any whiff or attempted approach can be swiftly shot down into a huge punish. And once their threat is established, Azutron can start to use them to begin their own offensive turns and get their pressure going.
This level of menace in the neutral doesn't come with downsides though. Azutron is tied for second lowest health in the game at 20000, a notable flaw when some characters' bnbs do 10K damage. Furthmore, Azutron's damage is on the lower end, especially if they want to go for their (admittedly incredibly good) oki setups, as most damage focused routes end in an air tech. While Azutron's anti-air capabilities are very good, they'd still much rather take a guaranteed mixup. Finally, Azutron's actual mixups mid blockstring are on the weaker end. They have two options, those being the usual hit/throw and the additional option of crossing up with teleport, although this is decently reactable. However, in the face of their overpowering neutral, Azutron's flaws can only hold them back so much.
| Azutron uses their long range punish tools to threaten the opponent into making mistakes. | |
| Pros | Cons |
|
|
Character Properties
| Health | 20000 |
| Backdash | XF |
| Unique Movement | Double Jump, Run |
| Fastest Attack | X (XF) |
Lock-Down
- Azutron has the Lock-Down gauge, a meter with 3 pips and a bar above. Whenever Azutron connects with any of his Lock-Down moves, the gauge is increased by one pip and the bar fills up. The bar will begin to run out unless another Lock-Down move hits, at which point it is reset. If 5 seconds pass, the bar expires and all pips are emptied. If Azutron fills all 3 pips, the opponent is put in a Lock-Down Cube. The Lock-Down Cube is a fixed hitstun state, during which the opponent can be hit by any move and it is guaranteed to combo (although if triggered Loop Protection will act immediately upon the state ending). If 3 moves are hit, the cube breaks and the opponent is launched with some additional damage. After a Lock-Down Cube is used, there's a cooldown of ~5 seconds before it can start being filled again. Generally, the Lock-Down gauge has two uses. One is to fill it up in one combo, then use the lock-down cube to get some extra damage, which is often how Azutron gets their higher damaging combos, but this removes the ability to end in good okizeme. The other is to fill 2 pips then end the combo, allow Azutron to get extra damage near the start of the next combo. Moves that add to the Lock-Down Gauge are as follows:
- 4H (Rocket Punch)
- 5S (Relocate)
- 4S (Hot Pursuit)
- 2S (Long Arm of the Law)
Relocate
- Relocate is Azutron's neutral special and an incredibly strong 8 way teleport. In exchange for its many, many strengths, the move has a cooldown of ~3 seconds before it can be used again. While this may sound short, this cooldown only starts once Azutron is on the ground. Additionally, if Azutron uses teleport as a follow-up from 4S, the cooldown lasts for ~8 seconds.
Character Summary
- Command Normals
- 4H - Rocket Punch: Fast projectile that counts as a normal.
- j.2H - Justice Boot: Aerial jump cancelable launcher.
- j.4H - Law Lariat: Air only dashing lariat, combo extender.
- Special Moves
- 5S (Air OK, Hold OK) - Relocate: Azutron teleports in one of 8 directions, plus on block but has a cooldown.
- 2S - Long Arm of the Law: Huge but unsafe anti-air move, also great combo ender.
- 4S - Hot Pursuit: Long range dash slash, can be canceled into Relocate.
- j.2S - Hot Pursuit: Very fast and overhead hitting divekick.
- Supers
- 5SP (Air OK) - Omega Beam: Fast fullscreen beam, good ender and punish tool.
- 2SP - System Override: Install that buffs Azutron's movement, damage, and ends with a massive explosion.
5L > 5M > 5H > 4S, 2M > 2H > jc j.M, 2M > 2S: Basic combo ending in an HKD for Az's strong oki game.
2M > delay 5H > 4S, 2M > 5H, 2M > 2H > jc j.H, 2M > 4H > 4S, 5H > 4S, 5H > 5SP: Somewhat more advanced combo focused on damage.
Normal Moves
5L
|
|
|---|---|
Toggle Hitboxes Toggle Hitboxes
|
5M Caption Caption
|
|
|---|---|
Toggle Hitboxes Toggle Hitboxes
|
5H
|
|
|---|---|
Toggle Hitboxes Toggle Hitboxes
|
2L
|
|
|---|---|
Toggle Hitboxes Toggle Hitboxes
|
2M
|
|
|---|---|
Toggle Hitboxes Toggle Hitboxes
|
2H
|
|
|---|---|
Toggle Hitboxes Toggle Hitboxes
|
j.L
|
|
|---|---|
Toggle Hitboxes Toggle Hitboxes
|
j.M
|
|
|---|---|
Toggle Hitboxes Toggle Hitboxes
|
j.H
|
|
|---|---|
Toggle Hitboxes Toggle Hitboxes
|
Command Normals
Command Normal Name
4H |
|
|---|---|
Toggle Hitboxes Toggle Hitboxes
|
Universal Mechanics
Throw
Throw
6H |
|
|---|---|
Toggle Hitboxes Toggle Hitboxes
|
Reversals
Reversal
5R |
|
|---|---|
Toggle Hitboxes Toggle Hitboxes
|
Wakeup Reversal
5R on Wakeup |
|
|---|---|
Toggle Hitboxes Toggle Hitboxes
|
Burst
Burst
5B |
|
|---|---|
Toggle Hitboxes Toggle Hitboxes
|
Taunt
Only add this section if a character has a taunt with a hitbox or some other unique effect like Sylvan's cheat. Otherwise remove it.
Taunt
5T |
|
|---|---|
Toggle Hitboxes Toggle Hitboxes
|
Down Taunt
2T |
|
|---|---|
Toggle Hitboxes Toggle Hitboxes
|
Special Moves
Special Name
5S |
|
|---|---|
Toggle Hitboxes Toggle Hitboxes
|
Special Name
4S |
|
|---|---|
Toggle Hitboxes Toggle Hitboxes
|
Special Name
2S |
|
|---|---|
Toggle Hitboxes Toggle Hitboxes
|
Special Name
j.S |
|
|---|---|
Toggle Hitboxes Toggle Hitboxes
|
Super Move
Super Name 5SP Informative and maybe funny caption Informative and maybe funny caption
|
|
|---|---|
Toggle Hitboxes Toggle Hitboxes
|
Super Name 2SP Informative and maybe funny caption Informative and maybe funny caption
|
|
|---|---|
Toggle Hitboxes Toggle Hitboxes
|
Strategy
Neutral
Describe how a character plays the neutral game. Add sub-categories if necessary, these should usually be on how you use a specific move.
Offense
Describe how a character runs their offense.
Defense
Describe how a character defends themselves when they're on the receiving end.
Additional Resources
Links to any additional resources like a tutorial video, delete category if there are none. If there aren't any but one gets made later, then re-add the category.
Additional Categories
Add any further categories as needed, just make sure they're worth a whole section.
Combos
General info on a character's combos, such as if they can always end a combo with a super as an ender rather than usual listed enders.
Combo Legend
| ||||||||||||||||||||||||||||||||||||||||||
| ||||||||||||||||||||||||||||||||||||||||||
Basic Combos
Easy combos for starting.
| Combo | Damage | Difficulty | Meter Spent | Position | Notes |
|---|---|---|---|---|---|
| 5L > 5M > 5H > 5S, Ender | X | Very Easy/Easy/Medium/Hard/Very Hard | 0/50/100 | Midscreen/Corner/Near Corner/From Corner |
Description of the combo. |
| Combo | Damage | Difficulty | Meter Spent | Position | Notes |
| 2L > 2M > 2H > 2S, Ender | X | Very Easy/Easy/Medium/Hard/Very Hard | 0/50/100 | Midscreen/Corner/Near Corner/From Corner |
Description of the combo. |
Advanced Combos
Harder combos that deal more damage or provide some other benefit.
| Combo | Damage | Difficulty | Meter Spent | Position | Notes |
|---|---|---|---|---|---|
| 5L > 5M > 5H > 5S, Ender | X | Very Easy/Easy/Medium/Hard/Very Hard | 0/50/100 | Midscreen/Corner/Near Corner/From Corner |
Description of the combo. |
| Combo | Damage | Difficulty | Meter Spent | Position | Notes |
| 2L > 2M > 2H > 2S, Ender | X | Very Easy/Easy/Medium/Hard/Very Hard | 0/50/100 | Midscreen/Corner/Near Corner/From Corner |
Description of the combo. |
X Combo Category
If a character has a specific kind of combo they do that has multiple variants, then you can make a new category for it. If they don't delete this.
| Combo | Damage | Difficulty | Meter Spent | Position | Notes |
|---|---|---|---|---|---|
| 5L > 5M > 5H > 5S, Ender | X | Very Easy/Easy/Medium/Hard/Very Hard | 0/50/100 | Midscreen/Corner/Near Corner/From Corner |
Description of the combo. |
| Combo | Damage | Difficulty | Meter Spent | Position | Notes |
| 2L > 2M > 2H > 2S, Ender | X | Very Easy/Easy/Medium/Hard/Very Hard | 0/50/100 | Midscreen/Corner/Near Corner/From Corner |
Description of the combo. |
Enders
List of combo enders a character has when there's multiple enders they can pick between, such as sacrificing oki for damage and vice-versa.
| Combo | Damage | Difficulty | Meter Spent | Position | Notes |
|---|---|---|---|---|---|
| 2H > 2S | X | Very Easy/Easy/Medium/Hard/Very Hard | 0/50/100 | Midscreen/Corner/Near Corner/From Corner |
Description of the ender. |
| Combo | Damage | Difficulty | Meter Spent | Position | Notes |
| 2H > 2SP | X | Very Easy/Easy/Medium/Hard/Very Hard | 0/50/100 | Midscreen/Corner/Near Corner/From Corner |
Description of the ender. |
Colors
Trivia
- Fun facts about the character. If it isn't redundant with something else said on the page, these can be pulled directly from the game.


