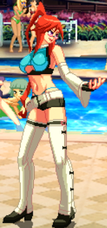
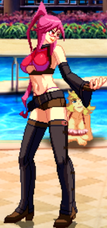
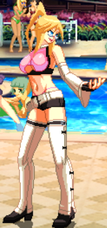
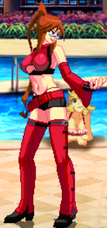
Chaos Code/NSC/Hermes: Difference between revisions
(→Colors) |
Crimefighter (talk | contribs) (updated to be on new template) |
||
| Line 1: | Line 1: | ||
[[image:profile-hermes.png|180px|right]] | [[image:profile-hermes.png|180px|right|]] | ||
{{TOClimit|2}} | |||
== Story == | |||
'''Hermes''' <br> | |||
'''『エルメス』''' | |||
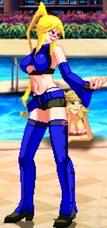
Hermes was once a mild mannered and prudish young girl before discovering a strange magical book which unlocked the power to control elemental spirits, at the cost of never being able to wear pants again. Now working for the anti-government ninja clan "kuranai" hermes seeks the Chaos Code, planning to use it's unlimited power to betray Kuranai cause they're boring. | Hermes was once a mild mannered and prudish young girl before discovering a strange magical book which unlocked the power to control elemental spirits, at the cost of never being able to wear pants again. Now working for the anti-government ninja clan "kuranai" hermes seeks the Chaos Code, planning to use it's unlimited power to betray Kuranai cause they're boring. | ||
=Playstyle= | == Playstyle == | ||
Health: 28000 Stun: 90 | |||
'''Health:''' 28000 | |||
'''<br>Stun:''' 90 | |||
It's important to note that you have to wait until a spirit disappears until you can use it again. This means you can't super cancel out of a lightning spirit special move into a lightning spirit super move. This limits her combo potential somewhat, but her zoning tools are strong enough to make up for that in match. | It's important to note that you have to wait until a spirit disappears until you can use it again. This means you can't super cancel out of a lightning spirit special move into a lightning spirit super move. This limits her combo potential somewhat, but her zoning tools are strong enough to make up for that in match. | ||
=Run vs Step= | === Mobility (Run vs. Step) === | ||
'''Run:''' Hermes needs to be able to run to do her corner loop which is a source of considerable damage if you manage to start it and keep it going. Being able to Run is also important to be able to capitalize on situations like ice trap knockdown or comboing off of ice trap super. You're going to need all the damage you can get, so you're probably better off sticking with Run. | |||
'''Run''' | |||
Hermes needs to be able to run to do her corner loop which is a source of considerable damage if you manage to start it and keep it going. Being able to Run is also important to be able to capitalize on situations like ice trap knockdown or comboing off of ice trap super. You're going to need all the damage you can get, so you're probably better off sticking with Run. | |||
'''Step:''' | |||
== Extra Move Selection == | |||
Blazing Jealousy gives better combo routes, Bursting desire gives more utility to lighting orbs, Scorching Pleasure provides high damage metered combos, and Raging Blizzard can provide more setplay opportunities. | |||
=== Recommended Sets === | |||
Describe specific combinations of extra moves here | |||
== Move List== | |||
''Click on a header to expand that section of the movelist'' | |||
<div class="mw-collapsible mw-collapsed"> | |||
<div class="mw-collapsible-toggle" style="float: none;"><center><font size="4"><b>Normal Moves</b></font></center></div> | |||
<div class="mw-collapsible-content"> | |||
=== <font style="visibility:hidden" size="0">Normal Moves</font> === | |||
====== <font style="visibility:hidden" size="0">5A</font> ====== | |||
{{MoveData |image=CC_HE_5A.png |name=5A |data= {{AttackData-CC | |||
|damage= |guard=High/Low |cancelable=Yes |chprop=- | |||
|startup= |active=- |recovery=- |frameadv=- | |||
|description = Basic standing chop. Doesn't link into itself and seems pretty slow. Can occasionally be used as an anti-air but 2C is much better for the job. | |||
}} }} | |||
====== <font style="visibility:hidden" size="0">2A</font> ====== | |||
{{MoveData |image=CC_HE_2A.png |name=2A |data= {{AttackData-CC | |||
|damage= |guard=High/Low |cancelable=Yes |chprop=- | |||
|startup= |active=- |recovery=- |frameadv=- | |||
|description = Better, faster, longer than 5A. It has a similar range to 2B and the two can be alternated due to their speed. A decent poke, but mostly used to catch falling opponents in combos when they're close to the ground and 2C won't get them in time. | |||
}} }} | |||
====== <font style="visibility:hidden" size="0">cl.B</font> ====== | |||
{{MoveData |image=CC_HE_clB.png |name=cl.B |data= {{AttackData-CC | |||
|damage= |guard=Low |cancelable=Yes |chprop=- | |||
|startup= |active=- |recovery=- |frameadv=- | |||
|description = Shin kick that hits low. It's faster than it looks and will link from 2B, but you'll only want to use it in the middle of combos and not as a poke. | |||
}} }} | |||
====== <font style="visibility:hidden" size="0">5B</font> ====== | |||
{{MoveData |image=CC_HE_5B.png |name=5B |data= {{AttackData-CC | |||
|damage= |guard=High/Low |cancelable=Yes |chprop=- | |||
|startup= |active=- |recovery=- |frameadv=- | |||
|description = Flapping heel kick that moves slightly forward and has the longest range of all Hermes's normals. A very respectable poke. Just beware of its mostly horizontal hitbox and try not to eat an IAD combo because of it. | |||
}} }} | |||
====== <font style="visibility:hidden" size="0">2B</font> ====== | |||
{{MoveData |image=CC_HE_2B.png |name=2B |data= {{AttackData-CC | |||
|damage= |guard=Low |cancelable=Yes |chprop=- | |||
|startup= |active=- |recovery=- |frameadv=- | |||
|description = A decent low poke that links into itself and can easily be converted into damage. | |||
}} }} | |||
====== <font style="visibility:hidden" size="0">5C</font> ====== | |||
{{MoveData |image=CC_HE_5C.png |name=5C |data= {{AttackData-CC | |||
|damage= |guard=High/Low |cancelable=Yes |chprop=- | |||
|startup= |active=- |recovery=- |frameadv=- | |||
|description = Hermes swings her arm up in the air as if she's dancing or something. While it looks goofy as hell, this move has pretty solid range for a cancellable C normal and has a pretty good vertical hitbox as well. This is mostly used in combos when you're out of range for cl.D and still want some decent damage. | |||
}} }} | |||
====== <font style="visibility:hidden" size="0">2C</font> ====== | |||
{{MoveData |image=CC_HE_2C.png |name=2C |data= {{AttackData-CC | |||
|damage= |guard=High/Low |cancelable=Yes |chprop=- | |||
|startup= |active=- |recovery=- |frameadv=- | |||
|description = Hermes stands and swats upwards leaving a trail of yellow behind. Her best anti-air and an okay poke if you're trying to keep the opponent from jumping. This move is often used with cl.D to pick up the opponent to start air combos as it pushes them up, rather than forward. | |||
}} }} | |||
====== <font style="visibility:hidden" size="0">cl.D</font> ====== | |||
{{MoveData |image=CC_HE_clD.png |name=cl.D |data= {{AttackData-CC | |||
|damage= |guard=High/Low |cancelable=Yes |chprop=- | |||
|startup= |active=- |recovery=- |frameadv=- | |||
|description = Hermes bends over and throws a high kick behind her. This move can be used as an anti-air but 2C is more effective as you won't have to worry about how close your opponent is. This is Hermes's main combo tool as the second hit launches. | |||
}} }} | |||
====== <font style="visibility:hidden" size="0">5D</font> ====== | |||
{{MoveData |image=CC_HE_5D.png |name=5D |data= {{AttackData-CC | |||
|damage= |guard=High/Low |cancelable=No |chprop=- | |||
|startup= |active=- |recovery=- |frameadv=- | |||
|description = Spinning forward kick that has more range than 5C, but less than 5B. It can be used as a poke occasionally but you'll probably see this more often if you misjudge the distance required for cl.D. While it's not exactly a terrible move, but it's not cancelable, so it's usefulness is quite limited. | |||
}} }} | |||
====== <font style="visibility:hidden" size="0">2D</font> ====== | |||
{{MoveData |image=CC_HE_2D.png |name=2D |data= {{AttackData-CC | |||
|damage= |guard=Low |cancelable=No |chprop=- | |||
|startup= |active=- |recovery=- |frameadv=- | |||
|description = Basic hard knockdown sweep with slightly more range than 2B. This is mostly used for ice trap setups on oki. | |||
}} }} | |||
====== <font style="visibility:hidden" size="0">j.A</font> ====== | |||
{{MoveData |image=CC_HE_jA.png |name=j.A |data= {{AttackData-CC | |||
|damage= |guard=High |cancelable=Yes |chprop=- | |||
|startup= |active=- |recovery=- |frameadv=- | |||
|description = Circular sleeve swat that you'll rarely ever use. It has SLIGHTLY more horizontal range than j.C and probably something you could use in a pinch, but it won't be often. | |||
}} }} | |||
====== <font style="visibility:hidden" size="0">j.B</font> ====== | |||
{{MoveData |image=CC_HE_jB.png |name=j.B |data= {{AttackData-CC | |||
|damage= |guard=High |cancelable=Yes |chprop=- | |||
|startup= |active=- |recovery=- |frameadv=- | |||
|description = A downward kick that comes out pretty fast and is your go-to air combo starter. It makes an alright jump-in and an okay air-to-air, but you'll probably use j.C more often due to its high number of active frames. | |||
}} }} | |||
====== <font style="visibility:hidden" size="0">j.C</font> ====== | |||
{{MoveData |image=CC_HE_jC.png |name=j.C |data= {{AttackData-CC | |||
|damage= |guard=High |cancelable=Yes |chprop=- | |||
|startup= |active=- |recovery=- |frameadv=- | |||
|description = Triangular sleeve slash that hits twice. This move is typically used for jump-ins and as an air-to-air because of how long it stays active and has pretty decent range to boot. It can be cancelled on the first hit into specials or j.D which is something you'll typically do in air combos. | |||
}} }} | |||
====== <font style="visibility:hidden" size="0">j.D</font> ====== | |||
{{MoveData |image=CC_HE_jD.png |name=j.D |data= {{AttackData-CC | |||
|damage= |guard=High |cancelable=- |chprop=- | |||
|startup= |active=- |recovery=- |frameadv=- | |||
|description = A downward heel stomp that looks awfully familiar. Hits more below Hermes than j.B and comes out fast enough to hit a standing opponent on neutral jump. This move is typically used in the middle of air combos to add damage and not very often on its own. | |||
}} }} | |||
</div> | |||
</div> | |||
|- | <div class="mw-collapsible mw-collapsed"> | ||
|} | <div class="mw-collapsible-toggle" style="float: none;"><center><font size="4"><b>Command Moves</b></font></center></div> | ||
<div class="mw-collapsible-content"> | |||
=== <font style="visibility:hidden" size="0">Command Moves</font> === | |||
====== <font style="visibility:hidden" size="0">6B</font> ====== | |||
{{MoveData |image=CC_HE_6B.png |name=Charming Step |data= {{AttackData-CC | |||
|damage= |guard=High |cancelable=Yes |chprop=- | |||
|startup= |active=- |recovery=- |frameadv=- | |||
|description = Short hopping kick with upper body invincibility. Hits overhead when done raw, mid when chained into. While Hermes is off the ground, she is considered airborne and can cancel into aerial specials. After she lands, she can cancel the recovery frames into ground specials. | |||
}} }} | |||
</div> </div> | |||
= | <div class="mw-collapsible mw-collapsed"> | ||
<div class="mw-collapsible-toggle" style="float: none;"><center><font size="4"><b>Universal Mechanics</b></font></center></div> | |||
<div class="mw-collapsible-content"> | |||
=== <font style="visibility:hidden" size="0">Universal Mechanics</font> === | |||
====== <font style="visibility:hidden" size="0">Throw</font> ====== | |||
{{MoveData|image=CC_HE_Throw.png|name=Throw|input= 5/6AC|data= {{AttackData-CC | |||
|damage= |guard=Throw |cancelable=No |chprop= | |||
|startup=5f |active=- |recovery=- |frameadv=- | |||
|description= Ground throw | |||
}} }} | |||
====== <font style="visibility:hidden" size="0">Guard Break</font> ====== | |||
|- | {{MoveData|image=CC_HE_6CD.png|name=Guard Break|input= 6CD|data= {{AttackData-CC | ||
|damage= |guard=Guard Break |cancelable=No |chprop= | |||
|startup=- |active=- |recovery=- |frameadv=- | |||
|description= Guard Break | |||
}} }} | |||
====== <font style="visibility:hidden" size="0">C+D</font> ====== | |||
{{MoveData|image=CC_HE_CD.png|name=Tactical Guard|input= CD|data= {{AttackData-CC | |||
|damage= |guard=High/Low |cancelable=No |chprop= | |||
|startup=- |active=- |recovery=- |frameadv=- | |||
|description= Parry | |||
}} }} | |||
====== <font style="visibility:hidden" size="0">A+B</font> ====== | |||
|- | {{MoveData|image=CC_HE_AB.png|name=Roll|input= CD|data= {{AttackData-CC | ||
|} | |damage= |guard=High/Low |cancelable=No |chprop= | ||
|startup=- |active=- |recovery=- |frameadv=- | |||
|description= Roll | |||
}} }} | |||
</div> | |||
</div> | |||
== | <div class="mw-collapsible mw-collapsed"> | ||
<div class="mw-collapsible-toggle" style="float: none;"><center><font size="4"><b>Special Moves</b></font></center></div> | |||
<div class="mw-collapsible-content"> | |||
=== <font style="visibility:hidden" size="0">Special Moves</font> === | |||
| | ====== <font style="visibility:hidden" size="0">632146P</font> ====== | ||
{{MoveData|image=CC_HE_632146P.png|name=Humiliating Bind|input= 632146P|data= {{AttackData-CC | |||
|damage= |guard=Throw |cancelable=No |chprop= | |||
|startup=- |active=- |recovery=- |frameadv=- | |||
|description= A command grab that disables the opponent from using special and super moves, air dashes, and Exceed. Cannot be cancelled into, but has a slight amount of invincibility. Curse effect lasts for about 7 seconds. It can be super cancelled but is generally not worth it. | |||
}} }} | |||
====== <font style="visibility:hidden" size="0">214K</font> ====== | |||
{{MoveData|image=CC_HE_214K.png|name=Flaming Desire|input= 214K|data= {{AttackData-CC | |||
|version=B |damage= |guard=High/Low |cancelable=No |chprop= | |||
|startup=- |active=- |recovery=- |frameadv=- | |||
|description= Hermes places a sphere of electricity in front of her. This sphere will be used for the D version of this move as well as for a few other specials. You can have a maximum of three spheres onscreen at any given moment. Can cancel in midair from 6B. Stays on-screen for about 10 seconds before exploding on its own for small damage. It'll stick around even if Hermes gets hit, making it a potential combo breaker. | |||
}}{{AttackData-CC | |||
|version=D |damage= |guard=High/Low |cancelable=- |chprop=- | |||
|startup= |active=- |recovery=- |frameadv=- | |||
|description = Hermes summons a ball of electricity in front of her. If you have any spheres placed from 214B, the ball will travel to each sphere in the order you placed them, like a projectile. Otherwise, it just explodes immediately. Can cancel in midair from 6B. Main air combo ender. | |||
}}{{AttackData-CC | |||
|version=EX |damage= |guard=High/Low |cancelable=- |chprop=- | |||
|startup= |active=- |recovery=- |frameadv=- | |||
|description = Lighting spirit summons a ball of electricity encased in a larger ball of electricity. It's basically both strengths at the same time but also faster. This move is amazing. It has a ton of active frames, is usable midair, and has a deceptively wide and tall hitbox. You'll get a wallbounce on counterhit for a big combo, otherwise you'll get a hard knockdown to set up your oki. Can cancel in midair from 6B. Overall a good use of meter and rather effective anti-air. | |||
}} }} | |||
Hermes and the fire spirit | ====== <font style="visibility:hidden" size="0">236P</font> ====== | ||
{{MoveData|image=CC_HE_236P.png|name=Singeing Sensation|input= 236P|data= {{AttackData-CC | |||
|version=A |damage= |guard=High/Low |cancelable=No |chprop= | |||
|startup=- |active=- |recovery=- |frameadv=- | |||
|description= Hermes lashes out directly in front of her with the fire spirit's whip. Solid range, unfortunately only has one super cancel that doesn't work except at close range anyway. | |||
}}{{AttackData-CC | |||
|version=C |damage= |guard=High/Low |cancelable=- |chprop=- | |||
|startup= |active=- |recovery=- |frameadv=- | |||
|description = Hermes lashes out diagonally above her to hit airborne opponents. There are two hits, the flame and the whip, of which only the whip is untechable. | |||
}}{{AttackData-CC | |||
|version=EX |damage= |guard=High/Low |cancelable=- |chprop=- | |||
|startup= |active=- |recovery=- |frameadv=- | |||
|description = Similar to the A version, except with a large ring of fire surrounding the whip. Hits 3 times and brings the opponent closer to Hermes. This can only be comboed into with a counterhit. Vacuum effect does not work on block. | |||
}} }} | |||
====== <font style="visibility:hidden" size="0">623K</font> ====== | |||
{{MoveData|image=CC_HE_623K.png|name=Piercing Thunder|input= 623K|data= {{AttackData-CC | |||
|version=B |damage= |guard=High/Low |cancelable=No |chprop= | |||
|startup=- |active=- |recovery=- |frameadv=- | |||
|description= Hermes calls the lightning spirit to summon a lightning bolt. Simultaneously, all spheres on screen will be detonated, creating additional lightning bolts at their location. The button used will determine the location of the initial bolt. It's not invincible but it's fast and since it'll only get stuffed if the lightning spirit gets hit you can use it as a reversal and bank on a trade giving you a counterhit. B version appears directly in front of Hermes. Not particularly useful unless you have spheres out. | |||
}}{{AttackData-CC | |||
|version=D |damage= |guard=High/Low |cancelable=- |chprop=- | |||
|startup= |active=- |recovery=- |frameadv=- | |||
|description = The lightning bolt appears about a half screen distance away. This version IS quite useful for controlling space, even without spheres on the screen, but take care because it is easy to punish. | |||
}}{{AttackData-CC | |||
|version=EX |damage= |guard=High/Low |cancelable=- |chprop=- | |||
|startup= |active=- |recovery=- |frameadv=- | |||
|description = Hermes calls a wave of lightning down in front of her, which hits 5 times. Inflicts a massive amount of stun damage, especially when used along with 3 orbs, but otherwise has no noticeable advantages over the B version. | |||
}} }} | |||
</div> | |||
</div> | |||
<div class="mw-collapsible mw-collapsed"> | |||
<div class="mw-collapsible-toggle" style="float: none;"><center><font size="4"><b>Extra Special Moves</b></font></center></div> | |||
<div class="mw-collapsible-content"> | |||
=== <font style="visibility:hidden" size="0">Extra Special Moves</font> === | |||
====== <font style="visibility:hidden" size="0">214P</font> ====== | |||
{{MoveData|image=CC_HE_214P.png|name=Blazing Jealousy|input= 214P|data= {{AttackData-CC | |||
|version=A |damage= |guard=High/Low |cancelable=No |chprop= | |||
|startup=- |active=- |recovery=- |frameadv=- | |||
|description= The fire spirit flies out in front of Hermes for a bit, like a short ranged projectile. Relatively safe and easyto combo into from 6B. | |||
}}{{AttackData-CC | |||
|version=C |damage= |guard=High/Low |cancelable=No |chprop= | |||
|startup=- |active=- |recovery=- |frameadv=- | |||
|description= Hermes and the fire spirit charge toward the opponent together. harder to combo into from 6B unless you space it perfectly. Air unblockable. Floats high in the air on counter-hit for easy combos. | |||
}} }} | |||
The lightning spirit appears and | ====== <font style="visibility:hidden" size="0">236K</font> ====== | ||
{{MoveData|image=CC_HE_236K.png|name=Bursting Desire|input= 236K|data= {{AttackData-CC | |||
|damage= |guard=High/Low |cancelable=No |chprop= | |||
|startup=- |active=- |recovery=- |frameadv=- | |||
|description= The lightning spirit appears and summons a large burst of electricity in front of Hermes, hitting 5 times. Visually similar to 214+D, but functionally quite different. If done too close to the opponent only one hit will connect. If you have sphere traps set, they will grow to be the same size as the lightning ball. This move inflicts the most stun damage out of all of Hermes' specials, especially with 3 orbs set, but it's very unlikely you'll ever be able to utilize such a situation. On grounded hit you're plus enough to link into fast normals like 2A in the corner. | |||
}} }} | |||
</div> | |||
</div> | |||
== | <div class="mw-collapsible mw-collapsed"> | ||
<div class="mw-collapsible-toggle" style="float: none;"><center><font size="4"><b>Ultimate Chaos Moves</b></font></center></div> | |||
<div class="mw-collapsible-content"> | |||
=== <font style="visibility:hidden" size="0">Ultimate Chaos Moves</font> === | |||
====== <font style="visibility:hidden" size="0">236236P</font> ====== | |||
{{MoveData|image=CC_HE_236236P.png|name=Infernal Conflagration|input= 236236P|data= {{AttackData-CC | |||
|damage= |guard=High/Low |cancelable=No |chprop= | |||
|startup=- |active=- |recovery=- |frameadv=- | |||
|description= Hermes and the fire spirit fire a massive beam of flame that hits three times. | |||
}} }} | |||
====== <font style="visibility:hidden" size="0">236236K</font> ====== | |||
{{MoveData|image=CC_HE_236236K.png|name=Shaking Lightning Storm|input= 236236K|data= {{AttackData-CC | |||
|damage= |guard=High/Low |cancelable=No |chprop= | |||
|startup=- |active=- |recovery=- |frameadv=- | |||
|description= The lightning spirit appears and surrounds Hermes with a giant barrier of electricity. Invincible on startup and Chaos Shiftable even on block or whiff. It's a little slow but it's still a good reversal. | |||
}} }} | |||
</div> | |||
</div> | |||
Hermes kicks directly in front of her. If the move connects, she will stomp the opponent to the floor as the fire spirit punishes them with a vicious whipping. The move has slight invulnerability on startup, but don't rely on it too much as a reversal. | <div class="mw-collapsible mw-collapsed"> | ||
<div class="mw-collapsible-toggle" style="float: none;"><center><font size="4"><b>Extra Ultimate Chaos Moves</b></font></center></div> | |||
<div class="mw-collapsible-content"> | |||
=== <font style="visibility:hidden" size="0">Extra Ultimate Chaos Moves</font> === | |||
====== <font style="visibility:hidden" size="0">632146K</font> ====== | |||
{{MoveData|image=CC_HE_632146K.png|name=Scorching Pleasure|input= 632146K|data= {{AttackData-CC | |||
|damage= |guard=High/Low |cancelable=No |chprop= | |||
|startup=- |active=- |recovery=- |frameadv=- | |||
|description= Hermes kicks directly in front of her. If the move connects, she will stomp the opponent to the floor as the fire spirit punishes them with a vicious whipping. The move has slight invulnerability on startup, but don't rely on it too much as a reversal. | |||
}} }} | |||
====== <font style="visibility:hidden" size="0">214214K</font> ====== | |||
{{MoveData|image=CC_HE_214214K.png|name=Raging Blizzard|input= 214214K|data= {{AttackData-CC | |||
|damage= |guard=High/Low |cancelable=No |chprop= | |||
|startup=- |active=- |recovery=- |frameadv=- | |||
|description= The ice spirit lays a much larger trap shortly in front of Hermes. If the opponent does not step on it it eventually fades away. However, if the opponent is hit Hermes is still active, allowing you to choose whether to go for the mixup or to try and increase your damage. | |||
}} }} | |||
</div> | |||
</div> | |||
<div class="mw-collapsible mw-collapsed"> | |||
<div class="mw-collapsible-toggle" style="float: none;"><center><font size="4"><b>Destruction Chaos</b></font></center></div> | |||
<div class="mw-collapsible-content"> | |||
=== <font style="visibility:hidden" size="0">Destruction Chaos</font> === | |||
====== <font style="visibility:hidden" size="0">2363214PP</font> ====== | |||
{{MoveData|image=CC_HE_2363214PP.png|name=Purifying Brilliance|input= 2363214PP|data= {{AttackData-CC | |||
|damage= |guard=High/Low |cancelable=No |chprop= | |||
|startup=- |active=- |recovery=- |frameadv=- | |||
|description= Hermes summons an earth spirit that slams its hand down to create a highly damaging energy wave. In spite of its lengthy animation, it can be comboed into quite easily and can also be comboed out of before the opponent touches the ground. | |||
}} }} | |||
</div> | |||
</div> | |||
== | == Strategy == | ||
=== Neutral === | |||
= Combos = | == Combos == | ||
'''j.C > 2B > cl.D(1) > 22BD > microdash > 2C > cl.D > sjc > j.A > j.C > j.D > 214D''' | '''j.C > 2B > cl.D(1) > 22BD > microdash > 2C > cl.D > sjc > j.A > j.C > j.D > 214D''' | ||
| Line 196: | Line 329: | ||
[https://www.youtube.com/watch?v=IF8IiLAem3w&t=12m02s video example (12:02)] | [https://www.youtube.com/watch?v=IF8IiLAem3w&t=12m02s video example (12:02)] | ||
== | ===Old combos=== | ||
These combos were relevant in the pre-nsoc version of the game and may still be useful | |||
*2AB, 5CD, 214+C, 236236+B/D | *2AB, 5CD, 214+C, 236236+B/D | ||
Revision as of 16:48, 5 December 2020
Story
Hermes
『エルメス』
Hermes was once a mild mannered and prudish young girl before discovering a strange magical book which unlocked the power to control elemental spirits, at the cost of never being able to wear pants again. Now working for the anti-government ninja clan "kuranai" hermes seeks the Chaos Code, planning to use it's unlimited power to betray Kuranai cause they're boring.
Playstyle
Health: 28000
Stun: 90
It's important to note that you have to wait until a spirit disappears until you can use it again. This means you can't super cancel out of a lightning spirit special move into a lightning spirit super move. This limits her combo potential somewhat, but her zoning tools are strong enough to make up for that in match.
Mobility (Run vs. Step)
Run: Hermes needs to be able to run to do her corner loop which is a source of considerable damage if you manage to start it and keep it going. Being able to Run is also important to be able to capitalize on situations like ice trap knockdown or comboing off of ice trap super. You're going to need all the damage you can get, so you're probably better off sticking with Run.
Step:
Extra Move Selection
Blazing Jealousy gives better combo routes, Bursting desire gives more utility to lighting orbs, Scorching Pleasure provides high damage metered combos, and Raging Blizzard can provide more setplay opportunities.
Recommended Sets
Describe specific combinations of extra moves here
Move List
Click on a header to expand that section of the movelist
Normal Moves
5A
5A
|
|---|
2A
2A
|
|---|
cl.B
cl.B
|
|---|
5B
5B
|
|---|
2B
2B
|
|---|
5C
5C
|
|---|
2C
2C
|
|---|
cl.D
cl.D
|
|---|
5D
5D
|
|---|
2D
2D
|
|---|
j.A
j.A
|
|---|
j.B
j.B
|
|---|
j.C
j.C
|
|---|
j.D
j.D
|
|---|
Universal Mechanics
Throw
Throw
5/6AC |
|---|
Guard Break
Guard Break
6CD |
|---|
C+D
Tactical Guard
CD |
|---|
A+B
Roll
CD |
|---|
Special Moves
632146P
Humiliating Bind
632146P |
|---|
====== 214K ======
Flaming Desire
214K |
|---|
====== 236P ======
Singeing Sensation
236P |
|---|
====== 623K ======
Piercing Thunder
623K |
|---|
Extra Special Moves
214P
Blazing Jealousy
214P |
|---|
236K
Bursting Desire
236K |
|---|
Ultimate Chaos Moves
236236P
Infernal Conflagration
236236P |
|---|
236236K
Shaking Lightning Storm
236236K |
|---|
Extra Ultimate Chaos Moves
632146K
Scorching Pleasure
632146K |
|---|
214214K
Raging Blizzard
214214K |
|---|
Strategy
Neutral
Combos
j.C > 2B > cl.D(1) > 22BD > microdash > 2C > cl.D > sjc > j.A > j.C > j.D > 214D
j.C > 2B > cl.D(1) > 22BD > 5B > 5C > 214C > 236A > cl.D(2) > 236C > 2B > 2A > 2A > 5B > 5C > 214C
Old combos
These combos were relevant in the pre-nsoc version of the game and may still be useful
- 2AB, 5CD, 214+C, 236236+B/D
- 2AB, 5CD 6+B, 214+A
- 2AB, 5CD 6+B, 2141236+B/D
- 22+B, 623+B
- 22+B, 214+C
- 22+B, 2C, cl.D, hj.BCD, 214+D or BD
- 5ABC, 623+BD, 236236+A/C
- 5ABC, 214+BD, 236236+A/C
- 2AB, 5BC, 236+B/D, 236236+A/C
- 5ABC, 236+B/D, 2141236+B/D
- 5ABC, 214+C, 214214+B/D
- 5ABC, 6+B, 2363214+AC
- 2B, 5C, B+C, 236236+A/C, A+B, 2C, 214+BD, 214214+B/D, 236236+A/C, A+B, 2C, j.BCD, j.214D
- Throw, 236+C
- Throw, 236+B/D, 236236+A/C
- Throw, dash up, 2C, cl.D, hj.BCD, j.214+D or BD
- Throw, IAD j.BD, cl.D, hj.BCD, j.214+D or BD
- Throw, IAD j.BD, 5C, 214+BD (wallslam), 236236+A/C
- Throw, IAD j.BD, 2C, cl.D, 236+C(one hit), 2A, 5BC, 214+BD (Corner only)
- 2B, 5CD, 2BB, 5C, delay 6+B, 214+C (Corner only)
- 2AB, 5CD, 6+B, 214+A, 214214+B/D (Corner only)
- 5ABC, 236+B/D, 214214+B/D (Corner only)
- 2B, 5CD, 2B, 5C, 214+C, B+C, cl.D, 214+BD, 214214+B/D, 236236+A/C, A+B, 5CD, 214+BD, 214214+B/D, 2C, hj.BCD, j.214+D (Corner only)
Colors
- Console Versions: You can hold R1 button while selecting a character to get an alternative color.
- Arcade Version: You can hold START button while selecting a character to get an alternative color.
I-no
(Guilty Gear)
Sarah Bryant
(Virtua Fighter)

