Spectral vs Generation/Roze: Difference between revisions
| Line 606: | Line 606: | ||
==Strategy== | ==Strategy== | ||
=Neutral= | ===Neutral=== | ||
In neutral, Roze a lot of value out of controlling ground space with f.5A which is unique in its large range, fast startup and low recovery; this button can and should be buffered into 2B/f.5C since on hit it will lead to a combo and on block a fireball can be tossed out to begin her pressure. Alternatively, f.5A can be buffered into chain 2D to close the gap between Roze and her opponent; however, she will receive much less reward on hit than buffering f.5C. Roze benefits greatly from her fast walking speed allowing her to push her opponents into the corner if they play her in a battle of grounded pokes for too long. As a result, you should always be on the ready for your opponent to approach you through one of 3 alternative means: jump-ins/airdashes, low profiling pokes and unreactable burst movement. | In neutral, Roze a lot of value out of controlling ground space with f.5A which is unique in its large range, fast startup and low recovery; this button can and should be buffered into 2B/f.5C since on hit it will lead to a combo and on block a fireball can be tossed out to begin her pressure. Alternatively, f.5A can be buffered into chain 2D to close the gap between Roze and her opponent; however, she will receive much less reward on hit than buffering f.5C. Roze benefits greatly from her fast walking speed allowing her to push her opponents into the corner if they play her in a battle of grounded pokes for too long. As a result, you should always be on the ready for your opponent to approach you through one of 3 alternative means: jump-ins/airdashes, low profiling pokes and unreactable burst movement. | ||
| Line 614: | Line 614: | ||
Unreactable burst movement defines many characters in this game which can be difficult to deal with given Roze's gameplan. A pre-emptive button will catch burst movement; however, it is not reasonable to time a f.5A perfectly every time as it will quickly become predictable and be punished, despite the low recovery. Instead, periodic use of 236X should be used to control ground space. Fireballs will lose to jump-ins, but they are Roze's best way of getting access to a long active advantaged hitbox. Fireballs can begin combos on grounded opponents and if your opponent chooses to block a fireball, that is the perfect opportunity to approach and begin your pressure. | Unreactable burst movement defines many characters in this game which can be difficult to deal with given Roze's gameplan. A pre-emptive button will catch burst movement; however, it is not reasonable to time a f.5A perfectly every time as it will quickly become predictable and be punished, despite the low recovery. Instead, periodic use of 236X should be used to control ground space. Fireballs will lose to jump-ins, but they are Roze's best way of getting access to a long active advantaged hitbox. Fireballs can begin combos on grounded opponents and if your opponent chooses to block a fireball, that is the perfect opportunity to approach and begin your pressure. | ||
=On Hit= | =On Hit= | ||
Revision as of 21:41, 28 February 2021
| Roze | |
|---|---|
| Health | 450 |
| Pre-Jump Frames | 3 |
| Play Style | All-Around, Mixup |
| Dash Type | Run |
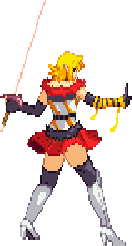
Character Background
Race: Demon
Motivation: Revenge upon the world
Weapon: Saqrif Velrouge
Likes: Sister, Quite life
Dislikes: Human's ugly hearts
Character Info
Roze is a strong character with a balanced toolkit. She possesses a great fireball, excellent mobility, and potent pressure that
can either be used to mix-ups or guard breaks. Roze's combos deal significant damage, often allowing her to two-touch opponents
and the majority of her tools work midscreen as well as in the corner. Roze's strengths and weakness come from the same source:
her install, which grants her access to EX specials. Finding a safe way to install mid-match will determine if you have access
to Roze's diverse toolkit and thus it is a priority in every match-up.
| Strengths | Weaknesses |
|---|---|
|
|
Normals
Close Standing Normals
c.5A
|
|---|
c.5B
|
|---|
c.5C
|
|---|
c.5D
|
|---|
Far Standing Normals
f.5A
|
|---|
f.5B
|
|---|
f.5C
|
|---|
f.5D
|
|---|
Crouching Normals
2A
|
|---|
2B
|
|---|
2C
|
|---|
2D
|
|---|
Air Normals
j.A
|
|---|
j.B
|
|---|
j.C
|
|---|
j.D
|
|---|
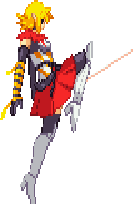
Command Normals
3D
|
|---|
Chain Specific Normals
Chain AAA
|
|---|
Chain c.5C
|
|---|
Chain 2D
|
|---|
Throws
A/B+D
|
|---|
Sword Series Slash (Dust)
5/2B+C
|
|---|
Taunt
C+D
|
|---|
Specials
236A/B/C (EX)
|
|---|
46A/B/C (EX)
|
|---|
623A/B/C (EX)
|
|---|
214A/B/C/D
|
|---|
22A/B/C
|
|---|
j.236D
|
|---|
Supers
236236A/B/C
|
|---|
214214A/B/C
|
|---|
236236D
|
|---|
4641236A/B/C
|
|---|
Strategy
Neutral
In neutral, Roze a lot of value out of controlling ground space with f.5A which is unique in its large range, fast startup and low recovery; this button can and should be buffered into 2B/f.5C since on hit it will lead to a combo and on block a fireball can be tossed out to begin her pressure. Alternatively, f.5A can be buffered into chain 2D to close the gap between Roze and her opponent; however, she will receive much less reward on hit than buffering f.5C. Roze benefits greatly from her fast walking speed allowing her to push her opponents into the corner if they play her in a battle of grounded pokes for too long. As a result, you should always be on the ready for your opponent to approach you through one of 3 alternative means: jump-ins/airdashes, low profiling pokes and unreactable burst movement.
To deal with jump-ins, you will want to rely on your DPs; however, these moves are extremely baitable with a backwards airdash and can be punished on whiff, even from a far distance, so you should use it sparingly. Instead, you should make use of 3 tools to avoid your airborne opponent. 3D may be used to side-swap an airborne opponent so you can begin pressure once they land. Backdash may be used to gain large amounts of invincibility at the cost of losing stage control. j.C may be used as an effective anti-air thanks to its long active frames. If you are feeling overwhelmed, 236236D functions as your 4th DP with the most damaging immediate reward and largest hitbox while still remaining extremely punishable on whiff or block.
Low profiling pokes will be used by characters who possess them to get under your standing pokes. You can cover low profiling moves with 2B, but you should be wary of using it all the time as a poke as the recovery far exceeds f.5A. You can low profile almost every poke in the game yourself by using 3D; however, if it is blocked you will almost certainly be punishable. Finally low pokes can be beaten by periodically taking to the air yourself with an instant airdash (IAD). j.D is your best IAD aerial as it can be cancelled into j.B to start a combo or to create safe pressure. The moment you connect with j.D on hit or on block, Roze is at massive advantage. This is not recommended as a frequent tool as there is no airblock in this game and many standing pokes will hit Roze out of her instant airdash.
Unreactable burst movement defines many characters in this game which can be difficult to deal with given Roze's gameplan. A pre-emptive button will catch burst movement; however, it is not reasonable to time a f.5A perfectly every time as it will quickly become predictable and be punished, despite the low recovery. Instead, periodic use of 236X should be used to control ground space. Fireballs will lose to jump-ins, but they are Roze's best way of getting access to a long active advantaged hitbox. Fireballs can begin combos on grounded opponents and if your opponent chooses to block a fireball, that is the perfect opportunity to approach and begin your pressure.
On Hit
Roze's offense is built around balancing 3 factors: her meter, her installs and her oki, with consideration given to damage.
Regarding meter, Roze's EX specials cost meter to install and gain no meter on hit or on block, so she frequently will struggle with meter gain compared to the rest of the cast. This, combined with her reliance on supers for significant damage means that finding opportunities to gain meter is frequently a priority and she cannot afford to spend meter mindlessly during pressure. This is why it is not recommended to work towards Roze's guard breaks frequently through the use of 46EX and 214214A. The cost is considered too high if a guard break isn't assured to win you the round. Oki and/or install opportunities may have to be be sacrificed periodically. to safely taunt to regain meter.
Roze's install is something she very much wants to obtain prior to hitting her opponent as her combos benefit greatly by using 46EX after the initial hit confirm. While Roze's combos do not functionally change without the install, she must win neutral several more times to take a set if she doesn't enter each combo with 1 install. Every install has a cost. An install in neutral requires a large time commitment and thus can only be performed in situations where your opponent is locked down (ie. blocking a fireball) or has already committed to their own action (ie. airdashing backwards). Installing mid-combo is performable; however, in order to perform it mid-combo, it must be preceded by 623X > SoT. As a result, installing mid-combo has a large associated meter cost, requiring 2 bars of meter before a combo begins at midrange to reasonably achieve. Finally, an install performed at the end of a combo is a valid choice; however, you sacrifice your oki by doing so. After a j.236D hard knockdown, you are barely positive when you install and after a grounded 236236D hard knockdown, you are positive, but unable to setup your full oki.
Roze's oki has strong potential assuming her other 2 factors listed above are managed properly. Like the other factors, Roze has to decide during her combos whether it is worth setting up strong oki from a hard knockdown or if she would rather install/taunt for meter. The primary oki tool you will use is 236A. Thanks to Roze's incredible walk speed, you can 236A and begin walking towards your downed opponent and will force them into a very unfavourable situation on wake-up. This is because their primary options on wake-up include backdash, block, DP, and parry. A backdash will be hit by a slow fireball removing it as the ideal option. Blocking a slow fireball on wake-up will leave Roze at a huge advantage (the further away you are from your opponent when you throw the fireball, the greater the advantage on wake-up). DP'ing Roze's fireball can be threatening; however, Roze can option select by blocking in front her opponent until the fireball hit-confirms. Finally, while parry dodges Roze's fireball, she will be in a position to react 5A and punish the parry during its recovery. Given all of these factors, Roze is able to successfully lockdown the entire cast after a hard knockdown which then allows her to safely transition into her pressure game. While the above oki is described under the pretense that you perform a hard knockdown, Roze's pressure out of 236A can also be achieved by performing a restand reset > 236A at any point of a combo versus an airborne opponent. Roze's advantage from her fireball is reduced this way; however, it should be utilized if finishing a combo will cost too much meter, will provide your opponent with too much meter or if the completed combo will put your opponent into burst range.
On Block
Roze's options on block are limited based upon range. When Roze is far from her opponent, she primarily relies on frame traps through the use of 236X and 46A. 236X will provide greater advantage on block, but both options will function as combo starters on hit. Alternatively, if Roze is focused primarily on closing the distance between herself and her opponent, she may utilize 5A > 2D to perform a special-cancellable slide-kick. This is useful primarily in match-ups where your opponent is doing their best to keep you out and it can still be cancelled into a fireball for leave her advantaged on block. Finally, Roze can, albeit rarely, make use of her 214X specials to surprise her opponent with overheads. This option is quite slow; however, it benefits by being able to be performed as a cross-up, limiting her opponents ability to 623X her out of the air. 214X should only be performed if Roze is aware of her opponents anti-air options and knows that they are lacking. Granted, 214D will close the distance between her and her opponent if they respect her.
Roze's options on block improve significantly at close range as she gains access to chain c.5C as an option. Chain c.5C is jump cancellable as explained above. This is most frequently used to cancel into an instant airdash (IAD) which opens up the majority of Roze's mixups. During an instant airdash Roze has the ability to land a gapless overhead with j.D > j.B, land into an unreactable grab with A+B > B+D (parrying during airdash begins your descent immediately), land into an unreactable low with A+B > c.5A or cross up her opponent by varying the height of the initial airdash. The versatility of Roze's pressure options in addition to j.D > j.B threatening a cross-up AND allowing Roze to extend her pressure without gaps, means that her pressure increases drastically if she can work her way safely just in front of her opponent. After landing a j.B on block, Roze can burst (B+C+D) to perform an unblockable and begin her OTG Loop. If she possesses the meter to burst this is almost always the best option.
Combos
Gatling Chart
| A | B | C | D | Cancel | |
|---|---|---|---|---|---|
| c.5A | Chain AAA | 5B, 2B | c.5C, f.5C, 2C | 5D, Chain 2D | Sp, Su, B |
| f.5A | Chain AAA | 5B, 2B | c.5C, f.5C, 2C | 5D, Chain 2D | Sp, Su, B |
| c.5B | f.5C, 2C | Sp, Su, B | |||
| f.5B | f.5C, 2C | Sp, Su, B | |||
| c.5C | Sp, Su, B | ||||
| f.5C | Sp, Su, B | ||||
| c.5D | |||||
| f.5D | 5A, 2A | 5B, 2B | 5C, 2C | Sp, Su, B | |
| 2A | Chain AAA | 5B, 2B | 5C, 2C | 5D, Chain 2D | Sp, Su, B |
| 2B | 5C, 2C | 5D, Chain 2D | Sp, Su, B | ||
| 2C | - | - | - | - | |
| 2D | 5A, 2A | 5B, 2B | 5C, 2C | Sp, Su, B | |
| 3D | - | - | - | - | |
| Chain AAA | - | - | - | - | |
| Chain 5C | - | - | - | - | Jump, Sp, Su, B |
| Chain 2D | - | - | - | - | Sp, Su, B |
Chain c.5C can be only canceled into Jump on hit
X = X is available on hit or block
Sp = Special Attacks and Overdrives (aka: Specials and Supers)
Su = Supers
