|
|
| Line 1,012: |
Line 1,012: |
|
| |
|
|
| |
|
|
| |
| <!-----------------------------------------------------------------------------Section Divider----------------------------------------------------------------------------->
| |
|
| |
| ==<big>'''Combos and Resets'''</big>==
| |
|
| |
| {{Combo-JCFoF/Infobox}}
| |
|
| |
| ===<big>'''Hitconfirm Combos'''</big>===
| |
|
| |
| {{ComboHeader-JCFoF}}
| |
| {{Combo-JCFoF
| |
| | notation=
| |
| :2LK x3 > 2LP xx 236K
| |
| | damage=23-34%
| |
| | location=Anywhere
| |
| | charspecific=Universal
| |
| | description=
| |
| * Basic hitconfirm; combo into 236K will hit twice vs. crouching Yeung (usually 1 hit vs. crouching)
| |
| * 236K ender is mostly for safety if you're unsure that Tiger Fist or Super will connect at range
| |
| * 236LK gives slight frame advantage, but usually whiffs 1 hit vs. standing opponents
| |
| * 236HK gives more damage but is slightly negative on hit (but never punishable)
| |
| | video=[https://www.youtube.com/watch?v=7G5X5TR737A video]<br>(0:00)
| |
| |}}
| |
|
| |
| {{Combo-JCFoF
| |
| | notation=
| |
| :2LK x3 > 2LP xx 41236HP, [2HK > 2HP > 236HK]
| |
| | damage=38%<br>[55%]
| |
| | location=Anywhere<br>[+Corner]
| |
| | charspecific=Universal
| |
| | description=
| |
| * Meterless BnB into knockdown; best route to use near the corner
| |
| * vs. '''M. Lion''', 2HK juggle is a little harder (4f); can use 2LK for consistency
| |
| | video=[https://youtu.be/7G5X5TR737A?t=19 video]<br>(0:19)
| |
| |}}
| |
|
| |
| {{Combo-JCFoF
| |
| | notation=
| |
| :2LK x3 > 2LP xx Super
| |
| | damage=46%
| |
| | location=Anywhere
| |
| | charspecific=Universal
| |
| | description=
| |
| * BnB into Super, slight damage boost to the above combo if outside the corner
| |
| * Super switches sides, so juggle is only possible if starting from close range with your back to the corner
| |
| | video=[https://youtu.be/7G5X5TR737A?t=34 video]<br>(0:34)
| |
| |}}
| |
|
| |
| {{Combo-JCFoF
| |
| | notation=
| |
| :2HK, 2LK xx 41236HP, [2HK > 2HP xx 236HK]<br>-or-
| |
| :2HK, 2LK xx (Super)
| |
| | damage=44%<br>[62%]<br>(53%)
| |
| | location=Anywhere<br>[+Corner]
| |
| | charspecific=Everyone but Drunk, Dragonball, Admiral Jackie
| |
| | description=
| |
| * Hitconfirm from point blank 2HK (+4 on block, so it's useful as a meaty)
| |
| * Much easier link than 2LP, but works on fewer characters
| |
| * vs. '''M. Lion''', can use 2LK > 2LP for more damage
| |
| * vs. '''Lau''', can use 2LK > 2LP only if comboing into '''Super''' afterward (57% dmg)
| |
| | video=[https://youtu.be/7G5X5TR737A?t=44 video]<br>(0:44)
| |
| |}}
| |
|
| |
| {{Combo-JCFoF
| |
| | notation=
| |
| :2HK, 2LP xx 41236HP, [2HK > 2HP > 236HK]<br>-or-
| |
| :2HK, 2LP xx (Super)
| |
| | damage=47%<br>[64%]<br>(55%)
| |
| | location=Anywhere<br>[+Corner]
| |
| | charspecific=Everyone but Drunk Jackie
| |
| | description=
| |
| * Hitconfirm from point blank 2HK (+4 on block, so it's useful as a meaty)
| |
| * Difficult 1f link timing, but this version works from farther range and against more characters
| |
| | video=[https://youtu.be/7G5X5TR737A?t=53 video]<br>(0:53)
| |
| |}}
| |
| |}
| |
|
| |
| <!-----------------------------------------------------------------------------Section Divider----------------------------------------------------------------------------->
| |
|
| |
| ===<big>'''Throw Combos'''</big>===
| |
|
| |
| {{ComboHeader-JCFoF}}
| |
| {{Combo-JCFoF
| |
| | notation=
| |
| :Throw, 2HK > 2HP xx 236HK
| |
| | damage=44%
| |
| | location=Corner
| |
| | charspecific=Yeung, Sam, Kim*, Dragonball Jackie
| |
| | description=
| |
| * Must be very close to corner for the 2HP to juggle properly
| |
| * vs. '''Sam, Yeung''': can easily dash before 2HK for spacing
| |
| * vs. '''Kim''': 1f juggle into 2HK (2LK much easier)
| |
| * This route can work vs. Lau, but requires ''very'' tight dash timing
| |
| | video=[https://youtu.be/7G5X5TR737A?t=61 video]<br>(1:01)
| |
| |}}
| |
|
| |
| {{Combo-JCFoF
| |
| | notation=
| |
| :Throw, 2LK > 2HP xx 236HK
| |
| | damage=38%
| |
| | location=Corner
| |
| | charspecific=Thorsten, Kim
| |
| | description=
| |
| * vs. '''Thorsten''': difficult 2f juggle timing, must be deep in the corner when starting
| |
| * vs. '''Kim''': this route is much more consistent than 2LK
| |
| | video=[https://youtu.be/7G5X5TR737A?t=68 video]<br>(1:08)
| |
| |}}
| |
|
| |
| {{Combo-JCFoF
| |
| | notation=
| |
| :Throw, 2HK > cl 5HP (1 hit) xx 236HK
| |
| | damage=43%
| |
| | location=Corner
| |
| | charspecific=Lau
| |
| | description=
| |
| * Most consistent route vs. Lau (works on others, but 2HP is better)
| |
| * Can microdash and start with 2LK if slightly out of the corner
| |
| | video=[https://youtu.be/7G5X5TR737A?t=74 video]<br>(1:14)
| |
| |}}
| |
|
| |
| {{Combo-JCFoF
| |
| | notation=
| |
| :Throw, 2LK > far 5HP > far 5HK
| |
| | damage=40%
| |
| | location=Corner
| |
| | charspecific=Drunk Jackie, Admiral Jackie
| |
| | description=
| |
| * Drunk and Admiral have awkward corner juggles, so this is the best route for getting damage and a mixup
| |
| * If not fully in the corner, may have to slightly walk before 2LK
| |
| | video=[https://youtu.be/7G5X5TR737A?t=81 video]<br>(1:21)
| |
| |}}
| |
|
| |
| {{Combo-JCFoF
| |
| | notation=
| |
| :63214K (Command Throw), 2HK > 2HP xx 236HK
| |
| | damage=43%
| |
| | location=Near Corner
| |
| | charspecific=Universal
| |
| | description=
| |
| * If not quite in the corner, dash before 2HK
| |
| * 2HP will drop if not close enough to the wall
| |
| | video=[https://youtu.be/7G5X5TR737A?t=87 video]<br>(1:27)
| |
| |}}
| |
| |}
| |
|
| |
| <!-----------------------------------------------------------------------------Section Divider----------------------------------------------------------------------------->
| |
|
| |
| ===<big>'''Overhead Combos'''</big>===
| |
|
| |
| {{ComboHeader-JCFoF}}
| |
| {{Combo-JCFoF
| |
| | notation=
| |
| :6HK (meaty), 2LK > 2LP xx 236HK
| |
| | damage=36%
| |
| | location=Anywhere
| |
| | charspecific=Universal
| |
| | description=
| |
| * Difficult combo from meaty 6HK; most practical after air reset
| |
| * Too much pushback for 41236HP to combo on some characters, so 236K is used for consistency
| |
| | video=[https://youtu.be/7G5X5TR737A?t=94 video]<br>(1:34)
| |
| |}}
| |
| |}
| |
|
| |
| <!-----------------------------------------------------------------------------Section Divider----------------------------------------------------------------------------->
| |
|
| |
| ===<big>'''OTG Options'''</big>===
| |
|
| |
| {{ComboHeader-JCFoF}}
| |
| {{Combo-JCFoF
| |
| | notation=
| |
| :2HK, dash 2LK, dash 2HK
| |
| | damage=~9%
| |
| | location=Midscreen
| |
| | charspecific=Universal
| |
| | description=
| |
| * Works consistently midscreen after most knockdowns
| |
| * After Super, 2LK > 2LK > 2HK is a safer option, since it takes longer to reach for the first OTG
| |
| | video=[https://youtu.be/7G5X5TR737A?t=101 video]<br>(1:41)
| |
| |}}
| |
|
| |
| {{Combo-JCFoF
| |
| | notation=
| |
| :2HK, 2HK, 2HK
| |
| | damage=~13%
| |
| | location=Corner
| |
| | charspecific=Universal
| |
| | description=
| |
| * Corner gives you more time to connect 3 sweeps
| |
| | video=[https://youtu.be/7G5X5TR737A?t=108 video]<br>(1:48)
| |
| |}}
| |
|
| |
| {{Combo-JCFoF
| |
| | notation=
| |
| :2HK, 2LK > 5LP xx 236HK
| |
| | damage=~15%
| |
| | location=Midscreen
| |
| | charspecific=Yeung
| |
| | description=
| |
| * Yeung OTG relaunch into air reset
| |
| * Using 2HP or cl 5HP midscreen usually causes 236K to whiff or knock down, preventing the mixup
| |
| * NOTE: you get more damage vs. Yeung by doing OTG 2HK, wait, OTG 2HK, 2LK relaunch
| |
| | video=[https://youtu.be/7G5X5TR737A?t=116 video]<br>(1:56)
| |
| |}}
| |
|
| |
| {{Combo-JCFoF
| |
| | notation=
| |
| :2HK, 2HK > 2HP xx 236HK
| |
| | damage=~24%
| |
| | location=Corner
| |
| | charspecific=Yeung
| |
| | description=
| |
| * Yeung OTG relaunch in the corner for more damage
| |
| * Must be close to Yeung for the first hit of 2HP to connect
| |
| * If slightly out of corner, can use 2HK > dash up 2LK instead
| |
| * NOTE: you get more damage vs. Yeung by doing OTG 2HK, wait, OTG 2HK, 2HK relaunch
| |
| | video=[https://youtu.be/7G5X5TR737A?t=124 video]<br>(2:04)
| |
| |}}
| |
|
| |
| {{Combo-JCFoF
| |
| | notation=
| |
| :(Hyper Jackie only)
| |
| :2LK, 2LK > 2HP xx 236LK, 8LP > 8HP, (land and repeat)
| |
| | damage=100%
| |
| | location=Corner*
| |
| | charspecific=Yeung
| |
| | description=
| |
| * '''Hyper Dragonball Jackie''' only Yeung OTG infinite
| |
| * Must delay the jump LP as late as possible, and slightly delay the chain into 8HP
| |
| * If starting from 236P, 63214K, or Super knockdown, you must walk slightly out of corner after each 2LK OTG
| |
| * Can convert outside corner by starting with OTG 2LK, 2LK > 5LK > 5LP xx 236LK, diagonal 9LP
| |
| | video=[https://www.youtube.com/watch?v=HzcuMgMtnmE video]
| |
| |}}
| |
| |}
| |
|
| |
| <!-----------------------------------------------------------------------------Section Divider----------------------------------------------------------------------------->
| |
|
| |
| ===<big>'''Miscellaneous Combos'''</big>===
| |
| <!---Combos that don't fall into other categories, plus random, impractical stuff like dash light infinites or "style combos" that aren't likely to actually be used in a match--->
| |
|
| |
| {{ComboHeader-JCFoF}}
| |
| {{Combo-JCFoF
| |
| | notation=
| |
| :Wakeup LK, dash 2HK > 2HP xx 236HK
| |
| | damage=36%
| |
| | location=Near Corner
| |
| | charspecific=Universal
| |
| | description=
| |
| * Can use cl 5HP (1 hit) if not close enough to the corner for 2HP juggle
| |
| * vs. '''Yeung''': midscreen, can wavedash (6646) into 2HK > cl 5HP (1 hit) xx 236HK (difficult)
| |
| * vs. '''Sam''': midscreen, can dash 2LK xx 236HK (wait until very end of dash before juggling)
| |
| | video=[https://youtu.be/7G5X5TR737A?t=153 video]<br>(2:33)
| |
| |}}
| |
|
| |
| {{Combo-JCFoF
| |
| | notation=
| |
| :Pursuit Counter, dash 2LK > 5LP xx 236HK
| |
| | damage=23%
| |
| | location=Anywhere
| |
| | charspecific=Universal
| |
| | description=
| |
| * Due to limited juggle options, this is the most consistent reset that gives decent damage and a good left/right mixup afterward
| |
| * The usual 2HK > 2HP juggle route can work deep in the corner, but is harder to space due to backturned opponent
| |
| | video=[https://youtu.be/7G5X5TR737A?t=170 video]<br>(2:50)
| |
| |}}
| |
|
| |
| {{Combo-JCFoF
| |
| | notation=
| |
| :--6LK, 2LK > 2LP xx 236HK
| |
| :--6LK, 2LK > 2LP xx (Super)
| |
| :--(corner) 6LK, 2LK > 2LP xx 41236HP, [2HK > 2HP xx 236HK]*
| |
| | damage=35%<br>(47%)<br>[55%]
| |
| | location=Anywhere*
| |
| | charspecific=Everyone but Drunk Jackie '''(Standing)'''
| |
| | description=
| |
| * 6LK whiffs very quickly against crouchers, setting up tick throws if it whiffs
| |
| * 41236HP (Tiger Fist) only combos vs. Lau, Sam, Kim-Maree, and M. Lion
| |
| | video=[https://youtu.be/7G5X5TR737A?t=177 video]<br>(2:57)
| |
| |}}
| |
|
| |
| {{Combo-JCFoF
| |
| | notation=
| |
| :Super (while cornered), microdash 2HK > 2HP xx 236HK
| |
| | damage=55%
| |
| | location=Corner (Back)
| |
| | charspecific=Everyone but Thorsten, M. Lion
| |
| | description=
| |
| * If you connect raw Super with your back to the wall, followup juggle is possible
| |
| * If not all the way in the corner, can microdash 2LK for juggle (less damage)
| |
| * vs. '''Kim-Maree''': no dash needed if Super is done from point blank
| |
| * vs. '''Yeung''': better to just use the OTG relaunch
| |
| | video=[https://youtu.be/7G5X5TR737A?t=198 video]<br>(3:18)
| |
| |}}
| |
|
| |
| {{Combo-JCFoF
| |
| | notation=
| |
| :Super (while cornered), 2LK > 5LP xx 236HK
| |
| | damage=47%
| |
| | location=Corner (Back)
| |
| | charspecific=Thorsten
| |
| | description=
| |
| * From absolute point blank, cornered Super only
| |
| * Can also use 2HK > 6HP for slightly more damage (but worse mixup)
| |
| | video=[https://youtu.be/7G5X5TR737A?t=208 video]<br>(3:28)
| |
| |}}
| |
|
| |
| {{Combo-JCFoF
| |
| | notation=
| |
| :cl 5HK > 2HP xx 41236HP, [2HK > 2HP xx 236HK]
| |
| | damage=50%<br>[67%]
| |
| | location=Anywhere
| |
| | charspecific=Universal '''(Standing)'''
| |
| | description=
| |
| * High damage punish combo from point blank
| |
| * Good stun combo ender
| |
| | video=[https://youtu.be/7G5X5TR737A?t=223 video]<br>(3:43)
| |
| |}}
| |
|
| |
| {{Combo-JCFoF
| |
| | notation=
| |
| :5LP > HP > HP > HK (Autocombo), 2LK xx 236HK<br>-or-
| |
| :5LP > HP > HP > HK (Autocombo), 2LK xx (Super)
| |
| | damage=40%<br>(55%)
| |
| | location=Anywhere
| |
| | charspecific=Everyone but Drunk & Dragonball Jackie '''(Standing)'''
| |
| | description=
| |
| * Link out of Special Autocombo on standing opponents
| |
| * Mostly for style, as it doesn't do much more than standard hitconfirm
| |
| * If near the corner, use the combo below instead
| |
| | video=[https://youtu.be/7G5X5TR737A?t=231 video]<br>(3:51)
| |
| |}}
| |
|
| |
| {{Combo-JCFoF
| |
| | notation=
| |
| :5LP > HP > HP > HK (Autocombo), 2LK xx 41236HP, 2HK > 2HP xx 236HK (stun)
| |
| | damage=100%
| |
| | location=Near Corner
| |
| | charspecific=Lau, Yeung, Admiral, Sam, Kim '''(Standing)'''
| |
| | description=
| |
| * Same as above, but TOD route if close enough to the corner for 2HK > 2HP juggle
| |
| * vs. '''Thorsten''': combo works but no stun; can stun with successful low/overhead/throw mixup
| |
| * vs. '''M. Lion''': combo works but no stun; can stun with 2LK combo, or kill with command throw combo
| |
| | video=[https://youtu.be/7G5X5TR737A?t=237 video]<br>(3:57)
| |
| |}}
| |
|
| |
| {{Combo-JCFoF
| |
| | notation=
| |
| :5LP > HP > HP > HK (Autocombo), 5LP > HP > HP > HK, 2LK xx 236HK '''(stun),''' <br>
| |
| :9HK, 5LP > HP > HP > HK, 5LP > HP > HP > HK, 2LK xx 236HK
| |
| | damage=100%
| |
| | location=Anywhere
| |
| | charspecific=Lau<br>'''(Standing)'''
| |
| | description=
| |
| * TOD from Special Autocombo on standing Lau
| |
| * Double Autocombo works on M. Lion, but can't link anything afterward
| |
| | video=[https://youtu.be/7G5X5TR737A?t=254 video]<br>(4:14)
| |
| |}}
| |
|
| |
| {{Combo-JCFoF
| |
| | notation=
| |
| :[2LK, dash], repeat
| |
| | damage=100%
| |
| | location=Anywhere
| |
| | charspecific=Universal
| |
| | description=
| |
| * High execution dash infinite; harder than Drunk/Admiral's dash infinite due to his slower dash and required use of a crouching normal
| |
| * Using a few reps of this can help push the opponent to the corner for a 41236P juggle
| |
| * 5LP is also a pseudo-infinite dash loop, but can get pushed out before stun depending on the opponent's hurtbox
| |
| | video=[https://youtu.be/7G5X5TR737A?t=273 video]<br>(4:33)
| |
| |}}
| |
| |}
| |
|
| |
| <!-----------------------------------------------------------------------------Section Divider----------------------------------------------------------------------------->
| |
|
| |
| ===<big>'''Hyper Dragonball Jackie Combos'''</big>===
| |
| <!---Combos that only work as Boss Version--->
| |
|
| |
| {{ComboHeader-JCFoF}}
| |
| {{Combo-JCFoF
| |
| | notation=
| |
| :2LK x3 > 2LP xx 41236HP, (dash) 2HK > 2HP xx 236HK, cl 5HP (2 hits) > cl 5HK '''(stun)''', (ender)
| |
| | damage=100%<br>(63%)
| |
| | location=Corner
| |
| | charspecific=Universal*
| |
| | description=
| |
| * Doesn't stun Thorsten or M. Lion, but still does significant damage.
| |
| * Must be very close to corner for 2HK > 2HP (1st hit) to connect, so dash can help with positioning
| |
| * May have to slightly walk out of corner before doing final juggle; delay cl 5HP until opponent is almost on the ground
| |
| | video=[https://youtu.be/7G5X5TR737A?t=278 video]<br>(4:38)
| |
| |}}
| |
|
| |
| {{Combo-JCFoF
| |
| | notation=
| |
| :2LK x4 > 2LP xx 41236HP, (dash) 2HK > 2HP xx 236HK, cl 5HK > 2HP xx 236HK '''(stun)''', (ender)
| |
| | damage=100%
| |
| | location=Corner
| |
| | charspecific=Thorsten
| |
| | description=
| |
| * Variation of above combo that stuns Thorsten
| |
| * Very strict timing on the final cl 5HK > 2HP juggle, must do as low to the ground as possible
| |
| | video=[https://youtu.be/7G5X5TR737A?t=297 video]<br>(4:57)
| |
| |}}
| |
|
| |
| {{Combo-JCFoF
| |
| | notation=
| |
| :Throw, 2HK > 2HP xx 236HK, cl 5HP (2 hits) > cl 5HK
| |
| | damage=51%
| |
| | location=Corner
| |
| | charspecific=Universal*
| |
| | description=
| |
| * Same as above combos, but starting from a throw makes stun impossible
| |
| * Must use 63214K Command Throw to juggle 2HK against '''Thorsten''' and '''M. Lion'''
| |
| * Thorsten can also be juggled after a normal throw with 2LK (with strict 2f timing)
| |
| | video=[https://youtu.be/7G5X5TR737A?t=315 video]<br>(5:15)
| |
| |}}
| |
| |}
| |
|
| |
|
| <!-----------------------------------------------------------------------------Section Divider-----------------------------------------------------------------------------> | | <!-----------------------------------------------------------------------------Section Divider-----------------------------------------------------------------------------> |
| “
|
You're getting better!
|
”
|
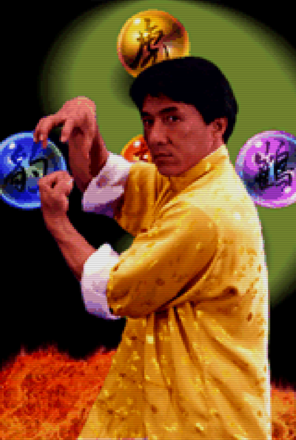
Intro
Also commonly known as "Dragonball Jackie" (due to his iconic attack animation) or "Five Animal Fists Jackie" (referring to the martial arts style he uses). In the movie Spiritual Kung Fu, Yi-Lang (Jackie Chan's character) learns the Five Style Fists fighting style from the ghosts of five previous masters. After a thief stole a book about a deadly style of Kung Fu from his temple's library, Yi-Lang uses this new technique to defend his school.
Dragonball Jackie has an unorthodox moveset. His juggles are very limited outside the corner, and his confirms generally only use light normals. He has a 2HK with frame advantage on hit and block, but is not cancellable. The highlight of his moveset is Crush Kick, which is a (generally) safe, far moving special that hops over low pokes and does good chip damage. This move can chase people until they are cornered, allowing Dragonball Jackie to dash in for command throw mixups. He also has some high execution combos, particularly against standing characters.
| Strengths |
Weaknesses
|
- Safe chip with QCF+K
- Command grab gives him extra throw range and a useful punish against safe-ish moves
- Buttons have good hitboxes
- Good damage and resets in the corner
- Hurtbox shrinks when crouch blocking, causing some moves to drop hits on block
(i.e. Admiral 41236P and Super)
|
- Limited combo potential off his best buttons
- No combo from overhead (unless perfectly timed as meaty)
- Very difficult execution on his highest damage options
- Lack of juggles midscreen makes his reset potential very weak
|
Character Stats
238 (Above Average) // Average
5f+58f (Floaty) // Average
56 (C)
24.9% / second // 7f
17.7% // 48f
Fastest // Fastest
4.8 (A)
20f // 158 (Very Far)
N: 32f // F: 49f // B: 32f
Hitstun, Blockstun, & Juggle Hurtboxes
| 26 -- Light/High Standing |
27 -- Heavy/High Standing |
32 -- Crouching
|
|
|
|
| 29 -- Light/Mid Standing |
30 -- Heavy/Mid Standing |
Juggle State
|
|
|
|
| Standing Blockstun |
Crouching Blockstun |
OTG State
|
|
|
|
| Frame Data Info (click to expand)
|
| Startup
|
The number of frames it takes for a move to become active.
If this value is lower than the opponent's Hit Adv or Block Adv, it can be used to punish that move if it is in range.
If a second value is listed in (parentheses), the move hits later during its active frames (i.e. a 2-hit overhead where the first hit whiffs vs. crouching).
|
| Active
|
The number of frames that an attack's hitbox remains active. The first active frame overlaps with the final startup frame.
Attacks with multiple hits are separated by an asterisk (*) if there is no gap between hits, or by a number in (parentheses) denoting the number of frames between active hitboxes.
--Example 1: 3*5 = 3 active frames (1st hit), 5 active frames (2nd hit)
--Example 2: 2(5)4 = 2 active frames, 5f gap, 4 active frames
For attacks with long, complex sets of active frames, the description will explain the details and the Active column will simply display the total number of active frames.
Attacks with more active frames are more effective as pokes and anti-airs.
|
| Recovery
|
The number of frames that a character cannot act after startup and active frames have passed.
For airborne attacks, recovery may be listed as 'X + Y land', where X+Y is the total recovery and Y is the number of grounded recovery frames (which allows the character to be thrown or punished with a grounded combo).
|
| Guard
|
The way a move must be guarded against.
High = Can be blocked standing, whiffs against crouching.
Mid = Can be blocked both standing and crouching.
Low = Must be blocked crouching.
Overhead = Must be blocked standing
Throw = Cannot be blocked
|
| Hit Adv
|
The frame advantage of an attack on hit. 0 means the attacker and defender recover at the same time.
A positive number means the attacker recovers before the defender.
--Example: A move listed as +4 on Hit may link into a move with 4f Startup.
A negative number means the defender recovers before the attacker, and the attack may be punishable.
--Example: A move listed as -6 on Hit may be punished by a move with 6f Startup, if it is in range.
KD means the attack knocks down if it hits.
May also be displayed as a range of values for attacks with significantly different frame advantage when used at different spacing.
--Example: A move with '-5 to 3' advantage on hit can be anywhere from -5 to +3 depending on which active frame hits the opponent.
|
| Block Adv
|
The frame advantage of an attack on block.
This includes the final Guard Cancel frame (see the 'reversal' section of the Basic System page for more details)
0 means the attacker and defender recover at the same time.
A positive number means the attacker recovers before the defender.
A negative number means the defender recovers before the attacker, and the attack may be punishable.
--Example: A move listed as -6 on Block may be punished by a move with 6f Startup, if it is in range.
Throws cannot be blocked, so the column is left empty in this case.
May also be displayed as a range of values for attacks with significantly different frame advantage when used at different spacing.
--Example: A move with '-5 to 3' advantage on block can be anywhere from -5 to +3 depending on which active frame hits the opponent.
|
| Damage
|
Base Damage of the attack, not accounting for scaling or opponent's defense value.
Damage for each hit is separated by an asterisk (*)
If there are several hits in a row with identical damage, it will be listed as A x B to save space
--Example: 4*5x3*8 = 4 damage + 5 damage (3 hits) + 8 damage
See Basic System page for details on damage scaling and defense.
|
| Stun
|
Stun damage of the attack, not accounting for any scaling (light normals do not have any stun scaling). Throws never deal stun.
Most characters have a maximum stun threshold of 10240, while Thorsten has 11520 and M. Lion has 12800.
Stun damage for each hit is separated by an asterisk (*)
If there are several hits in a row with identical stun, it will be listed as A x B to save space
--Example: 256*128x3*512 = 256 stun + 128 stun (x3 hits) + 512 stun
See Basic System page for details on stun.
|
| Knockdown Timer
|
KD Timer damage of the attack, not accounting for any scaling (follows normal damage scaling rules).
The higher a character's KD Timer value, the longer it takes to wake up after a knockdown.
See "Damage" for more information on how to read the values.
See Advanced System page for details on KD Timer.
|
| Special Cancel
|
The ability to cancel the animation of a normal attack into a special/super move. Command normals can never be special cancelled. Specials cannot be cancelled into supers like in some other games. The only special cancellable air normal is Admiral Jackie's j.LP (into Air Dragon Shot).
|
| Attribute
|
Self = Light normal that can be rapidly chained into itself on hit, block, or whiff.
By default, self chains can be input very quickly (after the first active frame, whether it connects or not)
- (slow) means the self-chain must be delayed until the move's recovery (cannot chain during active frames or hitstop)
No-Chain = Normal attack that cannot be chained into another normal
OTG = Off The Ground; Attack will connect vs. a knocked down opponent for 25% of its usual damage.
Airborne = Attack puts the user in the air, making them immune to throws, and hits will put them into a juggle state.
Invincible/Invulnerable = Attack has no hurtbox and cannot be interrupted during these invincibility frames
Mashable = Rapidly input buttons/directions for extra hits. For throws, defender can also mash to reduce damage.
KD0/Spike = Knockdown Timer set to 0 -- opponent will be knocked down and immediately stand up
Backturn = Causes juggled opponent to face the opposite direction, preventing backdash upon landing
Crossup = Attack must be blocked in the opposite direction if it connects behind the opponent
Squish = Move has a visual effect that flattens and stretches the opponent (no known gameplay effect)
|
| Hitstun Type
|
Against standing opponents, attacks can inflict two types of reeling animations.
They are referred to as High and Mid hitstun because it usually (but not always) correlates with High attacks vs. Mid/Low attacks.
The hitstun reeling animation can affect combo routes due to different hurtbox widths.
Crouching opponents always have the same reeling animation regardless of attack.
|
Normals
Standing Normals
Stand LP -- (Standing Hitstun Reeling: High/26)
5LP
Close Stand HP -- (Standing Hitstun Reeling: High+High+High/27+27+27)
Close 5HP
Far Stand HP -- (Standing Hitstun Reeling: High/27)
Far 5HP
Close Stand LK -- (Standing Hitstun Reeling: High/26)
Close 5LK
Far Stand LK -- (Standing Hitstun Reeling: High/26)
Far 5LK
Close Stand HK -- (Standing Hitstun Reeling: High/27)
Close 5HK
Far Stand HK -- (Standing Hitstun Reeling: High+Mid/27+30)
Far 5HK
Crouching Normals
Crouch LP -- (Standing Hitstun Reeling: Mid/29)
2LP
Crouch HP -- (Standing Hitstun Reeling: Mid+Mid/30+30)
2HP
Crouch LK -- (Standing Hitstun Reeling: Mid/29)
2LK
Crouch HK -- (Standing Hitstun Reeling: Mid/30)
2HK
Air Normals
Jump LP -- (Standing Hitstun Reeling: Mid/29)
8LP
8LP
|
| Startup
|
Active
|
Recovery
|
Guard
|
Hit Adv
|
Block Adv
|
| 6
|
9
|
--
|
Overhead
|
--
|
--
|
| Damage
|
Stun
|
KD Timer
|
Special Cancel
|
Attribute
|
Hitstun Type
|
| 9
|
-
|
-
|
-
|
-
|
-
|
|
|
|
Jump HP -- (Standing Hitstun Reeling: Mid/29)
8HP
8HP
|
| Startup
|
Active
|
Recovery
|
Guard
|
Hit Adv
|
Block Adv
|
| 6
|
6
|
--
|
Overhead
|
--
|
--
|
| Damage
|
Stun
|
KD Timer
|
Special Cancel
|
Attribute
|
Hitstun Type
|
| 24
|
-
|
-
|
-
|
Spike, Squish
|
-
|
|
|
|
Diagonal Jump LK -- (Standing Hitstun Reeling: High/26)
9LK
9LK
|
| Startup
|
Active
|
Recovery
|
Guard
|
Hit Adv
|
Block Adv
|
| 6
|
9
|
--
|
Overhead
|
--
|
--
|
| Damage
|
Stun
|
KD Timer
|
Special Cancel
|
Attribute
|
Hitstun Type
|
| 10
|
-
|
-
|
-
|
Crossup
|
-
|
- Instant overhead if performed exactly on the first airborne frame (does not work against crouching Spiritual Kung-Fu Jackie)
|
|
Neutral Jump LK -- (Standing Hitstun Reeling: High/26)
8LK
8LK
|
| Startup
|
Active
|
Recovery
|
Guard
|
Hit Adv
|
Block Adv
|
| 6
|
9
|
--
|
Overhead
|
--
|
--
|
| Damage
|
Stun
|
KD Timer
|
Special Cancel
|
Attribute
|
Hitstun Type
|
| 10
|
-
|
-
|
-
|
-
|
-
|
|
|
|
Diagonal Jump HK -- (Standing Hitstun Reeling: High/26)
9HK
9HK
|
| Startup
|
Active
|
Recovery
|
Guard
|
Hit Adv
|
Block Adv
|
| 6
|
6
|
--
|
Overhead
|
--
|
--
|
| Damage
|
Stun
|
KD Timer
|
Special Cancel
|
Attribute
|
Hitstun Type
|
| 28
|
-
|
-
|
-
|
-
|
-
|
|
|
|
Neutral Jump HK -- (Standing Hitstun Reeling: High+Mid/26+29)
8HK
8HK
|
| Startup
|
Active
|
Recovery
|
Guard
|
Hit Adv
|
Block Adv
|
| 6
|
3*7
|
--
|
Overhead
|
--
|
--
|
| Damage
|
Stun
|
KD Timer
|
Special Cancel
|
Attribute
|
Hitstun Type
|
| 16*16
|
-
|
-
|
-
|
Spike
|
-
|
|
|
|
Command Normals
Sobat Kick -- (Standing Hitstun Reeling: High/26)
6LK/4LK
6LK / 4LK
|
| Startup
|
Active
|
Recovery
|
Guard
|
Hit Adv
|
Block Adv
|
| 12
|
1
|
12
|
High
|
+6
|
+4
|
| Damage
|
Stun
|
KD Timer
|
Special Cancel
|
Attribute
|
Hitstun Type
|
| 8
|
-
|
-
|
-
|
Airborne 2-9f
|
-
|
- Moves forward or backward, depending on which direction is held.
- Due to its frame advantage and forward movement, links are possible into 5LP which begins his Special Autocombo.
- Early airborne frames means it can potentially be used to counter throws
|
|
One-Two Punch -- (Standing Hitstun Reeling: High+High/27+27)
6HP
6HP
|
| Startup
|
Active
|
Recovery
|
Guard
|
Hit Adv
|
Block Adv
|
| 9 (19)
|
7(3)9
|
27
|
High / High
|
-10
|
-13
|
| Damage
|
Stun
|
KD Timer
|
Special Cancel
|
Attribute
|
Hitstun Type
|
| 20*16
|
-
|
-
|
-
|
-
|
-
|
- 2 hits, long range but risky poke
|
|
Universal Overhead -- (Standing Hitstun Reeling: Mid/29)
6HK
6HK
|
| Startup
|
Active
|
Recovery
|
Guard
|
Hit Adv
|
Block Adv
|
| 24
|
4
|
13
|
Overhead
|
+2
|
+7
|
| Damage
|
Stun
|
KD Timer
|
Special Cancel
|
Attribute
|
Hitstun Type
|
| 24
|
-
|
-
|
-
|
Airborne 8-29f, Squish
|
-
|
- Hops over low attacks and throws
- Unique property of being much stronger on block than on hit
- Can only combo if done as a perfectly timed meaty, but on block he gets strong pressure
|
|
Throws
HP Throw
HP Throw
close 6LK/4LK
|
| Startup
|
Active
|
Recovery
|
Guard
|
Hit Adv
|
Block Adv
|
| 1
|
--
|
--
|
Throw
|
KD
|
--
|
| Damage
|
Stun
|
KD Timer
|
Special Cancel
|
Attribute
|
Hitstun Type
|
| 36
|
-
|
-
|
-
|
Backturn
|
-
|
- Can juggle afterward near the corner; opponent will be backturned so they can't backdash out of the reset
- Range: 56
|
|
Special Moves
Tiger Fist (Dragonball)
Priority: above 236K and 63214K ; Input Buffer: 18f window to press P after 41236 input
41236P
41236P
|
| LP
|
Startup
|
Active
|
Recovery
|
Guard
|
Hit Adv
|
Block Adv
|
| 10
|
18
|
0 (whiff)
|
Mid
|
KD
|
-11
|
| Damage
|
Stun
|
KD Timer
|
Special Cancel
|
Attribute
|
Hitstun Type
|
| 16*48
|
-
|
-
|
-
|
-
|
-
|
- Less travel distance, making it only useful if you intend to whiff the move.
- Cancel from max range into whiffed attack is a good setup for command throw
- 6 Hits, but damage is only applied on the first and last hit. This means comboing into Dragonball will make the last hit do less damage, and any juggle afterward will be at 50% scaling.
- Trade will cause immediate knockdown with no followup animation
- Against airborne opponents, will do the initial hit of damage but no full animation (opponent bounces away with almost no hitstun)
|
| HP
|
Startup
|
Active
|
Recovery
|
Guard
|
Hit Adv
|
Block Adv
|
| 10
|
27
|
0 (whiff)
|
Mid
|
KD
|
-11
|
| Damage
|
Stun
|
KD Timer
|
Special Cancel
|
Attribute
|
Hitstun Type
|
| 16*48
|
-
|
-
|
-
|
-
|
-
|
- Farther travel distance, making it strictly better for combos.
- 6 Hits, but damage is only applied on the first and last hit. This means comboing into Dragonball will make the last hit do less damage, and any juggle afterward will be at 50% scaling.
- Trade will cause immediate knockdown with no followup animation
- Against airborne opponents, will do the initial hit of damage but no full animation (opponent bounces away with almost no hitstun)
|
|
Crush Kick (Axe Kick)
Priority: above 63214K, below 41236P; Input Buffer: 14f window to press K after 236 input
-Note: The diagonal down+forward input is required, unlike most 236 move inputs in Fists of Fire
236K
236K
|
| LK
|
Startup
|
Active
|
Recovery
|
Guard
|
Hit Adv
|
Block Adv
|
| 8 (12)
|
4*1
|
24
|
High / Mid
|
+1
|
-2
|
| Damage
|
Stun
|
KD Timer
|
Special Cancel
|
Attribute
|
Hitstun Type
|
| 15*20
|
-
|
-
|
-
|
KD0 (2nd hit), Airborne 3-12f
|
-
|
- Hops over lows and throws from frame 3
- Good anti-air for jumps that aren't near crossup range
|
| HK
|
Startup
|
Active
|
Recovery
|
Guard
|
Hit Adv
|
Block Adv
|
| 11 (17)
|
6*1
|
27
|
High / Mid
|
-2
|
-5
|
| Damage
|
Stun
|
KD Timer
|
Special Cancel
|
Attribute
|
Hitstun Type
|
| 18*24
|
-
|
-
|
-
|
KD0 (2nd hit), Airborne 4-17f
|
-
|
- Hops over lows and throws from frame 4
- Identical hitbox to LK version, but travels farther with more recovery
- Good anti-air for far range jumps (i.e. dash 236HK to chase a backwards jump)
|
|
Frantic Kick (Command Grab)
Priority: below 41236P and 236K; Input Buffer: 18f window to press K after 63214 input
63214K
63214K
|
| LK
|
Startup
|
Active
|
Recovery
|
Guard
|
Hit Adv
|
Block Adv
|
| 1
|
--
|
--
|
Throw
|
KD
|
--
|
| Damage
|
Stun
|
KD Timer
|
Special Cancel
|
Attribute
|
Hitstun Type
|
| 35
|
-
|
-
|
-
|
-
|
-
|
- Command Throw; only counts as one hit for combo scaling
- Range: 64 (more throw range than normal throw)
- Special move buffer window makes it more useful than normal throw for punishes (no whiff animation if buffered)
|
| HK
|
Startup
|
Active
|
Recovery
|
Guard
|
Hit Adv
|
Block Adv
|
| 1
|
--
|
--
|
Throw
|
KD
|
--
|
| Damage
|
Stun
|
KD Timer
|
Special Cancel
|
Attribute
|
Hitstun Type
|
| 35
|
-
|
-
|
-
|
-
|
-
|
- Command Throw; only counts as one hit for combo scaling
- Range: 64 (more throw range than normal throw)
- Special move buffer window makes it more useful than normal throw for punishes (no whiff animation if buffered)
|
|
Super
Five Animal Fist Fury
Input Buffer: 18f window to press LP+HP after 41236 input
41236LP+HP
41236LP+HP
|
| Startup
|
Active
|
Recovery
|
Guard
|
Hit Adv
|
Block Adv
|
| 2+7
|
27
|
0 (whiff)
|
Mid
|
KD
|
-11
|
| Damage
|
Stun
|
KD Timer
|
Special Cancel
|
Attribute
|
Hitstun Type
|
| 16*72
|
-
|
-
|
-
|
Invincible 1-8f
|
-
|
- 19f super flash
- Chip Damage: ~3%
- 16 hits; damage only applies on first and last hits
- The last hit will always be at minimum scaling (50%), so the high base damage doesn't reflect its actual strength
- Switches sides; can only juggle afterward if started while backed into corner
-Combos into super make juggle harder, and no juggle vs. M. Lion
|
|
Wakeup/Knockdown
Wakeup Attack Detailed Info (click to expand)
- Wakeup LK or HK must be input within a specific 16 frame window during the wakeup animation.
- The exact timing of this window varies by character and by whether it was a neutral wakeup or forward/back roll.
- During these 16 frames, the final LK or HK input will decide which version comes out. If LK and HK are input simultaneously, Wakeup LK takes priority.
- The Wakeup Attack will always come out on the first frame after the 16 frame input window, regardless of when it was input.
- For some characters, there is very little time between the end of the 16 frame Wakeup Attack window and the end of recovery, making it difficult to input a reversal move with LK or HK, so be mindful of this if you get accidental Wakeup Attacks.
- After inputting a Wakeup Attack, any special move input that occurs afterward will automatically be buffered until the attack animation has ended. This means that it's important to stop mashing directions on wakeup once the Wakeup Attack window is active, as you may get an unexpected special move way after it was input.
Wakeup LK
Wakeup LK
|
|
| Startup
|
Active
|
Recovery
|
Guard
|
Hit Adv
|
Block Adv
|
| 4
|
3
|
25
|
Overhead
|
KD
|
-5
|
| Damage
|
Stun
|
KD Timer
|
Special Cancel
|
Attribute
|
Hitstun Type
|
| 24
|
-
|
-
|
-
|
Invincible 1-3f
|
-
|
- Can juggle afterward near the corner (or midscreen vs Sam/Yeung)--see Combo section
|
|
Wakeup HK
Wakeup HK
|
|
| Startup
|
Active
|
Recovery
|
Guard
|
Hit Adv
|
Block Adv
|
| 8
|
2(13)2
|
23
|
Low / Low
|
KD
|
-2
|
| Damage
|
Stun
|
KD Timer
|
Special Cancel
|
Attribute
|
Hitstun Type
|
| 16*16
|
-
|
-
|
-
|
Invincible 1-7f
|
-
|
- 2 hits; both hits connect vs M. Lion and Thorsten, otherwise only one will hit
- Can hit OTG off a traded knockdown
- Very short knockdown timer, so it is difficult to land OTG afterward
- Recovers in a crouching state, so it must be whiff punished with moves that work against crouchers
|
|
Pursuit Attack
Pursuit Attack
8LP or 8HP
|
| Startup
|
Active
|
Recovery
|
Guard
|
Hit Adv
|
Block Adv
|
| 43
|
3
|
23
|
Overhead
|
[-48]
|
[-44]
|
| Damage
|
Stun
|
KD Timer
|
Special Cancel
|
Attribute
|
Hitstun Type
|
| 14 * (6 each)
|
-
|
-
|
-
|
OTG, Mashable
|
-
|
- Only usable on a knocked down opponent
- First hit does 14 damage, all mashed followups do 6 damage each
- Damage scales as though it is part of a combo (rather than OTG scaling)
- Auto-tracks to the opponent's position at the time the Pursuit Attack is input
- If the opponent recovers from knockdown before the Pursuit Attack connects:
-[Frame Advantage] on standing/crouching opponents (bounces very far away)
|
|
Pursuit Counter
Pursuit Counter
Any 2 Buttons
|
| Startup
|
Active
|
Recovery
|
Guard
|
Hit Adv
|
Block Adv
|
| --
|
--
|
--
|
--
|
KD
|
--
|
| Damage
|
Stun
|
KD Timer
|
Special Cancel
|
Attribute
|
Hitstun Type
|
| 18
|
-
|
-
|
-
|
-
|
-
|
- 2f window to counter an opponent's pursuit attack; can counter against any hit of the pursuit attack
- Dragonball Jackie will take damage before the Counter happens, so it cannot save him from a KO
- Counter can only be performed while knocked down
-If Dragonball Jackie wakes up before the Pursuit Attack connects, he cannot use Pursuit Counter against it
- Can juggle afterward from anywhere on screen
|
|
Auto Combos
Normal Autocombo - LP > LP > LP > LP
|
|
| (LP) > LP
|
Startup
|
Active
|
Recovery
|
Guard
|
Hit Adv
|
Block Adv
|
| 15
|
1
|
13
|
High
|
+5
|
+3
|
| Damage
|
Stun
|
KD Timer
|
Special Cancel
|
Attribute
|
Hitstun Type
|
| 6
|
-
|
-
|
-
|
-
|
-
|
- Doesn't combo; same animation as 6LK
|
| (LP > LP) > LP
|
Startup
|
Active
|
Recovery
|
Guard
|
Hit Adv
|
Block Adv
|
| 12
|
2(8)2
|
33
|
High
|
-9
|
-12
|
| Damage
|
Stun
|
KD Timer
|
Special Cancel
|
Attribute
|
Hitstun Type
|
| 6*8
|
-
|
-
|
-
|
-
|
-
|
- 2 hits, same animation as 6HP
|
| (LP > LP > LP) > LP
|
Startup
|
Active
|
Recovery
|
Guard
|
Hit Adv
|
Block Adv
|
| 14
|
2
|
34
|
Mid
|
-10
|
-13
|
| Damage
|
Stun
|
KD Timer
|
Special Cancel
|
Attribute
|
Hitstun Type
|
| 12
|
-
|
-
|
-
|
-
|
-
|
- On block, will go through the opponent if done from close range. Uses animation from part of his 41236P.
|
|
Special Autocombo - LP > HP > HP > HK > HK > LK+HK
|
|
| (LP) > HP
|
Startup
|
Active
|
Recovery
|
Guard
|
Hit Adv
|
Block Adv
|
| 3
|
3(3)2(4)2
|
32
|
High
|
-8
|
-11
|
| Damage
|
Stun
|
KD Timer
|
Special Cancel
|
Attribute
|
Hitstun Type
|
| 6*6*8
|
-
|
-
|
-
|
-
|
-
|
- 3 hits, same animation as cl 5HP
|
| (LP > HP) > HP
|
Startup
|
Active
|
Recovery
|
Guard
|
Hit Adv
|
Block Adv
|
| 11
|
2
|
21
|
Mid
|
+3
|
0
|
| Damage
|
Stun
|
KD Timer
|
Special Cancel
|
Attribute
|
Hitstun Type
|
| 10
|
-
|
-
|
-
|
-
|
-
|
- Same animation as first hit of 2HP
|
| (LP > HP > HP) > HK
|
Startup
|
Active
|
Recovery
|
Guard
|
Hit Adv
|
Block Adv
|
| 10
|
3
|
18
|
Low
|
+5
|
+2
|
| Damage
|
Stun
|
KD Timer
|
Special Cancel
|
Attribute
|
Hitstun Type
|
| 8
|
-
|
-
|
-
|
-
|
-
|
- Same animation as 2HK, but rotating the opposite direction; OTG
|
| (LP > HP > HP > HK) > HK
|
Startup
|
Active
|
Recovery
|
Guard
|
Hit Adv
|
Block Adv
|
| 12
|
2
|
28
|
High
|
-4
|
-5
|
| Damage
|
Stun
|
KD Timer
|
Special Cancel
|
Attribute
|
Hitstun Type
|
| 8
|
-
|
-
|
-
|
-
|
-
|
|
|
| (LP > HP > HP > HK > HK) > LK+HK
|
Startup
|
Active
|
Recovery
|
Guard
|
Hit Adv
|
Block Adv
|
| 20
|
9
|
6 + 23 land (whiff)*
|
Mid
|
KD
|
-23
|
| Damage
|
Stun
|
KD Timer
|
Special Cancel
|
Attribute
|
Hitstun Type
|
| 16
|
-
|
-
|
-
|
-
|
-
|
- Same animation as 8LK; on block, bounces far away and has no landing recovery once grounded.
- Airborne 10-35f
|
|
Strategy & Matchups
(click to expand)
General Strategy
Dragonball Jackie has excellent movement like the other Jackie Chans, but lacks their ability to confirm into huge damage and resets in most situations. His heavy normals are not very combo friendly, leaving his main confirms to consist only of 2LK and 2LP. On top of that, he can't launch the opponent into a juggle state unless the opponent is cornered.
To make up for that, Dragonball has one of the game's most obnoxious neutral tools in his 236LK (Crush Kick). Crush Kick goes far, hops over lows, and is mostly safe on block (although the HK version is slightly punishable). It is also difficult to whiff punish if the opponent tries to avoid it with backdash. Many characters rely on their crouching buttons for neutral, and this move almost entirely negates that option. Dragonball Jackie's primary gameplan is to harass with this move, either raw or in blockstrings. Doing so will often allow you to open up the opponent with a dash into throw.
While it's tempting to throw out 41236P (Tiger Fist) in neutral, be aware that some characters can punish it severely, especially with Super stocked. If the opponent doesn't prove that they can punish it, however, the reward is quite strong compared to the risk. Dragonball Jackie is also one of only two characters with a command throw. This gives him additional throw range, as well as the ability to buffer a reversal command throw. Buffering a command throw lets him punish moves that are normally hard to punish, and if the throw doesn't connect, he won't whiff a button.
6HK overhead is not very combo friendly, but hops over low pokes and has great frame advantage on block, setting up good throw pressure. Chain into this button especially on cornered opponents to split their attention between the high/low and button/throw mixups.
As a side note, Dragonball Jackie is generally one of the characters whose boss version is legal. This doesn't do much for him outside the corner or after anti-airs, but it's still worth picking just in case those situations arise.
Anti-Airs
Dragonball Jackie's most consistent AA is 236K; the LK version hits a bit closer and the HK version hits far away. Both versions can whiff if the jump is near crossup range, in which case close 5HK or the first hit of 2HP can be used. 2HP has the advantage of cancelling into 236K for more damage, but the hitbox is mediocre and only has 2 active frames. 6LK/4LK have good AA hitboxes, but have only one active frame and can't chain into anything to increase the damage.
While this Jackie's anti-air game is a bit weak compared to the rest of the cast, his frantic ground movement should make it hard for the opponent to even attempt a jump in the first place.
Lau Matchup
Lau |
Important punishes
2HK: No punish, unless VERY poorly spaced
236LK (LK Dragon Kick): 63214K Command Throw if used from close range
-Can be buffered as a reversal; nothing will come out if the throw doesn't punish
236HK (HK Dragon Kick): TOD combo punish (see below)
-If you can survive the chip damage, stand block or Lau can fly over you
623P (Rising Dragon): Full TOD combo punish (see below)
-Be aware that 623LP can whiff quickly and be hard to punish from farther ranges
Super: block from close range, then dash up for TOD punish (see below)
-From around sweep range, 236HK can reach for a punish
-From just beyond Lau's 2HK range, it is possible to jump over the Super for a j.HK (or j.HK > j.HP) punish; there is no time to reposition before jumping
TOD Combos -- close range vs. standing only
1) 5LP>HP>HP>HK, 5LP>HP>HP>HK, 2LK xx 236HK (stun)
2) 5LP>HP>HP>HK, 2LK xx 41236HP, 2HK > 2HP xx 236HK (stun) (must reach corner for juggle)
Wakeup Attacks
Both wakeup attacks can be baited with a backdash, then whiff punished.
vs. Wakeup LK: the first hit must be stand blocked
-There is a 4f gap between the 2 hits that can be interrupted with Super or 63214K Command Throw
-It is -7 on block, but the pushback makes his Double Autocombo loop whiff, as well as anything more than 2LK xx Tiger Fist. Two light normals into 236HK or Super can still punish.
vs. Wakeup HK: despite the sweep animation, this does not hit low. The 2 hits are a true blockstring, and are safe at -2 on block.
-Dragonball Jackie's 6HK and 236K can hop over Lau's Wakeup HK
-Recovers crouching, so dash up cl 5HK will not work in punishes against it (and 236K will whiff a hit).
Strategy
Crush Kicks in neutral are good against Lau players that abuse sweep and 236HP. Lau might whiff light DP in anticipation of this, which can be hard to punish if you aren't ready. Dragonball Jackie has slightly better movement than Lau, which is important because Lau's hits are much more rewarding to land.
Absolutely NEVER throw out raw Tiger Fist (41236P) against Lau, as his reversal 236HK will punish it on block for huge damage. Whiffing the LP version in neutral is less risky, as the Lau may be anticipating the block, but even this could end badly if the Lau dashes forward to get in LP Tiger Fist range before blocking.
If you ever have an opportunity for a full, point blank punish, be sure to use the Lau-specific TOD starting with Special Autocombo. This is one of the rare matchups where Autocombos are actually useful, so don't let Lau get away with DPs and random Supers.
|
Yeung Matchup
Yeung |
Important punishes
2HK: No punish unless used at an absurdly close range
6HK: 63214K Command Throw punishes on hit or block
-2LK combo starter can punish on block, but it is a 1f punish timing
63214P (Crane Wings): From around max 2LP cancel range, LP version on block can be punished with a tight dash 2LK or 236HK
-The 2nd hit of this 236HK usually whiffs, giving Yeung a small punish if she is aware
-At farther ranges, LP version can't be punished
-HP version can be punished on hit or block near max range with dash up 2LP into Tiger Fist or Super
41236K (Swallow Kick): Dash up 2LK into a full combo
Super: After the flip, 2LP can interrupt and lead to a knockdown; can be tricky to time at further ranges
-From mid range, 6HP or 236HK will stuff it consistently after the freeze, but is unrewarding
-If the dash-in portion is blocked, the Super is completely safe
Wakeup Attacks
Both wakeup attacks can be baited with a backdash, then whiff punished. Wakeup LK has much faster recovery but also moves forward for an easier punish.
vs. Wakeup LK: must be stand blocked
-From very close range, Wakeup LK will whiff over a crouching opponent; crouch blocking can potentially work against both wakeup options
-0 on block at worst, and potentially advantageous from farther ranges
-Yeung can pick up juggles from this anywhere, so it is best to assume she will use Wakeup LK instead of HK
vs. Wakeup HK: must be blocked low
-Punishable at -7 on block, but can be too far away for anything to reach
-Yeung recovers crouching, so dashing into cl 5HK or 5LP Special Autocombo won't work in whiff punishes.
Yeung OTG Infinite (Hyper Dragonball Jackie only)
OTG 2LK, 2HK > 2HP xx 236LK, neutral jump, delayed 8LP > 8HP, land, immediate OTG 2LK (repeat)
-If knockdown is from Command Throw, Tiger Fist, or Super: walk out of corner after the land + 2LK
-Can start a bit outside the corner by using a forward jump on the first rep
-The jump LP must be done as late as possible, or he won't land fast enough to OTG
Strategy
_
|
Thorsten Matchup
Thorsten |
Important punishes
46LK (LK Jackknife Storm): 63214K Command Throw is an easy punish at any spacing, and can lead to a juggle if near the corner
-2LK or 5LP can also start a punish, but these require a 1f timing that can't be made easier with plinking
46HK (HK Jackknife Storm): Full combo punishable; Thorsten may fly over your head if you crouch block
28K (Gatling Kick): Punishable with a full combo, but difficult because there are only 3 landing frames
-Note that 28LK whiffs extremely quickly, so be careful if he whiffs at midrange
16P (Slash Sword): 41236HP will punish even at max range, is generally optimal on its own due to the way scaling affects this move
Teleport: Predict a direction to dash, then 2LP xx Tiger Fist
-Difficult to time since 2LP only has 2 active frames
Super: Block, then dash up for an punish after he lands
-Super only has 13 landing frames, so time the punish as soon as he hits the ground
-2LP buffered during the freeze can interrupt a raw Super at most ranges
-Hyper Dragonball Jackie can almost always get a stun combo starting with 2LK x4 > 2LP, since Thorsten will end up near the corner
Wakeup Attacks
_
Strategy
Dragonball Jackie can outmaneuver Thorsten in neutral, but Thorsten has much better damage so you have to control the spacing to prevent him from getting a big opening. It is important not to let Thorsten freely build meter, as this can lead to an instant TOD from a 2LK confirm or a Tiger Fist punish. Thorsten's punishes on Tiger Fist are usually pretty weak before he has meter, so it isn't a terrible idea to throw it out in neutral and then backdash in case he attempts a dash up throw afterward. 6HK and 236LK are occasionally good to hop over Thorsten's low pokes, which will hopefully cause him to play more defensively. When this happens, it becomes possible to go for tick throws.
|
Drunk Jackie Matchup
Drunk Jackie |
Important punishes
Far 5HK: 63214K Command Throw can punish unless very well spaced, and is safe to attempt as nothing will come out on whiff if used as a reversal
Light Normal > 6HK Chain: Super will punish the gap on hit or block
236P (Jug Throw): 236HK has great horizontal movement and can reliably punish the jug throw on reaction from a surprising distance
-Note: if used too early from mid-far ranges, you may recover into the jug explosion and take massive damage; time the 236HK later or begin with a forward dash
Blockstring into 236P Jug Throw: 236HK works just as well even in the small blockstring gap
63214P (Drunk Dragon): 236HK can punish both versions on block, and LP version on hit
-236LK can punish HP version on hit as well
-Dash up 2LK > 2LP can punish any version, but can be difficult to time due to awkward hitstun/blockstun
-Super can punish blocked LP Drunk Dragon (LP version is rarely used intentionally, but often happens as an execution error)
236K (Tricky Kick): Full combo punish
28P (JackieCopter): Full combo punish; be sure to wait until he fully lands
Super: Full combo punish
-Only has 10 landing recovery frames, so be careful about timing the punish; recommend starting with 2LK
-Note: The proximity guard of Super can prevent you from walking to position yourself for a punish; dash away from Jackie, then walk/dash forward as he descends
Wakeup Attacks
_
Strategy
_
|
Dragonball Jackie Matchup (Mirror)
Dragonball Jackie
(Mirror) |
Important punishes
6HP: Duck the 2nd hit, then 2HK or 236K to whiff punish
236HK (HK Crush Kick): Almost never punishable in a realistic scenario
-Crouch blocking a point blank 236HK can lead to a 2LK xx 236HK punish
41236P (Tiger Fist): 236HK will punish consistently on block
-2LP xx 236HK works for more damage, but stricter timing
Super: Same punishes as Tiger Fist
-2HP during Super freeze can cleanly beat a Super at short-mid range (i.e. after blocking a Tiger Fist or Crush Kick); can cancel into HP Tiger Fist
-From point blank range, can use cl 5HK during Super freeze to trade favorably (but if you don't mash quickly enough, he can OTG to even up the damage)
Wakeup Attacks
_
Strategy
Play as fast as your brain can handle and constantly throw out pokes (2LP, 5HK, far 5HP) to catch random Tiger Fist attempts. Don't get into a rhythm in this as they can time their Tiger Fist to punish.
|
Admiral Jackie Matchup
Admiral Jackie |
Important punishes
2HK: 236LK will punish consistently
41236P (Dragon Palm): Crouch block to make the followup hit whiff, then punish with a full combo
-Microdash if using cl 5HK > 2HP starter, but don't accidentally stand into the move's active frames
-Can still dash up for a full punish after stand block, but timing is more strict
623K (Double Dutch): Punish with a full combo; you can stand block to prevent HK version from flying over your head
Super: Crouch block, then 236HK (easy reversal punish)
-Crouch block, then interrupt the whiffed 2nd hit with 2LK > 2LP xx 41236HP (stricter, but more rewarding)
-Dash up 63214K Command Throw is possible after crouch blocking, but very difficult (3f timing)
Wakeup Attacks
_
Strategy
_
Important Note:
Admiral's 41236P and Super will both whiff the 2nd hit if you crouch block. This means he can't use them to effectively chip you out (see Important Punishes section).
|
Sam Matchup
Sam |
Important punishes
236P (Thousand Spears) (Blocked): Hold up forward, punish with j.LK > j.HK, dash into point blank punish
-Note: j.HK > j.HP can work as a jump punish on 236HP or from a spaced-out 236LP, but won't work against a close range 236LP
236P (Thousand Spears) (Whiffed): 2HK or 236HK can whiff punish reliably after standing outside the whiffed hands range (low reward)
-With good reactions, you can dash up into a 2LK or 5LP combo starter, but be careful not to dash too early into the 236P or the full attack animation will connect
214K (Divekick): 236HK will consistently punish at all ranges
-From close-mid range, can backdash on reaction and punish the whiff with a full combo
Super: Punish with full combo when he lands
-Note: The 5th and 6th hits are overheads, so block these high
-If chip damage or time are a concern, interrupt the 1st or 3rd hit with a 2LK combo starter (these hits whiff on crouchers)
Wakeup Attacks
_
Strategy
_
|
Kim-Maree Matchup
Kim-Maree |
Important punishes
2HK: No punish (unless spaced absurdly close)
6HK: 63214K Command Throw can reliably punish on hit or block
-Can punish on block with perfectly timed 2LK, but not worth the risk
236P (Running Lariat): Crouch, then start a 2LK combo right as she gets near you
28P (I Want You!): Dash up and punish with a point blank combo
Wakeup Attacks
_
Strategy
_
|
Mysterious Lion Matchup
M. Lion |
Important punishes
6HP: 236HK can punish on block, but may whiff the 2nd hit making it unsafe
-Crouch under the 6HP and 236HK whiff punish for a more reliable option
2HK: Not punishable if well spaced, but 236LK can punish from closer ranges and is low-risk to attempt
646LP (LP Lion Crusher): Full combo punish (2LK starter for consistency)
646HP (HP Lion Crusher): Dash up 2LK combo can work at some ranges, but is generally unpunishable
-If Lion corners himself or uses 646HP from fullscreen, dash up into point blank BnB combo
Normal xx 236LP (Lion Bomb): Dash forward and punish with 2LK or Command Throw combo starter
-236HK can work from closer range bomb cancels, but is very risky because he can recover into the blast (allowing M. Lion to combo)
-Reversal Super can connect, but the explosion will hit Jackie out of the animation early
Teleport: Predict a direction, then dash up 2LP xx 41236HP
Super: 2LK, 2LP, Tiger Fist, and Super all work normally on Chibi-Lion, and can be used in a combo to end the transformation
-236K generally whiffs, but can spike an airborne Chibi-Lion to the ground if it hits low enough (like right after Super activation)
Wakeup Attacks
_
-Note: M. Lion's Wakeup LK has a very similar animation to his wakeup forward roll. Pay attention on his wakeup so you don't react to the wrong move.
Strategy
236HK can work against bomb pressure, but this leaves Lion standing with frame advantage which is never a good situation. Tiger Fist or a dash up command throw can also be used as a read, but these open Jackie up to punishes for overextending.
|
Colors
Default Colors
Boss Version Colors
Select Boss variant with Start+Button on character select screen
Character Poses
| Taunt |
Win |
Time Loss/Draw
|
|
|
|
| Charge |
Perfect |
Loss (KO)
|
|
|
|
Stages
External Links


