Chaos Code/NSC/Kagari: Difference between revisions
Crimefighter (talk | contribs) |
Crimefighter (talk | contribs) (→Combo Videos: - adding a more recent combo video) |
||
| (42 intermediate revisions by 4 users not shown) | |||
| Line 1: | Line 1: | ||
[[image:profile-kagari. | [[image:profile-kagari.png|180px|right|]] | ||
{{TOClimit|2}} | |||
=Story= | ==Story== | ||
'''Kagari''' <br>'''『かがり』''' | |||
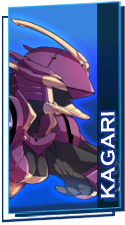
Kagari is a secret agent for Kurenai, a clan of ninjas that hate the earth-union military and raised Kagari. Her parents and brother were killed in war, now she fights to honor their memory and to repay Kurenai, her adoptive family. | Kagari is a secret agent for Kurenai, a clan of ninjas that hate the earth-union military and raised Kagari. Her parents and brother were killed in war, now she fights to honor their memory and to repay Kurenai, her adoptive family. | ||
=Playstyle= | ==Playstyle== | ||
Health: 28000 Stun: 75 | '''Health:''' 28000 | ||
<br>'''Stun:''' 75 | |||
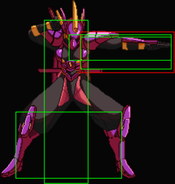
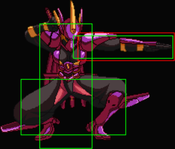
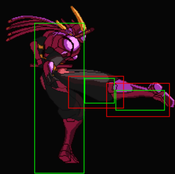
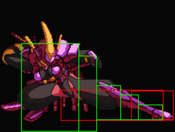
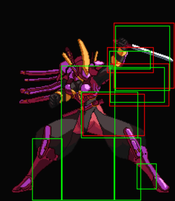
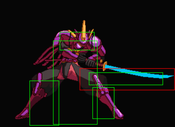
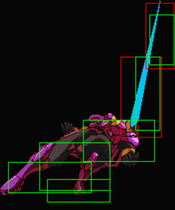
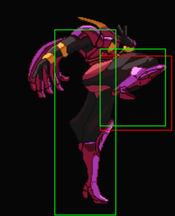
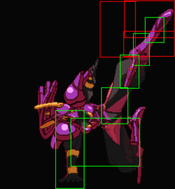
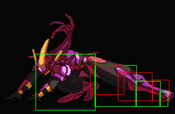
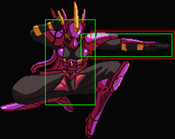
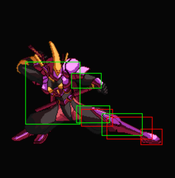
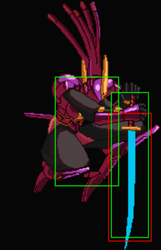
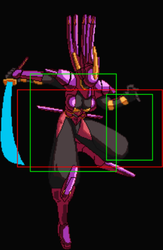
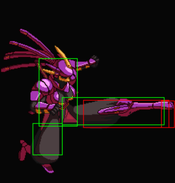
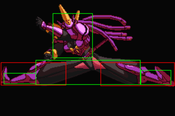
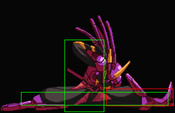
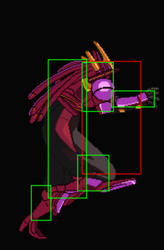
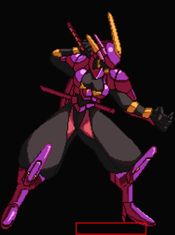
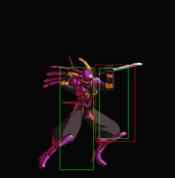
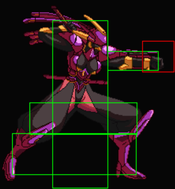
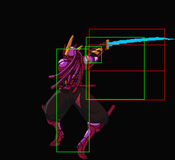
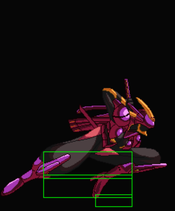
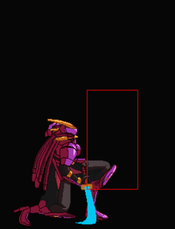
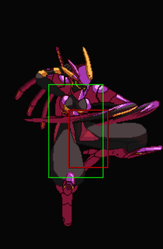
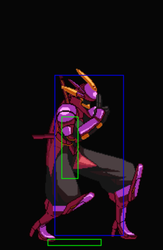
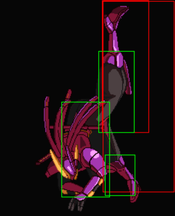
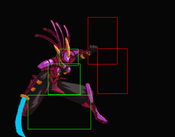
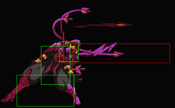
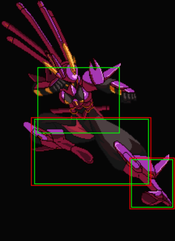
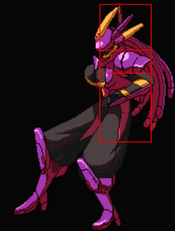
<br>[https://drive.google.com/file/d/0B8gPy-EXmVVbMzFhdk5rS0FxMWM/view?usp=sharing Full hitboxes] | |||
Kagari is an all-round character with a good fireball and DP, she's the closest thing to a traditional shoto in Chaos Code. She has strong space control and movement which she can use to control the pace of a match. Her mix-up is dangerous too thanks to being able to combo off throw anywhere on screen. Her damage leaves a bit to be desired, but she makes up for it with strong reset options thanks to her teleports. She's relativly simple to learn, but thanks to having such a wide array of tools she has a really high ceiling. | Kagari is an all-round character with a good fireball and DP, she's the closest thing to a traditional shoto in Chaos Code. She has strong space control and movement which she can use to control the pace of a match. Her mix-up is dangerous too thanks to being able to combo off throw anywhere on screen. Her damage leaves a bit to be desired, but she makes up for it with strong reset options thanks to her teleports. She's relativly simple to learn, but thanks to having such a wide array of tools she has a really high ceiling. | ||
=Run vs Step= | === Mobility (Run vs. Step) === | ||
Kagari's backdash is 20f total regardless of bounce choice | |||
'''Run''' | '''Run:''' Kagari has a very fast run speed, making it a good choice for tech chasing and aggressive styles of play. | ||
'''Step''' | '''Step:''' Supplies faster meter gain and evades lows/throws. Kagari is committed to the step for 16 frames. | ||
= Move | == Extra Move Selection == | ||
'''Shuriken - Rakurai:''' Air fireball, the angles are very good for controlling space. Probably Kagari's best neutral tool, but also has uses in combos either for special to super cancels or turn an air throw knockdown into an air tech for tech chase/air reset options. | |||
'''Kawarimi - Oboro:''' Teleport counter, it typically doesn't actually punish things because of it's recovery, but it gets Kagari close and activates on projectiles. It's utility is a little more matchup specific than kagari's other extra moves, but it's never useless. | |||
'''Ouji - Harinezumi:''' Poison Super, Does pretty good damage if you get all the poison ticks. Kagari has some pretty high damage exceeds using this move to stack on poison. A good choice for the resource dumps, but also good if you plan on running away and zoning out. | |||
'''Ougi - Ryuusei Kyaku:''' Divekick super, works as an ender for air combos and for exceed routes. Not as high damage as Harinezumi but because it can be used from air combos the chances to use this super are higher, and since it's damage is all upfront rather than poison it can be a better choice if you want to go in more than run away. | |||
===Recommended Sets=== | |||
Kagari is pretty mix and match, all of her options are strong so it comes down more to what you value and what the matchup calls for. | |||
'''Shuriken - Rakurai & Ouji - Harinezumi''' | |||
This pairing is pretty common. It's one of the most straight-forward Kagari sets since Shuriken helps her control space and it's very easy to find times when Harinezumi will combo. This set also has some nice synergy since Shuriken is an air special that Kagari can cancel into Harinezumi, her only air super. It will work with basically any kagari playstyle. | |||
'''Shuriken - Rakurai & Kawarimi - Oboro''' | |||
This pairing gives kagari the most neutral tools, but limits her damage output. That limit on her damage output isn't necessarily a huge deal however, as Kagari can get by using her default supers. | |||
'''Shuriken - Rakurai/Kawarimi Oboro & Ouji - Harinezumi''' | |||
Harinezumi's draw is mostly the damage, to that end it doesn't really matter which other extra move you take. | |||
== Move List== | |||
| | ''Click on a header to expand that section of the movelist'' | ||
<div class="mw-collapsible mw-collapsed"> | |||
<div class="mw-collapsible-toggle" style="float: none;"><center><font size="4"><b>Normal Moves</b></font></center></div> | |||
<div class="mw-collapsible-content"> | |||
=== <font style="visibility:hidden" size="0">Normal Moves</font> === | |||
====== <font style="visibility:hidden" size="0">5A</font> ====== | |||
{{MoveData | |||
|image=Kagari5a.png | |||
|name=5A | |||
|data= | |||
{{AttackData-CC | |||
|damage= | |||
|guard=High/Low | |||
|startup=7f | |||
|active=- | |||
|recovery=- | |||
|frameadv=+2 | |||
|cancelable=Yes | |||
|chprop=- | |||
|description = put words here | |||
}} | |||
}} | |||
| | ====== <font style="visibility:hidden" size="0">2A</font> ====== | ||
| | {{MoveData | ||
|image=Kagari2a.png | |||
|name=2A | |||
|data= | |||
{{AttackData-CC | |||
|damage= | |||
|guard=High/Low | |||
|startup=6f | |||
|active=- | |||
|recovery=- | |||
|frameadv=+4 | |||
|cancelable=Yes | |||
|chprop=- | |||
|description = put words here | |||
}} | |||
}} | |||
| | ====== <font style="visibility:hidden" size="0">5B</font> ====== | ||
| | {{MoveData | ||
|image=kagari5b.png | |||
|name=5B | |||
|data= | |||
{{AttackData-CC | |||
|damage= | |||
|guard=Low | |||
|startup=7f | |||
|active=- | |||
|recovery=- | |||
|frameadv=+2 | |||
|cancelable=Yes | |||
|chprop=- | |||
|description = A pretty quick move, good for catching people when in range. | |||
}} | |||
}} | |||
| | ====== <font style="visibility:hidden" size="0">2B</font> ====== | ||
| | {{MoveData | ||
|image=Kagari2b.png | |||
|name=2B | |||
|data= | |||
{{AttackData-CC | |||
|damage= | |||
|guard=Low | |||
|startup=6f | |||
|active=- | |||
|recovery=- | |||
|frameadv=+3 | |||
|cancelable=Yes | |||
|chprop=- | |||
|description = Fast crouching low kick with decent range. | |||
}} | |||
}} | |||
====== <font style="visibility:hidden" size="0">cl.C</font> ====== | |||
{{MoveData | |||
|image=KagariclC.png | |||
|name=cl.C | |||
|data= | |||
{{AttackData-CC | |||
|damage= | |||
|guard=High/Low | |||
|startup=13f | |||
|active=- | |||
|recovery=- | |||
|frameadv=-2 | |||
|cancelable=Yes | |||
|chprop=Stagger | |||
|description = Hits twice, both hits are cancelable. | |||
}} | |||
}} | |||
| | ====== <font style="visibility:hidden" size="0">5C</font> ====== | ||
| | {{MoveData | ||
|image=Kagari5c.png | |||
|name=5C | |||
|data= | |||
{{AttackData-CC | |||
|damage= | |||
|guard=High/Low | |||
|startup=8f | |||
|active=- | |||
|recovery=- | |||
|frameadv=-5 | |||
|cancelable=No | |||
|chprop=Stagger | |||
|description = Good range. | |||
}} | |||
}} | |||
| | ====== <font style="visibility:hidden" size="0">2C</font> ====== | ||
| | {{MoveData | ||
|image=Kagari2c.png | |||
|name=2C | |||
|data= | |||
{{AttackData-CC | |||
|damage= | |||
|guard=High/Low | |||
|startup=12f | |||
|active=- | |||
|recovery=- | |||
|frameadv=-6 | |||
|cancelable=Yes | |||
|chprop=Stagger | |||
|description = Sword swipe anti-air. Moves Kagari forward a bit. | |||
}} | |||
}} | |||
====== <font style="visibility:hidden" size="0">cl.D</font> ====== | |||
{{MoveData | |||
|image=KagariclD.png | |||
|name=cl.D | |||
|data= | |||
{{AttackData-CC | |||
|damage= | |||
|guard=High/Low | |||
|startup=9f | |||
|active=- | |||
|recovery=- | |||
|frameadv=-3 | |||
|cancelable=Yes | |||
|chprop=Stagger | |||
|description = put words here | |||
}} | |||
}} | |||
== | ====== <font style="visibility:hidden" size="0">5D</font> ====== | ||
{{MoveData | |||
|image=Kagari5D.png | |||
|name=5D | |||
|data= | |||
{{AttackData-CC | |||
|damage= | |||
|guard=High/Low | |||
|startup=10f | |||
|active=- | |||
|recovery=- | |||
|frameadv=-5 | |||
|cancelable=No | |||
|chprop=Stagger | |||
|description = Good anti-air. | |||
}} | |||
}} | |||
====== <font style="visibility:hidden" size="0">2D</font> ====== | |||
|- | {{MoveData | ||
|image=Kagari2D.png | |||
|- | |name=2D | ||
|data= | |||
{{AttackData-CC | |||
|damage= | |||
|guard=Low | |||
|startup=11f | |||
|active=- | |||
|recovery=- | |||
|frameadv=-2 | |||
|cancelable=No | |||
|chprop=Launch | |||
|description = Sweep. | |||
}} | |||
}} | |||
====== <font style="visibility:hidden" size="0">j.A</font> ====== | |||
| | {{MoveData | ||
|image=Kagarija.png | |||
|name=j.A | |||
|data= | |||
{{AttackData-CC | |||
|damage= | |||
|guard=High | |||
|startup=6f | |||
|active=- | |||
|recovery=- | |||
|frameadv=- | |||
|cancelable=Yes | |||
|chprop=- | |||
|description = put words here | |||
}} | |||
}} | |||
====== <font style="visibility:hidden" size="0">j.B</font> ====== | |||
{{MoveData | |||
|image=Kagarijb.png | |||
|name=j.B | |||
|data= | |||
{{AttackData-CC | |||
|damage= | |||
|guard=High | |||
|startup=6f | |||
|active=- | |||
|recovery=- | |||
|frameadv=- | |||
|cancelable=Yes | |||
|chprop=- | |||
|description = Hits twice. | |||
}} | |||
}} | |||
== | ====== <font style="visibility:hidden" size="0">j.C</font> ====== | ||
{{MoveData | |||
|image=Kagarijc.png | |||
|name=j.C | |||
|data= | |||
{{AttackData-CC | |||
|damage= | |||
|guard=High | |||
|startup=10f | |||
|active=- | |||
|recovery=- | |||
|frameadv=- | |||
|cancelable=Yes | |||
|chprop=Stagger | |||
|description = Lots of active frames, good jump-in | |||
}} | |||
}} | |||
====== <font style="visibility:hidden" size="0">nj.C</font> ====== | |||
|- | {{MoveData | ||
|image=Kagarinjc.png | |||
|- | |name=Neutral jump C | ||
|input=nj.C | |||
|data= | |||
{{AttackData-CC | |||
|damage= | |||
|guard=High | |||
|startup=8f | |||
|active=- | |||
|recovery=- | |||
|frameadv=- | |||
|cancelable=Yes | |||
|chprop=Stagger | |||
|description = put words here | |||
}} | |||
}} | |||
====== <font style="visibility:hidden" size="0">j.D</font> ====== | |||
| | {{MoveData | ||
|image=Kagarijd.png | |||
|name=j.D | |||
|data= | |||
{{AttackData-CC | |||
|damage= | |||
|guard=High | |||
|startup=7f | |||
|active=- | |||
|recovery=- | |||
|frameadv=- | |||
|cancelable=Yes | |||
|chprop=Stagger | |||
|description = put words here | |||
}} | |||
}} | |||
====== <font style="visibility:hidden" size="0">nj.D</font> ====== | |||
| | {{MoveData | ||
|image=Kagarinjd.png | |||
|name=neutral jump D | |||
|input=nj.D | |||
|data= | |||
{{AttackData-CC | |||
|damage= | |||
|guard=High | |||
|startup=8f | |||
|active=- | |||
|recovery=- | |||
|frameadv=- | |||
|cancelable=Yes | |||
|chprop=Stagger | |||
|description = put words here | |||
}} | |||
}} | |||
</div> | |||
</div> | |||
<div class="mw-collapsible mw-collapsed"> | |||
|- | <div class="mw-collapsible-toggle" style="float: none;"><center><font size="4"><b>Command Normals</b></font></center></div> | ||
<div class="mw-collapsible-content"> | |||
===<font style="visibility:hidden" size="0">Command Normals</font>=== | |||
====== <font style="visibility:hidden" size="0">3B</font> ====== | |||
{{MoveData | |||
|image=Kagari3B.png | |||
|name=Grind Kick | |||
|input=3B | |||
|data= | |||
{{AttackData-CC | |||
|damage= | |||
|guard=Low | |||
|startup=11f | |||
|active=- | |||
|recovery=- | |||
|frameadv=-3 | |||
|cancelable=Yes | |||
|chprop=- | |||
|description = Combo extender, good for picking up off of throw and wall bounces | |||
}} | |||
}} | |||
====== <font style="visibility:hidden" size="0">Air Throw</font> ====== | |||
{{MoveData | |||
|image=KagariAirThrow.png | |||
|name=Air Throw | |||
|input=j.A+C | |||
|data= | |||
{{AttackData-CC | |||
|damage= | |||
|guard=Throw | |||
|startup=5f | |||
|active=- | |||
|recovery=- | |||
|frameadv=- | |||
|cancelable=Yes | |||
|chprop=- | |||
|description = Combo ender. You can either take the knockdown or cancel it into an air shuriken for a little extra damage and the ability to super cancel. | |||
}} | |||
}} | |||
</div> </div> | |||
== | <div class="mw-collapsible mw-collapsed"> | ||
<div class="mw-collapsible-toggle" style="float: none;"><center><font size="4"><b>Universal Mechanics</b></font></center></div> | |||
<div class="mw-collapsible-content"> | |||
=== <font style="visibility:hidden" size="0">Universal Mechanics</font> === | |||
====== <font style="visibility:hidden" size="0">Normal Throw</font> ====== | |||
{{MoveData | |||
|image=KagariThrow.png | |||
|name=Normal Throw | |||
|input=A+C | |||
|data= | |||
{{AttackData-CC | |||
|damage= | |||
|guard=Throw | |||
|startup=5f | |||
|active=- | |||
|recovery=- | |||
|frameadv=- | |||
|cancelable= | |||
|chprop=- | |||
|description = Kagari teleports you to the sky and lets you fall. Buffer and whiff a 5A or 2A to frame kill and then buffer a 3B to catch them falling and super jump cancel from there into combo stuff. | |||
}} | |||
}} | |||
====== <font style="visibility:hidden" size="0">Guard Break</font> ====== | |||
{{MoveData|image=CC_KA_6CD.png|name=Guard Break|input= 6CD|data= {{AttackData-CC | |||
|damage= |guard=Guard Break |cancelable=No |chprop= | |||
|startup=- |active=- |recovery=- |frameadv=- | |||
|description= Guard Break | |||
}} }} | |||
====== <font style="visibility:hidden" size="0">C+D</font> ====== | |||
|- | {{MoveData|image=CC_KA_CD.png|name=Tactical Guard|input= CD|data= {{AttackData-CC | ||
|damage= |guard=High/Low |cancelable=No |chprop= | |||
|- | |startup=- |active=- |recovery=- |frameadv=- | ||
|description= Parry | |||
}} }} | |||
====== <font style="visibility:hidden" size="0">A+B</font> ====== | |||
| | {{MoveData|image=CC_KA_AB.png|name=Roll|input= AB|data= {{AttackData-CC | ||
|damage= |guard=High/Low |cancelable=No |chprop= | |||
|startup=- |active=- |recovery=- |frameadv=- | |||
|description= Roll | |||
}} }}</div> | |||
</div> | |||
<div class="mw-collapsible mw-collapsed"> | |||
<div class="mw-collapsible-toggle" style="float: none;"><center><font size="4"><b>Special Moves</b></font></center></div> | |||
<div class="mw-collapsible-content"> | |||
===<font style="visibility:hidden" size="0">Special Moves</font>=== | |||
====== <font style="visibility:hidden" size="0">214P</font> ====== | |||
{{MoveData | |||
|image=Kagari214A.png | |||
|name=Kasumi Nagi | |||
|input=214P | |||
|data= | |||
{{AttackData-CC | |||
|version=A | |||
|damage= | |||
|guard=High/Low | |||
|startup=10f | |||
|active=- | |||
|recovery=- | |||
|frameadv=-10/-12/-6 | |||
|cancelable= | |||
|chprop=- | |||
|description = ends in a teleport, safer on block | |||
}} | |||
{{AttackData-CC | |||
|version=C | |||
|damage= | |||
|guard=High/Low, High(third hit) | |||
|startup=10f | |||
|active=- | |||
|recovery=- | |||
|frameadv=-10/-12/-8 | |||
|cancelable= | |||
|chprop=- | |||
|description = ends with an overhead, more damage on hit | |||
}} | |||
{{AttackData-CC | |||
|version=EX | |||
|damage= | |||
|guard=High/Low | |||
|startup=10f | |||
|active=- | |||
|recovery=- | |||
|frameadv=-8/-5/-15 | |||
|cancelable= | |||
|chprop=- | |||
|description = Ends with a ground bound and is Kagari's primary combo extender. Doesn't fully blockstring for the final hits. | |||
}} | |||
}} | |||
| | ====== <font style="visibility:hidden" size="0">236P</font> ====== | ||
|- | {{MoveData|image=Kagari236A.png |name=Shuriken |input=236P | ||
|} | |data= {{AttackData-CC |version=A |damage= |guard=High/Low | ||
|startup=10f |active=- |recovery=- |frameadv=-9 |cancelable= |chprop=- | |||
|description = Slower than C version. Pretty classic fireball, good for controlling space. Frame advantage assumes point blank | |||
}} | |||
{{AttackData-CC |version=C |damage= |guard=High/Low | |||
|startup=10f |active=- |recovery=- |frameadv=-6 |chprop=- | |||
|description = Faster than A version. | |||
}} | |||
{{AttackData-CC |version=EX |damage= |guard=High/Low | |||
|startup=10f |active=- |recovery=- |frameadv=+8 |cancelable= |chprop=- | |||
|description = Faster than C version. Hits 3 times and launches, can be comboed off of in the corner. | |||
}} | |||
}} | |||
====== <font style="visibility:hidden" size="0">236K</font> ====== | |||
{{MoveData |image=Kagari236B.png |name=Mugen |input=236K (hold D for low) | |||
|data= {{AttackData-CC |version=B |damage= |guard=High/Low | |||
|startup=15f |active=- |recovery=- |frameadv=-7 |cancelable= |chprop=- | |||
|description = Run up slash. Useful to cancel from since the first hit keeps the opponent grounded. | |||
}} | |||
{{AttackData-CC |version=D |damage= |guard=High | |||
|startup=29f |active=- |recovery=- |frameadv=-10 |chprop=- | |||
|description = Has some use in combos and can be used for resets. | |||
}} | |||
{{AttackData-CC |version=[D] |damage= |guard=Low | |||
|startup=43f |active=- |recovery=- |frameadv=-1 |chprop=- | |||
|description = Fake the overhead and go low. Not the best as a mix-up, but only being -1 is pretty good. | |||
}} | |||
{{AttackData-CC |version=EX |damage= |guard=High/Low, High(last hit) | |||
|startup=13f |active=- |recovery=- |frameadv=-6 |cancelable= |chprop=- | |||
|description = Launches if it hits an airborne opponent which is very useful for picking someone up off a ground bound or OTG and then carrying them to the corner. Hold the input to go low. | |||
}} | |||
}} | |||
====== <font style="visibility:hidden" size="0">214K</font> ====== | |||
{{MoveData |image=Kagari214B.png|name=Mugen - Utsuroi|input=214K | |||
|data= {{AttackData-CC |version=B |damage= |guard= | |||
|startup=24f |active=- |recovery=- |frameadv=- |cancelable= |chprop=- | |||
|description = Command dash, good for mix-ups and resets when you have respect. Stays grounded | |||
}} | |||
{{AttackData-CC |version=D |damage= |guard= | |||
|startup=26f |active=- |recovery=- |frameadv=- |chprop=- | |||
|description = Goes into the air | |||
}} | |||
{{AttackData-CC |version=EX |damage= |guard= | |||
|startup=23f |active=- |recovery=- |frameadv=- |cancelable= |chprop=- | |||
|description = can cross through cornered opponents. Stays grounded | |||
}} }} | |||
====== <font style="visibility:hidden" size="0">623P</font> ====== | |||
{{MoveData |image=Kagari623C.png |name=Genjin |input=623P | |||
|data= {{AttackData-CC |version=A |damage= |guard=High/Low | |||
|startup=4f |active=- |recovery=- |frameadv=-20 |cancelable= |chprop=- | |||
|description = Invun until first active frame. Gives combos on trade. Does have a lot of horizontal reach but will tag opponents directly above Kagari. | |||
}} | |||
{{AttackData-CC |version=C |damage= |guard=High/Low | |||
|startup=8f |active=- |recovery=- |frameadv=-25 |chprop=- | |||
|description = Invun through active. Hits further horizontally but can miss opponents directly above. | |||
}} | |||
{{AttackData-CC |version=EX |damage= |guard=High/Low | |||
|startup=5f |active=- |recovery=- |frameadv=-18 |cancelable= |chprop=- | |||
|description = not invun on startup. Applies Poison | |||
}} | |||
}} | |||
</div> | |||
</div> | |||
== | <div class="mw-collapsible mw-collapsed"> | ||
<div class="mw-collapsible-toggle" style="float: none;"><center><font size="4"><b>Extra Special Moves</b></font></center></div> | |||
<div class="mw-collapsible-content"> | |||
===<font style="visibility:Hidden" Size="0">Extra Specials</font>=== | |||
====== <font style="visibility:hidden" size="0">j.236P</font> ====== | |||
{{MoveData |image=Kagarij236A.png |name=Shuriken - Rakurai |input=j.236P | |||
|- | |data= {{AttackData-CC |damage= |guard=High/Low | ||
|startup=18f |active=- |recovery=- |frameadv=- |cancelable= |chprop=- | |||
|description = Air fireball. A version goes at a very steep angle. C version has a wider angle. You can have an air fireball and a ground fireball out at the same time. Doing this move also restores your airdash if you've used one already. | |||
}} }} | |||
====== <font style="visibility:hidden" size="0">B+D</font> ====== | |||
{{MoveData |image=KagariBD.png |name=Kawarimi-Oboro |input=B+D | |||
|data= {{AttackData-CC |damage= |guard= | |||
|startup=5f |active=- |recovery=- |frameadv=- |cancelable= |chprop=- | |||
|description = Teleport counter, hit invun before active. Has a lot of recovery so it typically doesn't punish things, but it's good to get past projectiles or get out of really bad situations. | |||
}} }} | |||
</div> | |||
</div> | |||
<div class="mw-collapsible mw-collapsed"> | |||
<div class="mw-collapsible-toggle" style="float: none;"><center><font size="4"><b>Ultimate Chaos</b></font></center></div> | |||
<div class="mw-collapsible-content"> | |||
===<font Style="visibility:hidden" Size="0">Ultimate Chaos</font>=== | |||
====== <font style="visibility:hidden" size="0">236236K</font> ====== | |||
{{MoveData |image=Kagari236236K.png |name=Ougi - Rasen |input=236236K | |||
|data= {{AttackData-CC |damage= |guard=High/Low | |||
|startup=- |active=- |recovery=- |frameadv=-13 |cancelable= |chprop=- | |||
|description = D version dashes up further, but both do the same amount of damage. | |||
}} }} | |||
====== <font style="visibility:hidden" size="0">2141236P</font> ====== | |||
{{MoveData |image=Kagari2141236P.png |name=Ougi - Manji Senkou Ha |input=2141236P | |||
|data= {{AttackData-CC |damage= |guard=High/Low | |||
|startup=- |active=- |recovery=- |frameadv=+12 |cancelable= |chprop=- | |||
|description = Energy wave that pushes the opponent back. It's good for corner carry since you can dash up afterwards and keep a combo going. It's also good for pressure. | |||
}} }} | |||
</div> | |||
</div> | |||
| | <div class="mw-collapsible mw-collapsed"> | ||
|- | <div class="mw-collapsible-toggle" style="float: none;"><center><font size="4"><b>Extra Ultimate Chaos</b></font></center></div> | ||
|} | <div class="mw-collapsible-content"> | ||
===<font style="visibility:hidden" size="0">Extra Ultimate Chaos</font>=== | |||
====== <font style="visibility:hidden" size="0">236236P</font> ====== | |||
{{MoveData |image=Kagari236236P.png |name=Ougi - Harinezumi |input=236236P | |||
|data= {{AttackData-CC |damage= |guard=High/Low | |||
|startup=- |active=- |recovery=- |frameadv=-11 |cancelable= |chprop=- | |||
|description = Hair stabs that do alright damage and apply 3 stacks of poison. It's a lot of poison if you can run away and let it all tick down. | |||
}} }} | |||
====== <font style="visibility:hidden" size="0">214214K</font> ====== | |||
{{MoveData |image=Kagari214214B.png |name=Ougi - Ryuusei Kyaku |input=214214K (air okay) | |||
|data= {{AttackData-CC |damage= |guard=High/Low | |||
|startup=- |active=- |recovery=- |frameadv=-24 |cancelable= |chprop=- | |||
|description = DiveKick super, B version works better in combos, D version travels further in neutral. | |||
}} }} | |||
</div> | |||
</div> | |||
== | <div class="mw-collapsible mw-collapsed"> | ||
<div class="mw-collapsible-toggle" style="float: none;"><center><font size="4"><b>Destruction Chaos</b></font></center></div> | |||
<div class="mw-collapsible-content"> | |||
===<font style="visibility:hidden" size="0">Destruction Chaos</font>=== | |||
====== <font style="visibility:hidden" size="0">2363214A+C</font> ====== | |||
{{MoveData |image=Kagarilvl3.png |name=Hi Ougi - Ura Rasen |input=2363214A+C | |||
|data= {{AttackData-CC |damage= |guard=High/Low | |||
|startup=- |active=- |recovery=- |frameadv=-11 |cancelable= |chprop=- | |||
|description = Level 3. Easy to combo into and can be a good punish. Exceeds do better damage, but not too much better, if it's early in a match and an exceed wont kill it's probably better to use this so you can build back meter afterwards. | |||
}} }} | |||
</div> | |||
</div> | |||
== Combos == | |||
for all combos ending in airthrow > 236A you can buffer a 5A afterwards to catch no tech. If the opponent doesn't no tech you can jump up to chase their tech. If you don't want this tech trap and would rather have more standard oki you can just ignore the ending 236A and take the knockdown off air throw. | |||
===Combo Videos=== | |||
[https://www.nicovideo.jp/watch/sm19767947 Extensive Combo Video], the combos below & more with notation & timing! | |||
= | [https://www.youtube.com/watch?v=_WHr70F59PM Some more combos]! | ||
[https://youtu.be/6t-Wp8dgMPs Combo video from Ocelot] | |||
===Meterless=== | |||
= | |||
= | |||
[https://www.youtube.com/watch?v=iPgBAwhzdtQ video example] | [https://www.youtube.com/watch?v=iPgBAwhzdtQ video example] | ||
| Line 201: | Line 654: | ||
Combo off DP. The situation may seem unlikely, but A DP will trade in a lot of situations and most trades will lead to this combo. | Combo off DP. The situation may seem unlikely, but A DP will trade in a lot of situations and most trades will lead to this combo. | ||
==EX combos== | ===EX combos=== | ||
[https://www.youtube.com/watch?v=tXT_auEPvfg video example] | [https://www.youtube.com/watch?v=tXT_auEPvfg video example] | ||
| Line 221: | Line 674: | ||
Corner combo using ex rekka and ex mugen, bit more damage for 50 more meter, also easier since it avoids the rejump. | Corner combo using ex rekka and ex mugen, bit more damage for 50 more meter, also easier since it avoids the rejump. | ||
==Super combos== | ===Super combos=== | ||
[https://www.youtube.com/watch?v=W57kXe2TWdc video example] | [https://www.youtube.com/watch?v=W57kXe2TWdc video example] | ||
| Line 235: | Line 688: | ||
'''2A > 2B > cl.C > cl.D > 3B > 214AC > 214P > 214P > 5B > 2C > 236BD > jump > j.B(1) > j.C > j.D > double jump > j.A > j.C > j.D > 236A > air throw > 236A > 214214D''' | '''2A > 2B > cl.C > cl.D > 3B > 214AC > 214P > 214P > 5B > 2C > 236BD > jump > j.B(1) > j.C > j.D > double jump > j.A > j.C > j.D > 236A > air throw > 236A > 214214D''' | ||
For damage, it doesn't really matter what you start with, just know that you can cancel air shuriken into divekick super to kill for 2 bars. | |||
== Colors == | |||
* '''Console Versions''': You can hold R1 button while selecting a character to get an alternative color. | |||
* '''Arcade Version''': You can hold START button while selecting a character to get an alternative color. | |||
{{ColorGallery | filePrefix=Kagari | textHeights=3.2em | colors= | |||
{{ColorGallery/Color|A| text= A Button }} | |||
{{ColorGallery/Color|B| text= B Button<hr>{{Small|Eva Unit 02<hr>(Neon Genesis Evangelion)}} }} | |||
{{ColorGallery/Color|C| text= C Button }} | |||
{{ColorGallery/Color|D| text= D Button<hr>{{Small|Nirvash<hr>(Eureka Seven)}} }} | |||
}} | |||
{{ColorGallery | filePrefix=Kagari | textHeights=3.2em | colors= | |||
{{ColorGallery/Color|SA| text= R1 + A Button }} | |||
{{ColorGallery/Color|SB| text= R1 + B Button<hr>{{Small|Hyaku Shiki<hr>(Zeta Gundam)}} }} | |||
{{ColorGallery/Color|SC| text= R1 + C Button }} | |||
{{ColorGallery/Color|SD| text= R1 + D Button }} | |||
}} | |||
{{Navbox-CC}} | |||
[[Category: Chaos Code]] | |||
[[Category: Kagari]] | |||
{{CC}} | |||
[[Category:Chaos Code]] | |||
Latest revision as of 02:21, 3 December 2023
Story
Kagari
『かがり』
Kagari is a secret agent for Kurenai, a clan of ninjas that hate the earth-union military and raised Kagari. Her parents and brother were killed in war, now she fights to honor their memory and to repay Kurenai, her adoptive family.
Playstyle
Health: 28000
Stun: 75
Full hitboxes
Kagari is an all-round character with a good fireball and DP, she's the closest thing to a traditional shoto in Chaos Code. She has strong space control and movement which she can use to control the pace of a match. Her mix-up is dangerous too thanks to being able to combo off throw anywhere on screen. Her damage leaves a bit to be desired, but she makes up for it with strong reset options thanks to her teleports. She's relativly simple to learn, but thanks to having such a wide array of tools she has a really high ceiling.
Mobility (Run vs. Step)
Kagari's backdash is 20f total regardless of bounce choice
Run: Kagari has a very fast run speed, making it a good choice for tech chasing and aggressive styles of play.
Step: Supplies faster meter gain and evades lows/throws. Kagari is committed to the step for 16 frames.
Extra Move Selection
Shuriken - Rakurai: Air fireball, the angles are very good for controlling space. Probably Kagari's best neutral tool, but also has uses in combos either for special to super cancels or turn an air throw knockdown into an air tech for tech chase/air reset options.
Kawarimi - Oboro: Teleport counter, it typically doesn't actually punish things because of it's recovery, but it gets Kagari close and activates on projectiles. It's utility is a little more matchup specific than kagari's other extra moves, but it's never useless.
Ouji - Harinezumi: Poison Super, Does pretty good damage if you get all the poison ticks. Kagari has some pretty high damage exceeds using this move to stack on poison. A good choice for the resource dumps, but also good if you plan on running away and zoning out.
Ougi - Ryuusei Kyaku: Divekick super, works as an ender for air combos and for exceed routes. Not as high damage as Harinezumi but because it can be used from air combos the chances to use this super are higher, and since it's damage is all upfront rather than poison it can be a better choice if you want to go in more than run away.
Recommended Sets
Kagari is pretty mix and match, all of her options are strong so it comes down more to what you value and what the matchup calls for.
Shuriken - Rakurai & Ouji - Harinezumi
This pairing is pretty common. It's one of the most straight-forward Kagari sets since Shuriken helps her control space and it's very easy to find times when Harinezumi will combo. This set also has some nice synergy since Shuriken is an air special that Kagari can cancel into Harinezumi, her only air super. It will work with basically any kagari playstyle.
Shuriken - Rakurai & Kawarimi - Oboro
This pairing gives kagari the most neutral tools, but limits her damage output. That limit on her damage output isn't necessarily a huge deal however, as Kagari can get by using her default supers.
Shuriken - Rakurai/Kawarimi Oboro & Ouji - Harinezumi Harinezumi's draw is mostly the damage, to that end it doesn't really matter which other extra move you take.
Move List
Click on a header to expand that section of the movelist
Universal Mechanics
Normal Throw
Normal Throw
A+C |
|---|
Guard Break
Guard Break
6CD |
|---|
C+D
Tactical Guard
CD |
|---|
A+B
Roll
AB |
|---|
Combos
for all combos ending in airthrow > 236A you can buffer a 5A afterwards to catch no tech. If the opponent doesn't no tech you can jump up to chase their tech. If you don't want this tech trap and would rather have more standard oki you can just ignore the ending 236A and take the knockdown off air throw.
Combo Videos
Extensive Combo Video, the combos below & more with notation & timing!
Meterless
2A > 2B > cl.C > cl.D > 3B > 214C > 214C > 214C
Confirm into rekka, the string of normals before the rekka isn't super important, but you need to confirm that you're close enough for the rekka to connect.
2A > 2B > 2A > 2B > 2A > 2B > 5C > 236B
236B will work when you push yourself out in the confirm, or if you just start a string far away.
Throw > 5A/2A (whiff) > 3B > sjc > j.B(1) > j.C > j.D > land > jump > j.A > j.B(1) > j.C > j.D > double jump > j.A > j.B(1) > j.C > j.D > Air throw
Throw combo, use the whiff to make it easier to get the 3B to hit (don't forget that chaos code has an infinite buffer for held normals). Also, the first air series needs to be delayed a bit so that the opponent doesn't get floated too high for the rejump.
Throw > 236D > 2C > cl.D > sjc > j.B(1) > j.C > D > land > jump > j.A > j.B(1) > j.C > j.D > double jump > j.A > j.C > j.D > j.236A > air throw > 236A
Corner only throw combo. The j.236A isn't needed, so just ignore it and go straight into airthrow if you didn't take that extra move.
CH 623A(1) > 2B > 2C > j.B(1) > j.C > j.D > air throw
Combo off DP. The situation may seem unlikely, but A DP will trade in a lot of situations and most trades will lead to this combo.
EX combos
2A > 2B > cl.C > cl.D > 3B > 214AC > 214P > 214P > 2B > 236B
simple confirm into EX rekka, will carry to the corner and let the opponent air tech out.
2A > 2B > cl.C > cl.D > 3B > 214AC > 214P > 214P > 2B > 236BD > jump > j.A > j.C > j.D > double jump > j.B(1) > j.C > j.D > 236A > air throw > 236A
ex rekka into ex mugen, full screen corner carry for 1 bar into an air throw.
2A > 2B > cl.C > cl.D > 3B > 214AC > 214P > 214P > 5B > 2C > sjc > j.B(1) > j.C > j.D > land > jump > j.A > j.B(1) > j.C > j.D > double jump > j.A > j.B > j.C > j.D > 236A > air throw > 236A
Corner combo off ex rekka
2A > 2B > cl.C > cl.D > 3B > 214AC > 214P > 214P > 5B > 2C > 236BD > jump > j.B(1) > j.C > j.D > double jump > j.A > j.C > j.D > 236A > air throw > 236A
Corner combo using ex rekka and ex mugen, bit more damage for 50 more meter, also easier since it avoids the rejump.
Super combos
Throw > 5A/2A (whiff) > 3B > sjc > j.B(1) > j.C > j.D > land > jump > j.A > j.B(1) > j.C > j.D > double jump > j.A > j.B(1) > j.C > j.D > 214214D > land > 2A > 2C > sjc > j.A > j.B(1) > j.C > j.D > air throw
throw combo into divekick super.
2A > 2B > cl.C > cl.D > 3B > 214AC > 214P > 214P > 5B > 2C > 236BD > jump > j.B(1) > j.C > j.D > double jump > j.A > j.C > j.D > 214214B > oki
after the super you can jump and input an air shuriken to meaty the opponent back into the corner.
2A > 2B > cl.C > cl.D > 3B > 214AC > 214P > 214P > 5B > 2C > 236BD > jump > j.B(1) > j.C > j.D > double jump > j.A > j.C > j.D > 236A > air throw > 236A > 214214D
For damage, it doesn't really matter what you start with, just know that you can cancel air shuriken into divekick super to kill for 2 bars.
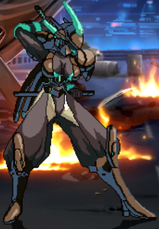
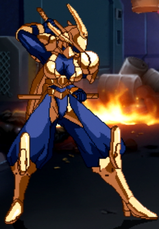
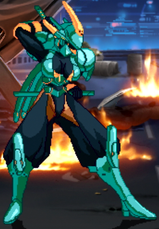
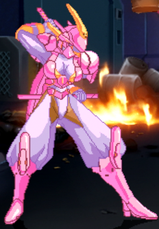
Colors
- Console Versions: You can hold R1 button while selecting a character to get an alternative color.
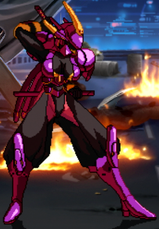
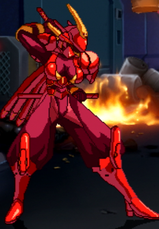
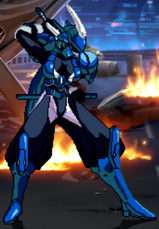
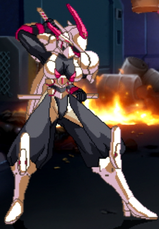
- Arcade Version: You can hold START button while selecting a character to get an alternative color.
