|
|
| Line 29: |
Line 29: |
| ==Gameplay Overview== | | ==Gameplay Overview== |
| {{StrengthsAndWeaknesses | | {{StrengthsAndWeaknesses |
| | intro = {{SUBPAGENAME}} is a versatile character with many tools allowing her to switch between playing passive or agressive depending on the opponent. Her most defining trait being her 214D, a trap which triggers even as she blocks against those who step on it making her hard to approach(Does this remind you of someone?) and giving her a free combo due to the amount of hitstun it provides. | | | intro = {{SUBPAGENAME}} is a versatile character with many tools allowing her to switch between playing passive or agressive depending on the opponent. Her most defining trait being her 214D, a trap which triggers even as she blocks on those who step on it making her hard to approach(Does this remind you of someone?) and giving her a free combo due to the amount of hitstun it provides. |
|
| |
|
| '''Hiro is a jack-of-all-trades mainly focused on setplay with strong neutral tools allowing her to play as she wants, may it be rushdown or zoner.''' | | '''Hiro is a jack-of-all-trades mainly focused on setplay with strong neutral tools allowing her to play as she wants, may it be rushdown or zoner.''' |
Revision as of 12:20, 1 January 2024
| Hiro
|
|
|
| Health |
510
|
| Pre-Jump Frames |
3
|
| Play Style |
All-Around, Setplay
|
| Dash Type |
Step
|
Character Background
Race: Demon
Motivation: To revive the Demon King
Weapon: Gate Of Heaven
Likes: Pride in demons
Dislikes: "Heroic" Humans
Gameplay Overview
Playstyle
|
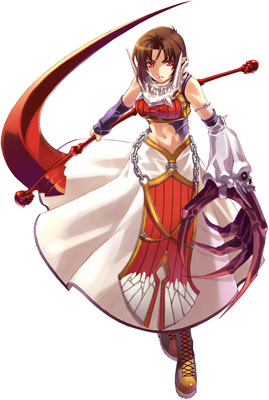
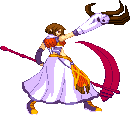
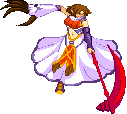
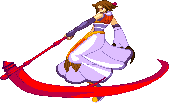
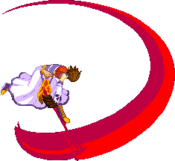
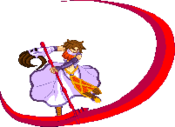
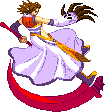
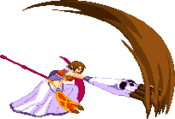
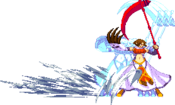
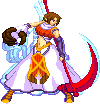
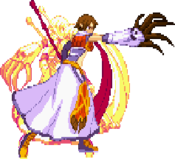
Hiro is a versatile character with many tools allowing her to switch between playing passive or agressive depending on the opponent. Her most defining trait being her 214D, a trap which triggers even as she blocks on those who step on it making her hard to approach(Does this remind you of someone?) and giving her a free combo due to the amount of hitstun it provides.
Hiro is a jack-of-all-trades mainly focused on setplay with strong neutral tools allowing her to play as she wants, may it be rushdown or zoner. |
| Pros |
Cons |
- Keepaway Master: Most of her tools such as her 236x and 214x forces the opponent into approaching while her 214D works as a trap which can catch those who are careless enough to step on it making Hiro hard to pin down.
- Anti-Zoning : Because they wanted her to fill the 'shoto' role despite not having a dp, they gave her a super fireball which tends to end any projectile war, and even without it, she can use 214x to stop careless zoning or dash through with 236D.
- 50/50 On Demand: Thanks to 214D alongside her unique string 5B>5C>j.B>j.C allowing for a HKD, she can force the opponent to guess between high and low anywhere on the screen after most hitconfirms, meaning she can play agressive if she wants.
- Amazing Normals: 5B, 5C, 8C have huge range compared to most of the cast's moves, 5b being an excellent anti air while the other two can stop approaching attempts. Her j.C works as an excellent jump in for good damage and j.B can be used for crossups.
- Simple Yet Effective Hiro doesn't have a demanding execution compared to most of the cast making her easy to pick and learn but hard to master.
|
- Poor Defense: Hiro relies on meter to get out of pressure, such as using guard cancel or a super reversal, outside of it she's forced to block on most situations and guess right.
- Average Damage: Without meter, Hiro's damage can be a bit underwhelming, requiring up to 4 or 5 interactions to get a round. Sometimes it makes you pick between damage and okizeme or dust for meter gain which resets neutral. This lack of damage also allows the opponent to enter burst threshold often and spin the round on their favor.
- Honest In A Dishonest Game: While she has many tools to work with, she's often the one having to play a lot more careful as most of the cast can blow her out of 2 or 3 hitconfirms and she doesn't have anything extremely crazy compared to some characters.
|
Normals
Far Standing Normals
5A
|
| Damage
|
Guard
|
Cancel
|
Startup
|
Adv Hit
|
Adv Block
|
Chain Adv Block
|
| 15
|
Mid
|
Specials
|
5
|
-
|
-
|
-
|
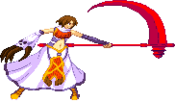
Hiro jabs her scythe forward.
|
|
5B
|
| Damage
|
Guard
|
Cancel
|
Startup
|
Adv Hit
|
Adv Block
|
Chain Adv Block
|
| 30
|
Mid
|
Specials
|
5
|
-
|
-
|
-
|
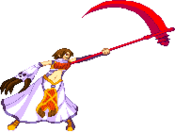
Hiro pokes her scythe diagonally upwards.
Whiffs on standing Hiro (1 & 2), Orochimaru, Roze, Wells, and Erile. Mainly used as an anti-air button.
|
|
5C
|
| Damage
|
Guard
|
Cancel
|
Startup
|
Adv Hit
|
Adv Block
|
Chain Adv Block
|
| 50
|
Mid
|
Specials
|
9
|
-
|
-
|
-
|
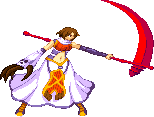
Hiro thrusts her scythe forward. Causes knockdown and does not push you back on Hit.
|
|
5D
|
| Damage
|
Guard
|
Cancel
|
Startup
|
Adv Hit
|
Adv Block
|
Chain Adv Block
|
| 10
|
Mid
|
Specials
|
8
|
-
|
-
|
-
|
Hiro balances on her scythe and kicks. Moves her forward a bit.
|
|
Close Standing Normals
5A
|
| Damage
|
Guard
|
Cancel
|
Startup
|
Adv Hit
|
Adv Block
|
Chain Adv Block
|
| 15
|
Mid
|
Specials
|
4
|
-
|
-
|
-
|
Hiro jabs her scythe at a lower angle.
|
|
5B
|
| Damage
|
Guard
|
Cancel
|
Startup
|
Adv Hit
|
Adv Block
|
Chain Adv Block
|
| 30
|
Mid
|
Specials
|
5
|
-
|
-
|
-
|
Hiro swipes her claw vertically.
|
|
5C
|
| Damage
|
Guard
|
Cancel
|
Startup
|
Adv Hit
|
Adv Block
|
Chain Adv Block
|
| 25, 25
|
Mid
|
Specials
|
6
|
-
|
-
|
-
|
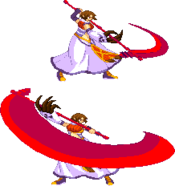
Horizontal scythe slash. Hits twice and can be canceled after the first hit.
|
|
5D
|
| Damage
|
Guard
|
Cancel
|
Startup
|
Adv Hit
|
Adv Block
|
Chain Adv Block
|
| 10
|
Mid
|
Specials
|
4
|
-
|
-
|
-
|
|
|
|
Crouching Normals
2A
|
| Damage
|
Guard
|
Cancel
|
Startup
|
Adv Hit
|
Adv Block
|
Chain Adv Block
|
| 15
|
Mid
|
Specials
|
5
|
-
|
-
|
-
|
|
|
|
2B
|
| Damage
|
Guard
|
Cancel
|
Startup
|
Adv Hit
|
Adv Block
|
Chain Adv Block
|
| 30
|
Mid
|
Specials
|
5
|
-
|
-
|
-
|
|
|
|
2C
|
| Damage
|
Guard
|
Cancel
|
Startup
|
Adv Hit
|
Adv Block
|
Chain Adv Block
|
| 50
|
Low
|
Specials
|
6
|
-
|
-
|
-
|
Hiro's scythe turns into multiple blades.
|
|
2D
|
| Damage
|
Guard
|
Cancel
|
Startup
|
Adv Hit
|
Adv Block
|
Chain Adv Block
|
| 10
|
Low
|
Specials
|
3
|
-
|
-
|
-
|
|
|
|
Jumping Normals
j.A
|
| Damage
|
Guard
|
Cancel
|
Startup
|
Adv Hit
|
Adv Block
|
Chain Adv Block
|
| 15
|
High
|
-
|
3
|
-
|
-
|
-
|
Hiro pokes her scythe out until she lands.
|
|
j.B
|
| Damage
|
Guard
|
Cancel
|
Startup
|
Adv Hit
|
Adv Block
|
Chain Adv Block
|
| 30
|
High
|
-
|
6
|
-
|
-
|
-
|
Hiro twirls her scythe around her. Long hitbox that extends behind you. Cross-up tool.
|
|
j.C Neutral jump (8) Neutral jump (8) Directional jump (7/9) or Airdash Directional jump (7/9) or Airdash
|
| Version
|
Damage
|
Guard
|
Cancel
|
Startup
|
Adv Hit
|
Adv Block
|
Chain Adv Block
|
| Neutral
|
50
|
High
|
-
|
12
|
-
|
-
|
-
|
Hiro swings her scythe down.
|
| Version
|
Damage
|
Guard
|
Cancel
|
Startup
|
Adv Hit
|
Adv Block
|
Chain Adv Block
|
| Directional
|
50
|
High
|
-
|
6
|
-
|
-
|
-
|
Faster swing, but shorter range. Has Knockdown property if chained after j.B if used as an air-to-air.
|
|
j.D
|
| Damage
|
Guard
|
Cancel
|
Startup
|
Adv Hit
|
Adv Block
|
Chain Adv Block
|
| 10
|
High
|
-
|
5
|
-
|
-
|
-
|
|
|
|
Chain Specific Normals
A -> 3C
|
| Damage
|
Guard
|
Cancel
|
Startup
|
Adv Hit
|
Adv Block
|
Chain Adv Block
|
| 30
|
High
|
None
|
-
|
-
|
-
|
-
|
Only accessible after chaining from any A normal. See Chain Combos.
Hiro crouches and does a downward claw swipe. Long startup, but the opponent won't have enough time to do anything except block or parry high.
|
|
Throws
A+D
Forward Throw
|
| Damage
|
Guard
|
Cancel
|
Startup
|
Adv Hit
|
Adv Block
|
Chain Adv Block
|
| 60
|
Throw
|
N/A
|
4
|
-
|
-
|
-
|
Hiro picks the opponent up and crushes them.
|
|
B+D
Back Throw
|
| Damage
|
Guard
|
Cancel
|
Startup
|
Adv Hit
|
Adv Block
|
Chain Adv Block
|
| 70
|
Throw
|
N/A
|
4
|
-
|
-
|
-
|
Hiro picks you up, teleports behind you, and slashes you. Can be comboed off of, but any immediate specials or supers need inputs in the same direction you were before the throw. The opponent cannot tech until they hit the ground, which carries over to any combos.
|
|
Sword Series Slash (Dust)
5B+C
Standing SSS
|
| Damage
|
Guard
|
Cancel
|
Startup
|
Adv Hit
|
Adv Block
|
Chain Adv Block
|
| 150
|
High
|
N/A
|
30
|
-
|
-
|
-
|
Triggers an air chase when you press A. To complete the air chase you must do AAABBBCCCD > 236D.
|
|
2B+C
Low SSS
|
| Damage
|
Guard
|
Cancel
|
Startup
|
Adv Hit
|
Adv Block
|
Chain Adv Block
|
| 150
|
Low
|
N/A
|
30
|
-
|
-
|
-
|
Same as standing SSS but hits low. Triggers an air chase when you press A. To complete the air chase you must do AAABBBCCCD > 236D.
|
|
Chaos Breaking (Parry)
A+B Standing Parry Standing Parry Crouching Parry Crouching Parry Jumping Parry Jumping Parry
|
| Damage
|
Guard
|
Cancel
|
Startup
|
Adv Hit
|
Adv Block
|
Chain Adv Block
|
| -
|
-
|
-
|
-
|
-
|
-
|
-
|
Dodges projectiles and counters any physical, non-grab attacks.
The Standing and Jumping versions parry anything that can be blocked High, but is vulnerable to grabs. The Crouching version only parries lows and cannot be grabbed.
|
|
Special Moves
Flaming Soul
焔魂
236A/B/C
|
| Version
|
Damage
|
Guard
|
Cancel
|
Startup
|
Adv Hit
|
Adv Block
|
Chain Adv Block
|
| A
|
33
|
Mid
|
Super
|
10
|
-
|
-
|
-
|
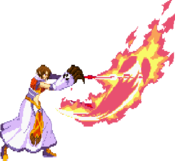
Light (A) version. Travels the slowest and does the least damage.
|
| Version
|
Damage
|
Guard
|
Cancel
|
Startup
|
Adv Hit
|
Adv Block
|
Chain Adv Block
|
| B
|
35
|
Mid
|
Super
|
11
|
-
|
-
|
-
|
Medium (B) version. Moderate speed with moderate damage.
|
| Version
|
Damage
|
Guard
|
Cancel
|
Startup
|
Adv Hit
|
Adv Block
|
Chain Adv Block
|
| C
|
37
|
Mid
|
Super
|
12
|
-
|
-
|
-
|
Heavy (C) version. Travels the fastest and does the most damage.
|
|
Scythe Ride Strike
サイズ・ライド・ストライク
623A/B/C
|
| Version
|
Damage
|
Guard
|
Cancel
|
Startup
|
Adv Hit
|
Adv Block
|
Chain Adv Block
|
| A
|
33
|
High
|
SoT
|
21
|
-
|
-
|
-
|
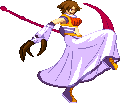
Light (A) version. Hiro dives forward with an overhead attack. Move doesn't become active till hiro starts her dive.
|
| Version
|
Damage
|
Guard
|
Cancel
|
Startup
|
Adv Hit
|
Adv Block
|
Chain Adv Block
|
| B
|
35
|
High
|
SoT
|
21
|
-
|
-
|
-
|
Medium (B) version. Hiro dives less than half a screen forward with an overhead attack that can cross-up if angled right. Move doesn't become active till hiro starts her dive.
|
| Version
|
Damage
|
Guard
|
Cancel
|
Startup
|
Adv Hit
|
Adv Block
|
Chain Adv Block
|
| C
|
37
|
High
|
SoT
|
21
|
-
|
-
|
-
|
Heavy (C) version. Hiro dives more than half a screen forward with an overhead attack that can cross-up if angled right. Move doesn't become active till hiro starts her dive.
|
|
Gate of Hell
ゲート・オブ・ヘル
214A/B/C A version A version B version B version C version C version
|
| Damage
|
Guard
|
Cancel
|
Startup
|
Adv Hit
|
Adv Block
|
Chain Adv Block
|
| 54 (18 per hit)
|
Mid
|
N/A
|
28
|
-
|
-
|
-
|
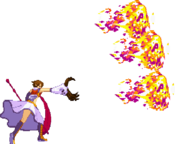
All three versions do the same damage, hit three times, and cause a knockdown on hit. Good tool for anti-zoning.
- 214A appears directly in front of Hiro.
- 214B appears mid-screen.
- 214C appears at the opposite corner.
|
|
Gate of Hell (D)
ゲート・オブ・ヘル
214D
|
| Damage
|
Guard
|
Cancel
|
Startup
|
Adv Hit
|
Adv Block
|
Chain Adv Block
|
| 60
|
Mid
|
N/A
|
46
|
-
|
-
|
-
|
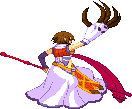
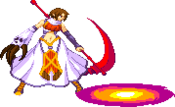
Hiro places a trap directly in front of her and said trap will not trigger unless the opponent steps on where it was placed. The trap does not detect the opponent if they have invincibility from Bursting, Parrying, etc. If the opponent doesn't step on the trap, it will disappear if Hiro is hit or after 10 seconds pass. 214D is extremely strong for Hiro's okizeme and can allow for 50/50 mixups.
|
|
Hell's Zone
ヘルズ・ゾーン
236D
|
| Damage
|
Guard
|
Cancel
|
Startup
|
Adv Hit
|
Adv Block
|
Chain Adv Block
|
| 0
|
N/A
|
N/A
|
-
|
-
|
-
|
-
|
Hiro twirls forward and disappears for a few frames. She is invulnerable until she reappears. Good for avoiding projectiles but can be hit out of in recovery.
|
|
Super Moves
Level 1 Supers
Devil Dust ~ Inferno
魔界粧・轟炎
236-236A
|
| Damage
|
Guard
|
Cancel
|
Startup
|
Adv Hit
|
Adv Block
|
Chain Adv Block
|
| 24x5 (120)
|
Mid
|
N/A
|
-
|
-
|
-
|
-
|
Consumes One Meter.
Five very slow moving fireballs are thrown horizontally together. Difficult to combo into but can pressure the opponent on oki. Excellent guard break tool when in burst.
|
|
236-236B
|
| Damage
|
Guard
|
Cancel
|
Startup
|
Adv Hit
|
Adv Block
|
Chain Adv Block
|
| 33x6 (198)
|
Mid
|
N/A
|
-
|
-
|
-
|
-
|
Consumes One Meter.
Three average speed fireballs thrown above Hiro. Excellent anti air for opponents trying to air dash in or backdash. Does the most damage raw but scales the hardest in combos.
|
|
236-236C
|
| Damage
|
Guard
|
Cancel
|
Startup
|
Adv Hit
|
Adv Block
|
Chain Adv Block
|
| 30x5 (150)
|
Mid
|
N/A
|
-
|
-
|
-
|
-
|
Consumes One Meter.
Only one fireball is thrown but this is the fastest compared to the A and B versions. This is your go to super for ending combos or catching zoning.
|
|
Devil Summon ~ Purgatory
魔召・煉獄
214-214D
|
| Damage
|
Guard
|
Cancel
|
Startup
|
Adv Hit
|
Adv Block
|
Chain Adv Block
|
| 115
|
Mid
|
N/A
|
-
|
-
|
-
|
-
|
Consumes 1 meter.
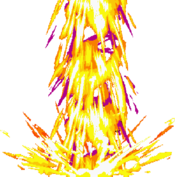
Really good anti-air super. Knockdown on hit.
|
|
Blazing Ghost Slice
烈火死霊斬
214-214A/B/C Start-up Start-up on hit on hit
|
| Damage
|
Guard
|
Cancel
|
Startup
|
Adv Hit
|
Adv Block
|
Chain Adv Block
|
| 139
|
Mid
|
N/A
|
-
|
-
|
-
|
-
|
Consumes 1 meter.
Hitgrab. Can catch opponents in the air.
|
|
Level 3 Super
Last Heaven
ラスト・ヘブン
2141236A/B/C
|
| Damage
|
Guard
|
Cancel
|
Startup
|
Adv Hit
|
Adv Block
|
Chain Adv Block
|
| 337
|
Mid
|
N/A
|
-
|
-
|
-
|
-
|
Consumes 3 meter.
Hitgrab, sort of works like a raging demon but can be confirmed off of most things like a fireball.
Completely invulnerable on startup and active frames.
|
|
Strategy
Neutral
Hiro is a very well rounded character for playing neutral. She has solid buttons to cover various angles, such as 5B which is great as a predictive anti air, 5C which covers a lot of space in front of her, and 8j.C which covers a lot of air space and makes it very hard to approach. Hiro also has a fast step dash letting her get in fast when there is a gap she can take advantage of. Hiro's main goal in neutral is to set up her 214D trap to control space and force the opponent to have to alter their approach, normally forcing them into the air which Hiro has options for.
Offence (On Hit)
On hit Hiro will aim to get a hard knockdown, normally achieved with her standard bnb 5B -> 5C >> 9jc >> j.B -> j.C which lets you set up a 214D for oki. Alternatively, you can instead of doing a jump cancel use 623A/B/C Sot which lets you extend for damage which still leads to a hard knockdown or a dust for meter. For the most part you wont use supers for combos as the meter is best spent on a 623A/B/C Sot, though in burst you should 100% go for a lvl 3 for damage.
HKD OKI
Hiro's HKD OKI is the best part of her kit thanks to her 214D and how easy it is to set it up after a combo. afterwards with a meaty 214D you have a solid mixup with 2D for a low, j.A for an instant overhead, and side swap mixups as well, letting you vortex the opponent into another HKD into 214D mixup.
Offence (On Block)
On block Hiro doesn't have to many tools for pressure on block, and most of her specials are for neutral and zoning, though her 623A/B/C is a true overhead, letting you open up people who arent expecting it. Note that it can be reacted to on block with a parry, complacently ending your turn
Defense
Unfortunately for Hiro she lacks a meterless reversal, though you thankfully have a reversal super that hits on both sides.
Combos
Chain Combos
| Chain Combo
|
Damage Per Hit
|
Notes
|
| 5A -> B -> C
|
15,15,22
|
C causes a knockdown.
|
| 5D -> B -> C
|
10,15,22
|
The Same as 5ABC chain but with D and does less damage. C causes a knockdown.
|
| 2A -> B -> C
|
15,15,22
|
Starting mid.
|
| 2D -> B -> C
|
10,15,22
|
Starting low.
|
| 5A -> C
|
15,25
|
C causes a knockdown. Always far C no matter how close you are.
|
| 5D -> C
|
10,25.
|
C causes a knockdown. Always far C no matter how close you are.
|
| 5B -> C
|
30,22
|
Launches the opponent into the air. Jump cancelable.
|
| jB -> C
|
30,18
|
Air chain. If done as an air to air it will hard knockdown.
|
| A -> 3C
|
15,30
|
C is an overhead that cannot be canceled. See Chain Specific Normals
|
BnB Combos
| Combo
|
Total Damage
|
Notes
|
| Meterless BnB
|
| 9C > 2D > 2B > 2C > 236C
|
|
|
| 9C > 5B > C > 9B > 9C
|
|
Hard knock-down finish. Good oki tool.
|
| 9C >> 5B -> C > 623C
|
|
|
| 9C > 5A > 5B > 5C > 214C
|
|
Mid-Screen Only
|
| One Bar BnB
|
| 9C > 5B> C > 623C (SOT) > B+C (AAABBBCCCDD > 236D)
|
|
|
| 9C > 2D > 2B > 2C > 236C > 236-236C
|
|
Punishable on hit in the corner point-blank. If in the corner, use 236-236B.
|
| 9C > cl.C (2 hits) > 214-214C
|
|
|
| 9C > 5B > C > 623C (SOT) > 5B > C > 9B > C
|
|
Hard Knockdown finish. Good tool for oki set-ups.
|
| Two Bar BnB
|
| 9C > 5B > C > 623C (SOT) > 5B > C > 214-214C
|
|
Cancel into 214-214C quickly or you'll drop the combo.
|
| Three Bar BnB
|
| 9C > 5B > C > 623C (SOT) > 5B > C > 623C (SOT) > 5B > C > 214-214C
|
|
Cancel into 214-214C quickly.
|
| (Corner Only) 9C > 2D > 2B > 2C > 236C > 214-1236C
|
|
You can set up 214D after level 3.
|
| 9C > cl.C (2 hits) > 214-1236C
|
|
You can set up 214D after level 3.
|
| Burst BnB
|
| 9C > 5B > C > 623C (SOT) > (Burst) 5B > C > 623C (SOT) > 5B > C > 623C (SOT) > 5B > C > 623C (SOT) > clB > C > 623C (SOT) > 214-1236A
|
|
Requires 2 bar. In the end wait for your opponent to be close to the ground, about Hiro's head level, before doing level 3. If you don't they can tech out of the after the super flash.
|
Additional Resources
{{#evu:https://www.youtube.com/watch?v=gHutFI8QDjA&ab_channel=Royshark
|alignment=left
}}
