![]()

Duels of Fortune/Baron: Difference between revisions
Jump to navigation
Jump to search


Character Properties
No edit summary |
|||
| Line 3: | Line 3: | ||
|overview=Give an overview of the char. | |overview=Give an overview of the char. | ||
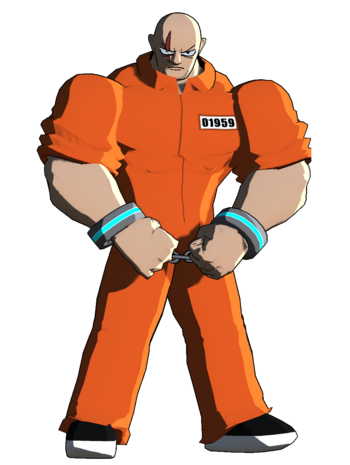
|intro= '''Baron''' | |intro= '''Baron''' armors his way into the opponent's face and mixes them with his terrifying command grabs. | ||
|pros= | |pros= | ||
* ''' | * '''Fear Invoking Mixups''' - Like any good grappler, Baron's command grabs are terrifying to get hit by. While not especially rewarding in midscreen besides solid damage, both of Baron's main command grabs give a combo in the corner, combos that can deal over 20K with 50 meter. The fear of these alone can cause opponents to do poor reversals or bursts, depriving them of valuable resources. | ||
* '''Explosive Damage Output''' - Baron does by far the most damage in the game besides Johnson, and doesn't even have to spend resources. Thanks to his ability to combo into both of his highly damaging command grabs, Baron does over 10K on bnbs and even more on bigger starters with resources in play. This amount of damage means it's common for Baron to two touch or even ToD opponents. | |||
* '''Great Armored Moves''' - Baron's '''4H''', '''2[H]''', and '''2S''' are all strong armored moves. 4H allows him to safely approach opponents and anti-air. 2S is a strong defensive tool as well as a threatening option on offense. Finally, '''2[H]''' can punish projectiles and get his pressure started. | |||
* '''Big Normals''' - Baron's normals while not disjointed cover a sizable distance and generally convert into combos very well. Standouts are '''5M''', '''4H''', and '''2[H]'''. 2[H] in particular is similar to Potemkin's slide head, only it's capable of converting from full combos even at a distance. | |||
* '''Great Defensive Choices''' - While he does have slow buttons, Baron has plenty of ways to deal with pressure. His reversal is huge and covers his entire body, making it great at catching even crossups. His wakeup reversal is even bigger, one of the biggest in the game. Beyond reversal, his '''2S''' is a near frame 1 armored move, allowing him to interrupt gaps without spending resources. Additionally, he can catch opponents attempting to bait reversals with '''63214S''' and potentially get a huge amount of damage. | |||
* '''High Health''' - Baron has by far the highest health in the game at 30K. This means he often takes an extra hit or two to kill, giving him more time to start his offense and build resources. | |||
|cons= | |cons= | ||
* ''' | * '''Awful Movement''' - Baron has the weakest movement in the game, lacking a forward dash, air dashes, having extra long prejump, and very slow walk speeds. This makes getting in on opponents and dealing with characters who have strong mobility quite difficult. | ||
* '''Committal Neutral''' - While Baron's neutral options are incredibly threatening due to their reward, most can be reliably avoided by patient and reactive opponents, and many are punishable if the opponent understands how they work. | |||
* '''Weak to Guard Reversal''' - Baron's buttons have higher recovery than normal, meaning he's especially weak to being guard cancel reversaled. This can be especially frustrating since it's hard for him to get close in the first place. While he can call this out with a meaty command grab, he's often not in a position to do this. | |||
* '''Huge Hurtbox''' - Baron has the biggest hurtbox in the game, meaning he tends to be caught by all sorts of things including a few instant overheads. In particular, it makes reaction anti-airing especially against low to the ground air dashes difficult. | |||
|border=yes|tablewidth=102 | |border=yes|tablewidth=102 | ||
Revision as of 01:43, 17 January 2024
Overview
Give an overview of the char.
Playstyle
| Baron armors his way into the opponent's face and mixes them with his terrifying command grabs. | |
| Pros | Cons |
|
|


Character Properties
| Health | 30000 |
| Backdash | XF |
| Unique Movement | No Forward Dash, No Air Dash, Increased Pre-Jump (8F) |
| Fastest Attack | X (XF) |
Character Summary
Move list
- Command Normals
- 4H - Giant Tackle: An armored approach and Baron's main way of getting in.
- j.2H - Body Press: Baron falls straight down with a crossup hitbox, launching on contact with the ground.
- Special Moves
- 5S (Air OK) - Brightstar Bomber: A fairly bog-standard command grab that causes a hard knockdown.
- 4S - Supernova Lariat: Projectile invincible long range lariat. Has the following built-in strike/throw mix listed below.
- 4S->S - Orbital Grapple: A grab that slams the opponent into the other side of the screen.
- 2S - Meteor Cannon: An armored punch that can be charged up to 3 levels. At level 2, it crumples, and at level 3, it becomes unblockable. Can be dash canceled.
- 63214S - Grand Brightstar Bomber: The most damaging special in the game and a rewarding command grab. You can hold 6 or 4 to move slightly while above the screen.
- Supers
- 5SP - Star Breaker Slam: A highly damaging anti-air command grab.
- 2SP - Muscle Form: Red Supergiant: An install that increases damage dealt, decreases damage taken, and gives armor that can only be broken by high damage attacks.
Quick combo reference
5L > 5M > 5H > 5S: Easy combo for helping beginners. Put a brief description here.
Normal Moves
5L
|
|
|---|---|
Toggle Hitboxes Toggle Hitboxes
|
5M Caption Caption
|
|
|---|---|
Toggle Hitboxes Toggle Hitboxes
|
5H
|
|
|---|---|
Toggle Hitboxes Toggle Hitboxes
|
2L
|
|
|---|---|
Toggle Hitboxes Toggle Hitboxes
|
2M
|
|
|---|---|
Toggle Hitboxes Toggle Hitboxes
|
2H
|
|
|---|---|
Toggle Hitboxes Toggle Hitboxes
|
j.L
|
|
|---|---|
Toggle Hitboxes Toggle Hitboxes
|
j.M
|
|
|---|---|
Toggle Hitboxes Toggle Hitboxes
|
j.H
|
|
|---|---|
Toggle Hitboxes Toggle Hitboxes
|
Command Normals
Command Normal Name
4H |
|
|---|---|
Toggle Hitboxes Toggle Hitboxes
|
Universal Mechanics
Throw
Throw
6H |
|
|---|---|
Toggle Hitboxes Toggle Hitboxes
|
Reversals
Reversal
5R |
|
|---|---|
Toggle Hitboxes Toggle Hitboxes
|
Wakeup Reversal
5R on Wakeup |
|
|---|---|
Toggle Hitboxes Toggle Hitboxes
|
Burst
Burst
5B |
|
|---|---|
Toggle Hitboxes Toggle Hitboxes
|
Taunt
Only add this section if a character has a taunt with a hitbox or some other unique effect like Sylvan's cheat. Otherwise remove it.
Taunt
5T |
|
|---|---|
Toggle Hitboxes Toggle Hitboxes
|
Down Taunt
2T |
|
|---|---|
Toggle Hitboxes Toggle Hitboxes
|
Special Moves
Special Name
5S |
|
|---|---|
Toggle Hitboxes Toggle Hitboxes
|
Special Name
4S |
|
|---|---|
Toggle Hitboxes Toggle Hitboxes
|
Special Name
2S |
|
|---|---|
Toggle Hitboxes Toggle Hitboxes
|
Special Name
j.S |
|
|---|---|
Toggle Hitboxes Toggle Hitboxes
|
Super Move
Super Name 5SP Heavenly Baron Buster Heavenly Baron Buster
|
|
|---|---|
Toggle Hitboxes Toggle Hitboxes
|
Super Name 2SP Informative and maybe funny caption Informative and maybe funny caption
|
|
|---|---|
Toggle Hitboxes Toggle Hitboxes
|
Strategy
Neutral
Describe how a character plays the neutral game. Add sub-categories if necessary, these should usually be on how you use a specific move.
Offense
Describe how a character runs their offense.
Defense
Describe how a character defends themselves when they're on the receiving end.
Additional Resources
Links to any additional resources like a tutorial video, delete category if there are none. If there aren't any but one gets made later, then re-add the category.
Additional Categories
Add any further categories as needed, just make sure they're worth a whole section.
Combos
General info on a character's combos, such as if they can always end a combo with a super as an ender rather than usual listed enders.
Combo Legend
| ||||||||||||||||||||||||||||||||||||||||||
| ||||||||||||||||||||||||||||||||||||||||||
Basic Combos
Easy combos for starting.
| Combo | Damage | Difficulty | Meter Spent | Position | Notes |
|---|---|---|---|---|---|
| 5L > 5M > 5H > 5S, Ender | X | Very Easy/Easy/Medium/Hard/Very Hard | 0/50/100 | Midscreen/Corner/Near Corner/From Corner |
Description of the combo. |
| Combo | Damage | Difficulty | Meter Spent | Position | Notes |
| 2L > 2M > 2H > 2S, Ender | X | Very Easy/Easy/Medium/Hard/Very Hard | 0/50/100 | Midscreen/Corner/Near Corner/From Corner |
Description of the combo. |
Advanced Combos
Harder combos that deal more damage or provide some other benefit.
| Combo | Damage | Difficulty | Meter Spent | Position | Notes |
|---|---|---|---|---|---|
| 5L > 5M > 5H > 5S, Ender | X | Very Easy/Easy/Medium/Hard/Very Hard | 0/50/100 | Midscreen/Corner/Near Corner/From Corner |
Description of the combo. |
| Combo | Damage | Difficulty | Meter Spent | Position | Notes |
| 2L > 2M > 2H > 2S, Ender | X | Very Easy/Easy/Medium/Hard/Very Hard | 0/50/100 | Midscreen/Corner/Near Corner/From Corner |
Description of the combo. |
X Combo Category
If a character has a specific kind of combo they do that has multiple variants, then you can make a new category for it. If they don't delete this.
| Combo | Damage | Difficulty | Meter Spent | Position | Notes |
|---|---|---|---|---|---|
| 5L > 5M > 5H > 5S, Ender | X | Very Easy/Easy/Medium/Hard/Very Hard | 0/50/100 | Midscreen/Corner/Near Corner/From Corner |
Description of the combo. |
| Combo | Damage | Difficulty | Meter Spent | Position | Notes |
| 2L > 2M > 2H > 2S, Ender | X | Very Easy/Easy/Medium/Hard/Very Hard | 0/50/100 | Midscreen/Corner/Near Corner/From Corner |
Description of the combo. |
Enders
List of combo enders a character has when there's multiple enders they can pick between, such as sacrificing oki for damage and vice-versa.
| Combo | Damage | Difficulty | Meter Spent | Position | Notes |
|---|---|---|---|---|---|
| 2H > 2S | X | Very Easy/Easy/Medium/Hard/Very Hard | 0/50/100 | Midscreen/Corner/Near Corner/From Corner |
Description of the ender. |
| Combo | Damage | Difficulty | Meter Spent | Position | Notes |
| 2H > 2SP | X | Very Easy/Easy/Medium/Hard/Very Hard | 0/50/100 | Midscreen/Corner/Near Corner/From Corner |
Description of the ender. |
Colors
_X_(Costume_Name)_Icon.png)
_X_(Costume_Name)_Colors.png)
Trivia
- Fun facts about the character. If it isn't redundant with something else said on the page, these can be pulled directly from the game.
Baron Wiki Roadmap
| 0% complete | |
|
|
| Page | Completed | To-do | Score |
|---|---|---|---|
| 0/25 | |||
| Move List | 0/25 | ||
| Strategy | 0/25 | ||
| Combos | 0/25 |