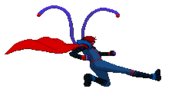
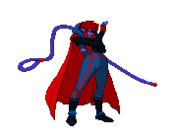
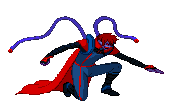
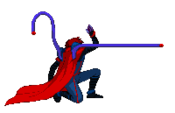
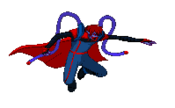
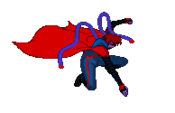
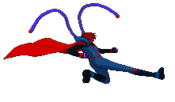
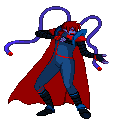
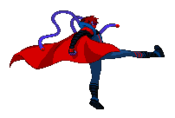
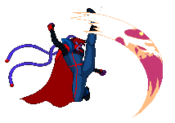
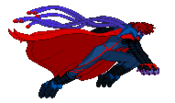
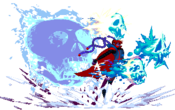
Spectral vs Generation/Jadou2: Difference between revisions
No edit summary |
Bladetastic (talk | contribs) |
||
| (39 intermediate revisions by 3 users not shown) | |||
| Line 3: | Line 3: | ||
! align="center" colspan="2" | Jadou 2 | ! align="center" colspan="2" | Jadou 2 | ||
|- | |- | ||
| align="center" colspan="2" |[[File:Spectral VS Generation Jadou2 Image. | | align="center" colspan="2" |[[File:Spectral VS Generation Jadou2 Image.png|400px|frameless|center|600x500px]] | ||
|- | |- | ||
| '''Health''' || 420 | | '''Health''' || 420 | ||
| Line 22: | Line 22: | ||
'''Likes''': Hate<br> | '''Likes''': Hate<br> | ||
'''Dislikes''': Everything | '''Dislikes''': Everything | ||
== | ==Gameplay Overview== | ||
{{StrengthsAndWeaknesses | |||
| intro = {{SUBPAGENAME}} is about as far away as you can get from regular Jadou. A straightforward rushdown character with small normals, but capable of high damage from even his weakest combo starters. Currently accepted in the community as the second best character, his excellent ground speed and long forward/backward superjumps, along with a fireball that can help cover him from anti-air or low-profile angles allow him to pose a threat from anywhere given enough space. Go fast, find a hit, keep applying pressure and you will find yourself being able to take rounds in as little as two combos. | |||
Go fast, find a hit, keep applying pressure and you will find yourself being able to take rounds in as little as two combos. | |||
'''Jadou2 is a character who makes up for his poor defense with one of the best offensive playstyles in the game''' | |||
| pros= | |||
* '''Tremendous Damage Output''': Jadou2 consistently deals a lot of damage from very simple conversions with at least 1 bar of meter. To make things better for him, a lot of his BNB options are very cost-efficient, leading to him building more meter than he spends. | |||
| | * '''Crazy Offence Everywhere...''': Jadou2 has strong presence in any part of the stage, whether it's fullscreen or in his opponent's face. At fullscreen, he has access to a fireball that can cover different angles and lets him hide behind it, and at close range, he has one of the best mixups in the game with powerful left-right mixups thanks to his command dash and his comboable back throw giving him strong strike/throw potential. | ||
* '''Energy Roar''': Jadou2's Cape super (236236A/B/C) is one of the best supers in the game in a lot of aspects. Great at checking your opponent on hit, powerful corner carry and juggle potential in combos, and unwinnable scenarios for your opponent while you're in burst. | |||
| cons= | |||
* | * '''...And Bad Defense Everywhere''': Jadou shares the lowest health in the game along with Hiro2, and despite having meterless options, they are very inconsistent and tend to be beaten outright by his opponents. His buttons are very stubby which leads to bad abare, and his backdash is short and slow, leading to Jadou2 always being put at the risk of being killed above his burst threshold and makes him have less room for error than most characters. | ||
* '''Unsafe Mix''': All of Jadou2 mixups, while spectacular, are mostly unsafe without spending meter to SOT. | |||
* '''False Advertising?''': Despite looking completely different in the character select screen, said form does not appear outside of idle animations and during Level 3, making Jadou2 looking like regular Jadou but with a different color palette for the majority of the time. | |||
*Cape super is | }} | ||
| | |||
* | |||
* | |||
==Normals== | ==Normals== | ||
===Far Standing Normals=== | ===Far Standing Normals=== | ||
{{MoveData | {{MoveData | ||
|name=5A | |name=f.5A | ||
|image=Spectral_VS_Generation_Jadou2Far5A_Image.png | |image=Spectral_VS_Generation_Jadou2Far5A_Image.png | ||
|data= | |data= | ||
{{AttackData-SVG | {{AttackData-SVG | ||
| damage = | | damage = 15 | ||
| guard = High/Low | | guard = High/Low | ||
| cancel = | | cancel = | ||
| startup = | | startup = 6 | ||
| advHit = | | advHit = | ||
| advBlock = | | advBlock = | ||
| Line 67: | Line 57: | ||
{{MoveData | {{MoveData | ||
|name=5B | |name=f.5B | ||
|image=Spectral_VS_Generation_Jadou25B_Image.png | |image=Spectral_VS_Generation_Jadou25B_Image.png | ||
|data= | |data= | ||
{{AttackData-SVG | {{AttackData-SVG | ||
| damage = | | damage = 35 | ||
| guard = High/Low | | guard = High/Low | ||
| cancel = | | cancel = | ||
| startup = | | startup = 5 | ||
| advHit = | | advHit = | ||
| advBlock = | | advBlock = | ||
| Line 84: | Line 74: | ||
{{MoveData | {{MoveData | ||
|name=5C | |name=f.5C | ||
|image=Spectral_VS_Generation_Jadou25C_Image.png | |image=Spectral_VS_Generation_Jadou25C_Image.png | ||
|data= | |data= | ||
{{AttackData-SVG | {{AttackData-SVG | ||
| damage = | | damage = 60 | ||
| guard = High/Low | | guard = High/Low | ||
| cancel = | | cancel = | ||
| startup = | | startup = 6 | ||
| advHit = | | advHit = | ||
| advBlock = | | advBlock = | ||
| Line 101: | Line 91: | ||
{{MoveData | {{MoveData | ||
|name=5D | |name=f.5D | ||
|image=Spectral_VS_Generation_Jadou25D_Image.png | |image=Spectral_VS_Generation_Jadou25D_Image.png | ||
|data= | |data= | ||
{{AttackData-SVG | {{AttackData-SVG | ||
| damage = | | damage = 20 | ||
| guard = High/Low | | guard = High/Low | ||
| cancel = | | cancel = | ||
| startup = | | startup = 7 | ||
| advHit = | | advHit = | ||
| advBlock = | | advBlock = | ||
| Line 116: | Line 106: | ||
===Close Standing Normals=== | ===Close Standing Normals=== | ||
{{MoveData | {{MoveData | ||
|name=5A | |name=cl.5A | ||
|image=Spectral_VS_Generation_Jadou2Close5A_Image.png | |image=Spectral_VS_Generation_Jadou2Close5A_Image.png | ||
|data= | |data= | ||
{{AttackData-SVG | {{AttackData-SVG | ||
| damage = | | damage = 15 | ||
| guard = High/Low | | guard = High/Low | ||
| cancel = | | cancel = | ||
| startup = | | startup = 4 | ||
| advHit = | | advHit = | ||
| advBlock = | | advBlock = | ||
| description = | | description = | ||
}} | }} | ||
}} | }} | ||
| Line 133: | Line 123: | ||
{{MoveData | {{MoveData | ||
|name=5B | |name=cl.5B | ||
|image=Spectral_VS_Generation_Jadou25B_Image.png | |image=Spectral_VS_Generation_Jadou25B_Image.png | ||
|data= | |data= | ||
{{AttackData-SVG | {{AttackData-SVG | ||
| damage = | | damage = 35 | ||
| guard = High/Low | | guard = High/Low | ||
| cancel = | | cancel = | ||
| startup = | | startup = 5 | ||
| advHit = | | advHit = | ||
| advBlock = | | advBlock = | ||
| Line 150: | Line 140: | ||
{{MoveData | {{MoveData | ||
|name=5C | |name=cl.5C | ||
|image=Spectral_VS_Generation_Jadou25C_Image.png | |image=Spectral_VS_Generation_Jadou25C_Image.png | ||
|data= | |data= | ||
{{AttackData-SVG | {{AttackData-SVG | ||
| damage = | | damage = 60 | ||
| guard = High/Low | | guard = High/Low | ||
| cancel = | | cancel = | ||
| startup = | | startup = 6 | ||
| advHit = | | advHit = | ||
| advBlock = | | advBlock = | ||
| Line 167: | Line 157: | ||
{{MoveData | {{MoveData | ||
|name=5D | |name=cl.5D | ||
|image=Spectral_VS_Generation_Jadou25D_Image.png | |image=Spectral_VS_Generation_Jadou25D_Image.png | ||
|data= | |data= | ||
{{AttackData-SVG | {{AttackData-SVG | ||
| damage = | | damage = 20 | ||
| guard = High/Low | | guard = High/Low | ||
| cancel = | | cancel = | ||
| startup = | | startup = 7 | ||
| advHit = | | advHit = | ||
| advBlock = | | advBlock = | ||
| Line 180: | Line 170: | ||
}} | }} | ||
}} | }} | ||
===Crouching Normals=== | ===Crouching Normals=== | ||
{{MoveData | {{MoveData | ||
| Line 186: | Line 177: | ||
|data= | |data= | ||
{{AttackData-SVG | {{AttackData-SVG | ||
| damage = | | damage = 15 | ||
| guard = High/Low | | guard = High/Low | ||
| cancel = | | cancel = | ||
| startup = | | startup = 4 | ||
| advHit = | | advHit = | ||
| advBlock = | | advBlock = | ||
| Line 203: | Line 194: | ||
|data= | |data= | ||
{{AttackData-SVG | {{AttackData-SVG | ||
| damage = | | damage = 35 | ||
| guard = High/Low | | guard = High/Low | ||
| cancel = | | cancel = | ||
| startup = | | startup = 5 | ||
| advHit = | | advHit = | ||
| advBlock = | | advBlock = | ||
| Line 220: | Line 211: | ||
|data= | |data= | ||
{{AttackData-SVG | {{AttackData-SVG | ||
| damage = | | damage = 60 | ||
| guard = High/Low | | guard = High/Low | ||
| cancel = | | cancel = | ||
| startup = | | startup = 6 | ||
| advHit = | | advHit = | ||
| advBlock = | | advBlock = | ||
| Line 237: | Line 228: | ||
|data= | |data= | ||
{{AttackData-SVG | {{AttackData-SVG | ||
| damage = | | damage = 20 | ||
| guard = High/Low | | guard = High/Low | ||
| cancel = | | cancel = | ||
| startup = | | startup = 5 | ||
| advHit = | | advHit = | ||
| advBlock = | | advBlock = | ||
| Line 255: | Line 246: | ||
|data= | |data= | ||
{{AttackData-SVG | {{AttackData-SVG | ||
| damage = | | damage = 15 | ||
| guard = High/Low | |||
| cancel = | |||
| startup = 4 | |||
| advHit = | |||
| advBlock = | |||
| description = | |||
}} | |||
{{AttackData-SVG | |||
| damage = 15 | |||
| guard = High/Low | | guard = High/Low | ||
| cancel = | | cancel = | ||
| startup = | | startup = 4 | ||
| advHit = | | advHit = | ||
| advBlock = | | advBlock = | ||
| Line 272: | Line 272: | ||
|data= | |data= | ||
{{AttackData-SVG | {{AttackData-SVG | ||
| damage = | | damage = 36 | ||
| guard = High/Low | | guard = High/Low | ||
| cancel = | | cancel = | ||
| startup = | | startup = 6 | ||
| advHit = | | advHit = | ||
| advBlock = | | advBlock = | ||
| description = | | description = Is essentially 2 hits of 7/9j.A | ||
}} | }} | ||
}} | }} | ||
| Line 289: | Line 289: | ||
|data= | |data= | ||
{{AttackData-SVG | {{AttackData-SVG | ||
| damage = | | damage = 60 | ||
| guard = High/Low | | guard = High/Low | ||
| cancel = | | cancel = | ||
| startup = | | startup = 10 | ||
| advHit = | | advHit = | ||
| advBlock = | | advBlock = | ||
| Line 306: | Line 306: | ||
|data= | |data= | ||
{{AttackData-SVG | {{AttackData-SVG | ||
| damage = | | damage = 20 | ||
| guard = High/Low | | guard = High/Low | ||
| cancel = | | cancel = | ||
| startup = | | startup = 5 | ||
| advHit = | | advHit = | ||
| advBlock = | | advBlock = | ||
| Line 322: | Line 322: | ||
|data= | |data= | ||
{{AttackData-SVG | {{AttackData-SVG | ||
| damage = | | damage = 28-32 | ||
| guard = Hight/Low | | guard = Hight/Low | ||
| cancel = | | cancel = | ||
| Line 341: | Line 341: | ||
|data= | |data= | ||
{{AttackData-SVG | {{AttackData-SVG | ||
| damage = | | damage = 60 | ||
| guard = Throw | |||
| cancel = N/A | |||
| startup = 4 | |||
| advHit = | |||
| advBlock = | |||
| description = Forward Throw<br>Animation for both throws is the same. | |||
}} | |||
{{AttackData-SVG | |||
| damage = 70 | |||
| guard = Throw | | guard = Throw | ||
| cancel = N/A | | cancel = N/A | ||
| startup = | | startup = 4 | ||
| advHit = | | advHit = | ||
| advBlock = | | advBlock = | ||
| description = Animation for both throws is the same. | | description = Back throw is fully untechable<br>Animation for both throws is the same. | ||
}} | }} | ||
}} | }} | ||
| Line 358: | Line 367: | ||
|data= | |data= | ||
{{AttackData-SVG | {{AttackData-SVG | ||
| damage = | | damage = 150 | ||
| guard = High | | guard = High | ||
| cancel = N/A | | cancel = N/A | ||
| startup = | | startup = 30 | ||
| advHit = | | advHit = | ||
| advBlock = | | advBlock = | ||
| Line 374: | Line 383: | ||
|data= | |data= | ||
{{AttackData-SVG | {{AttackData-SVG | ||
| damage = | | damage = 150 | ||
| guard = Low | | guard = Low | ||
| cancel = N/A | | cancel = N/A | ||
| startup = | | startup = 30 | ||
| advHit = | | advHit = | ||
| advBlock = | | advBlock = | ||
| Line 405: | Line 414: | ||
}} | }} | ||
}} | }} | ||
==Special Moves== | ==Special Moves== | ||
{{MoveData | {{MoveData | ||
| Line 417: | Line 427: | ||
|data= | |data= | ||
{{AttackData-SVG | {{AttackData-SVG | ||
| damage = | | version = A | ||
| damage = 30 | |||
| guard = High/Low | |||
| cancel = N/A | |||
| startup = 12 | |||
| advHit = | |||
| advBlock = | |||
| description = Anti Air Angle | |||
}} | |||
{{AttackData-SVG | |||
| version = B | |||
| damage = 30 | |||
| guard = High/Low | | guard = High/Low | ||
| cancel = N/A | | cancel = N/A | ||
| startup = | | startup = 12 | ||
| advHit = | |||
| advBlock = | |||
| description = Straight Forward | |||
}} | |||
{{AttackData-SVG | |||
| version = C | |||
| damage = 30 | |||
| guard = Low | |||
| cancel = N/A | |||
| startup = 12 | |||
| advHit = | | advHit = | ||
| advBlock = | | advBlock = | ||
| description = | | description = Skims the ground and hits low. Can hit OTG | ||
}} | }} | ||
}} | }} | ||
| Line 435: | Line 466: | ||
|data= | |data= | ||
{{AttackData-SVG | {{AttackData-SVG | ||
| damage = | | version = A | ||
| damage = 30 | |||
| guard = High/Low | |||
| cancel = Flying Tendrils, P Thunder, Super | |||
| startup = 8 | |||
| advHit = | |||
| advBlock = | |||
| description = Goes the shortest and has the least start up | |||
}} | |||
{{AttackData-SVG | |||
| version = B | |||
| damage = 33 | |||
| guard = High/Low | | guard = High/Low | ||
| cancel = Flying Tendrils, P Thunder, Super | | cancel = Flying Tendrils, P Thunder, Super | ||
| startup = | | startup = 13 | ||
| advHit = | | advHit = | ||
| advBlock = | | advBlock = | ||
| description = | | description = | ||
}} | |||
{{AttackData-SVG | |||
| version = C | |||
| damage = 35 | |||
| guard = High/Low | |||
| cancel = Flying Tendrils, P Thunder, Super | |||
| startup = 15 | |||
| advHit = | |||
| advBlock = | |||
| description = Goes the farthest and has the most start up. Will pop airborne opponents up a bit on hit. | |||
}} | }} | ||
}} | }} | ||
{{MoveData | {{MoveData | ||
|name=Flying Tendrils | |name=Flying Tendrils | ||
| Line 453: | Line 502: | ||
|data= | |data= | ||
{{AttackData-SVG | {{AttackData-SVG | ||
| damage = | | damage = 50 | ||
| guard = High | | guard = High | ||
| cancel =N/A | | cancel =N/A | ||
| startup = | | startup = 30 | ||
| advHit = | | advHit = | ||
| advBlock = | | advBlock = | ||
| Line 462: | Line 511: | ||
}} | }} | ||
}} | }} | ||
{{MoveData | {{MoveData | ||
|name=P Thunder | |name=P Thunder | ||
| Line 471: | Line 517: | ||
|data= | |data= | ||
{{AttackData-SVG | {{AttackData-SVG | ||
| damage = | | damage = 30 | ||
| guard = High/Low | | guard = High/Low | ||
| cancel = Snake Kick, SoT, Super | | cancel = Snake Kick, SoT, Super | ||
| startup = | | startup = 10 | ||
| advHit = | | advHit = | ||
| advBlock = | | advBlock = | ||
| Line 480: | Line 526: | ||
}} | }} | ||
}} | }} | ||
{{MoveData | {{MoveData | ||
|name=Snake Kick | |name=Snake Kick | ||
| Line 489: | Line 532: | ||
|data= | |data= | ||
{{AttackData-SVG | {{AttackData-SVG | ||
| damage = | | damage = 48 | ||
| guard = High | | guard = High | ||
| cancel = N/A | | cancel = N/A | ||
| startup = | | startup = 18 | ||
| advHit = | | advHit = | ||
| advBlock = | | advBlock = | ||
| Line 508: | Line 551: | ||
|data= | |data= | ||
{{AttackData-SVG | {{AttackData-SVG | ||
| damage = | | damage = 50 | ||
| guard = High/Low | | guard = High/Low | ||
| cancel = Evil Dragon Claws, Sot, Super | | cancel = Evil Dragon Claws, Sot, Super | ||
| startup = | | startup = 3 | ||
| advHit = | | advHit = | ||
| advBlock = | | advBlock = | ||
| Line 517: | Line 560: | ||
}} | }} | ||
}} | }} | ||
{{MoveData | {{MoveData | ||
|name=Evil Dragon Claws | |name=Evil Dragon Claws | ||
| Line 527: | Line 567: | ||
|data= | |data= | ||
{{AttackData-SVG | {{AttackData-SVG | ||
| damage = | | damage = 24 | ||
| guard = N/A | | guard = N/A | ||
| cancel = N/A | | cancel = N/A | ||
| startup = | | startup = 6 | ||
| advHit = | | advHit = | ||
| advBlock = | | advBlock = | ||
| Line 546: | Line 586: | ||
|data= | |data= | ||
{{AttackData-SVG | {{AttackData-SVG | ||
| damage = | | damage = 50 | ||
| guard = High, N/A for Air to Air | | guard = High, N/A for Air to Air | ||
| cancel = N/A | | cancel = N/A | ||
| startup = | | startup = 7 | ||
| advHit = | | advHit = | ||
| advBlock = | | advBlock = | ||
| Line 561: | Line 601: | ||
|name=Hidden Devil | |name=Hidden Devil | ||
|image=Spectral_VS_Generation_Jadou2236D_Image.png | |image=Spectral_VS_Generation_Jadou2236D_Image.png | ||
|caption= Haa | |caption= ''Haa'' | ||
|input=236D | |input=236D | ||
|data= | |data= | ||
{{AttackData-SVG | {{AttackData-SVG | ||
| damage = | | damage = N/A | ||
| guard = N/A | | guard = N/A | ||
| cancel = N/A | | cancel = N/A | ||
| startup = | | startup = 1 | ||
| advHit = | | advHit = | ||
| advBlock = | | advBlock = | ||
| description = Jadou2 dashes forwards while moving his hitbox quite low, allowing him to dodge quite alot of attacks, although he is in no way invulnerable during the dash<br>Can go through the opponent, thus causeing a side swap depending on spacing<br>Due to the sheer amount of moves that you can cancel into Hidden Devil, its quick recovery, and ability to side swap, Hidden Devil is vital to Jadou2's pressure game | | description = Jadou2 dashes forwards while moving his hitbox quite low, allowing him to dodge quite alot of attacks, although he is in no way invulnerable during the dash<br>Can go through the opponent, thus causeing a side swap depending on spacing<br>Due to the sheer amount of moves that you can cancel into Hidden Devil, its quick recovery, and ability to side swap, Hidden Devil is vital to Jadou2's pressure game<br>Total Length: 23 frames<br> | ||
Upper Body invincibility: 1-18 | |||
}} | }} | ||
}} | }} | ||
| Line 581: | Line 622: | ||
|image=Spectral_VS_Generation_Jadou2236236X_Image.png | |image=Spectral_VS_Generation_Jadou2236236X_Image.png | ||
|caption= | |caption= | ||
|input= | |input=236236A/B/C | ||
|data= | |data= | ||
{{AttackData-SVG | {{AttackData-SVG | ||
| damage = | | damage = 146 | ||
| guard = High/Low | | guard = High/Low | ||
| cancel = Energy Roar Evil Shadow | | cancel = Energy Roar Evil Shadow | ||
| Line 593: | Line 634: | ||
}} | }} | ||
}} | }} | ||
{{MoveData | {{MoveData | ||
|name=Energy Roar Evil Shadow | |name=Energy Roar Evil Shadow | ||
| Line 603: | Line 641: | ||
|data= | |data= | ||
{{AttackData-SVG | {{AttackData-SVG | ||
| damage = | | damage = 100 | ||
| guard = High/Low | | guard = High/Low | ||
| cancel = N/A | | cancel = N/A | ||
| Line 619: | Line 657: | ||
|image=Spectral_VS_Generation_Jadou2236236D_Image.png | |image=Spectral_VS_Generation_Jadou2236236D_Image.png | ||
|caption= | |caption= | ||
|input= | |input=236236D | ||
|data= | |data= | ||
{{AttackData-SVG | {{AttackData-SVG | ||
| damage = | | damage = 158 | ||
| guard = High/Low | | guard = High/Low | ||
| cancel = N/A | | cancel = N/A | ||
| Line 638: | Line 676: | ||
|image=Spectral_VS_Generation_Jadou2j.236236D_Image.png | |image=Spectral_VS_Generation_Jadou2j.236236D_Image.png | ||
|caption= | |caption= | ||
|input=j. | |input=j.236236D | ||
|data= | |data= | ||
{{AttackData-SVG | {{AttackData-SVG | ||
| damage = | | damage = 165 | ||
| guard = High/Low, N/A for Air to Air | | guard = High/Low, N/A for Air to Air | ||
| cancel = N/A | | cancel = N/A | ||
| Line 656: | Line 694: | ||
|image=Spectral_VS_Generation_Jadou2214214D_Image.png | |image=Spectral_VS_Generation_Jadou2214214D_Image.png | ||
|caption= No joke for this one. Just a real bad hitbox | |caption= No joke for this one. Just a real bad hitbox | ||
|input= | |input=214214D | ||
|data= | |data= | ||
{{AttackData-SVG | {{AttackData-SVG | ||
| damage = | | damage = 349 | ||
| guard = High/Low | | guard = High/Low | ||
| cancel = N/A | | cancel = N/A | ||
| Line 669: | Line 707: | ||
}} | }} | ||
==Strategy== | ==Strategy== | ||
===Neutral=== | |||
Jadou2 has a multitude of tools to allow him to surprisingly play an actual neutral game. Though he will normally be trying to advance Jadou2 can play a keep away game due to his fireball having variations that are able to anti-air and deal with low profile moves, as well as have some good range on some his normals, notably his j.C for air to air and air to ground control, and 2C for ground interactions. In terms of dealing with your opponents air approach Evil Dragon is your best bet due to being only 3 frames of startup, and will usually trade at worst. | |||
===Offence (On Hit)=== | |||
On hit Jadou2 will do one of two things, go for a reset with Hidden Devil, or more normally do a combo. Combo wise Jadou2 is quite straight forward, with his combo game being a question of how much meter do you want to spend for extra damage before you get a HKD with your Dancing Wolf ender. Alternatively, with proper spacing near the corner you can loop Evil Dragon ~> Evil Dragon Claws up to three times meterless in the corner, which builds more meter and does more damage then your standard HKD ender. You will unfortunately give up corner and HKD with this ender but it is still an option for more damage. | |||
====HKD OKI==== | |||
After a HKD you have a multitude of options to open the opponent up, but there never is a straight forward "correct" answer, and you will have to implement some free form mixups and conditioning to properly open the opponent up.<br> Nonetheless, here are a few standard options to consider. | |||
*Meaty Normal | |||
*Meaty Dancing Wolf A into follow up of choice | |||
*Jump over IAD back j.C | |||
*TK Evil Fang | |||
*Hidden Devil cross-up, afterwards you can Hidden Devil again for a re cross-up, or you can do one of the above | |||
*Back throw | |||
This isnt the be all end all for Oki as there are a multitude of other options. For example, in burst your Energy Roar ~> Energy Roar Evil Shadow is a catch 22 meaty with proper delay of the follow-up, as if they block they will be guard broken and subsequently will eat a combo, and if they parry to dodge the Energy Roar a delayed Energy Roar Evil Shadow will catch their recovery, again leading to a combo. | |||
===Offence (On Block)=== | |||
On Block, like his HKD Oki, is entirely free form with is usually consisting of a 2D -> 2B -> 2C > 214A/B/C ~> Follow up, with the mixup of Hidden Devil at any point during these 4 hits for a reset in pressure, and depending on when you use it it can either cross-up of remain on the same side. You also have Flying Tendrils and P Thunder after Dancing Wolf, with Flying Tendrils being safe on block, and P Thunder having a SoT cancel, allowing you to restart your pressure. You can also use Evil Ghost to end your pressure if you want to reset back to neutral. | |||
===Defense=== | |||
Jadou2 unfortunately dosen't have much more then anyone else for defense. While you have Hidden Devil it has no invincibility, and Evil Dragon, while only 3 frames of startup, will lose to a parry, and anything with invincibility like a backdash, though due to Evil Dragon being invulnerable during start-up, it will more often then not trade with an opponents hitbox at worst. Your backdash is also too slow to see any real defensive usage with the same going for Ultimate Devil Black Ghost Circle, your only reversal super. Thankfully you still have your standard guard cancel to get out of pressure, though this still costs 1 bar of meter. | |||
==Combos== | ==Combos== | ||
=== | :Need help reading the combos? Check out the [[Spectral_vs_Generation/Glossary|'''Glossary''']] for explanations on notation and game specific terms! All damage values tested against Hiro. | ||
===BnB Combos=== | |||
{| border="1em" cellpadding="3" cellspacing="0" | {| border="1em" cellpadding="3" cellspacing="0" | ||
| align="center" style="background:#f0f0f0;"|'''Combo''' | | align="center" style="background:#f0f0f0;"|'''Combo''' | ||
| Line 676: | Line 734: | ||
| align="center" style="background:#f0f0f0;"|'''Notes''' | | align="center" style="background:#f0f0f0;"|'''Notes''' | ||
|- | |- | ||
|2A -> 2B -> 2C > 214C ~> D > SoT ( | | colspan="6" align="center" | '''As a rule of thumb, all Jadou2 combos, throw combos exempt, can be started with j.C >> 2D or if close enough j.C >> 5/2C for better damage''' | ||
| | |- | ||
|Burst Combo. Requires | | colspan="6" align="center" | '''Meterless BnB''' | ||
|- | |||
|2A -> 2B -> 2C > 214C ~> D ~> D | |||
|139 | |||
|Standard BnB when you lack meter. Ends in a hard knockdown still so you get to run your oki mixups. | |||
|- | |||
|Back Throw >> 623D ~> D >> 66 >> 5/2C > 236B | |||
|121 | |||
|Standard back throw combo that will work on everyone. you wont get the 5/2C link depending on where you throw and which you have to do is character dependent. Damage does not count the 236B as that is purely for continued pressure after. | |||
|- | |||
|Back Throw >> 214A ~> D ~> D | |||
|112 | |||
|Better Back Throw combo that does less damage then the above but grants a hard knockdown. Does not work on Hiro2, Roze, Eartj, Jadou, or Mayura. | |||
|- | |||
|Back Throw >> {623D ~> D}x3 | |||
|143 | |||
|Standard back throw combo that will work on everyone. Requires you to be near the corner. Builds a full bar of meter should the full combo connect. | |||
|- | |||
| colspan="6" align="center" | '''One Bar BnB''' | |||
|- | |||
|2D -> 2B -> 2C > 214C ~> D > 236236A/B/C ~> 236D >> 5C > 214A ~> D ~> D | |||
|256 | |||
|Your standard 1 bar BnB combo. Works anywhere, deals good damage, and ends in a hard knockdown. | |||
|- | |||
|Back Throw >> 214A ~> D > 236236A/B/C ~> 236D >> 5C > 214A ~> D ~> D | |||
|184 | |||
|Character specific back throw combo that works anywhere. Will not work on Roze, Earth, Jadou, Mayura, or Hiro2. Hiro2 the 214A ~> D will hit but it will hit too low to actually continue the combo. | |||
|- | |||
|Back Throw >> 623D > Delayed SoT >> 214B ~> D ~> D | |||
|137 | |||
|Seal of Time extension that guarantees a hard knock down on every character. | |||
|- | |||
| colspan="6" align="center" | '''Two Bar BnB''' | |||
|- | |||
|2D -> 2B -> 2C > 214C ~> D > SoT >> 66/236D >> 5C > 623D > Delayed Sot >> 5C > {623D ~> 6D}x2 >> 623D > Delayed Sot >> 66(side swap) >> 214B ~> D ~> D | |||
|300 | |||
|Your main 2 bar BnB. Deals great damage, gets a hard knock down, and will let you get corner from anywhere on the screen. This combo requires extremely specific spacings and depending on where you start the combo you will have to heavily alter how much space you walk and when to side swap and when not to. | |||
|- | |||
|2D -> 2B -> 2C > 214C > 236236A/B/C ~> 236D >> 5C > 623D > SoT >> B+C (AAABBBCCCD 236D) | |||
|264 | |||
|Dust ender combo. Wont work if the opponent is too close to the corner after the 236236A/B/C ~> 236D. If they are then you have to micro dash after the 236236A/B/C ~> 236D for the 5C to connect. Will leave you with about 2 2/3 of meter. | |||
|- | |||
|2D -> 2B -> 2C > 214C ~> D > SoT > Whiffed Burst >> 66 >> { 5C > 623D > Delayed Sot }x3 >> 214214D | |||
|403 | |||
|Alt Route Burst Combo. Requires 2 bars by the time you do the first Sot. | |||
|- | |||
| colspan="6" align="center" | '''Three Bar BnB''' | |||
|- | |||
|2D -> 2B -> 2C > 214C ~> D > SoT >> 66 or 236D >> { 5C > 623D > Delayed Sot }x2 >> 5C > { 623D ~> 6D }x2 >> 623D > Delayed Sot >> 214B ~> D ~> D | |||
|328 | |||
|Non burst meter dump combo. Requires extremely specific spacing from corner to work. The choice between walking, dashing, or using 236D after the first Sot entirely depends on where you are on the screen | |||
|- | |||
|2D -> 2B -> 2C > 214C ~> D > SoT >> 5C > 623D > Delayed Sot > Whiffed Burst > { 5C > 623D > Delayed Sot }x3 >> 214214D | |||
|406 | |||
|Burst Combo. Requires 3 bars for this route. | |||
|- | |- | ||
|} | |} | ||
{{Navbox-SVG}} | {{Navbox-SVG}} | ||
Latest revision as of 10:28, 5 April 2024
| Jadou 2 | |
|---|---|
| Health | 420 |
| Pre-Jump Frames | 2 |
| Play Style | Rushdown, Mixup |
| Dash Type | Run |
Character Background
Race: Demon
Motivation: Instinct
Weapon: Tentacle
Likes: Hate
Dislikes: Everything
Gameplay Overview
|
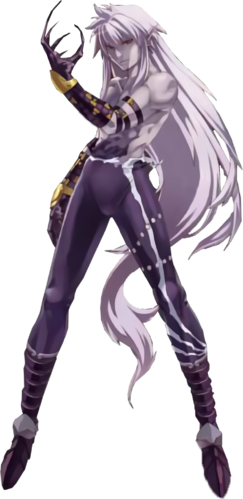
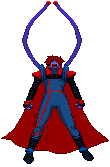
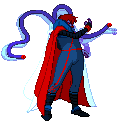
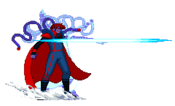
Jadou2 is about as far away as you can get from regular Jadou. A straightforward rushdown character with small normals, but capable of high damage from even his weakest combo starters. Currently accepted in the community as the second best character, his excellent ground speed and long forward/backward superjumps, along with a fireball that can help cover him from anti-air or low-profile angles allow him to pose a threat from anywhere given enough space. Go fast, find a hit, keep applying pressure and you will find yourself being able to take rounds in as little as two combos. Jadou2 is a character who makes up for his poor defense with one of the best offensive playstyles in the game |
|
| Pros | Cons |
|
|
Normals
Far Standing Normals
f.5A
|
|---|
f.5B
|
|---|
f.5C
|
|---|
f.5D
|
|---|
Close Standing Normals
cl.5A
|
|---|
cl.5B
|
|---|
cl.5C
|
|---|
cl.5D
|
|---|
Crouching Normals
2A
|
|---|
2B
|
|---|
2C
|
|---|
2D
|
|---|
Jumping Normals
j.A 8A 8A 7/9A 7/9A
|
|---|
j.B
|
|---|
j.C
|
|---|
j.D
|
|---|
Chain Specific Normals
Any A/B/D Normal -> 5C
|
|---|
Throws
A/B+D Hand over your vibes Hand over your vibes Vibe check Vibe check
|
|---|
Dust (Sword Series Slash)
5B+C
|
|---|
2B+C
|
|---|
Parry (Chaos Breaking)
A+B Standing Parry Standing Parry Crouching Parry Crouching Parry Jumping Parry Jumping Parry
|
|---|
Special Moves
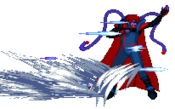
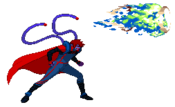
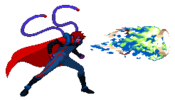
Evil Ghost 236A/B/C 236A 236A 236B 236B 236C 236C
|
|---|
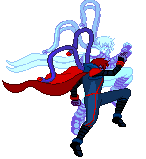
Dancing Wolf
214A/B/C |
|---|
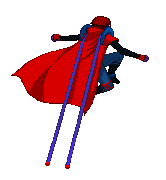
Flying Tendrils
Dancing Wolf ~> A/B/C |
|---|
P Thunder
Dancing Wolf ~> D |
|---|
Snake Kick
P Thunder ~> D |
|---|
Evil Dragon 623D Genocide Cutta! Genocide Cutta!
|
|---|
Evil Dragon Claws Evil Dragon ~> 6D Follow up Genocide Cutta! Follow up Genocide Cutta!
|
|---|
Evil Fang j.236D Aerial Genocide Cutta! Aerial Genocide Cutta!
|
|---|
Hidden Devil 236D Haa Haa
|
|---|
Super Moves
Level 1 Supers
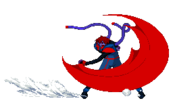
Energy Roar
236236A/B/C |
|---|
Energy Roar Evil Shadow
236D During Energy Roar |
|---|
Ultimate Devil Black Ghost Circle
236236D |
|---|
Aerial Ultimate Devil Black Ghost Circle
j.236236D |
|---|
Level 3 Super
Dead Spirits Dance 214214D No joke for this one. Just a real bad hitbox No joke for this one. Just a real bad hitbox
|
|---|
Strategy
Neutral
Jadou2 has a multitude of tools to allow him to surprisingly play an actual neutral game. Though he will normally be trying to advance Jadou2 can play a keep away game due to his fireball having variations that are able to anti-air and deal with low profile moves, as well as have some good range on some his normals, notably his j.C for air to air and air to ground control, and 2C for ground interactions. In terms of dealing with your opponents air approach Evil Dragon is your best bet due to being only 3 frames of startup, and will usually trade at worst.
Offence (On Hit)
On hit Jadou2 will do one of two things, go for a reset with Hidden Devil, or more normally do a combo. Combo wise Jadou2 is quite straight forward, with his combo game being a question of how much meter do you want to spend for extra damage before you get a HKD with your Dancing Wolf ender. Alternatively, with proper spacing near the corner you can loop Evil Dragon ~> Evil Dragon Claws up to three times meterless in the corner, which builds more meter and does more damage then your standard HKD ender. You will unfortunately give up corner and HKD with this ender but it is still an option for more damage.
HKD OKI
After a HKD you have a multitude of options to open the opponent up, but there never is a straight forward "correct" answer, and you will have to implement some free form mixups and conditioning to properly open the opponent up.
Nonetheless, here are a few standard options to consider.
- Meaty Normal
- Meaty Dancing Wolf A into follow up of choice
- Jump over IAD back j.C
- TK Evil Fang
- Hidden Devil cross-up, afterwards you can Hidden Devil again for a re cross-up, or you can do one of the above
- Back throw
This isnt the be all end all for Oki as there are a multitude of other options. For example, in burst your Energy Roar ~> Energy Roar Evil Shadow is a catch 22 meaty with proper delay of the follow-up, as if they block they will be guard broken and subsequently will eat a combo, and if they parry to dodge the Energy Roar a delayed Energy Roar Evil Shadow will catch their recovery, again leading to a combo.
Offence (On Block)
On Block, like his HKD Oki, is entirely free form with is usually consisting of a 2D -> 2B -> 2C > 214A/B/C ~> Follow up, with the mixup of Hidden Devil at any point during these 4 hits for a reset in pressure, and depending on when you use it it can either cross-up of remain on the same side. You also have Flying Tendrils and P Thunder after Dancing Wolf, with Flying Tendrils being safe on block, and P Thunder having a SoT cancel, allowing you to restart your pressure. You can also use Evil Ghost to end your pressure if you want to reset back to neutral.
Defense
Jadou2 unfortunately dosen't have much more then anyone else for defense. While you have Hidden Devil it has no invincibility, and Evil Dragon, while only 3 frames of startup, will lose to a parry, and anything with invincibility like a backdash, though due to Evil Dragon being invulnerable during start-up, it will more often then not trade with an opponents hitbox at worst. Your backdash is also too slow to see any real defensive usage with the same going for Ultimate Devil Black Ghost Circle, your only reversal super. Thankfully you still have your standard guard cancel to get out of pressure, though this still costs 1 bar of meter.
Combos
- Need help reading the combos? Check out the Glossary for explanations on notation and game specific terms! All damage values tested against Hiro.
BnB Combos
| Combo | Total Damage | Notes | |||
| As a rule of thumb, all Jadou2 combos, throw combos exempt, can be started with j.C >> 2D or if close enough j.C >> 5/2C for better damage | |||||
| Meterless BnB | |||||
| 2A -> 2B -> 2C > 214C ~> D ~> D | 139 | Standard BnB when you lack meter. Ends in a hard knockdown still so you get to run your oki mixups. | |||
| Back Throw >> 623D ~> D >> 66 >> 5/2C > 236B | 121 | Standard back throw combo that will work on everyone. you wont get the 5/2C link depending on where you throw and which you have to do is character dependent. Damage does not count the 236B as that is purely for continued pressure after. | |||
| Back Throw >> 214A ~> D ~> D | 112 | Better Back Throw combo that does less damage then the above but grants a hard knockdown. Does not work on Hiro2, Roze, Eartj, Jadou, or Mayura. | |||
| Back Throw >> {623D ~> D}x3 | 143 | Standard back throw combo that will work on everyone. Requires you to be near the corner. Builds a full bar of meter should the full combo connect. | |||
| One Bar BnB | |||||
| 2D -> 2B -> 2C > 214C ~> D > 236236A/B/C ~> 236D >> 5C > 214A ~> D ~> D | 256 | Your standard 1 bar BnB combo. Works anywhere, deals good damage, and ends in a hard knockdown. | |||
| Back Throw >> 214A ~> D > 236236A/B/C ~> 236D >> 5C > 214A ~> D ~> D | 184 | Character specific back throw combo that works anywhere. Will not work on Roze, Earth, Jadou, Mayura, or Hiro2. Hiro2 the 214A ~> D will hit but it will hit too low to actually continue the combo. | |||
| Back Throw >> 623D > Delayed SoT >> 214B ~> D ~> D | 137 | Seal of Time extension that guarantees a hard knock down on every character. | |||
| Two Bar BnB | |||||
| 2D -> 2B -> 2C > 214C ~> D > SoT >> 66/236D >> 5C > 623D > Delayed Sot >> 5C > {623D ~> 6D}x2 >> 623D > Delayed Sot >> 66(side swap) >> 214B ~> D ~> D | 300 | Your main 2 bar BnB. Deals great damage, gets a hard knock down, and will let you get corner from anywhere on the screen. This combo requires extremely specific spacings and depending on where you start the combo you will have to heavily alter how much space you walk and when to side swap and when not to. | |||
| 2D -> 2B -> 2C > 214C > 236236A/B/C ~> 236D >> 5C > 623D > SoT >> B+C (AAABBBCCCD 236D) | 264 | Dust ender combo. Wont work if the opponent is too close to the corner after the 236236A/B/C ~> 236D. If they are then you have to micro dash after the 236236A/B/C ~> 236D for the 5C to connect. Will leave you with about 2 2/3 of meter. | |||
| 2D -> 2B -> 2C > 214C ~> D > SoT > Whiffed Burst >> 66 >> { 5C > 623D > Delayed Sot }x3 >> 214214D | 403 | Alt Route Burst Combo. Requires 2 bars by the time you do the first Sot. | |||
| Three Bar BnB | |||||
| 2D -> 2B -> 2C > 214C ~> D > SoT >> 66 or 236D >> { 5C > 623D > Delayed Sot }x2 >> 5C > { 623D ~> 6D }x2 >> 623D > Delayed Sot >> 214B ~> D ~> D | 328 | Non burst meter dump combo. Requires extremely specific spacing from corner to work. The choice between walking, dashing, or using 236D after the first Sot entirely depends on where you are on the screen | |||
| 2D -> 2B -> 2C > 214C ~> D > SoT >> 5C > 623D > Delayed Sot > Whiffed Burst > { 5C > 623D > Delayed Sot }x3 >> 214214D | 406 | Burst Combo. Requires 3 bars for this route. | |||
