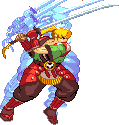
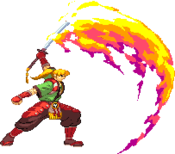
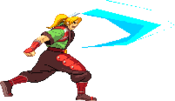
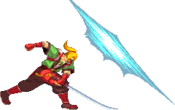
Spectral vs Generation/Orochimaru: Difference between revisions
Jump to navigation
Jump to search
Magistrate (talk | contribs) No edit summary |
Bladetastic (talk | contribs) |
||
| (39 intermediate revisions by 6 users not shown) | |||
| Line 4: | Line 4: | ||
|- | |- | ||
| align="center" colspan="2" |[[File:Spectral VS Generation Orochimaru Image.jpg|frameless|center|600x600px]] | | align="center" colspan="2" |[[File:Spectral VS Generation Orochimaru Image.jpg|frameless|center|600x600px]] | ||
|- | |||
| '''Health''' || 500 | |||
|- | |||
| '''Pre-Jump Frames''' || 4 | |||
|- | |- | ||
| '''Play Style''' || All-Around | | '''Play Style''' || All-Around | ||
| Line 13: | Line 17: | ||
== Character Background == | == Character Background == | ||
'''Race''': | '''Race''': Dragon<br> | ||
'''Motivation''': To preserve order<br> | '''Motivation''': To preserve order<br> | ||
'''Weapon''': Rising Sun<br> | '''Weapon''': Rising Sun<br> | ||
'''Likes''': Alcohol, Women, Fighting<br> | '''Likes''': Alcohol, Women, Fighting<br> | ||
'''Dislikes''': Marriage | '''Dislikes''': Marriage | ||
==Gameplay Overview== | |||
{{StrengthsAndWeaknesses | |||
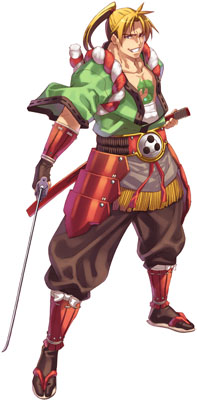
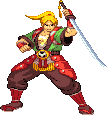
| intro = {{SUBPAGENAME}} (usually shorted down to "Oro") is the most neutral heavy character in the game. he relies on excellent positioning, great intuition and smart use of his stance to take advantage. he benefits from an easy execution for his optimal combos and good pokes. However, he is rewarded with extremely poor damage compared to everyone else for relatively high risk. Which, coupled with his lack of disjoints, projectiles and his very slow air speed, lands him at the bottom of all tier lists. | |||
'''Orochimaru is a character who excels in neutral, but sadly not much else.''' | |||
| pros= | |||
* '''Strong Neutral''': Oro's neutral game is very powerful. Having good pokes in 5A, 2A and 5C to check his opponents, and a very powerful air-to-air in j.B which is very difficult for anyone to contest. | |||
* '''Good Pressure''': With his stance making his most common pressure options safe, his 236A being Seal Of Time'd and even having access to a command grab which you can combo from, Oro has surprisingly good pressure. | |||
* '''Dustloop''': Not a joke. Orochimaru has an actual Dustloop in this game. While being character specific (Earth, Erile, Hiro, Hiro2, Jadou2 and Ryuken), it's a very effective timer-scam method if you're consistent with your inputs. | |||
| cons= | |||
* '''A Plethora Of Serious Flaws''': Unfortunately, Orochimaru has the biggest shortcomings in this game. Having the slowest air dash, no disjoints on his normals, useless buttons and chain combos, poor combo damage, weak reward off command grab, unsafe pressure options without meter outside of stance-cancellable options ([https://youtu.be/EXhRf9FIwFM and the list goes on]), Orochimaru has the highest risk of any character while also having very low reward for pulling anything off. | |||
* '''Zoning Woes''': Because of aformentioned flaws, and the fact that he has no fireball himself, Oro suffers a lot from zoning and genuinely has a difficult time even approaching characters who can keep their distance without much worry. | |||
* '''Really Weak Super Options''': From a fire pillar super (214214X) which is your best combo ender but not only has poor scaling but also so much startup that you can't use it on reaction to jump-ins AND has a blind spot in the corner, a tornado super (236236X) which is so stubby you'll never find any way to properly utilize it in your gameplan, a counter super which is a contender for the '''WORST''' one in fighting game history alongside 3S Remy's Blue Nocturne SA3, and a LVL 3, while good, has a very awkward input. Orochimaru has very poor super options. | |||
}} | |||
==Normals== | |||
===Far Standing Normals=== | |||
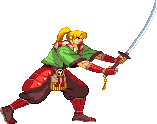
{{MoveData | |||
|name=5A | |||
|image=SVG_Orochimaru_Far5A.png | |||
|data= | |||
{{AttackData-SVG | |||
| damage = 15 | |||
| guard = Mid | |||
| cancel = Specials | |||
| startup = | |||
| advHit = | |||
| advBlock = | |||
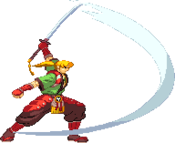
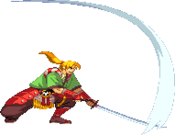
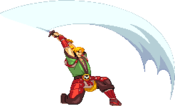
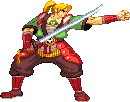
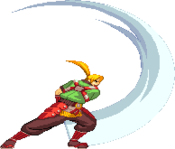
| description = Orochimaru does a light wide slice<br>while having fast startup, it cannot combo into anything so 5B is generally more useful | |||
}} | |||
}} | |||
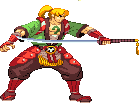
{{MoveData | |||
|name=5B | |||
|image=SVG_Orochimaru_Far5B.png | |||
|data= | |||
{{AttackData-SVG | |||
| damage = 35 | |||
| guard = Mid | |||
| cancel = Specials | |||
| startup = | |||
| advHit = | |||
| advBlock = | |||
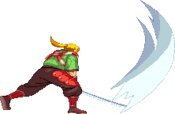
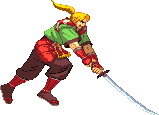
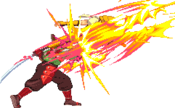
| description = '''can cancel into stance'''<br>Your main poking tool. very fast startup and one of the longest normals in the game | |||
}} | |||
}} | |||
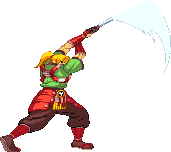
' | {{MoveData | ||
|name=5C | |||
|image=SVG_Orochimaru_Far5C.png | |||
|caption=Making Haomaru proud | |||
|data= | |||
{{AttackData-SVG | |||
| damage = 55 | |||
| guard = Mid | |||
| cancel = - | |||
| startup = | |||
| advHit = | |||
| advBlock = | |||
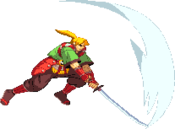
| description = Orochimaru does a heavy slash that slightly staggers oppnents on hit. it's very unsafe on hit so other than 5B>5C this is rarely used other than predictions | |||
}} | |||
}} | |||
{{MoveData | |||
|name=5D | |||
|image=SVG_Orochimaru_Far5D.png | |||
|data= | |||
{{AttackData-SVG | |||
| damage = 20 | |||
| guard = Mid | |||
| cancel = Specials | |||
| startup = | |||
| advHit = | |||
| advBlock = | |||
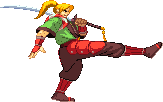
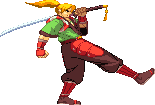
| description = a quick kick, but better normals do the same job<br>can not be added to BNBs and is outclassed by 5B in every aspect | |||
}} | |||
}} | |||
===Close Standing Normals=== | |||
{{MoveData | |||
|name=cl.5A | |||
|image=SVG_Orochimaru_Close5A.png | |||
|data= | |||
{{AttackData-SVG | |||
| damage = 15 | |||
| guard = Mid | |||
| cancel = Specials | |||
| startup = | |||
| advHit = | |||
| advBlock = | |||
| description = Orochimaru taps the enemy with the pommel of his sword, has fast startup and recovery, allowing you to tick throw with this | |||
}} | |||
}} | |||
{{MoveData | {{MoveData | ||
|name= | |name=cl.5B | ||
|image= | |image=SVG_Orochimaru_Close5B.png | ||
|caption=''Bonk'' | |||
|data= | |data= | ||
{{AttackData-SVG | {{AttackData-SVG | ||
| damage = | | damage = 35 | ||
| guard = | | guard = Mid | ||
| cancel = Specials | |||
| startup = | | startup = | ||
| advHit = | | advHit = | ||
| advBlock = | | advBlock = | ||
| description = | | description = very quick attack<br>the most common close BNB starter alongside cl.5A | ||
}} | }} | ||
}} | }} | ||
''' | {{MoveData | ||
|name=cl.5C | |||
|image=SVG_Orochimaru_Close5C.png | |||
|data= | |||
{{AttackData-SVG | |||
| damage = 55 | |||
| guard = Mid | |||
| cancel = Specials | |||
| startup = | |||
| advHit = | |||
| advBlock = | |||
| description = '''can cancel into stance'''<br>quick vertical slash with average range<br>visually identical to 2C with a few differences | |||
}} | |||
}} | |||
{{MoveData | |||
|name=cl.5D | |||
|image=SVG_Orochimaru_Close5D.png | |||
|data= | |||
{{AttackData-SVG | |||
| damage = 20 | |||
| guard = Mid | |||
| cancel = Specials | |||
| startup = | |||
| advHit = | |||
| advBlock = | |||
| description = 5D but a bit lower | |||
}} | |||
}} | |||
== | ===Crouching Normals=== | ||
{{MoveData | |||
|name=2A | |||
|image=SVG_Orochimaru_2A.png | |||
|data= | |||
{{AttackData-SVG | |||
| damage = 15 | |||
| guard = Mid | |||
| cancel = - | |||
| startup = | |||
| advHit = | |||
| advBlock = | |||
| description = very similar to 5A but he is crouching | |||
}} | |||
}} | |||
{{MoveData | |||
|name=2B | |||
|image=SVG_Orochimaru_2B.png | |||
|data= | |||
{{AttackData-SVG | |||
| damage = 35 | |||
| guard = Mid | |||
| cancel = Specials | |||
| startup = | |||
| advHit = | |||
| advBlock = | |||
| description = slash slightly longer than 2A | |||
}} | |||
}} | |||
{{MoveData | |||
|name=2C | |||
|image=SVG_Orochimaru_Close5C.png | |||
|data= | |||
{{AttackData-SVG | |||
| damage = 55 | |||
| guard = Low | |||
| cancel = Specials | |||
| startup = | |||
| advHit = | |||
| advBlock = | |||
| description = visually identical to cl.5C with a few differences | |||
}} | |||
}} | |||
== | {{MoveData | ||
|name=2D | |||
|image=SVG_Orochimaru_2D.png | |||
|data= | |||
{{AttackData-SVG | |||
| damage = 20 | |||
| guard = Low | |||
| cancel = Specials | |||
| startup = | |||
| advHit = | |||
| advBlock = | |||
| description = A short kick. | |||
}} | |||
}} | |||
'' | ===Jumping Normals=== | ||
{{MoveData | |||
|name=j.A | |||
|image=SVG_Orochimaru_j.A.png | |||
|data= | |||
{{AttackData-SVG | |||
| damage = 15 | |||
| guard = High | |||
| cancel = - | |||
| startup = | |||
| advHit = | |||
| advBlock = | |||
| description = Orochimaru pokes his sword out downwards until he lands. | |||
}} | |||
}} | |||
{{MoveData | |||
|name=j.B | |||
|image=SVG_Orochimaru_j.B.png | |||
|data= | |||
{{AttackData-SVG | |||
| damage = 35 | |||
| guard = High | |||
| cancel = - | |||
| startup = | |||
| advHit = | |||
| advBlock = | |||
| description = completely horizontal slash<br>Orochimaru's best air-to-air | |||
}} | |||
}} | |||
{{MoveData | |||
|name=j.C | |||
|image=SVG_Orochimaru_j.C.png | |||
|data= | |||
{{AttackData-SVG | |||
| damage = 55 | |||
| guard = High | |||
| cancel = - | |||
| startup = | |||
| advHit = | |||
| advBlock = | |||
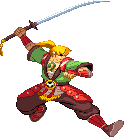
| description = wide slash, Orochimaru's main jump-in<br> good damage and can combo off of it if done low enough | |||
}} | |||
}} | |||
{{MoveData | |||
|name=j.D | |||
|image=SVG_Orochimaru_j.D.png | |||
|data= | |||
{{AttackData-SVG | |||
| damage = 20 | |||
| guard = High | |||
| cancel = - | |||
| startup = | |||
| advHit = | |||
| advBlock = | |||
| description = Air kick. | |||
}} | |||
}} | |||
===Command Normals=== | |||
{{MoveData | |||
|name=3B | |||
|image=SVG_Orochimaru_3B.png | |||
|data= | |||
{{AttackData-SVG | |||
| damage = 40 | |||
| guard = Mid | |||
| cancel = - | |||
| startup = | |||
| advHit = | |||
| advBlock = | |||
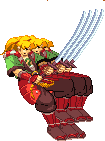
| description = stab that causes a hard knockdown. this is the most frequent and reliable way orochimaru gets knockdowns<br>hits OTG | |||
}} | |||
}} | |||
{{MoveData | |||
|name=4D | |||
|image=SVG_Orochimaru_4D.png | |||
|data= | |||
{{AttackData-SVG | |||
| damage = 30 | |||
| guard = Mid | |||
| cancel = - | |||
| startup = | |||
| advHit = | |||
| advBlock = | |||
| description = Orochimaru jumps in the air and kicks<br>immune to low enough attacks | |||
}} | |||
}} | |||
===Chain Specific Normals=== | |||
{{MoveData | |||
|name=A -> B -> C | |||
|image=SVG_Orochimaru_Far5B.png | |||
|image2=SVG_Orochimaru_5C2.png | |||
|data= | |||
{{AttackData-SVG | |||
| damage = B 17, C 28 | |||
| guard = High | |||
| cancel = Specials | |||
| startup = | |||
| advHit = | |||
| advBlock = | |||
| description = 5B and 5C are faster than their non-chain counterparts | |||
}} | |||
}} | |||
{{MoveData | |||
|name=2B -> 2C | |||
|image=SVG_Orochimaru_2C2.png | |||
|data= | |||
{{AttackData-SVG | |||
| damage = 28 | |||
| guard = High | |||
| cancel = - | |||
| startup = | |||
| advHit = | |||
| advBlock = | |||
| description = 2C becomes an upward slash that slightly launches opponents. this property is yet to receive any practical use | |||
}} | |||
}} | |||
===Throws=== | |||
{{MoveData | |||
|name=A+D | |||
|subtitle=Forward Throw | |||
|caption=the 2nd coolest throw in the game | |||
|image=SVG_Orochimaru_Grab1.png | |||
|data= | |||
{{AttackData-SVG | |||
| damage = 60 | |||
| guard = Throw | |||
| cancel = N/A | |||
| startup = | |||
| advHit = | |||
| advBlock = | |||
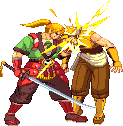
| description = Orochimaru grabs his opponent and headbutts them | |||
}} | |||
}} | |||
{{MoveData | |||
|name=B+D | |||
|subtitle=Back Throw | |||
|caption=the coolest throw in the game | |||
|image=SVG_Orochimaru_Grab2.png | |||
|data= | |||
{{AttackData-SVG | |||
| damage = 70 | |||
| guard = Throw | |||
| cancel = N/A | |||
| startup = | |||
| advHit = | |||
| advBlock = | |||
| description = similar to A+D but instead they get throw behind<br>fully untechable and can be followed up with OTG 3B | |||
}} | |||
}} | |||
===Sword Series Slash (Dust)=== | |||
{{MoveData | |||
|name=5B+C | |||
|image=SVG_Orochimaru_Close5C.png | |||
|subtitle=Standing SSS | |||
|data= | |||
{{AttackData-SVG | |||
| damage = 150 | |||
| guard = High | |||
| cancel = N/A | |||
| startup = | |||
| advHit = | |||
| advBlock = | |||
| description = Triggers an air chase when you press A. To complete the air chase you must do AAABBBCCCD > 236D. | |||
}} | |||
}} | |||
{{MoveData | |||
|name=2B+C | |||
|subtitle=Low SSS | |||
|image=SVG_Orochimaru_3B.png | |||
|data= | |||
{{AttackData-SVG | |||
| damage = 145 | |||
| guard = Low | |||
| cancel = N/A | |||
| startup = | |||
| advHit = | |||
| advBlock = | |||
| description = Same as standing SSS but hits low. Triggers an air chase when you press A. To complete the air chase you must do AAABBBCCCD > 236D. | |||
}} | |||
}} | |||
===Chaos Breaking (Parry)=== | |||
{{MoveData | |||
|name=A+B | |||
|image=SVG_Orochimaru_GroundParry.png | |||
|caption=Standing Parry | |||
|image2=SVG_Orochimaru_CrouchParry.png | |||
|caption2=Crouching Parry | |||
|image3=SVG_Orochimaru_AirParry.png | |||
|caption3=Jumping Parry | |||
|data= | |||
{{AttackData-SVG | |||
| damage = | |||
| guard = | |||
| cancel = | |||
| startup = | |||
| advHit = | |||
| advBlock = | |||
| description = Dodges projectiles and counters any physical, non-grab attacks. | |||
</Br>The Standing and Jumping versions parry anything that can be blocked High, but is vulnerable to grabs. The Crouching version only parries lows and cannot be grabbed. | |||
}} | |||
}} | |||
==Special Moves== | |||
{{MoveData | |||
|name=Fire Dragon Wave | |||
|input=236A/B/C | |||
|image=SVG_Orochimaru_236ABC.png | |||
|data= | |||
{{AttackData-SVG | |||
| version = A | |||
| damage = 50 | |||
| guard = High/Low | |||
| cancel = Super | |||
| startup = | |||
| advHit = | |||
| advBlock = | |||
| description = big move that can SOT cancel<br>A version is stationary and is a single hit | |||
}} | |||
{{AttackData-SVG | |||
| version = B | |||
| damage = 51 | |||
| guard = High/Low | |||
| cancel = Super | |||
| startup = | |||
| advHit = | |||
| advBlock = | |||
| description = big move that can SOT cancel<br>B version is 3 hits and advances Orochimaru | |||
}} | |||
{{AttackData-SVG | |||
| version = C | |||
| damage = 56 | |||
| guard = High/Low | |||
| cancel = Super | |||
| startup = | |||
| advHit = | |||
| advBlock = | |||
| description = big move that can SOT cancel<br>C version is 4 hits and advances Orochimaru | |||
}} | |||
}} | |||
{{MoveData | |||
|name=Vertical Slicer | |||
|input=214A/B/C | |||
|image=SVG_Orochimaru_214ABC1.png | |||
|data= | |||
{{AttackData-SVG | |||
| version = A | |||
| damage = 11 | |||
| guard = Mid | |||
| cancel = Vertical Gale, Super | |||
| startup = | |||
| advHit = | |||
| advBlock = | |||
| description = short slash with somewhat slow startup | |||
}} | |||
{{AttackData-SVG | |||
| version = B | |||
| damage = 15 | |||
| guard = Mid | |||
| cancel = Vertical Gale, Super | |||
| startup = | |||
| advHit = | |||
| advBlock = | |||
| description = short slash with somewhat slow startup | |||
}} | |||
{{AttackData-SVG | |||
| version = C | |||
| damage = 19 | |||
| guard = Mid | |||
| cancel = Vertical Gale, Super | |||
| startup = | |||
| advHit = | |||
| advBlock = | |||
| description = short slash with somewhat slow startup | |||
}} | |||
}} | |||
{{MoveData | |||
|name=Vertical Gale | |||
|input=Vertical Slicer ~> 214A/B/C | |||
|image=SVG_Orochimaru_214ABC2.png | |||
|data= | |||
{{AttackData-SVG | |||
| damage = 24-27 | |||
| guard = Mid | |||
| cancel = V Gale Dragon Crest, Readiness | |||
| startup = | |||
| advHit = | |||
| advBlock = | |||
| description = followup to 214A/B/C<br>'''can cancel into stance''' | |||
}} | |||
}} | |||
{{MoveData | |||
|name=V Gale Dragon Crest | |||
|input=Vertical Gale ~> A/B/C | |||
|image=SVG_Orochimaru_214ABC3.png | |||
|data= | |||
{{AttackData-SVG | |||
| damage = 26-33 | |||
| guard = Mid | |||
| cancel = Static Dragon, SoT | |||
| startup = | |||
| advHit = | |||
| advBlock = | |||
| description = final followup. can SOT cancel. D can be added for extra damage and a wallbounce<br>it's possible to get a wallbounce ''and'' SOT at the same time if the inputs are done fast enough | |||
}} | |||
}} | |||
{{MoveData | |||
|name=Static Dragon | |||
|input=V Gale Dragon Crest ~> D | |||
|image=SVG_Orochimaru_214ABC4.png | |||
|data= | |||
{{AttackData-SVG | |||
| damage = 32 | |||
| guard = Mid | |||
| cancel = N/A | |||
| startup = | |||
| advHit = | |||
| advBlock = | |||
| description = final followup. can SOT cancel. D can be added for extra damage and a wallbounce<br>it's possible to get a wallbounce ''and'' SOT at the same time if the inputs are done fast enough | |||
}} | |||
}} | |||
{{MoveData | |||
|name=Unclean Killer | |||
|input=632146D | |||
|image=SVG_Orochimaru_632146D.png | |||
|data= | |||
{{AttackData-SVG | |||
| damage = 45 | |||
| guard = N/A | |||
| cancel = N/A | |||
| startup = | |||
| advHit = | |||
| advBlock = | |||
| description = Command grab with decent range<br>can be comboed off of but scales combos a lot | |||
}} | |||
}} | |||
{{MoveData | |||
|name=Readiness | |||
|input=A+B After 5B/cl.5C/Vertical Gale On Hit/Block | |||
|image=SVG_Orochimaru_Stance.png | |||
|image2=SVG_Orochimaru_Stance_fdash.png | |||
|image3=SVG_Orochimaru_Stance_bdash.png | |||
|caption=This Is The Stance | |||
|caption2=Forward dash | |||
|caption3=Back dash | |||
|data= | |||
{{AttackData-SVG | |||
| damage = N/A | |||
| guard = Mid | |||
| cancel = N/A | |||
| startup = | |||
| advHit = | |||
| advBlock = | |||
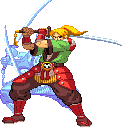
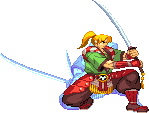
| description = Stance that can be entered with 5B, cl.5C, or 214A/B/C ~> 214A/B/C<br>Stance can also cancel into throw or (very difficult) command throw<br>will disable automatically if no followup is selected | |||
}} | |||
{{AttackData-SVG | |||
| damage = N/A | |||
| guard = Mid | |||
| cancel = N/A | |||
| startup = | |||
| advHit = | |||
| advBlock = | |||
| description = Orochimaru hops forward a short distance<br>has a fair ammount of end lag so the opponent can grab you first if you attempt to grab them<br>Can side swap if you are close enough | |||
}} | |||
{{AttackData-SVG | |||
| damage = N/A | |||
| guard = Mid | |||
| cancel = N/A | |||
| startup = | |||
| advHit = | |||
| advBlock = | |||
| description = Orochimaru does a short hop backwards<br>exits the stance | |||
}} | |||
}} | |||
{{MoveData | |||
|name=Reverse Fire | |||
|input=Readiness ~> 5A | |||
|image=SVG_Orochimaru_Stance_5A.png | |||
|data= | |||
{{AttackData-SVG | |||
| damage = 50 | |||
| guard = High | |||
| cancel = N/A | |||
| startup = | |||
| advHit = | |||
| advBlock = | |||
| description = quick overhead that causes a hard knockdown<br>exits the stance | |||
}} | |||
}} | |||
{{MoveData | |||
|name=Dragon Slice | |||
|input=Readiness ~> 2A | |||
|image=SVG_Orochimaru_Stance_2A.png | |||
|data= | |||
{{AttackData-SVG | |||
| damage = 45 | |||
| guard = Low | |||
| cancel = N/A | |||
| startup = | |||
| advHit = | |||
| advBlock = | |||
| description = quick low that causes a hard knockdown<br>exits the stance | |||
}} | |||
}} | |||
{{MoveData | |||
|name=Fire Dragon | |||
|input=Readiness ~> B | |||
|image=SVG_Orochimaru_Stance_B.png | |||
|data= | |||
{{AttackData-SVG | |||
| damage = 40 | |||
| guard = Mid | |||
| cancel = N/A | |||
| startup = | |||
| advHit = | |||
| advBlock = | |||
| description = very fast and very damaging poke | |||
}} | |||
}} | |||
{{MoveData | |||
|name=Dragon Chop | |||
|input=Readiness ~> C | |||
|image=SVG_Orochimaru_Stance_C.png | |||
|data= | |||
{{AttackData-SVG | |||
| damage = 80 | |||
| guard = Mid | |||
| cancel = Super | |||
| startup = | |||
| advHit = | |||
| advBlock = | |||
| description = armored move that guard breaks on block or causes a knockdown on hit<br>Will Combo into Single Slice Howling Gale on Hit/Block anywhere. In the corner it can combo into Reverse Blade Dragon Flash for more damage.<br>is stopped by multihits and lows and parries<br>needs further testing, but if attacked near the end of the animation orochimaru will attack instantly<br>exits the stance | |||
}} | |||
}} | |||
==Super Moves== | |||
===Level 1 Supers=== | |||
{{MoveData | |||
|name=Reverse Blade Dragon Flash | |||
|input=214214A/B/C | |||
|image=SVG_Orochimaru_214214A-B-C.png | |||
|caption= | |||
|data= | |||
{{AttackData-SVG | |||
| damage = 131 | |||
| guard = Mid | |||
| cancel = N/A | |||
| startup = | |||
| advHit = | |||
| advBlock = | |||
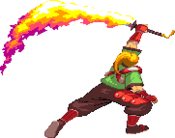
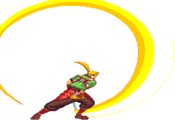
| description = fire pillar super with good reach<br>has a very long startup. opponents can attack on the superflash but still recover and block in time<br>aerial opponents can air dash forward on the superflash and end up behind you<br>it is often used in long advanced combos but it scales damage a lot | |||
}} | |||
}} | |||
{{MoveData | |||
|name=Single Slice Howling Gale | |||
|input=236236A/B/C | |||
|image=SVG_Orochimaru_236236A.png | |||
|caption= | |||
|data= | |||
{{AttackData-SVG | |||
| damage = 134 | |||
| guard = Mid | |||
| cancel = N/A | |||
| startup = | |||
| advHit = | |||
| advBlock = | |||
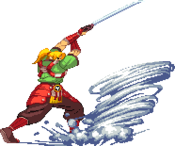
| description = very very short attack that on hit initiates a sequence ending in a knockdown<br>while it can be used as a reversal, it can't reliably punish jump-ins<br>it's range is so short that most BNBs can't end with it | |||
}} | |||
}} | |||
{{MoveData | |||
|name=Emperor Dragon Thunder | |||
|input=236236D | |||
|image=SVG_Orochimaru_236236D.png | |||
|caption= | |||
|data= | |||
{{AttackData-SVG | |||
| damage = | |||
| guard = - | |||
| cancel = N/A | |||
| startup = | |||
| advHit = | |||
| advBlock = | |||
| description = this breaks mizuumi guidelines but '''please never use this'''<br>a parry super with tons of damage however :<br>- if the opponent's attack is active during the superflash it will not counter it<br>- it's beaten by lows<br>- it's beaten by throws<br>- it will almost never be timed correctly to punish a jump-in, since they can empty jump when they see the superflash | |||
}} | |||
}} | |||
===Level 3 Super=== | |||
{{MoveData | |||
|name=Seven Blades: Pegasus | |||
|image=SVG_Orochimaru_214214214D1.png | |||
|image2=SVG_Orochimaru_214214214D2.png | |||
|caption2=Translation : you dead | |||
|input=214214214D | |||
|caption= | |||
|data= | |||
{{AttackData-SVG | |||
| damage = 339 | |||
| guard = Mid | |||
| cancel = N/A | |||
| startup = | |||
| advHit = | |||
| advBlock = | |||
| description = a very wide slash that on hit initiates a short sequence<br>the main damage comes from a single slash so it's not affected by scaling as much as other level 3s<br>while one of the best level 3 supers,it is hindered a lot by it's 3 motion input, as it makes it very reactable when done raw and a bit hard to get used to doing it fast enough mid combo | |||
}} | |||
}} | |||
==Strategy== | |||
===Neutral=== | |||
===Offence (On Hit)=== | |||
====HKD OKI==== | |||
===Offence (On Block)=== | |||
===Defense=== | |||
==Combos== | |||
:Need help reading the combos? Check out the [[Spectral_vs_Generation/Glossary|'''Glossary''']] for explanations on notation and game specific terms! <br> | |||
===Chain Combos=== | |||
===Basic Combos=== | |||
{| border="1em" cellpadding="3" cellspacing="0" | |||
| align="center" style="background:#f0f0f0;"|'''Combo''' | |||
| align="center" style="background:#f0f0f0;"|'''Total Damage''' | |||
| align="center" style="background:#f0f0f0;"|'''Notes''' | |||
|- | |||
| colspan="6" align="center" | '''Meterless BnB''' | |||
|- | |||
|B+D >> 3B | |||
| | |||
|Back throw combo. | |||
|- | |||
|9C >> 5A -> 5B -> 5C > 236A | |||
| | |||
| | |||
|- | |||
|9C >> cl.5C > 214B ~> 214B ~> B ~> D | |||
| | |||
|Oro's most damaging meterless combo. | |||
|- | |||
|632146D >> (DU) 5A -> 5B -> 5C > 236C | |||
| | |||
|Command grab starter, dash up to link 5A. | |||
|- | |||
| colspan="6" align="center" | '''One Bar Combos''' | |||
|- | |||
|9C >> 5A -> 5B -> 214B ~> 214B ~> B ~> D (SOT) >> (DU) B+C | |||
| | |||
|Extremely good corner carry. Run with the opponent when they're in SOT and it'll carry them to the wall. | |||
|- | |||
|9C >> 5A -> 5B -> 5C > 236A (SOT) >> B+C | |||
| | |||
| | |||
|- | |||
| colspan="6" align="center" | '''Two Bar Combo''' | |||
|- | |||
|9C >> 5A -> 5B -> 5C > 236A (SOT) >> cl.B -> C > 236A (SOT) >> B+C | |||
| | |||
| | |||
|- | |||
| colspan="6" align="center" | '''Three Bar Combos''' | |||
|- | |||
|9C >> 5A -> 5B -> 5C > 236C (3 hits) > 214214214D >> (OTG) 3B | |||
| | |||
|You'll have to walk up to link 3B OTG outside of the corner. | |||
|- | |||
|632146D >> (DU) 5A -> 5B -> 5C > 236C (3 hits) > 214214214D >> (OTG) 3B | |||
| | |||
|Command grab starter, dash up to link 5A. You'll have to walk up to link 3B OTG outside of the corner. | |||
|- | |||
| colspan="6" align="center" | '''Burst''' | |||
|- | |||
|9C >> 5A -> 5B -> 5C -> 236A (SOT) >> cl.B -> C > 236A (SOT) >> Burst (whiff) >> <br> | |||
[cl.B -> C > 236A (SOT)] x3 >> cl.B -> 5C -> 236B > 214214214D >> (OTG) 3B | |||
| | |||
|Two bar burst combo. You'll have to walk up to link 3B OTG outside of the corner. | |||
|- | |||
|} | |||
{{Navbox-SVG}} | {{Navbox-SVG}} | ||
Latest revision as of 01:38, 14 April 2024
| Orochimaru | |
|---|---|
| Health | 500 |
| Pre-Jump Frames | 4 |
| Play Style | All-Around |
| Dash Type | Run |
Character Background
Race: Dragon
Motivation: To preserve order
Weapon: Rising Sun
Likes: Alcohol, Women, Fighting
Dislikes: Marriage
Gameplay Overview
Playstyle
|
Orochimaru (usually shorted down to "Oro") is the most neutral heavy character in the game. he relies on excellent positioning, great intuition and smart use of his stance to take advantage. he benefits from an easy execution for his optimal combos and good pokes. However, he is rewarded with extremely poor damage compared to everyone else for relatively high risk. Which, coupled with his lack of disjoints, projectiles and his very slow air speed, lands him at the bottom of all tier lists. Orochimaru is a character who excels in neutral, but sadly not much else. |
|
| Pros | Cons |
|
|
Normals
Far Standing Normals
5A
|
|---|
5B
|
|---|
5C Making Haomaru proud Making Haomaru proud
|
|---|
5D
|
|---|
Close Standing Normals
cl.5A
|
|---|
cl.5B Bonk Bonk
|
|---|
cl.5C
|
|---|
cl.5D
|
|---|
Crouching Normals
2A
|
|---|
2B
|
|---|
2C
|
|---|
2D
|
|---|
Jumping Normals
j.A
|
|---|
j.B
|
|---|
j.C
|
|---|
j.D
|
|---|
Command Normals
3B
|
|---|
4D
|
|---|
Chain Specific Normals
A -> B -> C
|
|---|
2B -> 2C
|
|---|
Throws
A+D Forward Throw the 2nd coolest throw in the game the 2nd coolest throw in the game
|
|---|
B+D Back Throw the coolest throw in the game the coolest throw in the game
|
|---|
Sword Series Slash (Dust)
5B+C
Standing SSS |
|---|
2B+C
Low SSS |
|---|
Chaos Breaking (Parry)
A+B Standing Parry Standing Parry Crouching Parry Crouching Parry Jumping Parry Jumping Parry
|
|---|
Special Moves
Fire Dragon Wave
236A/B/C |
|---|
Vertical Slicer
214A/B/C |
|---|
Vertical Gale
Vertical Slicer ~> 214A/B/C |
|---|
V Gale Dragon Crest
Vertical Gale ~> A/B/C |
|---|
Static Dragon
V Gale Dragon Crest ~> D |
|---|
Unclean Killer
632146D |
|---|
Readiness A+B After 5B/cl.5C/Vertical Gale On Hit/Block This Is The Stance This Is The Stance Forward dash Forward dash Back dash Back dash
|
|---|
Reverse Fire
Readiness ~> 5A |
|---|
Dragon Slice
Readiness ~> 2A |
|---|
Fire Dragon
Readiness ~> B |
|---|
Dragon Chop
Readiness ~> C |
|---|
Super Moves
Level 1 Supers
Reverse Blade Dragon Flash
214214A/B/C |
|---|
Single Slice Howling Gale
236236A/B/C |
|---|
Emperor Dragon Thunder
236236D |
|---|
Level 3 Super
Seven Blades: Pegasus 214214214D Translation : you dead Translation : you dead
|
|---|
Strategy
Neutral
Offence (On Hit)
HKD OKI
Offence (On Block)
Defense
Combos
- Need help reading the combos? Check out the Glossary for explanations on notation and game specific terms!
Chain Combos
Basic Combos
| Combo | Total Damage | Notes | |||
| Meterless BnB | |||||
| B+D >> 3B | Back throw combo. | ||||
| 9C >> 5A -> 5B -> 5C > 236A | |||||
| 9C >> cl.5C > 214B ~> 214B ~> B ~> D | Oro's most damaging meterless combo. | ||||
| 632146D >> (DU) 5A -> 5B -> 5C > 236C | Command grab starter, dash up to link 5A. | ||||
| One Bar Combos | |||||
| 9C >> 5A -> 5B -> 214B ~> 214B ~> B ~> D (SOT) >> (DU) B+C | Extremely good corner carry. Run with the opponent when they're in SOT and it'll carry them to the wall. | ||||
| 9C >> 5A -> 5B -> 5C > 236A (SOT) >> B+C | |||||
| Two Bar Combo | |||||
| 9C >> 5A -> 5B -> 5C > 236A (SOT) >> cl.B -> C > 236A (SOT) >> B+C | |||||
| Three Bar Combos | |||||
| 9C >> 5A -> 5B -> 5C > 236C (3 hits) > 214214214D >> (OTG) 3B | You'll have to walk up to link 3B OTG outside of the corner. | ||||
| 632146D >> (DU) 5A -> 5B -> 5C > 236C (3 hits) > 214214214D >> (OTG) 3B | Command grab starter, dash up to link 5A. You'll have to walk up to link 3B OTG outside of the corner. | ||||
| Burst | |||||
| 9C >> 5A -> 5B -> 5C -> 236A (SOT) >> cl.B -> C > 236A (SOT) >> Burst (whiff) >> [cl.B -> C > 236A (SOT)] x3 >> cl.B -> 5C -> 236B > 214214214D >> (OTG) 3B |
Two bar burst combo. You'll have to walk up to link 3B OTG outside of the corner. | ||||
