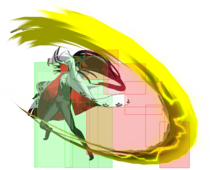
Under Night In-Birth/UNI2/Kuon: Difference between revisions
(→Special Moves: split up 236x into the separate moves it actually is) |
(→External Links: Add link to Mo.Sin's anti-Kuon doc) |
||
| (84 intermediate revisions by 10 users not shown) | |||
| Line 4: | Line 4: | ||
{{WIP}} | {{WIP}} | ||
{{Navigation-UNI2}} | {{Navigation-UNI2}} | ||
{{UNI2-Character-infobox | |||
|umo=Float (Force Function) | |||
|fastestAttack=5A/2A (6f) | |||
|reversal=[2]8C (10f), [2]8B (12f), 623C (23f) | |||
}} | |||
{{QuotationBox | margin = left | fontsize=0.8 | | {{QuotationBox | margin = left | fontsize=0.8 | | ||
| Line 39: | Line 43: | ||
{{ProConTable | {{ProConTable | ||
|pros= | |pros= | ||
*'''Pressure:''' Kuon's Force Function flight, Heavenly Law, can be used to quickly reset pressure, or run ambiguous high/low/throw mixups, while dealing chip damage with most of your normals on block. Kuon's projectiles also make for great setplay and ranged pressure tools, while 214C is a massively + pressure reset available at any moment thanks to 3C. | |||
*'''Neutral Projectiles:''' Kuon has several projectiles useful for zoning, counterzoning, and area denial, making him a very adaptable character in neutral. | |||
*'''Meter Gain:''' Kuon's BnB's build a very large amount of EXS, which gives him near-constant access to high damage enders that lead to setplay, anti zoning tools, and forced pressure resets. | |||
*'''Airgame:''' Heavenly Law, its followups, and other strong aerial attacks and projectiles make Kuon difficult to contest midair. | *'''Airgame:''' Heavenly Law, its followups, and other strong aerial attacks and projectiles make Kuon difficult to contest midair. | ||
*'''Mobility:''' Kuon's run is great at covering long distances, on top of his access to several teleports, his increased flight speed in vorpal, and many advancing attacks. | *'''Mobility:''' Kuon's run is great at covering long distances, on top of his access to several teleports, his increased flight speed in vorpal, and many advancing attacks. | ||
|cons= | |cons= | ||
*'''GRD | *'''GRD Expenditure:''' Heavenly Law, being a Force Function, drains Kuon's GRD gauge for its entire duration so long as he isn't moving towards the opponent, with the activation alone taking a large chunk of it. This forces Kuon to forfeit Vorpal in a lot of situations, or play around gaining GRD and use the move less. | ||
*'''Rebeats:''' Kuon's rebeats are more | *'''Rebeats:''' Kuon's rebeats are -5 for B buttons and -3 for C buttons so more minus than conventional characters. Kuon's 5A is -4 which can be dangerous if No-cancelled infront of an opponent's face due to throw. Kuon's run isn't good at covering short distances so dash throwing can be more telegraphed. This forces him to resort to risky options to reset pressure, or use moves that cost large amounts of resources (214C), with Heavenly Law (FF) in particular being both due to leaving Kuon open to anti-airs and abare in most blockstrings. | ||
}} | }} | ||
{{3 Column Flex|flex1=5|flex2=3|flex3=2 | |||
{{ | |content1={{Content Box|header=Unique Mechanics: Floating|content= | ||
| | Kuon's [[Under_Night_In-Birth/UNI2/Kuon#Force_Function|Heavenly Law]] allows him to float in the air and move in any direction for a limited time. He can cancel into it from ground or air normals, and has access to enhanced versions of his air normals and some unique follow-ups while in this state. | ||
| | }} | ||
| | |content2={{Content Box|header=Chip Damage|content= | ||
| | All of Kuon's normals that use his blades inflict chip damage on block, similar to Hyde's normals with his sword. | ||
| | }} | ||
| | |content3={{Content Box|header=Vorpal Trait|content= | ||
| | With Vorpal, Kuon's movement speed is increased while he is using [[Under_Night_In-Birth/UNI2/Kuon#Force_Function|Heavenly Law]]. His blade normals also inflict increased chip damage. | ||
}} | |||
| | |||
| | |||
| | |||
| | |||
| | |||
| | |||
}} | }} | ||
| Line 102: | Line 88: | ||
|description= | |description= | ||
Very important poke and combo tool. Low profilable, but rarely. | Very important poke and combo tool. Low profilable, but rarely. | ||
* | *Slower than 2B, but hits lower airborne opponents and reaches further. | ||
*Converts into several routes at many ranges, and a good starter too. | *Converts into several routes at many ranges, and a good starter too. | ||
}} | }} | ||
| Line 117: | Line 103: | ||
*-3 if followed with a whiffed 2A, which is Kuon's least minus rebeat option. | *-3 if followed with a whiffed 2A, which is Kuon's least minus rebeat option. | ||
| 5[C] = | | 5[C] = | ||
Increased version of 5C. | |||
*Does not change grounded hitstun or blockstun, so it's not more adventageous on rebeat. | *Does not change grounded hitstun or blockstun, so it's not more adventageous on rebeat. | ||
*Increases distance travelled compared to non-increased version. | *Increases distance travelled compared to non-increased version. | ||
| Line 137: | Line 124: | ||
|input=2B | |input=2B | ||
|description= | |description= | ||
Kuon's main low attack, poke supreme with good range and startup. | |||
*Great poke against grounded opponents due to the fantastic active frames and relatively quick startup. Also convertable at any range with many attacks. | |||
*Primary mixup tool, but preferable over 3C due to its safety. | *Primary mixup tool, but preferable over 3C due to its safety. | ||
*Otherwise good as string filler, and useful in some juggles. | *Otherwise good as string filler, and useful in some juggles. | ||
}} | }} | ||
| Line 171: | Line 157: | ||
|input=jB | |input=jB | ||
|description= | |description= | ||
Air-to-air with notably long range. | Air-to-air with notably long range and a good crossup hitbox. | ||
*Mostly used as combo filler, or as a long range alternative to Flight jA or Flight jC. | *Mostly used as combo filler, or as a long range alternative to Flight jA or Flight jC. | ||
*Hits late as a jumpin, but nevertheless good as a consistent crossup. | |||
}} | }} | ||
| Line 180: | Line 167: | ||
| input=jC, j[C] | | input=jC, j[C] | ||
| jC = | | jC = | ||
Very large air normal with a crossup hitbox. Also one of the most damaging air normals Kuon has. | Very large air normal with a small crossup hitbox. Also one of the most damaging air normals Kuon has. | ||
*Primary combo filler with a healthy amount of hitstun. Great for converting from air-to-airs into grounded combos. | *Primary combo filler with a healthy amount of hitstun. Great for converting from air-to-airs into grounded combos. | ||
*Great normal for low Flight, where it's plus unless both hits are shielded, and even then, Kuon is safe. The fastest Flight jC possible is 29 frames. | *Great normal for low Flight, where it's plus unless both hits are shielded, and even then, Kuon is safe. The fastest Flight jC possible is 29 frames. | ||
| Line 186: | Line 173: | ||
| j[C] = | | j[C] = | ||
Not different from jC in blockstun, but floats the opponent higher on hit. | Not different from jC in blockstun, but floats the opponent higher on hit. | ||
*Mostly used for fakeouts during | *Mostly used for fakeouts or for F-Shiki overheads during Jumps or Assault, as its not used in any of Kuon's optimal bnb's. | ||
*If it does hit, it can lead to more damage than regular jC. | *If it does hit, it can lead to more damage than regular jC. | ||
}} | }} | ||
| Line 202: | Line 189: | ||
=====6B~6B===== | =====6B~6B===== | ||
{{MoveData-UNI2 | {{MoveData-UNI2 | ||
|input= | |input=6B~6B | ||
|description= | |description= | ||
Followup to 6B, not available from other normals. Launches the opponent with a really long untech time. | Followup to 6B, not available from other normals. Launches the opponent with a really long untech time. | ||
| Line 214: | Line 201: | ||
{{MoveData-UNI2 | {{MoveData-UNI2 | ||
|input=6C | |input=6C | ||
|description= | |description= | ||
Kuon summons a big, spinning projectile in front of him that does 4 hits on the opponent. Launches very adventageously on hit, and is cancelable on hit or block. | |||
* | *Not actually a frametrap from anything, and not +, so it's more useful when spaced to make it harder to interrupt during pressure. | ||
* | *As a combo tool, it does high damage, and the long launch is enough to combo into 214A and 623B, which plays a big role in some routes. | ||
* | *Is technically a projectile, which means it can clash with others (as useless as that is in gameplay), and can be avoided by projectile invul moves or jumpblocked. | ||
}} | }} | ||
| Line 235: | Line 215: | ||
*Key component in getting knockdowns on airborne opponents. | *Key component in getting knockdowns on airborne opponents. | ||
*Has the same blockstun as 5C, so it can be used to rebeat with 2A, which is easier as 4C has no forward movement. | *Has the same blockstun as 5C, so it can be used to rebeat with 2A, which is easier as 4C has no forward movement. | ||
}} | }} | ||
| Line 250: | Line 229: | ||
}} | }} | ||
=== | =====j.6C===== | ||
{{MoveData-UNI2 | {{MoveData-UNI2 | ||
|input= | |input=j6C | ||
|description= | |description= | ||
Horizontal attack that launches the opponent to the other side of the screen for a wallbounce, making it a very important combo tool. | |||
*The fullscreen launch can usually be followed up with 623B midscreen, giving Kuon his good corner carry. | |||
* | *The untech time on the wallbounce is long enough to allow for a variety moves to connect in the corner, allowing for stronger routes. | ||
* | *Despite its looks, this move reaches shockingly low, and is actually Kuon's most adventageous jump normal most of the time, and often + on shield. | ||
* | *Only air normal that doesn't deal chip damage. | ||
* | |||
}} | }} | ||
===Dash Moves=== | |||
=====66B===== | =====66B===== | ||
| Line 283: | Line 261: | ||
*Since Kuon has several other overheads that are less obvious and at least plus while still comboing, this one is rarely used for mixups. | *Since Kuon has several other overheads that are less obvious and at least plus while still comboing, this one is rarely used for mixups. | ||
*Special cancelable after landing, even on block. | *Special cancelable after landing, even on block. | ||
*Knocks the opponent down, allowing for links afterwards. This also makes it your best knockdown for 214X setplay. | *Knocks the opponent down, allowing for links or cancels afterwards. This also makes it your best knockdown for 214X setplay. | ||
*Kuon is lifted off the ground for the move, beating lows and throws, but granted, he has safer options for that purpose. | *Kuon is lifted off the ground for the move, beating lows and throws, but granted, he has safer options for that purpose. | ||
}} | |||
=====66~6A+B===== | |||
{{MoveData-UNI2 | |||
|input=66~6A+B | |||
|description= | |||
A teleport that tracks the opponent and appears a set distance behind them, except in the corner, where Kuon stays in front. Only performable during a dash. | |||
*Has very long recovery, making it very rare for the opponent to not retaliate upon seeing this. | |||
*Due to Kuon's restricted midscreen setplay options, it's not possible to set up any efficient crossups using this. | |||
*Useful mainly to get to the opponent's location when they're far away and knocked down, but it is very rarely better than running in. | |||
*Has invul, however its is VERY short, and not early into its frames. | |||
*Can be CS'd 8 frames before the end of its recovery to make it 31f instead of 39f total. The only usage for this is getting plus frames in specific knockdown situations. | |||
}} | }} | ||
| Line 297: | Line 287: | ||
*Performable both on the ground or midair, '''and cancelable into from normals both airborne or grounded'''. This includes cancels from aerial assault normals, but not gounded assault ones. | *Performable both on the ground or midair, '''and cancelable into from normals both airborne or grounded'''. This includes cancels from aerial assault normals, but not gounded assault ones. | ||
*The direction input during B+C changes what direction the flight initiates towards. | *The direction input during B+C changes what direction the flight initiates towards. | ||
*Initially costs around | *Initially costs around 1 block of GRD, and drains more as long as Kuon isn't approaching the opponent. | ||
|[B]+[C]= | |[B]+[C]= | ||
After a noticeably longer startup, Kuon teleports above the opponent and enters flight. Takes a very long time for Kuon to become actionable. | After a noticeably longer startup, Kuon teleports above the opponent and enters flight. Takes a very long time for Kuon to become actionable. | ||
*Mostly rare to see due to being very easily countered on reaction with anti airs | *Mostly rare to see due to being very easily countered on reaction with anti airs | ||
*The side it puts Kuon on is ambiguous and easily changed with slight movement, which can especially be confusing in the corner. | *The side it puts Kuon on is ambiguous and easily changed with slight movement, which can especially be confusing in the corner. | ||
}} | |||
=====Force Function Followups===== | |||
{{MoveData-UNI2 | |||
|versioned=input | |||
|input=B+C~D, B+C~X, B+C~6B+C, B+C~4B+C, B+C~2B+C | |||
|B+C~D= | |||
Cancels the flight and gives Kuon access to his air attacks, but not assault. Is affected by any directions input during cancel. | |||
*Used for high/low and strike/throw mix in pressure, which is the core of Kuon's mixup. | |||
*Can be used to quickly exit flight in neutral and return the the ground or use falling air attacks. | |||
|B+C~X= | |||
All of Kuon's air normals gain a second hit if cancelled into from flight. Kuon loses access to j6C, Increased jC, and air specials while in Heavenly Law, so only jA, jB, and jC have this variant. | |||
*The second hit works to make shielding harder, which is normally a strong answer to jumping attacks. This forces the opponent to shield in response to blocking a hit, which gives you time to land and throw or 2B. | |||
*Flight normals are generally better starters than assault normals, and flight is generally more accessible and stronger, so Flight normals are preferable to assault on offense, albeit they cost you rather than giving you GRD, so use both. | |||
|B+C~6B+C= | |||
Triggers a falling, multi-hitting version of j236X, with no followup moves but good combo opportunities. | |||
*Superior to j236X is basically every way: has the speed of j236A, the range of B, the knockdown of 236X~X, and carries downwards momentum, allowing for vastly more conversions. | |||
*Plus at low height, which is generally where it will be used due to the deadzone below Kuon and punishable recovery on whiff. | |||
*Is still cancelable into EXS, which allows conversions at even more ranges, but in either case, the damage the move leads to is surprisingly high, one of Kuon's best starters in general. | |||
|B+C~4B+C= | |||
Has Kuon throwing a stronger version of 214X with 9 hits from midair downwards before teleporting next to the wheel. This is always plus. | |||
*Fantastic move for baiting comittal anti-airs, and a strong starter to boot. | |||
*Can reset pressure on opponents that are passive against your Flight offense. | |||
*Good in neutral due to the area denial and how safe it is to do when high up in the air, but it costs a lot of GRD to do this, and the opponent can run under Kuon and whiff punish him after the teleport. | |||
|B+C~2B+C= | |||
Is a multihit version of j623A with roughly the same frame data and followup options. | |||
*Is better than j623A, since it goes further, does more damage and can rarely lead to meterless combos if it connects at max range. | |||
*Generally used to GRD break opponents that shield against Flight, but having meter is basically necessary due to how unsafe it is on block. | |||
}} | }} | ||
=====Throw===== | =====Throw===== | ||
{{ | {{MoveData-UNI2 | ||
|input=A+D | |||
|description= | |||
| input | |||
| | |||
Solid throw that leads to oki, even midscreen. Its damage is on the higher end, and while not comboable, if the opponent is held into 214X, the damage increases to 1.8-2.2k. | Solid throw that leads to oki, even midscreen. Its damage is on the higher end, and while not comboable, if the opponent is held into 214X, the damage increases to 1.8-2.2k. | ||
}} | |||
=====Smart Steer===== | |||
{{MoveData-UNI2 | |||
|input=5A+B | |||
|description= | |||
An upwards kick followed by a downwards midair slam for a hard knockdown. Has basically no special qualities to set it apart from other Smart Steer enders. | |||
*Kuon is often in situations where he is on the offensive, has GRD gain advantage, and yet still loses cycles due to Flight's high costs, so cutting a combo short with this can help gain back momentum. | |||
*On the other hand, there is basically never a reason to use Smart Steer late in combos outside of resource dump combos to finish off rounds, since it just piles on Kuon's alreay high GRD costs. | |||
*Kuon ''really'' doesnt struggle to convert from grounded normals or to get knockdowns, so it's not used specifically to pick up stray hits. | |||
}} | }} | ||
=====Guard Thrust===== | =====Guard Thrust===== | ||
{{ | {{MoveData-UNI2 | input = 6A+B+C | ||
| description = | |||
| input | |||
| | |||
{{AttackDataCargo-UNI2/Guard_Thrust_Description}} | {{AttackDataCargo-UNI2/Guard_Thrust_Description}} | ||
}} | }} | ||
====Veil Off==== | |||
{{ | {{MoveData-UNI2 |versioned=input |input=A+B+C,A+B+C (during a move) | ||
| | |A+B+C={{AttackDataCargo-UNI2/Veil_Off_Description|normal}} | ||
|A+B+C (during a move)={{AttackDataCargo-UNI2/Veil_Off_Description|crosscast}} | |||
| input | |||
| | |||
{{AttackDataCargo-UNI2/Veil_Off_Description|normal}} | |||
{{AttackDataCargo-UNI2/Veil_Off_Description|crosscast}} | |||
}} | }} | ||
| Line 359: | Line 360: | ||
|input=236A, 236B, 236C | |input=236A, 236B, 236C | ||
|236A= | |236A= | ||
A quick, medium range laser beam. Mostly used | A quick, medium range laser beam. Mostly used in neutral/footsies and as a knockdown tool in combos. | ||
*Not great for zoning | *Incredible midrange neutral tool with very low commitment, very good screen control, and comparatively good reward. | ||
*Unsafe | *Not great for long range zoning, but it's also very hard to whiff punish. | ||
*Unsafe up close unless cancelled. | |||
*With a similar animation to 236B, it can be used to bait a reaction and halt the opponent during neutral. | |||
|236B= | |236B= | ||
A meterless fullscreen beam with minimal travel time | A meterless fullscreen beam with minimal travel time. Your main tool for fullscreen zoning and counterzoning. | ||
*At 20 frames, 236B is reactable but not easily, making it good for getting hits in neutral. | *At 20 frames, 236B is reactable, but not easily, making it good for getting hits in neutral. | ||
*Takes a maximum of 2 extra frames to reach far away opponents. | *Takes a maximum of 2 extra frames to reach far away opponents. | ||
*Avoided with preemptive jumps, but not low profilable. | *Avoided with preemptive jumps, but not low profilable. | ||
*Not useful in combos due to its startup, but good after 5C as a frametrap. | *Not useful in combos due to its startup, but good after 5C as a frametrap. | ||
|236C= | |236C= | ||
Fullscreen | Fullscreen version of 236X that's safe or plus. Not instant, but has a short travel time with a very fast startup. | ||
*Wallbounces on hit, leading to combos from around 3/4 screen distance. | *Wallbounces on hit, leading to combos from around 3/4 screen distance. | ||
*Good for hitconfirming 236B | *Good for hitconfirming 236B or whiff punishing, with great corner carry if converted into a combo. | ||
}} | }} | ||
| Line 380: | Line 383: | ||
|input=j236A, j236B, j236C | |input=j236A, j236B, j236C | ||
|j236A= | |j236A= | ||
Aerial version of 236A. Has slightly worse frame data and is aimed towards the ground at an angle. | |||
*Very fast on startup, but has high recovery, and it's easily to whiff punised if the opponent runs under it. | |||
*Good during a backjump to bait specific options or keep the opponent in place. | |||
*Can catch forward jumps at close range. | |||
*Is usable in combos during aerial segments, but usually not worth it. | |||
|j236B= | |j236B= | ||
Longer range than j236A, but doesn't go fullscreen, unlike its grounded counterpart, 236B. | |||
*Pretty much exclusively used for zoning due to its slow speed, but outdone in that aspect by 236B due to its superior range, speed, and safety. | |||
* Can catch jumping opponents, unlike 236X, but is inferior to j236A in this regard. | |||
|j236C= | |j236C= | ||
Air version of | Air version of 236C with identical startup, but knocks down instead of wallbouncing. | ||
*Used to confirm j236A/B into a knockdown, but is very hard to actually follow up, j623C is generally better unless a sideswitch would hurt you. | |||
*Can be used to safely land after j236A/B via cancel on block or whiff, but j22C is more adventageous and more likely to catch the opponent. | |||
}} | }} | ||
=====236X~X===== | =====236X~X===== | ||
| Line 391: | Line 403: | ||
|input=236X~X | |input=236X~X | ||
|description= | |description= | ||
Followup to the meterless versions of 236X: Kuon calls down a pillar identical to 22X, but with a hard knockdown. The beam tracks if 236X hit or was blocked, and appears at a set distance depending on version used if it whiffed. | |||
*Cancelled from 236A, this is Kuon's most common meterless combo ender. Good knockdown and damage, but no setplay without meter. | |||
*Additionally, it makes 236A's potential screen coverage even better, leading to jumps calling out 236A in neutral still often getting interrupted. | |||
*From 236B, this can make approaching Kuon from long distances harder, due to it countering preemptive jump into assault at some distances, potentially with a combo. | |||
*Safe pressure on block for both versions, serving as both a gapless pressure ender and a frametrap. | |||
*Ground versions can be converted meterlessly with 3C depending on distance from the opponent. | |||
*Aerial version is used to confirm j236X into EXS, but is way more unsafe on block than the grounded version. Make sure you have meter or vorpal to cancel it. | |||
*3 hits, making it very difficult to shield the last hit. | |||
}} | }} | ||
=====623X===== | =====623X===== | ||
{{ | {{MoveData-UNI2 | ||
| | |versioned=input | ||
| | |command=623X | ||
| input | |input=623A, 623B, 623C | ||
|623A= | |||
Grounded teleport kick with medium range. Puts Kuon next to the opponent, and crosses up if he is close enough. | Grounded teleport kick with medium range. Puts Kuon next to the opponent, and crosses up if he is close enough. | ||
*Cancelable into Heavenly Law and specials on block, and into jump on hit | *Cancelable into Heavenly Law and specials on block unless shielded, and into jump on hit. Cancelable into EXS on any connect. | ||
*Not incredibly useful for mixups, but it puts Kuon next to the opponent for continued pressure | *Not incredibly useful for mixups, but it puts Kuon next to the opponent for continued pressure. | ||
*Quite a good tool for sideswitch combos, and it doesn't sacrifice a lot of damage to use it compared to normal routes | *Quite a good tool for sideswitch combos, and it doesn't sacrifice a lot of damage to use it compared to normal routes. | ||
Dissapears on frame 12. | |||
|623B= | |||
Teleports Kuon forward a significant distance, making him airborne for some of its recovery. | Teleports Kuon forward a significant distance, making him airborne for some of its recovery. | ||
*VERY important midscreen combo tool with amazing corner carry | *VERY important midscreen combo tool with amazing corner carry. | ||
*Can again cross up, but this is less useful with 623B | *Can again cross up, but this is less useful with 623B. | ||
*Cancels into aerial specials on hit or block | *Cancels into aerial specials on hit or block unless shielded. Cancelable into EXS on any connect. | ||
Dissapears on frame 16. | |||
Fullscreen tracking teleport with invincibility, no meterless combos afterwards and a sideswitch. | |623C= | ||
*This move is VERY slow for a reversal, outdone at close range by [2]8X. | Fullscreen tracking teleport attack with invincibility, no meterless combos afterwards and a sideswitch. | ||
*Tracks the | *This move is VERY slow for a reversal, outdone at close range by [2]8X, and its speed also causes it to whiff in many other situations where the opponent is moving. | ||
*Tracks fullscreen, and yet somehow whiffs on opponents positioned at the other edge of the screen moving backwards. | |||
*Useful in very specific situations to counter long-range pokes, or reversal after an EXS super flash. | |||
*Weirdly difficult to combo into, and can't consistently be followed up with Infinite Worth, so despite its damage, it's rarely used in combos. | *Weirdly difficult to combo into, and can't consistently be followed up with Infinite Worth, so despite its damage, it's rarely used in combos. | ||
{{ | }} | ||
Kuon teleports to the ground below him and performs a slide with the same animation as 3C. Sadly not nearly as good as 3C | |||
=====j623X===== | |||
{{MoveData-UNI2 | |||
|versioned=input | |||
|command=j623X | |||
|input=j623A, j623B, j623C | |||
|j623A= | |||
Kuon teleports to the ground below him and performs a slide with the same animation as 3C. Sadly not nearly as good as 3C. | |||
*Not special or FF cancelable, even on hit. | *Not special or FF cancelable, even on hit. | ||
*Has significantly worse frame data than 3C, making meter a necessity for it to be safe. | *Has significantly worse frame data than 3C, making meter a necessity for it to be safe. | ||
*Mainly used to bait a preemptive Stand Shield, but is incredibly risky without meter, since Kuon is put precisely next to the opponent, and is -9 at the very best. | |||
*Only gives a meterless combo on a precisely spaced counterhit. | *Only gives a meterless combo on a precisely spaced counterhit. | ||
*Kuon can actually be hit at ground level during the teleport animation, making highly active moves very good at beating j623A. | *Kuon can actually be hit at ground level during the teleport animation, making highly active moves very good at beating j623A. | ||
|j623B= | |||
After a noticably longer pause, Kuon teleports a short distance towards the opponent to a set height above ground and hits them with an overhead similar to 66C. | After a noticably longer pause, Kuon teleports a short distance towards the opponent to a set height above ground and hits them with an overhead similar to 66C. | ||
*Between this and j623A, there is something of a mixup, but far from unreactable. | *Between this and j623A, there is something of a mixup, but far from unreactable. | ||
*Unlike j623A, this can be special-and-flight cancelled on block, making it significantly safer. | *Unlike j623A, this can be special-and-flight cancelled on block unless shielded, making it significantly safer. Cancelable into EXS on any connect. | ||
*The knockdown results in damaging, meterless combos with good corner carry without meter. | *The knockdown results in damaging, meterless combos with good corner carry without meter. | ||
*Can be used in combos, but is more often seen as a misinput of land->623B | *Can be used in combos, but is more often seen as a misinput of land->623B | ||
|j623C= | |||
Identical move to 623C, just initiated from midair. | Identical move to 623C, just initiated from midair. | ||
*Has a slightly longer startup at 26 frames, making it more situational | *Has a slightly longer startup at 26 frames, making it more situational | ||
| Line 441: | Line 463: | ||
=====22X===== | =====22X===== | ||
{{ | {{MoveData-UNI2 | ||
| | |versioned=input | ||
| | |command=22X | ||
| input | |input=22A, 22B, 22C | ||
| | |22A= | ||
Kuon calls down a pillar of energy close in front of him. Bounces the opponent off the ground for a juggle. | |||
*Mostly used for combos, as it launches the opponent to a good height. | |||
*Surprisingly active and covers the entire vertical space it's cast in, so it can be used to put up a wall against characters with varied approaches, but this is pretty risky. | |||
*''Mostly'' safe on block, but with how small its horizontal reach and no meterless cancels, 236A~X is generally better. | |||
{{ | *Unlike 236A~X, this is only 1 hit. | ||
|22B= | |||
| | Identical to 22A, but safer on block and cast at a further distance. | ||
*Has basically identical uses to 22A with a higher emphasis on neutral usage. | |||
*Also only 1 hit. | |||
|22C= | |||
Horizontally tracking tornado that covers the entire vertical space. Very good neutral tool. | |||
*Fast enough to confirm 236X, and leads to combos from most spacings on the screen. | |||
*Avoidable if the opponent moves out horizontally before the move goes active. | |||
*Has an incredibly long launch time on hit, which makes it useful in close range combos to land bigger hits. | |||
*Is +12 on block, so it can reset pressure. | |||
}} | |||
=====j22X===== | |||
{{MoveData-UNI2 | |||
|versioned=input | |||
|command=j22X | |||
|input=j22A, j22B, j22C | |||
|j22A= | |||
Aerial version of 22A with notably less recovery (Kuon can reovery midair), with the downside of having extra recovery on landing. | |||
*Less applicable in combos, and sees more usage as a neutral tool thanks to the ability to attack or use movement options while falling. | |||
*Can bait anti airs, which can lead to a combo on counterhit or with resources. | |||
|j22B= | |||
Mostly the same as j22A, with a different range on it, as such there's really no unique uses for it outside of doing the same at longer range. | |||
|j22C= | |||
Identical to 22C, but with a variable amount of recovery depending on how much Kuon has to fall to land. | |||
*Tracks the same as 22C, so unless the opponent is dp'ing, they will be hit out of their anti-air and they will usually get combo'd for it. | |||
*As EXS moves go, you can still whiff cancel into 22C after whiffing air specials, so the opponent will usually get pressured, disengage, or straight up get counterhit and combo'd even after avoiding your special. Tough luck. | |||
*Can convert into combos off j22X, j236X, Flight 6B+C, or j623B depending on distance from the opponent and the ground. | |||
}} | }} | ||
=====214X===== | =====214X===== | ||
{{ | {{MoveData-UNI2 | ||
| | |versioned=input | ||
| | |command=214X | ||
| input | |input=214A, 214[A], 214B, 214C | ||
| | |214A= | ||
Kuon throws a spinning projectile towards the opponent that stays active at ground level for an extneded period of time. | |||
*Once it connects, the projectile has 4 hits, locking down the opponent for a good bit. | |||
*Primarily used in neutral to deny the midrange, or in meterless setups after 4C, where you don't have time for the increased version. | |||
*Can reset pressure as it is always plus on block, but this requires a highly passive opponent. | |||
*Combos after 6C in a lot of situations, which is used in high damage corner juggles. | |||
*Can be CS'd just after the saucer is thrown, cutting its recovery and giving more freedom in setups, such as post-throw. | |||
|214[A]= | |||
Same animation as 214A, but longer. The projectile now goes up and down until reaching about 80% of the screen, where it stops above ground and remains active. | |||
*Incredible tool to be used in neutral. While the startup is lentghy, the large space covered by the projectile completely restricts the opponent's movement, giving Kuon lots of room to breathe. | |||
*The saucer eats most projectiles thrown at it while moving forward, which makes it very good for an aggressive approach using Kuon's fast run. | |||
*Has an extra hit once connected for a total of 5, and is the preferred option for metered setups, where it's thrown after a 214C/22C > 66C knockdown. | |||
|214B= | |||
Shorter startup and recovery than 214A, however the projectile is stopped up and above Kuon. Has no increased version. | |||
*Largely a combo tool, since it combos from 66B(1) even mindscreen and gives good damage with a long window for followups. | |||
*Since it denies some of the airspace, it can temporarily restrict characters that rely heavily on air approaches and struggle in grounded footsies. | |||
*Shares its animation with 214A, so it can be used during setplay to bait a shield attempt against 214A and GRD break the opponent. | |||
|214C= | |||
Faster, metered variant of 214A with more range, but not nearly as much as Increased 214A. | |||
*Can form a gapless blockstring from many attacks, so it's Kuon's primary way to dump meter to restart pressure, notably after a gap close with 3C. | |||
*Hits 12 times in total, which makes it incredibly plus, enough to run a high/low mixup obscured by the projectile. | |||
*Has higher minimum damage than 22C, so it is preferred in ender sequences into 66C. | |||
*Can be spaced in a way that allows for opponents to be held into it with throw, resulting in a highly-damaging 2.2k damage off throw. | |||
}} | }} | ||
=====[2]8X===== | =====[2]8X===== | ||
{{ | {{MoveData-UNI2 | ||
| | |versioned=input | ||
| | |command=[2]8X | ||
| input | |input=[2]8A, [2]8B, [2]8C | ||
| | |[2]8A= | ||
A sphere-shaped flashkick done on ground level. Not super reliable as an anti air, but does hit both sides and is very active. | |||
*Used in most optimal corner combos due to its good launch and high damage. | |||
*Cancelable into EXS or CS on block or whiff, so it can be used as abare, but be careful as it has no strike invul, and is only active on frame 8. | |||
|[2]8B= | |||
Kuon's meterless reversal, this version actually lifts him off the ground. | |||
*Relatively slow at 13 frames, but still useful as a defensive tool. | |||
*Doesn't knock down, has significantly more recovery than the A version, and is not cancelable into EXS, removing its usages in combos. | |||
*Bigger, than [2]8A, and due to its invul, it's generally better in scrambles, but way more unsafe. | |||
*It hits both sides (while also automatically sidecorrecting due to its input), and is very active, so it's best used as a reversal against aerial moves and left/right mixups. | |||
|[2]8C= | |||
Kuon's best reversal, the same size as [2]8B with more hits. | |||
*Carries all of [2]8B's good qualities, but is more active, more damaging, and faster. | |||
*Still unsafe, but harder to bait than [2]8B | |||
*Is technically Kuon's highest damage EXS move, but very restricting to use in combos. | |||
*In some spacings, only a few of the hits connect, reducing its damage. | |||
}} | }} | ||
| Line 501: | Line 559: | ||
===Infinite Worth=== | ===Infinite Worth=== | ||
{{ | {{MoveData-UNI2 | ||
|input=41236D | |||
|description= | |||
| input | Absolutely massive IW. On the slower side at 15 frames. | ||
| | *Quite literally '''COVERS THE ENTIRE SCREEN'''. While it's mostly used as a combo ender, it must be noted that this move can technically whiff punish the opponent no matter where they are if they are minus enough. | ||
}} | }} | ||
===Infinite Worth EXS=== | ===Infinite Worth EXS=== | ||
{{MoveData-UNI2 | |||
{{ | |command=A+B+C+D | ||
| | |input=A+B+C+D (while at orange health) | ||
|description= | |||
| input | {{AttackDataCargo-UNI/IWEX_Description}} | ||
| | |||
{{AttackDataCargo- | |||
}} | }} | ||
| Line 558: | Line 604: | ||
==External Links== | ==External Links== | ||
<!-- Add links to documents and the link here using this formt: *[http://wiki.mizuumi.net DocumentTitle] by [https://www.twitter.com AuthorName] --> | <!-- Add links to documents and the link here using this formt: *[http://wiki.mizuumi.net DocumentTitle] by [https://www.twitter.com AuthorName] --> | ||
*[https://docs.google.com/document/d/1KPL_Q6m1eZolFXd9nMDo9E5jdyfpl_ng6dSv_VfH-j0/edit Anti-Kuon Guide] by [https://twitter.com/Sins_Mo Mo.Sin] | |||
==Colors== | ==Colors== | ||
Latest revision as of 23:12, 13 June 2024
 |
Under Construction
|

| “ |
He pursues. And he continues to pursue. He pursues a spirit of a distant past. An existence |
” |
Story
In the story of the Night, Kuon stands as the root of all evil.
He is a Re-Birth--said to be the strongest form of existence.
Kuon has lived for 500 years, wielding the inexhaustible power of the Night; now, he aims to bring an end to the world.
Long ago, Kuon and his sister Linne were charged with protecting the Power of Sealing.
However, the immense power eventually consumed Kuon, and he lost sight of himself.
Now he desires further power--which he can attain by seizing the other half of the Power of Sealing possessed by his sister.
Kuon's arch-nemesis fled beyond the Night. By taking Linne's power and breaking the wall of the Night, Kuon hopes to reach him.
The resulting destruction of the world is merely the means to that end.
| “ |
My guests will start arriving here at the abyss shortly... to become the stakes with which I bore through the wall of the Night. |
” |
Gameplay
Kuon has a zoner's toolkit and a unique flight ability that allows him to control his opponents anywhere on the screen. He has long-range specials to keep away or fight at range, but also has tools to close the gap when Kuon's turn arrives.
| Strengths | Weaknesses |
|---|---|
|
|
Kuon's Heavenly Law allows him to float in the air and move in any direction for a limited time. He can cancel into it from ground or air normals, and has access to enhanced versions of his air normals and some unique follow-ups while in this state.
All of Kuon's normals that use his blades inflict chip damage on block, similar to Hyde's normals with his sword.
With Vorpal, Kuon's movement speed is increased while he is using Heavenly Law. His blade normals also inflict increased chip damage.
| Frame Data Help | |
|---|---|
| Header | Tooltip |
| Damage | Damage done by this attack. (x) denotes combined damage [x] denotes minimum damage |
| Guard | The way this move must be blocked. High = Can block standing Low = Can block crouching Mid = Can block standing or crouching Air = Can block in the air Air Shield = Can block in the air while shielding Unblockable = Cannot be blocked |
| Cancel | Actions this move can be canceled into on hit or block, unless specially noted. N = Normal Cancelable SE = Self Cancelable SP = Special Cancelable EX = EX/IW Cancelable CS = Chain Shift UNQ = Unique (See description) TH = Throw Cancelable J = Jump Cancelable (Hit cancelable only by default) (X) = Hit cancelable only -X- = Can additionally be cancelled during whiff |
| Property | Special properties this move has. Click on the property to navigate to an explanation. |
| Cost | The resources this move costs to use. GRD = GRD Blocks EXS = EXS Meter Vorpal = Vorpal GRD Break = Causes GRD Break |
| Attribute | Attributes of the attack. Mostly used in situations involving invul. There are two sets of attributes: Strike/Throw and Head/Foot/Dive/Projectile Every move has a Strike/Throw attribute, but doesn't always have Head/Foot/Dive/Projectile attribute. --- Strike = Strike (Anything that isn't a Throw is a Strike) Throw = Throw --- Head = Head (Most jump normals) Foot = Foot Dive = Some air specials Projectile = Projectile |
| Startup | Frame when the first hitbox is present. + denotes the frames before and after super flash. |
| Active | The amount of frames that this move will have a hitbox. (x) denotes frame gaps where there are no hitboxes is present. Due to varied blockstuns, (x) frames are difficult to use to determine punish windows. Generally the larger the numbers, the more time you have to punish. |
| Recovery | Frames that this move has after the active frames if not canceled. |
| Overall | Frames that this move takes from start to finish before the character returns to neutral. |
| Advantage | The difference in frames where you can act before your opponent when this move is blocked (assuming the move isn't canceled and the first active frame is blocked). If the opponent uses a move with startup equal or less than this move's advantage, it will result in opponent hitting that move. ±x~±x denotes a possible range of advantage. The left value is when the active frames hit sooner (generally worse) and the right value is for when the active frames hit later (generally better). |
| Invul | The frames where this move cannot be hit by an attribute. Full = Fully invincible Strike = Strike invincible Throw = Throw invincible Head = Head invincible Foot = Foot invincible Dive = Dive invincible Projectile = Projectile invincible |
Normal Moves
Standing Normals
5A


| Damage | Guard | Startup | Active | Recovery | On-Block | Cancel | Attribute | Invuln |
|---|---|---|---|---|---|---|---|---|
| 200 | Mid | 6 | Total 21 | -4 |
- Tall enough to anti air but not consistently.
- It still hits crouching opponents, so it mostly sees use in pressure and hitconforming.
- One frame slower to recover than 2A, so it's not your best option for rebeats.
| Overall | Blockstun | Property | Proration | Combo Proration | Data link |
|---|---|---|---|---|---|
| 21 | /Data#5A |
5B


| Damage | Guard | Startup | Active | Recovery | On-Block | Cancel | Attribute | Invuln |
|---|---|---|---|---|---|---|---|---|
| 490 | Mid | 9 | Total 30 | -6 |
- Slower than 2B, but hits lower airborne opponents and reaches further.
- Converts into several routes at many ranges, and a good starter too.
| Overall | Blockstun | Property | Proration | Combo Proration | Data link |
|---|---|---|---|---|---|
| 30 | /Data#5B |
5C

Normal

Increased


Normal

Increased


| Version | Damage | Guard | Startup | Active | Recovery | On-Block | Cancel | Attribute | Invuln |
|---|---|---|---|---|---|---|---|---|---|
| 5C | 690 | mid | 12 | Total 39 | -10 |
- Moves Kuon forward enough to help stay close for combos or offense.
- One of Kuon's best starters, and a damaging extender mid-combo.
- Hits opponents OTG after moves like 3C or 236X~X
- -3 if followed with a whiffed 2A, which is Kuon's least minus rebeat option.
| Version | Damage | Guard | Startup | Active | Recovery | On-Block | Cancel | Attribute | Invuln |
|---|---|---|---|---|---|---|---|---|---|
| 5[C] | 780 | mid | 24 | Total 59 | -5 |
- Does not change grounded hitstun or blockstun, so it's not more adventageous on rebeat.
- Increases distance travelled compared to non-increased version.
- Increases damage but lowers proration, so its use as a combo tool is more specific.
| Version | Overall | Blockstun | Property | Proration | Combo Proration | Data link |
|---|---|---|---|---|---|---|
| 5C | 39 | /Data#5C | ||||
| 5[C] | 59 | B button into 5[C] 9f gap, C button into 5[C] 7f gap | /Data#5[C] |
5[C] :
Crouching Normals
2A


| Damage | Guard | Startup | Active | Recovery | On-Block | Cancel | Attribute | Invuln |
|---|---|---|---|---|---|---|---|---|
| 160 | Mid | 6 | Total 20 | -3 |
- Despite its recovery, still Kuon's best normal for rebeats.
- If not used for rebeats, still quite good for pressure, and it can be hitconfirmed into a surprising amount of damage.
| Overall | Blockstun | Property | Proration | Combo Proration | Data link |
|---|---|---|---|---|---|
| 20 | /Data#2A |
2B


| Damage | Guard | Startup | Active | Recovery | On-Block | Cancel | Attribute | Invuln |
|---|---|---|---|---|---|---|---|---|
| 460 | Low | 8 | Total 30 | -7 |
- Great poke against grounded opponents due to the fantastic active frames and relatively quick startup. Also convertable at any range with many attacks.
- Primary mixup tool, but preferable over 3C due to its safety.
- Otherwise good as string filler, and useful in some juggles.
| Overall | Blockstun | Property | Proration | Combo Proration | Data link |
|---|---|---|---|---|---|
| 30 | /Data#2B |
2C


| Damage | Guard | Startup | Active | Recovery | On-Block | Cancel | Attribute | Invuln |
|---|---|---|---|---|---|---|---|---|
| 640 | Mid | 10 | Total 34 | -7 |
- Consistently leads to combos using 22A when anti-airing, but has more optimal routes available on counterhit.
- Launches the opponent high, which plays an important role in many routes.
- Its forward movement makes it better at hitconfirming, but can actually cause a whiff when anti airing opponents above Kuon.
- Is actually one of Kuon's best starters due to its followup options
| Overall | Blockstun | Property | Proration | Combo Proration | Data link |
|---|---|---|---|---|---|
| 34 | /Data#2C |
Air Normals
j.A


| Damage | Guard | Startup | Active | Recovery | On-Block | Cancel | Attribute | Invuln |
|---|---|---|---|---|---|---|---|---|
| 140 | High | 8 | Total 25 | -5 on Assault |
- Flight jA is Kuon's fastest overhead option at 25 frames if done perfectly. While it's not very hard to block, it's unthrowable, beats lows, and is +6~8 on block, serving as a very effecive pressure reset.
- As a light jump normal, it's weak to shield, but done from flight it has two hits, making it safer if only one hit is shielded, and it can also be mixed up with land > throw to dissuade shielding.
- Can also be used for more traditional purposes, as a short range air-to-air, or for reverse beat overhead pressure.
| Overall | Blockstun | Property | Proration | Combo Proration | Data link |
|---|---|---|---|---|---|
| 25 | /Data#jA |
j.B


| Damage | Guard | Startup | Active | Recovery | On-Block | Cancel | Attribute | Invuln |
|---|---|---|---|---|---|---|---|---|
| 420 | High | 9 | Total 30 | +1 on Assault |
- Mostly used as combo filler, or as a long range alternative to Flight jA or Flight jC.
- Hits late as a jumpin, but nevertheless good as a consistent crossup.
| Overall | Blockstun | Property | Proration | Combo Proration | Data link |
|---|---|---|---|---|---|
| 30 | /Data#jB |
j.C

Normal

Increased


Normal

Increased


| Version | Damage | Guard | Startup | Active | Recovery | On-Block | Cancel | Attribute | Invuln |
|---|---|---|---|---|---|---|---|---|---|
| jC | 590 | High | 12 | [4 on landing] |
+7 on Assault |
- Primary combo filler with a healthy amount of hitstun. Great for converting from air-to-airs into grounded combos.
- Great normal for low Flight, where it's plus unless both hits are shielded, and even then, Kuon is safe. The fastest Flight jC possible is 29 frames.
- Its large hitbox makes it preferable as a jumpin, where it can be cancelled into Flight for diverse pressure options.
| Version | Damage | Guard | Startup | Active | Recovery | On-Block | Cancel | Attribute | Invuln |
|---|---|---|---|---|---|---|---|---|---|
| j[C] | 760 | High | 20 | Total long | +15 on Assault |
- Mostly used for fakeouts or for F-Shiki overheads during Jumps or Assault, as its not used in any of Kuon's optimal bnb's.
- If it does hit, it can lead to more damage than regular jC.
| Version | Overall | Blockstun | Property | Proration | Combo Proration | Data link |
|---|---|---|---|---|---|---|
| jC | /Data#jC | |||||
| j[C] | long | /Data#j[C] |
j[C] :
Command Normals
6B


| Damage | Guard | Startup | Active | Recovery | On-Block | Cancel | Attribute | Invuln |
|---|---|---|---|---|---|---|---|---|
| 520 | Mid | 11 | Total 38 | -12 |
- One of the most common normals in juggles into 4C, and is really a combo tool most of the time.
- While not good on block, it's advancing, meaning it can be useful for pressure.
| Overall | Blockstun | Property | Proration | Combo Proration | Data link |
|---|---|---|---|---|---|
| 38 | /Data#6B |
6B~6B


| Damage | Guard | Startup | Active | Recovery | On-Block | Cancel | Attribute | Invuln |
|---|---|---|---|---|---|---|---|---|
| 590 | Mid | Total 50 (full sequence) | -11 |
- Central combo tool, and often cancelled directly into 4C for a knockdown.
- Can actually go into slower moves like 6C and 214B for unique combo routes.
- Like 6B, advances (with the same blockstun), so it can be used in pressure strings to keep close to the opponent.
- Has a longer cancel window from 6B than other moves, so it works as a frametrap normal.
| Overall | Blockstun | Property | Proration | Combo Proration | Data link |
|---|---|---|---|---|---|
| 50 (full sequence) | /Data#6B~6B |
6C


| Damage | Guard | Startup | Active | Recovery | On-Block | Cancel | Attribute | Invuln |
|---|---|---|---|---|---|---|---|---|
| 240×4 (852) | Mid/Air | 25 | Total 62 | -5 |
- Not actually a frametrap from anything, and not +, so it's more useful when spaced to make it harder to interrupt during pressure.
- As a combo tool, it does high damage, and the long launch is enough to combo into 214A and 623B, which plays a big role in some routes.
- Is technically a projectile, which means it can clash with others (as useless as that is in gameplay), and can be avoided by projectile invul moves or jumpblocked.
| Overall | Blockstun | Property | Proration | Combo Proration | Data link |
|---|---|---|---|---|---|
| 62 | B button into 6C is a 10f gap, C button into 6C is an 8f gap | /Data#6C |
4C


| Damage | Guard | Startup | Active | Recovery | On-Block | Cancel | Attribute | Invuln |
|---|---|---|---|---|---|---|---|---|
| 660 | Mid | 15 | Total 32 | -8 |
- Key component in getting knockdowns on airborne opponents.
- Has the same blockstun as 5C, so it can be used to rebeat with 2A, which is easier as 4C has no forward movement.
| Overall | Blockstun | Property | Proration | Combo Proration | Data link |
|---|---|---|---|---|---|
| 32 | /Data#4C |
3C


| Damage | Guard | Startup | Active | Recovery | On-Block | Cancel | Attribute | Invuln |
|---|---|---|---|---|---|---|---|---|
| 640 | Low | 8 | 15 | 13 | -10 ~ +4 |
- Very active, to the point that a spaced slide can be not only safe, but plus on block.
- Only cancelable to specials on hit, but if spaced well, it can link to other attacks.
- Cancels to EXS and Chain Shift on block, making it a good tool to get in close and reset pressure gaplessly.
- Part of Kuon's most common ender sequence, cancelled into 236A~X for a knockdown.
- One of the only moves in Kuon's aresenal that DOES NOT deal chip damage.
| Overall | Blockstun | Property | Proration | Combo Proration | Data link |
|---|---|---|---|---|---|
| 35 | /Data#3C |
j.6C


| Damage | Guard | Startup | Active | Recovery | On-Block | Cancel | Attribute | Invuln |
|---|---|---|---|---|---|---|---|---|
| 710 | 13 | Total 31 | +13 on Assault |
- The fullscreen launch can usually be followed up with 623B midscreen, giving Kuon his good corner carry.
- The untech time on the wallbounce is long enough to allow for a variety moves to connect in the corner, allowing for stronger routes.
- Despite its looks, this move reaches shockingly low, and is actually Kuon's most adventageous jump normal most of the time, and often + on shield.
- Only air normal that doesn't deal chip damage.
| Overall | Blockstun | Property | Proration | Combo Proration | Data link |
|---|---|---|---|---|---|
| 31 | /Data#j6C |
Dash Moves
66B


| Damage | Guard | Startup | Active | Recovery | On-Block | Cancel | Attribute | Invuln |
|---|---|---|---|---|---|---|---|---|
| 490×2 (931) | Mid | 10 | Total 46 | -4 |
- The first hit, for some reason, has an incredible amount of untech time, which makes it a central combo tool for juggles.
- Cancelling the first hit with Heavenly Law is Kuon's only relaible way to be plus upon flight activation due to its similarily high blockstun.
- Lacks the range of many other dash attacks, making it less useful as a neutral tool.
- The second hit is a lot weaker than the first, but can still be used in certain combos to go into 22X, or to confirm the move hitting from neutral.
| Overall | Blockstun | Property | Proration | Combo Proration | Data link |
|---|---|---|---|---|---|
| 46 | /Data#66B |
66C


| Damage | Guard | Startup | Active | Recovery | On-Block | Cancel | Attribute | Invuln |
|---|---|---|---|---|---|---|---|---|
| 940 | High | 27 | Total 50 | -6 |
- Since Kuon has several other overheads that are less obvious and at least plus while still comboing, this one is rarely used for mixups.
- Special cancelable after landing, even on block.
- Knocks the opponent down, allowing for links or cancels afterwards. This also makes it your best knockdown for 214X setplay.
- Kuon is lifted off the ground for the move, beating lows and throws, but granted, he has safer options for that purpose.
| Overall | Blockstun | Property | Proration | Combo Proration | Data link |
|---|---|---|---|---|---|
| 50 | /Data#66C |
66~6A+B

| Damage | Guard | Startup | Active | Recovery | On-Block | Cancel | Attribute | Invuln |
|---|---|---|---|---|---|---|---|---|
| Total 39 | 10~13 Strike |
- Has very long recovery, making it very rare for the opponent to not retaliate upon seeing this.
- Due to Kuon's restricted midscreen setplay options, it's not possible to set up any efficient crossups using this.
- Useful mainly to get to the opponent's location when they're far away and knocked down, but it is very rarely better than running in.
- Has invul, however its is VERY short, and not early into its frames.
- Can be CS'd 8 frames before the end of its recovery to make it 31f instead of 39f total. The only usage for this is getting plus frames in specific knockdown situations.
| Overall | Blockstun | Property | Proration | Combo Proration | Data link |
|---|---|---|---|---|---|
| 39 | /Data#66~6A+B |
Universal Mechanics
Force Function

| Version | Damage | Guard | Startup | Active | Recovery | On-Block | Cancel | Attribute | Invuln |
|---|---|---|---|---|---|---|---|---|---|
| B+C | 17 | - |
- Performable both on the ground or midair, and cancelable into from normals both airborne or grounded. This includes cancels from aerial assault normals, but not gounded assault ones.
- The direction input during B+C changes what direction the flight initiates towards.
- Initially costs around 1 block of GRD, and drains more as long as Kuon isn't approaching the opponent.
| Version | Damage | Guard | Startup | Active | Recovery | On-Block | Cancel | Attribute | Invuln |
|---|---|---|---|---|---|---|---|---|---|
| [B]+[C] | 44 | - |
- Mostly rare to see due to being very easily countered on reaction with anti airs
- The side it puts Kuon on is ambiguous and easily changed with slight movement, which can especially be confusing in the corner.
| Version | Overall | Blockstun | Property | Proration | Combo Proration | Data link |
|---|---|---|---|---|---|---|
| B+C | /Data#B+C | |||||
| [B]+[C] | /Data#[B]+[C] |
[B]+[C] :
Force Function Followups
- UNI2 Kuon BC D.png
- UNI2 Kuon BC X.png

- UNI2 Kuon BC 4BC.png


| Version | Damage | Guard | Startup | Active | Recovery | On-Block | Cancel | Attribute | Invuln |
|---|---|---|---|---|---|---|---|---|---|
| B+C~D | - |
- Used for high/low and strike/throw mix in pressure, which is the core of Kuon's mixup.
- Can be used to quickly exit flight in neutral and return the the ground or use falling air attacks.
| Version | Damage | Guard | Startup | Active | Recovery | On-Block | Cancel | Attribute | Invuln |
|---|---|---|---|---|---|---|---|---|---|
| B+C~X | - |
- The second hit works to make shielding harder, which is normally a strong answer to jumping attacks. This forces the opponent to shield in response to blocking a hit, which gives you time to land and throw or 2B.
- Flight normals are generally better starters than assault normals, and flight is generally more accessible and stronger, so Flight normals are preferable to assault on offense, albeit they cost you rather than giving you GRD, so use both.
| Version | Damage | Guard | Startup | Active | Recovery | On-Block | Cancel | Attribute | Invuln |
|---|---|---|---|---|---|---|---|---|---|
| B+C~6B+C | 15 | - | +4 ~ -10 |
- Superior to j236X is basically every way: has the speed of j236A, the range of B, the knockdown of 236X~X, and carries downwards momentum, allowing for vastly more conversions.
- Plus at low height, which is generally where it will be used due to the deadzone below Kuon and punishable recovery on whiff.
- Is still cancelable into EXS, which allows conversions at even more ranges, but in either case, the damage the move leads to is surprisingly high, one of Kuon's best starters in general.
| Version | Damage | Guard | Startup | Active | Recovery | On-Block | Cancel | Attribute | Invuln |
|---|---|---|---|---|---|---|---|---|---|
| B+C~4B+C | 35 | - | +36 |
- Fantastic move for baiting comittal anti-airs, and a strong starter to boot.
- Can reset pressure on opponents that are passive against your Flight offense.
- Good in neutral due to the area denial and how safe it is to do when high up in the air, but it costs a lot of GRD to do this, and the opponent can run under Kuon and whiff punish him after the teleport.
| Version | Damage | Guard | Startup | Active | Recovery | On-Block | Cancel | Attribute | Invuln |
|---|---|---|---|---|---|---|---|---|---|
| B+C~2B+C | Low | 28 | - | -19 |
- Is better than j623A, since it goes further, does more damage and can rarely lead to meterless combos if it connects at max range.
- Generally used to GRD break opponents that shield against Flight, but having meter is basically necessary due to how unsafe it is on block.
| Version | Overall | Blockstun | Property | Proration | Combo Proration | Data link |
|---|---|---|---|---|---|---|
| B+C~D | /Data#B+C~D | |||||
| B+C~X | /Data#B+C~X | |||||
| B+C~6B+C | /Data#B+C~6B+C | |||||
| B+C~4B+C | /Data#B+C~4B+C | |||||
| B+C~2B+C | /Data#B+C~2B+C |
B+C~X :
B+C~6B+C :
B+C~4B+C :
B+C~2B+C :
Throw

| Damage | Guard | Startup | Active | Recovery | On-Block | Cancel | Attribute | Invuln |
|---|---|---|---|---|---|---|---|---|
| 1635 | Throw | 4 | Total 30 |
| Overall | Blockstun | Property | Proration | Combo Proration | Data link |
|---|---|---|---|---|---|
| 30 | /Data#A+D |
Smart Steer

- UNI2 Kuon 5AB HB 1.png
- UNI2 Kuon 5AB HB 2.png
| Damage | Guard | Startup | Active | Recovery | On-Block | Cancel | Attribute | Invuln |
|---|---|---|---|---|---|---|---|---|
| Mid | - | (EX) (only IW or IWEXS), CS | Strike |
- Kuon is often in situations where he is on the offensive, has GRD gain advantage, and yet still loses cycles due to Flight's high costs, so cutting a combo short with this can help gain back momentum.
- On the other hand, there is basically never a reason to use Smart Steer late in combos outside of resource dump combos to finish off rounds, since it just piles on Kuon's alreay high GRD costs.
- Kuon really doesnt struggle to convert from grounded normals or to get knockdowns, so it's not used specifically to pick up stray hits.
| Overall | Blockstun | Property | Proration | Combo Proration | Data link |
|---|---|---|---|---|---|
| Knockdown | /Data#5A+B |
Guard Thrust

| Damage | Guard | Startup | Active | Recovery | On-Block | Cancel | Attribute | Invuln |
|---|---|---|---|---|---|---|---|---|
| 0 | Mid | 15 | 5 | 26 | -12 | Strike | 1~15 Full, 16~45 Full on hit |
| Overall | Blockstun | Property | Proration | Combo Proration | Data link |
|---|---|---|---|---|---|
| 45 | Launch | /Data#6A+B+C |
Veil Off

| Version | Damage | Guard | Startup | Active | Recovery | On-Block | Cancel | Attribute | Invuln |
|---|---|---|---|---|---|---|---|---|---|
| A+B+C 100+ EXS |
0 | All | 15 | 2 | Total 64 (54 on hit) | -23 | Strike | 1~30 Full |
- Requires at least 100 meter and puts you in Veil Off state which grants 20% more damage, but drains your meter at a slow rate.
- Meter drains much slower when health is below 30% (orange health).
- If your opponent has Vorpal state and is hit with Veil Off outside of a combo, they will lose Vorpal.
| Version | Damage | Guard | Startup | Active | Recovery | On-Block | Cancel | Attribute | Invuln |
|---|---|---|---|---|---|---|---|---|---|
| A+B+C (during a move) 100+ EXS |
0 | All | 2 | 4 | 20 | +3 | Strike | 1~19 Full |
- CVO cancel is treated the same as EX cancel; you can only CVO when you can EX and the opponent is in hit/blockstun.
- Including in the air.
- Requires at least 100 meter and consumes Vorpal state and drains meter at a fast rate.
- Has a lot of hitstun, making it easy to combo from.
- Allows for an additional bounce in the combo if two have been used so far, without hitting the combo bounce limit.
- Pressing A+B+C can be used for a shortcut for Infinite Worth.
- Used mostly as a way to tack on extra damage, or to reliably close out the round.
| Version | Overall | Blockstun | Property | Proration | Combo Proration | Data link |
|---|---|---|---|---|---|---|
| A+B+C | 64 (54 on hit) | Launch | /Data#A+B+C | |||
| A+B+C (during a move) |
25 | Launch | /Data#A+B+C |
A+B+C (during a move):
Special Moves
236X


| Version | Damage | Guard | Startup | Active | Recovery | On-Block | Cancel | Attribute | Invuln |
|---|---|---|---|---|---|---|---|---|---|
| 236A | 818 | Mid/Air | 12 | Total 44 | -7 |
- Incredible midrange neutral tool with very low commitment, very good screen control, and comparatively good reward.
- Not great for long range zoning, but it's also very hard to whiff punish.
- Unsafe up close unless cancelled.
- With a similar animation to 236B, it can be used to bait a reaction and halt the opponent during neutral.
| Version | Damage | Guard | Startup | Active | Recovery | On-Block | Cancel | Attribute | Invuln |
|---|---|---|---|---|---|---|---|---|---|
| 236B | 870 | Mid/Air | 20 | Total 52 | -7 |
- At 20 frames, 236B is reactable, but not easily, making it good for getting hits in neutral.
- Takes a maximum of 2 extra frames to reach far away opponents.
- Avoided with preemptive jumps, but not low profilable.
- Not useful in combos due to its startup, but good after 5C as a frametrap.
| Version | Damage | Guard | Startup | Active | Recovery | On-Block | Cancel | Attribute | Invuln |
|---|---|---|---|---|---|---|---|---|---|
| 236C | 1769 | Mid/Air | 10 | Total 41 | -1 |
- Wallbounces on hit, leading to combos from around 3/4 screen distance.
- Good for hitconfirming 236B or whiff punishing, with great corner carry if converted into a combo.
| Version | Overall | Blockstun | Property | Proration | Combo Proration | Data link |
|---|---|---|---|---|---|---|
| 236A | 44 | /Data#236A | ||||
| 236B | 52 | /Data#236B | ||||
| 236C | 41 | /Data#236C |
236B :
236C :
j236X

| Version | Damage | Guard | Startup | Active | Recovery | On-Block | Cancel | Attribute | Invuln |
|---|---|---|---|---|---|---|---|---|---|
| j236A | 15 | - |
- Very fast on startup, but has high recovery, and it's easily to whiff punised if the opponent runs under it.
- Good during a backjump to bait specific options or keep the opponent in place.
- Can catch forward jumps at close range.
- Is usable in combos during aerial segments, but usually not worth it.
| Version | Damage | Guard | Startup | Active | Recovery | On-Block | Cancel | Attribute | Invuln |
|---|---|---|---|---|---|---|---|---|---|
| j236B | 21 | - |
- Pretty much exclusively used for zoning due to its slow speed, but outdone in that aspect by 236B due to its superior range, speed, and safety.
- Can catch jumping opponents, unlike 236X, but is inferior to j236A in this regard.
| Version | Damage | Guard | Startup | Active | Recovery | On-Block | Cancel | Attribute | Invuln |
|---|---|---|---|---|---|---|---|---|---|
| j236C | 10 | - |
- Used to confirm j236A/B into a knockdown, but is very hard to actually follow up, j623C is generally better unless a sideswitch would hurt you.
- Can be used to safely land after j236A/B via cancel on block or whiff, but j22C is more adventageous and more likely to catch the opponent.
| Version | Overall | Blockstun | Property | Proration | Combo Proration | Data link |
|---|---|---|---|---|---|---|
| j236A | /Data#j236A | |||||
| j236B | /Data#j236B | |||||
| j236C | /Data#j236C |
j236B :
j236C :
236X~X

| Damage | Guard | Startup | Active | Recovery | On-Block | Cancel | Attribute | Invuln |
|---|---|---|---|---|---|---|---|---|
| - | -4 |
- Cancelled from 236A, this is Kuon's most common meterless combo ender. Good knockdown and damage, but no setplay without meter.
- Additionally, it makes 236A's potential screen coverage even better, leading to jumps calling out 236A in neutral still often getting interrupted.
- From 236B, this can make approaching Kuon from long distances harder, due to it countering preemptive jump into assault at some distances, potentially with a combo.
- Safe pressure on block for both versions, serving as both a gapless pressure ender and a frametrap.
- Ground versions can be converted meterlessly with 3C depending on distance from the opponent.
- Aerial version is used to confirm j236X into EXS, but is way more unsafe on block than the grounded version. Make sure you have meter or vorpal to cancel it.
- 3 hits, making it very difficult to shield the last hit.
| Overall | Blockstun | Property | Proration | Combo Proration | Data link |
|---|---|---|---|---|---|
| /Data#236X~X |
623X


| Version | Damage | Guard | Startup | Active | Recovery | On-Block | Cancel | Attribute | Invuln |
|---|---|---|---|---|---|---|---|---|---|
| 623A | 22 | - | -11 |
- Cancelable into Heavenly Law and specials on block unless shielded, and into jump on hit. Cancelable into EXS on any connect.
- Not incredibly useful for mixups, but it puts Kuon next to the opponent for continued pressure.
- Quite a good tool for sideswitch combos, and it doesn't sacrifice a lot of damage to use it compared to normal routes.
| Version | Damage | Guard | Startup | Active | Recovery | On-Block | Cancel | Attribute | Invuln |
|---|---|---|---|---|---|---|---|---|---|
| 623B | 29 | - | -5 |
- VERY important midscreen combo tool with amazing corner carry.
- Can again cross up, but this is less useful with 623B.
- Cancels into aerial specials on hit or block unless shielded. Cancelable into EXS on any connect.
| Version | Damage | Guard | Startup | Active | Recovery | On-Block | Cancel | Attribute | Invuln |
|---|---|---|---|---|---|---|---|---|---|
| 623C | 23 | - | -18 |
- This move is VERY slow for a reversal, outdone at close range by [2]8X, and its speed also causes it to whiff in many other situations where the opponent is moving.
- Tracks fullscreen, and yet somehow whiffs on opponents positioned at the other edge of the screen moving backwards.
- Useful in very specific situations to counter long-range pokes, or reversal after an EXS super flash.
- Weirdly difficult to combo into, and can't consistently be followed up with Infinite Worth, so despite its damage, it's rarely used in combos.
| Version | Overall | Blockstun | Property | Proration | Combo Proration | Data link |
|---|---|---|---|---|---|---|
| 623A | 623A dissapears on the 12f | /Data#623A | ||||
| 623B | 623B dissapears on the 16f | /Data#623B | ||||
| 623C | /Data#623C |
623B :
623C :
j623X
| Version | Damage | Guard | Startup | Active | Recovery | On-Block | Cancel | Attribute | Invuln |
|---|---|---|---|---|---|---|---|---|---|
| j623A | 22 | - | -11 |
- Not special or FF cancelable, even on hit.
- Has significantly worse frame data than 3C, making meter a necessity for it to be safe.
- Mainly used to bait a preemptive Stand Shield, but is incredibly risky without meter, since Kuon is put precisely next to the opponent, and is -9 at the very best.
- Only gives a meterless combo on a precisely spaced counterhit.
- Kuon can actually be hit at ground level during the teleport animation, making highly active moves very good at beating j623A.
| Version | Damage | Guard | Startup | Active | Recovery | On-Block | Cancel | Attribute | Invuln |
|---|---|---|---|---|---|---|---|---|---|
| j623B | 39 | - | -10 |
- Between this and j623A, there is something of a mixup, but far from unreactable.
- Unlike j623A, this can be special-and-flight cancelled on block unless shielded, making it significantly safer. Cancelable into EXS on any connect.
- The knockdown results in damaging, meterless combos with good corner carry without meter.
- Can be used in combos, but is more often seen as a misinput of land->623B
| Version | Damage | Guard | Startup | Active | Recovery | On-Block | Cancel | Attribute | Invuln |
|---|---|---|---|---|---|---|---|---|---|
| j623C | 23 | - | -18 |
- Has a slightly longer startup at 26 frames, making it more situational
- Still invincible, letting you juke long range anti-air options from characters like Merkava.
| Version | Overall | Blockstun | Property | Proration | Combo Proration | Data link |
|---|---|---|---|---|---|---|
| j623A | /Data#j623A | |||||
| j623B | /Data#j623B | |||||
| j623C | /Data#j623C |
j623B :
j623C :
22X

| Version | Damage | Guard | Startup | Active | Recovery | On-Block | Cancel | Attribute | Invuln |
|---|---|---|---|---|---|---|---|---|---|
| 22A | 14 | - | -6 |
- Mostly used for combos, as it launches the opponent to a good height.
- Surprisingly active and covers the entire vertical space it's cast in, so it can be used to put up a wall against characters with varied approaches, but this is pretty risky.
- Mostly safe on block, but with how small its horizontal reach and no meterless cancels, 236A~X is generally better.
- Unlike 236A~X, this is only 1 hit.
| Version | Damage | Guard | Startup | Active | Recovery | On-Block | Cancel | Attribute | Invuln |
|---|---|---|---|---|---|---|---|---|---|
| 22B | 14 | - | -4 |
- Has basically identical uses to 22A with a higher emphasis on neutral usage.
- Also only 1 hit.
| Version | Damage | Guard | Startup | Active | Recovery | On-Block | Cancel | Attribute | Invuln |
|---|---|---|---|---|---|---|---|---|---|
| 22C | 19 | - | +12 |
- Fast enough to confirm 236X, and leads to combos from most spacings on the screen.
- Avoidable if the opponent moves out horizontally before the move goes active.
- Has an incredibly long launch time on hit, which makes it useful in close range combos to land bigger hits.
- Is +12 on block, so it can reset pressure.
j22X


| Version | Damage | Guard | Startup | Active | Recovery | On-Block | Cancel | Attribute | Invuln |
|---|---|---|---|---|---|---|---|---|---|
| j22A | 18 | - | +3 |
- Less applicable in combos, and sees more usage as a neutral tool thanks to the ability to attack or use movement options while falling.
- Can bait anti airs, which can lead to a combo on counterhit or with resources.
| Version | Damage | Guard | Startup | Active | Recovery | On-Block | Cancel | Attribute | Invuln |
|---|---|---|---|---|---|---|---|---|---|
| j22B | 18 | - | +3 |
| Version | Damage | Guard | Startup | Active | Recovery | On-Block | Cancel | Attribute | Invuln |
|---|---|---|---|---|---|---|---|---|---|
| j22C | 19 | - | -1 ~ +20 |
- Tracks the same as 22C, so unless the opponent is dp'ing, they will be hit out of their anti-air and they will usually get combo'd for it.
- As EXS moves go, you can still whiff cancel into 22C after whiffing air specials, so the opponent will usually get pressured, disengage, or straight up get counterhit and combo'd even after avoiding your special. Tough luck.
- Can convert into combos off j22X, j236X, Flight 6B+C, or j623B depending on distance from the opponent and the ground.
| Version | Overall | Blockstun | Property | Proration | Combo Proration | Data link |
|---|---|---|---|---|---|---|
| j22A | /Data#j22A | |||||
| j22B | /Data#j22B | |||||
| j22C | /Data#j22C |
j22B :
j22C :
214X


| Version | Damage | Guard | Startup | Active | Recovery | On-Block | Cancel | Attribute | Invuln |
|---|---|---|---|---|---|---|---|---|---|
| 214A | 34 | - | +19 |
- Once it connects, the projectile has 4 hits, locking down the opponent for a good bit.
- Primarily used in neutral to deny the midrange, or in meterless setups after 4C, where you don't have time for the increased version.
- Can reset pressure as it is always plus on block, but this requires a highly passive opponent.
- Combos after 6C in a lot of situations, which is used in high damage corner juggles.
- Can be CS'd just after the saucer is thrown, cutting its recovery and giving more freedom in setups, such as post-throw.
| Version | Damage | Guard | Startup | Active | Recovery | On-Block | Cancel | Attribute | Invuln |
|---|---|---|---|---|---|---|---|---|---|
| 214[A] | 40 | - | +25 |
- Incredible tool to be used in neutral. While the startup is lentghy, the large space covered by the projectile completely restricts the opponent's movement, giving Kuon lots of room to breathe.
- The saucer eats most projectiles thrown at it while moving forward, which makes it very good for an aggressive approach using Kuon's fast run.
- Has an extra hit once connected for a total of 5, and is the preferred option for metered setups, where it's thrown after a 214C/22C > 66C knockdown.
| Version | Damage | Guard | Startup | Active | Recovery | On-Block | Cancel | Attribute | Invuln |
|---|---|---|---|---|---|---|---|---|---|
| 214B | 25 | - | +18 |
- Largely a combo tool, since it combos from 66B(1) even mindscreen and gives good damage with a long window for followups.
- Since it denies some of the airspace, it can temporarily restrict characters that rely heavily on air approaches and struggle in grounded footsies.
- Shares its animation with 214A, so it can be used during setplay to bait a shield attempt against 214A and GRD break the opponent.
| Version | Damage | Guard | Startup | Active | Recovery | On-Block | Cancel | Attribute | Invuln |
|---|---|---|---|---|---|---|---|---|---|
| 214C | 15 | - | +60 |
- Can form a gapless blockstring from many attacks, so it's Kuon's primary way to dump meter to restart pressure, notably after a gap close with 3C.
- Hits 12 times in total, which makes it incredibly plus, enough to run a high/low mixup obscured by the projectile.
- Has higher minimum damage than 22C, so it is preferred in ender sequences into 66C.
- Can be spaced in a way that allows for opponents to be held into it with throw, resulting in a highly-damaging 2.2k damage off throw.
| Version | Overall | Blockstun | Property | Proration | Combo Proration | Data link |
|---|---|---|---|---|---|---|
| 214A | /Data#214A | |||||
| 214[A] | /Data#214[A] | |||||
| 214B | /Data#214B | |||||
| 214C | /Data#214C |
214[A] :
214B :
214C :
[2]8X

- UNI2 Kuon 28B.png
- UNI2 Kuon 28C.png

| Version | Damage | Guard | Startup | Active | Recovery | On-Block | Cancel | Attribute | Invuln |
|---|---|---|---|---|---|---|---|---|---|
| [2]8A | 7 | - | -14 | 1~X Head (Check Dive) |
- Used in most optimal corner combos due to its good launch and high damage.
- Cancelable into EXS or CS on block or whiff, so it can be used as abare, but be careful as it has no strike invul, and is only active on frame 8.
| Version | Damage | Guard | Startup | Active | Recovery | On-Block | Cancel | Attribute | Invuln |
|---|---|---|---|---|---|---|---|---|---|
| [2]8B | 12 | - | -29 |
- Relatively slow at 13 frames, but still useful as a defensive tool.
- Doesn't knock down, has significantly more recovery than the A version, and is not cancelable into EXS, removing its usages in combos.
- Bigger, than [2]8A, and due to its invul, it's generally better in scrambles, but way more unsafe.
- It hits both sides (while also automatically sidecorrecting due to its input), and is very active, so it's best used as a reversal against aerial moves and left/right mixups.
| Version | Damage | Guard | Startup | Active | Recovery | On-Block | Cancel | Attribute | Invuln |
|---|---|---|---|---|---|---|---|---|---|
| [2]8C | 10 | - | -38 |
- Carries all of [2]8B's good qualities, but is more active, more damaging, and faster.
- Still unsafe, but harder to bait than [2]8B
- Is technically Kuon's highest damage EXS move, but very restricting to use in combos.
- In some spacings, only a few of the hits connect, reducing its damage.
| Version | Overall | Blockstun | Property | Proration | Combo Proration | Data link |
|---|---|---|---|---|---|---|
| [2]8A | /Data#[2]8A | |||||
| [2]8B | /Data#[2]8B | |||||
| [2]8C | /Data#[2]8C |
[2]8B :
[2]8C :
Super Moves
Infinite Worth


| Damage | Guard | Startup | Active | Recovery | On-Block | Cancel | Attribute | Invuln |
|---|---|---|---|---|---|---|---|---|
| 3442 | All | 15 | Total 75 | -32 |
- Quite literally COVERS THE ENTIRE SCREEN. While it's mostly used as a combo ender, it must be noted that this move can technically whiff punish the opponent no matter where they are if they are minus enough.
| Overall | Blockstun | Property | Proration | Combo Proration | Data link |
|---|---|---|---|---|---|
| 75 | /Data#41236D |
Infinite Worth EXS

| Damage | Guard | Startup | Active | Recovery | On-Block | Cancel | Attribute | Invuln |
|---|---|---|---|---|---|---|---|---|
| 3760 | All | 3+14 | 2 | 51 | -25 | Strike | 1~? Full |
- Must have less than 30% health (orange health) to use.
- After the cinematic, characters will be moved to the middle of the stage, regardless of where they were positioned before.
- Due to the cost, it is usually not recommended to use this move unless it will kill the opponent.
| Overall | Blockstun | Property | Proration | Combo Proration | Data link |
|---|---|---|---|---|---|
| 69 | Knockdown | /Data#A+B+C+D |
Notable Rebeats and Gaps
| Attack | Chain | Advantage |
|---|---|---|
| 5C | 2A | -3 |
| 2C | -3 | |
| 5C | 5A | -4 |
| 2C | -4 |
| Attack | Chain | Frame Gap |
|---|---|---|
| 5A | 5C | 1F |
Videos
External Links
Colors
Default Unlocks


