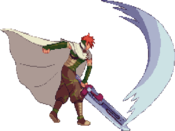
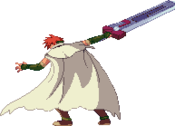
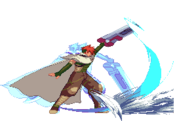
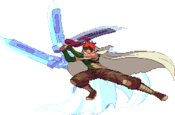
Spectral vs Generation/Krayce: Difference between revisions
Bladetastic (talk | contribs) |
Bladetastic (talk | contribs) m (→Specials) |
||
| (89 intermediate revisions by 5 users not shown) | |||
| Line 22: | Line 22: | ||
'''Likes''': Macaroni<br> | '''Likes''': Macaroni<br> | ||
'''Dislikes''': Sashimi | '''Dislikes''': Sashimi | ||
== | |||
==Gameplay Overview== | |||
{{StrengthsAndWeaknesses | |||
| | | intro = {{SUBPAGENAME}} is the BIG Rekka with good movement, huge normals and impressive combo damage. While he can't two touch his opponents in comparison to other members of the cast, his corner carry more than makes up for it. Combine this with his great corner pressue, okizeme, and High/Low mixups, he can run away with a lead very quickly if he is able to get it. However, not only does Krayce have a large hurtbox because of his size, but his sword has little to no disjoints meaning that most of his pokes can easily be counterpoked. He is also extremely dependent on meter for any sort of optimal combo, as he lacks any way to confirm a hard knockdown from anything other then being on top of the opponent without meter. Even with his faults Krayce is still a character that can be a terror on block and okizeme, while still being a difficult character to approach if Krayce dosen't have to. | ||
'''Krayce is a big character who spends meter to take you to the corner to deal with his inescapable 50/50 mixup unless you spend meter.''' | |||
| pros= | |||
* '''Coast-To-Coast''': Krayce's 1-bar midscreen combo always guarantees you the corner no matter where you are, letting you proceed with your corner pressure as you see fit. | |||
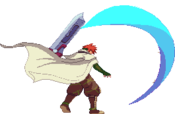
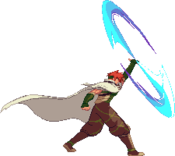
* '''Safe Reversal''': Not only does Krayce have one of the better DP's in this game (623C), but he can also make it safe using Seal Of Time. | |||
* '''Monstrous Corner Game''': Krayce's 236C is a stationary projectile which your opponent must respect because of how active it is on their wakeup, which lets you go for your 50/50 opener, and should your opponent be GC-happy, using 236B is an excellent punish as you recover fast enough to parry their guard cancels. Outside of corner oki, his corner combo is just as good as he has a true and consistent corner infinite. | |||
* | * '''Great Normals''': While not the fastest, Krayce's big normals more than make up for it. Having great range both on the ground and in the air lets him have great screen presence should the opponent whiff a normal. | ||
*Krayce's | *'''Armor Shenanigans''': Krayce has armor properties in some of his moves (cl.5B, 5C, 2C) which will stuff any weak pokes and let him take his turn. | ||
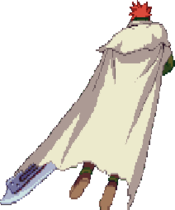
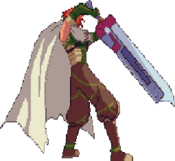
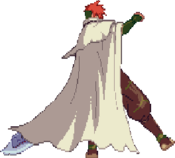
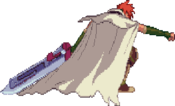
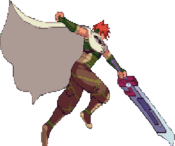
* '''The Greatest Palette To Exist''': Krayce has the greatest palette in the game (D Palette) because it turns him into Ike from Fire Emblem. | |||
* | | cons= | ||
* | * '''Meter Is KING''': Krayce is hardly a threat without meter, since he loses his corner carry, damage, his safe reversal and even access to hard knockdowns. Fortunately, his meter build is decent enough, but you will have a lot to work for when you're out of juice. | ||
| | * '''Big Body Problems''': Being a big character comes with it flaws, such as bigger hurtboxes, harder to navigate around projectiles and even suspectible to instant overhead setups that aren't normally possible. Not only that, his sword has almost no disjoints meaning that he can easily be counterpoked should one spam his buttons recklessly. | ||
* | * '''Harsh Scaling''': Despite having good damage, a lot of his combos scale very hard. Krayce is forced to go for options such as his time-consuming corner infinite or score hard knockdowns for his 236C 50/50 oki whereas most characters could probably kill you at this point. | ||
* '''Armor Shenanigans''': Despite the fact that he has armor properties on his moves, they're very inconsistent in general. It has a multitude of flaws that makes it impossible to abuse them on reaction and it's better to not rely on them for combos, but for knockdowns. | |||
* '''No Sympathy From Me''': Krayce's other palettes suck because they don't turn him into Ike from Fire Emblem. I don't make the rules. | |||
}} | |||
* | |||
* | |||
* | |||
==Normals== | ==Normals== | ||
===Far Standing Normals=== | ===Far Standing Normals=== | ||
{{MoveData | {{MoveData | ||
|name=5A | |name=f.5A | ||
|image=Spectral_VS_Generation_KrayceFar5A_Image.png | |image=Spectral_VS_Generation_KrayceFar5A_Image.png | ||
|caption= | |caption= | ||
|data= | |data= | ||
{{AttackData-SVG | {{AttackData-SVG | ||
| damage = | | damage = 15 | ||
| guard = High/Low | | guard = High/Low | ||
| cancel = | | cancel = Chain/Special/Super | ||
| startup = | | startup = 3 | ||
| advHit = | | advHit = +7 | ||
| advBlock = | | advBlock = +5 | ||
| description = | | description = Krayce does a quick jab in front of him. Good to use sometimes in neutral but whiffs against Erile and Ryuken in 214d. | ||
}} | }} | ||
}} | }} | ||
<br> | <br> | ||
{{MoveData | {{MoveData | ||
|name=5B | |name=f.5B | ||
|image=Spectral_VS_Generation_KrayceFar5B_Image.png | |image=Spectral_VS_Generation_KrayceFar5B_Image.png | ||
|caption= | |caption= | ||
|data= | |data= | ||
{{AttackData-SVG | {{AttackData-SVG | ||
| damage = | | damage = 35 | ||
| guard = High/Low | | guard = High/Low | ||
| cancel = | | cancel = Chain/Special/Super | ||
| startup = | | startup = 10 | ||
| advHit = | | advHit = -8 | ||
| advBlock = | | advBlock = -10 | ||
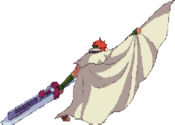
| description = | | description = Krayce thrusts his sword in front of him. A move that pokes quite far but whiffs against crouching opponents, although can anti-air if spaced properly. | ||
}} | }} | ||
}} | }} | ||
<br> | <br> | ||
{{MoveData | {{MoveData | ||
|name=5C | |name=f.5C | ||
|image=Spectral_VS_Generation_KrayceFar5C_Image.png | |image=Spectral_VS_Generation_KrayceFar5C_Image.png | ||
|caption=The weaker overhead | |caption=The weaker overhead | ||
|data= | |data= | ||
{{AttackData-SVG | {{AttackData-SVG | ||
| damage = | | damage = 55 | ||
| guard = High | | guard = High | ||
| cancel = | | cancel = N/A | ||
| startup = | | startup = 18 | ||
| advHit = | | advHit = HKD | ||
| advBlock = | | advBlock = -15 | ||
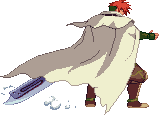
| description = Krayce slams his sword to the ground. An overhead with long startup but has armor as well. Causes HDK on hit and links into OTG 2C. | | description = Krayce slams his sword to the ground. An overhead with long startup but has armor as well. Causes HDK on hit and links into OTG 2C. When chained into it loses its overhead properties but becomes cancellable. | ||
}} | }} | ||
}} | }} | ||
| Line 102: | Line 96: | ||
|name=f.5D | |name=f.5D | ||
|image=Spectral_VS_Generation_KrayceFar5D_Image.png | |image=Spectral_VS_Generation_KrayceFar5D_Image.png | ||
|caption= | |caption=Hiro players hate him! | ||
|data= | |data= | ||
{{AttackData-SVG | {{AttackData-SVG | ||
| damage = | | damage = 20 | ||
| guard = High/Low | | guard = High/Low | ||
| cancel = | | cancel = Chain/Special/Super | ||
| startup = | | startup = 5 | ||
| advHit = | | advHit = 0 | ||
| advBlock = | | advBlock = -3 | ||
| description = Extremely good button. Visually similar to Close 5D. But this one kicks up dust that is blocked Mid AND eats most projectiles. Pressing 5D in the middle of your dash makes you stop in place, giving Krayce great control on his ground movement | | description = Extremely good button. Visually similar to Close 5D. But this one kicks up dust that is blocked Mid AND eats most projectiles. Pressing 5D in the middle of your dash makes you stop in place, giving Krayce great control on his ground movement. The kicked-up dust acts like a projectile but can be parried like a hit. | ||
}} | }} | ||
}} | }} | ||
| Line 120: | Line 114: | ||
|name=cl.5A | |name=cl.5A | ||
|image=Spectral_VS_Generation_KrayceClose5A_Image.png | |image=Spectral_VS_Generation_KrayceClose5A_Image.png | ||
|caption= | |caption= | ||
|data= | |data= | ||
{{AttackData-SVG | {{AttackData-SVG | ||
| damage = | | damage = 15 | ||
| guard = High/Low | | guard = High/Low | ||
| cancel = | | cancel = Chain/Special/Super | ||
| startup = | | startup = 3 | ||
| advHit = | | advHit = +6 | ||
| advBlock = | | advBlock = +4 | ||
| description = | | description = Krayce does a bonk against his opponent. The exact same as far 5A in terms of startup and damage. | ||
}} | }} | ||
}} | }} | ||
| Line 136: | Line 130: | ||
|name=cl.5B | |name=cl.5B | ||
|image=Spectral_VS_Generation_KrayceClose5B_Image.png | |image=Spectral_VS_Generation_KrayceClose5B_Image.png | ||
|caption= | |caption= | ||
|data= | |data= | ||
{{AttackData-SVG | {{AttackData-SVG | ||
| damage = | | damage = 35 | ||
| guard = High/Low | | guard = High/Low | ||
| cancel = | | cancel = N/A | ||
| startup = | | startup = 6 | ||
| advHit = | | advHit = SKD | ||
| advBlock = | | advBlock = -12 | ||
| description = Krayce does a shoulder bash which launches the opponent. While it has armor it's not that useful of a move since it forces both players to go back to neutral. | | description = Krayce does a shoulder bash which launches the opponent. While it has armor it's not that useful of a move since it forces both players to go back to neutral. | ||
}} | }} | ||
| Line 152: | Line 146: | ||
|name=cl.5C | |name=cl.5C | ||
|image=Spectral_VS_Generation_KrayceClose5C_Image.png | |image=Spectral_VS_Generation_KrayceClose5C_Image.png | ||
|caption= | |caption= | ||
|data= | |data= | ||
{{AttackData-SVG | {{AttackData-SVG | ||
| damage = | | damage = 55 | ||
| guard = High/Low | | guard = High/Low | ||
| cancel = | | cancel = Chain/Special/Super | ||
| startup = | | startup = 7 | ||
| advHit = | | advHit = 0 | ||
| advBlock = | | advBlock = -3 | ||
| description = Krayce slashes slightly upwards. One of your best ways to start a combo in terms of optimal damage | | description = Krayce slashes slightly upwards. One of your best ways to start a combo in terms of optimal damage | ||
}} | }} | ||
| Line 168: | Line 162: | ||
|name=cl.5D | |name=cl.5D | ||
|image=Spectral_VS_Generation_Krayce5D_Image.png | |image=Spectral_VS_Generation_Krayce5D_Image.png | ||
|caption= | |caption= | ||
|data= | |data= | ||
{{AttackData-SVG | {{AttackData-SVG | ||
| damage = | | damage = 20 | ||
| guard = Low | | guard = Low | ||
| cancel = | | cancel = Chain/Special/Super | ||
| startup = | | startup = 4 | ||
| advHit = | | advHit = +3 | ||
| advBlock = | | advBlock = +1 | ||
| description = Visually similar to Far 5D. Kick that hits Low. This one does not kick up dust, therefore making it an inferior version of Far D <br> still a very fast low | | description = Visually similar to Far 5D. Kick that hits Low. This one does not kick up dust, therefore making it an inferior version of Far D <br> still a very fast low | ||
}} | }} | ||
| Line 186: | Line 180: | ||
|name=2A | |name=2A | ||
|image=Spectral_VS_Generation_Krayce2A_Image.png | |image=Spectral_VS_Generation_Krayce2A_Image.png | ||
|caption= | |caption= | ||
|data= | |data= | ||
{{AttackData-SVG | {{AttackData-SVG | ||
| damage = | | damage = 15 | ||
| guard = Low | | guard = High/Low | ||
| cancel = | | cancel = Chain/Special/Super | ||
| startup = | | startup = 4 | ||
| advHit = | | advHit = +6 | ||
| advBlock = | | advBlock = +4 | ||
| description = Krayce does a low punch. Good button to punish unsafe normals and | | description = Krayce does a low punch. Good button to punish unsafe normals and gaps in pressure. | ||
}} | }} | ||
}} | }} | ||
| Line 202: | Line 196: | ||
|name=2B | |name=2B | ||
|image=Spectral_VS_Generation_Krayce2B_Image.png | |image=Spectral_VS_Generation_Krayce2B_Image.png | ||
|caption= | |caption= | ||
|data= | |data= | ||
{{AttackData-SVG | {{AttackData-SVG | ||
| damage = | | damage = 35 | ||
| guard = Low | | guard = High/Low | ||
| cancel = | | cancel = Chain/Special/Super | ||
| startup = | | startup = 11 | ||
| advHit = | | advHit = -9 | ||
| advBlock = | | advBlock = -11 | ||
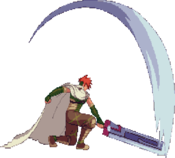
| description = Krayce throws his cape forward a bit. Has some startup but a really good poke in comparison to 5B since it doesn't whiff against crouching opponents. | | description = Krayce throws his cape forward a bit. Has some startup but a really good poke in comparison to 5B since it doesn't whiff against crouching opponents. | ||
}} | }} | ||
| Line 221: | Line 215: | ||
|data= | |data= | ||
{{AttackData-SVG | {{AttackData-SVG | ||
| damage = | | damage = 55 | ||
| guard = High/low | | guard = High/low | ||
| cancel = | | cancel = Special/Super | ||
| startup = | | startup = 14 | ||
| advHit = | | advHit = -12 | ||
| advBlock = | | advBlock = -13 ~ -18 | ||
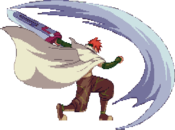
| description = Krayce does an identical slam like his 5C, except he crouches here. Another armored move that does a HDK if it hits an opponent in the air. Also important for his Burst combos. | | description = Krayce does an identical slam like his 5C, except he crouches here. Another armored move that does a HDK if it hits an opponent in the air. Also important for his Burst combos. Advantage will change depending on whether they're crouching or standing | ||
}} | }} | ||
}} | }} | ||
| Line 234: | Line 228: | ||
|name=2D | |name=2D | ||
|image=Spectral_VS_Generation_Krayce2D_Image.png | |image=Spectral_VS_Generation_Krayce2D_Image.png | ||
|caption= | |caption= | ||
|data= | |data= | ||
{{AttackData-SVG | {{AttackData-SVG | ||
| damage = | | damage = 20 | ||
| guard = Low | | guard = Low | ||
| cancel = | | cancel = Chain/Special/Super | ||
| startup = | | startup = 5 | ||
| advHit = | | advHit = +2 | ||
| advBlock = | | advBlock = 0 | ||
| description = Krayce does a kick from a crouching position. Much | | description = Krayce does a kick from a crouching position. Much longer button than his 5A and 2A and has a long cancel window, making it Krayce's go-to for low confirms and punishes. | ||
}} | }} | ||
}} | }} | ||
| Line 254: | Line 248: | ||
|data= | |data= | ||
{{AttackData-SVG | {{AttackData-SVG | ||
| damage = | | damage = 40 | ||
| guard = High | | guard = High | ||
| cancel = | | cancel = Special/Super | ||
| startup = | | startup = 16 | ||
| advHit = | | advHit = -7 | ||
| advBlock = | | advBlock = -9 | ||
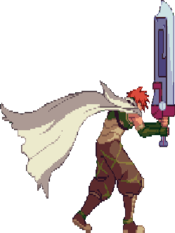
| description = Krayce slams the hilt of the sword on the opponent. | | description = Krayce slams the hilt of the sword on the opponent. One of the only standing overhead command normals in the game. | ||
While it's a very fast overhead, it has a stubby hitbox and it can be both high and low parried. This forces you to condition your opponent to not parry on reaction against Krayce's 4C. However, it's great to use during his 236C 50/50 oki as the enemy can't parry on wakeup due to dealing with the projectile. | |||
}} | }} | ||
}} | }} | ||
| Line 270: | Line 266: | ||
|data= | |data= | ||
{{AttackData-SVG | {{AttackData-SVG | ||
| damage = | | damage = 56 | ||
| guard = Low | | guard = Low | ||
| cancel = | | cancel = N/A | ||
| startup = | | startup = 8 | ||
| advHit = | | advHit = SKD | ||
| advBlock = | | advBlock = -10 | ||
| description = 2 hit sweep that isn't useful, unfortunately. Because if the kick hits the second attack will knock down and if the kick is blocked, the second attack can be parried. | | description = 2 hit sweep that isn't useful, unfortunately. Because if the kick hits the second attack will knock down and if the kick is blocked, the second attack can be parried. | ||
| Line 286: | Line 282: | ||
|name=J.A | |name=J.A | ||
|image=Spectral_VS_Generation_KrayceJ.A_Image.png | |image=Spectral_VS_Generation_KrayceJ.A_Image.png | ||
|caption= | |caption= | ||
|data= | |data= | ||
{{AttackData-SVG | {{AttackData-SVG | ||
| damage = | | damage = 15 | ||
| guard = High | | guard = High | ||
| cancel = | | cancel = | ||
| startup = | | startup = 5 | ||
| advHit = | | advHit = | ||
| advBlock = | | advBlock = | ||
| Line 302: | Line 298: | ||
|name=J.B | |name=J.B | ||
|image=Spectral_VS_Generation_KrayceJ.B_Image.png | |image=Spectral_VS_Generation_KrayceJ.B_Image.png | ||
|caption= | |caption=Controlling the skies better than Wells ever could. | ||
|data= | |data= | ||
{{AttackData-SVG | {{AttackData-SVG | ||
| damage = | | damage = 35 | ||
| guard = High | | guard = High | ||
| cancel = | | cancel = | ||
| startup = | | startup = 8 | ||
| advHit = | | advHit = | ||
| advBlock = | | advBlock = | ||
| Line 318: | Line 314: | ||
|name=J.C | |name=J.C | ||
|image=Spectral_VS_Generation_KrayceJ.C_Image.png | |image=Spectral_VS_Generation_KrayceJ.C_Image.png | ||
|caption= | |caption= | ||
|data= | |data= | ||
{{AttackData-SVG | {{AttackData-SVG | ||
| damage = | | damage = 55 | ||
| guard = High | | guard = High | ||
| cancel = | | cancel = | ||
| startup = | | startup = 12 | ||
| advHit = | | advHit = | ||
| advBlock = | | advBlock = | ||
| Line 337: | Line 333: | ||
|data= | |data= | ||
{{AttackData-SVG | {{AttackData-SVG | ||
| damage = | | damage = 20 | ||
| guard = High | | guard = High | ||
| cancel = | | cancel = | ||
| startup = | | startup = 5 | ||
| advHit = | | advHit = | ||
| advBlock = | | advBlock = | ||
| Line 355: | Line 351: | ||
|data= | |data= | ||
{{AttackData-SVG | {{AttackData-SVG | ||
| damage = | | damage = 15 | ||
| guard = High/Low | | guard = High/Low | ||
| cancel = | | cancel = Special/Super | ||
| startup = | | startup = | ||
| advHit = | | advHit = +7 | ||
| advBlock = | | advBlock = -4 | ||
| description = Krayce swings his sword downwards. This attack can only be used after 5D, Close/Far 5A and Close 5C. A great normal which deals good damage and is special cancellable. Present in a lot of bnbs and paramount for his | | description = Krayce swings his sword downwards. This attack can only be used after 5D, Close/Far 5A and Close 5C. A great normal which deals good damage and is special cancellable. Present in a lot of bnbs and paramount for his 236B corner loops. | ||
}} | }} | ||
}} | }} | ||
| Line 369: | Line 365: | ||
|name=A+D | |name=A+D | ||
|subtitle=Forward Throw | |subtitle=Forward Throw | ||
|caption= | |caption= | ||
|image=krayce fthrow.png | |image=krayce fthrow.png | ||
|data= | |data= | ||
{{AttackData-SVG | {{AttackData-SVG | ||
| damage = | | damage = 60 | ||
| guard = Throw | | guard = Throw | ||
| cancel = N/A | | cancel = N/A | ||
| Line 391: | Line 387: | ||
|data= | |data= | ||
{{AttackData-SVG | {{AttackData-SVG | ||
| damage = | | damage = 70 | ||
| guard = Throw | | guard = Throw | ||
| cancel = N/A | | cancel = N/A | ||
| startup = | | startup = | ||
| advHit = | | advHit = | ||
| Line 408: | Line 404: | ||
|data= | |data= | ||
{{AttackData-SVG | {{AttackData-SVG | ||
| damage = | | damage = 150 | ||
| guard = High | | guard = High | ||
| cancel = N/A | | cancel = N/A | ||
| Line 424: | Line 420: | ||
|data= | |data= | ||
{{AttackData-SVG | {{AttackData-SVG | ||
| damage = | | damage = 150 | ||
| guard = Low | | guard = Low | ||
| cancel = N/A | | cancel = N/A | ||
| Line 435: | Line 431: | ||
===Chaos Breaking (Parry)=== | ===Chaos Breaking (Parry)=== | ||
{{MoveData | {{MoveData | ||
|name=A+B | |name=A+B | ||
| Line 458: | Line 453: | ||
==Specials== | ==Specials== | ||
{{MoveData | {{MoveData | ||
|name= | |name=Blade Wave | ||
|input= | |input=236A/B/C | ||
|image= | |image=Spectral_VS_Generation_Krayce236ABC_Image.png | ||
|caption= | |caption=The BnB of your Oki and corner pressure | ||
|data= | |data= | ||
{{AttackData-SVG | {{AttackData-SVG | ||
| damage = | | version = A | ||
| damage = 40 | |||
| guard = High/Low | |||
| cancel = N/A | |||
| startup = | |||
| advHit = | |||
| advBlock = | |||
| description = The version that starts up the fastest and does less hits. Not used much in comparison to B or C | |||
}} | |||
{{AttackData-SVG | |||
| version = B | |||
| damage =44 | |||
| guard = High/Low | | guard = High/Low | ||
| cancel = | | cancel = N/A | ||
| startup = | | startup = | ||
| advHit = | | advHit = | ||
| advBlock = | | advBlock = | ||
| description = | | description = The best version of Blade Wave for combos as this is the version used for Krayce's corner infinite. Also used for his okizeme to bait Guard Cancels. | ||
}} | }} | ||
{{AttackData-SVG | {{AttackData-SVG | ||
| damage = | | version = C | ||
| damage =51 | |||
| guard = High/Low | | guard = High/Low | ||
| cancel = | | cancel = N/A | ||
| startup = | |||
| advHit = | |||
| advBlock = | |||
| description = Krayce's best oki tool. Use it whenever you get a HDK and they'll be forced to block it (unless they burst) | |||
}} | |||
}} | |||
{{MoveData | |||
|name=Sky Sword | |||
|input=623A/B/C | |||
|image=krayce_623a.png | |||
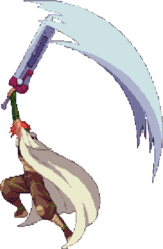
|caption=One of the largest DP's in the game | |||
|data= | |||
{{AttackData-SVG | |||
| version = A | |||
| damage =40 | |||
| guard = Mid | |||
| cancel = SoT | |||
| startup = | | startup = | ||
| advHit = | | advHit = | ||
| Line 490: | Line 509: | ||
}} | }} | ||
{{AttackData-SVG | {{AttackData-SVG | ||
| damage = | | version = B | ||
| guard = | | damage =50 | ||
| cancel = | | guard = Mid | ||
| cancel = N/A | |||
| startup = | | startup = | ||
| advHit = | | advHit = | ||
| Line 499: | Line 519: | ||
}} | }} | ||
{{AttackData-SVG | {{AttackData-SVG | ||
| damage = | | version = C | ||
| guard = | | damage =40 | ||
| cancel = | | guard = Mid | ||
| cancel = Slide Blade, SoT | |||
| startup = | |||
| advHit = | |||
| advBlock = | |||
| description = Krayce does a large vertical swing in front of him, swatting anything in range out of the air. The A version is the fastest but does not have i-frames, therefore it can be stuffed. Used in his burst loop. | |||
B version has more startup than A but does more damage. Still doesn't have i-frames. Should be a good enough reason to never use this version. | |||
C Version of Sky Sword acts like a true dp, being invulnerable during startup. The best reversal in the game alongside Welles' own DP but outclasses it in terms of incredible range. Can also be made safe on block with SOT cancelling. Always having this in your arsenal will make your opponent second guess their okizeme. | |||
}} | |||
}} | |||
{{MoveData | |||
|name=Slide Blade | |||
|input=Sky Sword C ~> 623C | |||
|image=krayce_623a.png | |||
|caption= | |||
|data= | |||
{{AttackData-SVG | |||
| damage = 36 | |||
| guard = Mid | |||
| cancel = N/A | |||
| startup = | | startup = | ||
| advHit = | | advHit = | ||
| advBlock = | | advBlock = | ||
| description = | | description = Krayce does an extra dp that sends the opponent flying. You cannot follow this up with anything else and is only really used as combo ender for corner carry | ||
}} | }} | ||
}} | }} | ||
{{MoveData | {{MoveData | ||
|name= | |name=Wind Slide Blade | ||
|input= | |input=214A/B/C | ||
|image= | |image=Spectral_VS_Generation_Krayce214x_Animation.png | ||
|caption= | |caption=Distance will vary based on button pressed | ||
|data= | |data= | ||
{{AttackData-SVG | {{AttackData-SVG | ||
| damage = | | version = A | ||
| damage = 20 | |||
| guard = High/Low | |||
| cancel = Wind Slide Sword, Super | |||
| startup = | |||
| advHit = | |||
| advBlock = | |||
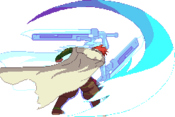
| description = The start of Krayce's rekka series. He dashes forward and does a barrage of swings. The A version goes the shortest distance and is used the least because of that. | |||
}} | |||
{{AttackData-SVG | |||
| version = B | |||
| damage = 23-46 | |||
| guard = High/Low | | guard = High/Low | ||
| cancel = | | cancel = Wind Slide Sword, Super | ||
| startup = | | startup = | ||
| advHit = | | advHit = | ||
| advBlock = | | advBlock = | ||
| description = | | description = The B version goes further than A, but still not used much compared to C. | ||
}} | }} | ||
{{AttackData-SVG | {{AttackData-SVG | ||
| damage = | | version = C | ||
| damage = 25-50 | |||
| guard = High/Low | |||
| cancel = Wind Slide Sword, Super | |||
| startup = | |||
| advHit = | |||
| advBlock = | |||
| description = The C version goes the furthest and is the most consistent version for your combos. | |||
}} | |||
}} | |||
{{MoveData | |||
|name=Wind Slide Sword | |||
|input=Wind Slide Blade ~> B ~> B ~> C | |||
|image=Spectral_VS_Generation_Krayce214xFollowUp1_Animation.png | |||
|image2=Spectral_VS_Generation_Krayce214xFollowUp2_Animation.png | |||
|image3=Spectral_VS_Generation_Krayce214xFollowUp3_Animation.png | |||
|data= | |||
{{AttackData-SVG | |||
| damage = 16 | |||
| guard = High/Low | | guard = High/Low | ||
| cancel = | | cancel = Next Hit | ||
| startup = | | startup = | ||
| advHit = | | advHit = | ||
| Line 540: | Line 605: | ||
}} | }} | ||
{{AttackData-SVG | {{AttackData-SVG | ||
| damage = | | damage = 16 | ||
| guard = High/Low | | guard = High/Low | ||
| cancel = | | cancel = Next Hit | ||
| startup = | | startup = | ||
| advHit = | | advHit = | ||
| Line 549: | Line 614: | ||
}} | }} | ||
{{AttackData-SVG | {{AttackData-SVG | ||
| damage = | | damage = 39 | ||
| guard = High/Low | | guard = High/Low | ||
| cancel = | | cancel = SoT, Super | ||
| startup = | | startup = | ||
| advHit = | | advHit = | ||
| advBlock = | | advBlock = | ||
| description = | | description = Hits three times and can cancel into supers. Can be parried on block, but you can also delay the input to bait out a parry attempt.<br> The last hit will knock the opponent into the air so therefore canceling on the second hit is usually preferable for combos. | ||
}} | |||
}} | |||
{{MoveData | |||
|name=Swallow Flight | |||
|input=236d | |||
|image=Spectral_VS_Generation_Krayce2D_Image.png | |||
|caption= | |||
|data= | |||
{{AttackData-SVG | |||
| damage = 25 | |||
| guard = Low | |||
| cancel = Double Slash, Swallow Slide Sword, Super | |||
| startup = 19 | |||
| advHit = +6 | |||
| advBlock = +5 | |||
| description = Identical to 214A/B/C but Krayce does a small hop and slides instead of dashing, doing a low. Good for checking the opponent's feet but goes at a fixed range. | |||
}} | |||
}} | |||
{{MoveData | |||
|name=Double Slash | |||
|input=Swallow Flight ~> D | |||
|image=Spectral_VS_Generation_Krayce3D_Image.png | |||
|caption= | |||
|data= | |||
{{AttackData-SVG | |||
| damage = 24 | |||
| guard = Low | |||
| cancel = N/A | |||
| startup = 9 | |||
| advHit = SKD | |||
| advBlock = -5 | |||
| description = Krayce does his 3D, and that's it. Air techable before you are able to get a true combo into anything, making this followup useless. Avoid it! | |||
}} | }} | ||
}} | }} | ||
{{MoveData | {{MoveData | ||
|name= | |name=Swallow Slide Sword | ||
|image= | |input=Swallow Flight ~> B ~> B ~> C | ||
|image=Spectral_VS_Generation_Krayce214xFollowUp1_Animation.png | |||
|image2=Spectral_VS_Generation_Krayce214xFollowUp2_Animation.png | |||
|image3=Spectral_VS_Generation_Krayce214xFollowUp3_Animation.png | |||
|caption= | |caption= | ||
|data= | |data= | ||
{{AttackData-SVG | {{AttackData-SVG | ||
| damage = | | damage = 16 | ||
| guard = High/Low | | guard = High/Low | ||
| cancel = | | cancel = Next Hit | ||
| startup = | | startup = | ||
| advHit = | | advHit = | ||
| advBlock = | | advBlock = | ||
| description = | | description = | ||
}} | }} | ||
{{AttackData-SVG | {{AttackData-SVG | ||
| damage = | | damage = 39 | ||
| guard = High/Low | | guard = High/Low | ||
| cancel = | | cancel = SoT, Super | ||
| startup = | | startup = | ||
| advHit = | | advHit = | ||
| advBlock = | | advBlock = | ||
| description = | | description = Rekka followups are the exact same as the 214A/B/C versions. | ||
}} | }} | ||
}} | |||
<br> | |||
{{MoveData | |||
|name=Tornado Kick | |||
|input=214D | |||
|image=krayce_214d.png | |||
|caption=Boot | |||
|data= | |||
{{AttackData-SVG | {{AttackData-SVG | ||
| damage = | | damage =30 | ||
| guard = | | guard = Mid | ||
| cancel = | | cancel = Double Tornado, Side Attack | ||
| startup = | | startup = | ||
| advHit = | | advHit = | ||
| advBlock = | | advBlock = | ||
| description = | | description = Krayce does a short range kick that starts a rekka equally as important to his gameplan as 214a/b/c | ||
}} | }} | ||
}} | |||
{{MoveData | |||
|name=Double Tornado | |||
|input=Tornado Kick ~> D | |||
|image=Krayce_214d_d.png | |||
|caption=Second Boot | |||
|data= | |||
{{AttackData-SVG | {{AttackData-SVG | ||
| damage = | | damage =20 | ||
| guard = | | guard = Mid | ||
| cancel = | | cancel = SoT | ||
| startup = | |||
| advHit = | |||
| advBlock = | |||
| description = A second kick that you can Seal of Time. Great for going into lvl 3 in burst combos | |||
}} | |||
}} | |||
{{MoveData | |||
|name=Side Attack | |||
|input=Tornado Kick ~> B | |||
|image=Krayce_214d_b.png | |||
|caption= | |||
|data= | |||
{{AttackData-SVG | |||
| damage =23 | |||
| guard = Mid | |||
| cancel = Speedy Screw, Sky Drop | |||
| startup = | | startup = | ||
| advHit = | | advHit = | ||
| advBlock = | | advBlock = | ||
| description = | | description = A fast swipe with two follow ups. Exclusively combo or pressure filler. | ||
}} | }} | ||
}} | }} | ||
{{MoveData | {{MoveData | ||
|name= | |name=Speedy Screw | ||
|image= | |input=Side Attack ~> B | ||
|caption= | |image=Krayce_214d_bb.png | ||
|caption= | |||
|data= | |data= | ||
{{AttackData-SVG | {{AttackData-SVG | ||
| damage = | | damage =98 | ||
| guard = Mid | | guard = Mid | ||
| cancel = N/A | | cancel = N/A | ||
| Line 631: | Line 755: | ||
| advHit = | | advHit = | ||
| advBlock = | | advBlock = | ||
| description = | | description = A very large multi hit move that cannot be parried low, making this a solid 50/50 on block between this and Sky Drop | ||
}} | }} | ||
}} | }} | ||
{{MoveData | {{MoveData | ||
|name= | |name=Sky Drop | ||
|image= | |input=Side Attack ~> C | ||
|caption= | |image=Krayce_214d_bc_whiff.png | ||
|caption= | |||
|data= | |data= | ||
{{AttackData-SVG | {{AttackData-SVG | ||
| damage = | | damage =104 | ||
| guard = | | guard = N/A | ||
| cancel = N/A | | cancel = N/A | ||
| startup = | | startup = | ||
| advHit = | | advHit = | ||
| advBlock = | | advBlock = | ||
| description = | | description = Command Grab ender that grants a hard knockdown. If the Side Attack hit then you need to delay your input so that they are grabbed after hitstun has ended, else the grab will whiff. During the dash forward part you can actually cancel into supers, though this isn't preferred over other specials that you can cancel into supers | ||
}} | }} | ||
}} | }} | ||
| Line 659: | Line 778: | ||
===Level 1 Supers=== | ===Level 1 Supers=== | ||
{{MoveData | {{MoveData | ||
|name= | |name=Rising Force | ||
|input=214214A/B/B | |||
|image=krayce 214214a.png | |image=krayce 214214a.png | ||
|caption=Your best super, get used to using it | |||
|caption= | |||
|data= | |data= | ||
{{AttackData-SVG | {{AttackData-SVG | ||
| damage = | | damage = 90 | ||
| guard = Mid | | guard = Mid | ||
| cancel = N/A | | cancel = N/A | ||
| Line 672: | Line 790: | ||
| advHit = | | advHit = | ||
| advBlock = | | advBlock = | ||
| description = | | description = Krayce does three quick and wide sword slices which does insane guard damage while in burst.<br> This is your best super for combos, being part of your corner infinite and in general being the super you want to end combos in. | ||
}} | |||
}} | |||
{{MoveData | |||
|name=Rising Strike | |||
|input=Rising Force ~> 236A+B | |||
|image=236afollow.png | |||
|caption=For when you don't go infinite | |||
|data= | |||
{{AttackData-SVG | {{AttackData-SVG | ||
| damage = | | damage = 100 | ||
| guard = High/Low | | guard = High/Low | ||
| cancel = | | cancel = | ||
| Line 683: | Line 807: | ||
| advHit = | | advHit = | ||
| advBlock = | | advBlock = | ||
| description = | | description =Krayce does a gigantic lightning infused swing downwards which grants you a hard knockdown, hits overhead. If you want to go for your 236C okizeme, then this is the ender. Does 100 damage when hit raw, damage will change depending on variables such as scaling and guts | ||
}} | |||
}} | |||
{{MoveData | {{MoveData | ||
|name= | |name=Tornado Blade | ||
|input=236236A/B/C | |||
|image=krayce 236236a.png | |image=krayce 236236a.png | ||
|caption= | |caption=Tornado Twister | ||
|data= | |data= | ||
{{AttackData-SVG | {{AttackData-SVG | ||
| damage = | | damage = 125 | ||
| guard = Mid | | guard = Mid | ||
| cancel = N/A | | cancel = N/A | ||
| Line 700: | Line 825: | ||
| advHit = | | advHit = | ||
| advBlock = | | advBlock = | ||
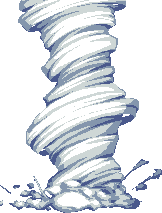
| description = | | description = Krayce summons a tornado by swinging his sword very fast that grants a hard knockdown on hit. This projectile has a very high vertical hitbox and travels 3/4 of the screen but is very east to dodge post super flash. This is also Krayce's reversal super and is invulnerable during startup. | ||
It's hard to hit this outside of corner combos or predictions but parry timing can be tricky and may catch some people off guard. Eats every other projectile except Jadou's 214214D (level 3 funny orb) | It's hard to hit this outside of corner combos or predictions but parry timing can be tricky and may catch some people off guard. Eats every other projectile except Jadou's 214214D (level 3 funny orb) | ||
| Line 708: | Line 833: | ||
===Level 3 Super=== | ===Level 3 Super=== | ||
{{MoveData | {{MoveData | ||
|name= | |name=Secret Art: Sealed God | ||
|input=641236A+B+C | |||
|image=lvl3pose.png | |image=lvl3pose.png | ||
|image2=lvl3attack.png | |image2=lvl3attack.png | ||
|caption= "YOU PRESSING BUTTONS?" | |caption= "YOU PRESSING BUTTONS?" | ||
|caption2= No sympathy | |caption2= No sympathy received | ||
|data= | |data= | ||
{{AttackData-SVG | {{AttackData-SVG | ||
| damage = | | damage = 313 | ||
| guard = Mid | | guard = Mid | ||
| cancel = N/A | | cancel = N/A | ||
| Line 721: | Line 847: | ||
| advHit = | | advHit = | ||
| advBlock = | | advBlock = | ||
| description = | | description = Krayce's LVL 3 is a blockable/parriable Raging Demon which has the longest startup of every character's level 3 super but it makes up for it by being fully invincible. | ||
Best used as enders for Burst combos or for punishing reckless zoning attempts, since it's fast and goes 3/4s of the screen. | Best used as enders for Burst combos or for punishing reckless zoning attempts, since it's fast and goes 3/4s of the screen. | ||
| Line 730: | Line 854: | ||
==Strategy== | ==Strategy== | ||
===Neutral=== | |||
Krayce's neutral game relies on using your big buttons, but not throwing them out wildly, as he lacks disjoints and can get stuffed by his own sword. | |||
Your best approaches are j.C, j.D, f.5B, 2B f.5D, dash up 2D and dash up parry. | |||
J.C is your best far range jump in because of it's range and hitstun. Most J.C's that hit can be followed up with dash up 2D/5A or cl.5C>ch.5C into your main BnB combo. J.D is your best jump in in general due to it's active frames and the amount of pressure it gives since it's very hard to react to. Even if they block the j.D, you get a mixup option (i.e 2D, 4C or grab). | |||
f.5B, 2B and f.5D are good poke buttons that you can confirm into your BnB. f.5D can actually stop your dash and the dust that Krayce kicks eats low projectiles. | |||
While Krayce does have armored moves (cl.5B, 5C and 2C), they're very inconsistent in neutral since they either get stuffed by a multi hit, are nowhere near useful (cl.5B and 5C) or just won't let you cancel from your hitconfirm (2C). So it's best to not rely on them at all. | |||
if you're knocked down, you can either choose to not respect your opponent's mixup by doing 623C on wakeup, commit to a parry on wakeup, just bite it and attempt to block your opponent's mixup, or guard cancel. | |||
If you're fighting a lot in the air (especially against Wells), use j.B religiously. However, if you're not used to air to air fights, go for 623C instead. | |||
You can easily stuff your opponents jump in with your 236236A super, as it will catch them and give you hard knockdown for your okizeme game. | |||
===Offence (On Hit)=== | |||
====HKD OKI==== | |||
Krayce's oki game is amazing, being one of the better oki games when he has you in the corner | |||
Your options on their wakeup are: | |||
236B, 236C, j.D, empty jump (into FORWARD grab, for example) | |||
Krayce's 236A/B/C is the main reason why his oki game is some of the best in the SvG when he has you in the corner. While the B version is used for punishing GC on wakeup with parries or jumps (except Jadou, since his GC is a teleport), his 236C is incredibly oppressive because of how active it is as a stationary projectile. If they block it, you get a free 50/50 high-low mixup with your 2D and 4C into your BnB. If they get hit, you follow up with your main BnB or your infinite. 236A is also a good option when the opponent is able to ground tech, as they are usually able to parry to dodge or hit you out of a 236B/C. | |||
===Offence (On Block)=== | |||
===Defense=== | |||
==Combos== | ==Combos== | ||
:Need help reading the combos? Check out the [[Spectral_vs_Generation/Glossary|'''Glossary''']] for explanations on notation and game specific terms! All damage values tested against Hiro. | |||
===Chain Combos=== | ===Chain Combos=== | ||
{| border="1em" cellpadding="3" cellspacing="0" | {| border="1em" cellpadding="3" cellspacing="0" | ||
| align="center" style="background:#f0f0f0;"|'''Chain Combo''' | | align="center" style="background:#f0f0f0;"|'''Chain Combo''' | ||
| align="center" style="background:#f0f0f0;"|''' | | align="center" style="background:#f0f0f0;"|'''Damage Per Hit''' | ||
| align="center" style="background:#f0f0f0;"|'''Notes''' | | align="center" style="background:#f0f0f0;"|'''Notes''' | ||
|- | |- | ||
|5B -> 5C | |||
| | |||
|Basic poke confirm from 5B. | |||
|- | |- | ||
| | |5A -> B -> 5C | ||
| | | | ||
|Simple 5A confirm. | |||
|- | |||
|5D -> 2B -> 5C | |||
| | | | ||
|The Same as 5A -> B -> C chain but uses 5D instead. Has much better reach. | |||
|- | |- | ||
| | |2A -> 2B -> 2C | ||
| | | | ||
|One of Krayce's low starters. Used for low starter BnBs. | |||
|- | |||
|2D -> 2B -> 2C | |||
| | |||
|Another version of Krayce's low starters using 2D instead. The better starter for low BnBs. | |||
|- | |||
|2D -> 2A -> 2B -> 2C | |||
| | | | ||
|While 2D -> 2A is chainable, it's not advised since it scales your combo a lot more. Same situation as the other two combos above otherwise. | |||
|- | |- | ||
| | |5A/5D/2A/2D -> ch.5C | ||
| | | | ||
|Chain that utilizes the Chain 5C button. Very strong starter into your BnBs | |||
|- | |||
|5D -> 5B/2B | |||
| | | | ||
|This is your main poking tool when too far to land your basic combos. Can be cancelled into your 214C/236D rekka combo. | |||
|- | |||
|} | |||
'''Note: All chains ending with 5C (not ch.5C) causes a knockdown. Therefore, they are not advised to use since you'll be wanting to go for your BnBs.''' | |||
===BnB Combos=== | |||
{| border="1em" cellpadding="3" cellspacing="0" | |||
| align="center" style="background:#f0f0f0;"|'''Combo''' | |||
| align="center" style="background:#f0f0f0;"|'''Total Damage''' | |||
| align="center" style="background:#f0f0f0;"|'''Notes''' | |||
|- | |||
| colspan="6" align="center" | '''The Corner Infinite''' | |||
|- | |||
|(Starter) > 214C ~> B ~> B ~> C (2 hits) > 214214A/B/C >> { {far.A -> 5C > 236B >> 66}x4 > far.A -> 5C > 214C ~> B ~> B ~> C (2 hits) > 214214A/B/C }x∞ | |||
|Yes | |||
|Krayce's corner infinite. Requires the opponent be standing. Wont work on Erile as he is too small nor Roze due to her hit animation causing the far.A to whiff. | |||
|- | |||
|- | |||
| colspan="6" align="center" | '''Meterless BnB''' | |||
|- | |||
|2D -> 2B -> 2C > 214C ~> B ~> B ~> C | |||
|119 | |||
|Krayce's main low starter BnB. Punishable in the corner, consider using a bar to SOT if you can. | |||
|- | |||
|cl.D -> 5C > 214D ~> D >> 66 2C OTG | |||
|110 | |||
|Krayce's main BnB for meterless kd. If you are already in the corner you do not need to dash for the 2C OTG. 2C OTG sets up for 236C Oki of 214D ~> B ~> B/C mixup | |||
|- | |||
|cl.D -> 5C > 214D ~> B ~> B | |||
|152 | |||
|More damage in exchange for no kd | |||
|- | |||
| colspan="6" align="center" | '''One Bar BnB''' | |||
|- | |||
|2D -> 2B -> 2C > 214C ~> B ~> B ~> C (SOT) >> 66 cl.5C -> C > 623C ~> 623C >> 66 | |||
|182 | |||
|This is Krayce's main corner carry combo that even goes corner to corner. The dash at the end is to put yourself right in front of the opponent for oki, although they get to ground tech. Very important to learn, since you'll be using this a lot. | |||
|- | |||
|2D -> 2B -> 2C > 214C ~> B ~> B ~> C (SOT) >> 66 B+C | |||
|156 | |||
|Your BnB with the Dust ender, still requires the dash after the SoT for the combo to work. Does less damage than your corner carry version but builds a lot of meter in comparison. | |||
|- | |||
|2D -> 2B > 214C ~> B ~> B ~> C (2 hits) > 214214A/B/C >> far.D -> 5C > 214D ~> D >> 2C (OTG) | |||
|203 | |||
|Krayce's most damaging 1 bar combo that sets up for oki. Make sure to cancel into super immediately on the 2nd hit of the final rekka part. If you don't they'll be pushed out of the combo. | |||
|- | |||
|(Corner)2D -> 2B -> 2C > 214C ~> C ~> C ~> B >> 214214C ~> 236A+B >> 2C OTG | |||
|219 | |||
|Your normal corner combo. Causes an HKD and lets you 2C OTG ino oki. | |||
|- | |||
| colspan="6" align="center" | '''2 Bar BnB''' | |||
|- | |||
|2D -> 2B -> 2C > 214B ~> C ~> C ~> B SOT >> cl.5C -> C > 623C > 236236C >> 2C (OTG) | |||
|229 | |||
|Your corner carry combo but ends with the tornado super for more damage and causes an HKD. Sets up for oki. | |||
|- | |||
|2D -> 2B -> 2C > 214C ~> B ~> B ~> C (2 hits) > 214214A/B/C >> far.D -> 5C 214D ~> B ~> B >214214A/B/C ~> 236A+B >> 2C OTG | |||
|231 | |||
|extension of your 1 bar combo of the same route. Cancel into super as soon as the last part of the 214D ~> B ~> B rekka launches the opponent into the air. | |||
|- | |||
| colspan="6" align="center" | '''3 Bar BnB''' | |||
|- | |||
|2D -> 2B -> 2C > 214C ~> B ~> B ~> C (2 hits) > 214214A/B/C >> {far.D -> 5C > 214C ~> B ~> B ~> C (2 hits) > 214214A/B/C}x2 >> far.D -> 5C > 214C ~> B ~> B ~> C > 214214A/B/C ~> 236A+B >> 2C OTG | |||
|246 | |||
|Super loop Combo. For when you really want to cash out all your meter, look cool while doing it, and not use your level 3 super. This is actually a huge waste of meter so don't actually do this unless it will kill. | |||
|- | |||
|2D -> 2B -> 2C > 214C ~> B ~> B > 641236A+B+C | |||
|322 | |||
|Extremely simple and damaging level 3 confirm. You dont want to do the last part of the 214C rekka as it hurts the overall damage | |||
|- | |||
|- | |||
| colspan="6" align="center" | '''Burst BnB''' | |||
|- | |||
|662D -> 2B -> 214D > D (SOT) >> Burst >> 623A Delayed SoT >> {2C > 623A Delayed SoT}x4 >> B+C | |||
|261 | |||
|Requires a 1 bar burst, 2 bars to start the combo. Burst has to hit to pick up on the combo. Maximizes your damage and finishes with some meter from dust. 623A > 2C loops are a bit tricky to get down, try to 2C when the opponent is at Krayce's crouching head height then immediately cancel into 623A. | |||
|- | |||
|662D -> 2B -> 214D > D (SOT) >> Burst >> 623A Delayed SoT > {2C > 623A Delayed SoT}x3 >> 214C (1 hit) > 643216A+B+C | |||
|305 | |||
|Requires a 1 bar burst, 2 bars to start the combo. Burst has to hit to pick up on the combo. Maximizes your damage and finishes with some meter from dust. 623A > 2C loops are a bit tricky to get down, try to 2C when the opponent is at Krayce's crouching head height then immediately cancel into 623A. Do the same for the 214C, if they are to low both hits of 214C will connect leading to less dmg. If you hit too high they will flip out of the combo and the level 3 will whiff, leaving you wide open. | |||
|- | |- | ||
|} | |} | ||
{{Navbox-SVG}} | {{Navbox-SVG}} | ||
Latest revision as of 15:22, 25 May 2024
| Krayce | |
|---|---|
| Health | 500 |
| Pre-Jump Frames | 4 |
| Play Style | All-Around |
| Dash Type | Step |
Character Background
Race: Human
Motivation: To destroy all the Devil Swords
Weapon: Sword Breaker
Likes: Macaroni
Dislikes: Sashimi
Gameplay Overview
|
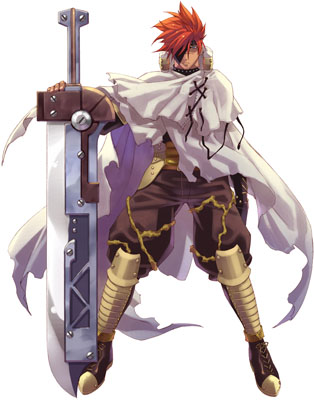
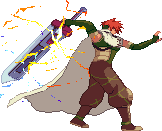
Krayce is the BIG Rekka with good movement, huge normals and impressive combo damage. While he can't two touch his opponents in comparison to other members of the cast, his corner carry more than makes up for it. Combine this with his great corner pressue, okizeme, and High/Low mixups, he can run away with a lead very quickly if he is able to get it. However, not only does Krayce have a large hurtbox because of his size, but his sword has little to no disjoints meaning that most of his pokes can easily be counterpoked. He is also extremely dependent on meter for any sort of optimal combo, as he lacks any way to confirm a hard knockdown from anything other then being on top of the opponent without meter. Even with his faults Krayce is still a character that can be a terror on block and okizeme, while still being a difficult character to approach if Krayce dosen't have to. Krayce is a big character who spends meter to take you to the corner to deal with his inescapable 50/50 mixup unless you spend meter. |
|
| Pros | Cons |
|
|
Normals
Far Standing Normals
f.5A
|
|---|
f.5B
|
|---|
f.5C The weaker overhead The weaker overhead
|
|---|
f.5D Hiro players hate him! Hiro players hate him!
|
|---|
Close Standing Normals
cl.5A
|
|---|
cl.5B
|
|---|
cl.5C
|
|---|
cl.5D
|
|---|
Crouching Normals
2A
|
|---|
2B
|
|---|
2C Making Order-Sol proud with this one Making Order-Sol proud with this one
|
|---|
2D
|
|---|
Command Normals
4C The reason people should be scared of your oki game The reason people should be scared of your oki game
|
|---|
3D I didn't mean to press this one I didn't mean to press this one
|
|---|
Jumping Normals
J.A
|
|---|
J.B Controlling the skies better than Wells ever could. Controlling the skies better than Wells ever could.
|
|---|
J.C
|
|---|
J.D The main reason your opponent should be scared of your jump-ins The main reason your opponent should be scared of your jump-ins
|
|---|
Chain Specific Normals
Chain 5C A really good combo filler A really good combo filler
|
|---|
Throws
A+D
Forward Throw |
|---|
B+D Back Throw *teleports behind you* "nothing personal, kid" *teleports behind you* "nothing personal, kid"
|
|---|
Dust (Sword Series Slash)
5B+C
|
|---|
2B+C
|
|---|
Chaos Breaking (Parry)
A+B Standing Parry Standing Parry Crouching Parry Crouching Parry Jumping Parry Jumping Parry
|
|---|
Specials
Blade Wave 236A/B/C The BnB of your Oki and corner pressure The BnB of your Oki and corner pressure
|
|---|
Sky Sword 623A/B/C One of the largest DP's in the game One of the largest DP's in the game
|
|---|
Slide Blade
Sky Sword C ~> 623C |
|---|
Wind Slide Blade 214A/B/C Distance will vary based on button pressed Distance will vary based on button pressed
|
|---|
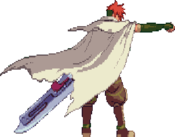
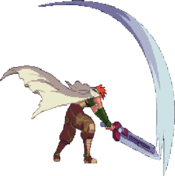
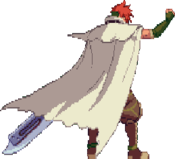
Wind Slide Sword
Wind Slide Blade ~> B ~> B ~> C |
|---|
Swallow Flight
236d |
|---|
Double Slash
Swallow Flight ~> D |
|---|
Swallow Slide Sword
Swallow Flight ~> B ~> B ~> C |
|---|
Tornado Kick 214D Boot Boot
|
|---|
Double Tornado Tornado Kick ~> D Second Boot Second Boot
|
|---|
Side Attack
Tornado Kick ~> B |
|---|
Speedy Screw
Side Attack ~> B |
|---|
Sky Drop
Side Attack ~> C |
|---|
Super Moves
Level 1 Supers
Rising Force 214214A/B/B Your best super, get used to using it Your best super, get used to using it
|
|---|
Rising Strike Rising Force ~> 236A+B For when you don't go infinite For when you don't go infinite
|
|---|
Tornado Blade 236236A/B/C Tornado Twister Tornado Twister
|
|---|
Level 3 Super
Secret Art: Sealed God 641236A+B+C "YOU PRESSING BUTTONS?" "YOU PRESSING BUTTONS?" No sympathy received No sympathy received
|
|---|
Strategy
Neutral
Krayce's neutral game relies on using your big buttons, but not throwing them out wildly, as he lacks disjoints and can get stuffed by his own sword.
Your best approaches are j.C, j.D, f.5B, 2B f.5D, dash up 2D and dash up parry.
J.C is your best far range jump in because of it's range and hitstun. Most J.C's that hit can be followed up with dash up 2D/5A or cl.5C>ch.5C into your main BnB combo. J.D is your best jump in in general due to it's active frames and the amount of pressure it gives since it's very hard to react to. Even if they block the j.D, you get a mixup option (i.e 2D, 4C or grab).
f.5B, 2B and f.5D are good poke buttons that you can confirm into your BnB. f.5D can actually stop your dash and the dust that Krayce kicks eats low projectiles.
While Krayce does have armored moves (cl.5B, 5C and 2C), they're very inconsistent in neutral since they either get stuffed by a multi hit, are nowhere near useful (cl.5B and 5C) or just won't let you cancel from your hitconfirm (2C). So it's best to not rely on them at all.
if you're knocked down, you can either choose to not respect your opponent's mixup by doing 623C on wakeup, commit to a parry on wakeup, just bite it and attempt to block your opponent's mixup, or guard cancel.
If you're fighting a lot in the air (especially against Wells), use j.B religiously. However, if you're not used to air to air fights, go for 623C instead.
You can easily stuff your opponents jump in with your 236236A super, as it will catch them and give you hard knockdown for your okizeme game.
Offence (On Hit)
HKD OKI
Krayce's oki game is amazing, being one of the better oki games when he has you in the corner
Your options on their wakeup are: 236B, 236C, j.D, empty jump (into FORWARD grab, for example)
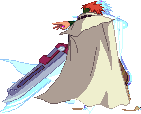
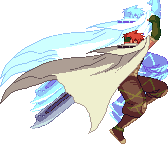
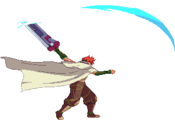
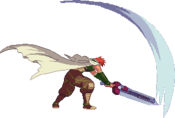
Krayce's 236A/B/C is the main reason why his oki game is some of the best in the SvG when he has you in the corner. While the B version is used for punishing GC on wakeup with parries or jumps (except Jadou, since his GC is a teleport), his 236C is incredibly oppressive because of how active it is as a stationary projectile. If they block it, you get a free 50/50 high-low mixup with your 2D and 4C into your BnB. If they get hit, you follow up with your main BnB or your infinite. 236A is also a good option when the opponent is able to ground tech, as they are usually able to parry to dodge or hit you out of a 236B/C.
Offence (On Block)
Defense
Combos
- Need help reading the combos? Check out the Glossary for explanations on notation and game specific terms! All damage values tested against Hiro.
Chain Combos
| Chain Combo | Damage Per Hit | Notes |
| 5B -> 5C | Basic poke confirm from 5B. | |
| 5A -> B -> 5C | Simple 5A confirm. | |
| 5D -> 2B -> 5C | The Same as 5A -> B -> C chain but uses 5D instead. Has much better reach. | |
| 2A -> 2B -> 2C | One of Krayce's low starters. Used for low starter BnBs. | |
| 2D -> 2B -> 2C | Another version of Krayce's low starters using 2D instead. The better starter for low BnBs. | |
| 2D -> 2A -> 2B -> 2C | While 2D -> 2A is chainable, it's not advised since it scales your combo a lot more. Same situation as the other two combos above otherwise. | |
| 5A/5D/2A/2D -> ch.5C | Chain that utilizes the Chain 5C button. Very strong starter into your BnBs | |
| 5D -> 5B/2B | This is your main poking tool when too far to land your basic combos. Can be cancelled into your 214C/236D rekka combo. |
Note: All chains ending with 5C (not ch.5C) causes a knockdown. Therefore, they are not advised to use since you'll be wanting to go for your BnBs.
BnB Combos
| Combo | Total Damage | Notes | |||
| The Corner Infinite | |||||
| (Starter) > 214C ~> B ~> B ~> C (2 hits) > 214214A/B/C >> { {far.A -> 5C > 236B >> 66}x4 > far.A -> 5C > 214C ~> B ~> B ~> C (2 hits) > 214214A/B/C }x∞ | Yes | Krayce's corner infinite. Requires the opponent be standing. Wont work on Erile as he is too small nor Roze due to her hit animation causing the far.A to whiff. | |||
| Meterless BnB | |||||
| 2D -> 2B -> 2C > 214C ~> B ~> B ~> C | 119 | Krayce's main low starter BnB. Punishable in the corner, consider using a bar to SOT if you can. | |||
| cl.D -> 5C > 214D ~> D >> 66 2C OTG | 110 | Krayce's main BnB for meterless kd. If you are already in the corner you do not need to dash for the 2C OTG. 2C OTG sets up for 236C Oki of 214D ~> B ~> B/C mixup | |||
| cl.D -> 5C > 214D ~> B ~> B | 152 | More damage in exchange for no kd | |||
| One Bar BnB | |||||
| 2D -> 2B -> 2C > 214C ~> B ~> B ~> C (SOT) >> 66 cl.5C -> C > 623C ~> 623C >> 66 | 182 | This is Krayce's main corner carry combo that even goes corner to corner. The dash at the end is to put yourself right in front of the opponent for oki, although they get to ground tech. Very important to learn, since you'll be using this a lot. | |||
| 2D -> 2B -> 2C > 214C ~> B ~> B ~> C (SOT) >> 66 B+C | 156 | Your BnB with the Dust ender, still requires the dash after the SoT for the combo to work. Does less damage than your corner carry version but builds a lot of meter in comparison. | |||
| 2D -> 2B > 214C ~> B ~> B ~> C (2 hits) > 214214A/B/C >> far.D -> 5C > 214D ~> D >> 2C (OTG) | 203 | Krayce's most damaging 1 bar combo that sets up for oki. Make sure to cancel into super immediately on the 2nd hit of the final rekka part. If you don't they'll be pushed out of the combo. | |||
| (Corner)2D -> 2B -> 2C > 214C ~> C ~> C ~> B >> 214214C ~> 236A+B >> 2C OTG | 219 | Your normal corner combo. Causes an HKD and lets you 2C OTG ino oki. | |||
| 2 Bar BnB | |||||
| 2D -> 2B -> 2C > 214B ~> C ~> C ~> B SOT >> cl.5C -> C > 623C > 236236C >> 2C (OTG) | 229 | Your corner carry combo but ends with the tornado super for more damage and causes an HKD. Sets up for oki. | |||
| 2D -> 2B -> 2C > 214C ~> B ~> B ~> C (2 hits) > 214214A/B/C >> far.D -> 5C 214D ~> B ~> B >214214A/B/C ~> 236A+B >> 2C OTG | 231 | extension of your 1 bar combo of the same route. Cancel into super as soon as the last part of the 214D ~> B ~> B rekka launches the opponent into the air. | |||
| 3 Bar BnB | |||||
| 2D -> 2B -> 2C > 214C ~> B ~> B ~> C (2 hits) > 214214A/B/C >> {far.D -> 5C > 214C ~> B ~> B ~> C (2 hits) > 214214A/B/C}x2 >> far.D -> 5C > 214C ~> B ~> B ~> C > 214214A/B/C ~> 236A+B >> 2C OTG | 246 | Super loop Combo. For when you really want to cash out all your meter, look cool while doing it, and not use your level 3 super. This is actually a huge waste of meter so don't actually do this unless it will kill. | |||
| 2D -> 2B -> 2C > 214C ~> B ~> B > 641236A+B+C | 322 | Extremely simple and damaging level 3 confirm. You dont want to do the last part of the 214C rekka as it hurts the overall damage | |||
| Burst BnB | |||||
| 662D -> 2B -> 214D > D (SOT) >> Burst >> 623A Delayed SoT >> {2C > 623A Delayed SoT}x4 >> B+C | 261 | Requires a 1 bar burst, 2 bars to start the combo. Burst has to hit to pick up on the combo. Maximizes your damage and finishes with some meter from dust. 623A > 2C loops are a bit tricky to get down, try to 2C when the opponent is at Krayce's crouching head height then immediately cancel into 623A. | |||
| 662D -> 2B -> 214D > D (SOT) >> Burst >> 623A Delayed SoT > {2C > 623A Delayed SoT}x3 >> 214C (1 hit) > 643216A+B+C | 305 | Requires a 1 bar burst, 2 bars to start the combo. Burst has to hit to pick up on the combo. Maximizes your damage and finishes with some meter from dust. 623A > 2C loops are a bit tricky to get down, try to 2C when the opponent is at Krayce's crouching head height then immediately cancel into 623A. Do the same for the 214C, if they are to low both hits of 214C will connect leading to less dmg. If you hit too high they will flip out of the combo and the level 3 will whiff, leaving you wide open. | |||
