![]()

Duels of Fortune/Red: Difference between revisions
Jump to navigation
Jump to search


Character Properties
| (5 intermediate revisions by 2 users not shown) | |||
| Line 3: | Line 3: | ||
|overview=Give an overview of the char. | |overview=Give an overview of the char. | ||
|intro= ''' | |intro= '''Red''' *briefly describe playstyle*. | ||
|pros= | |pros= | ||
| Line 13: | Line 13: | ||
|border=yes|tablewidth=102 | |border=yes|tablewidth=102 | ||
|flex_data=<tabber> | |flex_data=<tabber> | ||
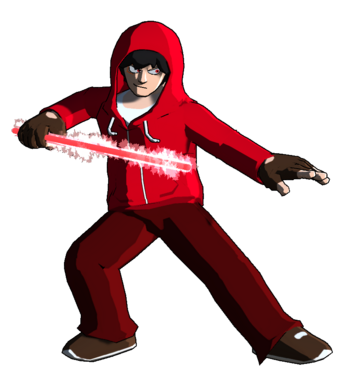
|-| | |-|Hoodie= | ||
[[File: | [[File:DoF_Red_Name.png|75px]] <br> | ||
[[File: | [[File:DoF_Red_profile.png|300px]] | ||
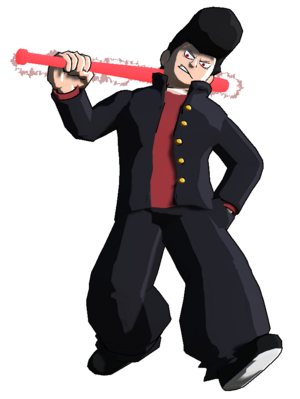
|-| | |-|Gakuran= | ||
[[File: | [[File:DoF_Red_Name.png|75px]] <br> | ||
[[File: | [[File:DoF_Red_profile_Gakuran.png|300px]] | ||
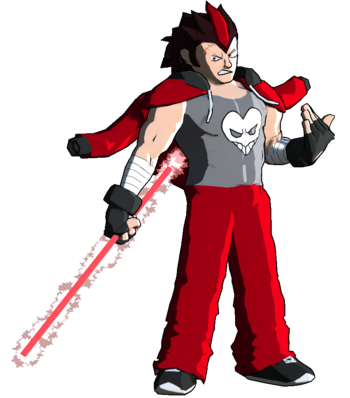
|-|Rugged= | |||
[[File:DoF_Red_Name.png|75px]] <br> | |||
[[File:DoF_Red_profile_Rugged.png|350px]] | |||
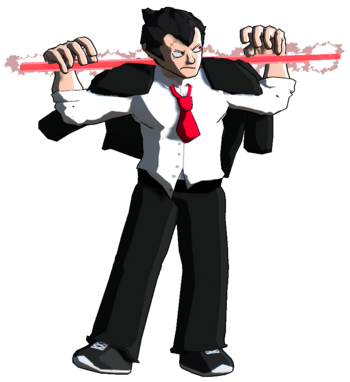
|-|Classic= | |||
[[File:DoF_Red_Name.png|75px]] <br> | |||
[[File:DoF_Red_profile_Classic.png|350px]] | |||
|-|Scruffy Suit= | |||
[[File:DoF_Red_Name.png|75px]] <br> | |||
[[File:DoF_Red_profile_Scruffy_Suit.png|350px]] | |||
|-|Rat Mask= | |||
[[File:DoF_Red_Name_Ricky_Travis.png|200px]] <br> | |||
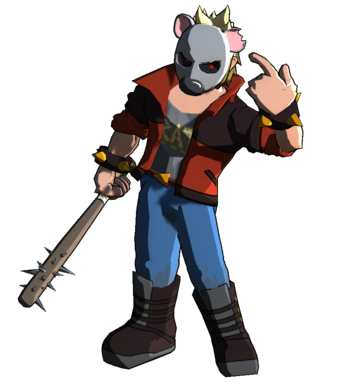
[[File:DoF_Red_profile_Rat_Mask.png|350px]] | |||
</tabber> <br> | </tabber> <br> | ||
<table style="width: 100%; border-collapse: collapse;"> | <table class="wikitable" style="width: 100%; border: none; background: none; border-collapse: collapse;"> | ||
'''Character Properties''' | '''Character Properties''' | ||
<tr><td style="text-align: left;">'''Health''' | <tr> | ||
<td style="text-align: left; border-style: none none solid none;">'''''Health''''' <td style="width:48%; border-style: none none solid none; text-align: right;"><br> '''26000''' | |||
<tr> | |||
<td style="text-align: left; border-style: none none solid none;">'''''Backdash''''' <td style="width:48%; border-style: none none solid none; text-align: right;"><br> '''XF''' | |||
<tr> | |||
</table> | <td style="width:25%; text-align: left; border-style: none none solid none;">'''''Unique Movement''''' <td style="width:48%; border-style: none none solid none; text-align: right;"><br> '''None''' | ||
<tr> | |||
<td style="text-align: left; border-style: none none none none;">'''''Fastest Attack''''' <td style="width:48%; border-style: none none none none; text-align: right;"><br> '''X (XF)''' | |||
</table> | |||
}} | }} | ||
{{FP Box | {{FP Box | ||
|header=Unique Mechanic: | |header=Unique Mechanic: Rage Meter | ||
|content= | |content=On top of the regular super meter, Red has the Rage Meter. <br> | ||
}} | }} | ||
| Line 46: | Line 56: | ||
{{Content Box|header=Move list|content= | {{Content Box|header=Move list|content= | ||
;Command Normals | ;Command Normals | ||
:4H - '' | :4H - ''Spinecracker'': A command grab that can OTG. Works well as a combo tool. | ||
:j.2H - ''Scarlet Spinner'': A multi-hit air-to-air. | |||
;Special Moves | ;Special Moves | ||
:5S - '' | :5S - ''Bruiser Beatdown'': 3-hit rekka with a built-in mixup. 5S on the last hit is an overhead while 2S is a mid. Raging version is instead a command grab. | ||
:4S - '' | :4S - ''Riot Fist'': A projectile invincible approach that wall bounces. Raging version knocks the opponent behind you. | ||
:2S - '' | :2S - ''Rebel Reversal'': Anti-air command grab. Raging version ground bounces. | ||
:j.S - '' | :j.S - ''Breaker Ball'': Air-to-ground projectile. The explosion knocks the opponent towards you. Raging version goes at a better angle and always knocks the opponent towards you.. | ||
;Supers | ;Supers | ||
:5SP - '' | :5SP - ''Breaker Barrage'': A barrage of projectiles. Raging version follows up with a giant projectile. | ||
:2SP - '' | :2SP - ''Beam Overdrive'': Big overhead super that floor bounces. Raging version has an additional follow-up. | ||
}} | }} | ||
|content2= | |content2= | ||
| Line 115: | Line 126: | ||
{{MoveData | {{MoveData | ||
|name=2L | |name=2L | ||
|input=[[File: | |input=[[File:DoF_Direction_Down.png|25px|link=]][[File:DoF_Buttons_L.png|25px|link=]] | ||
|image=DoF__2L.png | |image=DoF__2L.png | ||
|hitbox=DoF__2L_Hitbox.png | |hitbox=DoF__2L_Hitbox.png | ||
| Line 131: | Line 142: | ||
{{MoveData | {{MoveData | ||
|name=2M | |name=2M | ||
|input=[[File: | |input=[[File:DoF_Direction_Down.png|25px|link=]][[File:DoF_Buttons_M.png|25px|link=]] | ||
|image=DoF__2M.png | |image=DoF__2M.png | ||
|hitbox=DoF__2M_Hitbox.png | |hitbox=DoF__2M_Hitbox.png | ||
| Line 147: | Line 158: | ||
{{MoveData | {{MoveData | ||
|name=2H | |name=2H | ||
|input=[[File: | |input=[[File:DoF_Direction_Down.png|25px|link=]][[File:DoF_Buttons_H.png|25px|link=]] | ||
|image=DoF__2H.png | |image=DoF__2H.png | ||
|hitbox=DoF__2H_Hitbox.png | |hitbox=DoF__2H_Hitbox.png | ||
| Line 163: | Line 174: | ||
{{MoveData | {{MoveData | ||
|name=j.L | |name=j.L | ||
|input=[[File: | |input=[[File:DoF_Direction_Up.png|25px|link=]][[File:DoF_Buttons_L.png|25px|link=]] | ||
|image=DoF__jL.png | |image=DoF__jL.png | ||
|hitbox=DoF__jL_Hitbox.png | |hitbox=DoF__jL_Hitbox.png | ||
| Line 179: | Line 190: | ||
{{MoveData | {{MoveData | ||
|name=j.M | |name=j.M | ||
|input=[[File: | |input=[[File:DoF_Direction_Up.png|25px|link=]][[File:DoF_Buttons_M.png|25px|link=]] | ||
|image=DoF__M.png | |image=DoF__M.png | ||
|hitbox=DoF__jM_Hitbox.png | |hitbox=DoF__jM_Hitbox.png | ||
| Line 195: | Line 206: | ||
{{MoveData | {{MoveData | ||
|name=j.H | |name=j.H | ||
|input=[[File: | |input=[[File:DoF_Direction_Up.png|25px|link=]][[File:DoF_Buttons_H.png|25px|link=]] | ||
|image=DoF__jH.png | |image=DoF__jH.png | ||
|hitbox=DoF__jH_Hitbox.png | |hitbox=DoF__jH_Hitbox.png | ||
| Line 214: | Line 225: | ||
{{MoveData | {{MoveData | ||
|name='''Command Normal Name''' | |name='''Command Normal Name''' | ||
|input = 4H <br> [[File: | |input = 4H <br> [[File:DoF_Direction_Left.png|20px|link=]][[File:DoF_Buttons_H.png|20px|link=]] | ||
|image=DoF__4H.png | |image=DoF__4H.png | ||
|hitbox=DoF__4H_Hitbox.png | |hitbox=DoF__4H_Hitbox.png | ||
| Line 233: | Line 244: | ||
{{MoveData | {{MoveData | ||
|name=Throw | |name=Throw | ||
|input = 6H <br> [[File: | |input = 6H <br> [[File:DoF_Direction_Right.png|20px|link=]][[File:DoF_Buttons_H.png|20px|link=]] | ||
|image=DoF__6H.png | |image=DoF__6H.png | ||
|hitbox=DoF__6H_Hitbox.png | |hitbox=DoF__6H_Hitbox.png | ||
| Line 319: | Line 330: | ||
{{MoveData | {{MoveData | ||
|name=Down Taunt | |name=Down Taunt | ||
|input = 2T <br> [[File: | |input = 2T <br> [[File:DoF_Direction_Down.png|20px|link=]][[File:DoF_Buttons_Taunt.png|15px|link=]] | ||
|image=DoF__2T.png | |image=DoF__2T.png | ||
|hitbox=DoF__2T_Hitbox.png | |hitbox=DoF__2T_Hitbox.png | ||
| Line 353: | Line 364: | ||
{{MoveData | {{MoveData | ||
|name='''Special Name''' | |name='''Special Name''' | ||
|input = 4S <br> [[File: | |input = 4S <br> [[File:DoF_Direction_Left.png|20px|link=]][[File:DoF_Buttons_S.png|20px|link=]] | ||
|image=DoF__4S.png | |image=DoF__4S.png | ||
|hitbox=DoF__4S_Hitbox.png | |hitbox=DoF__4S_Hitbox.png | ||
| Line 369: | Line 380: | ||
{{MoveData | {{MoveData | ||
|name='''Special Name''' | |name='''Special Name''' | ||
|input = 2S <br> [[File: | |input = 2S <br> [[File:DoF_Direction_Down.png|20px|link=]][[File:DoF_Buttons_S.png|20px|link=]] | ||
|image=DoF__2S.png | |image=DoF__2S.png | ||
|hitbox=DoF__2S_Hitbox.png | |hitbox=DoF__2S_Hitbox.png | ||
| Line 385: | Line 396: | ||
{{MoveData | {{MoveData | ||
|name='''Special Name''' | |name='''Special Name''' | ||
|input = j.S <br> [[File: | |input = j.S <br> [[File:DoF_Direction_Up.png|20px|link=]][[File:DoF_Buttons_S.png|20px|link=]] | ||
|image=DoF__jS.png | |image=DoF__jS.png | ||
|hitbox=DoF__jS_Hitbox.png | |hitbox=DoF__jS_Hitbox.png | ||
| Line 422: | Line 433: | ||
{{MoveData | {{MoveData | ||
|name='''Super Name''' | |name='''Super Name''' | ||
|input = 2SP <br> [[File: | |input = 2SP <br> [[File:DoF_Direction_Down.png|20px|link=]][[File:DoF_Buttons_Super.png|30px|link=]] | ||
|image=DoF__2SP.png | |image=DoF__2SP.png | ||
|hitbox=DoF__2SP_Hitbox.png | |hitbox=DoF__2SP_Hitbox.png | ||
| Line 556: | Line 567: | ||
[[Category:Duels of Fortune]] | [[Category:Duels of Fortune]] | ||
[[Category: | [[Category:DoF Red]] | ||
Latest revision as of 17:06, 16 May 2024
Overview
Give an overview of the char.
Playstyle
| Red *briefly describe playstyle*. | |
| Pros | Cons |
|
|


Character Properties
| Health | 26000 |
| Backdash | XF |
| Unique Movement | None |
| Fastest Attack | X (XF) |
Unique Mechanic: Rage Meter
On top of the regular super meter, Red has the Rage Meter.
Character Summary
Move list
- Command Normals
- 4H - Spinecracker: A command grab that can OTG. Works well as a combo tool.
- j.2H - Scarlet Spinner: A multi-hit air-to-air.
- Special Moves
- 5S - Bruiser Beatdown: 3-hit rekka with a built-in mixup. 5S on the last hit is an overhead while 2S is a mid. Raging version is instead a command grab.
- 4S - Riot Fist: A projectile invincible approach that wall bounces. Raging version knocks the opponent behind you.
- 2S - Rebel Reversal: Anti-air command grab. Raging version ground bounces.
- j.S - Breaker Ball: Air-to-ground projectile. The explosion knocks the opponent towards you. Raging version goes at a better angle and always knocks the opponent towards you..
- Supers
- 5SP - Breaker Barrage: A barrage of projectiles. Raging version follows up with a giant projectile.
- 2SP - Beam Overdrive: Big overhead super that floor bounces. Raging version has an additional follow-up.
Quick combo reference
5L > 5M > 5H > 5S: Easy combo for helping beginners. Put a brief description here.
Normal Moves
5L
|
|
|---|---|
Toggle Hitboxes Toggle Hitboxes
|
5M Caption Caption
|
|
|---|---|
Toggle Hitboxes Toggle Hitboxes
|
5H
|
|
|---|---|
Toggle Hitboxes Toggle Hitboxes
|
2L
|
|
|---|---|
Toggle Hitboxes Toggle Hitboxes
|
2M
|
|
|---|---|
Toggle Hitboxes Toggle Hitboxes
|
2H
|
|
|---|---|
Toggle Hitboxes Toggle Hitboxes
|
j.L
|
|
|---|---|
Toggle Hitboxes Toggle Hitboxes
|
j.M
|
|
|---|---|
Toggle Hitboxes Toggle Hitboxes
|
j.H
|
|
|---|---|
Toggle Hitboxes Toggle Hitboxes
|
Command Normals
Command Normal Name
4H |
|
|---|---|
Toggle Hitboxes Toggle Hitboxes
|
Universal Mechanics
Throw
Throw
6H |
|
|---|---|
Toggle Hitboxes Toggle Hitboxes
|
Reversals
Reversal
5R |
|
|---|---|
Toggle Hitboxes Toggle Hitboxes
|
Wakeup Reversal
5R on Wakeup |
|
|---|---|
Toggle Hitboxes Toggle Hitboxes
|
Burst
Burst
5B |
|
|---|---|
Toggle Hitboxes Toggle Hitboxes
|
Taunt
Only add this section if a character has a taunt with a hitbox or some other unique effect like Sylvan's cheat. Otherwise remove it.
Taunt
5T |
|
|---|---|
Toggle Hitboxes Toggle Hitboxes
|
Down Taunt
2T |
|
|---|---|
Toggle Hitboxes Toggle Hitboxes
|
Special Moves
Special Name
5S |
|
|---|---|
Toggle Hitboxes Toggle Hitboxes
|
Special Name
4S |
|
|---|---|
Toggle Hitboxes Toggle Hitboxes
|
Special Name
2S |
|
|---|---|
Toggle Hitboxes Toggle Hitboxes
|
Special Name
j.S |
|
|---|---|
Toggle Hitboxes Toggle Hitboxes
|
Super Move
Super Name 5SP Informative and maybe funny caption Informative and maybe funny caption
|
|
|---|---|
Toggle Hitboxes Toggle Hitboxes
|
Super Name 2SP Informative and maybe funny caption Informative and maybe funny caption
|
|
|---|---|
Toggle Hitboxes Toggle Hitboxes
|
Strategy
Neutral
Describe how a character plays the neutral game. Add sub-categories if necessary, these should usually be on how you use a specific move.
Offense
Describe how a character runs their offense.
Defense
Describe how a character defends themselves when they're on the receiving end.
Additional Resources
Links to any additional resources like a tutorial video, delete category if there are none. If there aren't any but one gets made later, then re-add the category.
Additional Categories
Add any further categories as needed, just make sure they're worth a whole section.
Combos
General info on a character's combos, such as if they can always end a combo with a super as an ender rather than usual listed enders.
Combo Legend
| ||||||||||||||||||||||||||||||||||||||||||
| ||||||||||||||||||||||||||||||||||||||||||
Basic Combos
Easy combos for starting.
| Combo | Damage | Difficulty | Meter Spent | Position | Notes |
|---|---|---|---|---|---|
| 5L > 5M > 5H > 5S, Ender | X | Very Easy/Easy/Medium/Hard/Very Hard | 0/50/100 | Midscreen/Corner/Near Corner/From Corner |
Description of the combo. |
| Combo | Damage | Difficulty | Meter Spent | Position | Notes |
| 2L > 2M > 2H > 2S, Ender | X | Very Easy/Easy/Medium/Hard/Very Hard | 0/50/100 | Midscreen/Corner/Near Corner/From Corner |
Description of the combo. |
Advanced Combos
Harder combos that deal more damage or provide some other benefit.
| Combo | Damage | Difficulty | Meter Spent | Position | Notes |
|---|---|---|---|---|---|
| 5L > 5M > 5H > 5S, Ender | X | Very Easy/Easy/Medium/Hard/Very Hard | 0/50/100 | Midscreen/Corner/Near Corner/From Corner |
Description of the combo. |
| Combo | Damage | Difficulty | Meter Spent | Position | Notes |
| 2L > 2M > 2H > 2S, Ender | X | Very Easy/Easy/Medium/Hard/Very Hard | 0/50/100 | Midscreen/Corner/Near Corner/From Corner |
Description of the combo. |
X Combo Category
If a character has a specific kind of combo they do that has multiple variants, then you can make a new category for it. If they don't delete this.
| Combo | Damage | Difficulty | Meter Spent | Position | Notes |
|---|---|---|---|---|---|
| 5L > 5M > 5H > 5S, Ender | X | Very Easy/Easy/Medium/Hard/Very Hard | 0/50/100 | Midscreen/Corner/Near Corner/From Corner |
Description of the combo. |
| Combo | Damage | Difficulty | Meter Spent | Position | Notes |
| 2L > 2M > 2H > 2S, Ender | X | Very Easy/Easy/Medium/Hard/Very Hard | 0/50/100 | Midscreen/Corner/Near Corner/From Corner |
Description of the combo. |
Enders
List of combo enders a character has when there's multiple enders they can pick between, such as sacrificing oki for damage and vice-versa.
| Combo | Damage | Difficulty | Meter Spent | Position | Notes |
|---|---|---|---|---|---|
| 2H > 2S | X | Very Easy/Easy/Medium/Hard/Very Hard | 0/50/100 | Midscreen/Corner/Near Corner/From Corner |
Description of the ender. |
| Combo | Damage | Difficulty | Meter Spent | Position | Notes |
| 2H > 2SP | X | Very Easy/Easy/Medium/Hard/Very Hard | 0/50/100 | Midscreen/Corner/Near Corner/From Corner |
Description of the ender. |
Colors
_X_(Costume_Name)_Icon.png)
_X_(Costume_Name)_Colors.png)
Trivia
- Fun facts about the character. If it isn't redundant with something else said on the page, these can be pulled directly from the game.
Red Wiki Roadmap
| 0% complete | |
|
|
| Page | Completed | To-do | Score |
|---|---|---|---|
| 0/25 | |||
| Move List | 0/25 | ||
| Strategy | 0/25 | ||
| Combos | 0/25 |