![]()

Duels of Fortune/Rattlebone: Difference between revisions
Jump to navigation
Jump to search


Character Properties
| (8 intermediate revisions by 2 users not shown) | |||
| Line 1: | Line 1: | ||
======<span style="visibility:hidden;font-size:0">Overview</span>====== | ======<span style="visibility:hidden;font-size:0">Overview</span>====== | ||
{{FP Overview | {{FP Overview | ||
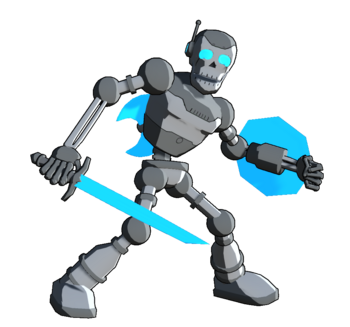
|overview= | |overview=Rattlebone is DoF's jack of all trades, with a very well rounded moveset that leaves him lacking nowhere. Thanks to his trusty sword, many of his normals like '''2M''', '''5H''', '''2H''', and '''j.2H''' are long range disjoints. He can convert well off these too, making his mid range game quite potent. His projectiles are solid too, with '''2S''', '''j.2S''', and '''5S''' having different utilities for both pressure and neutral. Adding on to this is his '''4S''', Shield Bash, one of the strongest armored moves in the game. Beyond uses on defense, it's also a powerful neutral tool and has uses in pressure. Taking his strong oki and reversals into account too and you get one of the best characters at playing from any situation. | ||
|intro= ''' | This isn't to say Rattlebone is a flawless character though. His sword normals have extra recovery, which both makes him more susceptible to both whiff punishes and guard cancels. He also has fairly mediocre mixups on regular blockstrings, with no way to go into his overhead options when '''5S''' or '''2SP''' aren't active. This means his main options to open up opponents are staggers and throws, which are much more interactable. Perhaps his biggest flaw though is his inherent attribute of being a jack of all trades. While Rattlebone can do well in any situation, he can also find himself outclassed by dedicated archetypes, such as Baron's close range game, Blackheart's okizeme, or ERROR's zoning. These flaws though can be overcome when his kit is used to its full potential, with his adaptability allowing him to theoretically handle any matchup. | ||
|intro= '''Rattlebone''' is DoF's all rounder, with answers for every situation. | |||
|pros= | |pros= | ||
* ''' | * '''Space Control''' - Many of Rattlebone's normals are long disjoints, and like much of the cast, he can reliably get full combos from these normals. Furthermore, while not on the same level as dedicated zoners, Rattlebone's projectile game using '''2S''', '''j.2S''', and '''5S''' can't be discounted. | ||
* '''Strong Armored Threat''' - Rattlebone's '''4S''', Shield Bash, is one of the strongest armored options in the game. While the armor isn't fast enough to reliably escape pressure, the move's very long range, strong hitbox, and ability to whiff cancel into follow-ups for safety makes it a key part of his gameplan. | |||
* '''Powerful Okizeme''' - Oki using Rattlebone's '''5S''' is very powerful, giving him plus frames to enforce a high low mixup using his '''j.2H''' or to stagger his throw. | |||
* '''Great Reversals''' - Both of Rattlebone's reversals are notably large, with his regular reversal in particular hitting far behind him. | |||
|cons= | |cons= | ||
* ''' | * '''High Recovery on Normals''' - Rattlebone's normals have notably more recovery than other characters. Beyond making him more susceptible to whiff punishes, he also has a harder time than normal dealing with guard cancels. | ||
* '''Mediocre Mixup without Oki or Install''' - Rattlebone's only enforceable mixup without either '''5S''' oki or '''2SP''' install is hit throw, which while certainly workable is much easier to interact with. | |||
* '''Master of None''' - While strong in all situations, Rattlebone can be outlcassed in specific areas by specialized characters. | |||
|border=yes|tablewidth=102 | |border=yes|tablewidth=102 | ||
|flex_data=<tabber> | |flex_data=<tabber> | ||
|-| | |-|Knight= | ||
[[File: | [[File:DoF_Rattlebone_Name.png|100px]] <br> | ||
[[File: | [[File:DoF_Rattlebone_profile.png|350px]] | ||
|-| | |-|Robot= | ||
[[File: | [[File:DoF_Rattlebone_Name_Robobone.png|100px]] <br> | ||
[[File: | [[File:DoF_Rattlebone_profile_Robot.png|350px]] | ||
|-|Disguised= | |||
[[File:DoF_Rattlebone_Name.png|100px]] <br> | |||
[[File:DoF_Rattlebone_profile_Disguised.png|225px]] | |||
|-|Lifeguard= | |||
[[File:DoF_Rattlebone_Name.png|100px]] <br> | |||
[[File:DoF_Rattlebone_profile_Lifeguard.png|260px]] | |||
|-|Chez Mick= | |||
[[File:DoF_Rattlebone_Name.png|100px]] <br> | |||
[[File:DoF_Rattlebone_profile_Chez_Mick.png|400px]] | |||
|-|Stylish Suit= | |||
[[File:DoF_Rattlebone_Name.png|100px]] <br> | |||
[[File:DoF_Rattlebone_profile_Stylish_Suit.png|250px]] | |||
|-|Royal Armour= | |||
[[File:DoF_Rattlebone_Name.png|100px]] <br> | |||
[[File:DoF_Rattlebone_profile_Full_Armour.png|255px]] | |||
</tabber> <br> | </tabber> <br> | ||
<table style="width: 100%; border-collapse: collapse;"> | <table class="wikitable" style="width: 100%; border: none; background: none; border-collapse: collapse;"> | ||
'''Character Properties''' | '''Character Properties''' | ||
<tr><td style="text-align: left;">'''Health''' | <tr> | ||
<td style="text-align: left; border-style: none none solid none;">'''''Health''''' <td style="width:48%; border-style: none none solid none; text-align: right;"><br> '''24000''' | |||
<tr> | |||
<td style="text-align: left; border-style: none none solid none;">'''''Backdash''''' <td style="width:48%; border-style: none none solid none; text-align: right;"><br> '''XF''' | |||
<tr> | |||
<td style="width:25%; text-align: left; border-style: none none solid none;">'''''Unique Movement''''' <td style="width:48%; border-style: none none solid none; text-align: right;"><br> '''None''' | |||
<tr> | |||
<td style="text-align: left; border-style: none none none none;">'''''Fastest Attack''''' <td style="width:48%; border-style: none none none none; text-align: right;"><br> '''5L (XF)''' | |||
</table> | |||
}} | }} | ||
| Line 49: | Line 64: | ||
:j.2H - ''Jaw Drop'': An overhead dive that goes straight down. | :j.2H - ''Jaw Drop'': An overhead dive that goes straight down. | ||
;Special Moves | ;Special Moves | ||
:5S - ''Skull Toss'': Rattlebone throws his head, which bounces towards him. This move can be used again when it makes contact with him or bounces 5 times. The skull has a hurtbox | :5S - ''Skull Toss'': Rattlebone throws his head, which bounces towards him. This move can be used again when it makes contact with him or bounces 5 times. The skull has a hurtbox that can be hit to do damage to Rattlebone. | ||
:4S - ''Shield Bash'': An armored | :4S - ''Shield Bash'': An armored charge that has two follow-ups. | ||
:4S->8 - ''Kingbone Slicer'': A series of spinning slashes through the air. Can be angled with 6 or 4. | :4S->8 - ''Kingbone Slicer'': A series of spinning slashes through the air. Can be angled with 6 or 4. | ||
:4S->S - ''Tibia Chopper'': A low follow-up that | :4S->S - ''Tibia Chopper'': A low follow-up that causes a hard knockdown. | ||
:( | :2S (Air OK) - ''Spinal Axe'': An arcing projectile. Ground version goes upwards and can be jump canceled on hit. Air version goes downwards. | ||
:j.S - ''Haunted Slash'': A big and fast aerial hitbox. | :j.S - ''Haunted Slash'': A big and fast aerial attack with a large hitbox. | ||
;Supers | ;Supers | ||
:5SP - ''Skeletal Spinner'': A big barrage of hitboxes that hits both sides. | :5SP - ''Skeletal Spinner'': A big barrage of hitboxes that hits both sides. Anti-air invincible. | ||
:2SP - ''Chivalrous Spirit'': An install boosting the power of all of Rattlebone's sword attacks for a short period of time. | :2SP - ''Chivalrous Spirit'': An install boosting the power of all of Rattlebone's sword attacks for a short period of time. | ||
}} | }} | ||
| Line 118: | Line 133: | ||
{{MoveData | {{MoveData | ||
|name=2L | |name=2L | ||
|input=[[File: | |input=[[File:DoF_Direction_Down.png|25px|link=]][[File:DoF_Buttons_L.png|25px|link=]] | ||
|image=DoF__2L.png | |image=DoF__2L.png | ||
|hitbox=DoF__2L_Hitbox.png | |hitbox=DoF__2L_Hitbox.png | ||
| Line 134: | Line 149: | ||
{{MoveData | {{MoveData | ||
|name=2M | |name=2M | ||
|input=[[File: | |input=[[File:DoF_Direction_Down.png|25px|link=]][[File:DoF_Buttons_M.png|25px|link=]] | ||
|image=DoF__2M.png | |image=DoF__2M.png | ||
|hitbox=DoF__2M_Hitbox.png | |hitbox=DoF__2M_Hitbox.png | ||
| Line 150: | Line 165: | ||
{{MoveData | {{MoveData | ||
|name=2H | |name=2H | ||
|input=[[File: | |input=[[File:DoF_Direction_Down.png|25px|link=]][[File:DoF_Buttons_H.png|25px|link=]] | ||
|image=DoF__2H.png | |image=DoF__2H.png | ||
|hitbox=DoF__2H_Hitbox.png | |hitbox=DoF__2H_Hitbox.png | ||
| Line 166: | Line 181: | ||
{{MoveData | {{MoveData | ||
|name=j.L | |name=j.L | ||
|input=[[File: | |input=[[File:DoF_Direction_Up.png|25px|link=]][[File:DoF_Buttons_L.png|25px|link=]] | ||
|image=DoF__jL.png | |image=DoF__jL.png | ||
|hitbox=DoF__jL_Hitbox.png | |hitbox=DoF__jL_Hitbox.png | ||
| Line 182: | Line 197: | ||
{{MoveData | {{MoveData | ||
|name=j.M | |name=j.M | ||
|input=[[File: | |input=[[File:DoF_Direction_Up.png|25px|link=]][[File:DoF_Buttons_M.png|25px|link=]] | ||
|image=DoF__M.png | |image=DoF__M.png | ||
|hitbox=DoF__jM_Hitbox.png | |hitbox=DoF__jM_Hitbox.png | ||
| Line 198: | Line 213: | ||
{{MoveData | {{MoveData | ||
|name=j.H | |name=j.H | ||
|input=[[File: | |input=[[File:DoF_Direction_Up.png|25px|link=]][[File:DoF_Buttons_H.png|25px|link=]] | ||
|image=DoF__jH.png | |image=DoF__jH.png | ||
|hitbox=DoF__jH_Hitbox.png | |hitbox=DoF__jH_Hitbox.png | ||
| Line 217: | Line 232: | ||
{{MoveData | {{MoveData | ||
|name='''Command Normal Name''' | |name='''Command Normal Name''' | ||
|input = 4H <br> [[File: | |input = 4H <br> [[File:DoF_Direction_Left.png|20px|link=]][[File:DoF_Buttons_H.png|20px|link=]] | ||
|image=DoF__4H.png | |image=DoF__4H.png | ||
|hitbox=DoF__4H_Hitbox.png | |hitbox=DoF__4H_Hitbox.png | ||
| Line 236: | Line 251: | ||
{{MoveData | {{MoveData | ||
|name=Throw | |name=Throw | ||
|input = 6H <br> [[File: | |input = 6H <br> [[File:DoF_Direction_Right.png|20px|link=]][[File:DoF_Buttons_H.png|20px|link=]] | ||
|image=DoF__6H.png | |image=DoF__6H.png | ||
|hitbox=DoF__6H_Hitbox.png | |hitbox=DoF__6H_Hitbox.png | ||
| Line 322: | Line 337: | ||
{{MoveData | {{MoveData | ||
|name=Down Taunt | |name=Down Taunt | ||
|input = 2T <br> [[File: | |input = 2T <br> [[File:DoF_Direction_Down.png|20px|link=]][[File:DoF_Buttons_Taunt.png|15px|link=]] | ||
|image=DoF__2T.png | |image=DoF__2T.png | ||
|hitbox=DoF__2T_Hitbox.png | |hitbox=DoF__2T_Hitbox.png | ||
| Line 356: | Line 371: | ||
{{MoveData | {{MoveData | ||
|name='''Special Name''' | |name='''Special Name''' | ||
|input = 4S <br> [[File: | |input = 4S <br> [[File:DoF_Direction_Left.png|20px|link=]][[File:DoF_Buttons_S.png|20px|link=]] | ||
|image=DoF__4S.png | |image=DoF__4S.png | ||
|hitbox=DoF__4S_Hitbox.png | |hitbox=DoF__4S_Hitbox.png | ||
| Line 372: | Line 387: | ||
{{MoveData | {{MoveData | ||
|name='''Special Name''' | |name='''Special Name''' | ||
|input = 2S <br> [[File: | |input = 2S <br> [[File:DoF_Direction_Down.png|20px|link=]][[File:DoF_Buttons_S.png|20px|link=]] | ||
|image=DoF__2S.png | |image=DoF__2S.png | ||
|hitbox=DoF__2S_Hitbox.png | |hitbox=DoF__2S_Hitbox.png | ||
| Line 388: | Line 403: | ||
{{MoveData | {{MoveData | ||
|name='''Special Name''' | |name='''Special Name''' | ||
|input = j.S <br> [[File: | |input = j.S <br> [[File:DoF_Direction_Up.png|20px|link=]][[File:DoF_Buttons_S.png|20px|link=]] | ||
|image=DoF__jS.png | |image=DoF__jS.png | ||
|hitbox=DoF__jS_Hitbox.png | |hitbox=DoF__jS_Hitbox.png | ||
| Line 425: | Line 440: | ||
{{MoveData | {{MoveData | ||
|name='''Super Name''' | |name='''Super Name''' | ||
|input = 2SP <br> [[File: | |input = 2SP <br> [[File:DoF_Direction_Down.png|20px|link=]][[File:DoF_Buttons_Super.png|30px|link=]] | ||
|image=DoF__2SP.png | |image=DoF__2SP.png | ||
|hitbox=DoF__2SP_Hitbox.png | |hitbox=DoF__2SP_Hitbox.png | ||
| Line 559: | Line 574: | ||
[[Category:Duels of Fortune]] | [[Category:Duels of Fortune]] | ||
[[Category: | [[Category:DoF Rattlebone]] | ||
Latest revision as of 17:07, 16 May 2024
Overview
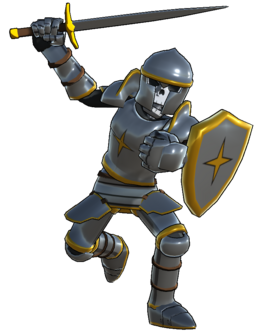
Rattlebone is DoF's jack of all trades, with a very well rounded moveset that leaves him lacking nowhere. Thanks to his trusty sword, many of his normals like 2M, 5H, 2H, and j.2H are long range disjoints. He can convert well off these too, making his mid range game quite potent. His projectiles are solid too, with 2S, j.2S, and 5S having different utilities for both pressure and neutral. Adding on to this is his 4S, Shield Bash, one of the strongest armored moves in the game. Beyond uses on defense, it's also a powerful neutral tool and has uses in pressure. Taking his strong oki and reversals into account too and you get one of the best characters at playing from any situation.
This isn't to say Rattlebone is a flawless character though. His sword normals have extra recovery, which both makes him more susceptible to both whiff punishes and guard cancels. He also has fairly mediocre mixups on regular blockstrings, with no way to go into his overhead options when 5S or 2SP aren't active. This means his main options to open up opponents are staggers and throws, which are much more interactable. Perhaps his biggest flaw though is his inherent attribute of being a jack of all trades. While Rattlebone can do well in any situation, he can also find himself outclassed by dedicated archetypes, such as Baron's close range game, Blackheart's okizeme, or ERROR's zoning. These flaws though can be overcome when his kit is used to its full potential, with his adaptability allowing him to theoretically handle any matchup.
Playstyle
| Rattlebone is DoF's all rounder, with answers for every situation. | |
| Pros | Cons |
|
|


Character Properties
| Health | 24000 |
| Backdash | XF |
| Unique Movement | None |
| Fastest Attack | 5L (XF) |
Character Summary
Move list
- Command Normals
- 4H - Double Jointed: A long ranged but risky slash.
- j.2H - Jaw Drop: An overhead dive that goes straight down.
- Special Moves
- 5S - Skull Toss: Rattlebone throws his head, which bounces towards him. This move can be used again when it makes contact with him or bounces 5 times. The skull has a hurtbox that can be hit to do damage to Rattlebone.
- 4S - Shield Bash: An armored charge that has two follow-ups.
- 4S->8 - Kingbone Slicer: A series of spinning slashes through the air. Can be angled with 6 or 4.
- 4S->S - Tibia Chopper: A low follow-up that causes a hard knockdown.
- 2S (Air OK) - Spinal Axe: An arcing projectile. Ground version goes upwards and can be jump canceled on hit. Air version goes downwards.
- j.S - Haunted Slash: A big and fast aerial attack with a large hitbox.
- Supers
- 5SP - Skeletal Spinner: A big barrage of hitboxes that hits both sides. Anti-air invincible.
- 2SP - Chivalrous Spirit: An install boosting the power of all of Rattlebone's sword attacks for a short period of time.
Quick combo reference
5L > 5M > 5H > 5S: Easy combo for helping beginners. Put a brief description here.
Normal Moves
5L
|
|
|---|---|
Toggle Hitboxes Toggle Hitboxes
|
5M Caption Caption
|
|
|---|---|
Toggle Hitboxes Toggle Hitboxes
|
5H
|
|
|---|---|
Toggle Hitboxes Toggle Hitboxes
|
2L
|
|
|---|---|
Toggle Hitboxes Toggle Hitboxes
|
2M
|
|
|---|---|
Toggle Hitboxes Toggle Hitboxes
|
2H
|
|
|---|---|
Toggle Hitboxes Toggle Hitboxes
|
j.L
|
|
|---|---|
Toggle Hitboxes Toggle Hitboxes
|
j.M
|
|
|---|---|
Toggle Hitboxes Toggle Hitboxes
|
j.H
|
|
|---|---|
Toggle Hitboxes Toggle Hitboxes
|
Command Normals
Command Normal Name
4H |
|
|---|---|
Toggle Hitboxes Toggle Hitboxes
|
Universal Mechanics
Throw
Throw
6H |
|
|---|---|
Toggle Hitboxes Toggle Hitboxes
|
Reversals
Reversal
5R |
|
|---|---|
Toggle Hitboxes Toggle Hitboxes
|
Wakeup Reversal
5R on Wakeup |
|
|---|---|
Toggle Hitboxes Toggle Hitboxes
|
Burst
Burst
5B |
|
|---|---|
Toggle Hitboxes Toggle Hitboxes
|
Taunt
Only add this section if a character has a taunt with a hitbox or some other unique effect like Sylvan's cheat. Otherwise remove it.
Taunt
5T |
|
|---|---|
Toggle Hitboxes Toggle Hitboxes
|
Down Taunt
2T |
|
|---|---|
Toggle Hitboxes Toggle Hitboxes
|
Special Moves
Special Name
5S |
|
|---|---|
Toggle Hitboxes Toggle Hitboxes
|
Special Name
4S |
|
|---|---|
Toggle Hitboxes Toggle Hitboxes
|
Special Name
2S |
|
|---|---|
Toggle Hitboxes Toggle Hitboxes
|
Special Name
j.S |
|
|---|---|
Toggle Hitboxes Toggle Hitboxes
|
Super Move
Super Name 5SP Informative and maybe funny caption Informative and maybe funny caption
|
|
|---|---|
Toggle Hitboxes Toggle Hitboxes
|
Super Name 2SP Informative and maybe funny caption Informative and maybe funny caption
|
|
|---|---|
Toggle Hitboxes Toggle Hitboxes
|
Strategy
Neutral
Describe how a character plays the neutral game. Add sub-categories if necessary, these should usually be on how you use a specific move.
Offense
Describe how a character runs their offense.
Defense
Describe how a character defends themselves when they're on the receiving end.
Additional Resources
Links to any additional resources like a tutorial video, delete category if there are none. If there aren't any but one gets made later, then re-add the category.
Additional Categories
Add any further categories as needed, just make sure they're worth a whole section.
Combos
General info on a character's combos, such as if they can always end a combo with a super as an ender rather than usual listed enders.
Combo Legend
| ||||||||||||||||||||||||||||||||||||||||||
| ||||||||||||||||||||||||||||||||||||||||||
Basic Combos
Easy combos for starting.
| Combo | Damage | Difficulty | Meter Spent | Position | Notes |
|---|---|---|---|---|---|
| 5L > 5M > 5H > 5S, Ender | X | Very Easy/Easy/Medium/Hard/Very Hard | 0/50/100 | Midscreen/Corner/Near Corner/From Corner |
Description of the combo. |
| Combo | Damage | Difficulty | Meter Spent | Position | Notes |
| 2L > 2M > 2H > 2S, Ender | X | Very Easy/Easy/Medium/Hard/Very Hard | 0/50/100 | Midscreen/Corner/Near Corner/From Corner |
Description of the combo. |
Advanced Combos
Harder combos that deal more damage or provide some other benefit.
| Combo | Damage | Difficulty | Meter Spent | Position | Notes |
|---|---|---|---|---|---|
| 5L > 5M > 5H > 5S, Ender | X | Very Easy/Easy/Medium/Hard/Very Hard | 0/50/100 | Midscreen/Corner/Near Corner/From Corner |
Description of the combo. |
| Combo | Damage | Difficulty | Meter Spent | Position | Notes |
| 2L > 2M > 2H > 2S, Ender | X | Very Easy/Easy/Medium/Hard/Very Hard | 0/50/100 | Midscreen/Corner/Near Corner/From Corner |
Description of the combo. |
X Combo Category
If a character has a specific kind of combo they do that has multiple variants, then you can make a new category for it. If they don't delete this.
| Combo | Damage | Difficulty | Meter Spent | Position | Notes |
|---|---|---|---|---|---|
| 5L > 5M > 5H > 5S, Ender | X | Very Easy/Easy/Medium/Hard/Very Hard | 0/50/100 | Midscreen/Corner/Near Corner/From Corner |
Description of the combo. |
| Combo | Damage | Difficulty | Meter Spent | Position | Notes |
| 2L > 2M > 2H > 2S, Ender | X | Very Easy/Easy/Medium/Hard/Very Hard | 0/50/100 | Midscreen/Corner/Near Corner/From Corner |
Description of the combo. |
Enders
List of combo enders a character has when there's multiple enders they can pick between, such as sacrificing oki for damage and vice-versa.
| Combo | Damage | Difficulty | Meter Spent | Position | Notes |
|---|---|---|---|---|---|
| 2H > 2S | X | Very Easy/Easy/Medium/Hard/Very Hard | 0/50/100 | Midscreen/Corner/Near Corner/From Corner |
Description of the ender. |
| Combo | Damage | Difficulty | Meter Spent | Position | Notes |
| 2H > 2SP | X | Very Easy/Easy/Medium/Hard/Very Hard | 0/50/100 | Midscreen/Corner/Near Corner/From Corner |
Description of the ender. |
Colors
_X_(Costume_Name)_Icon.png)
_X_(Costume_Name)_Colors.png)
Trivia
- Fun facts about the character. If it isn't redundant with something else said on the page, these can be pulled directly from the game.
Rattlebone Wiki Roadmap
| 0% complete | |
|
|
| Page | Completed | To-do | Score |
|---|---|---|---|
| 0/25 | |||
| Move List | 0/25 | ||
| Strategy | 0/25 | ||
| Combos | 0/25 |