Fighting Vipers 2/Bahn/Throws: Difference between revisions
< Fighting Vipers 2 | Bahn
Jump to navigation
Jump to search
m (→Iwao Sai) |
No edit summary |
||
| Line 28: | Line 28: | ||
|data= | |data= | ||
{{AttackData-FV2 | {{AttackData-FV2 | ||
|Damage= | |Damage=40 | ||
|Height= | |Height=High | ||
|Startup= | |Startup= | ||
|Recovery= | |Recovery= | ||
| Line 36: | Line 36: | ||
|Block Adv= | |Block Adv= | ||
|Counterhit= | |Counterhit= | ||
|Additional Properties= | |Additional Properties=Stagger. Opponent can crash towards the wall | ||
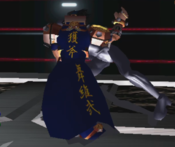
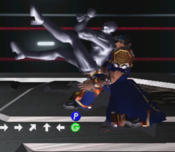
|description= | |description=Bahn's basic Wall Slam throw. He throws his opponent to the wall behind him. The stagger can be recovered. | ||
}} | }} | ||
}} | }} | ||
| Line 50: | Line 50: | ||
|data= | |data= | ||
{{AttackData-FV2 | {{AttackData-FV2 | ||
|Damage= | |Damage=50 | ||
|Height= | |Height= | ||
|Startup= | |Startup= | ||
| Line 58: | Line 58: | ||
|Block Adv= | |Block Adv= | ||
|Counterhit= | |Counterhit= | ||
|Additional Properties= | |Additional Properties=Hard Knockdown. Does not go into traditional throw escape when broken. | ||
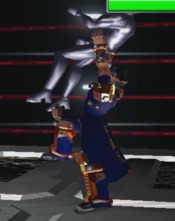
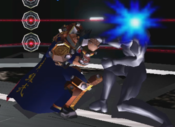
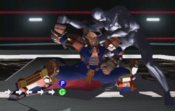
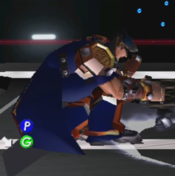
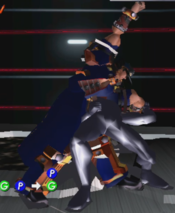
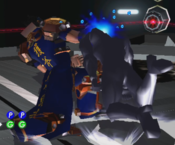
|description= | |description=You can call it a "chain throw". Its his other hard to execute move out of the two. Like as the caption says, as soon as you press P+G, you have '''10 FRAMES''' to do the second command. It wasn't like that in FV1 or Fighters Megamix. Doesn't do as much damage last I checked. | ||
Also, when the opponent recovers from the stagger completely, they can crouch the second part of the throw. | |||
}} | }} | ||
}} | }} | ||
| Line 72: | Line 73: | ||
|data= | |data= | ||
{{AttackData-FV2 | {{AttackData-FV2 | ||
|Damage= | |Damage=50 | ||
|Height= | |Height= | ||
|Startup= | |Startup= | ||
| Line 80: | Line 81: | ||
|Block Adv= | |Block Adv= | ||
|Counterhit= | |Counterhit= | ||
|Additional Properties= | |Additional Properties=Hard Knockdown | ||
|description= | |description= | ||
}} | }} | ||
| Line 94: | Line 95: | ||
|data= | |data= | ||
{{AttackData-FV2 | {{AttackData-FV2 | ||
|Damage= | |Damage=20 | ||
|Height= | |Height= | ||
|Startup= | |Startup= | ||
| Line 102: | Line 103: | ||
|Block Adv= | |Block Adv= | ||
|Counterhit= | |Counterhit= | ||
|Additional Properties= | |Additional Properties=Wall bounce | ||
|description= | |description= | ||
}} | }} | ||
| Line 116: | Line 117: | ||
|data= | |data= | ||
{{AttackData-FV2 | {{AttackData-FV2 | ||
|Damage= | |Damage=60 | ||
|Height= | |Height= | ||
|Startup= | |Startup= | ||
| Line 124: | Line 125: | ||
|Block Adv= | |Block Adv= | ||
|Counterhit= | |Counterhit= | ||
|Additional Properties= | |Additional Properties=Hard knockdown | ||
|description= | |description= | ||
}} | }} | ||
| Line 137: | Line 138: | ||
|data= | |data= | ||
{{AttackData-FV2 | {{AttackData-FV2 | ||
|Damage= | |Damage=40 | ||
|Height= | |Height= | ||
|Startup= | |Startup= | ||
|Recovery= | |Recovery= | ||
|Total= | |Total= | ||
|Hit Adv= | |Hit Adv=Staggers | ||
|Block Adv= | |Block Adv= | ||
|Counterhit= | |Counterhit= | ||
|Additional Properties= | |Additional Properties= | ||
|description= | |description=Good to attack with, say, a launcher after. | ||
}} | }} | ||
}} | }} | ||
| Line 158: | Line 159: | ||
|data= | |data= | ||
{{AttackData-FV2 | {{AttackData-FV2 | ||
|Damage= | |Damage=45 | ||
|Height= | |Height= | ||
|Startup= | |Startup= | ||
| Line 166: | Line 167: | ||
|Block Adv= | |Block Adv= | ||
|Counterhit= | |Counterhit= | ||
|Additional Properties= | |Additional Properties=Soft Knockdown. Can be Tech recovered for less damage. | ||
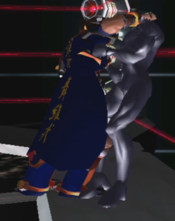
|description= | |description=Bahn throws the opponent to his left. | ||
}} | }} | ||
}} | }} | ||
| Line 179: | Line 180: | ||
|data= | |data= | ||
{{AttackData-FV2 | {{AttackData-FV2 | ||
|Damage= | |Damage=30 | ||
|Height= | |Height= | ||
|Startup= | |Startup= | ||
| Line 187: | Line 188: | ||
|Block Adv= | |Block Adv= | ||
|Counterhit= | |Counterhit= | ||
|Additional Properties= | |Additional Properties=Hard Knockdown | ||
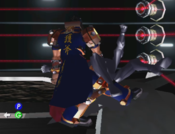
|description= | |description=Pretty much made for stomping pursuits. | ||
}} | }} | ||
}} | }} | ||
| Line 201: | Line 202: | ||
|data= | |data= | ||
{{AttackData-FV2 | {{AttackData-FV2 | ||
|Damage= | |Damage=40~60 | ||
|Height= | |Height= | ||
|Startup= | |Startup= | ||
| Line 209: | Line 210: | ||
|Block Adv= | |Block Adv= | ||
|Counterhit= | |Counterhit= | ||
|Additional Properties= | |Additional Properties=Soft Knockdown. Can be Tech recovered for less damage. | ||
|description= | |description=Good for wall slam combos for big damage. | ||
}} | }} | ||
}} | }} | ||
| Line 222: | Line 223: | ||
|data= | |data= | ||
{{AttackData-FV2 | {{AttackData-FV2 | ||
|Damage= | |Damage=40 | ||
|Height= | |Height=Low | ||
|Startup= | |Startup= | ||
|Recovery= | |Recovery= | ||
|Total= | |Total= | ||
|Hit Adv= | |Hit Adv=Stagger | ||
|Block Adv= | |Block Adv= | ||
|Counterhit= | |Counterhit= | ||
|Additional Properties= | |Additional Properties=Opponent stays staggered during recovery. | ||
|description= | |description= | ||
}} | }} | ||
| Line 245: | Line 246: | ||
|data= | |data= | ||
{{AttackData-FV2 | {{AttackData-FV2 | ||
|Damage= | |Damage=45 | ||
|Height= | |Height= | ||
|Startup= | |Startup= | ||
| Line 253: | Line 254: | ||
|Block Adv= | |Block Adv= | ||
|Counterhit= | |Counterhit= | ||
|Additional Properties= | |Additional Properties=Hard Knockdown | ||
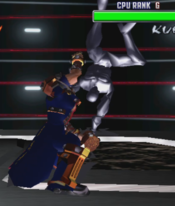
|description= | |description=Fun fact: the animation was taken from Sarah Bryant's Elbow Smash side throw from the Virtua Fighter series. | ||
}} | }} | ||
}} | }} | ||
| Line 267: | Line 268: | ||
|data= | |data= | ||
{{AttackData-FV2 | {{AttackData-FV2 | ||
|Damage= | |Damage=40 | ||
|Height= | |Height= | ||
|Startup= | |Startup= | ||
| Line 275: | Line 276: | ||
|Block Adv= | |Block Adv= | ||
|Counterhit= | |Counterhit= | ||
|Additional Properties= | |Additional Properties=Hard Knockdown | ||
|description= | |description= | ||
}} | }} | ||
Latest revision as of 08:02, 25 September 2022
Normal Throws
Kabenage
Momentary Fall
Second command must be pressed within 10 frames after the first. Second command must be pressed within 10 frames after the first.
|
|---|
Oroshigane
Opponent's back to Wall Opponent's back to Wall
|
|---|
Tag Hand Wall Crash
Back to wall Back to wall
|
|---|
Kotsuban Wari
From behind the opponent From behind the opponent
|
|---|
Violent Super General
Shinkūnage
Taoshi
Setsuna Otoshi
Iwao Sai
Opponent must be crouching Opponent must be crouching
|
|---|
Tech Step side throws
Shako Tū
From opponent's Right side From opponent's Right side
|
|---|
Setsuna Ochi
From opponent's Left side From opponent's Left side
|
|---|
