
Duels of Fortune/Clyde: Difference between revisions
Jump to navigation
Jump to search


Character Properties


m (→Facts) |
No edit summary |
||
| Line 487: | Line 487: | ||
|image=DoF__2SP.png | |image=DoF__2SP.png | ||
|hitbox=DoF__2SP_Hitbox.png | |hitbox=DoF__2SP_Hitbox.png | ||
|caption= | |caption=Instant Transmission | ||
|data= | |data= | ||
{{AttackData-DoF | {{AttackData-DoF | ||
Revision as of 00:48, 8 January 2024
Overview
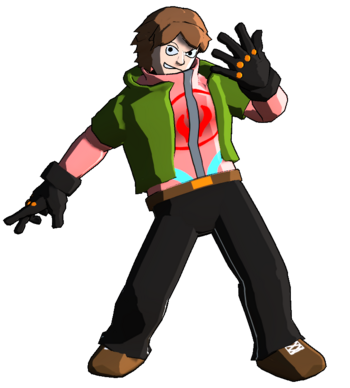
Clyde Brightstar is the main character of Duels of Fortune. While you may be expecting the usual all-rounder shoto, Clyde is THE rushdown character of the game. With his powerful movement, he can get in the opponent's face better than anyone else.
Clyde as a character is defined by his forward dash. Clyde's forward dash, an insanely fast low-profiling side-switching run, is arguably the best movement option in the game. When used well, it's a powerful neutral tool that can control the pace of a match,. This gets all the stronger when you add in his other options in neutral and on offense. His air dash is one of the faster ones in the game, and 664L lets him bait attempts to check his dash. Furthermore, all his hits can convert into lengthy combos that carry the opponent across the screen and into a hard knockdown, leading to his pressure. This pressure is quite potent too. Clyde's buttons are all above average speed wise, letting him perform especially tricky staggers and pressure resets. His forward dash factors in too as an oppressive offense option that allows him to perform a left/right mixup at almost any time in any part of the screen, a tactic especially potent once the opponent starts to fear his frame traps. These aspects all make Clyde a relentless offense machine when he can take the game at his pace.
However, Clyde doesn't always get to run at his pace. In exchange for his amazing movement and frame data, Clyde's normals are on the smaller end with zero disjoints. While 66M and 4H are decent buttons, they have their weaknesses and won't help him contest other characters. He also has one of the worst set of lows in the game, with an 11F 2L and 12F 2M being his only options. Beyond limiting his high/low, it's tough for Clyde to deal with armored moves and chicken blocking on defense. In addition, his combos build a huge amount of burst for the opponent. His biggest flaw by far though is his general need to be in the opponent's face. While he's the best character at getting into that position, against characters like ERROR, Doodle, and Shiverskull, all of whom have strong keepaway and good ways to check his dash, his avenues are limited. He often has to make multiple high risk plays to force his way in. Similarly, if a character has stronger close range than him like Baron, then he may find himself with no easy paths to victory. Still, no character is immune to his unending pressure and unreactable left rights.
Playstyle
| Clyde relentlessly rushes in to overwhelm opponents with his fast buttons and left/rights. | |
| Pros | Cons |
|
|


Character Properties
| Health | 24000 |
| Prejump | 4F |
| Backdash | 19F |
| Unique Movement | Low Profile Side Switching Run Forward Dash |
| Fastest Attack | 5L (5F) |
Unique Mechanic: Forward Dash
Clyde's forward dash is unique, even compared to other run type dashes. Not only is it the fastest run in the game, but it low profiles and can side switch. As a result, it's probably his most important tool both in neutral and offense. The low profile is almost immediate (frame 2-3 after inputting dash) and while not especially low, it still goes under many projectiles and higher hitting pokes. When he side switches, any normals done will auto-correct to face the opponent, which creates Clyde's powerful left/right mixups. Additionally, Clyde has two unique command normals out of his dash with 4L and 6M. 4L is a partially invincible backdash that lets him bait out a reaction while not having to commit much. 6M is Clyde's biggest button, although it's still not especially big and is incredibly unsafe on block. These options make challenging his forward dash even scarier and builds up the mental stack. While one can be belligerent with it, making calculated use of his forward dash can allow Clyde to dominate the neutral game.

Character Summary
Move List
- Command Normals
- 4H - Rushing Upper: Low profile, even lower than his dash, forward moving uppercut. Launcher that's good for combos, pressure, and defense.
- 4L While Dashing - Fake Out: Invincible back dash out of forward dash.
- 6M While Dashing - Rushing Straight: Large and fast normal exclusive to his dash. Uncancellable on block.
- Special Moves
- 5S - Heat Rush: A short ranged but high damage baarrage of strikes ending in a jump cancelable uppercut. Combo filler.
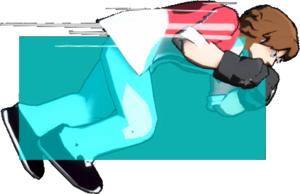
- 4S (Air OK) - Blazing Dash: Dash punch with three hits. Good for combos and occasionally for rushing in.
- 2S - Inferno Upper: Fast and high reward anti-air with invuln to air attacks, has an unfortunate tendency to trade.
- j.S - Meteor Slam: Dive punch. Primary combo ender but also a fast overhead that wallbounces in the corner.
- Supers
- 5SP - Eruption Fist: Fast super with a large anti-air hitbox. Air unblockable. Good combo ender and anti-air.
- 2SP - Brightstar Barrage: Clyde teleports behind the opponent to do an invincible strike. Somewhat slow.
- 2[SP] - Frontal Assault: Clyde teleports in front of the opponent without doing a strike.
Quick combo reference
5L > 5M > 4H > 9jc j.H, land 2M > 2S, land 2M > 5S > 9jc j.S: Easy corner to corner combo.
5L > 5M > 4H > 9jc j.H > j.4S, land 2M > 5S > 9jc j.4S, land 2M > 5H > 5SP: Corner bnb combo.
Normal Moves
5L   |
|
|---|---|
Toggle Hitboxes Toggle Hitboxes
|
5M Caption Caption
|
|
|---|---|
Toggle Hitboxes Toggle Hitboxes
|
5H
|
|
|---|---|
Toggle Hitboxes Toggle Hitboxes
|
2L
|
|
|---|---|
Toggle Hitboxes Toggle Hitboxes
|
2M
|
|
|---|---|
Toggle Hitboxes Toggle Hitboxes
|
2H
|
|
|---|---|
Toggle Hitboxes Toggle Hitboxes
|
j.L
|
|
|---|---|
Toggle Hitboxes Toggle Hitboxes
|
j.M
|
|
|---|---|
Toggle Hitboxes Toggle Hitboxes
|
j.H
|
|
|---|---|
Toggle Hitboxes Toggle Hitboxes
|
Command Normals
Command Normal Name
4H |
|
|---|---|
Toggle Hitboxes Toggle Hitboxes
|
Fake Out
(While Dashing) 4L |
|
|---|---|
Toggle Hitboxes Toggle Hitboxes
|
Command Normal Name (While Dashing) 6M   |
|
|---|---|
Toggle Hitboxes Toggle Hitboxes
|
Universal Mechanics
Throw
Throw
6H |
|
|---|---|
Toggle Hitboxes Toggle Hitboxes
|
Reversals
Reversal
5R |
|
|---|---|
Toggle Hitboxes Toggle Hitboxes
|
Wakeup Reversal
5R on Wakeup |
|
|---|---|
Toggle Hitboxes Toggle Hitboxes
|
Burst
Burst
5B |
|
|---|---|
Toggle Hitboxes Toggle Hitboxes
|
Taunt
Only add this section if a character has a taunt with a hitbox or some other unique effect like Sylvan's cheat. Otherwise remove it.
Taunt
5T |
|
|---|---|
Toggle Hitboxes Toggle Hitboxes
|
Down Taunt
2T |
|
|---|---|
Toggle Hitboxes Toggle Hitboxes
|
Special Moves
Special Name
5S |
|
|---|---|
Toggle Hitboxes Toggle Hitboxes
|
Special Name
4S |
|
|---|---|
Toggle Hitboxes Toggle Hitboxes
|
Special Name
2S |
|
|---|---|
Toggle Hitboxes Toggle Hitboxes
|
Special Name
j.S |
|
|---|---|
Toggle Hitboxes Toggle Hitboxes
|
Super Move
Super Name 5SP  Tyrant Rave if it was the scariest anti-air known to man Tyrant Rave if it was the scariest anti-air known to man
|
|
|---|---|
Toggle Hitboxes Toggle Hitboxes
|
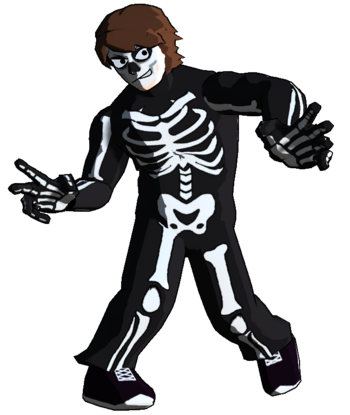
Super Name 2SP Instant Transmission Instant Transmission
|
|
|---|---|
Toggle Hitboxes Toggle Hitboxes
|
Strategy
Neutral
Describe how a character plays the neutral game. Add sub-categories if necessary, these should usually be on how you use a specific move.
Offense
Describe how a character runs their offense.
Defense
Describe how a character defends themselves when they're on the receiving end.
Additional Resources
Links to any additional resources like a tutorial video, delete category if there are none. If there aren't any but one gets made later, then re-add the category.
Additional Categories
Add any further categories as needed, just make sure they're worth a whole section.
Combos
Combo Legend
| ||||||||||||||||||||||||||||||||||||||||||
| ||||||||||||||||||||||||||||||||||||||||||
Basic Combos
Easy combos for starting.
| Combo | Damage | Difficulty | Meter Spent | Position | Notes |
|---|---|---|---|---|---|
| 5L > 5M > 4H > 9jc j.H, land 2M > 2S, land 2M > Ender | 4960 | Very Easy | 0 | Midscreen/From Corner |
Basic corner to corner combo. Damage is fairly underwhelming but it can lead to strong oki. |
| Combo | Damage | Difficulty | Meter Spent | Position | Notes |
| 5L > 5M > 4H > 9jc j.H > j.4S, land 2M > 5S > 9jc j.4S, land 2M > Ender | 6060 | Easy | 0 | Corner |
Basic combo showing Clyde's usual corner combo theory. |
Advanced Combos
Harder combos that deal more damage or provide some other benefit.
| Combo | Damage | Difficulty | Meter Spent | Position | Notes |
|---|---|---|---|---|---|
| 5L > 5M > 5H > 5S, Ender | X | Very Easy/Easy/Medium/Hard/Very Hard | 0/50/100 | Midscreen/Corner/Near Corner/From Corner |
Description of the combo. |
| Combo | Damage | Difficulty | Meter Spent | Position | Notes |
| 2L > 2M > 2H > 2S, Ender | X | Very Easy/Easy/Medium/Hard/Very Hard | 0/50/100 | Midscreen/Corner/Near Corner/From Corner |
Description of the combo. |
X Combo Category
If a character has a specific kind of combo they do that has multiple variants, then you can make a new category for it. If they don't delete this.
| Combo | Damage | Difficulty | Meter Spent | Position | Notes |
|---|---|---|---|---|---|
| 5L > 5M > 5H > 5S, Ender | X | Very Easy/Easy/Medium/Hard/Very Hard | 0/50/100 | Midscreen/Corner/Near Corner/From Corner |
Description of the combo. |
| Combo | Damage | Difficulty | Meter Spent | Position | Notes |
| 2L > 2M > 2H > 2S, Ender | X | Very Easy/Easy/Medium/Hard/Very Hard | 0/50/100 | Midscreen/Corner/Near Corner/From Corner |
Description of the combo. |
Enders
List of combo enders a character has when there's multiple enders they can pick between, such as sacrificing oki for damage and vice-versa.
| Combo | Damage | Difficulty | Meter Spent | Position | Notes |
|---|---|---|---|---|---|
| 2H > 2S | X | Very Easy/Easy/Medium/Hard/Very Hard | 0/50/100 | Midscreen/Corner/Near Corner/From Corner |
Description of the ender. |
| Combo | Damage | Difficulty | Meter Spent | Position | Notes |
| 2H > 2SP | X | Very Easy/Easy/Medium/Hard/Very Hard | 0/50/100 | Midscreen/Corner/Near Corner/From Corner |
Description of the ender. |
Colors


Facts
- Clyde likes to punch things with his fist.
- During the early stages of development, Clyde was called "Boxer".
- Clyde's Aspect is called "Flame Jacket". His skin has special glands that let him produce fire! As an added bonus, it also makes him vewry heat-resistant.
- Originally, Clyde was designed as a hunter who would fight otherworldly monsters.
- Clyde's older brother Matthew created the highly successful Buff Boy comic series, known across all of Eagleton.
- Clyde originally started boxing just to spite his father Baron and prove that he's the "better man". Although it didn't take long for him to start genuinely enjoying it.
- Clyde's Aspect first manifested while he was trying to help his mom cook garlic bread. Needless to say, the garlic bread was seared to a crisp.
Clyde Wiki Roadmap
| 100% complete | |
|
|
| Page | Completed | To-do | Score |
|---|---|---|---|
| 25/25 | |||
| Move List | 25/25 | ||
| Strategy | 25/25 | ||
| Combos | 25/25 |