Story
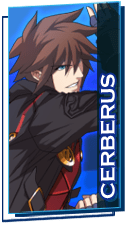
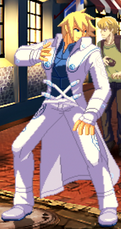
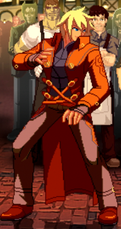
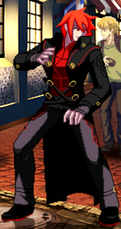
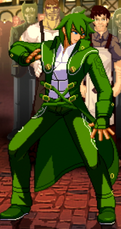
Cerberus Black
『サーベラス』
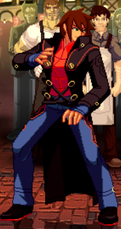
Cerberus is a world renown treasure hunter and adventurer who accidentally turned his best friend pit into a hat. He fights with his magical sword-hands and magical bullet-gun while searching for the Chaos Code to use it's unlimited power to save Pit so the two of them can go back to adventuring/ignoring their children
Playstyle
Health: 30000
Stun: 100
Cerberus is a character with strong tools for pretty much any situation. His mix-up can leave a lot to be desired with no command grab and no standing overhead outside of the very telegraphed followup to close D, but Cerb has pretty high damage and does a good job taking advantage of system mechanics. Jack of all trades, master of a few.
Mobility (Run vs. Step)
Picking what you feel comfortable with is the goal of Cerberus. Selecting your Bounce is no exception.
Run: Running gives Cerberus an edge in most of his matchups. Running into a high jump helps because it lets him cover a lot of distance and gives him a chance to properly Smashdown Arrow or Air Smash when needed.
Step: Choosing step with Cerberus isn't anything out of the ordinary, but most players favor run for high jump benefits. Step has it's positives as well. Dash canceling during pressure strings can easily force your opponent to make the wrong move.
Smashdown Arrow is a divekick and is very useful for mobility as well as a combo piece. It also has a cross-up hitbox which is nice since none of cerb's air normals are very good for cross-ups.
Sweet Trap is a counter that has 2 versions, one for highs/mids and one for lows. Sweet trap activates on projectiles, which makes it a little more versitile than TG, and doesn't cost meter. It's use is pretty matchup dependent though since sometimes Cerb doesn't really need to counter anything.
Dancing Storm is the combo extra super, it gives Cerb access to higher damage routes including straight up TODs.
Easy Come, Easy Go is also a combo super, but of a different sort. Easy come lets cerb confirm/punish some things that are otherwise awkward, and by chaos shifting in the middle do a lot of damage for 2 bars.
Recommended Sets
Cerb basically always wants Smashdown Arrow, you could play him without it if you really wanted to but it's not recommended. Past that all of his other moves are very good, so you can pick whichever you personally like or feel is the best for the matchup.
Move List
Click on a header to expand that section of the movelist
Normal Moves
Normal Moves
cl.A
cl.A
|
| Damage
|
Stun
|
Guard
|
Startup
|
Active
|
Recovery
|
Frame Advantage (block)
|
Cancelable
|
Counterhit Properties
|
| -
|
-
|
High/Low
|
5f
|
7f
|
-
|
+1
|
Yes
|
-
|
close version of 5A, slightly faster but not really that different, the main thing is it's hitbox is not good for anti-air.
|
|
5A
5A Caption.Caption. Caption.Caption.
|
| Damage
|
Stun
|
Guard
|
Startup
|
Active
|
Recovery
|
Frame Advantage (block)
|
Cancelable
|
Counterhit Properties
|
| -
|
-
|
High/Low
|
6f
|
3f
|
-
|
+3
|
Yes
|
-
|
Good poke, can Anti-air some jump-ins but will get beat out by a lot. Also good for and applying pressure on standing opponents.
|
|
2A
2A Caption. Caption.
|
| Damage
|
Stun
|
Guard
|
Startup
|
Active
|
Recovery
|
Frame Advantage (block)
|
Cancelable
|
Counterhit Properties
|
| -
|
-
|
High/Low
|
7f
|
-
|
-
|
+3
|
Yes
|
-
|
2A and 2B are your tools for massive pressure. Both have the same reach and speed, and can combo into each other consistently as long as you're in range.
|
|
cl.B
cl.B Caption. Caption.
|
| Damage
|
Stun
|
Guard
|
Startup
|
Active
|
Recovery
|
Frame Advantage (block)
|
Cancelable
|
Counterhit Properties
|
| -
|
-
|
High/Low
|
6f
|
5f
|
-
|
+2
|
Yes
|
-
|
You won't really be using cl.B outside of combos. Almost always chained into unless you're starting a link after 6C.
|
|
5B
5B Caption. Caption.
|
| Damage
|
Stun
|
Guard
|
Startup
|
Active
|
Recovery
|
Frame Advantage (block)
|
Cancelable
|
Counterhit Properties
|
| -
|
-
|
High/Low
|
8
|
5f
|
-
|
+0
|
Yes
|
-
|
Average poke. Best used in corner combos.
|
|
2B
2B Caption. Caption.
|
| Damage
|
Stun
|
Guard
|
Startup
|
Active
|
Recovery
|
Frame Advantage (block)
|
Cancelable
|
Counterhit Properties
|
| -
|
-
|
Low
|
7f
|
-
|
-
|
+3
|
Yes
|
-
|
|
|
|
cl.C
cl.C Caption. Caption.
|
| Damage
|
Stun
|
Guard
|
Startup
|
Active
|
Recovery
|
Frame Advantage (block)
|
Cancelable
|
Counterhit Properties
|
| -
|
-
|
High/Low
|
7f, 18f
|
5f, 6f
|
-
|
-
|
Yes
|
-
|
cl.C has 2 hits, which can be canceled prematurely for only 1 hit. The second hit also hits mid. Gives you enough time to think about what you're going to do next.
|
|
5C
5C Caption. Caption.
|
| Damage
|
Stun
|
Guard
|
Startup
|
Active
|
Recovery
|
Frame Advantage (block)
|
Cancelable
|
Counterhit Properties
|
| -
|
-
|
High/Low
|
8f
|
7f
|
-
|
-5
|
No
|
-
|
A slow punch that has above-average reach. It's slow, so don't rely on it too much. Good for forcing counter hits.
|
|
2C
2C Caption. Caption.
|
| Damage
|
Stun
|
Guard
|
Startup
|
Active
|
Recovery
|
Frame Advantage (block)
|
Cancelable
|
Counterhit Properties
|
| -
|
-
|
High/Low
|
9f
|
5f
|
-
|
-1
|
Yes
|
-
|
A hook which has great range, decent speed and some anti-air properties. This will be your main high jump cancel tool in your BnBs.
|
|
cl.D
cl.D Caption. Caption.
|
| Damage
|
Stun
|
Guard
|
Startup
|
Active
|
Recovery
|
Frame Advantage (block)
|
Cancelable
|
Counterhit Properties
|
| -
|
-
|
High/Low
|
9f
|
4f
|
-
|
+1
|
Yes
|
-
|
Similar to close C, but this time instead of being 2 hits there's a target combo
|
|
5D
5D Caption. Caption.
|
| Damage
|
Stun
|
Guard
|
Startup
|
Active
|
Recovery
|
Frame Advantage (block)
|
Cancelable
|
Counterhit Properties
|
| -
|
-
|
High/Low
|
11f
|
7f
|
-
|
-1
|
No
|
-
|
A spin kick which sends Cerberus forward. A good tool for footsies due to it's reach, but it's slow, so use sparingly.
|
|
2D
2D Caption. Caption.
|
| Damage
|
Stun
|
Guard
|
Startup
|
Active
|
Recovery
|
Frame Advantage (block)
|
Cancelable
|
Counterhit Properties
|
| -
|
-
|
Low
|
11f
|
5f
|
-
|
-3
|
No
|
-
|
Cerberus's sweep. Does a good chunk of damage and causes a hard knockdown. This should only be used for midscreen okizeme or following up with a Destruction Chaos in the middle of a combo.
|
|
j.A
j.A Caption. Caption.
|
| Damage
|
Stun
|
Guard
|
Startup
|
Active
|
Recovery
|
Frame Advantage (block)
|
Cancelable
|
Counterhit Properties
|
| -
|
-
|
High
|
5f
|
19f
|
-
|
-
|
Yes
|
-
|
Mainly a combo normal, although it's useful for it's active frames
|
|
j.B
j.B Caption. Caption.
|
| Damage
|
Stun
|
Guard
|
Startup
|
Active
|
Recovery
|
Frame Advantage (block)
|
Cancelable
|
Counterhit Properties
|
| -
|
-
|
High
|
6f
|
10f
|
-
|
-
|
Yes
|
-
|
A very good air-to-air and jump-in normal. If using as a jump-in you probably want to cancel into j.C or j.D
|
|
j.C
j.C Caption. Caption.
|
| Damage
|
Stun
|
Guard
|
Startup
|
Active
|
Recovery
|
Frame Advantage (block)
|
Cancelable
|
Counterhit Properties
|
| -
|
-
|
High
|
7f
|
6f
|
-
|
-
|
Yes
|
-
|
Fast and pretty alright range. Doesn't hit downward as much as j.D and because Cerb swings from such a high place he tends to land before actually hitting crouching opponents, so it's not the most reliable jump-in, although it can work, especially as a cancel option after a j.B
|
|
j.D
j.D Caption. Caption.
|
| Damage
|
Stun
|
Guard
|
Startup
|
Active
|
Recovery
|
Frame Advantage (block)
|
Cancelable
|
Counterhit Properties
|
| -
|
-
|
High
|
7f
|
5f
|
-
|
-
|
Yes
|
-
|
The best tool that Cerberus has for jump-ins. Hitbox almost touches the ground if you IAD correctly. Keep in mind that the hitbox is located in the lower section, so you will get hit in any air-to-air situation that involves your opponent either above or in front of you
|
|
Command Moves
Command Moves
6C
Sunrise Hush
6C Caption. Caption.
|
| Damage
|
Stun
|
Guard
|
Startup
|
Active
|
Recovery
|
Frame Advantage (block)
|
Cancelable
|
Counterhit Properties
|
| -
|
-
|
High/Low
|
14f
|
8f
|
-
|
-5
|
No
|
-
|
Cerberus clubs the opponent by twirling his body. Sends him forward. Can be used as a crossup if you're very close. Good on it's own for okizeme and overall approach. Leads to an OTGable knockdown
|
|
Axe Drop
cl.D > 6D Caption. Caption.
|
| Damage
|
Stun
|
Guard
|
Startup
|
Active
|
Recovery
|
Frame Advantage (block)
|
Cancelable
|
Counterhit Properties
|
| -
|
-
|
High
|
17
|
8f
|
-
|
-5
|
Yes
|
-
|
Target combo from cl.D, hits overhead and is +3 on hit.
|
|
Throw
Throw
5/6AC Caption. Caption.
|
| Damage
|
Stun
|
Guard
|
Startup
|
Active
|
Recovery
|
Frame Advantage (block)
|
Cancelable
|
Counterhit Properties
|
| -
|
-
|
-
|
-
|
-
|
-
|
-
|
No
|
-
|
Cerb tumbles down with the opponent. Can't combo from this normally, however there is a spacing near the corner where Cerb wont get pushed back and can juggle afterwards.
|
|
Special Moves
Special Moves
236P
Special Move Name
236P Caption. Caption.
|
| Version
|
Damage
|
Stun
|
Guard
|
Startup
|
Active
|
Recovery
|
Frame Advantage (block)
|
Cancelable
|
Counterhit Properties
|
| A
|
-
|
-
|
Low
|
12f
|
-
|
-
|
-
|
-
|
-
|
Low Bullet. Good for catching people trying to run in. Has followups on A for a straight shot and C for an anti-air angle. Uses 1 bullet, the followup doesn't cost any bullets
|
| C
|
-
|
-
|
High/Low
|
12
|
-
|
-
|
-
|
-
|
-
|
Straight Bullet. Better than A if you think they might jump as it'll catch early jump frames. Has followups on A for a low shot and C for an anti-air angle. Uses 1 bullet, the followup doesn't cost any bullets
|
| EX
|
-
|
-
|
High/Low
|
9f,16f,18f,26f,32f,38f,40f,53f
|
-
|
-
|
-
|
-
|
-
|
The EX version has 8 shots. Great for filling the screen with garbage and taking a round by either chip or by tagging any sort of approach. Uses 1 bullet
|
|
236K
Dual Slicer
236K Caption. Caption.
|
| Version
|
Damage
|
Stun
|
Guard
|
Startup
|
Active
|
Recovery
|
Frame Advantage (block)
|
Cancelable
|
Counterhit Properties
|
| B
|
-
|
-
|
High/Low
|
12f,28f
|
4f,8f
|
-
|
-10
|
-
|
-
|
Mostly a combo ender, cancel into 236236K for an unscale super to do a bunch of damage, or don't and let them air tech and chase.
|
| D
|
-
|
-
|
High/Low
|
35f,51f
|
4f,4f
|
-
|
-4
|
-
|
-
|
Cerb slides a ways then slashes, can cross-up although it's too slow to really be a mix-up tool. Has either invun or just a low profile and can make some stuff whiff then punish
|
| EX
|
-
|
-
|
High/Low
|
12f,32f,52f
|
5f,5f,5f
|
-
|
-5
|
-
|
-
|
3 Slashes, third slash pops the opponent up for a combo, a buffered 6C will combo and slam the opponent down for an otg combo
|
|
214P
Slash Beat
214P
|
| Version
|
Damage
|
Stun
|
Guard
|
Startup
|
Active
|
Recovery
|
Frame Advantage (block)
|
Cancelable
|
Counterhit Properties
|
| A
|
-
|
-
|
High/Low
|
8f
|
5f
|
-
|
-19
|
-
|
-
|
Cerb slashes backwards and on hit goes into a series of slashes that can wallbounce. Common ender near the corner since if the wallbounce can't extend, it'll lead to a hard knockdown extremely close to corner but not fully there so cross-ups are possible
|
| C
|
-
|
-
|
High/Low
|
15f
|
3f
|
-
|
-13
|
-
|
-
|
A slash followed by a forward charge. Causes the opponent to tech out mid-air.
|
| EX
|
-
|
-
|
High/Low
|
5f
|
5f
|
-
|
-21
|
-
|
-
|
A slash followed by gunshots. Doesn't take a bullet and reloads all bullets on hit. Has invun and is Cerb's main reversal.
|
|
623P
Air Smash
623P Nice catch! Nice catch!
|
| Version
|
Damage
|
Stun
|
Guard
|
Startup
|
Active
|
Recovery
|
Frame Advantage (block)
|
Cancelable
|
Counterhit Properties
|
| A
|
-
|
-
|
High/Low
|
7f
|
11f
|
-
|
-
|
-
|
-
|
Anti-air grab, but more of a combo piece/ender than an actual anti-air. A version doesn't go as far as the C version but doesn't consume a bullet. Not super useful, more of something you do when you're worried about bullet gauge.
|
| C
|
-
|
-
|
High/Low
|
7f
|
12f
|
-
|
-
|
-
|
-
|
Goes further than A version and uses a bullet. Has a lot more hitstun which lets cerb either combo further on landing when done fairly low, or apply pressure on the knockdown.
|
| EX
|
-
|
-
|
High/Low
|
7f
|
12f
|
-
|
-
|
-
|
-
|
The EX version hits 4 times, and wall bounces from anywhere. Cerb recovers in the air so he can followup with a smashdown arrow or something. Invincible startup. Doesn't use a bullet
|
|
Extra Special Moves
j.236K
Smashdown Arrow
j.236K Obah Zher Obah Zher
|
| Version
|
Damage
|
Stun
|
Guard
|
Startup
|
Active
|
Recovery
|
Frame Advantage (block)
|
Cancelable
|
Counterhit Properties
|
| B
|
-
|
-
|
High/Low
|
12f
|
-
|
-
|
-
|
-
|
-
|
Dive kick, one of Cerb's best tools, can send him half screen if done high up which helps him escape tech chases. The entire lower portion is a hitbox and this move can cross-up. Very useful in exceeds as well.
|
| D
|
-
|
-
|
High/Low
|
12f
|
-
|
-
|
-
|
-
|
-
|
Basically the same as B version except there's a second hit on the ground. Depending on how this is spaced it can be followed up for a combo.
|
|
214K
Sweet Trap
214K
|
| Version
|
Damage
|
Stun
|
Guard
|
Startup
|
Active
|
Recovery
|
Frame Advantage (block)
|
Cancelable
|
Counterhit Properties
|
| B
|
-
|
-
|
-
|
-
|
-
|
-
|
-
|
-
|
-
|
|
|
| Version
|
Damage
|
Stun
|
Guard
|
Startup
|
Active
|
Recovery
|
Frame Advantage (block)
|
Cancelable
|
Counterhit Properties
|
| D
|
-
|
-
|
-
|
-
|
-
|
-
|
-
|
-
|
-
|
|
|
|
Ultimate Chaos Moves
Ultimate Chaos Moves
236236K
Shall we dance
236236K Fever! Fever!
|
| Damage
|
Stun
|
Guard
|
Startup
|
Active
|
Recovery
|
Frame Advantage (block)
|
Cancelable
|
Counterhit Properties
|
| -
|
-
|
High/Low
|
1+4f
|
-
|
-
|
-66
|
-
|
-
|
Cerberus spins up vertically and slashes continuously. The final hit causes a hard knockdown. Can be Chaos Shifted into either a Smashdown Arrow or a well timed j.D.
|
|
236236P
Passionate Slicer
236236P
|
| Damage
|
Stun
|
Guard
|
Startup
|
Active
|
Recovery
|
Frame Advantage (block)
|
Cancelable
|
Counterhit Properties
|
| -
|
-
|
High/Low
|
1+3f
|
-
|
-
|
-17
|
-
|
-
|
A 5 hit combo with some slashes followed by a burst from Cerberus's gun. Good for ground Exceed combos and a corner ender if you lack Easy Come, Easy Go or don't want to spend for an Exceed.
|
|
Extra Ultimate Chaos Moves
214214K
Dancing Storm
214214K Caption. Caption.
|
| Damage
|
Stun
|
Guard
|
Startup
|
Active
|
Recovery
|
Frame Advantage (block)
|
Cancelable
|
Counterhit Properties
|
| -
|
-
|
High/Low
|
1+1f(ground), 1+6f(air)
|
-
|
-
|
-
|
-
|
-
|
Cerberus spins in the air, firing multiple shots below. Pressing K rapidly lets him shoot longer; causing him to fall to the ground in a comedic fashion.
|
|
Easy Come, Easy Go
Super Move Name
Input. Come here! Come here!
|
| Damage
|
Stun
|
Guard
|
Startup
|
Active
|
Recovery
|
Frame Advantage (block)
|
Cancelable
|
Counterhit Properties
|
| -
|
-
|
High/Low
|
1+2f
|
8f
|
-
|
-20
|
-
|
-
|
Cerberus throws energy wires forward and pulls the opponent towards him, followed by a series of stylish kicks and 4 shots. Always leaves you and your opponent separated at fullscreen. Very useful as a mid-range punish.
|
|
Destruction Chaos
Destruction Chaos
2141236PP
Move Name
Input. Caption. Caption.
|
| Damage
|
Stun
|
Guard
|
Startup
|
Active
|
Recovery
|
Frame Advantage (block)
|
Cancelable
|
Counterhit Properties
|
| -
|
-
|
-
|
1+7f
|
-
|
-
|
-
|
-
|
-
|
Cerberus materializes a giant gun with wings. When he smashes the ground, a giant wave of energy comes out and travels fullscreen. Can combo off of it if far from the corner. How punishable it is depends on how much screen space you have in front of you when you do it. Not especially useful, since exceeds have higher damage potential for 3 bars.
|
|
Strategy
Neutral
Combos
Basic combo tutorial
collection of old cerb combos (may still be useful)
Midscreen
2A > 2B > 2C > 236B > (236236K)
Basic combo. Works anywhere on screen. You can omit the 236B and go right into super if you don't want to spend the extra bar. You can also sub out 236B for a 214P if you'd rather. After a 236B if your opponent is in the corner you can hold 9A to meaty with j.A. Off of that you can either confirm a hit if they pressed buttons and do an air combo into 623C or divekick, or if they blocked attempt to keep them in blockstun for an air unblockable reset when you land.
2A > 2B> 2C > 236KK > 6C > 2A > 2C > sjc > j.B > j.C > j.D > j.623C > 2C > 214A
Metered combo. Requires you be at ~ the midpoint of the screen of closer to the corner. If you're not quite there you wont be able to follow up with the super jump. To get the proper spacing for the 2C after j.623C you need to grab the opponent when they're at the right height, the range for this is pretty lenient and as long as you delay a bit after the j.D you should get it. This is the core of a lot of Cerb's BnBs and there's a lot of ways you can vary it.
2A > 2B> 2C > 236KK > 6C > 2A > 214A > 6C > 2A > 2C > sjc > j.B > j.C > j.D > j.623C > 2C > 214A
Alternate version for when you're further away from the corner. This can work even if you're mostly cornered, although in that case you'll need to microdash after the first 6C and before the 2A to ensure the 214A wall bounces. If you're having trouble landing the 2A after the first 6C try doing cl.B instead, it can be easier especially when doing it out of a microdash.
5A > 5B > cl.C (1) > cl.D > sjc > j.D > j.236D > 214A
A combo which requires a super jump cancel and Smashdown Arrow. Only works on standing opponents. Make sure you neutral super jump, otherwise you likely wont hit with j.D. You also need to be at a pretty specific distance to get the 214A to combo afterwards.
2C > 2363214K(3) > A+B > jump back air dash towards > j.C > j.D > cl.C > cl.D > sjc > j.D > j.236D > 214C > 6C > cl.B > cl.C > 236C~C > 5B > 2C > 236C~C > 5A > 5B > 2C > sjc > j.B > j.C > j.D > j.623C > 2C > 236B > 236236K
Easy come easy go smash down arrow combo. The super resets positioning which helps setup for some extensions. The super at the end is optional but leads to really big damage. A good alternative to exceed combos if you either aren't confident that it'll kill and don't want to be in overheat, don't think you'll need the full 3 bars to kill, or just want to do a much cooler looking combo. Video Example
2C > 2363214K(9) > A+B > j.A > j.B > j.C > j.D > microdash > cl.C > cl.D > 5A > 2C > sjc > j.D > j.236B > 5A > 2C > 236C~C > 5A > 2C > 236C~C > 5A > 5B > 2C > sjc > j.B > j.C > j.D > j.623C > 2C > 236B
Alternate easy come easy go arrow combo. Video Example
Corner
2A > 2B > 2C > 236KK > 6C > 2A > 2C > 236C~C > 2A > 2C > 236C~C > 2A > 2C > 214A
Meter'd corner combo. Uses up 2 of your bullets but gives pretty good damage and avoids super jump cancels
2A > 2B > 2C > 236KK > 6C > cl.B > cl.C > sjc > j.B > j.C > j.D > 623C > land > 2C > 214A
Corner combo that doesn't use gun loops, tho you can add them in if you want. Does ~10k. Since 236KK will corner carry so far on it's own you can do this from ~half screen distance. The primary Cerb BnB. If you're having trouble with the 2C after 623C try delaying after the j.D a bit. If you omit the 2C at the end and go directly into 214A it will put the opponent out of the corner and you can go for some cross-ups.
Throw > cl.B > cl.C > 236C~C > etc.
Cerb isn't supposed to be able to combo off his throw, but he can if he spaces it such that he doesn't get pushed away from the corner. video example
Exceed
2A > 2B > 2C > 236KK > 6C > 2A > 2C > 236C~C > 2A > 2C > 236C~C > 2A > 2C > sjc > j.B > j.C > j.D > land > cl.A > regular jump > j.A > j.C > j.D > double jump > j.C > j.D > 623C > land > 214A
Highly damaging extended corner combo. Uses all 3 bullets but nets ~14.5k damage. The advanced Cerb BnB.
Colors
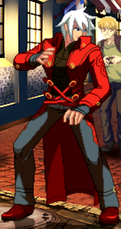
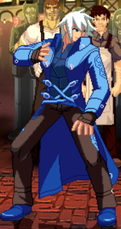
- Console Versions: You can hold R1 button while selecting a character to get an alternative color.
- Arcade Version: You can hold START button while selecting a character to get an alternative color.
