Duels of Fortune/Clyde

From Mizuumi Wiki
< Duels of Fortune
Revision as of 18:52, 5 January 2024 by MrChristian2023 (talk | contribs) (664L is basically done)
Jump to navigation Jump to search
Overview
Overview

Give an overview of the char.

Playstyle
Clyde *briefly describe playstyle*.
Pros Cons
  • Pro - Something the character is good at.
  • Con - Something bad about the character.
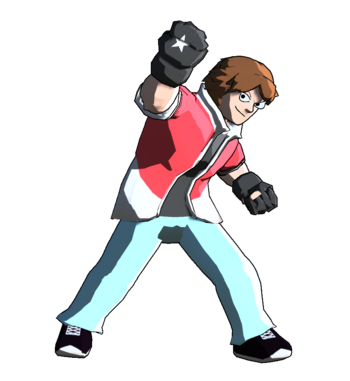
DoF Clyde Name.png

DoF Clyde profile.png

Character Properties
Health
24000.
Prejump
Their prejump in frames. If we find it's universal then delete this.
Backdash
Their backdash duration in frames.
Unique Movement
Low Profile Run
Fastest Attack
Their fastest attack then its startup frames. For example "5L (5F)".


Unique Mechanic: X

If a character has a unique mechanic write about it here. If there's nothing like that then delete this section.

Section Header

If there's more details to talk about and whatnot add new sections.

Section Header

F.

Character Summary

Move list

Command Normals
4H - X (Move Name): Give a brief description of a command normal. If there's more than one add them in.
Special Moves
5S - X: Give a brief description of their special moves. If it has followups briefly describe those. If they have any additional specials add them in.
4S - X: F.
2S - X: F.
j.S - X: F.
Supers
5SP - X: Give a brief description of their super moves.
2SP - X: F.
Quick combo reference

5L > 5M > 5H > 5S: Easy combo for helping beginners. Put a brief description here.

Normal Moves

5L
DoF Buttons L.png
DoF Clyde 5L.png
DoF Clyde 5L Hitbox.png
Damage Guard Startup Active Recovery Adv Hit Adv Block Properties
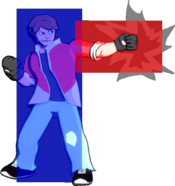
800 High/Low 5 10 5 +3 +7 -

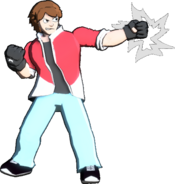
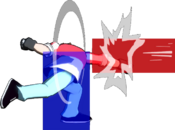
Fast but short ranged jab with amazing frame data for pressure. Strong stagger tool and pressure reset after a reverse beaat. Also an important abare tool as it's his fastest button. Leads into his usual routing on hit. His fastest option out of dash but 5M and 66M are almost as fast with better reward. Like all of Clyde's buttons, this isn't disjointed.

Toggle Hitboxes
Toggle Hitboxes
5M
DoF Buttons M.png
Caption
Caption
Damage Guard Startup Active Recovery Adv Hit Adv Block Properties
1200 High/Low 6 6 16 +6 -8 -

F

Toggle Hitboxes
Toggle Hitboxes
5H
DoF Buttons H.png
Damage Guard Startup Active Recovery Adv Hit Adv Block Properties
1400 High/Low 11 6 21 KD -9 -

F

Toggle Hitboxes
Toggle Hitboxes
2L
DoF Buttons Down.pngDoF Buttons L.png
Damage Guard Startup Active Recovery Adv Hit Adv Block Properties
- High/Low - - - - - -

F

Toggle Hitboxes
Toggle Hitboxes
2M
DoF Buttons Down.pngDoF Buttons M.png
Damage Guard Startup Active Recovery Adv Hit Adv Block Properties
- High/Low - - - - - -

F

Toggle Hitboxes
Toggle Hitboxes
2H
DoF Buttons Down.pngDoF Buttons H.png
Damage Guard Startup Active Recovery Adv Hit Adv Block Properties
- High/Low - - - - - -

F

Toggle Hitboxes
Toggle Hitboxes
j.L
DoF Buttons Up.pngDoF Buttons L.png
Damage Guard Startup Active Recovery Adv Hit Adv Block Properties
- High/Low - - - - - -

F

Toggle Hitboxes
Toggle Hitboxes
j.M
DoF Buttons Up.pngDoF Buttons M.png
Damage Guard Startup Active Recovery Adv Hit Adv Block Properties
- High/Low - - - - - -

F

Toggle Hitboxes
Toggle Hitboxes
j.H
DoF Buttons Up.pngDoF Buttons H.png
Damage Guard Startup Active Recovery Adv Hit Adv Block Properties
- High/Low - - - - - -

F

Toggle Hitboxes
Toggle Hitboxes

Command Normals

Command Normal Name
4H
DoF Buttons Left.pngDoF Buttons H.png
Damage Guard Startup Active Recovery Adv Hit Adv Block Properties
- High/Low - - - - - -

Describe a command normal. Add bullet points if necessary.

Toggle Hitboxes
Toggle Hitboxes
Fake Out
(While Dashing) 4L
DoF Buttons Left.pngDoF Buttons L.png
Damage Guard Startup Active Recovery Adv Hit Adv Block Properties
- - - - 21 - - Full Invuln from frame 1-8

Clyde quickly does a backdash, moving Clyde backwards and also stopping his dash. Can be used as a great mixup tool to trick enemies into thinking you were going to do Rushing Straight, or as a makeshift dodge. If this move is used behind the enemy, it will autocorrect.

Toggle Hitboxes
Toggle Hitboxes
Command Normal Name
(While Dashing) 6M
DoF Buttons Right.pngDoF Buttons M.png
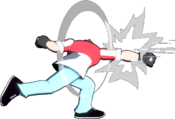
DoF Clyde 66M.png
DoF Clyde 66M Hitbox.png
Damage Guard Startup Active Recovery Adv Hit Adv Block Properties
- High/Low - - - - - -

Describe a command normal. Add bullet points if necessary.

Toggle Hitboxes
Toggle Hitboxes

Universal Mechanics

Throw
Throw
6H
DoF Buttons Right.pngDoF Buttons H.png
Damage Guard Startup Active Recovery Adv Hit Adv Block Properties
- Unblockable - - - - N/A -

Describe their throw. Add bullet points if necessary.

Toggle Hitboxes
Toggle Hitboxes
Reversals
Reversal
5R
DoF Buttons Block.png
Damage Guard Startup Active Recovery Adv Hit Adv Block Properties
- High/Low - - - - - -

Describe their regular reversal. Add bullet points if necessary.

Toggle Hitboxes
Toggle Hitboxes
Wakeup Reversal
5R on Wakeup
DoF Buttons Block.png
Damage Guard Startup Active Recovery Adv Hit Adv Block Properties
- High/Low - - - - - -

Describe their wakeup reversal. Add bullet points if necessary.

Toggle Hitboxes
Toggle Hitboxes
Burst
Burst
5B
DoF Buttons Burst.png
Damage Guard Startup Active Recovery Adv Hit Adv Block Properties
0 High/Low - - - - - -

Describe their burst, this should be roughly the same for most characters. Add bullet points if necessary.

Toggle Hitboxes
Toggle Hitboxes
Taunt

Only add this section if a character has a taunt with a hitbox or some other unique effect like Sylvan's cheat. Otherwise remove it.

Taunt
5T
DoF Buttons Taunt.png
Damage Guard Startup Active Recovery Adv Hit Adv Block Properties
- High/Low - - - - - -

Describe the taunt and its uses. Add bullet points if necessary.

Toggle Hitboxes
Toggle Hitboxes
Down Taunt
2T
DoF Buttons Down.pngDoF Buttons Taunt.png
Damage Guard Startup Active Recovery Adv Hit Adv Block Properties
- High/Low - - - - - -

Describe the taunt and its uses. Add bullet points if necessary.

Toggle Hitboxes
Toggle Hitboxes

Special Moves

Special Name
5S
DoF Buttons S.png
Damage Guard Startup Active Recovery Adv Hit Adv Block Properties
- High/Low - - - - - -

Generally describe a special and its uses. Add bullet points for data things, and if need be, a table.

Toggle Hitboxes
Toggle Hitboxes
Special Name
4S
DoF Buttons Left.pngDoF Buttons S.png
Damage Guard Startup Active Recovery Adv Hit Adv Block Properties
- High/Low - - - - - -

Generally describe a special and its uses. Add bullet points for data.

Toggle Hitboxes
Toggle Hitboxes
Special Name
2S
DoF Buttons Down.pngDoF Buttons S.png
Damage Guard Startup Active Recovery Adv Hit Adv Block Properties
- High/Low - - - - - -

Generally describe a special and its uses. Add bullet points for data.

Toggle Hitboxes
Toggle Hitboxes
Special Name
j.S
DoF Buttons Up.pngDoF Buttons S.png
Damage Guard Startup Active Recovery Adv Hit Adv Block Properties
- High/Low - - - - - -

Generally describe a special and its uses. Add bullet points for data.

Toggle Hitboxes
Toggle Hitboxes

Super Move

Super Name
5SP
DoF Buttons Super.png
Informative and maybe funny caption
Damage Guard Startup Active Recovery Adv Hit Adv Block Properties
- High/Low - - - - - -

Describe the super and what you can do with it.

  • Any additional information that doesn't fit with the main description, such as it whiffing on certain characters.
Toggle Hitboxes
Toggle Hitboxes
Super Name
2SP
DoF Buttons Down.pngDoF Buttons Super.png
Informative and maybe funny caption
Damage Guard Startup Active Recovery Adv Hit Adv Block Properties
- High/Low - - - - - -

Describe the super and what you can do with it.

  • Any additional information that doesn't fit with the main description, such as it whiffing on certain characters.
Toggle Hitboxes
Toggle Hitboxes

Strategy

Neutral

Describe how a character plays the neutral game. Add sub-categories if necessary, these should usually be on how you use a specific move.

Offense

Describe how a character runs their offense.

Defense

Describe how a character defends themselves when they're on the receiving end.

Additional Resources

Links to any additional resources like a tutorial video, delete category if there are none. If there aren't any but one gets made later, then re-add the category.

Additional Categories

Add any further categories as needed, just make sure they're worth a whole section.

Combos

General info on a character's combos, such as if they can always end a combo with a super as an ender rather than usual listed enders.

Combo Legend

Numpad Notation

DoF Buttons Up-Left.png DoF Buttons Up.png DoF Buttons Up-Right.png
DoF Buttons Left.png DoF Buttons Right.png
DoF Buttons Down-Left.png DoF Buttons Down.png DoF Buttons Down-Right.png
 = 
7 8 9
4 5 6
1 2 3
 = 
up-back up up-forward
back neutral forward
down-back down down-forward
  • 236 = DoF Direction Down.pngDoF Direction Down-Right.pngDoF Direction Right.png
  • 214 = DoF Direction Down.pngDoF Direction Down-Left.pngDoF Direction Left.png
  • 63214 = DoF Direction 624.png
  • 46 = DoF Direction Left.pngDoF Direction Right.png
  • 28 = DoF Direction Down.pngDoF Direction Up.png
  • Light: DoF Buttons L.png
  • Medium: DoF Buttons M.png
  • Heavy: DoF Buttons H.png
  • Special: DoF Buttons S.png
  • Super: DoF Buttons Super.png
  • Block/Reversal: DoF Buttons Block.png
  • Burst: DoF Buttons Burst.png
  • Taunt: DoF Buttons Taunt.png
Dash = 66 DoF Direction Right.pngDoF Direction Right.png
j. = Jump DoF Direction Up-Left.png / DoF Direction Up.png / DoF Direction Up-Right.png
dc = Dash Cancel
jc = Jump Cancel
dl. = Delay
[X] = Hold
]X[ = Release
gb = Ground Bounce
wb = Wall Bounce
bb = Blast Burst
tc = Trigger Cancel
SP = Super
[X]*N = Repeat sequence N amount of times.
X(N) = Multi-hit move hits only N times. May be omitted if all hits are used.
(X) = Optional input
OTG = On The Ground
TK = Tiger Knee (doing an air move the moment a jump sends you airborne)
> = Cancel
, = Link
AA = Anti-air
land = Land before doing the next input.


Basic Combos

Easy combos for starting.

Combo Damage Difficulty Meter Spent Position Notes
5L > 5M > 5H > 5S, Ender X Very Easy/Easy/Medium/Hard/Very Hard 0/50/100 Midscreen/Corner/Near Corner/From Corner

Description of the combo.

Combo Damage Difficulty Meter Spent Position Notes
2L > 2M > 2H > 2S, Ender X Very Easy/Easy/Medium/Hard/Very Hard 0/50/100 Midscreen/Corner/Near Corner/From Corner

Description of the combo.

Advanced Combos

Harder combos that deal more damage or provide some other benefit.

Combo Damage Difficulty Meter Spent Position Notes
5L > 5M > 5H > 5S, Ender X Very Easy/Easy/Medium/Hard/Very Hard 0/50/100 Midscreen/Corner/Near Corner/From Corner

Description of the combo.

Combo Damage Difficulty Meter Spent Position Notes
2L > 2M > 2H > 2S, Ender X Very Easy/Easy/Medium/Hard/Very Hard 0/50/100 Midscreen/Corner/Near Corner/From Corner

Description of the combo.

X Combo Category

If a character has a specific kind of combo they do that has multiple variants, then you can make a new category for it. If they don't delete this.

Combo Damage Difficulty Meter Spent Position Notes
5L > 5M > 5H > 5S, Ender X Very Easy/Easy/Medium/Hard/Very Hard 0/50/100 Midscreen/Corner/Near Corner/From Corner

Description of the combo.

Combo Damage Difficulty Meter Spent Position Notes
2L > 2M > 2H > 2S, Ender X Very Easy/Easy/Medium/Hard/Very Hard 0/50/100 Midscreen/Corner/Near Corner/From Corner

Description of the combo.

Enders

List of combo enders a character has when there's multiple enders they can pick between, such as sacrificing oki for damage and vice-versa.

Combo Damage Difficulty Meter Spent Position Notes
2H > 2S X Very Easy/Easy/Medium/Hard/Very Hard 0/50/100 Midscreen/Corner/Near Corner/From Corner

Description of the ender.

Combo Damage Difficulty Meter Spent Position Notes
2H > 2SP X Very Easy/Easy/Medium/Hard/Very Hard 0/50/100 Midscreen/Corner/Near Corner/From Corner

Description of the ender.

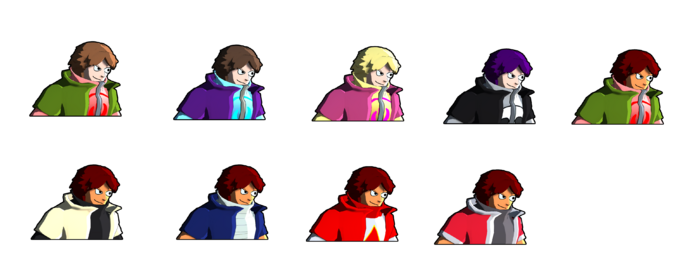
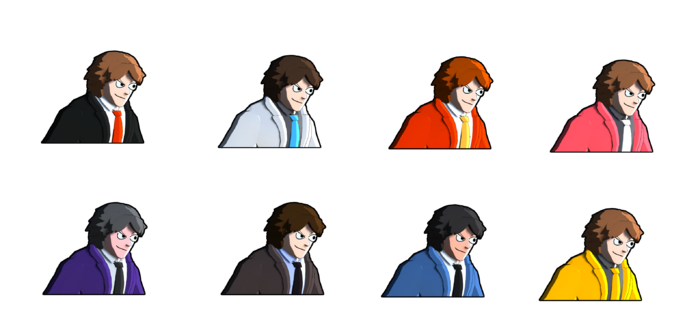
Colors

DoF Clyde Jacket Icon.png
DoF Clyde Boxer Icon.png
DoF Clyde Skeleton Icon.png
DoF Clyde Renzo Icon.png
DoF Clyde Casual Suit Icon.png

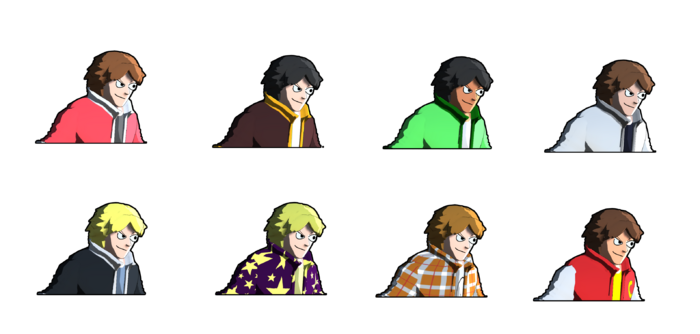
Jacket

DoF Clyde Jacket Colors.png


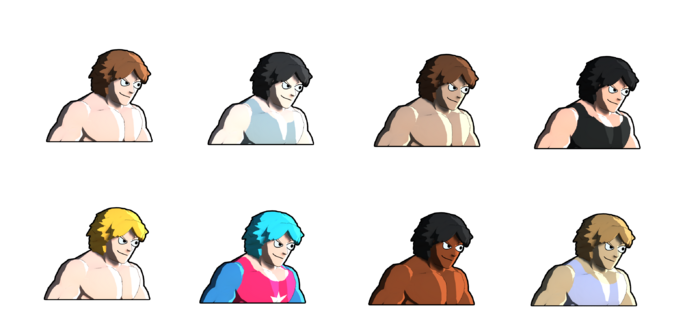
Boxer

DoF Clyde Boxer Colors.png


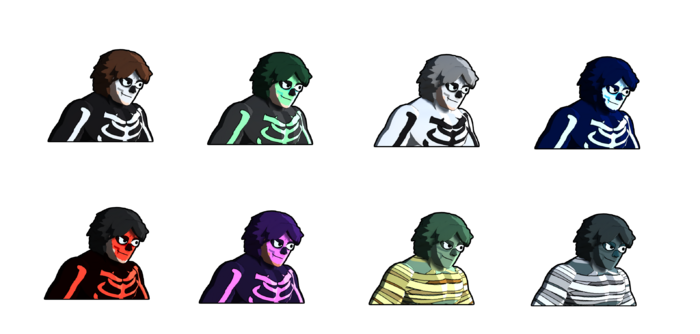
Skeleton

DoF Clyde Skeleton Colors.png


Renzo

DoF Clyde Renzo Colors.png


Casual Suit

DoF Clyde Casual Suit Colors.png


Trivia

  • Fun facts about the character. If it isn't redundant with something else said on the page, these can be pulled directly from the game.


Clyde Wiki Roadmap

100% complete
Page Completed To-do Score

Overview

25/25
Move List 25/25
Strategy 25/25
Combos 25/25

Navigation

General
Getting Started
FAQ
HUD & UI
Updates
Systems
Controls
Offense
Defense
Movement
Game Data
Azutron
Shoto
Clyde
Bosses
Baron
Black Heart
Callowman
Ember
Derrick
Annie
ERROR
Sylvan
Lumina
Johnson
Guy
Red
Rattlebone
Shiverskull
Doodle
Samurai