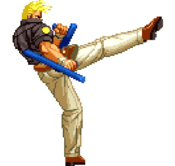
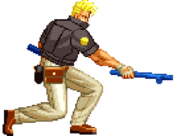
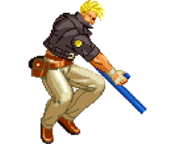
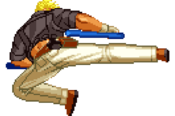
Art of Fighting 3/Rody Birts
| ロディ・バーツ, Rody Birts | |
|---|---|
| Difficulty | Moderate |
| Playstyle | Midrange poking (some rushdown), mixups |
| Birthplace | USA |
| Occupation | Bounty hunter |
| Fighting style | Two tonfas |
| Weight Class | Light (2/10) |
| Birthday | July 24 |
Introduction
| Player 1 Color | Player 2 Color |
 |

|
Rody Birts, a bounty hunter and partner of Lenny, who has been hired by her to find Freia.
Rody Birts is a cop with a cool attitude that doesn't mess with anybody, and his batons will make sure you know that he means business. Being a rushdown character, he's pretty fast and packing pretty solid mixups out of his pressure. Rody can either go for his double sweep out of 1BB, or blindside foes with his 6B launcher that hits overhead. Add this on top of his straightforward, highly damaging combos and Rody can quickly swat rounds off the match, acting as a constant threat on okizeme. Why Rody is packing double batons is beyond us, but he most definitely knows how to weild them. He easily stands out better than most characters in the Art of Fighting series thanks to his aggressive playstyle.
That's not to say Rody doesn't have at least some flaws. Although he carries his momentum incredibly well, he can lose it quite easily from one bad read since both 6B and his 1BB sweep have steep recovery, especially 1BB which leaves him at somewhere lower than -20 on block. Ouch! If the opponent can consistently look past his mixup game, then Rody's fighting an uphill battle where he has to play a lot more respectfully, despite lacking good defensive tools. And against Ryo, Rody has no choice but to zone him out or else suffer a deadly death combo, as a character who cannot zone well. Look past his shortcomings though, and you have a character who refuses to play fair and will always charge in to apply deadly pressure.
| Strengths | Weaknesses |
|---|---|
|
|
Move List
Esoterics
Color Coding
- Green refers to special move damage/frames when done in green meter, or otherwise the strongest damage it can deal.
- Blue refers to special move damage/frames when done in blue meter, or otherwise moderate damage it can deal.
- Purple refers to special move damage/frames when done in purple meter, or otherwise the weakest damage it can deal.
- Orange refers to the damage dealt in chip damage during block.
- Colors may be used otherwise to associate frames/scenarios to avoid confusion, i.e. Kasumi's 4C parry having two different sets of frame data.
Attacks, Notation and Damage
- [Brackets] refers to the specific attack in a string/rush combo that the attack box data is referring to.
- The arrow > on the left of it is the attacks that need to be done before the move in brackets can be performed. If there is an X, it means there are multiple ways of getting to the move in brackets which will be listed in the description.
- Damage values always assume grounded damage with no modifiers. If two damage values are listed with a / in-between them, it lists the damage it deals for grounded and airborne respectively.
- This is because these attacks are used in strings or otherwise as follow-ups where they're more likely to connect with airborne opponents rather than grounded opponents, such as Jin's 6B which hits twice, the first hit leaving the opponent airborne before the second hit.
- Ground/Aerial means if the attack is performed grounded or airborne. If an aerial, being hit during the attack will result in the attacker being knocked down.
- There is no true throw invulnerability in Art of Fighting 3, so when a move is listed as "Throw Invulnerable" it means the attack changes the character's hurtboxes in a way that the throw hitbox cannot collide with it.
Reading Frame Data
- Description of the five stats:
- Startup frames counts all frames before the first active frame comes out, aka how long it takes for the attack to come out
- Active frames is how long the attack is able to hit the opponent, starting at the first active frame
- Recovery frames is how long it takes before the player resets to neutral and can act again
- Total is all three stats above added up, so total number of frames in the move
- Hit/Block advantage is how much faster or slower you can act than the opponent by the number of frames
- Frame advantage, both on hit and block, always assumes frame advantage after the first active frame connects.
- If an attack lists "QKD" in its properties, this means it's an attack that can be teched out of faster than a normal knockdown. This affect only applies to counter hit launches or if the attack connects with the opponent in the air.
- When a move lists ST, SKD, etc. followed by a number in (parentheses) it indicates the frame advantage for the attacking player. Not all knockdowns are plus on hit and depends on the move.
- Knockdown frames always assume frame advantage against Jin. Everyone except for Robert, Sinclair, and Wyler share 16f of wakeup recovery after a knockdown. For Robert, Sinclair, and Wyler, add +1 frame advantage.
- This rule also applies to SKDs, however in this case Jin and everyone else shares 58f total of being in an SKD state except for Lenny, who is in an SKD state for 59 frames instead. For SKD frame advantage against Lenny, add +1 frame advantage.
- The wiki omits STKD frame advantage mostly because those are always plus no matter what, so it's somewhat pointless.
- The frames in (parentheses) next to a "Cancellable into..." sentence is how long you can delay a follow-up, AKA which exact frames you're allowed to cancel into a follow-up. If it states "onwards" then the cancel can be done whenever after the given frame. This info helps both for buffering inputs and also delaying strings for mixups.
Other Tips
- Moves are sorted by ascending number followed by ascending alphabet, so lower numbers first followed by lower alphabet letters. Moves with two button presses are organized last.
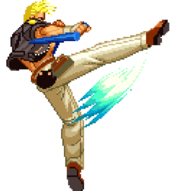
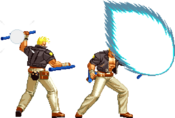
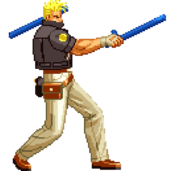
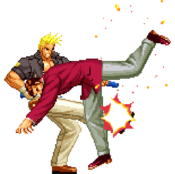
- It is recommended you read the brief descriptions to how the attacks animate in-game to familiarize yourself with each attack. Unfortunately, due to the rotoscoped graphics, animations lack key frames that help distinguish themselves as separate moves when viewed as single frames. This in turn makes some moves that share frames look identical to one another without context to how they are supposed to appear, without resorting to using gifs.
General Frame Data
| Character | Jump Startup | Jump Recovery | Jump Frames | Hop Frames | Crouch Frames | Restand Frames | Crouch Height |
| 5f | 6f | 50f | 39f | 6f | 6f | Average | |
| Walk Startup | Walk Speed | F. Dash Frames | F. Dash Speed | F. Dash Distance | Backdash Frames | Backdash Speed | Backdash Distance |
| 0f | Average | 21f | Fast | Far | 19f | Fast | Far |
Grounded Normals
5A
|
|---|
5B
|
|---|
5C Charging High Kick Charging High Kick
|
|---|
2A / Full Crouch 2A Tonfa Sweep / Ankle Swipe Tonfa Sweep / Ankle Swipe
|
|---|
2B / Full Crouch 2B Stub Kick / Quick S. Stub Kick / Quick S.
|
|---|
Jumps
j.A
|
|---|
j.B/C
|
|---|
Command Normals
1B Quick Sweep Quick Sweep
|
|---|
1B~[5B] Final Sweep Final Sweep
|
|---|
3B Dashing Knee Dashing Knee
|
|---|
4B Dodge Knee Strike Dodge Knee Strike
|
|---|
5AB Clobber Clobber
|
|---|
Launchers
3A Beheading Beheading
|
|---|
4A Tonfa Swat Tonfa Swat
|
|---|
6B Driving Knee Driving Knee
|
|---|
Rush Combo Attacks
6A Tonfa Rush Tonfa Rush
|
|---|
6A[A] Tonfa Poke Tonfa Poke
|
|---|
6AA[C] Handle Strike Handle Strike
|
|---|
6X[B] High Kick High Kick
|
|---|
Specials
Revolving Rod
236A/C |
|---|
Middle Impact TT
236B |
|---|
Decisive Impact
646A |
|---|
Hyper Tonfa
64646C |
|---|
Miscellaneous
Raz
4C |
|---|
Taunt
5D |
|---|
Throw
6C |
|---|
Pursuit
3A/B when opponent is on the ground |
|---|
Strategy
| Moves to USE | Moves to AVOID |
|---|---|
|
|
General Strategy
You have ample time to dash up to the opponent after the knockdown regardless of if they quickrise, and you get to start your nasty setplay. Rody’s rush chains are unique in that he has both an overhead launcher, and low sweep, both with the same timing. Your main mixup is a blocked 6AA leading into the 6BB launcher string, or 1BB sweep string. Either of these options lets you dash up and continue to do it over and over until you need to recharge your spirit or the opponent dies/breaks out. Not to mention that nifty command grab you have to mix it up even more. That said, if the opponent guesses correctly on the mixup, Rody will crumble, especially if his 1BB is blocked, which leaves him at over -20 on block despite its other great benefits. If otherwise not trying to force the opponent open with his 50/50, Rody has really simple but effective combos that are essentially just variations of the same combo, so he's easy to learn. Rody's problem lies in when he's being pressured back, since he has great tools for combos and rushdown, but outside of that has to rely on stray pokes and wonky special moves, most of which don't carry much defensive value. His damage output is average without combos, too, but it shouldn't undermine his ability to force the opponent to guess and otherwise eat swift pressure. It should also be noted that while 6AA is good pressure and will still give him room to apply his 50/50, careful opponents can just 4C parry Rody and kill his momentum, so you should sometimes apply the 50/50 without 6AA just to be safe.
Regarding Rody's wonky specials, his projectile is a huge risk up close and should only be used from afar. His 236B is combo fodder at best because in neutral, Rody has a bunch of other better punish tools at his disposal, so there's little reason to use it. His "command grab," is an enigma half the time in how you land it, so when it does work, it's great at opening the opponent up for free, but it largely depends on how close you are and if the opponent is in an optimal position, so bad timing leaves Rody wide open. His super isn't bad, but it's lacking in range and isn't fast, but it's slightly faster than Kasumi's super. It also packs more range than Sinclair's super does, but it's generally difficult and awkward to land.
Rody does quite well generally speaking, but suffers bad matchups against Kasumi and especially Ryo. Rody's whole game structure gives Kasumi more than enough time to punish any failed attempts to open her up while also being in just the right range to eat the worst of Kasumi's pressure. Against Ryo, Rody has no choice but to abandon his rushdown strategy almost entirely because one mistake can lead to Ryo landing his infinite on Rody, who is one of only two characters in the game that it works on (three counting Wyler). Outside of this, he has pretty decent matchups, but some characters such as Karman don't struggle too much fighting back against his pressure.
Matchups
VS  Jin
Jin
Nothing awful for Rody, he has to put up with the fact Jin plays defensively more than he does aggressively, but both characters are equally on par with each other over mixups and setting up for launches. The key difference is Rody lacks real range, or at the least his whiff punishers aren't as rewarding as Jin's. Rody's BnB combos will work against Jin regardless of his heavy weight, but getting the launchers is the issue. For Rody to get equal footing in range he needs to use either 3A or 4A, 6B being too stubby when Jin is spaced out. Compared to Jin punishing Rody at around the same distance, staggers and wrongblocks can be linked into 66A or other similar command normals, giving Jin some juggle combos. If Rody isn't close enough he usually just gets a poke and retains his turn but it's harder for him to set up for combos as he has to close the distance. Overall not too bad otherwise, Rody can also take advantage of the fact that Jin's air game is mediocre, though Jin has double jump, too. The matchup is an issue of consistency with reward rather than a lack of tools, Jin has more reliable pressure overall and has tools he can fall back on if he's the one taking a beating.
VS  Karman
Since Rody has to constantly charge in to be a threat, there's almost zero reason for Karman to play on the offensive when Rody is approaching him instead. He has a projectile, but besides that, Rody has nothing to incentivize Karman to approach him other than a life lead. Rody has unquestionably better lows than Karman does, so despite the worse range compared to Karman, it's easy for Rody to charge in and force Karman in a 50/50. If Karman knows how to handle Rody's mixups, Karman is free to punish Rody. That said, Karman will likely burn through meter a little more due to his instant reversal, on wakeup or neutral otherwise, and having a counter can make Rody second guess using highs or mids. Rody at the least has jump B he can use to delay a counter hit launch combo with the use of hops, an attack that also packs good range to deal with Karman. Karman is also unlikely to have much chance to use 4B as Rody is fast enough to punish it on reaction if the player is quick enough, so no plus on block pressure for Karman. That's more or less it, as it really is a matter if Karman guesses wrong or not on Rody's mixups - and that's with Karman being a very tough wall to crack with a strictly rushdown character.
VS  Kasumi
Kasumi has little reason to block low against Rody, other than anticipating a 1BB mixup. If Rody's 1BB gets blocked, Kasumi can punish with nearly anything due to the huge frame disadvantage Rody suffers, and given her strong okizeme and combos, this is the last thing Rody wants as the second lightest character in the game that is also a rushdown fiend. The fact that Rody has to force himself in front of Kasumi to be a real threat is already pretty bad since that just makes it easier for Kasumi to punish simple mistakes. Rody can at least fight off Kasumi with his projectile if used very judiciously, but Kasumi can punish even this with 66B if she's close enough. For Rody to get by in the matchup, he needs to be very careful about guessing on his 50/50s and landing raw pokes consistently, especially taking advantage of delayable strings and forcing the Kasumi player to react and get baited into delayed, raw pokes. Fortunately for Rody, his combos are just as effective on Kasumi as they are on most everyone else so he doesn't have to force himself to learn Kasumi specific combos, which he doesn't need very many combos either to score a round, nor does he really need spirit when Kasumi is gonna be in his face the majority of the match anyways. The Rody player might be able to land one 646A if he can time it perfectly, however unlikely and will probably end in him getting smacked anyways. If Rody lands a knockdown against Kasumi, this is his chance to turn the whole round around in his favor, but this doesn't change Kasumi's frightening presence with her powerful normals and specials that can do what Rody can also do, just better and baiting rushdown instead of playing rushdown herself. Still, Rody has both speed and range to help himself, the Rody player just needs a ton of patience to pull through.
VS  Lenny
Lenny
It's less of an issue that Rody can't get in but more an issue that he has very little to work with to fight against Lenny's keepout game. While his own fireball cannot be stopped, Lenny can throw out a fireball to disable its hitbox, or if Rody throws it second, all it will do is trade with her fireball. Given Lenny's awful jump attacks, fireball and other anti-airs mean Rody doesn't have too much issue hitting her out of the air, and his jump attacks, particularly j.B, are better overall anyways. Even when Rody does get in, Lenny has just as effective rush combos as he does and a jab that always leaves her plus, giving Rody almost no room to fight back. Rody having more lows is a plus, but it doesn't matter when Lenny can trap him with 2A attacks from even farther away. Although, if Rody blocks 2A, he can punish Lenny even from farther away and close the distance, catching up to do okizeme and potentially turn things around. Lenny's wakeup options are mediocre if she isn't using 4A or jab/rush combo attacks, maybe 2A. Lenny's regular BnBs are also far more damaging than Rody's is on top of having a ranbu super. If Rody has the life lead, then he could potentially play keepout, but this then presents another issue: making sure Lenny never pushes him in the corner. Her midscreen damage is already huge with the right juggles, but if Rody gets caught in the corner, even with a counter hit launch, as long as Lenny has meter she can loop fireball and immediately 180 the round in her favor. In other words, Rody has to get in to avoid being trapped in the corner against Lenny, but also can't afford to get close to Lenny when her footsies zoning is strong and has a low that reaches so far his approach can become pretty predictable. It isn't entirely awful for him, with tight spacing and good timing he can still squeeze out a super in some cases to hit Lenny, particularly on okizeme where her options are not good - wakeup low kick in particular lacking a good hitbox. Having faster lows than Lenny when he's up close also helps, acting twice as fast as Lenny to get easy pokes, and by making Lenny block low he can utilize overhead properties. If he plays more patiently up-close than he usually does, he can prevent Lenny from getting in her rhythm.
VS  Robert
The most likely thing to happen with this matchup is both characters playing neutral with each other to see who can get their two juggles in first. Robert can do slightly more damaging combos than Rody can, though they tend to have harder links and the reward isn't a massive difference. Robert has a ranbu super, but as long as Rody taunts when possible, Robert will not have much chance to use either that or his specials which he relies on. Rody doesn't need meter much in this matchup either beyond super, his fireball can help him but Robert can punish that with tools like 5AB and j.214B so it isn't always the best idea to try and zone with Rody, even if Robert is a primarily defensive character. Robert can usually outpoke Rody with his longer reaching normals, too, but on the flip side, Rody can somewhat better punish Robert on block. Overall not a hugely drastic matchup, one character needs more meter than the other but they both have the same end goal and achieve it relatively the same - land two juggle combos to call it a round.
VS  Ryo
Ryo
Ryo only needs to land one launcher and that's the match for him. Ryo's 6AACB rush combo gives him the ability to infinite combo Rody and Lenny due to their lightweight, and given that Rody is primarily a rush down character, to make one mistake spells his demise. Rody cannot afford to take this risk and instead opt to play the zoning/hit-and-run game against Ryo. While punishing Ryo won't be too big an issue, Ryo also has a ton more variety in the tools he can use and if he has the life lead, he can utilize fireballs and wall jumps to play the run away game and force Rody to chase after him. And if for whatever reason Ryo cannot punish Rody in a scenario, he can rely on Zan Retsu Ken and hope for the Rody player to choke for not expecting it. A unique trait for both characters is that they can both also meaty each other, Rody with CH 2B and Ryo with 33A, though Rody is better in this regard as it's less punishable and also faster to set up, on top of having better lows than Ryo to begin with. Plus, once he gets the momentum, Rody can of course still carry the round in his favor as he is just as capable of shredding Ryo's life bar, but too much of it relies on Ryo reacting poorly to Rody playing the zoning game and/or if Rody plays normally and can avoid being launched altogether. Counter hit launches won't be quite as bad, as they don't lead to an infinite, however it's okizeme for Ryo which Rody has little answer for beyond fast buttons and parries, and possibly a backdash away. Lacking a ranbu super doesn't help Rody much either, when he has a power slash type attack which leaves him still as opposed to Ryo's mobile ranbu super, making it harder to set up. As for Ryo, as long as he has the life lead, he forces Rody to play his game. The only immediate cause for concern is if the Rody player can bait whiff punishes and wall jumps not being as reliable due to Rody's anti-airs, most notably his fireball.
VS  Sinclair
Rody wins on one simple fact: he's much faster than Sinclair. Not only that, but he's constantly in Sinclair's face, and as long as he avoids his overly punishable attacks, Sinclair can't safely land 4A if use it at all. He's bound to use them at some point (those moves being 6B, 1B, 2B, 3B), but outside of that, he's free to pressure Sinclair and force her to guess between a 50/50. He can't use jab to pressure due to its frame data, or 5B either. Given Sinclair has poor range and speed issues, Rody should safely be able to punish the majority of attacks with a simple backdash cancel 5C, leading to a knockdown. And if Rody wants to play really rough, he can hit Sinclair to get the life lead and zone her out with fireballs. Even though it's a slow fireball, Sinclair can't properly deal with it. Her dash and walk speeds are too slow, her jumps are awful with recovery, and the only way she could punish it is probably either 3A or 214A. Sinclair needs to play this matchup patiently and wait for the Rody player to make mistakes. Utilize universal mechanics whenever possible, particularly 4C parries if Rody gets aggressive with the mids and overheads. Sinclair can usually rely on jabs for quick pokes even though the damage will hardly do anything, since Rody is in her face a lot, but going for lows is usually not gonna work since Rody can act faster, even with his own lows. Sinclair's other option if she has to escape pressure is to use 4AB. Rody's rushdown means there's an okay chance that Sinclair can land a counter hit with it resulting in a knockdown to get some breathing room.
VS  Wang
Wang
If Rody plays the rushdown game, it will essentially turn into a war of attrition where both characters are looking for low/overhead mixups with the exception that Rody is much faster than Wang. If Rody plays the runaway game, it's not as pretty for Wang. Wang only needs to block one projectile from Rody to close the gap, but this is a matchup where 22A is too risky for its own good. From up-close, Rody can punish it right away and from far away, Rody can trade with his projectile. Wang's small size doesn't help him much either when being wrongblocked by Rody only helps Rody, which leaves him not wanting to block low. And as is typical of Wang, his poor range is an issue. Rody's range isn't amazing either, however he has 3A and 4A, both far reaching launchers that make one mistake during footsies and Wang eats a juggle combo. Wang's super easily beats Rody's super thanks to being a ranbu super, and while slow, can potentially catch Rody off-guard if he plays the rushdown game, as opposed to Rody who has fewer chances to throw out super. Keep in mind, however, Rody can throw out projectile to stop it from afar. Wang can get by allowing Rody to act first and blocking against his pressure, which ensures easy confirms off of 6AA and if the Rody player gets predictable, 4C parries that help Wang score knockdown damage. Rody is also more likely to burn meter than Wang is, though all this means is less runaway from Rody and maybe some windows for Wang to use DP, maybe super.
Combos
Note: Combos marked with a ★ symbol are the optimal combos available to the character. Characters are also denoted by the first three letters of their names to indicate that the combo works on them. If it works on all characters, it will, obviously, be marked as "All."
- JIN: Jin
- KAR: Karman
- KAS: Kasumi
- LEN: Lenny
- ROB: Robert
- ROD: Rody
- RYO: Ryo
- SIN: Sinclair
- WAN: Wang
- WYL: Wyler
Rush Combos
| Rush Combos | |||||
| Combo | Difficulty | Damage | Works On | Notes | |
| 6AB | Easy | All | Basic Virtua Fighter-esque string, but reliable none-the-less. Fast speed and decent reach so it makes a decent quick poke punish. | ||
| 6AAC | Easy | All | Rody's double punch into a strong C attack. The go-to option for raw damage or as a combo ender, though 6AABB is still better. | ||
| 6AABB | Easy | All | One of Rody's main mixup options, by pressuring the opponent with a few punches and hoping they guess incorrectly, block low, and get hit by the 6B launcher. While you can use 6BB, there's no need to when 6b gives you ample time to juggle the opponent. It is punishable on block, however, so be very careful about going too willy nilly about this rush combo. | ||
| 6AA, 1BB | Easy | All | One of Rody's main mixup options, pressure with 6AA and then combo into the double sweep hoping that the opponent guesses incorrectly. Just one problem: it's extremely unsafe on block, meaning if the opponent does guess correctly, then Rody will lose all momentum he had. Highly rewarding for Rody, but it's also highly rewarding for the opponent on a good read, especially if you're fighting against Ryo. | ||
| 5AB (1), 2B~5B | Easy | All | An okay mixup, more reliable than the rush combo below it. The issue is since 5AB hits mid, the opponent can crouch block to nullify all three attacks. Rody also cannot cancel 5Ab beyond the first hit, leaving him to commit to the rush combo. If the opponent doesn't know the matchup they'll likely not realize this rush combo exists so Rody can gain some momentum from it. | ||
| 5AB (1), 4A | Easy | All | There isn't a ton of reason to use this considering 6B is already a 6 frame launcher, but you could make the argument that having the extra attack to confirm into 4A as a launcher instead is helpful for mixing up the opponent. The big issue with this rush combo is only the first hit of 5AB can be cancelled, which means Rody has to commit to 4A if he chooses to use it. With this too, however, the opponent can crouch block to nullify both the 2B and 4A rush combo follow-ups. Still, it's extra damage compared to using just 6B by itself, so use this rush combo over a raw 6B if you're certain it'll land for the extra damage. | ||
Juggle Combos
| Juggle Combos | |||||
| Combo | Difficulty | Damage | Works On | Notes | |
| 5C > 6AA > 6BB (whiffs in the corner, use 5C > 6A > 6B in that case) | Easy | ||||
| 3/4 > micro walk > 236B | Easy | ||||
| 6AA > 6B > 6AA > 6BB | Easy | ||||
| 3/4A > 6AA > 236B | Easy | ||||
| 6AA > 6B > 6AA > 5AB | Easy | ||||
| (corner) j.B, 5AB (1 hit), 4A, 6AA, 6AAC | Easy | ||||
| j.B, 6AAB, 236B | Easy | ||||
| j.B, 6AAB, 6AA, 6AAC | Easy | ||||
| j.B, 6AAB, 6AA, 1BB | Easy | ||||
| 6AAB, 6AA, 6AA, 1BB | Easy | ||||
| j.B, 5AB (1 hit), 4A, 6AA, 6AA, 6BB | Easy | ||||
| j.B, 6AAB, 6AA, 5AB (1 hit), 1BB | Easy | ||||
| j.B, 5AB (1 hit), 4A, 6AA, 5AB (1 hit), 4A | Easy | ||||
| j.B, 6AAB, 6AA, 236B | Easy | ||||

