Art of Fighting 3/Sinclair
Introduction
| Player 1 Color | Player 2 Color |
 |

|
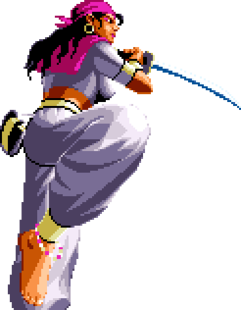
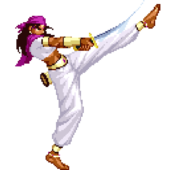
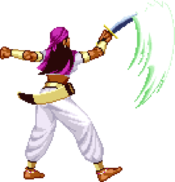
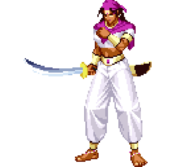
Sinclair, the sub boss of the game, is Wyler's bodyguard. She is pretending to encourage him in his experiments, but secretly wants him to stop them.
Sinclair is the midboss of Art of Fighting 3, a deadly female swordfighter who works for Wyler and wants the elixer for herself. No one, not even Wyler knows her very well, making her a very mysterious woman who keeps her secrets from all. Well we do know one thing: she really stinks in this game. Sinclair has very little to work with overall, so playing her means you're dedicated (or screwing around). How exactly SNK decided to make one boss very weak, and the other boss overly strong is truly a mystery, indeed.
So what is good about Sinclair? For one, at least most of her specials have some sort of use with low cost, so you have something to work with. Aside from that, she's easy to understand despite her various flaws, and she technically can still Touch of Death the opponent. Now for her long list of flaws. Terrible combos that are hard to execute, inability to throw at all, low damage unless you combo, a terrible OTG 3A, and huge delay on everything she does, making everything a commitment. Sinclair's a pretty cool character, but you have to work hard to keep your momentum, since you can lose it in a second. Still, Sinclair is definitely one of the more unique characters SNK has made for her unorthodox playstyle.
On a side note, whenever you play on Sinclair's stage, the stage intro is pretty lengthy compared to most of the other stages that start the match right away. You can skip part of this intro - but not all of it. Simply press the A button for either player 1 or player 2 and the game will skip the earthquake and background thunder effect and cut straight to the chandelier dropping. You cannot skip the chandelier drop itself, however, but you can save a few seconds of your time and keep the flow consistent with the game's instant rematch transitions.
| Strengths | Weaknesses |
|---|---|
|
|
Move List
Esoterics
Color Coding
- Green refers to special move damage/frames when done in green meter, or otherwise the strongest damage it can deal.
- Blue refers to special move damage/frames when done in blue meter, or otherwise moderate damage it can deal.
- Purple refers to special move damage/frames when done in purple meter, or otherwise the weakest damage it can deal.
- Orange refers to the damage dealt in chip damage during block.
- Colors may be used otherwise to associate frames/scenarios to avoid confusion, i.e. Kasumi's 4C parry having two different sets of frame data.
Attacks, Notation and Damage
- [Brackets] refers to the specific attack in a string/rush combo that the attack box data is referring to.
- The arrow > on the left of it is the attacks that need to be done before the move in brackets can be performed. If there is an X, it means there are multiple ways of getting to the move in brackets which will be listed in the description.
- Damage values always assume grounded damage with no modifiers. If two damage values are listed with a / in-between them, it lists the damage it deals for grounded and airborne respectively.
- This is because these attacks are used in strings or otherwise as follow-ups where they're more likely to connect with airborne opponents rather than grounded opponents, such as Jin's 6B which hits twice, the first hit leaving the opponent airborne before the second hit.
- Ground/Aerial means if the attack is performed grounded or airborne. If an aerial, being hit during the attack will result in the attacker being knocked down.
- There is no true throw invulnerability in Art of Fighting 3, so when a move is listed as "Throw Invulnerable" it means the attack changes the character's hurtboxes in a way that the throw hitbox cannot collide with it.
Reading Frame Data
- Description of the five stats:
- Startup frames counts all frames before the first active frame comes out, aka how long it takes for the attack to come out
- Active frames is how long the attack is able to hit the opponent, starting at the first active frame
- Recovery frames is how long it takes before the player resets to neutral and can act again
- Total is all three stats above added up, so total number of frames in the move
- Hit/Block advantage is how much faster or slower you can act than the opponent by the number of frames
- Frame advantage, both on hit and block, always assumes frame advantage after the first active frame connects.
- If an attack lists "QKD" in its properties, this means it's an attack that can be teched out of faster than a normal knockdown. This affect only applies to counter hit launches or if the attack connects with the opponent in the air.
- When a move lists ST, SKD, etc. followed by a number in (parentheses) it indicates the frame advantage for the attacking player. Not all knockdowns are plus on hit and depends on the move.
- Knockdown frames always assume frame advantage against Jin. Everyone except for Robert, Sinclair, and Wyler share 16f of wakeup recovery after a knockdown. For Robert, Sinclair, and Wyler, add +1 frame advantage.
- This rule also applies to SKDs, however in this case Jin and everyone else shares 58f total of being in an SKD state except for Lenny, who is in an SKD state for 59 frames instead. For SKD frame advantage against Lenny, add +1 frame advantage.
- The wiki omits STKD frame advantage mostly because those are always plus no matter what, so it's somewhat pointless.
- The frames in (parentheses) next to a "Cancellable into..." sentence is how long you can delay a follow-up, AKA which exact frames you're allowed to cancel into a follow-up. If it states "onwards" then the cancel can be done whenever after the given frame. This info helps both for buffering inputs and also delaying strings for mixups.
Other Tips
- Moves are sorted by ascending number followed by ascending alphabet, so lower numbers first followed by lower alphabet letters. Moves with two button presses are organized last.
- It is recommended you read the brief descriptions to how the attacks animate in-game to familiarize yourself with each attack. Unfortunately, due to the rotoscoped graphics, animations lack key frames that help distinguish themselves as separate moves when viewed as single frames. This in turn makes some moves that share frames look identical to one another without context to how they are supposed to appear, without resorting to using gifs.
General Frame Data
| Character | Jump Startup | Jump Recovery | Jump Frames | Hop Frames | Crouch Frames | Restand Frames | Crouch Height |
| 5f | 16f | 60f | 49f | 15f | 12f | Short | |
| Walk Startup | Walk Speed | F. Dash Frames | F. Dash Speed | F. Dash Distance | Backdash Frames | Backdash Speed | Backdash Distance |
| 9f or 1f* | Fast | 31f | Slow | Short | 28f | Average | Average |
- Sinclair has 9 frames of startup on her forward walk and 1 frame of startup on her backwards walk. If you let go of forward as Sinclair is in the middle of her startup, instead of resetting back to neutral, she will reverse her walk startup animation first. Meaning, if you let go at frame 8 for example, instead of going back to neutral, the animation reversing means she has to count back down the startup in order to return to neutral again.
Grounded Normals
5A
|
|---|
5C
|
|---|
2A Ankle Slice Ankle Slice
|
|---|
2B Strong Sweep Slice Strong Sweep Slice
|
|---|
Full Crouch 2A/2B Low Cutter Low Cutter
|
|---|
Jumps
j.A
|
|---|
j.B/C
|
|---|
Command Normals
3A/B Direct Stab Direct Stab
|
|---|
6A Spiral Flash Spiral Flash
|
|---|
4B Blind Sacrifice Blind Sacrifice
|
|---|
4AB Escape Duel Escape Duel
|
|---|
Launchers
5B Takeoff Takeoff
|
|---|
4A Turning Edge Turning Edge
|
|---|
Specials
Vision Cutter
646A |
|---|
Revolving Sword
214A |
|---|
Diving Sword
28A |
|---|
Hyper Aura Slash
641236A |
|---|
Miscellaneous
Raz
4C |
|---|
Taunt
5D |
|---|
Pursuit
3A/B when opponent is on the ground |
|---|
Strategy
| Moves to USE | Moves to AVOID |
|---|---|
|
|
General Strategy
In every matchup, Sinclair is going to be fighting an uphill battle, as everyone else outclasses her. She lacks meaningful ways to escape the corner, to push the opponent into the corner herself, fast moves, attacks that function the way they should, a good super, combos, anything you can think of, at least one other character does better. Sinclair has three goals at most to keep in mind of during the match: poke the opponent as far away as possible, use hops to apply 50/50 pressure, and try to get her TOD combo. However, these 3 goals all contradict each other, despite being the only things that Sinclair has going for her. If you try to poke as far away as possible, while 3A will still prove a very effective move and a must use for every match, it's a mid, so it will be blocked both standing and crouching. The farthest reach will also be out of range for Sinclair to do her 50/50s with her jump B hops. But even if you get just in range of being able to use her jump B for overhead mixups, you might still be out of range for her low moves. So you try and get closer to land those, but at that point you aren't capable of zoning and poking from afar anymore. What's worse, Sinclair still cannot setup her TOD combo from this range unless she gets even closer, which proves the greatest risk. So basically, you have to pick between either staying as far away as possible and poke super aggressively, or risk everything and attempt her TOD.
Everything Sinclair does is quite delayed, and usually you land hits because of impatience from the opponent, but even then Sinclair's damage output is incredibly low. Her combo damage is surprisingly high, but she has so few combos anyways that it hardly matters. Outside of the very few normals she has that are of use, her specials are useful but still easy to punish. Sinclair must never use 646A as it is easily the worst special in the game, posing no actual threat. 214A is great for combos or other simple punishes with rewarding damage, just be careful not to accidentally use it on block. 28A is her only real corner escape option, so a well timed 28A makes for an effective poke, however it is marred by the fact that some hitboxes can trade and effectively shut out Sinclair's attempt at gaining momentum. It is also best not to use it as an OTG either, since the opponent will instantly recover and have ample leg room to punish Sinclair. Her super deals great damage, but the range is worse than Rody's super which functions the same way, so you need ample spacing and a hard read to land it.
If you decide to play Sinclair, you'll need great matchup knowledge. On the bright side, there's the chance that the opponent will not know the matchup all that well, but in a game with only 10 characters, it's not hard to study it either. The game's system actively acts against Sinclair's design that gaining any momentum is an uphill battle. Scoring knockdowns are the only reliable way for Sinclair to gain momentum, which isn't too difficult since a decent chunk of moves can knockdown, but as stated, you need game knowledge to know how and when to score these knockdowns, unlike Wang who has plenty of tools to pester the opponent with ease.
Matchups
VS  Jin
Jin
Jin wins the matchup, though he should avoid using any of his overly punishable moves against Sinclair since despite his heavy weight, he is still susceptible to Sinclair's TOD combo. The irony in this is that Jin being heavy makes it most likely for 214A to whiff, but to substitute this, Sinclair can use 28A for almost the same damage. However, 28A would hit overhead in this case, dealing only about 98% damage to Jin (and any other character), which thus means Jin recovers near instantly and is perfectly capable of punishing Sinclair. If the Jin player chooses not to pop super, he still has desperation so he can perform a near TOD combo on Sinclair using his 4A launcher on her. The actual likelihood any of this will happen is low as the TOD would have to be done on Jin at full health, and that assumes the Sinclair player isn't able to time 214A properly to connect or doesn't have desperation to mitigate the damage difference, but it's still something Sinclair should avoid at all costs and practice doing the normal TOD combo on Jin to ensure no immediate backfire. Beyond that, Jin loses out to Sinclair's better jump attacks and while his jump recovery is better than Sinclair's, it's only by a few frames difference so it isn't as big an advantage for him. Still, he has several other useful special moves that he also doesn't rely quite as much on, better frame data on moves like his jab, no major range issues, better whiff punishes, and stronger mixups. The only serious cause for concern for Jin is avoiding death wishes with moves like 5AB being extremely punishable on block. If Sinclair doesn't have a chance to set up her death combo, she has to burn meter to dish out 8 frame punishes with 214A, or whiff punishes with 28A, and otherwise playing neutral with Jin. This is easier said than done when one wrong mistake means Jin can easily delete a mass chunk of Sinclair's life, to which she has few safe pokes.
VS  Karman
Any long ranged attack, or any attack that Sinclair does in general, is a free window for Karman to use his 646X special attack to punish Sinclair. Besides that, Karman outranges Sinclair's jab and her 2A low, which gives Sinclair very little chance to charge in and land a 4A launcher, especially since Karman can freely 5AB or 236B Sinclair out of fake jump-ins to setup her TOD combo. For Sinclair to use her 50/50, she needs to use 2B to contest with Karman's own long ranged 2B. Overall an easy matchup for Karman as long as he keeps playing the keepout game against Sinclair and remains aware of his spacing from her. Sinclair is still capable of poking with 3A against Karman, and on whiff scores free damage with 214A. It hardly matters when Sinclair has to approach Karman, however. The only advantage Sinclair has is she can duck Karman's main moves, even though she still can't punish with anything reliable.
VS  Kasumi
This matchup's pretty easy for Kasumi. 5AB and Kasane Ate shut down everything Sinclair can do. If Sinclair doesn't play perfectly then it's all downhill moving forward as Kasumi is significantly faster than Sinclair in every regard. While Sinclair can use jab, and it will hit Kasumi the same as it would anyone else, Kasumi's 5AB will reach Sinclair well out of jab range. In order for Kasumi to lose, the Kasumi player has to either make serious mistakes, or the Sinclair player has to commit to pure offense and hard reads. Doing Sinclair's TOD against Kasumi will almost never happen given Kasumi's advantages, so Sinclair will have to opt for the zoning, poking game instead, and maybe a 50/50 here and there. Incredibly rough for Sinclair in every regard.
VS  Lenny
Lenny
Other than respect it and block it, jump over it just right (which Lenny can delay anyways), or a well timed 28A which runs the risk of Lenny being able to recover in time to block it anyways, there's basically nothing Sinclair can do about Lenny's fireball. She can taunt like anyone else, but if Lenny has the life lead, that won't matter when Lenny can simply charge up and negate any taunts, forcing Sinclair to approach. That's really all Lenny needs in this matchup is her fireball and Sinclair will struggle getting in at all to punish it or deal with Lenny's zoning. This is also ignoring the fact that Lenny can use 4B or rush combos into 4B to escape away from Sinclair and Sinclair's only possible choice is 214A if Lenny doesn't recover in time. Worst of all for Sinclair is Lenny's large 2A hitbox. The only serious advantage Sinclair has is the fact that almost all of Lenny's attacks hit mid or overhead, so she only has to block low for 2A, but this also brings the issue of Sinclair's lengthy restand animation with no good FC cancels out of it beyond 214A and 28A. Sinclair really needs meter in order to work in this matchup to dish out damage and punish Lenny. Since Lenny has much better range, she can comfortably keep herself out of Sinclair's TOD range, that being point-blank range. Sinclair has to play the slow and deliberate poking game and be extremely careful about the punishes she goes for. Lenny has little issue keeping Sinclair out and punishing anything Sinclair does as well, other than maybe Sinclair's 3A which has good range.
VS  Robert
As is usual for Sinclair, she loses the matchup, particularly in the way she spends meter as Robert has better special moves. Robert can more consistently keep Sinclair out of the air and has better whiff punishers, and although 2 frames slower than Zan Retsu Ken, his Genei Kyaku is still a big threat for Sinclair to deal with. She can more consistently punish it with 28A but it's still fairly risky and probably not worth it. Whether Robert or Sinclair wins depends on who is more patient than the other player, Robert can knock Sinclair out in two juggle combos which are easy to setup, but if Robert makes one mistake then Sinclair can kill him with her TOD combo. The key moves for Sinclair to look out for are 5C, 2B, j.214B, and 28B as those moves are minus enough for her to punish with 4A. Worst case scenario, she can also use 214A to get a quick block and/or whiff punish. Both characters are gonna be meter hungry, although Robert has the advantage of playing more defensively so if he gets the life lead then he forces Sinclair to approach him. In this case, while his keep out isn't amazing and he can't backdash cancel, he still has easy to use launchers and whiff punishes aren't difficult to set up, either. Not a horrible matchup for Sinclair but she can still play footsies with him and attempt to do a death combo, albeit poorly.
VS  Rody
Rody
Rody wins on one simple fact: he's much faster than Sinclair. Not only that, but he's constantly in Sinclair's face, and as long as he avoids his overly punishable attacks, Sinclair can't safely land 4A if use it at all. He's bound to use them at some point (those moves being 6B, 1B, 2B, 3B), but outside of that, he's free to pressure Sinclair and force her to guess between a 50/50. He can't use jab to pressure due to its frame data, or 5B either. Given Sinclair has poor range and speed issues, Rody should safely be able to punish the majority of attacks with a simple backdash cancel 5C, leading to a knockdown. And if Rody wants to play really rough, he can hit Sinclair to get the life lead and zone her out with fireballs. Even though it's a slow fireball, Sinclair can't properly deal with it. Her dash and walk speeds are too slow, her jumps are awful with recovery, and the only way she could punish it is probably either 3A or 214A. Sinclair needs to play this matchup patiently and wait for the Rody player to make mistakes. Utilize universal mechanics whenever possible, particularly 4C parries if Rody gets aggressive with the mids and overheads. Sinclair can usually rely on jabs for quick pokes even though the damage will hardly do anything, since Rody is in her face a lot, but going for lows is usually not gonna work since Rody can act faster, even with his own lows. Sinclair's other option if she has to escape pressure is to use 4AB. Rody's rushdown means there's an okay chance that Sinclair can land a counter hit with it resulting in a knockdown to get some breathing room.
VS  Ryo
Ryo
Any time Ryo pops off a Zan Retsu Ken, that's it for Sinclair. She can punish it back with 28A but timing this is incredibly difficult as it's a tiny window that has to be done while 646A's hitboxes are lowered down to the ground. And as a punish, it can punish just about anything Sinclair does thanks to its 4 frame startup. Sinclair shouldn't have too much trouble dealing with Ryo's wall jumps thanks to having decently ranged jump button attacks, but the timing of it and pressure of blocking them will still prove a hassle for her. She can attempt to jab them out too, but this usually leads to trades if jab hits. Ryo cannot perform his infinite on Sinclair, though he can still net a huge amount of damage with a second loop using the corner. Ryo's range outside of 2B or 646A vacuum hitboxes isn't particularly huge otherwise, Sinclair will struggle in this matchup as she will every other matchup, but it won't be quite as difficult for her to get in and set up for her TOD combo. The only fast launcher Ryo has is 3A, which requires close range and although not minus enough to be punished with her TOD, still gives Sinclair enough room to throw in a 214A or some other poke. Unless Sinclair does 4A super early in the attack's startup, she cannot punish Ryo's 64BC so Ryo can use that as a safe keepout poke if he's spaced out. Sinclair also doesn't need to worry as much since Ryo's frame data is abysmal. Thing is, if Ryo avoids his highly punishable attacks, Sinclair has to deal with the likes of Zan Retsu Ken, his DP, better hitboxes, and his plus jab. Ryo may have more room to pressure than Sinclair does, but it's a matter of who plays more patiently and lands the huge damaging blow. It's over for Ryo if Sinclair lands 4A, Ryo can take down Sinclair in about 2-3 knockdowns and/or juggles.
VS  Wang
Wang
Sinclair can outrange Wang on some attacks, and other than that she's not winning the matchup. Wang can't rely on 22A much since Sinclair can punish it with both 3A and 214A, but outside of that all Wang has to really worry about over Sinclair is 4A. If wrongblocked, it will leave Sinclair plus even if she can't get a real follow-up off of it. All Wang really needs is to spam 4A and throw out 6AA rush combo attempts, both of which all Sinclair can really do is either jab or 4C parry. Sinclair's jump buttons beat Wang's jump buttons, but despite this Sinclair probably isn't going to attempt jumping given her massive 16f jump recovery for a mere knockdown, meaning Wang is free to throw out jump normal counter hits. There's practically nothing Sinclair can do besides respect Wang's mixups if he's close. At the same time, every time Wang is up close is a chance for her to use 4A, which even if it leaves her minus, the only option Wang can use is 4A and DP. Wang's overall damage output isn't impressive without his BnBs so if Sinclair can, she should always prevent Wang from landing any combos, and thus give herself free chances to throw out 4A. The matchup depends on how well Wang maintains his spacing to keep Sinclair from using 4A and launching him. He never has to worry about the corner either, and if anything, he'll easily push Sinclair into the corner from raw pokes alone.
Combos
Note: Combos marked with a ★ symbol are the optimal combos available to the character. Characters are also denoted by the first three letters of their names to indicate that the combo works on them. If it works on all characters, it will, obviously, be marked as "All."
- JIN: Jin
- KAR: Karman
- KAS: Kasumi
- LEN: Lenny
- ROB: Robert
- ROD: Rody
- RYO: Ryo
- SIN: Sinclair
- WAN: Wang
- WYL: Wyler
Rush Combos
| Rush Combos | |||||
| Combo | Difficulty | Damage | Works On | Notes | |
| 6A,5B | Easy | 894 | All | Unfortunately, this is all Sinclair has. Since it uses her 5B launcher, you need to use whatever combos you can use from that instead of her 4A launcher. A rush combo that cancels Sinclair’s 6A midway through into a 5B followup. If the second hit connects in 6A, then it will combo, but still, this is 5B which is very difficult to actually follow up on. I guess if you’re in a panic, you can use it. Why is she a boss character exactly? | |
| 6A,4B | Easy | All | Sinclair's only other rush combo, but since it ends with 4B which is punishable on reaction and otherwise easy to block (and therefore still punish), this makes the rush combo borderline useless. Even if hit by Sinclair's 6A, the opponent can still act in the middle of the rush combo. | ||
Juggle Combos
| Juggle Combos | |||||
| Combo | Difficulty | Damage | Works On | Notes | |
| 5B > 214A | Easy | 384 + (360 x 2-4) | All | Works best in the corner where you can easily connect all hits. It also works midscreen, but it's less consistent. You can attempt to use 5A before 214A but it makes the combo much harder to pull off. | |
| ★28A > j.A while falling > 28A OTG | Easy | All | Sinclair is significantly minus on hit once this combo ends since 28A hitting OTG makes the opponent recover near instantly. Worth it for the damage output alone but you should also make sure it counts and kills the opponent when they're close enough to death or else you risk being punished and losing the round yourself, if not eating a raw super. | ||
| (corner) 4A > microdash 5A x2-3 > 5C | Moderate | 2560-2880 | KAR, RYO | Very unlikely you'll ever land this combo, since it requires very specific spacing for it to connect, on top of needing to be in the corner, which it'll be a miracle if Sinclair can trap you in the corner at all. If you're too far the 5A wont connect. The combo is easier to land if you omit one of Sinclair's 5As. | |
| Death Combos | |||||
| ★4A > move forward > 4A > 214A / 28A | Moderate | 3840-4320 | All | Sinclair's TOD combo. The damage on her 4A alone is what makes this a deadly combo, but in order for it to actually work you need to be at point blank range, since that's the only way it'll launch. Still, an extremely important combo in Sinclair's bag as this is what will guarantee rounds if you can consistently set it up. Depending on the opponent, you'll either need to walk forward or dash forward. If you can't land the 214A, 28A makes for a good substitute, although it will not kill. It's likely the 214A will not connect with Jin at all if you don't time the second 4A perfectly and right away, forcing you to use 28A. Although, the combo will still kill from anything less than full health, if you use 28A as it equates to roughly 95% damage. | |
