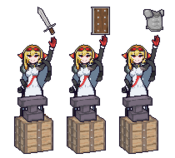
Collabs (commonly referred to as Assists) are characters that are called into the fight using a full Superchat Meter or 2 stocks of Star Meter. One is selected during character select, and determines whether or not the point character has 2 or 3 maximum bars of Superchat Meter. They can be called at any time the point character is not in hitstun or blockstun with some exceptions.
Mio Ookami
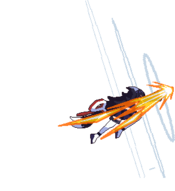
Full Power Flaming Punch + +
|
| Damage
|
Guard
|
Startup
|
Active
|
Recovery
|
Adv. on Block
|
Adv. on Hit
|
Invulnerability
|
| 190
|
Mid
|
31
|
15
|
-
|
12
|
-
|
None
|
- Requires and uses 2 stocks of Star Meter.
- Applies 1.2x scaling on hit.
Mio travels across the screen at an upward angle, wall-bouncing for a full combo on hit. Deals a great amount of hitstop on block and hit, and the lack of superflash can make it hard to IB. Gives the next hit after the punch lands a 120% scaling bonus, which makes this an excellent way to gain additional damage and extensions on characters with limited combo potential. Will miss at point-blank.
|
|
|
|
| Damage
|
Guard
|
Startup
|
Active
|
Recovery
|
Adv. on Block
|
Adv. on Hit
|
Invulnerability
|
| -
|
-
|
5
|
See below
|
-
|
-
|
-
|
None
|
- Requires and uses a full Superchat meter (2 bars).
- Cannot be activated while in the air.
- 180F between each card pull.
Mio draws 5 random cards from a tarot deck in regular intervals, each applying a debuff to the opponent. All debuffs last 5 seconds unless otherwise specified and cannot be prevented.
- Poison (Purple): Deals 75 damage over time.
- ATK- (Green): Attacks from the opponent now deal 0.85x their usual damage. Does not stack with itself.
- DEF- (Pink): The opponent receives 1.20x as much damage from attacks (includes chip from all sources). Does not stack with itself.
- Crow (Blue): The opponent receives additional chip damage from all attacks (including those that usually don't deal chip, such as normals). Chip dealt is equal to 0.4x the attack's damage. Does not stack with itself.
- Skull (Orange): The opponent loses around 1/8 of a bar of meter.
|
|
Marine Houshou
The Aquamarine + +
|
| Damage
|
Guard
|
Startup
|
Active
|
Recovery
|
Adv. on Block
|
Adv. on Hit
|
Invulnerability
|
| 50x4 (200)
|
Mid
|
2+(18 Flash)+18
|
1(17)1x3
|
-
|
30~
|
-
|
None
|
- Requires and uses 2 stocks of Star Meter.
- Applies 0.85x scaling on hit.
- Effective startup: 20F
Marine's pirate ship appears from behind the point character and fires its cannons 4 times in quick succession, the first one centered in the middle of the screen and each successive one aiming at a spot further forward. Without IB, it will usually push back the opponent enough to hit at least twice in quick succession. Will only hit once in the corner. Useful to immediately force the opponent into the corner and begin your offense.
|
|
I'm horny~! I'm horny~!
|
| Damage
|
Guard
|
Startup
|
Active
|
Recovery
|
Adv. on Block
|
Adv. on Hit
|
Invulnerability
|
| 0
|
Unblockable
|
5
|
-
|
-
|
-
|
32
|
None
|
- Requires and uses a full Superchat meter (3 bars).
Marine walks in and slowly approaches the opponent, leaping at them with an unblockable grab when she gets close enough. If she manages to grab the opponent, they become stuck in hitstun for 32F, and are temporarily unable to dash in addition to taking chip damage from normals for 6 seconds (360F). This move inflicts x0.50 scaling when used to start a combo, and chip dealt is equal to 0.2x the attacks' damage. Ideal for unblockable setups.
The length of Marine's hug debuff is not affected by how long she has been out on the screen patrolling. It will always be a set amount, even if she lands the hug right before she would have disappeared normally.
Different parts of Marine's summon have different startups:
- Activation after L+H press: 5F
- Earliest walk to detection: 82F
- Glomp after detection: 20F
|
|
Kanata Amane
50kg Grip + +
|
| Damage
|
Guard
|
Startup
|
Active
|
Recovery
|
Adv. on Block
|
Adv. on Hit
|
Invulnerability
|
| 201
|
Unblockable
|
41
|
11
|
-
|
-
|
31
|
None
|
- Requires and uses 2 stocks of Star Meter.
- Applies 0.44x scaling on hit.
- Maximum startup (full screen): 52F
Kanata appears in front of you and dashes forward, grabbing the opponent and squeezing them. This attack goes full screen and will whiff on jumping opponents. There is a dead zone if your point character is too close to the opponent where Kanata will whiff.
While the opponent appears to be in an invulnerable state after the grab, there is a small window right before they touch the ground that they can be hit and juggled into a combo. As this command grab does not apply any combo starter scaling, the followup combo will deal a sizeable amount of damage.
|
|
|
|
| Damage
|
Guard
|
Startup
|
Active
|
Recovery
|
Adv. on Block
|
Adv. on Hit
|
Invulnerability
|
| -
|
-
|
5
|
-
|
-
|
-
|
-
|
None
|
- Requires and uses a full Superchat meter (2 bars).
- First wave spawn: 130F
Kanata appears to perform her famous Soran Bushi dance, temporarily preventing the screen from scrolling and periodically summoning waves that do no damage but push the opponent away significantly. Waves work during either player's hitstun, which can break combos. As this assist does not track your point character's current position, you can use it just before switching sides to have the waves force the opponent towards your point rather than away, which can serve as an "artificial corner" midscreen.
The "artificial corner" that Kanata creates removes pushback from all moves on hit and block which is completely independent of the waves that Kanata creates. This can allow for some combos and pressure that may not even be possible in the regular corner normally.
|
|
Iroha Kazama
Eggplant Slice + +
|
| Damage
|
Guard
|
Startup
|
Active
|
Recovery
|
Adv. on Block
|
Adv. on Hit
|
Invulnerability
|
| 200
|
Air Unblockable
|
23
|
16
|
-
|
12
|
-
|
None
|
- Requires and uses 2 stocks of Star Meter.
- Applies 0.85x scaling on hit.
After throwing some eggplants into the air, Iroha performs a huge air unblockable sword slash in front of her that reaches fullscreen, only whiffing on some low profile options (such as Korone's 3H or Botan's 214L) and dealing a great chunk of damage. Causes a wallbounce on an airborne or already juggled opponent, even midscreen, so it is great for extending combos and easy to get an extension off of sniping the opponent out of the air.
|
|
|
|
| Damage
|
Guard
|
Startup
|
Active
|
Recovery
|
Adv. on Block
|
Adv. on Hit
|
Invulnerability
|
| 30X18 (540)
|
Mid
|
5+77
|
1(18)1x17
|
-
|
-
|
-
|
None
|
- Requires and uses a full Superchat meter (2 bars).
- Effective startup: 82F
Iroha, aiming at flying ninjas, performs a series of very quick dashing slashes that cover the upper half of the screen, catching opponents in the air and knocking them back down to the ground. Great at denying aerial space from the opponent, and can keep them blocking up high for a while in case they jump, leaving them vulnerable to air unblockable attacks.
|
|
Risu Ayunda
Isekai Truck + + HONK HONK HONK HONK
|
| Damage
|
Guard
|
Startup
|
Active
|
Recovery
|
Adv. on Block
|
Adv. on Hit
|
Invulnerability
|
| 260
|
Mid
|
25
|
21
|
-
|
12
|
-
|
None
|
- Requires and uses 2 stocks of Star Meter.
- Can OTG to get a bit more damage after a throw or any knockdown, timing varies depending on character.
- Applies 0.50x scaling on hit.
- Maximum startup (max truck range): 31F
Risu rams her truck into the area in front of the point character, making the opponent fly away a considerable distance with a techable knockdown on hit. The truck can even pick up OTG and has a wide enough hitbox to cover behind the point character as well. Up-close and in the corner, it slightly pushes the point character away, but can be used as both a combo starter and/or extension depending on the character.
|
|
Respect the nuts! Respect the nuts!
|
| Damage
|
Guard
|
Startup
|
Active
|
Recovery
|
Adv. on Block
|
Adv. on Hit
|
Invulnerability
|
| 20xN
|
Mid
|
5
|
-
|
-
|
-
|
-
|
None
|
- Requires and uses a full Superchat meter (2 bars).
- Earliest tengu stone nut use: 62F
Risu summons nuts that fly at the opponent when normals are performed. Light buttons make them fly downward and nearby, Medium and all non-2H Heavy buttons make them fly further forward at an angle, and crouching Heavy specifically makes them fly upward at an angle.
|
|
Kiara Takanashi
SPARKS + +
|
| Damage
|
Guard
|
Startup
|
Active
|
Recovery
|
Adv. on Block
|
Adv. on Hit
|
Invulnerability
|
| 20x11 (220)
|
Mid
|
2+(18 Flash)+9
|
1(9)1x10
|
-
|
51~
|
-
|
None
|
- Requires and uses 2 stocks of Star Meter.
- Applies 0.85x scaling on hit.
- Minimum effective startup back-to-corner: 11F
- Average effective startup midscreen: 21F
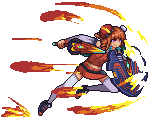
Kiara flies across the screen with a multi-hitting shield charge that ends in an explosion which launches the opponent sky high. Can be used to cover an approach in neutral, extend pressure, or even to confirm mixups after a hard knockdown. The damage that this move deals is based on how early into Kiara's tackle she makes contact with the opponent.
|
|
|
|
| Damage
|
Guard
|
Startup
|
Active
|
Recovery
|
Adv. on Block
|
Adv. on Hit
|
Invulnerability
|
| -
|
-
|
5
|
-
|
-
|
-
|
-
|
None
|
- Requires and uses a full Superchat meter (2 bars).
Kiara floats nearby with her shield out for 360 frames, temporarily reflecting projectiles. Startup is nearly instant, so Kiara can be used on reaction if a projectile is just about to make contact with your point character.
|
|
Amelia Watson
Ground Pound + + Hide your moms. Hide your moms.
|
| Damage
|
Guard
|
Startup
|
Active
|
Recovery
|
Adv. on Block
|
Adv. on Hit
|
Invulnerability
|
| 160
|
Mid
|
2+(43 Flash)+28
|
-
|
-
|
20
|
-
|
None
|
- Requires and uses 2 stocks of Star Meter.
- Can OTG for combos after throw or any knockdown, timing varies depending on character.
- Applies 0.75x scaling on hit.
- Effective startup: 30F
After turning into Smol Ame, Amelia locks on to the opponent's current position and does a ground pound. Useful for extending combos after a knockdown using the OTG or adding on just a bit more damage for the kill.
|
|
ゴゴゴゴ... ゴゴゴゴ...
|
| Damage
|
Guard
|
Startup
|
Active
|
Recovery
|
Adv. on Block
|
Adv. on Hit
|
Invulnerability
|
| 0
|
Mid
|
5+15
|
?
|
-
|
-
|
-
|
None
|
- Requires and uses a full Superchat meter (3 bars).
- Time slow lasts 6 seconds.
- Applies 0.90x scaling as a constant pulse after each combo hit.
- Effective startup: 20F
Amelia appears in front of your point character and sends out an invisible pulse that temporarily slows the opponent on hit, effectively doubling the amount of frames they experience. The invisible pulse can be blocked to prevent the time slow effect from activating. The time slow itself while it is active sends a constant 0 damage pulse after every hit of a combo which will cause damage to scale downward much faster than normal.
The time slow effect has a variety of applications and has extreme versatility that matches its expensive cost. Use it in neutral on reaction to the opponent whiffing or jumping at your point character to make them punishable. Use it on defense during gaps in pressure to turn normally safe or advantageous blockstrings extremely negative or punishable. Use it to extend combos at any time, or get followups out of some moves that would normally not be possible, such as your universal overhead.
|
|
Moona Hoshinova
Supernova + +
|
| Damage
|
Guard
|
Startup
|
Active
|
Recovery
|
Adv. on Block
|
Adv. on Hit
|
Invulnerability
|
| 20,25x5,75
|
Mid
|
31
|
-
|
-
|
12
|
-
|
None
|
- Requires and uses 2 stocks of Star Meter.
- Applies 0.50x scaling on hit.
Moona performs an axe slash, trapping her opponent in an onslaught of aerial attacks. Multi-hit slashes only activate on hit and not on block. Forces hard knockdown on hit and cannot be followed up normally.
|
|
|
|
| Damage
|
Guard
|
Startup
|
Active
|
Recovery
|
Adv. on Block
|
Adv. on Hit
|
Invulnerability
|
| 0
|
-
|
5
|
-
|
-
|
-
|
-
|
None
|
- Requires and uses a full Superchat meter (3 bars).
- Gravity well lasts 8 seconds.
- Applies 0.90x scaling as an initial pulse.
- Gravity well is active immediately after startup with no delay.
Moona invokes her divine lunar presence, producing a field that pulls you in. Like gravity. While active, the gravity well sends a constant 0 damage pulse across the entire screen, which will cause the first hit of combos to have 90% scaling applied or add that additional 90% scaling if used mid-combo.
|
|
AZKi
Zero-Guessr + +
|
| Damage
|
Guard
|
Startup
|
Active
|
Recovery
|
Adv. on Block
|
Adv. on Hit
|
Invulnerability
|
| 100x2
|
Mid
|
34
|
-
|
-
|
12
|
-
|
None
|
- Requires and uses 2 stocks of Star Meter.
- Can OTG for added extra damage after throw or any knockdown, timing varies depending on character.
- Applies 0.50x scaling on hit.
AZKi pulls off a 0 meter guess on her opponent's location and drops a map pin, briefly stunning them. Causes forced hard knockdown, so can be used to turn soft knockdowns into hard knockdowns.
|
|
|
|
| Damage
|
Guard
|
Startup
|
Active
|
Recovery
|
Adv. on Block
|
Adv. on Hit
|
Invulnerability
|
| -
|
-
|
5+63
|
-
|
-
|
-
|
-
|
None
|
- Requires and uses a full Superchat meter (3 bars).
- Meter lock debuff lasts 6 seconds.
- Effective startup: 68F
AZKi glitches through various forms, rendering her opponent unable to perform STAR specials. The 3 hits of the move deal no damage and apply no hitstun or blockstun, similar to Mio's cards. The meter lock debuff is applied on hit or block.
|
|
Kaela Kovalskia
Get Some Help! + +
|
| Damage
|
Guard
|
Startup
|
Active
|
Recovery
|
Adv. on Block
|
Adv. on Hit
|
Invulnerability
|
| 220
|
Mid
|
31
|
-
|
-
|
20
|
-
|
None
|
- Requires and uses 2 stocks of Star Meter.
- Applies 0.85x scaling on hit.
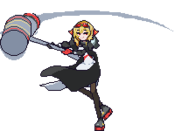
Kaela swings a huge hammer that sends the opponent flying and leads to a wallsplat in the corner. Deals a great amount of hitstop on block and hit like Mio's 214S and has a sizeable amount of blockstun, so it can be used to make unsafe moves safe or advantageous.
|
|
Lvl. 69 Smithing Grindset + + or or 
|
| Damage
|
Guard
|
Startup
|
Active
|
Recovery
|
Adv. on Block
|
Adv. on Hit
|
Invulnerability
|
| -
|
-
|
5+53
|
-
|
-
|
-
|
-
|
None
|
- Requires and uses a full Superchat meter (2 bars).
- Effective startup (Chip Prevention): 58F
- Effective startup (+10% Attack): 131F
- Effective startup (+10% Defense): 204F
Kaela appears on screen and grants 3 passive buffs to the point character which each last 6 seconds. The buffs do not all apply immediately, but they always apply in the same order: Chip Prevention, +10% Attack, +10% Defense
|
|
Roboco
Hi-Spec Beam + +
|
| Damage
|
Guard
|
Startup
|
Active
|
Recovery
|
Adv. on Block
|
Adv. on Hit
|
Invulnerability
|
| 18x10
|
Mid
|
2+(32 Flash)+8
|
-
|
-
|
19
|
-
|
None
|
- Requires and uses 2 stocks of Star Meter.
- Applies 0.85x scaling on hit.
- Effective startup: 10F
Roboco fires a large laser beam that reaches fullscreen.
|
|
HIDDEN MISSILES HIDDEN MISSILES
|
| Damage
|
Guard
|
Startup
|
Active
|
Recovery
|
Adv. on Block
|
Adv. on Hit
|
Invulnerability
|
| 20x7 (140)
|
Mid
|
5+125
|
?(13)?x6
|
-
|
-
|
-
|
None
|
- Requires and uses a full Superchat meter (3 bars).
- Applies 0.85x scaling on hit.
- Cannot be activated while in the air.
- Average effective startup on grounded opponent: 130F
Roboco locks on to the opponent's current position and fires a barrage of missiles. The 7 missiles do not track the opponent's location and will only land at the exact position the opponent was at when the assist was activated. Can be used for oki, to extend pressure, or to route into highly damaging combos (for some characters).
|
|
Miko Sakura
Lava Disaster + +
|
| Damage
|
Guard
|
Startup
|
Active
|
Recovery
|
Adv. on Block
|
Adv. on Hit
|
Invulnerability
|
| 12x15
|
Mid
|
9
|
1(22)1x14
|
-
|
357~
|
19~
|
None
|
- Requires and uses 2 stocks of Star Meter.
- Applies 0.85x scaling on hit.
- Disappears if the point character is hit.
- The lava pillar's individual hits have gaps inbetween them on hit (3 frame gap) and do not combo into themselves as a result.
- Advantage based on point character not acting until the lava pillar makes contact.
Miko trips and spills a lava bucket, producing a long-lasting pillar of fire that locks down opponents or prevents them from approaching. While this move can enable mixups when used together with an instant overhead or a crossup jumping normal, the lava has low hitstun and juggle when connecting, and so it can be difficult to combo afterwards.
|
|
Nya-hello! Nya-hello! FAQ FAQ
|
| Damage
|
Guard
|
Startup
|
Active
|
Recovery
|
Adv. on Block
|
Adv. on Hit
|
Invulnerability
|
| 65xN
|
Mid
|
5
|
-
|
-
|
-
|
-
|
None
|
- Requires and uses a full Superchat meter (3 bars).
- Cannot be activated while in the air.
Miko appears behind her point character and walks back and forth nearby. If the opponent gets too close (a little less than roundstart distance), she faceplants in the opponent's direction. Since Miko can't be interrupted while she does this, her point character is often free to pressure the opponent, as she will save them even if they are hit.
Different parts of Miko's summon have different startups:
- Activation after L+H press: 5F
- Earliest walk to detection: 24F
- Faceplant after detection: 9F
|
|
Navigation
| The Game
|
|
| The Battle System
|
|
| Idols
|
|
| Collabs
|
|
