Introduction
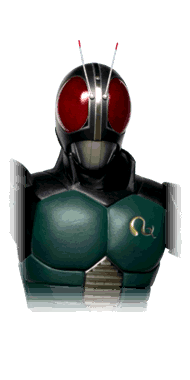 Kamen Rider BLACK RX
Kamen Rider BLACK RX is the prescription-grade version of Kamen Rider BLACK.
BLACK RX is a versatile and powerful rushdown character. Thanks in part to his weapon, the Revolcane, his quick normals also have excellent reach. He's also one of the most terrifying wielders of the Finisher Mode Cancel glitch, suffering no negative effects from using it. This allows him to turn his Rider Gauge into guaranteed damage in neutral, in addition to obscuring his attack range while under its effects.
Notably, BLACK RX is also the only Showa-era Kamen Rider who uses the Power Up style, and in fact, has access to two Power Up forms: Roborider and Biorider.
In this variation, BLACK RX can transform into Roborider, a gunfighter with Super Armor on some of his attacks.
Although he's quite unique, using Roborider is not recommended over Biorider. His moveset is very small and limited, and his projectiles aren't particularly threatening. They call this guy the Prince of Sadness for a reason.
Playstyle
 Kamen Rider BLACK RX (Roborider) switches between an aggressive, well-rounded swordfighter, and an armored gunfighter. Kamen Rider BLACK RX (Roborider) switches between an aggressive, well-rounded swordfighter, and an armored gunfighter. |
| Pros |
Cons |
- Wide Range of Useful Attacks: BLACK RX has a wide variety of attacks that move him forward, cover unique angles, and are just plain strong.
- Finisher Mode Cancel: A potent glitch available only to Showa-era Kamen Riders which enables them to time-stop their opponent, among other things. BLACK RX is notably among the best at utilizing this glitch.
- Power Up Style: Power Up Style characters universally are able to refresh their Guard Gauge and damage scaling by transforming.
|
- Low Damage in Base Form: BLACK RX has all of the tools he needs to win, but struggles to kill his opponent quickly without transforming.
- Meter Reliant: BLACK RX is very hungry for Rider Gauge, and mismanaging said resource can be a fatal mistake.
- Roborider: Put plainly, Roborider isn't very good. Although he has Super Armor, he's easily sidestepped and punished on almost every attack he has. Crucially, unlike Biorider, he does not help BLACK RX deal damage in any way.
|
In this variation, BLACK RX can transform into Biorider, a heavier swordfighter that can liquefy himself.
Biorider deals excellent damage and directly pressures the opponent's Guard Gauge with moves that are very difficult to attack against. When he's put on defense, Biorider also has a parry special that helps him to counterattack if his opponent leaves an opening.
Biorider is generally BLACK RX's preferred Power Up form, as Biorider helps cover up one of his base form's only real weaknesses and is a strong character in his own right.
Playstyle
|
Kamen Rider BLACK RX (Biorider) switches between a quick and a heavier swordfighter, and overwhelms the opponent with his aggression. |
| Pros |
Cons |
- Wide Range of Useful Attacks: BLACK RX has a wide variety of attacks that move him forward, cover unique angles, and are just plain strong.
- Finisher Mode Cancel: A potent glitch available only to Showa-era Kamen Riders which enables them to time-stop their opponent, among other things. BLACK RX is notably among the best at utilizing this glitch.
- Biorider Brings Raw Power: Once he's able to transform into Biorider, BLACK RX hits a lot harder. Although Biorider is not a strict upgrade to BLACK RX, both forms are very strong and being able to switch is a strength in itself.
- Power Up Style: Power Up Style characters universally are able to refresh their Guard Gauge and damage scaling by transforming.
|
- Low Damage in Base Form: BLACK RX has all of the tools he needs to win, but struggles to kill his opponent quickly without transforming.
- Meter Reliant: BLACK RX is very hungry for Rider Gauge, and mismanaging said resource can be a fatal mistake.
|
Form Select
Move List
Normal Moves
5LLLL
5LLLL
|
| Version
|
Damage
|
Guard
|
Startup
|
Active
|
Recovery
|
Block Adv.
|
Hit Adv.
|
| 5L
|
-
|
Y
|
-
|
-
|
-
|
-
|
-
|
A quick advancing jab. Thanks to its speed and range, this is a very useful poke for BLACK RX.
|
| 5LL
|
-
|
Y
|
-
|
-
|
-
|
-
|
-
|
| 5LLL
|
-
|
Y
|
-
|
-
|
-
|
-
|
-
|
Has a mashable stagger on hit.
|
| 5LLLL
|
-
|
Y
|
-
|
-
|
-
|
-
|
-
|
Knocks the opponent away on hit.
|
|
5LH
5LH
|
| Version
|
Damage
|
Guard
|
Startup
|
Active
|
Recovery
|
Block Adv.
|
Hit Adv.
|
| 5L
|
-
|
Y
|
-
|
-
|
-
|
-
|
-
|
A quick advancing jab. Thanks to its speed and range, this is a very useful poke for BLACK RX.
|
| 5LH
|
-
|
Y
|
-
|
-
|
-
|
-
|
-
|
Knocks the opponent away on hit.
|
|
4/6LL
4/6LL
|
| Version
|
Damage
|
Guard
|
Startup
|
Active
|
Recovery
|
Block Adv.
|
Hit Adv.
|
| 4/6L
|
-
|
Y
|
-
|
-
|
-
|
-
|
-
|
A very quick advancing step kick. An excellent poke option.
|
| 4/6LL
|
-
|
Y
|
-
|
-
|
-
|
-
|
-
|
Knocks the opponent away on hit. It's safe on block, so you can use this string followup to poke the opponent safely.
|
|
4/6LH
4/6LH
|
| Version
|
Damage
|
Guard
|
Startup
|
Active
|
Recovery
|
Block Adv.
|
Hit Adv.
|
| 4/6L
|
-
|
Y
|
-
|
-
|
-
|
-
|
-
|
A very quick advancing step kick. An excellent poke option.
|
| 4/6LH
|
-
|
Y
|
-
|
-
|
-
|
-
|
-
|
An upward slashing launcher. This string is especially handy when using 4/6L as a whiff punisher. Can be followed up with a Combo Jump into its aircombo followup string, jLHS.
This launcher cannot be air teched, and can also be followed up meterlessly by linking another attack.
|
| 4/6LHH
|
-
|
Y
|
-
|
-
|
-
|
-
|
-
|
An alternate ender that leaves the opponent knocked down nearby. This ender can also be air or ground teched.
|
|
2/8LL
2/8LL
|
| Version
|
Damage
|
Guard
|
Startup
|
Active
|
Recovery
|
Block Adv.
|
Hit Adv.
|
| 2/8L
|
-
|
Y
|
-
|
-
|
-
|
-
|
-
|
An advancing low kick. BLACK RX's shortest and slowest advancing normal, but still quite good.
|
| 2/8LL
|
-
|
Y
|
-
|
-
|
-
|
-
|
-
|
Knocks the opponent away on hit. Safe on block, so it's a useful poke string.
|
|
2/8LH
2/8LH
|
| Version
|
Damage
|
Guard
|
Startup
|
Active
|
Recovery
|
Block Adv.
|
Hit Adv.
|
| 2/8L
|
-
|
Y
|
-
|
-
|
-
|
-
|
-
|
| 2/8LH
|
-
|
Y
|
-
|
-
|
-
|
-
|
-
|
Knocks the opponent away on hit. This string is even on block, making it not only a very safe poking string, but also a useful pressure tool when paired with BLACK RX's wide range of quick attacks.
|
|
5HHHH
5HHHH
|
| Version
|
Damage
|
Guard
|
Startup
|
Active
|
Recovery
|
Block Adv.
|
Hit Adv.
|
| 5H
|
-
|
Y
|
-
|
-
|
-
|
-
|
-
|
BLACK RX stands in place and slashes. A very useful normal.
|
| 5HH
|
-
|
Y
|
-
|
-
|
-
|
-
|
-
|
An advancing slash. Allows BLACK RX to convert comfortably from 5H at any range, and makes it dangerous to whiff punish 5H.
|
| 5HHH
|
-
|
Y
|
-
|
-
|
-
|
-
|
-
|
A launcher with low launch height. Useful string filler that helps BLACK RX combo into specials with RC.
|
| 5HHHH
|
-
|
Y
|
-
|
-
|
-
|
-
|
-
|
Knocks the opponent away on hit.
|
|
6H
6H
|
| Damage
|
Guard
|
Startup
|
Active
|
Recovery
|
Block Adv.
|
Hit Adv.
|
| -
|
Y
|
-
|
-
|
-
|
-
|
-
|
BLACK RX does a Stinger, lunging forward and stabbing with a lot of range and active frames. A key normal for BLACK RX at range, but be careful using it up close as it is very unsafe when blocked early.
|
|
2/8HHH
2/8HHH
|
| Version
|
Damage
|
Guard
|
Startup
|
Active
|
Recovery
|
Block Adv.
|
Hit Adv.
|
| 2/8H
|
-
|
Y
|
-
|
-
|
-
|
-
|
-
|
A slashing uppercut. One of BLACK RX's least useful normals for neutral, but can see use as a combo filler.
|
| 2/8HH
|
-
|
Y
|
-
|
-
|
-
|
-
|
-
|
Launches the opponent on hit.
|
| 2/8HHH
|
-
|
Y
|
-
|
-
|
-
|
-
|
-
|
Launches the opponent on hit.
|
|
jL
jL
|
| Damage
|
Guard
|
Startup
|
Active
|
Recovery
|
Block Adv.
|
Hit Adv.
|
| -
|
Y
|
-
|
-
|
-
|
-
|
-
|
BLACK RX does a jumping punch. A standard but good jumping normal that stays active until landing.
|
|
jH
jH
|
| Damage
|
Guard
|
Startup
|
Active
|
Recovery
|
Block Adv.
|
Hit Adv.
|
| -
|
Y
|
-
|
-
|
-
|
-
|
-
|
BLACK RX holds out the Revolcane. An overall superior jumping normal, boasting greater range than most jumping normals in the game, while also having active frames until landing. It's also quite fast, making it a viable crossup tool.
|
|
Special Moves
5S
Kingstone Flash
5S
|
| Damage
|
Guard
|
Startup
|
Active
|
Recovery
|
Block Adv.
|
Hit Adv.
|
| -
|
Y
|
-
|
-
|
-
|
-
|
-
|
BLACK RX poses while the Kingstone in his belt fires a large cone of light in front of him, hitting up to 6 times at a range of about 1/3 stage length away, and knocking the opponent away on hit.
This special has a fair bit of startup, a long total duration, and is unsafe on block provided your opponent can attack quickly at range. This makes using it risky, but it's often a risk worth taking in order to shut down an opponent's movement.
Kingstone Flash is also a very powerful tool for guard crushing the opponent and safely hitting them once they're guard crushed. A full Kingstone Flash removes a little over 1/3 of the opponent's guard gauge, is safe to guard cancels, and is highly advantageous on hit, allowing BLACK RX to do it repeatedly if the opponent can't or won't block.
|
|
DS
RX Kick
Any direction + S
|
| Damage
|
Guard
|
Startup
|
Active
|
Recovery
|
Block Adv.
|
Hit Adv.
|
| -
|
Y
|
-
|
-
|
-
|
-
|
-
|
BLACK RX does a backflip kick, followed by a divekick. The initial hitbox of RX Kick is very fast and has a great vertical hitbox that can OTG as well as anti-air.
As a quick, reliable and damaging move, this is BLACK RX's preferred combo ender, even comboing after a throw near the wall. It's also useful as an extremely fast punish after blocking or sidestepping a move that leaves the opponent point-blank.
As an anti-air, RX Kick will often whiff its second hit, but can only be ground teched and leaves BLACK RX safe on hit. Having a reliable reactive anti-air like this is exceedingly rare in Climax Heroes, and this is a great privilege for BLACK RX.
On top of all this, it can be very difficult to punish compared to a lot of divekicks in Super Climax Heroes. If the second hit lands spaced out, this move can even become safe on block.
|
|
JS
Diving Kick
jS
|
| Damage
|
Guard
|
Startup
|
Active
|
Recovery
|
Block Adv.
|
Hit Adv.
|
| -
|
Y
|
-
|
-
|
-
|
-
|
-
|
A divekick that's identical to the second hit of RX Kick. This makes it a lot safer than most divekicks in Super Climax Heroes, though it's still a risky attack.
|
|
Universal Mechanics
Throw
Throw
4H
|
| Damage
|
Guard
|
Startup
|
Active
|
Recovery
|
Block Adv.
|
Hit Adv.
|
| -
|
N
|
-
|
-
|
-
|
-
|
-
|
BLACK RX's throw. This throw has an untechable knockdown, and following up with an OTG RX Kick (dS) is guaranteed near the wall.
|
|
Dash Action
Dash Action Air Dash Air Dash
|
| Damage
|
Guard
|
Startup
|
Active
|
Recovery
|
Block Adv.
|
Hit Adv.
|
| -
|
N/A
|
-
|
-
|
-
|
-
|
-
|
BLACK RX airdashes. A generic mobility tool. Costs .5 stocks of the Rider Gauge.
|
|
Rider Art
Rider Art Finisher Mode Finisher Mode
|
| Damage
|
Guard
|
Startup
|
Active
|
Recovery
|
Block Adv.
|
Hit Adv.
|
| -
|
N/A
|
-
|
-
|
-
|
-
|
-
|
When pressing Rider Art, BLACK RX instantly causes a screen freeze, enters Finisher Mode, and the belt icon in the UI begins to spin. When leaving the Rider Art screen freeze, BLACK RX has some invulnerable frames, and it is possible to cause your opponent's attack to whiff. During Finisher Mode, BLACK RX's next special attack that hits will gain a damage boost, and some special attacks freeze the action while the narrator describes the attack. This costs 1 stock of the Rider Gauge.
BLACK RX also has access to the Finisher Mode Cancel bug. This is triggered by inputting Rider Art followed by throw (4H) within a 1-2f window. When executed this way, the cinematic camera will trigger, but rather than posing, BLACK RX will instead execute a throw and recover early. This has a number of effects on the match, most notably:
- Briefly time-stops the opponent in whatever state they were in when the Rider Art activated.
- If they were grounded, your throw attempt is guaranteed, but can still be teched by your opponent.
- If your opponent was not holding back to block before the superfreeze, an otherwise blockable strike will become unblockable. For BLACK RX, this is commonly used with Kingstone Flash (5S) to do a long-range unblockable.
- The match is stuck in a "superfrozen" state until another superfreeze occurs or the round ends. During this state, some effects will become invisible, and some affected moves will behave improperly.
In practical terms, BLACK RX benefits greatly from this technique. It allows him to go for unblockables at long range, his weapons and projectiles will become invisible, and it does not negatively impact him in any way.
Be careful when using this: if you cancel the throw animation into Power Up's Style Action, BLACK RX will leave the match, never to return. This is a great way to make your friends mad and instantly forfeit a tournament match. YOOP
|
|
Style Action
Style Action Power Up Power Up
|
| Damage
|
Guard
|
Startup
|
Active
|
Recovery
|
Block Adv.
|
Hit Adv.
|
| -
|
N/A
|
-
|
-
|
-
|
-
|
-
|
BLACK RX transforms into his chosen alternate form (Roborider or Biorider) at the cost of three stocks of the Rider Gauge. As with all Power Up style transformations, this can be used to cancel grounded normal attacks and blockstun. Doing so also refreshes damage scaling and the Guard Gauge.
|
|
Combos
- Advanced meterless combos from BLACK RX's launcher string.
- Comboing this launcher string into dS requires the wall.
- Many of BLACK RX's strings reliably combo into dS with an RC for a simple and effective 1-bar combo.
Move List
Normal Moves
Robo 5LL
5LL
|
| Version
|
Damage
|
Guard
|
Startup
|
Active
|
Recovery
|
Block Adv.
|
Hit Adv.
|
| 5L
|
-
|
Y
|
-
|
-
|
-
|
-
|
-
|
|
|
| 5LL
|
-
|
Y
|
-
|
-
|
-
|
-
|
-
|
A backhand. Knocks the opponent away on hit.
|
|
Robo 4/6LLL
4/6LLL
|
| Version
|
Damage
|
Guard
|
Startup
|
Active
|
Recovery
|
Block Adv.
|
Hit Adv.
|
| 4/6L
|
-
|
Y
|
-
|
-
|
-
|
-
|
-
|
|
|
| 4/6LL
|
-
|
Y
|
-
|
-
|
-
|
-
|
-
|
|
|
| 4/6LLL
|
-
|
Y
|
-
|
-
|
-
|
-
|
-
|
One final gut punch. Knocks the opponent away on hit.
|
|
Robo 2/8L
2/8L
|
| Damage
|
Guard
|
Startup
|
Active
|
Recovery
|
Block Adv.
|
Hit Adv.
|
| -
|
Y
|
-
|
-
|
-
|
-
|
-
|
Roborider backpedals while firing two shots forward. The second shot knocks the opponent down on hit. This attack also has superarmor.
|
|
Robo 5HH
5HH
|
| Version
|
Damage
|
Guard
|
Startup
|
Active
|
Recovery
|
Block Adv.
|
Hit Adv.
|
| 5H
|
-
|
Y
|
-
|
-
|
-
|
-
|
-
|
|
|
| 5HH
|
-
|
Y
|
-
|
-
|
-
|
-
|
-
|
Roborider's hand explodes for an additional hit that knocks the opponent down. This attack will only come out on hit.
|
|
Robo 6H
6H
|
| Damage
|
Guard
|
Startup
|
Active
|
Recovery
|
Block Adv.
|
Hit Adv.
|
| -
|
Y
|
-
|
-
|
-
|
-
|
-
|
Roborider walks forward while firing two shots. Leaves the opponent standing on hit, so it's excellent to start something when paired with an RC.
|
|
Robo 2/8HH
2/8HH
|
| Version
|
Damage
|
Guard
|
Startup
|
Active
|
Recovery
|
Block Adv.
|
Hit Adv.
|
| 2/8H
|
-
|
Y
|
-
|
-
|
-
|
-
|
-
|
A low kick. One of Roborider's fastest normals, and it's safe on block to boot. This also crumples the opponent on hit, making it an invaluable tool.
|
| 2/8HH
|
-
|
Y
|
-
|
-
|
-
|
-
|
-
|
Roborider slowly aims at the opponent's crumple before shooting them execution-style. While 2/8H is excellent, this followup is mostly useless. It's very slow, making it easy to interrupt or avoid on block. Even if the opponent blocks it, it's extremely punishable. It doesn't even do much to the guard gauge, and a meterless followup to 2/8H's crumple does more damage than this attack.
|
|
Robo JL
jL
|
| Damage
|
Guard
|
Startup
|
Active
|
Recovery
|
Block Adv.
|
Hit Adv.
|
| -
|
Y
|
-
|
-
|
-
|
-
|
-
|
Roborider puts his leg out. Has active frames until landing. A very standard jumping normal.
jH is identical to this attack.
|
|
Special Moves
Robo 5S
Robo Punch
5S
|
| Damage
|
Guard
|
Startup
|
Active
|
Recovery
|
Block Adv.
|
Hit Adv.
|
| -
|
Y
|
-
|
-
|
-
|
-
|
-
|
Roborider throws a lunging straight punch. Knocks the opponent away on hit.
Although it's unsafe on block, this attack is pretty useful. It's not too slow, has a lot of range, and has superarmor, making it a viable option to blow through an opponent's attacks.
|
|
Robo DS
Hard Shot
Any direction + S
|
| Damage
|
Guard
|
Startup
|
Active
|
Recovery
|
Block Adv.
|
Hit Adv.
|
| -
|
-
|
-
|
-
|
-
|
-
|
-
|
Roborider fires a shot forward at head level. Knocks the opponent away on hit.
Like 5S, this attack is unsafe on block, but isn't too slow and has superarmor. This attack is actually faster than 5S and has longer range, being a projectile, but they're both still useful, as this projectile's height makes it whiff in a lot of situations where 5S won't.
|
|
Robo JS
Diving Kick
jS
|
| Damage
|
Guard
|
Startup
|
Active
|
Recovery
|
Block Adv.
|
Hit Adv.
|
| -
|
-
|
-
|
-
|
-
|
-
|
-
|
A standard divekick. Deals the most damage out of Roborider's specials, but is otherwise unremarkable.
|
|
Universal Mechanics
Robo Throw
Throw
4H
|
| Damage
|
Guard
|
Startup
|
Active
|
Recovery
|
Block Adv.
|
Hit Adv.
|
| -
|
N
|
-
|
-
|
-
|
-
|
-
|
Roborider's throw. This has a hard knockdown, like BLACK RX's base form throw, but doesn't cause a comboable state like BLACK RX's does.
|
|
Robo Dash Action
Dash Action Guard Dash Guard Dash
|
| Damage
|
Guard
|
Startup
|
Active
|
Recovery
|
Block Adv.
|
Hit Adv.
|
| -
|
N/A
|
-
|
-
|
-
|
-
|
-
|
Roborider runs forward with a shield that guards against projectile attacks. This slowly depletes the Guard Gauge as it is used.
|
|
Robo Rider Art
Rider Art Finisher Mode Finisher Mode
|
| Damage
|
Guard
|
Startup
|
Active
|
Recovery
|
Block Adv.
|
Hit Adv.
|
| -
|
Y
|
-
|
-
|
-
|
-
|
-
|
When pressing Rider Art, BLACK RX instantly causes a screen freeze, enters Finisher Mode, and the belt icon in the UI begins to spin. When leaving the Rider Art screen freeze, BLACK RX has some invulnerable frames, and it is possible to cause your opponent's attack to whiff. During Finisher Mode, BLACK RX's next special attack that hits will gain a damage boost, and some special attacks freeze the action while the narrator describes the attack. This costs 1 stock of the Rider Gauge.
BLACK RX also has access to the Finisher Mode Cancel bug. This is triggered by simultaneously inputting throw (4H) and Rider Art. When executed this way, the cinematic camera will trigger, but rather than posing, BLACK RX will instead execute a throw and recover early. This has a number of effects on the match, most notably:
- Briefly time-stops the opponent in whatever state they were in when the Rider Art activated.
- If they were grounded, your throw attempt is guaranteed, but can still be teched by your opponent.
- If your opponent was not holding back to block before the superfreeze, an otherwise blockable strike will become unblockable. For Roborider, this can be done with Robo Punch (5S) for a powerful single hit.
- The match is stuck in a "superfrozen" state until another superfreeze occurs or the round ends. During this state, some effects will become invisible, and some affected moves will behave improperly.
In practical terms, BLACK RX benefits greatly from this technique. It allows him to go for unblockables at long range, his weapons and projectiles will become invisible, and it does not negatively impact him in any way.
Be careful when using this: if you cancel the throw animation into Power Up's Style Action, BLACK RX will leave the match, never to return. This is a great way to make your friends mad and instantly forfeit a tournament match. YOOP
|
|
Roborider Style Action
Style Action Power Up Power Up
|
| Damage
|
Guard
|
Startup
|
Active
|
Recovery
|
Block Adv.
|
Hit Adv.
|
| -
|
N/A
|
-
|
-
|
-
|
-
|
-
|
While already in Roborider, Style Action transforms back into BLACK RX's Base Form at no cost. Doing so also refreshes damage scaling and the Guard Gauge.
|
|
Combos
- 2/8H > 5S
- 2/8H > jump back > jS
- 2/8H > Rider Art > 5S
- 2/8H > Rider Finale
- Roborider is a limited character, but his one combo starter goes into anything you want.
Move List
Normal Moves
Bio 5LL
5LL
|
| Version
|
Damage
|
Guard
|
Startup
|
Active
|
Recovery
|
Block Adv.
|
Hit Adv.
|
| 5L
|
-
|
Y
|
-
|
-
|
-
|
-
|
-
|
|
|
| 5LL
|
-
|
Y
|
-
|
-
|
-
|
-
|
-
|
A sobat. Knocks the opponent away on hit.
|
|
Bio 5LHH
5LHH
|
| Version
|
Damage
|
Guard
|
Startup
|
Active
|
Recovery
|
Block Adv.
|
Hit Adv.
|
| 5L
|
-
|
Y
|
-
|
-
|
-
|
-
|
-
|
|
|
| 5LH
|
-
|
Y
|
-
|
-
|
-
|
-
|
-
|
|
|
| 5LHH
|
-
|
Y
|
-
|
-
|
-
|
-
|
-
|
A sword chop. Has a mashable stagger, so it's best to RC this string.
|
|
Bio 4/6LLL
4/6LLL
|
| Version
|
Damage
|
Guard
|
Startup
|
Active
|
Recovery
|
Block Adv.
|
Hit Adv.
|
| 4/6L
|
-
|
Y
|
-
|
-
|
-
|
-
|
-
|
A very quick advancing step kick, similar to BLACK RX's base form.
|
| 4/6LL
|
-
|
Y
|
-
|
-
|
-
|
-
|
-
|
|
|
| 4/6LLL
|
-
|
Y
|
-
|
-
|
-
|
-
|
-
|
A sobat that knocks the opponent away on hit.
|
|
Bio 4/6LHH
4/6LH
|
| Version
|
Damage
|
Guard
|
Startup
|
Active
|
Recovery
|
Block Adv.
|
Hit Adv.
|
| 4/6L
|
-
|
Y
|
-
|
-
|
-
|
-
|
-
|
A very quick advancing step kick, similar to BLACK RX's base form.
|
| 4/6LH
|
-
|
Y
|
-
|
-
|
-
|
-
|
-
|
|
|
| 4/6LHH
|
-
|
Y
|
-
|
-
|
-
|
-
|
-
|
A final sword slice that knocks the opponent away on hit.
|
|
Bio 2/8LL
2/8LL
|
| Version
|
Damage
|
Guard
|
Startup
|
Active
|
Recovery
|
Block Adv.
|
Hit Adv.
|
| 2/8L
|
-
|
Y
|
-
|
-
|
-
|
-
|
-
|
A quick stepping low kick.
|
| 2/8LL
|
-
|
Y
|
-
|
-
|
-
|
-
|
-
|
A spinning side kick. Knocks the opponent away on hit.
|
|
Bio 28LH
2/8LH
|
| Version
|
Damage
|
Guard
|
Startup
|
Active
|
Recovery
|
Block Adv.
|
Hit Adv.
|
| 2/8L
|
-
|
Y
|
-
|
-
|
-
|
-
|
-
|
A quick stepping low kick.
|
| 2/8LH
|
-
|
Y
|
-
|
-
|
-
|
-
|
-
|
A sword chop. Knocks the opponent away on hit.
|
|
Bio 5HHH
5HHH
|
| Version
|
Damage
|
Guard
|
Startup
|
Active
|
Recovery
|
Block Adv.
|
Hit Adv.
|
| 5H
|
-
|
Y
|
-
|
-
|
-
|
-
|
-
|
|
|
| 5HH
|
-
|
Y
|
-
|
-
|
-
|
-
|
-
|
|
|
| 5HHH
|
-
|
Y
|
-
|
-
|
-
|
-
|
-
|
A final sword chop. Has a mashable stagger, so it's best to RC this string.
|
|
Bio 6HH
6HH
|
| Version
|
Damage
|
Guard
|
Startup
|
Active
|
Recovery
|
Block Adv.
|
Hit Adv.
|
| 6H
|
-
|
Y
|
-
|
-
|
-
|
-
|
-
|
A sword thrust. Biorider doesn't advance very far, but has a lot of range.
|
| 6HH
|
-
|
Y
|
-
|
-
|
-
|
-
|
-
|
A spinning sword strike that knocks the opponent away on hit.
|
|
Bio 2/8HHH
2/8HHH
|
| Version
|
Damage
|
Guard
|
Startup
|
Active
|
Recovery
|
Block Adv.
|
Hit Adv.
|
| 2/8H
|
-
|
Y
|
-
|
-
|
-
|
-
|
-
|
|
|
| 2/8HH
|
-
|
Y
|
-
|
-
|
-
|
-
|
-
|
Biorider evades to the side, then does a spinning slash. A very strange normal. Near the wall, this can cross up on block.
|
| 2/8HHH
|
-
|
Y
|
-
|
-
|
-
|
-
|
-
|
A final sword strike that knocks the opponent away on hit.
|
|
Bio JL
jL
|
| Damage
|
Guard
|
Startup
|
Active
|
Recovery
|
Block Adv.
|
Hit Adv.
|
| -
|
Y
|
-
|
-
|
-
|
-
|
-
|
Biorider puts his leg out. Has active frames until landing. A standard jumping normal.
jH is identical to this attack.
|
|
Special Moves
Bio 5S
Liquefy Trap
5S
|
| Damage
|
Guard
|
Startup
|
Active
|
Recovery
|
Block Adv.
|
Hit Adv.
|
| -
|
Y
|
-
|
-
|
-
|
-
|
-
|
Biorider turns into a puddle of goop. Once he's in this state, he's invulnerable to attacks and will hit an opponent who moves into him with a launching splash.
|
|
Bio 4/6S
Liquefy Charge
4/6S
|
| Damage
|
Guard
|
Startup
|
Active
|
Recovery
|
Block Adv.
|
Hit Adv.
|
| -
|
-
|
-
|
-
|
-
|
-
|
-
|
Biorider curls up into a ball and becomes a pile of goop, charging forward and striking 6 times. The final hit launches a grounded opponent.
This is an invaluable combo tool for Biorider, comboing reliably from any string RC or crumple and dealing high damage. In addition, although it's unsafe on block, it deals about 40% of the guard gauge when blocked, so it's excellent for guard crushing the opponent.
|
|
Bio 2/8S
Spark Cutter
2/8S
|
| Damage
|
Guard
|
Startup
|
Active
|
Recovery
|
Block Adv.
|
Hit Adv.
|
| -
|
-
|
-
|
-
|
-
|
-
|
-
|
Biorider takes a counter stance, and when struck, slashes upward at the opponent, crumpling them on hit.
An instant counter with very short active frames and huge reward on hit. A huge defensive privilege for Biorider that will benefit players with strong reactions greatly.
|
|
Bio JS
Liquefy Charge (Air)
jS
|
| Damage
|
Guard
|
Startup
|
Active
|
Recovery
|
Block Adv.
|
Hit Adv.
|
| -
|
-
|
-
|
-
|
-
|
-
|
-
|
Biorider curls into a ball of goop and dives at the opponent.
In many ways, this is a standard divekick that uses animations similar to the ground 4/6S. However, it also alters Biorider's momentum in a way that makes it very crossup-friendly.
|
|
Universal Mechanics
Bio Throw
Throw
4H
|
| Damage
|
Guard
|
Startup
|
Active
|
Recovery
|
Block Adv.
|
Hit Adv.
|
| -
|
N
|
-
|
-
|
-
|
-
|
-
|
Biorider's throw. Causes hard knockdown, but does not cause a comboable state.
|
|
Bio Dash Action
Dash Action Air Dash Air Dash
|
| Damage
|
Guard
|
Startup
|
Active
|
Recovery
|
Block Adv.
|
Hit Adv.
|
| -
|
N/A
|
-
|
-
|
-
|
-
|
-
|
Biorider airdashes. A generic mobility tool. Costs .5 stocks of Rider Gauge.
|
|
Bio Rider Art
Rider Art Finisher Mode Finisher Mode
|
| Damage
|
Guard
|
Startup
|
Active
|
Recovery
|
Block Adv.
|
Hit Adv.
|
| -
|
Y
|
-
|
-
|
-
|
-
|
-
|
When pressing Rider Art, BLACK RX instantly causes a screen freeze, enters Finisher Mode, and the belt icon in the UI begins to spin. When leaving the Rider Art screen freeze, BLACK RX has some invulnerable frames, and it is possible to cause your opponent's attack to whiff. During Finisher Mode, BLACK RX's next special attack that hits will gain a damage boost, and some special attacks freeze the action while the narrator describes the attack. This costs 1 stock of the Rider Gauge.
BLACK RX also has access to the Finisher Mode Cancel bug. This is triggered by simultaneously inputting throw (4H) and Rider Art. When executed this way, the cinematic camera will trigger, but rather than posing, BLACK RX will instead execute a throw and recover early. This has a number of effects on the match, most notably:
- Briefly time-stops the opponent in whatever state they were in when the Rider Art activated.
- If they were grounded, your throw attempt is guaranteed, but can still be teched by your opponent.
- If your opponent was not holding back to block before the superfreeze, an otherwise blockable strike will become unblockable. For Biorider, this can be done with Liquefy Charge (6S) for an unblockable with quite a bit of range.
- The match is stuck in a "superfrozen" state until another superfreeze occurs or the round ends. During this state, some effects will become invisible, and some affected moves will behave improperly.
In practical terms, BLACK RX benefits greatly from this technique. It allows him to go for unblockables at long range, his weapons and projectiles will become invisible, and it does not negatively impact him in any way.
Be careful when using this: if you cancel the throw animation into Power Up's Style Action, BLACK RX will leave the match, never to return. This is a great way to make your friends mad and instantly forfeit a tournament match. YOOP
|
|
Biorider Style Action
Style Action Power Up Power Up
|
| Damage
|
Guard
|
Startup
|
Active
|
Recovery
|
Block Adv.
|
Hit Adv.
|
| -
|
N/A
|
-
|
-
|
-
|
-
|
-
|
While already in Biorider, Style Action transforms back into BLACK RX's Base Form at no cost. Doing so also refreshes damage scaling and the Guard Gauge.
|
|
Combos
- 5LHH > RC > 4/6S
- 5HHH > RC > 4/6S
- Biorider's strings can reliably RC into Liquefy Charge for high damage.
- 2/8S > 4/6S
- 2/8S > (5S) > Rider Finale
- A Spark Cutter counter will also juggle into Liquefy Charge or Rider Finale.
- 5S > Climax Time > Rider Finale
- 5S is the only way that Biorider can make use of Climax Time to combo into Rider Finale without transforming back into BLACK RX.
- 2/8LL > RC > Finisher Mode Cancel (4H+RA) > run forward > 5S > Climax Time > Rider Finale
- A highly situational and frankly very silly combo into Rider Finale that is only possible at the wall.
- This is mostly included for completion's sake, as it's the only way to combo into Liquefy Trap without Spark Cutter.
Navigation
| General
|
|
|
Showa
|
| Kamen Rider
|
|
| Kamen Rider V3
|
|
| Kamen Rider Amazon
|
|
| Kamen Rider BLACK (RX)
|
|
|
Heisei Phase 1
|
| Kamen Rider Kuuga
|
|
| Kamen Rider Agito
|
|
| Kamen Rider Ryuki
|
|
| Kamen Rider 555
|
|
| Kamen Rider Blade
|
|
| Kamen Rider Hibiki
|
|
| Kamen Rider Kabuto
|
|
| Kamen Rider Den-O
|
|
| Kamen Rider Kiva
|
|
| Kamen Rider Decade
|
|
|
Heisei Phase 2
|
| Kamen Rider W
|
|
| Kamen Rider OOO
|
|
| Kamen Rider Fourze
|
|
| Kamen Rider Wizard
|
|


