Introduction
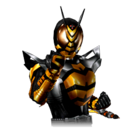
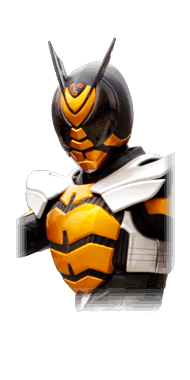 Kamen Rider TheBee
Kamen Rider TheBee is a member of ZECT who has been the secret identity of far too many people.
In general, TheBee plays as an in-fighting boxer type character. He uses his normals to duck and weave through the opponent's attacks, his rekka special to safely pressure them, and once he's got a hard read, he can deliver a sucker punch in the form of Rider Sting to really make them pay.
In this variation, TheBee has the identity of Sou Yaguruma. He has access to a striker that just does everything for a character like this. He's able to use it to terrify the opponent out of whiffing anything, and to extend combos all the way to a kill. In a pinch, he can even use it like a burst such that he can start his own combo in return.
Playstyle
 Kamen Rider TheBee (Support Attack) controls the flow of the match and punches his opponent really hard. Kamen Rider TheBee (Support Attack) controls the flow of the match and punches his opponent really hard. |
| Pros |
Cons |
- Evasive Normals: Many of TheBee's normals duck, sidestep or otherwise evade the opponent's attack, making it scary to swing against him.
- Reliable Stagger Pressure: Between a rekka-style move and a number of great buttons on block, TheBee is very comfortable when his opponent is overly patient.
- Excellent Striker: By placing his striker well, TheBee can turn just about any situation into his favor.
|
- Speed: Although TheBee isn't a slow character and has access to a bunch of fast moves, his options with farther reach are a bit on the slow side.
- Meter Reliant: If TheBee doesn't have meter for his striker, he loses a lot of the control he otherwise exerts on the flow of a match.
- Striker Isn't Reliable Against Mobile Opponents: As powerful as TheBee's striker is, it isn't perfect. Characters who move quickly, feel comfortable in the air, or teleport can make his life hell.
|
In this variation, TheBee has the identity of Shun Kageyama. He gains access to the Speed Up Style Action, which enables him to forcefully take control of the match as long as it lasts.
Playstyle
|
Kamen Rider TheBee (Speed Up) goes all-in on in-fighting and beats down the opponent. |
| Pros |
Cons |
- Evasive Advancing Normals: Many of TheBee's normals duck, sidestep or otherwise evade the opponent's attack, making it scary to swing against him. This version in particular has greatly souped up normals, such as a dash punch that he can link out of on hit, and a sliding uppercut that goes under many attacks.
- Reliable Stagger Pressure: Between a rekka-style move and a number of great buttons on block, TheBee is very comfortable when his opponent is overly patient.
- Speed Up Style: Clock Up has a lot of offensive utility, from whiff punishing, to untouchable pressure, to combos that are effectively unburstable.
|
- Lower Damage and Meter Efficiency: With Speed Up style, TheBee has a harder time accessing his damage ceiling and more often finds himself playing meterless.
- Safety: This version of TheBee puts himself at greater risk than the Support Attack version. You really don't want them to block your most evasive options, and it's a lot scarier to be without Guard Gauge when you don't have a striker.
- Speed Up Style: Clock Up's defensive utility is arguably among the worst for Battle Style mechanics. This doesn't hold Speed Up back, but does force Speed Up players to be very careful.
|
Form Select
Move List
Normal Moves
Sou 5LLL
5LHH
|
| Version
|
Damage
|
Guard
|
Startup
|
Active
|
Recovery
|
Block Adv.
|
Hit Adv.
|
| 5L
|
-
|
Y
|
-
|
-
|
-
|
-
|
-
|
| 5LL
|
-
|
Y
|
-
|
-
|
-
|
-
|
-
|
| 5LLL
|
-
|
Y
|
-
|
-
|
-
|
-
|
-
|
|
Sou 5LHH
5LHH
|
| Version
|
Damage
|
Guard
|
Startup
|
Active
|
Recovery
|
Block Adv.
|
Hit Adv.
|
| 5L
|
-
|
Y
|
-
|
-
|
-
|
-
|
-
|
| 5LH
|
-
|
Y
|
-
|
-
|
-
|
-
|
-
|
| 5LHH
|
-
|
Y
|
-
|
-
|
-
|
-
|
-
|
|
Sou 4/6LLL
4/6LLL
|
| Version
|
Damage
|
Guard
|
Startup
|
Active
|
Recovery
|
Block Adv.
|
Hit Adv.
|
| 4/6L
|
-
|
Y
|
-
|
-
|
-
|
-
|
-
|
| 4/6LL
|
-
|
Y
|
-
|
-
|
-
|
-
|
-
|
| 4/6LLL
|
-
|
Y
|
-
|
-
|
-
|
-
|
-
|
|
Sou 4/6LHH
4/6LHH
|
| Version
|
Damage
|
Guard
|
Startup
|
Active
|
Recovery
|
Block Adv.
|
Hit Adv.
|
| 4/6L
|
-
|
Y
|
-
|
-
|
-
|
-
|
-
|
| 4/6LH
|
-
|
Y
|
-
|
-
|
-
|
-
|
-
|
This string can be followed up with a Combo Jump into its aircombo string, jLHHS.
|
| 4/6LHH
|
-
|
Y
|
-
|
-
|
-
|
-
|
-
|
|
Sou 2/8LL
2/8LL
|
| Version
|
Damage
|
Guard
|
Startup
|
Active
|
Recovery
|
Block Adv.
|
Hit Adv.
|
| 2/8L
|
-
|
Y
|
-
|
-
|
-
|
-
|
-
|
| 2/8LL
|
-
|
Y
|
-
|
-
|
-
|
-
|
-
|
|
Sou 2/8LH
2/8LH
|
| Version
|
Damage
|
Guard
|
Startup
|
Active
|
Recovery
|
Block Adv.
|
Hit Adv.
|
| 2/8L
|
-
|
Y
|
-
|
-
|
-
|
-
|
-
|
| 2/8LH
|
-
|
Y
|
-
|
-
|
-
|
-
|
-
|
|
Sou 5HHH
5HHH
|
| Version
|
Damage
|
Guard
|
Startup
|
Active
|
Recovery
|
Block Adv.
|
Hit Adv.
|
| 5H
|
-
|
Y
|
-
|
-
|
-
|
-
|
-
|
| 5HH
|
-
|
Y
|
-
|
-
|
-
|
-
|
-
|
| 5HHH
|
-
|
Y
|
-
|
-
|
-
|
-
|
-
|
|
Sou 6HHH
6HHH
|
| Version
|
Damage
|
Guard
|
Startup
|
Active
|
Recovery
|
Block Adv.
|
Hit Adv.
|
| 6H
|
-
|
Y
|
-
|
-
|
-
|
-
|
-
|
| 6HH
|
-
|
Y
|
-
|
-
|
-
|
-
|
-
|
| 6HHH
|
-
|
Y
|
-
|
-
|
-
|
-
|
-
|
|
Sou 2/8HH
2/8HH
|
| Version
|
Damage
|
Guard
|
Startup
|
Active
|
Recovery
|
Block Adv.
|
Hit Adv.
|
| 2/8H
|
-
|
Y
|
-
|
-
|
-
|
-
|
-
|
| 2/8HH
|
-
|
Y
|
-
|
-
|
-
|
-
|
-
|
|
Sou jL
jL
|
| Damage
|
Guard
|
Startup
|
Active
|
Recovery
|
Block Adv.
|
Hit Adv.
|
| -
|
Y
|
-
|
-
|
-
|
-
|
-
|
|
Sou jH
jH
|
| Damage
|
Guard
|
Startup
|
Active
|
Recovery
|
Block Adv.
|
Hit Adv.
|
| -
|
Y
|
-
|
-
|
-
|
-
|
-
|
|
Special Moves
Sou 5S
Rider Sting
5S
|
| Damage
|
Guard
|
Startup
|
Active
|
Recovery
|
Block Adv.
|
Hit Adv.
|
| -
|
Y
|
-
|
-
|
-
|
-
|
-
|
TheBee steps back slightly and then delivers a step-in Rider Sting to the gut. Crumples on hit, making it an excellent combo tool. Very unsafe on block.
|
|
Sou 46S
Punch Combination
4/6S > 4/6S > 4/6S
|
| Damage
|
Guard
|
Startup
|
Active
|
Recovery
|
Block Adv.
|
Hit Adv.
|
| -
|
Y
|
-
|
-
|
-
|
-
|
-
|
TheBee throws a jab combo, then a hook combo, and ends in a straight punch. One of his fastest moves, hit-confirmable, safe on block until its final punch, and even dealing huge damage, it's just about as strong a rekka as you could hope for. A cornerstone of TheBee's gameplan both in combos and in pressure.
|
|
Sou 28S
Clock Up
2/8s
|
| Damage
|
Guard
|
Startup
|
Active
|
Recovery
|
Block Adv.
|
Hit Adv.
|
| -
|
N/A
|
-
|
-
|
-
|
-
|
-
|
Requires 4 stocks of the Rider Gauge, and activates Clock Up, slowing time the same as a Speed Up Style character would. This adds a layer of flexibility to the Support Attack Style version of TheBee. Mostly sees use in situations where it's effectively a checkmate.
This unique version of Clock Up belongs only to TheBee, and is slightly worse in a number of ways than the Speed Up Style's version. Most importantly, this version of TheBee doesn't gain improved strings, and doesn't speed up in any way.
|
|
Sou JS
Rider Sting (Air Version)
jS
|
| Damage
|
Guard
|
Startup
|
Active
|
Recovery
|
Block Adv.
|
Hit Adv.
|
| -
|
Y
|
-
|
-
|
-
|
-
|
-
|
TheBee dives at a wide angle with a Rider Sting extended in front of him. Extremely unsafe on block, with barely any blockstun, and has no tracking. It does move very far, so it may see some sparing use as a long-range whiff punish.
|
|
Universal Mechanics
Sou Throw
Throw
4H
|
| Damage
|
Guard
|
Startup
|
Active
|
Recovery
|
Block Adv.
|
Hit Adv.
|
| -
|
N
|
-
|
-
|
-
|
-
|
-
|
|
|
|
Sou Dash Action
Dash Action Air Dash Air Dash
|
| Damage
|
Guard
|
Startup
|
Active
|
Recovery
|
Block Adv.
|
Hit Adv.
|
| -
|
N/A
|
-
|
-
|
-
|
-
|
-
|
TheBee airdashes. A generic mobility tool. Costs .5 stocks of the Rider Gauge.
|
|
Sou Rider Art
Rider Art Zig-Zag Dash Zig-Zag Dash
|
| Damage
|
Guard
|
Startup
|
Active
|
Recovery
|
Block Adv.
|
Hit Adv.
|
| -
|
N/A
|
-
|
-
|
-
|
-
|
-
|
Standard Zig-Zag Dash type Rider Art. Costs .5 stocks of Rider Gauge.
|
|
Sou Style Action
Support Attack
|
| Damage
|
Guard
|
Startup
|
Active
|
Recovery
|
Block Adv.
|
Hit Adv.
|
| -
|
Y
|
-
|
-
|
-
|
-
|
-
|
Sou calls out the Zectroopers, who instantly appear and begin firing upon the opponent. This costs 2 stocks of the Rider Gauge, or 4 stocks when executed from hitstun.
This Style Action has three variants:
- When executed with 2/8SA, the Zectroopers appear in a cross formation at the edges of the stage. This version effectively has variable start up; much slower when the opponent is near the center of the stage, and much faster when they're against the wall. With 8SA, the Zectroopers appear at the corners of the stage, and with 2SA, the Zectroopers appear at the midpoint of the edges of the stage.
- When executed with 4/6SA, the Zectroopers appear in a fan formation behind TheBee.
These strikers are otherwise identical. Extremely fast, deals substantial damage, and causes a ton of hitstun. Expect to use this anytime that makes sense at any stage of the match. When used from hitstun, it may even allow you to burst a combo while getting a huge combo opportunity.
The main downside here is that the Zectroopers are neither firing homing bullets, nor tracking their target after they begin firing. Even in combos where the opponent is stationary, it's unreliable to get every bullet to hit. Against a moving target, it's possible that it whiffs completely.
|
|
Combos
- Standard combo with one RC. TheBee's special enders are highly efficient and almost completely refund the RC's meter cost.
- 5LLL > RC > 6S~6S~6S
- 5LLL > RC > 5HH > RC > 5S > 6S~6S~6S
- TheBee has some strings that cause a stagger, during which 5S's crumple will fail and instead juggle the opponent.
- Instead, go straight to 6S or RC into a string that does not stagger or launch the opponent.
- 5LLL > Style Action > jH > 5S > 6S~6S~6S
- 5LLL > Style Action > Gauge Charge > 5S > 6S~6S~6S
- Sample combos that use one striker call. Using jH increases the damage slightly, while meter charging increases the meter efficiency.
- 2HH > Style Action > Meter Charge > 2HH > Style Action > Gauge Charge > 2HH > RC > 5S > Climax Time > Rider Finale
- Touch of death combo. Requires about 4 meters at the first striker call, with a little wiggle room thanks to gauge charge.
Move List
Normal Moves
Shun 5LLL
5LHH
|
| Version
|
Damage
|
Guard
|
Startup
|
Active
|
Recovery
|
Block Adv.
|
Hit Adv.
|
| 5L
|
-
|
Y
|
-
|
-
|
-
|
-
|
-
|
| 5LL
|
-
|
Y
|
-
|
-
|
-
|
-
|
-
|
| 5LLL
|
-
|
Y
|
-
|
-
|
-
|
-
|
-
|
|
Shun 5LHH
5LHH
|
| Version
|
Damage
|
Guard
|
Startup
|
Active
|
Recovery
|
Block Adv.
|
Hit Adv.
|
| 5L
|
-
|
Y
|
-
|
-
|
-
|
-
|
-
|
| 5LH
|
-
|
Y
|
-
|
-
|
-
|
-
|
-
|
| 5LHH
|
-
|
Y
|
-
|
-
|
-
|
-
|
-
|
|
Shun 4/6LLL
4/6LLL
|
| Version
|
Damage
|
Guard
|
Startup
|
Active
|
Recovery
|
Block Adv.
|
Hit Adv.
|
| 4/6L
|
-
|
Y
|
-
|
-
|
-
|
-
|
-
|
| 4/6LL
|
-
|
Y
|
-
|
-
|
-
|
-
|
-
|
| 4/6LLL
|
-
|
Y
|
-
|
-
|
-
|
-
|
-
|
|
Shun 4/6LHH
4/6LHH
|
| Version
|
Damage
|
Guard
|
Startup
|
Active
|
Recovery
|
Block Adv.
|
Hit Adv.
|
| 4/6L
|
-
|
Y
|
-
|
-
|
-
|
-
|
-
|
| 4/6LH
|
-
|
Y
|
-
|
-
|
-
|
-
|
-
|
This string can be followed up with a Combo Jump into its aircombo string, jLHHS.
|
| 4/6LHH
|
-
|
Y
|
-
|
-
|
-
|
-
|
-
|
|
Shun 2/8LL
2/8LL
|
| Version
|
Damage
|
Guard
|
Startup
|
Active
|
Recovery
|
Block Adv.
|
Hit Adv.
|
| 2/8L
|
-
|
Y
|
-
|
-
|
-
|
-
|
-
|
| 2/8LL
|
-
|
Y
|
-
|
-
|
-
|
-
|
-
|
|
Shun 2/8LHH
2/8LHH
|
| Version
|
Damage
|
Guard
|
Startup
|
Active
|
Recovery
|
Block Adv.
|
Hit Adv.
|
| 2/8L
|
-
|
Y
|
-
|
-
|
-
|
-
|
-
|
| 2/8LH
|
-
|
Y
|
-
|
-
|
-
|
-
|
-
|
| 2/8LHH
|
-
|
Y
|
-
|
-
|
-
|
-
|
-
|
|
Shun 5HHH
5HHH
|
| Version
|
Damage
|
Guard
|
Startup
|
Active
|
Recovery
|
Block Adv.
|
Hit Adv.
|
| 5H
|
-
|
Y
|
-
|
-
|
-
|
-
|
-
|
| 5HH
|
-
|
Y
|
-
|
-
|
-
|
-
|
-
|
| 5HHH
|
-
|
Y
|
-
|
-
|
-
|
-
|
-
|
|
Shun 6HH
6HH
|
| Version
|
Damage
|
Guard
|
Startup
|
Active
|
Recovery
|
Block Adv.
|
Hit Adv.
|
| 6H
|
-
|
Y
|
-
|
-
|
-
|
-
|
-
|
| 6HH
|
-
|
Y
|
-
|
-
|
-
|
-
|
-
|
|
Shun 2/8HH
2/8HH
|
| Version
|
Damage
|
Guard
|
Startup
|
Active
|
Recovery
|
Block Adv.
|
Hit Adv.
|
| 2/8H
|
-
|
Y
|
-
|
-
|
-
|
-
|
-
|
| 2/8HH
|
-
|
Y
|
-
|
-
|
-
|
-
|
-
|
|
Shun jL
jL
|
| Damage
|
Guard
|
Startup
|
Active
|
Recovery
|
Block Adv.
|
Hit Adv.
|
| -
|
Y
|
-
|
-
|
-
|
-
|
-
|
|
Shun jH
jH
|
| Damage
|
Guard
|
Startup
|
Active
|
Recovery
|
Block Adv.
|
Hit Adv.
|
| -
|
Y
|
-
|
-
|
-
|
-
|
-
|
|
During Clock Up
Shun Clock Up 5LLLLL
5LLLLL (Clock Up)
|
| Version
|
Damage
|
Guard
|
Startup
|
Active
|
Recovery
|
Block Adv.
|
Hit Adv.
|
| 5L
|
-
|
Y
|
-
|
-
|
-
|
-
|
-
|
| 5LL
|
-
|
Y
|
-
|
-
|
-
|
-
|
-
|
| 5LLL
|
-
|
Y
|
-
|
-
|
-
|
-
|
-
|
| 5LLLL
|
-
|
Y
|
-
|
-
|
-
|
-
|
-
|
| 5LLLLL
|
-
|
Y
|
-
|
-
|
-
|
-
|
-
|
|
Shun Clock Up 4/6LLLLL
4/6LLLLL (Clock Up)
|
| Version
|
Damage
|
Guard
|
Startup
|
Active
|
Recovery
|
Block Adv.
|
Hit Adv.
|
| 4/6L
|
-
|
Y
|
-
|
-
|
-
|
-
|
-
|
| 4/6LL
|
-
|
Y
|
-
|
-
|
-
|
-
|
-
|
| 4/6LLL
|
-
|
Y
|
-
|
-
|
-
|
-
|
-
|
| 4/6LLLL
|
-
|
Y
|
-
|
-
|
-
|
-
|
-
|
| 4/6LLLLL
|
-
|
Y
|
-
|
-
|
-
|
-
|
-
|
|
Shun Clock Up 2/8LLLL
2/8LLLL (Clock Up)
|
| Version
|
Damage
|
Guard
|
Startup
|
Active
|
Recovery
|
Block Adv.
|
Hit Adv.
|
| 2/8L
|
-
|
Y
|
-
|
-
|
-
|
-
|
-
|
| 2/8LL
|
-
|
Y
|
-
|
-
|
-
|
-
|
-
|
| 2/8LLL
|
-
|
Y
|
-
|
-
|
-
|
-
|
-
|
| 2/8LLLL
|
-
|
Y
|
-
|
-
|
-
|
-
|
-
|
|
Shun Clock Up 5HHHHH
5HHHHH (Clock Up)
|
| Version
|
Damage
|
Guard
|
Startup
|
Active
|
Recovery
|
Block Adv.
|
Hit Adv.
|
| 5H
|
-
|
Y
|
-
|
-
|
-
|
-
|
-
|
| 5HH
|
-
|
Y
|
-
|
-
|
-
|
-
|
-
|
| 5HHH
|
-
|
Y
|
-
|
-
|
-
|
-
|
-
|
| 5HHHH
|
-
|
Y
|
-
|
-
|
-
|
-
|
-
|
| 5HHHHH
|
-
|
Y
|
-
|
-
|
-
|
-
|
-
|
|
Shun Clock Up 6HHHHH
6HHHHH (Clock Up)
|
| Version
|
Damage
|
Guard
|
Startup
|
Active
|
Recovery
|
Block Adv.
|
Hit Adv.
|
| 6H
|
-
|
Y
|
-
|
-
|
-
|
-
|
-
|
| 6HH
|
-
|
Y
|
-
|
-
|
-
|
-
|
-
|
| 6HHH
|
-
|
Y
|
-
|
-
|
-
|
-
|
-
|
| 6HHHH
|
-
|
Y
|
-
|
-
|
-
|
-
|
-
|
| 6HHHHH
|
-
|
Y
|
-
|
-
|
-
|
-
|
-
|
|
Shun Clock Up 2/8HHHH
2/8HHHH (Clock Up)
|
| Version
|
Damage
|
Guard
|
Startup
|
Active
|
Recovery
|
Block Adv.
|
Hit Adv.
|
| 2/8H
|
-
|
Y
|
-
|
-
|
-
|
-
|
-
|
| 2/8HH
|
-
|
Y
|
-
|
-
|
-
|
-
|
-
|
| 2/8HHH
|
-
|
Y
|
-
|
-
|
-
|
-
|
-
|
| 2/8HHHH
|
-
|
Y
|
-
|
-
|
-
|
-
|
-
|
|
Special Moves
Shun 5S
Rider Sting
5S
|
| Damage
|
Guard
|
Startup
|
Active
|
Recovery
|
Block Adv.
|
Hit Adv.
|
| -
|
Y
|
-
|
-
|
-
|
-
|
-
|
TheBee steps back slightly and then delivers a step-in Rider Sting to the gut. Crumples on hit, making it an excellent combo tool. Very unsafe on block.
|
|
Shun 46S
Punch Combination
dS > dS > dS
|
| Damage
|
Guard
|
Startup
|
Active
|
Recovery
|
Block Adv.
|
Hit Adv.
|
| -
|
Y
|
-
|
-
|
-
|
-
|
-
|
TheBee throws a jab combo, then a hook combo, and ends in a straight punch. One of his fastest moves, hit-confirmable, safe on block until its final punch, and even dealing huge damage, it's just about as strong a rekka as you could hope for. A cornerstone of TheBee's gameplan both in combos and in pressure.
During Clock Up, the rekka series extends from 3 to 6 parts.
|
|
Shun JS
Rider Sting (Air Version)
jS
|
| Damage
|
Guard
|
Startup
|
Active
|
Recovery
|
Block Adv.
|
Hit Adv.
|
| -
|
Y
|
-
|
-
|
-
|
-
|
-
|
TheBee dives at a wide angle with a Rider Sting extended in front of him. Extremely unsafe on block, with barely any blockstun, and has no tracking. It does move very far, so it may see some sparing use as a long-range whiff punish.
|
|
Universal Mechanics
Shun Throw
Throw
4H
|
| Damage
|
Guard
|
Startup
|
Active
|
Recovery
|
Block Adv.
|
Hit Adv.
|
| -
|
N
|
-
|
-
|
-
|
-
|
-
|
|
|
|
Shun Dash Action
Dash Action Air Dash Air Dash
|
| Damage
|
Guard
|
Startup
|
Active
|
Recovery
|
Block Adv.
|
Hit Adv.
|
| -
|
N/A
|
-
|
-
|
-
|
-
|
-
|
TheBee airdashes. A generic mobility tool. Costs .5 stocks of the Rider Gauge.
|
|
Shun Rider Art
Rider Art Super Jump Super Jump
|
| Damage
|
Guard
|
Startup
|
Active
|
Recovery
|
Block Adv.
|
Hit Adv.
|
| -
|
N/A
|
-
|
-
|
-
|
-
|
-
|
Standard Super Jump type Rider Art. Costs .5 stocks of Rider Gauge.
|
|
Shun Style Action
Style Action Speed Up Speed Up
|
| Damage
|
Guard
|
Startup
|
Active
|
Recovery
|
Block Adv.
|
Hit Adv.
|
| -
|
N/A
|
-
|
-
|
-
|
-
|
-
|
Shun activates Clock Up, slowing time for the opponent. Requires at least 2 stocks of the Rider Gauge to initiate, and lasts until the Rider Gauge fully drains.
During Clock Up, TheBee has access to the following extended strings:
- 5LLLLL
- 4/6LLLLL
- 2/8LLLL
- 5HHHHH
- 6HHHHH
- 2/8HHHH
- dSSSSSS
|
|
Combos
- A link starter into a special. Most characters don't get to do this, so it's really nice that he can.
- 2H > 5H > 2LH > RC > 5H > 6LL > RC > 5S > 6S~6S~6S
- A more complex link combo with one RC. The (2H > 5H) combo part requires 2H to hit at a distance.
- 5HH > RC > 6S~6S~6S
- 5HH > RC > 5H > 2LH > RC > 5S > 6S~6S~6S
- TheBee has some strings that cause a stagger, during which 5S's crumple will fail and instead juggle the opponent.
- Instead, go straight to 6S or RC into a string that does not stagger or launch the opponent.
- 5HH > Style Action > 5LLLL > 6HHHH > Speed Up Ends > 5S > 6S~6S~6S
- A sample combo into Clock Up, starting at 2 stocks of the Rider Gauge.
- It's best to freestyle strings for the duration of Clock Up and then link a standard 5S ender so that there's no easy burst point during Clock Up.
- Style Action > (5S)*7 > Climax Time > Rider Finale
- Touch of death combo. Requires Clock Up as a point-blank punish with 4 stocks of the Rider Gauge on hand, so it's not the most practical, but it's useful to know.
Navigation
| General
|
|
|
Showa
|
| Kamen Rider
|
|
| Kamen Rider V3
|
|
| Kamen Rider Amazon
|
|
| Kamen Rider BLACK (RX)
|
|
|
Heisei Phase 1
|
| Kamen Rider Kuuga
|
|
| Kamen Rider Agito
|
|
| Kamen Rider Ryuki
|
|
| Kamen Rider 555
|
|
| Kamen Rider Blade
|
|
| Kamen Rider Hibiki
|
|
| Kamen Rider Kabuto
|
|
| Kamen Rider Den-O
|
|
| Kamen Rider Kiva
|
|
| Kamen Rider Decade
|
|
|
Heisei Phase 2
|
| Kamen Rider W
|
|
| Kamen Rider OOO
|
|
| Kamen Rider Fourze
|
|
| Kamen Rider Wizard
|
|
