Kamen Rider: Super Climax Heroes/Fourze

From Mizuumi Wiki
Jump to navigation Jump to search

Introduction

Kamen Rider Fourze

For Kamen Rider Fourze, SPACE IS HERE!

In this variation, Fourze is an extremely customizable character who overwhelms his opponent with an array of powerful special moves. This style is chosen with the first option on the Form Change Style menu.

After choosing this style, Fourze is presented with a unique menu. The top option allows him to select four Astroswitches, customizing many properties of his moveset. While Fourze starts the round with all of your chosen Astroswitches equipped, you can still access Fourze's default moveset by using Style Action inputs.

  • The first row chooses a replacement special for 5S
  • The second row chooses a replacement special for 2/8S
  • The third row chooses a replacement special for jS
  • The fourth row chooses a replacement special for 4/6S

Additionally, the fourth option on the Form Change Style menu will get you this style with a selection of random Astroswitches.

This Battle Style offers Fourze not only an unparalleled wealth of flexibility for different matchups and playstyles, but a number of extremely strong special moves taken on their own.

Playstyle
KRSCH Fourze icon.png Kamen Rider Fourze (Form Change) is a highly customizable character.
Pros Cons
  • Overwhelming Switch Arsenal: Unique special moves offered by Astroswitches allow Fourze access to unblockables, extreme mobility, meter drain, healing, and more.
  • Infinite Combo that Drains Meter: While the opponent will likely burst, having an infinite combo forces the issue. The opponent must burst immediately on a clean hit, and if they don't it's only going to get worse for them, even stretching into the next round.
  • Extreme Flexibility: Even beyond choosing Astroswitches before the match begins, Fourze is capable of switching to his basic moveset in the middle of the match to suit the situation.
  • Combos From Throw: If Fourze has the opponent against the wall, he can combo off of his throw. While not unique to him, this is very nice to have, especially in combination with maximized combos.
  • Slow and Stubby Normals: Because his basic strikes are lacking, Fourze may struggle to play normal strike/throw offense, even with his opponent pinned down.
  • Base Switches are Just Okay: Fourze has an additional layer of flexibility, but his default Special Attacks just aren't as strong as the Astroswitches exclusive to Form Change Style.

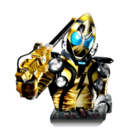
In this variation, Fourze gains access to his Elek States form. In it, he wields Billy the Rod, rushing the opponent down and limiting their options. This version of Fourze is chosen as the second option in the Form Change Style menu.

The defining aspect of Elek States is that his 5S and 4/6S drain the opponent's meter. His 5S even crumples the opponent, allowing a second Special Attack as a follow-up.

Playstyle
KRSCH Fourze icon.png Kamen Rider Fourze (Elek States) is a close-range bruiser specializing in short, damaging combos and meter drain.
Pros Cons
  • Stick Normals: Choosing Elek States trades away the major weakness of Fourze's Base Form. His normals are quick and allow for link combos, turning him into a close range threat.
  • Drains Meter: Elek States drains one stock of the opponent's Rider Gauge upon hitting a Special Attack and can hit up to two in one combo, dramatically limiting the opponent's metered options.
  • Combos From Throw: If Fourze has the opponent against the wall, he can combo off of his throw. While not unique to him, this is very nice to have.
  • Low Damage Ceiling: Elek's short and punchy combos go a long way, but he will have to touch the opponent a few times.
  • No Other Style Actions: While Elek is free and does not impose a limitation on this character, he also doesn't benefit from any of the Battle Style mechanics.
  • Struggles Outside of Close Range: Elek really wants to be at close range. He's not totally helpless at long range, but his projectile has a lot of recovery and his quick normals don't reach too far.

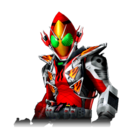
In this variation, Fourze gains access to his Fire States form. With it, he uses a variety of projectiles through the Hee-Hackgun to augment a mid-to-close-range gameplan. This version of Fourze is chosen as the third option in the Form Change Style menu.

Fire States has a lot in common with Fourze's Base Form, and trades away the versatility and power of customizable Astroswitches. In return, he lives and dies by his jS fire hose, a gliding air beam that remains active until he lands.

Playstyle
KRSCH Fourze icon.png Kamen Rider Fourze (Fire States) is an aggressive character who primarily uses projectiles.
Pros Cons
  • jS Fire Hose: A gliding air beam that hits until landing, Fire's jS is able to control a lot of space, approach, run away, and generally bully the opponent. In combination with his Air Dash-type Dash Action, he can even cross up the opponent.
  • Combos From Throw: If Fourze has the opponent against the wall, he can combo off of his throw. While not unique to him, this is very nice to have.
  • Low Average Damage: Fire's combos are very limited, and it can be difficult for Fire States to remove red life at the end of a combo.
  • Slow and Stubby Normals: Because his basic strikes are lacking, Fourze may struggle to play normal strike/throw offense, even with his opponent pinned down.
  • Every Ground Attack is A Huge Risk: Although he has access to a number of projectile attacks, they all have massive recovery. He's not really able to zone as such, and these moves are mostly relegated to punishing the opponent.
  • No Other Style Actions: While Fire States is free and does not impose a limitation on this character, he also doesn't benefit from any of the Battle Style mechanics.

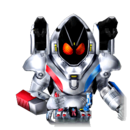
In this variation, Fourze gains access to his final form, Cosmic States. In this form, he becomes an aggressive character with long reach.

Cosmic States has access to multiple fullscreen gap closers, long-reaching normals, and a 5S slashing combo attack with extreme reach.

In exchange, you have to play Base Form Fourze without any extra help sometimes. Because Cosmic States is a Power Up Style, Fourze doesn't have access to it without 3 stocks of the Rider Gauge. If Fourze is stuck without Cosmic States for long, this can become a pretty big weakness.

Playstyle
KRSCH Fourze icon.png Kamen Rider Fourze (Power Up) uses extreme forward mobility and huge hitboxes to harrass the opponent at any screen position.
Pros Cons
  • Huge Hitboxes: In Cosmic States, Fourze gains normals with excellent reach. 5S is the cherry on top, striking basically the entire screen.
  • Extreme Forward Mobility: jS and Rider Art send Cosmic States flying across the screen, and the latter also allows for an extremely fast follow-up attack.
  • Power Up Style: Power Up Style characters universally are able to refresh their Guard Gauge and damage scaling by transforming.
  • Unstable Juggles: If the opponent is hit airborne by 5S, the follow-up strikes will not combo, leaving Fourze open.
  • Average Damage: Cosmic States does solid damage with short combos, but can't easily extend a long combo into big damage.
  • Base Form Fourze: Without Astroswitches, Base Form Fourze is left with slow and stubby normals, and unsafe special moves. Getting out of Base Form as soon as possible is a priority.

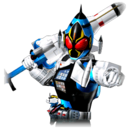
In this variation, Fourze makes use of the exclusive Magnet States form, in which he gains an array of projectile moves.

Fourze pays a few prices for choosing Magnet States. Most notably, he loses a lot of mobility, and he still doesn't have great attack strings. His new projectiles also don't represent a complete gameplan on their own, leaving a bit to be desired.

The real benefit of this Battle Style is the Support Attack striker itself: the Powerdizer. Its most commonly used variant drops in from the top of the screen near-instantly, knocking the opponent back to start the process of getting in all over again. As a wise man once said, you're not playing as Magnet States Fourze, you're playing as the Powerdizer.

Playstyle
KRSCH Fourze icon.png Kamen Rider Fourze (Support Attack) covers projectile zoning with the help of a powerful striker.
Pros Cons
  • Keepaway Gameplan: Although his projectiles don't win the game on their own, as long as Magnet States has room to build 2 stocks of Rider Gauge, he's exceedingly comfortable.
  • Ridiculous Striker: The Powerdizer assist is quick, deals high damage, and puts them right where he wants them. With 4 stocks of Rider Gauge on hand, not even hitting Magnet States is enough to avoid the Powerdizer.
  • Banned Character: One of the few characters universally agreed to be too much. Only pick this guy for laughs.

Meteor Fusion States is a secret character who acts as a fusion between Fourze and Meteor. To select Meteor Fusion States, select Tag Battle Style, then hold + or Start and select Meteor as Fourze's partner.

When choosing Meteor Fusion States, Fourze starts the round in this special form, using the Assault Battle Style.

A combination of Fourze's and Meteor's toolkits, Meteor Fusion States punishes the opponent's mistakes above all else.

Playstyle
KRSCH Fourze icon.png Kamen Rider Fourze (Meteor Fusion States) is a highly dangerous whiff punisher.
Pros Cons
  • Unburstable Combo: Rider Art is easily comboable, turns off the opponent's burst for the rest of the combo, and can be comboed from. It's also unblockable, so it's even useful as a starter on its own.
  • Whiff Punishment: Using quick advancing normals similar to Meteor's, Meteor Fusion States can reliably catch the opponent overextending and make them really pay.
  • Meter Generation: Because Meteor Fusion States uses the Assault Battle Style, he is able to build an extra bar of meter at the end of many of his strings.
  • Honest Toolkit Outside of Rider Art: When Meteor Fusion States doesn't have anything to whiff punish, it can be difficult for him to get started.
  • Picks Two Characters: KRSCH doesn't have mirror matches, and you can't pick Meteor Fusion States if your opponent wants to play either Fourze or Meteor.

Form Select

KRSCH Fourze Basestates Illustration.png
Base States
KRSCH Fourze Elekstates Illustration.png
Elek States
KRSCH Fourze Firestates Illustration.png
Fire States
KRSCH Fourze Cosmicstates Illustration.png
Cosmic States
KRSCH Fourze Magnetstates Illustration.png
Magnet States
KRSCH Fourze Meteor Fusion States Illustration.png
Meteor Fusion States

Move List

Normal Moves

5LL
5LL
Version Damage Guard Startup Active Recovery Block Adv. Hit Adv.
5L - Y - - - - -

Fourze performs a standing jab. Has a ton of recovery, but chains to 5LL and (more importantly) 5LH.

5LL - Y - - - - -

Fourze backhands the opponent. Short range and small forward movement make this difficult to hit with, and it has a lot of recovery.

5LHH
5LHH
Version Damage Guard Startup Active Recovery Block Adv. Hit Adv.
5L - Y - - - - -

Fourze performs a standing jab. Has a ton of recovery, but chains to 5LL and (more importantly) 5LH.

5LH - Y - - - - -

Launcher string that can be followed up with a Combo Jump. Very useful in combos. The uppercut can also OTG pickup, ie after the Magic Hand switch's untechable knockdown.

5LHH - Y - - - - -

Fourze casually uppercuts the opponent, knocking them away. Mostly useful as a meterless follow-up to 5LH.

46LLL
4/6LLL
Version Damage Guard Startup Active Recovery Block Adv. Hit Adv.
4/6L - Y - - - - -

Fourze scuffs their boots. A key normal for combos, but not so useful in neutral.

4/6LL - Y - - - - -

After scuffing their boots, Fourze adds injury to insult with an axe kick. Still difficult to use in neutral, but very plus on hit and enables link combos.

4/6LLL - Y - - - - -

Gut punch. Plus on hit and leaves the opponent standing, so it makes pretty good RC filler.

28LL
2/8LL
Version Damage Guard Startup Active Recovery Block Adv. Hit Adv.
2/8L - Y - - - - -

Fourze performs a hook punch. His fastest and overall best normal, and one of the most important for combos as well.

2/8LL - Y - - - - -

Overhead punch that knocks the opponent down. A great knockdown that allows Fourze to set up oki afterwards.

28LHHH
2/8LHHH
Version Damage Guard Startup Active Recovery Block Adv. Hit Adv.
2/8L - Y - - - - -

Fourze performs a hook punch. His fastest and overall best normal, and one of the most important for combos as well.

2/8LH - Y - - - - -

A quick gut punch. Mostly just used as string filler.

2/8LHH - Y - - - - -

Rocket Shoryuken. Horribly unsafe on block, but an excellent combo string on hit for all other purposes. RC-ing this string and following up with another grounded move is key for a number of combos. The RC must be input during startup and the hit must be cancelled quickly.

2/8LHHH - Y - - - - -

Fourze kicks the opponent away. Doesn't have any application besides as a combo follow-up since he's at the top of the screen.

5HH
5HH
Version Damage Guard Startup Active Recovery Block Adv. Hit Adv.
5H - Y - - - - -

Fourze drops an elbow on the opponent. Slow and stubby, it's not very useful for neutral, but it's one of his best options as a combo follow-up.

5HH - Y - - - - -

Gut punch that uses the same animation as 4/6LLL, but much more plus on hit. This is Fourze's go-to link starter, most notably into 2/8L but it's plus enough that it even links into Rider Finale.

6HH
6HH
Version Damage Guard Startup Active Recovery Block Adv. Hit Adv.
6H - Y - - - - -

Fourze's only advancing normal, but otherwise unremarkable. It doesn't go super far, and it's got a ton of recovery.

6HH - Y - - - - -

Fourze knocks the opponent away. Very punishable on block.

28HH
2/8HH
Version Damage Guard Startup Active Recovery Block Adv. Hit Adv.
2/8H - Y - - - - -

Double axe handle. Slow, punishable on block, and generally not a good idea.

2/8HH - Y - - - - -

follow-up uppercut. This string whiffs on block, so it's probably best to use something else.

jL
jL
Damage Guard Startup Active Recovery Block Adv. Hit Adv.
- Y - - - - -

Fourze sticks out his knee. Has active frames until landing.

Fourze's jH is identical to this attack.

Special Moves

5S
Rocket Astroswitch
5S (default)
Damage Guard Startup Active Recovery Block Adv. Hit Adv.
- Y - - - - -

Fourze's right arm becomes a Rocket, propelling him towards the opponent and striking them if he connects. Travels forward quickly with a lot of active frames. Unsafe on block.

46S
Radar Astroswitch
4/6S (default)
Damage Guard Startup Active Recovery Block Adv. Hit Adv.
- N/A - - - - -

Fourze deploys a Radar and holds it in front of him. If the opponent strikes the Radar with a non-projectile attack, Fourze becomes invincible and rolls to the side. Activates quickly, making it a strong defensive option.

28S
Launcher Astroswitch
2/8S (default)
Damage Guard Startup Active Recovery Block Adv. Hit Adv.
- Y - - - - -

Fourze deploys a Launcher on his leg, firing missiles at the opponent. While this move has a lengthy recovery, it also has lengthy hitstun, making it a workable projectile option.

The Launcher's missiles will also home in on the opponent if the Radar Astroswitch is currently equipped.

JS
Drill Astroswitch
jS (default)
Damage Guard Startup Active Recovery Block Adv. Hit Adv.
- Y - - - - -

Fourze's leg becomes a drill, and he does an otherwise-standard divekick. Very unsafe on block.

Universal Mechanics

Throw
Throw
4H
Damage Guard Startup Active Recovery Block Adv. Hit Adv.
- N - - - - -

Fourze's throw. This throw has an untechable knockdown, allowing combo follow-ups.

Dash Action
Dash Action
Air Dash
Air Dash
Damage Guard Startup Active Recovery Block Adv. Hit Adv.
- N/A - - - - -

Fourze airdashes. A generic mobility tool that can be especially useful in combination with some Astroswitches. Costs .5 stocks of the Rider Gauge.

Rider Art
Rider Art
Flight Mode
Flight Mode
Damage Guard Startup Active Recovery Block Adv. Hit Adv.
- N/A - - - - -

Upon pressing Rider Art, Fourze enters Flight Mode until the button is released. While hovering, the Rider Gauge slowly drains, and Fourze has access to moves exclusive to Flight Mode. Requires (but does not consume) 1 stock of Rider Gauge to initiate.

Rider Art L
L During Flight Mode
Damage Guard Startup Active Recovery Block Adv. Hit Adv.
- Y - - - - -

Fourze taps the opponent with his toe. Preferred Flight Mode button for hitting an airborne opponent in a pinch.

Rider Art H
H During Flight Mode
Damage Guard Startup Active Recovery Block Adv. Hit Adv.
- Y - - - - -

Fourze does an axe kick. Preferred Flight Mode button for hitting a grounded opponent.

Rider Art S
S During Flight Mode
Damage Guard Startup Active Recovery Block Adv. Hit Adv.
- N - - - - -

Fourze starts blasting downward with a minigun. The first shot is unblockable, and locks the opponent into a cinematic. If the first shot misses, he continues shooting for a total of 10 shots.

Style Action
Style Action
Form Change
Form Change
Damage Guard Startup Active Recovery Block Adv. Hit Adv.
- N - - - - -

Fourze (Form Change) is able to use the Style Action inputs to change his selected Astroswitches back to the default special moves.

Style Action 4/6 scroll left and right on Fourze's Astroswitch display. Style Action 2/8 changes out the highlighted switch between its default and its chosen variant.

Astroswitches

Fourze's Astroswitch mechanic has a hidden mechanic within it: comboing specific switches will change the properties of some Astroswitch special moves! Most notably is that Fourze's base kit of special moves has a combo within it, namely the Launcher + Radar combo, which adds homing to the Launcher's missiles. While this page will do its best to detail every Astroswitch, the exact details of this combo mechanic aren't documented anywhere currently.

Recommended Astroswitches

  • 5S
    • Magic Hand
    • Scoop
  • 2/8S
    • Stealth
    • Giant Foot
    • Net
  • jS
    • Screw
  • 4/6S
    • Camera
    • Scissors
    • Medical
Magic Hand Switch (5S)
Astroswitch #5
KRSCH Fourze Astroswitch 5.png
Damage Guard Startup Active Recovery Block Adv. Hit Adv.
- N - - - - -

Fourze uses the Magic Hand to grab the opponent. A very fast command grab with long reach that launches for a follow-up combo, with an untechable knockdown.

Chain Array Switch (5S)
Astroswitch #13
KRSCH Fourze Astroswitch 13.png
Damage Guard Startup Active Recovery Block Adv. Hit Adv.
- Y - - - - -

Fourze swings the Chain Array. Mostly useful as a combo ender or to break the opponent's guard.

Flash Switch (5S)
Astroswitch #17
KRSCH Fourze Astroswitch 17.png
Damage Guard Startup Active Recovery Block Adv. Hit Adv.
- Y - - - - -

Fourze grabs a light bulb and gets an idea. Steals one stock of Rider Gauge on hit.

Scoop Switch (5S)
Astroswitch #29
KRSCH Fourze Astroswitch 29.png
Damage Guard Startup Active Recovery Block Adv. Hit Adv.
- N - - - - -

Fourze scoops some dirt on em. Unblockable and holds the opponent in place for 5 seconds, allowing you to charge meter before following up with a combo. It's also possible to combo into this with RC.

Claw Switch (5S)
Astroswitch #33
KRSCH Fourze Astroswitch 33.png
Damage Guard Startup Active Recovery Block Adv. Hit Adv.
- Y - - - - -

Fourze equips the Claws and slashes the opponent. Mostly useful as a combo ender, and is fast enough to link from 4/6LL or 5HH.

The Claw Astroswitch has a combo with the Board Astroswitch (jS) which uses both switches during the Board Astroswitch's attack.

Chainsaw Switch (2/8S)
Astroswitch #8
KRSCH Fourze Astroswitch 8.png
Damage Guard Startup Active Recovery Block Adv. Hit Adv.
- Y - - - - -

Fourze's leg becomes a Chainsaw, and he does a kick combo. Fast, but short range and unsafe on block.

Beat Switch (2/8S)
Astroswitch #12
KRSCH Fourze Astroswitch 12.png
Damage Guard Startup Active Recovery Block Adv. Hit Adv.
- Y - - - - -

Fourze parties down. Very slow, but can be comboed into with RC.

Smoke Switch (2/8S)
Astroswitch #14
KRSCH Fourze Astroswitch 14.png
Damage Guard Startup Active Recovery Block Adv. Hit Adv.
- N - - - - -

Fourze Smoke Bombs the opponent, then follows up with a punch. Unblockable, but cannot be comboed into, and does not work on a jumping opponent.

Stealth Switch (2/8S)
Astroswitch #21
KRSCH Fourze Astroswitch 21.png
Damage Guard Startup Active Recovery Block Adv. Hit Adv.
- N/A - - - - -

Fourze turns invisible. During this time you can mix up the opponent with invisible throws, strikes that are difficult to guard cancel against, or even just do an unblockable special move.

Pen Switch (2/8S)
Astroswitch #25
KRSCH Fourze Astroswitch 25.png
Damage Guard Startup Active Recovery Block Adv. Hit Adv.
- Y - - - - -

Fourze starts writing with his foot. Fast startup, but very unsafe on block or whiff.

Hand Switch (2/8S)
Astroswitch #28
KRSCH Fourze Astroswitch 28.png
Damage Guard Startup Active Recovery Block Adv. Hit Adv.
- N - - - - -

Fourze's leg becomes hand. A command grab similar to the Magic Hand Astroswitch. By comparison, it's faster, shorter range, deals damage, and has less follow-up combo potential.

Freeze Switch (2/8S)
Astroswitch #32
KRSCH Fourze Astroswitch 32.png
Damage Guard Startup Active Recovery Block Adv. Hit Adv.
- Y - - - - -

Fourze's leg becomes a minifridge. Similar to the Scoop Astroswitch, but faster and blockable. It stuns the opponent for a shorter duration than the Scoop, but enables a meterless infinite.

Giant Foot Switch (2/8S)
Astroswitch #35
KRSCH Fourze Astroswitch 35.png
Damage Guard Startup Active Recovery Block Adv. Hit Adv.
- Y - - - - -

Fourze calls upon the Giant Foot, which homes in on the opponent to stomp them. A great zoning and anti-zoning tool. Deals big guard damage on block and crumples on hit.

Net Switch (2/8S)
Astroswitch #38
KRSCH Fourze Astroswitch 38.png
Damage Guard Startup Active Recovery Block Adv. Hit Adv.
- Y - - - - -

Fourze does a sick flip and summons a net over the opponent. Homes in on the opponent just as well as Giant Foot, drains meter on hit, restands an airborne opponent, and combos from many strings with RC, enabling an infinite combo.

Spike Switch (jS)
Astroswitch #15
KRSCH Fourze Astroswitch 15.png
Damage Guard Startup Active Recovery Block Adv. Hit Adv.
- Y - - - - -

Fourze does a plunging flipkick with spikes on his feet. It is possible for Spike to cross up the opponent after using an airdash, but it has a very tiny hitbox, limiting its usefulness. Even on block, it's very punishable.

Water Switch (jS)
Astroswitch #23
KRSCH Fourze Astroswitch 23.png
Damage Guard Startup Active Recovery Block Adv. Hit Adv.
- Y - - - - -

Fourze sprays water downward from the air. Effectively a beam special, but the hitbox is a little narrow and it can't be used for air combos. Deals decent guard damage if all hits connect.

Screw Switch (jS)
Astroswitch #27
KRSCH Fourze Astroswitch 27.png
Damage Guard Startup Active Recovery Block Adv. Hit Adv.
- Y - - - - -

Fourze flies across the screen horizontally. Can be done low to the ground to pursue the opponent, or high up for mobility. Deals big damage and is generally safe on block, making it the go-to switch for this slot.

Board Switch (jS)
Astroswitch #34
KRSCH Fourze Astroswitch 34.png
Damage Guard Startup Active Recovery Block Adv. Hit Adv.
- Y - - - - -

Fourze gets on the Board and dives diagonally. Can be a safe option to approach the opponent when spaced properly.

The Board Astroswitch has a combo with the Claw Astroswitch (5S). When using this combo, instead of diving to the ground, Fourze does a swooping dive while spinning with the Claw.

Aero Switch (jS)
Astroswitch #36
KRSCH Fourze Astroswitch 36.png
Damage Guard Startup Active Recovery Block Adv. Hit Adv.
- Y - - - - -

Fourze hovers and then releases a ball of wind. A decent projectile option for jS. It's also combo-friendly and deals decent guard damage.

Stamper Switch (jS)
Astroswitch #39
KRSCH Fourze Astroswitch 39.png
Damage Guard Startup Active Recovery Block Adv. Hit Adv.
- Y - - - - -

Fourze stomps real hard. Offers some combo potential in the corner thanks to its low recovery on hit. It also occasionally becomes unblockable, though we're not sure why.

Camera Switch (4/6S)
Astroswitch #6
KRSCH Fourze Astroswitch 6.png
Damage Guard Startup Active Recovery Block Adv. Hit Adv.
- N - - - - -

Fourze does his normal throw animation, and upon connecting, takes a picture of the opponent. This can be comboed into, and drains a bar of meter on hit. The opponent can burst during this, but Fourze is invulnerable until fully recovered.

Scissors Switch (4/6S)
Astroswitch #11
KRSCH Fourze Astroswitch 11.png
Damage Guard Startup Active Recovery Block Adv. Hit Adv.
- Y - - - - -

Fourze uses the Scissors like a claw to grab the opponent, and can follow up with another 4/6S to do a Rocket Shoryuken on the opponent. Very combo friendly, deals big damage, and has a great knockdown, enabling Flight Mode okizeme.

Winch Switch (4/6S)
Astroswitch #16
KRSCH Fourze Astroswitch 16.png
Damage Guard Startup Active Recovery Block Adv. Hit Adv.
- Y - - - - -

Fourze swings like Tarzan. Minus on hit and block, so it has limited usefulness.

Shield Switch (4/6S)
Astroswitch #18
KRSCH Fourze Astroswitch 18.png
Damage Guard Startup Active Recovery Block Adv. Hit Adv.
- N/A - - - - -

Fourze guards with a Shield. Similar to the default Radar switch, it's a great defensive option that deals damage on a successful parry instead of dodging.

Hammer Switch (4/6S)
Astroswitch #22
KRSCH Fourze Astroswitch 22.png
Damage Guard Startup Active Recovery Block Adv. Hit Adv.
- Y - - - - -

Fourze brings down the hammer. A combo-friendly special move that deals decent damage.

Medical Switch (4/6S)
Astroswitch #24
KRSCH Fourze Astroswitch 24.png
Damage Guard Startup Active Recovery Block Adv. Hit Adv.
- N - - - - -

Fourze grabs the opponent, then heals about 10% HP. Surprisingly combo-friendly, and links in the same places as Scissors and Hammer do. Resets both characters to neutral on hit.

Combos

  • 5HH > 2LHHH
Standard link combo that doesn't require any specific switches.
  • 5HH > 2LHH > RC > jS
Standard link combo that works with most jS Astroswitches and ends in a Special Attack.
  • 5HH > 6S
Link combo that requires Scissors, Hammer, or Medical Astroswitch. Alternatively, links into Claw Switch 5S.
  • 5S > 5LH > combo jump > jLHS
Magic Hand starter that doesn't require any specific other Astroswitches.
  • [5HH > 2LHH > RC > Scoop/Net/Freeze] repeat xN
Infinite loop using Scoop, Net or Freeze Astroswitches.
When using Scoop or Freeze Astroswitch, you can manually charge meter between each rep, making it a true infinite.
When using Net Astroswitch, this is not a true infinite as meter gain stops after 50 hits in the combo. It does, however, do enough damage to trigger Climax Time and end in Rider Finale for a touch of death combo.
  • 5S > 5LH > RC > Scoop/Net/Freeze > ...
Magic Hand starter into any containment Astroswitch. Can continue with the above combo.
  • [2S > jL] repeat xN
True infinite combo that requires Freeze Astroswitch.
  • (Corner) Throw > 6L
Basic combo from throw.

Move List

Normal Moves

Elek 5LLL
5LLL
Version Damage Guard Startup Active Recovery Block Adv. Hit Adv.
5L - Y - - - - -
5LL - Y - - - - -
5LLL - Y - - - - -
Elek 5LH
5LH
Version Damage Guard Startup Active Recovery Block Adv. Hit Adv.
5L - Y - - - - -
5LH - Y - - - - -
Elek 5LLH
5LLH
Version Damage Guard Startup Active Recovery Block Adv. Hit Adv.
5L - Y - - - - -
5LL - Y - - - - -
5LLH - Y - - - - -
Elek 4/6LLL
4/6LLL
Version Damage Guard Startup Active Recovery Block Adv. Hit Adv.
4/6L - Y - - - - -
4/6LL - Y - - - - -
4/6LLL - Y - - - - -
Elek 4/6LLHH
4/6LLHH
Version Damage Guard Startup Active Recovery Block Adv. Hit Adv.
4/6L - Y - - - - -
4/6LL - Y - - - - -
4/6LLH - Y - - - - -
4/6LLHH - Y - - - - -
Elek 2/8LL
2/8LL
Version Damage Guard Startup Active Recovery Block Adv. Hit Adv.
2/8L - Y - - - - -
2/8LL - Y - - - - -
Elek 2/8LH
2/8LH
Version Damage Guard Startup Active Recovery Block Adv. Hit Adv.
2/8L - Y - - - - -
2/8LH - Y - - - - -
Elek 5HHH
5HHH
Version Damage Guard Startup Active Recovery Block Adv. Hit Adv.
5H - Y - - - - -
5HH - Y - - - - -
5HHH - Y - - - - -
Elek 6HH
6HH
Version Damage Guard Startup Active Recovery Block Adv. Hit Adv.
6H - Y - - - - -
6HH - Y - - - - -
Elek 2/8HH
2/8HH
Version Damage Guard Startup Active Recovery Block Adv. Hit Adv.
2/8H - Y - - - - -
2/8HH - Y - - - - -
Elek jL
jL
Damage Guard Startup Active Recovery Block Adv. Hit Adv.
- Y - - - - -
Elek jH
jH
Damage Guard Startup Active Recovery Block Adv. Hit Adv.
- Y - - - - -

Special Moves

Elek 5S
Shock Attack
5S
Damage Guard Startup Active Recovery Block Adv. Hit Adv.
- Y - - - - -

Fourze clobbers the opponent with the stun rod, causing a crumple and draining 1 stock of the Rider Gauge. Try to combo into this at any opportunity.

Elek 46S
Elek Slash
4/6S
Damage Guard Startup Active Recovery Block Adv. Hit Adv.
- Y - - - - -

With a swipe of the stun rod, Fourze fires a wave of electricity across the stage. A pretty standard projectile, fairly quick to start up but has long recovery. Also drains 1 stock of the rider gauge on hit as a bonus.

Elek 28S
Shockwave
2/8S
Damage Guard Startup Active Recovery Block Adv. Hit Adv.
- Y - - - - -

Fourze stabs at the ground, creating a ring of electricity. Elek States' most damaging special move, and an amazing meaty thanks to its active frames and hitbox. It's also fairly safe when blocked even on its first frame, as long as it's spaced out.

Elek JS
Drill Module
jS
Damage Guard Startup Active Recovery Block Adv. Hit Adv.
- Y - - - - -

Drill Astroswitch divekick, identical to Base States' default jS. Very unsafe on block.

Universal Mechanics

Elek Throw
Throw
4H
Damage Guard Startup Active Recovery Block Adv. Hit Adv.
- N - - - - -

Fourze's Elek States throw. Allows a combo follow-up.

Base Elek Dash Action
Dash Action (Base Form)
Air Dash
Air Dash
Damage Guard Startup Active Recovery Block Adv. Hit Adv.
- N/A - - - - -

Fourze airdashes. A generic mobility tool, but not especially useful in this variant. Costs .5 stocks of the Rider Gauge.

Elek Dash Action
Dash Action (Elek States)
Guard Dash
Guard Dash
Damage Guard Startup Active Recovery Block Adv. Hit Adv.
- N/A - - - - -

Fourze runs forward with a shield that guards against projectile attacks. This slowly depletes the Guard Gauge as it is used.

Base Elek Rider Art
Rider Art (Base Form)
Hopping Switch
Hopping Switch
Damage Guard Startup Active Recovery Block Adv. Hit Adv.
- N - - - - -

A unique Rider Art available exclusively to this version of Fourze's Base Form. When pressed, it behaves similarly to the Super Jump type Rider Art. However, when RA is held, Fourze will continue hopping on his pogo leg. This actually gives it a hitbox, which is unblockable. Costs .5 stocks of the Rider Gauge to initiate and per bounce (consumed upon touching the ground). Must have at least .5 stocks in reserve to initiate a further bounce, but only consumes that meter upon jumping.

Elek Rider Art
Rider Art (Elek States)
Super Jump
Super Jump
Damage Guard Startup Active Recovery Block Adv. Hit Adv.
- N/A - - - - -

Standard Super Jump type Rider Art. Costs .5 stocks of the Rider Gauge.

Elek Style Action
Style Action
Form Change
Form Change
Damage Guard Startup Active Recovery Block Adv. Hit Adv.
- N/A - - - - -

Upon pressing Style Action, Fourze switches between Elek States and Base Form. This doesn't cost anything to do.

Combos

Base Form

  • 5HH > 2LHHH
Standard link combo that doesn't require any specific switches.
  • 5HH > 2LHH > RC > jS
Standard link combo that ends in a Special Attack.
  • (Corner) Throw > 4/6L
Basic throw combo.

Elek States

  • 5HH > 6LLH > RC > 5S > 5S
  • 5HH > 6LLH > 5LL > RC > 5S > 5S
Standard link combo from 5HH. Ending in double 5S drains 2 full stocks of Rider Gauge from the opponent.
The 5LL extension is much harder and deals less damage, but gains slightly more Rider Gauge. It's recommended to skip this extension, but it is listed here for completion's sake.
  • 6LLH > 6LLH > repeat xN
Infinite combo. Feels like an actual just frame, and scales the combo too quickly, so it's not the most useful infinite, but doing two reps of the string can be a nice hitconfirm into RC > 5S.
  • (Corner) Throw > 2HH
Basic throw combo.
  • 5HH > Rider Finale
  • 6LLH > Rider Finale
Elek States is able to hitconfirm into Rider Finale from any of his clean hits. In a pinch, he could even loop his 6LLH infinite to build some extra meter before cashing out.

Move List

Normal Moves

Fire 5LLL
5LLL
Version Damage Guard Startup Active Recovery Block Adv. Hit Adv.
5L - Y - - - - -
5LL - Y - - - - -
5LLL - Y - - - - -
Fire 5LLH
5LLH
Version Damage Guard Startup Active Recovery Block Adv. Hit Adv.
5L - Y - - - - -
5LL - Y - - - - -
5LLH - Y - - - - -
Fire 4/6LLH
4/6LLH
Version Damage Guard Startup Active Recovery Block Adv. Hit Adv.
4/6L - Y - - - - -
4/6LL - Y - - - - -
4/6LLH - Y - - - - -
Fire 2/8LL
2/8LL
Version Damage Guard Startup Active Recovery Block Adv. Hit Adv.
2/8L - Y - - - - -
2/8LL - Y - - - - -
Fire 2/8LH
2/8LH
Version Damage Guard Startup Active Recovery Block Adv. Hit Adv.
2/8L - Y - - - - -
2/8LH - Y - - - - -
Fire 5HHH
5HHH
Version Damage Guard Startup Active Recovery Block Adv. Hit Adv.
5H - Y - - - - -
5HH - Y - - - - -
5HHH - Y - - - - -
Fire 6HHH
6HHH
Version Damage Guard Startup Active Recovery Block Adv. Hit Adv.
6H - Y - - - - -
6HH - Y - - - - -
6HHH - Y - - - - -
Fire 2/8H
2/8H
Version Damage Guard Startup Active Recovery Block Adv. Hit Adv.
2/8H - Y - - - - -
Fire jL
jL
Damage Guard Startup Active Recovery Block Adv. Hit Adv.
- Y - - - - -
Fire jH
jH
Damage Guard Startup Active Recovery Block Adv. Hit Adv.
- Y - - - - -

Special Moves

Fire 5S
Blaze Emission
5S
Damage Guard Startup Active Recovery Block Adv. Hit Adv.
- Y - - - - -

Fourze blasts a jet of flame straight ahead. On ground hit, this has no pushback, and Fourze is very slightly negative on hit. On block, it's very negative but has a lot of pushback.

Fire 46S
Blaze Emission (Wide)
4/6S
Damage Guard Startup Active Recovery Block Adv. Hit Adv.
- Y - - - - -

Fourze blasts a jet of flame, starting at his left and sweeping to his right. Will hit fewer times and deal less damage than 5S, but has frame advantage on ground hit.

Fire 28S
Rapid Blaze Shot
2/8S
Damage Guard Startup Active Recovery Block Adv. Hit Adv.
- Y - - - - -

Fourze slowly shoots three shots in a spread pattern, aiming towards the feet and finishing with a shot into the air. In theory this has good space coverage, but in practice using it is likely to kill you because of its recovery. On ground hit, Fourze is negative and even punishable from close range, and on air hit the shots don't combo. They're unlikely to run into the up-shot on their own so the recovery in any other situation is a death sentence.

Fire JS
Super Extinguisher Tornado
jS
Damage Guard Startup Active Recovery Block Adv. Hit Adv.
- Y - - - - -

Fourze glides to the ground blasting water diagonally, with active frames until he lands. Plus on ground hit, negative on block but safe. Deals a lot of guard damage if all hits connect.

Universal Mechanics

Fire Throw
Throw
4H
Damage Guard Startup Active Recovery Block Adv. Hit Adv.
- N - - - - -

Fourze's Fire States throw. Allows a combo follow-up.

Base Fire Dash Action
Dash Action (Base Form)
Air Dash
Air Dash
Damage Guard Startup Active Recovery Block Adv. Hit Adv.
- N/A - - - - -

Fourze airdashes. A generic mobility tool, but not especially useful in this variant. Costs .5 stocks of the Rider Gauge.

Fire Dash Action
Dash Action (Fire States)
Air Dash
Air Dash
Damage Guard Startup Active Recovery Block Adv. Hit Adv.
- N/A - - - - -

Fourze airdashes. A generic mobility tool, and can be followed up with jS to cross up the opponent while getting extra distance from the airdash. Costs .5 stocks of Rider Gauge.

Base Fire Rider Art
Rider Art (Base Form)
High-Speed Dash
High-Speed Dash
Damage Guard Startup Active Recovery Block Adv. Hit Adv.
- N/A - - - - -

A Rider Art available exclusively to this version of Fourze's Base Form. It is a High-Speed Dash type Rider Art with a unique animation, and can be used side-to-side in addition to forward. Costs .5 stocks of Rider Gauge.

Fire Rider Art
Rider Art (Fire States)
Dodge Shot
Dodge Shot
Damage Guard Startup Active Recovery Block Adv. Hit Adv.
- Y - - - - -

A Dodge Shot type Rider Art. Backdashes with full invulnerability and fires a spread of 3 shots straight forward. A reliable escape option when being pressured. Costs 1 stock of Rider Gauge.

Fire Style Action
Style Action
Form Change
Form Change
Damage Guard Startup Active Recovery Block Adv. Hit Adv.
- Y - - - - -

Upon pressing Style Action, Fourze switches between Fire States and Base Form. This doesn't cost anything to do.

Combos

Base Form

  • 5HH > 2LHHH
Standard link combo that doesn't require any specific switches.
  • 5HH > 2LHH > RC > jS
Standard link combo that ends in a Special Attack.
  • Throw > 4/6L
Basic throw combo.

Fire States

  • 5LLL > RC > 6S
Fire's combos are fairly limited. However, he does have strings with long hitstun that allow him to combo into his specials reliably using RC.
  • Throw > 2H
Basic throw combo.

Move List

Normal Moves

Cosmic 5LL
5LL
Version Damage Guard Startup Active Recovery Block Adv. Hit Adv.
5L - Y - - - - -
5LL - Y - - - - -
Cosmic 5LHH
5LHH
Version Damage Guard Startup Active Recovery Block Adv. Hit Adv.
5L - Y - - - - -
5LL - Y - - - - -
5LHH - Y - - - - -
Cosmic 4/6LL
4/6LL
Version Damage Guard Startup Active Recovery Block Adv. Hit Adv.
4/6L - Y - - - - -
4/6LL - Y - - - - -
Cosmic 4/6LHH
4/6LHH
Version Damage Guard Startup Active Recovery Block Adv. Hit Adv.
4/6L - Y - - - - -
4/6LH - Y - - - - -
4/6LHH - Y - - - - -
Cosmic 2/8LL
2/8LL
Version Damage Guard Startup Active Recovery Block Adv. Hit Adv.
2/8L - Y - - - - -
2/8LL - Y - - - - -
Cosmic 2/8LH
2/8LH
Version Damage Guard Startup Active Recovery Block Adv. Hit Adv.
2/8L - Y - - - - -
2/8LH - Y - - - - -
Cosmic 5HHH
5HHH
Version Damage Guard Startup Active Recovery Block Adv. Hit Adv.
5H - Y - - - - -
5HH - Y - - - - -
5HHH - Y - - - - -
Cosmic 6HH
6HH
Version Damage Guard Startup Active Recovery Block Adv. Hit Adv.
6H - Y - - - - -
6HH - Y - - - - -
Cosmic 2/8HHH
2/8HHH
Version Damage Guard Startup Active Recovery Block Adv. Hit Adv.
2/8H - Y - - - - -
Version Damage Guard Startup Active Recovery Block Adv. Hit Adv.
2/8HH - Y - - - - -
Version Damage Guard Startup Active Recovery Block Adv. Hit Adv.
2/8HHH - Y - - - - -
Cosmic jL
jL
Damage Guard Startup Active Recovery Block Adv. Hit Adv.
- Y - - - - -
Cosmic jH
jH
Damage Guard Startup Active Recovery Block Adv. Hit Adv.
- Y - - - - -

Special Moves

Cosmic 5S
Blazing Slash
5S
Damage Guard Startup Active Recovery Block Adv. Hit Adv.
- Y - - - - -

Fourze brandishes a flaming sword and launches a 4-hit slashing combo. With massive reach, quick startup, and relative safety on block, this allows Cosmic States to strike at the opponent even at long range. Be aware that if the opponent is hit airborne, 5S will not combo all of its hits.

Cosmic DS
Freeze Launcher
any direction + S
Damage Guard Startup Active Recovery Block Adv. Hit Adv.
- Y - - - - -

Fourze's leg becomes a Launcher and fires homing missiles. A souped up version of his Base Form's default 2/8S. The homing is greatly improved, and on grounded hit, it deals increased hitstun and causes a freeze effect. Although this situation is not extremely common, when these missiles connect at full-stage distance, it is possible to combo into Rider Art follow-up.

Cosmic JS
Shocking Rocket Slash
jS
Damage Guard Startup Active Recovery Block Adv. Hit Adv.
- Y - - - - -

Fourze uses a burst of momentum from his jetpack to dive diagonally forward and slash upon landing. Moves very quickly, and can reach a considerable distance when done high in the air. Can be used to strike at the opponent, or intentionally whiffed over the opponent to create distance. It's even possible, though inconsistent, to cross up the opponent at some spacings.

Universal Mechanics

Cosmic Throw
Throw
4H
Damage Guard Startup Active Recovery Block Adv. Hit Adv.
- N - - - - -

Fourze's Cosmic States throw. Allows a combo follow-up.

Base Cosmic Dash Action
Dash Action (Base Form)
Air Dash
Air Dash
Damage Guard Startup Active Recovery Block Adv. Hit Adv.
- N/A - - - - -

Fourze airdashes. A generic mobility tool. Costs .5 stocks of the Rider Gauge.

Cosmic Dash Action
Dash Action (Cosmic States)
Air Dash
Air Dash
Damage Guard Startup Active Recovery Block Adv. Hit Adv.
- N/A - - - - -

Fourze airdashes. A generic mobility tool, and can also be used to position for jS. Costs .5 stocks of Rider Gauge.

Base Cosmic Rider Art
Rider Art (Base Form)
Super Jump
Super Jump
Damage Guard Startup Active Recovery Block Adv. Hit Adv.
- N/A - - - - -

Standard Super Jump type Rider Art. Costs .5 stocks of Rider Gauge.

Cosmic Rider Art
Rider Art (Cosmic States)
High-Speed Dash
High-Speed Dash
Damage Guard Startup Active Recovery Block Adv. Hit Adv.
- Y - - - - -

Standard High-Speed Dash type Rider Art. Costs .5 stocks of the Rider Gauge.

Has access to a follow-up by pressing Rider Art or Special Attack at no additional cost, launching an extremely quick attack that begins a cinematic. Unsafe on block.

This Rider Art follow-up is a critical part of Cosmic States' gameplan in multiple respects. It's a fast whiff punisher, an unburstable combo ender for huge damage, and may even work as a reversal thanks to its speed.

Cosmic Style Action
Style Action
Power Up
Power Up
Damage Guard Startup Active Recovery Block Adv. Hit Adv.
- Y - - - - -

By pressing Style Action, Fourze transforms into his final form, Cosmic States, at the cost of 3 stocks of the Rider Gauge. Doing so also refreshes damage scaling and the Guard Gauge.

While already in Cosmic States, Style Action transforms back into Fourze's Base Form at no cost. Doing so also refreshes damage scaling and the Guard Gauge.

Combos

Base Form

  • 5HH > 2LHHH
Standard link combo that doesn't require any specific switches.
  • 5HH > 2LHH > RC > jS
Standard link combo that ends in a Special Attack.
  • (Corner) Throw > 6L
Basic throw combo.

Cosmic States

  • 6LHH > dS
  • 6LHH > RA follow-up
Essential combo. 6LHH builds about .49 of a Rider Gauge stock, so it's very rare that you won't have the meter for RA.
  • 2HH > RC > 6LHH > RA follow-up
Simple RC extension. Cosmic States has many good poking normals, and can easily RC to get big reward from them.
  • 2HH > Style Action (Base Form) > 5HH > 2LH > Style Action (Cosmic States) > 5HH > RC > 6LHH > RA follow-up
Un-transform re-transform combo. May be useful if you have a lot of extra meter, ie after Climax Time is initiated.
  • 6LHH > Rider Finale
Thanks to 6LHH's crumple, this is a common point where Cosmic States is able to link Rider Finale.
  • 2HH > Style Action (Base Form) > 5HH > 2LH > RC > 5HH > 2LH > Style Action (Cosmic States) > 6LHH > Climax Time > Rider Finale
Touch of death combo that requires Cosmic States to already have 4 stocks of Rider Gauge before Climax Time is triggered. It's rare to have that much meter on hand, but not impossible either. Included for completion's sake.

Move List

Normal Moves

Special Moves

Universal Mechanics

Magnet Style Action
Support Attack
KRSCH Fourze Support Attack Illustration.png
Damage Guard Startup Active Recovery Block Adv. Hit Adv.
- Y - - - - -

Combos

Move List

Normal Moves

Fusion 5LL
5LL
Version Damage Guard Startup Active Recovery Block Adv. Hit Adv.
5L - Y - - - - -
5LL - Y - - - - -
Fusion 5LHH
5LHH
Version Damage Guard Startup Active Recovery Block Adv. Hit Adv.
5L - Y - - - - -
5LH - Y - - - - -
5LHH - Y - - - - -
Fusion 4/6LLL
4/6LLL
Version Damage Guard Startup Active Recovery Block Adv. Hit Adv.
4/6L - Y - - - - -
4/6LL - Y - - - - -
4/6LLL - Y - - - - -
Fusion 4/6LHH
4/6LHH
Version Damage Guard Startup Active Recovery Block Adv. Hit Adv.
4/6L - Y - - - - -
4/6LH - Y - - - - -
4/6LHH - Y - - - - -

This string can be followed up with an Instant Charge by pressing the Special Attack button.

Fusion 2/8LLL
2/8LL
Version Damage Guard Startup Active Recovery Block Adv. Hit Adv.
2/8L - Y - - - - -
2/8LL - Y - - - - -
2/8LLL - Y - - - - -
Fusion 2/8LH
2/8LH
Version Damage Guard Startup Active Recovery Block Adv. Hit Adv.
2/8L - Y - - - - -
2/8LH - Y - - - - -
Fusion 5HHHH
5HHHH
Version Damage Guard Startup Active Recovery Block Adv. Hit Adv.
5H - Y - - - - -
5HH - Y - - - - -
5HHH - Y - - - - -
5HHHH - Y - - - - -

This string can be followed up with an Instant Charge by pressing the Special Attack button.

Fusion 6HHHH
6HHHH
Version Damage Guard Startup Active Recovery Block Adv. Hit Adv.
6H - Y - - - - -
6HH - Y - - - - -
Version Damage Guard Startup Active Recovery Block Adv. Hit Adv.
6HHH - Y - - - - -
6HHHH - Y - - - - -
Fusion 2/8HHH
2/8HHH
Version Damage Guard Startup Active Recovery Block Adv. Hit Adv.
2/8H - Y - - - - -
Version Damage Guard Startup Active Recovery Block Adv. Hit Adv.
2/8HH - Y - - - - -
Version Damage Guard Startup Active Recovery Block Adv. Hit Adv.
2/8HHH - Y - - - - -
Fusion jL
jL
Damage Guard Startup Active Recovery Block Adv. Hit Adv.
- Y - - - - -

Fourze sticks his knee out, a variant of his base form's jump normals. Has active frames until landing.

Fusion jH
jH
Damage Guard Startup Active Recovery Block Adv. Hit Adv.
- Y - - - - -

Fourze does a jumping kick, a variant of Meteor's jH. Has active frames until landing.

Assault Mode

Fusion Assault 4/6LLLLL
4/6LLLLL
Version Damage Guard Startup Active Recovery Block Adv. Hit Adv.
4/6L - Y - - - - -
4/6LL - Y - - - - -
4/6LLL - Y - - - - -
4/6LLLL - Y - - - - -
4/6LLLLL - Y - - - - -
Fusion Assault 5HHHHH
5HHHHH
Version Damage Guard Startup Active Recovery Block Adv. Hit Adv.
5H - Y - - - - -
5HH - Y - - - - -
5HHH - Y - - - - -
5HHHH - Y - - - - -
5HHHHH - Y - - - - -
Fusion Assault 5LHHH
5LHHH
Version Damage Guard Startup Active Recovery Block Adv. Hit Adv.
5L - Y - - - - -
5LH - Y - - - - -
5LHH - Y - - - - -
5LHHH - Y - - - - -

Special Moves

Fusion 5S
Launcher / Blazing Slash
5S
Version Damage Guard Startup Active Recovery Block Adv. Hit Adv.
Normal
Launcher
- Y - - - - -

A variant on Fourze's base form's Launcher Astroswitch. Fires homing missiles at the opponent. The preferred special to combo into if you can't combo into Rider Art.

Assault
lazing Slash
- Y - - - - -

A variant on Fourze's Cosmic States 5S. Unleashes a 4-hit combo slash that hits a wide and long range ahead of Fourze. Like that move, it's really good as a neutral harassment tool. Because it's only available in Assault Mode, its usefulness is limited.

Fusion DS
Saturn Sorcery
any direction + Special
Damage Guard Startup Active Recovery Block Adv. Hit Adv.
- Y - - - - -

A variant on Meteor's Saturn Sorcery. Winds up for a little while, then fires the rings of Saturn. A projectile with long startup, very little recovery, and very strong homing that allows follow-up combos if the opponent is hit grounded. The long startup makes using this a big risk, but once it's on the screen, your opponent has a problem to deal with now.

Fusion JS
Drill Kick
jS
Damage Guard Startup Active Recovery Block Adv. Hit Adv.
- Y - - - - -

A variant on Fourze's Drill Astroswitch divekick, identical to Base States' default jS. Very unsafe on block.

Universal Mechanics

Fusion Throw
Throw
4H
Damage Guard Startup Active Recovery Block Adv. Hit Adv.
- N - - - - -

Fourze's Fusion States throw.

Fusion Dash Action
Dash Action
Air Dash
Air Dash
Damage Guard Startup Active Recovery Block Adv. Hit Adv.
- N/A - - - - -

Fourze airdashes. A generic mobility tool, but it's often not the best use of meter in this form. Costs .5 stocks of the Rider Gauge.

Fusion Rider Art
Rider Art
Super Jump
Super Jump
Damage Guard Startup Active Recovery Block Adv. Hit Adv.
- N - - - - -

Standard Super Jump type Rider Art. Costs .5 stocks of the Rider Gauge.

Has access to a follow-up by pressing Special Attack at no additional cost, which is a variant on his normal jS. This variant is unblockable, allows follow-up combos, and turns off the opponent's ability to burst for the rest of the combo.

This is the reason to pick the character. If you have enough meter and this hits, you just won the round and there's nothing they can do about it. Comboable from multiple strings with RC, and a dangerous approach in its own right since it's unblockable.

Fusion Style Action
Style Action
Assault
Assault
Damage Guard Startup Active Recovery Block Adv. Hit Adv.
- N/A - - - - -

Meteor Fusion States uses the Assault Style. Pressing Style Action with at least two stocks of Rider Gauge at any time besides during hitstun activates Assault Mode.

During Assault Mode, Meteor Fusion States gains the following extended strings:

  • 4/6LLLLL
  • 5HHHHH
  • 5LHHH
  • dS (replaces Saturn Sorcery with Blazing Slash)

Combos

  • 5HHH > RC > RA~S
  • 6HHH > RC > RA~S
  • 6LH > RC > RA~S
Standard Rider Art combos from strings. Uses 1.5 stocks of the Rider Gauge, but builds some during the string.
  • RA~S > run > 5HHH > RC > RA~S
Optimal Rider Art loop. Forward movement is required for 5HHH to connect after Rider Art. While any other strings that combo into Rider Art work in this loop combo, this more difficult link does the highest damage and builds the most meter.
  • 5HHH > RC > RA~S > run > 5HHHHS
Efficient combo example that uses Rider Art once and builds more meter than it spends. 5HHHHS alone builds about 1.8 stocks of Rider Gauge, and is the preferred combo ender in most situations.
  • 5HHH > RC > RA~S > run > 5HHH > RC > RA~S > run > 5HHH > RC > RA~S > Climax Time > 6HHH > RC + Rider Finale
Touch of death combo from Rider Art loop.
For some reason, Meteor Fusion States sometimes activates Climax Time from an RC, which isn't normally supposed to happen. If that happens on the final rep of the Rider Art loop, immediate Rider Finale will still kill from 100%.

Navigation

General
FAQ
Controls
HUD
Strategy
System
Links
Showa
Kamen Rider
1gou
2gou
Kamen Rider V3
V3
Kamen Rider Amazon
Amazon
Kamen Rider BLACK (RX)
BLACK
BLACK RX
Shadow Moon
Heisei Phase 1
Kamen Rider Kuuga
Kuuga
Kamen Rider Agito
Agito
G3-X
Gills
Kamen Rider Ryuki
Ryuki
Knight
Scissors
Zolda
Raia
Gai
Ouja
Verde
Tiger
Imperer
Odin
Femme
Ryuga
Kamen Rider 555
Faiz
Kaixa
Delta
Kamen Rider Blade
Blade
Garren
Chalice
Leangle
Kamen Rider Hibiki
Hibiki
Ibuki
Zanki
Todoroki
Kamen Rider Kabuto
Kabuto
Gatack
TheBee
Drake
Sasword
KickHopper
PunchHopper
Dark Kabuto
Kamen Rider Den-O
Den-O
Zeronos
Nega Den-O
New Den-O
Kamen Rider Kiva
Kiva
Ixa
Saga
Kamen Rider Decade
Decade
Diend
Heisei Phase 2
Kamen Rider W
W
Accel
Skull
Eternal
Kamen Rider OOO
OOO
Birth
Kamen Rider Fourze
Fourze
Meteor
Kamen Rider Wizard
Wizard