Introduction
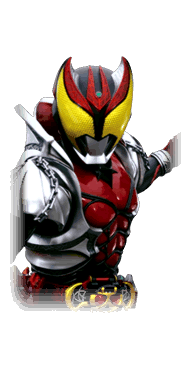 Kamen Rider Kiva
Kamen Rider Kiva is a talented violinist who believes all humans are music.
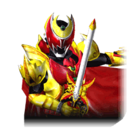
In this variation, Kiva has access to his final form, Emperor Form, during which he becomes exceedingly difficult to attack safely.
Emperor Form is a strong character taken on normals alone, but also has one of the fastest moves in the game: Dogga Hammer. Once he's transformed, your opponent has to play scared of him, or else give you a lot of free opportunities to clobber them.
Playstyle
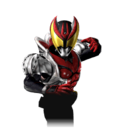
 Kamen Rider Kiva (Power Up) makes attacking feel like a really bad idea, and then cuts down his opponent while they cower. Kamen Rider Kiva (Power Up) makes attacking feel like a really bad idea, and then cuts down his opponent while they cower. |
| Pros |
Cons |
- Ridiculous Punishment: In Emperor Form, Kiva's dS is one of the fastest moves in the game, making almost anything punishable on block. He can even swing successfully between hits in a lot of strings.
- High Average Damage: Both of Kiva's forms have access to a Rider Art follow-up that deals a lot of damage, and a string that combos into it without RC.
- Strong Normals: Even in Base Form, Kiva has a decent set of normals, but once in Emperor Form, his normals are very strong in all situations.
- Power Up Style: Power Up Style characters universally are able to refresh their Guard Gauge and damage scaling by transforming.
|
- No Offensive Gimmicks: Kiva is leaning entirely on his normals and one useful special. If you wanna get through the opponent's guard, you've gotta do it the same way as everyone else.
- Pretty Normal in Base Form: Base Form Kiva's not a bad character, but has a very minimal kit. Reaching Emperor Form quickly should be your priority.
|
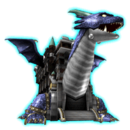
In this variation, Kiva trades away Emperor Form's straightforward power for a striker that takes some time to start up, but covers the screen in highly damaging fireballs.
This isn't really a fair trade in terms of picking the stronger version of Kiva. That said, Castle Doran is a pretty fun striker to play with. If you're familiar with Tron Bonne's assist in Marvel vs Capcom 2, which deals massive total damage but doesn't combo on its own, you'll recognize something similar here.
Playstyle
|
Kamen Rider Kiva (Support Attack) calls upon Castle Doran to bombard the opponent. |
| Pros |
Cons |
- High Average Damage: Kiva has access to a Rider Art follow-up that deals a lot of damage, and a string that combos into it without RC.
- Striker Can Deal Massive Damage: Normally intended to hit twice, it's possible for Kiva's striker to hit 4 times and deal a really silly amount of damage for a single move.
|
- Striker is Very Difficult to Use Efficiently: Castle Doran's projectiles have a long travel time and a wide spread, so this striker is difficult to use reactively and requires a plan ahead of time.
- Pretty Normal: Base Form Kiva's not a bad character, but has a very minimal kit. In this variant, he really has to flex every part of that kit to its maximum.
- Starved for Meter: Kiva struggles without spending meter to RC strings or call his striker, but he doesn't build a ton of meter either.
|
Form Select
Move List
Normal Moves
5LLL
5LLL
|
| Version
|
Damage
|
Guard
|
Startup
|
Active
|
Recovery
|
Block Adv.
|
Hit Adv.
|
| 5L
|
-
|
Y
|
-
|
-
|
-
|
-
|
-
|
| 5LL
|
-
|
Y
|
-
|
-
|
-
|
-
|
-
|
| 5LLL
|
-
|
Y
|
-
|
-
|
-
|
-
|
-
|
|
5LH
5LH
|
| Version
|
Damage
|
Guard
|
Startup
|
Active
|
Recovery
|
Block Adv.
|
Hit Adv.
|
| 5L
|
-
|
Y
|
-
|
-
|
-
|
-
|
-
|
| 5LH
|
-
|
Y
|
-
|
-
|
-
|
-
|
-
|
|
4/6LLL
4/6LLL
|
| Version
|
Damage
|
Guard
|
Startup
|
Active
|
Recovery
|
Block Adv.
|
Hit Adv.
|
| 4/6L
|
-
|
Y
|
-
|
-
|
-
|
-
|
-
|
| 4/6LL
|
-
|
Y
|
-
|
-
|
-
|
-
|
-
|
| 4/6LLL
|
-
|
Y
|
-
|
-
|
-
|
-
|
-
|
|
4/6LHH
4/6LHH
|
| Version
|
Damage
|
Guard
|
Startup
|
Active
|
Recovery
|
Block Adv.
|
Hit Adv.
|
| 4/6L
|
-
|
Y
|
-
|
-
|
-
|
-
|
-
|
| 4/6LH
|
-
|
Y
|
-
|
-
|
-
|
-
|
-
|
This string can be followed up with a Combo Jump into its aircombo follow-up string, jLHS.
|
| 4/6LHH
|
-
|
Y
|
-
|
-
|
-
|
-
|
-
|
|
2/8LLLL
2/8LLLL
|
| Version
|
Damage
|
Guard
|
Startup
|
Active
|
Recovery
|
Block Adv.
|
Hit Adv.
|
| 2/8L
|
-
|
Y
|
-
|
-
|
-
|
-
|
-
|
| 2/8LL
|
-
|
Y
|
-
|
-
|
-
|
-
|
-
|
| 2/8LLL
|
-
|
Y
|
-
|
-
|
-
|
-
|
-
|
| 2/8LLLL
|
-
|
Y
|
-
|
-
|
-
|
-
|
-
|
|
2/8LH
2/8LH
|
| Version
|
Damage
|
Guard
|
Startup
|
Active
|
Recovery
|
Block Adv.
|
Hit Adv.
|
| 2/8L
|
-
|
Y
|
-
|
-
|
-
|
-
|
-
|
| 2/8LH
|
-
|
Y
|
-
|
-
|
-
|
-
|
-
|
|
5HHH
5HHH
|
| Version
|
Damage
|
Guard
|
Startup
|
Active
|
Recovery
|
Block Adv.
|
Hit Adv.
|
| 5H
|
-
|
Y
|
-
|
-
|
-
|
-
|
-
|
| 5HH
|
-
|
Y
|
-
|
-
|
-
|
-
|
-
|
| 5HHH
|
-
|
Y
|
-
|
-
|
-
|
-
|
-
|
|
6HHH
6HHH
|
| Version
|
Damage
|
Guard
|
Startup
|
Active
|
Recovery
|
Block Adv.
|
Hit Adv.
|
| 6H
|
-
|
Y
|
-
|
-
|
-
|
-
|
-
|
| 6HH
|
-
|
Y
|
-
|
-
|
-
|
-
|
-
|
| 6HHH
|
-
|
Y
|
-
|
-
|
-
|
-
|
-
|
|
2/8HH
2/8HH
|
| Version
|
Damage
|
Guard
|
Startup
|
Active
|
Recovery
|
Block Adv.
|
Hit Adv.
|
| 2/8H
|
-
|
Y
|
-
|
-
|
-
|
-
|
-
|
| 2/8HH
|
-
|
Y
|
-
|
-
|
-
|
-
|
-
|
|
jL
jL
|
| Damage
|
Guard
|
Startup
|
Active
|
Recovery
|
Block Adv.
|
Hit Adv.
|
| -
|
Y
|
-
|
-
|
-
|
-
|
-
|
Kiva sticks out his knee. Has active frames until landing.
|
|
jH
jH
|
| Damage
|
Guard
|
Startup
|
Active
|
Recovery
|
Block Adv.
|
Hit Adv.
|
| -
|
Y
|
-
|
-
|
-
|
-
|
-
|
Visually identical to jL, but does more damage.
|
|
Special Moves
5S
Bloody Punch
5S
|
| Damage
|
Guard
|
Startup
|
Active
|
Recovery
|
Block Adv.
|
Hit Adv.
|
| -
|
Y
|
-
|
-
|
-
|
-
|
-
|
Kiva throws a lunging straight punch. Does a lot of damage, but has no tracking, and it's very bad on block and on whiff. Mostly sees use as a meterless combo ender.
|
|
DS
Catena Release
Any direction + S
|
| Damage
|
Guard
|
Startup
|
Active
|
Recovery
|
Block Adv.
|
Hit Adv.
|
| -
|
N/A
|
-
|
-
|
-
|
-
|
-
|
Kiva poses, breaks the chains binding his leg, and changes the stage's visuals for a set duration. While under this effect, Kiva deals more damage. This is very quick to execute, so you may as well sneak it in sometimes.
|
|
JS
Diving Kick
jS
|
| Damage
|
Guard
|
Startup
|
Active
|
Recovery
|
Block Adv.
|
Hit Adv.
|
| -
|
Y
|
-
|
-
|
-
|
-
|
-
|
Kiva backflips, and then divekicks. A little slower and a little more evasive than a normal divekick, and still very unsafe on block.
|
|
Universal Mechanics
Throw
Throw
4H
|
| Damage
|
Guard
|
Startup
|
Active
|
Recovery
|
Block Adv.
|
Hit Adv.
|
| -
|
N
|
-
|
-
|
-
|
-
|
-
|
Kiva's throw. Deals notably low damage for a throw.
|
|
Dash Action
Dash Action Air Dash Air Dash
|
| Damage
|
Guard
|
Startup
|
Active
|
Recovery
|
Block Adv.
|
Hit Adv.
|
| -
|
N/A
|
-
|
-
|
-
|
-
|
-
|
Kiva airdashes. A generic mobility tool. Costs .5 stocks of the Rider Gauge.
|
|
Rider Art
Rider Art High Speed Dash High Speed Dash WAKE UP! WAKE UP!
|
| Damage
|
Guard
|
Startup
|
Active
|
Recovery
|
Block Adv.
|
Hit Adv.
|
| -
|
Y
|
-
|
-
|
-
|
-
|
-
|
High Speed Dash type Rider Art. Costs .5 stocks of the Rider Gauge. Has access to a follow-up by pressing Rider Art or Special Attack at no additional cost, which does a soccer kick into a cinematic. Useful to end combos and whiff punish.
Kiva is also able to use this Rider Art in directions besides forward. When using the follow-up from other directions, it will face the opponent.
Occasionally, when hitting the opponent out of an attack at a very specific angle, they will be temporarily frozen in place afterward. Kiva can take advantage of this to fully charge his meter.
|
|
Style Action
Style Action Power Up Power Up
|
| Damage
|
Guard
|
Startup
|
Active
|
Recovery
|
Block Adv.
|
Hit Adv.
|
| -
|
N/A
|
-
|
-
|
-
|
-
|
-
|
Kiva transforms into his final form, Emperor Form, at the cost of 3 stocks of the Rider Gauge. Doing so also refreshes damage scaling and the Guard Gauge.
|
|
Combos
- 6HH > RC > 2LH > 5S
- 6HH > RC > 2LH > RA follow-up
- Standard combo with one RC. It's usually best to save your meter for Emperor Form, but the Rider Art follow-up deals more damage.
- Because this string crumples, it's an easy point to link Rider Finale.
Move List
Normal Moves
Emperor 5LLL
5LLL
|
| Version
|
Damage
|
Guard
|
Startup
|
Active
|
Recovery
|
Block Adv.
|
Hit Adv.
|
| 5L
|
-
|
Y
|
-
|
-
|
-
|
-
|
-
|
| 5LL
|
-
|
Y
|
-
|
-
|
-
|
-
|
-
|
|
|
| 5LLL
|
-
|
Y
|
-
|
-
|
-
|
-
|
-
|
|
Emperor 5LHH
5LHH
|
| Version
|
Damage
|
Guard
|
Startup
|
Active
|
Recovery
|
Block Adv.
|
Hit Adv.
|
| 5L
|
-
|
Y
|
-
|
-
|
-
|
-
|
-
|
| 5LH
|
-
|
Y
|
-
|
-
|
-
|
-
|
-
|
This string has enough advantage on hit to link Emperor Form's dS afterwards.
|
| 5LHH
|
-
|
Y
|
-
|
-
|
-
|
-
|
-
|
|
Emperor 4/6LL
4/6LL
|
| Version
|
Damage
|
Guard
|
Startup
|
Active
|
Recovery
|
Block Adv.
|
Hit Adv.
|
| 4/6L
|
-
|
Y
|
-
|
-
|
-
|
-
|
-
|
| 4/6LL
|
-
|
Y
|
-
|
-
|
-
|
-
|
-
|
Crumples the opponent on hit, allowing a meterless combo into Rider Art follow-up.
|
|
Emperor 4/6LH
4/6LH
|
| Version
|
Damage
|
Guard
|
Startup
|
Active
|
Recovery
|
Block Adv.
|
Hit Adv.
|
| 4/6L
|
-
|
Y
|
-
|
-
|
-
|
-
|
-
|
| 4/6LH
|
-
|
Y
|
-
|
-
|
-
|
-
|
-
|
Knocks the opponent down.
|
|
Emperor 2/8LLL
2/8LLL
|
| Version
|
Damage
|
Guard
|
Startup
|
Active
|
Recovery
|
Block Adv.
|
Hit Adv.
|
| 2/8L
|
-
|
Y
|
-
|
-
|
-
|
-
|
-
|
| 2/8LL
|
-
|
Y
|
-
|
-
|
-
|
-
|
-
|
|
|
| 2/8LLL
|
-
|
Y
|
-
|
-
|
-
|
-
|
-
|
|
Emperor 28LHH
2/8LHH
|
| Version
|
Damage
|
Guard
|
Startup
|
Active
|
Recovery
|
Block Adv.
|
Hit Adv.
|
| 2/8L
|
-
|
Y
|
-
|
-
|
-
|
-
|
-
|
| 2/8LH
|
-
|
Y
|
-
|
-
|
-
|
-
|
-
|
Emperor Form's launcher string. Can be followed up with a Combo Jump into its aircombo follow-up string, jLHS.
This launcher is also completely untechable, and can be followed up meterlessly by juggling Emperor Form's dS.
|
| 2/8LHH
|
-
|
Y
|
-
|
-
|
-
|
-
|
-
|
|
Emperor 5HHHH
5HHHH
|
| Version
|
Damage
|
Guard
|
Startup
|
Active
|
Recovery
|
Block Adv.
|
Hit Adv.
|
| 5H
|
-
|
Y
|
-
|
-
|
-
|
-
|
-
|
This attack has enough advantage on hit to link Emperor Form's dS afterwards.
|
| 5HH
|
-
|
Y
|
-
|
-
|
-
|
-
|
-
|
This string has enough advantage on hit to link Emperor Form's dS afterwards.
|
| 5HHH
|
-
|
Y
|
-
|
-
|
-
|
-
|
-
|
| 5HHHH
|
-
|
Y
|
-
|
-
|
-
|
-
|
-
|
|
Emperor 4/6HHHH
4/6HHHH
|
| Version
|
Damage
|
Guard
|
Startup
|
Active
|
Recovery
|
Block Adv.
|
Hit Adv.
|
| 4/6H
|
-
|
Y
|
-
|
-
|
-
|
-
|
-
|
This attack has enough advantage on hit to link Emperor Form's dS afterwards.
|
| 4/6HH
|
-
|
Y
|
-
|
-
|
-
|
-
|
-
|
|
|
| 4/6HHH
|
-
|
Y
|
-
|
-
|
-
|
-
|
-
|
Launches the opponent on ground hit, though it's intended to juggle as part of the string.
|
| 4/6HHHH
|
-
|
Y
|
-
|
-
|
-
|
-
|
-
|
Ground bounces the opponent. This ground bounce can't be ground teched.
|
|
Emperor 2/8HH
2/8HH
|
| Version
|
Damage
|
Guard
|
Startup
|
Active
|
Recovery
|
Block Adv.
|
Hit Adv.
|
| 2/8H
|
-
|
Y
|
-
|
-
|
-
|
-
|
-
|
|
|
| 2/8HH
|
-
|
Y
|
-
|
-
|
-
|
-
|
-
|
Launches the opponent on ground hit, though it's intended to juggle as part of the string.
|
|
Emperor jL
jL
|
| Damage
|
Guard
|
Startup
|
Active
|
Recovery
|
Block Adv.
|
Hit Adv.
|
| -
|
Y
|
-
|
-
|
-
|
-
|
-
|
Emperor Form's jumping attack, a slash that does not change Kiva's momentum.
|
|
Emperor jH
jH
|
| Damage
|
Guard
|
Startup
|
Active
|
Recovery
|
Block Adv.
|
Hit Adv.
|
| -
|
Y
|
-
|
-
|
-
|
-
|
-
|
Visually identical to jL, but deals more damage.
|
|
Special Moves
Emperor 5S
Zanvat Slash
5S
|
| Damage
|
Guard
|
Startup
|
Active
|
Recovery
|
Block Adv.
|
Hit Adv.
|
| -
|
Y
|
-
|
-
|
-
|
-
|
-
|
Kiva poses, turns his sword red, then delivers a leaping slash. Its extremely lengthy startup and recovery makes this difficult to use effectively. Aside from that it does carry a number of positives. It has some invincibility during the leap, buffs Kiva's damage for a set duration, and crumples the opponent on hit.
|
|
Emperor DS
Dogga Hammer
Any direction + S DOGGA FEVER! DOGGA FEVER!
|
| Damage
|
Guard
|
Startup
|
Active
|
Recovery
|
Block Adv.
|
Hit Adv.
|
| -
|
-
|
-
|
-
|
-
|
-
|
-
|
Kiva spins the Dogga Hammer around himself for a two-hit attack. One of the fastest attacks in the game, and deals a grip of damage to boot. This special makes attacking Kiva extremely dangerous, and it's also his go-to combo ender. Unsafe on block.
|
|
Emperor JS
Garulu Saber
jS
|
| Damage
|
Guard
|
Startup
|
Active
|
Recovery
|
Block Adv.
|
Hit Adv.
|
| -
|
-
|
-
|
-
|
-
|
-
|
-
|
Kiva dives with his sword extended. Very unsafe on block. Sees niche use as a combo ender from 6LL's crumple, since Dogga Hammer will not fully combo from that crumple.
|
|
Universal Mechanics
Emperor Throw
Throw
4H
|
| Damage
|
Guard
|
Startup
|
Active
|
Recovery
|
Block Adv.
|
Hit Adv.
|
| -
|
N
|
-
|
-
|
-
|
-
|
-
|
|
|
|
Emperor Dash Action
Dash Action Air Dash Air Dash
|
| Damage
|
Guard
|
Startup
|
Active
|
Recovery
|
Block Adv.
|
Hit Adv.
|
| -
|
N/A
|
-
|
-
|
-
|
-
|
-
|
Kiva airdashes. A generic mobility tool. Costs .5 stocks of Rider Gauge.
|
|
Emperor Rider Art
Rider Art High Speed Dash High Speed Dash
|
| Damage
|
Guard
|
Startup
|
Active
|
Recovery
|
Block Adv.
|
Hit Adv.
|
| -
|
Y
|
-
|
-
|
-
|
-
|
-
|
High Speed Dash type Rider Art. Costs .5 stocks of the Rider Gauge. Has access to a follow-up by pressing Rider Art or Special Attack at no additional cost, which does a slash into a cinematic. Useful to end combos and whiff punish.
Kiva is also able to use this Rider Art in directions besides forward. When using the follow-up from other directions, it will face the opponent.
This Rider Art follow-up's animation will occasionally bug out. This is caused by attacking Kiva during its recovery frames, and affects the next use of Rider Art follow-up. The function of the move doesn't change, but it looks funny.
|
|
Emperor Style Action
Style Action Power Up Power Up
|
| Damage
|
Guard
|
Startup
|
Active
|
Recovery
|
Block Adv.
|
Hit Adv.
|
| -
|
N/A
|
-
|
-
|
-
|
-
|
-
|
Emperor Form Kiva transforms back into Base Form at no cost. Doing so also refreshes damage scaling and the Guard Gauge.
As with all Power Up style transformations, this can be used to cancel grounded normal attacks and blockstun.
|
|
Combos
- 5LH > 6S
- 5HH > 6S
- 2LH > 6S
- Strings which link into 6S. It's easy to extend damage by using 5HHH as a combo filler, then RC and do one of these sequences. These strings can also link into Rider Finale if needed.
- These strings successfully combo into the first hit of 6S, but the second hit is tech-rollable. It's still safe on hit, so it's useful to know you can do this in a pinch.
- 6LL > jS
- 6LL > Rider Art follow-up
- 6LL > Rider Finale
- 6LL crumples the opponent, allowing for easy follow-ups. As noted above, 6S doesn't combo its second hit, so jS is the preferred meterless follow-up.
- 6LL > walk back > 2LH (second hit only) > 6S
- Advanced extension from 6LL's crumple. Requires quite a bit of space to walk backwards and intentionally whiff 2L.
- 5HHH > RC > 5HHH > RC > 5HHH > RC > 5HHH > Style Action (Base Form) > 6HH > RC > 2LLL > RC > 2LH > Climax Time > Rider Finale
- Touch of death combo from full resources. While this full combo might not be practical, it shows an example of how to use un-transform to extend damage.
Move List
Normal Moves
Special Moves
Support 5S
Bloody Punch
5S
|
| Damage
|
Guard
|
Startup
|
Active
|
Recovery
|
Block Adv.
|
Hit Adv.
|
| -
|
Y
|
-
|
-
|
-
|
-
|
-
|
Kiva throws a lunging straight punch. Does a lot of damage, but has no tracking, and it's very bad on block and on whiff. Mostly sees use as a meterless combo ender.
|
|
Support DS
Catena Release
Any direction + S
|
| Damage
|
Guard
|
Startup
|
Active
|
Recovery
|
Block Adv.
|
Hit Adv.
|
| -
|
N/A
|
-
|
-
|
-
|
-
|
-
|
Kiva poses, breaks the chains binding his leg, and changes the stage's visuals for a set duration. While under this effect, Kiva deals more damage. This is very quick to execute, so you may as well sneak it in sometimes.
|
|
Support JS
Diving Kick
jS
|
| Damage
|
Guard
|
Startup
|
Active
|
Recovery
|
Block Adv.
|
Hit Adv.
|
| -
|
Y
|
-
|
-
|
-
|
-
|
-
|
Kiva backflips, and then divekicks. A little slower and a little more evasive than a normal divekick, and still very unsafe on block.
|
|
Universal Mechanics
Support Throw
Throw
4H
|
| Damage
|
Guard
|
Startup
|
Active
|
Recovery
|
Block Adv.
|
Hit Adv.
|
| -
|
N
|
-
|
-
|
-
|
-
|
-
|
Kiva's throw. Deals notably low damage for a throw.
|
|
Support Dash Action
Dash Action Air Dash Air Dash
|
| Damage
|
Guard
|
Startup
|
Active
|
Recovery
|
Block Adv.
|
Hit Adv.
|
| -
|
N/A
|
-
|
-
|
-
|
-
|
-
|
Kiva airdashes. A generic mobility tool. Costs .5 stocks of the Rider Gauge.
|
|
Support Rider Art
Rider Art High Speed Dash High Speed Dash
|
| Damage
|
Guard
|
Startup
|
Active
|
Recovery
|
Block Adv.
|
Hit Adv.
|
| -
|
Y
|
-
|
-
|
-
|
-
|
-
|
High Speed Dash type Rider Art. Costs .5 stocks of the Rider Gauge. Has access to a follow-up by pressing Rider Art or Special Attack at no additional cost, which does a soccer kick into a cinematic. Useful to end combos and whiff punish.
Kiva is also able to use this Rider Art in directions besides forward. When using the follow-up from other directions, it will face the opponent. Occasionally, when hitting the opponent at a very specific angle, they will be temporarily frozen in place afterward.
|
|
Support Style Action
Style Action Support Attack Support Attack
|
| Damage
|
Guard
|
Startup
|
Active
|
Recovery
|
Block Adv.
|
Hit Adv.
|
| -
|
Y
|
-
|
-
|
-
|
-
|
-
|
By pressing Style Action, Kiva (Support Attack) can call his striker to launch an attack. This costs 2 stocks of the Rider Gauge, or 4 stocks when executed from hitstun.
Castle Doran appears in the background and launches a spread of four fireballs into the arena. Takes a pretty long time to reach the arena, but is difficult to evade completely and deals a lot of damage.
This is the entire reason you picked this version of the character, so you probably want to spend a lot of meter on it. Thankfully, it's pretty good for neutral, and in combos it's both a lot of damage and basically unburstable, since the fireballs continue approaching even if Kiva's in hitstun.
|
|
Combos
- 6HH > RC > 2LH > 5S
- 6HH > RC > 2LH > RA follow-up
- Standard combo with one RC. It's often best to save your meter, but the Rider Art follow-up deals more damage.
- Because this string crumples, it's an easy point to link Rider Finale.
- 6HH > RC > Style Action > 2LH > 2HH > Striker Hits
- Basic combo that uses Kiva's striker. Delaying the strings can buy time for the fireballs to connect.
- 6HH > RC > Style Action > 2LH > Micro-Sidewalk > 5S > Striker Hits
- Advanced combo that lands all four hits of Castle Doran by hitting the opponent towards its position. Requires a very specific angle and stage position that you must adjust on the fly. Incredibly inconsistent, but when it works, it deals massive damage.
- The timing for Style Action is variable based on stage position. Try doing it either during the startup of 2L, or between the hits of 2LH.
Navigation
| General
|
|
|
Showa
|
| Kamen Rider
|
|
| Kamen Rider V3
|
|
| Kamen Rider Amazon
|
|
| Kamen Rider BLACK (RX)
|
|
|
Heisei Phase 1
|
| Kamen Rider Kuuga
|
|
| Kamen Rider Agito
|
|
| Kamen Rider Ryuki
|
|
| Kamen Rider 555
|
|
| Kamen Rider Blade
|
|
| Kamen Rider Hibiki
|
|
| Kamen Rider Kabuto
|
|
| Kamen Rider Den-O
|
|
| Kamen Rider Kiva
|
|
| Kamen Rider Decade
|
|
|
Heisei Phase 2
|
| Kamen Rider W
|
|
| Kamen Rider OOO
|
|
| Kamen Rider Fourze
|
|
| Kamen Rider Wizard
|
|
