Introduction
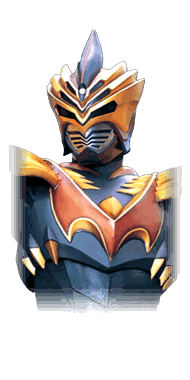 Kamen Rider Odin
Kamen Rider Odin is the mastermind behind Ryuki's Rider War, and being the mastermind gives him the power to blatantly cheat by teleporting.
Being a Ryuki rider, Odin uses the Support Attack style, and does not have access to normal grounded special attacks. He instead equips weapons at the cost of Rider Gauge. In particular, Odin has access to Sword Vent (which improves his heavy normals) and Guard Vent (which grants him temporary Super Armor).
While he lacks a normal range of special attacks, there's a lot of power in Odin's moveset. His normals are excellent, and only get better when he's equipped with Sword Vent. His Rider Art, a teleport, is a dominating way to close the distance, instantly mixing the opponent up or giving Odin the chance to whiff-punish an attack. On top of all that, while his Support Attack is not as dominant in neutral as some others are, it's extremely quick and combo-friendly, potentially hitting multiple times in a single use for huge damage.
When Odin would sidestep or backdash, he teleports instead. This has additional invincibility over the standard versions of these actions.
Playstyle
 Kamen Rider Odin is a mobile offensive powerhouse who employs a strong teleport along with powerful, Vent-augmented normals. Kamen Rider Odin is a mobile offensive powerhouse who employs a strong teleport along with powerful, Vent-augmented normals. |
| Pros |
Cons |
- High Damage: Odin's damage is naturally very good, and really flourishes thanks to his excellent link combos and incredible Support Attack.
- Teleport: Odin's Rider Art is a one-of-a-kind teleport, allowing him to close the distance between himself and his opponent in an instant.
- Flexible Normals: Odin's kit features many different types of excellent normals.
|
- Difficulty Removing Red Life: Because Ryuki riders lack standard special attacks, it's very difficult for them to cut off the opponent's red life without spending a resource.
- Meter Requirements: While Odin is not especially starved for Rider Gauge, many of his tools require it to activate at all. As such, if he's ever completely out of Rider Gauge, he loses a lot of his unpredictability and flexibility.
|
Form Select
Move List
Normal Moves
5LLL
5LHH
|
| Version
|
Damage
|
Guard
|
Startup
|
Active
|
Recovery
|
Block Adv.
|
Hit Adv.
|
| 5L
|
-
|
Y
|
-
|
-
|
-
|
-
|
-
|
An advancing jab. A quick attack with a lot of range.
|
| 5LL
|
-
|
Y
|
-
|
-
|
-
|
-
|
-
|
|
|
| 5LLL
|
-
|
Y
|
-
|
-
|
-
|
-
|
-
|
Knocks the opponent away on hit. A very useful string to combo into Support Attack.
|
|
5LHH
5LHH
|
| Version
|
Damage
|
Guard
|
Startup
|
Active
|
Recovery
|
Block Adv.
|
Hit Adv.
|
| 5L
|
-
|
Y
|
-
|
-
|
-
|
-
|
-
|
An advancing jab. A quick attack with a lot of range.
|
| 5LH
|
-
|
Y
|
-
|
-
|
-
|
-
|
-
|
A dash punch similar to 5H. Can be useful for attacking at range when 5L whiffs.
|
| 5LHH
|
-
|
Y
|
-
|
-
|
-
|
-
|
-
|
Odin stomps the opponent, groundbouncing them on hit. The opponent cannot ground tech the initial bounce, but can tech when landing from it. Extremely unsafe on block.
|
|
4/6LL
4/6LL
|
| Version
|
Damage
|
Guard
|
Startup
|
Active
|
Recovery
|
Block Adv.
|
Hit Adv.
|
| 4/6L
|
-
|
Y
|
-
|
-
|
-
|
-
|
-
|
A quick advancing side kick.
|
| 4/6LL
|
-
|
Y
|
-
|
-
|
-
|
-
|
-
|
Odin stomps the opponent, groundbouncing them on hit. The opponent cannot ground tech the initial bounce, but can tech when landing from it. Extremely unsafe on block.
|
|
Shun 4/6LHH
4/6LHH
|
| Version
|
Damage
|
Guard
|
Startup
|
Active
|
Recovery
|
Block Adv.
|
Hit Adv.
|
| 4/6L
|
-
|
Y
|
-
|
-
|
-
|
-
|
-
|
A quick advancing side kick.
|
| 4/6LH
|
-
|
Y
|
-
|
-
|
-
|
-
|
-
|
A dash punch similar to 5H. Can be useful for attacking at range, but in this case it's also attached to the better string followup, so it's commonly used.
|
| 4/6LHH
|
-
|
Y
|
-
|
-
|
-
|
-
|
-
|
A spinning back kick that knocks the opponent away diagonally on hit.
|
|
2/8LL
2/8LL
|
| Version
|
Damage
|
Guard
|
Startup
|
Active
|
Recovery
|
Block Adv.
|
Hit Adv.
|
| 2/8L
|
-
|
Y
|
-
|
-
|
-
|
-
|
-
|
An advancing thrust kick.
|
| 2/8LL
|
-
|
Y
|
-
|
-
|
-
|
-
|
-
|
Odin throws a haymaker that knocks the opponent away on hit.
|
|
2/8LHH
2/8LH
|
| Version
|
Damage
|
Guard
|
Startup
|
Active
|
Recovery
|
Block Adv.
|
Hit Adv.
|
| 2/8L
|
-
|
Y
|
-
|
-
|
-
|
-
|
-
|
An advancing thrust kick.
|
| 2/8LH
|
-
|
Y
|
-
|
-
|
-
|
-
|
-
|
A backhand that knocks the opponent diagonally away on hit.
|
|
5HHH
5HHH
|
| Version
|
Damage
|
Guard
|
Startup
|
Active
|
Recovery
|
Block Adv.
|
Hit Adv.
|
| 5H
|
-
|
Y
|
-
|
-
|
-
|
-
|
-
|
A dash punch with huge forward movement. An incredible approach on its own or paired with an RC to start something else.
In Odin's case, this normal also has a lot of hitstun and short recovery, making it a viable link starter even at point blank.
|
| 5HH
|
-
|
Y
|
-
|
-
|
-
|
-
|
-
|
A gut punch. Mostly just used as string filler.
|
| 5HHH
|
-
|
Y
|
-
|
-
|
-
|
-
|
-
|
A spinning back kick that knocks the opponent diagonally away on hit.
|
|
6HHH
6HHH
|
| Version
|
Damage
|
Guard
|
Startup
|
Active
|
Recovery
|
Block Adv.
|
Hit Adv.
|
| 6H
|
-
|
Y
|
-
|
-
|
-
|
-
|
-
|
|
|
| 6HH
|
-
|
Y
|
-
|
-
|
-
|
-
|
-
|
A spinning backhand.
This attack is one of Odin's primary link starters, and has enough hitstun to link 5L or 2H.
|
| 6HHH
|
-
|
Y
|
-
|
-
|
-
|
-
|
-
|
An uppercut that launches the opponent on hit. There's slightly too much recovery on this attack to link anything without Support Attack or RC, but the launch is completely untechable.
|
|
2/8HHH
2/8HHH
|
| Version
|
Damage
|
Guard
|
Startup
|
Active
|
Recovery
|
Block Adv.
|
Hit Adv.
|
| 2/8H
|
-
|
Y
|
-
|
-
|
-
|
-
|
-
|
An uppercut that launches the opponent on hit.
|
| 2/8HH
|
-
|
Y
|
-
|
-
|
-
|
-
|
-
|
A hopping knee. Can be delayed for stability if the opponent was hit too high in the air.
|
| 2/8HHH
|
-
|
Y
|
-
|
-
|
-
|
-
|
-
|
A spinning backhand that knocks the opponent diagonally away on hit.
|
|
jL
jL
|
| Damage
|
Guard
|
Startup
|
Active
|
Recovery
|
Block Adv.
|
Hit Adv.
|
| -
|
Y
|
-
|
-
|
-
|
-
|
-
|
Odin holds his fist out. A jump-in that has active frames until landing.
|
|
During Sword Vent
Sword Vent 5LHHHH
5LHHHH (Sword Vent)
|
| Version
|
Damage
|
Guard
|
Startup
|
Active
|
Recovery
|
Block Adv.
|
Hit Adv.
|
| 5L
|
-
|
Y
|
-
|
-
|
-
|
-
|
-
|
An advancing jab. A quick attack with a lot of range.
|
| 5LH
|
-
|
Y
|
-
|
-
|
-
|
-
|
-
|
A horizontal sword slash.
|
| 5LHH
|
-
|
Y
|
-
|
-
|
-
|
-
|
-
|
A second horizontal sword slash.
|
| 5LHHH
|
-
|
Y
|
-
|
-
|
-
|
-
|
-
|
A hopping knee that launches the opponent on hit.
|
| 5LHHHH
|
-
|
Y
|
-
|
-
|
-
|
-
|
-
|
A spinning slash that knocks the opponent diagonally away on hit.
|
|
Sword Vent 4/6LH
4/6LH (Sword Vent)
|
| Version
|
Damage
|
Guard
|
Startup
|
Active
|
Recovery
|
Block Adv.
|
Hit Adv.
|
| 4/6L
|
-
|
Y
|
-
|
-
|
-
|
-
|
-
|
A quick advancing side kick.
|
| 4/6LH
|
-
|
Y
|
-
|
-
|
-
|
-
|
-
|
A sword thrust that crumples the opponent on hit.
On another character this might be a fantastic starter, but for Odin, a crumple isn't especially helpful. This string can still be very nice to combo easily into a Rider Finale from a quick starter.
|
|
Sword Vent 2/8LHHH
2/8LHHH (Sword Vent)
|
| Version
|
Damage
|
Guard
|
Startup
|
Active
|
Recovery
|
Block Adv.
|
Hit Adv.
|
| 2/8L
|
-
|
Y
|
-
|
-
|
-
|
-
|
-
|
An advancing thrust kick.
|
| 2/8LH
|
-
|
Y
|
-
|
-
|
-
|
-
|
-
|
|
|
| 2/8LHH
|
-
|
Y
|
-
|
-
|
-
|
-
|
-
|
|
|
| 2/8LHHH
|
-
|
Y
|
-
|
-
|
-
|
-
|
-
|
A downward slash that knocks the opponent away on hit.
This string has a niche in combos using Support Attack. During a Sword Vent combo, you can use this string in the exact same way as 5LLL in order to set the opponent up for a double- or triple-hit Goldphoenix.
|
|
Sword Vent 5HHHHH
5HHHHH (Sword Vent)
|
| Version
|
Damage
|
Guard
|
Startup
|
Active
|
Recovery
|
Block Adv.
|
Hit Adv.
|
| 5H
|
-
|
Y
|
-
|
-
|
-
|
-
|
-
|
|
|
| 5HH
|
-
|
Y
|
-
|
-
|
-
|
-
|
-
|
|
|
| 5HHH
|
-
|
Y
|
-
|
-
|
-
|
-
|
-
|
|
|
| 5HHHH
|
-
|
Y
|
-
|
-
|
-
|
-
|
-
|
|
|
| 5HHHHH
|
-
|
Y
|
-
|
-
|
-
|
-
|
-
|
A downward slash that groundbounces the opponent. The opponent cannot ground tech the initial bounce, but can tech when landing from it.
This string can be used to combo into Support Attack, then follow up with another attack. This is mostly useful for triggering Climax Time and comboing into Rider Finale.
|
|
Sword Vent 6HHHH
6HHHH (Sword Vent)
|
| Version
|
Damage
|
Guard
|
Startup
|
Active
|
Recovery
|
Block Adv.
|
Hit Adv.
|
| 6H
|
-
|
Y
|
-
|
-
|
-
|
-
|
-
|
A stepping sword thrust with long range. Although it is one of Odin's slowest attacks, it's still fairly fast.
|
| 6HH
|
-
|
Y
|
-
|
-
|
-
|
-
|
-
|
A horizontal slash with very little recovery.
An excellent link starter that Odin gains during Sword Vent. Combos easily to 5H, as well as into itself.
|
| 6HHH
|
-
|
Y
|
-
|
-
|
-
|
-
|
-
|
An upward slash.
This mostly comes out when attempting to link 6HH from 6HH, and will always combo in that case. This attack can then be RC'd into 6H to recover the dropped combo.
|
| 6HHHH
|
-
|
Y
|
-
|
-
|
-
|
-
|
-
|
A downward slash that knocks the opponent away on hit.
|
|
Sword Vent 2/8HHH
2/8HHH (Sword Vent)
|
| Version
|
Damage
|
Guard
|
Startup
|
Active
|
Recovery
|
Block Adv.
|
Hit Adv.
|
| 2/8H
|
-
|
Y
|
-
|
-
|
-
|
-
|
-
|
|
|
| 2/8HH
|
-
|
Y
|
-
|
-
|
-
|
-
|
-
|
|
|
| 2/8HHH
|
-
|
Y
|
-
|
-
|
-
|
-
|
-
|
A spinning slash. Knocks the opponent diagonally away on hit.
|
|
Special Moves
5S
Sword Vent
5S
|
| Damage
|
Guard
|
Startup
|
Active
|
Recovery
|
Block Adv.
|
Hit Adv.
|
| -
|
N/A
|
-
|
-
|
-
|
-
|
-
|
Odin equips a sword in exchange for 1 stock of the Rider Gauge. Sword Vent lasts for about 15 seconds.
Vent activations can be Rider Canceled once they take effect and their corresponding card in the UI flashes.
Using Guard Vent (dS) while under the effects of Sword Vent will cancel Sword Vent and switch to Guard Vent.
Odin only loses his sword when he next returns to neutral after Sword Vent's timer runs out. This means that you can continue to RC and start new Sword Vent strings after the timer has expired.
Having Sword Vent active completely changes Odin's heavy normals and strings. Overall, Sword Vent's attacks deal more damage and have stronger hitboxes, and it's generally better to have Sword Vent active than not. However, keep in mind that you will lose access to barehanded heavy attacks like Odin's dash punch 5H for the duration of Sword Vent.
|
|
DS
Guard Vent
any direction + S
|
| Damage
|
Guard
|
Startup
|
Active
|
Recovery
|
Block Adv.
|
Hit Adv.
|
| -
|
N/A
|
-
|
-
|
-
|
-
|
-
|
Odin equips a shield in exchange for 3 stocks of the Rider Gauge. This grants Odin about 15 seconds of temporary Super Armor. Guard Vent does not change Odin's attack properties in any other way.
Vent activations can be Rider Canceled once they take effect and their corresponding card in the UI flashes.
Using Sword Vent (5S) while under the effects of Guard Vent will cancel Guard Vent and switch to Sword Vent.
Using 3 stocks of Rider Gauge on this is a bit of a hard sell, especially since you can't also have Sword Vent active at the same time. That said, its effect is very strong, especially when the opponent doesn't have enough health left to take big risks in playing against your Super Armor.
|
|
JS
Diving Kick
jS
|
| Damage
|
Guard
|
Startup
|
Active
|
Recovery
|
Block Adv.
|
Hit Adv.
|
| -
|
Y
|
-
|
-
|
-
|
-
|
-
|
A very standard divekick shared with other Ryuki riders.
Odin's jH is identical to this attack.
|
|
Universal Mechanics
Throw
Throw 4H 4H
|
| Damage
|
Guard
|
Startup
|
Active
|
Recovery
|
Block Adv.
|
Hit Adv.
|
| -
|
N
|
-
|
-
|
-
|
-
|
-
|
Odin's throw. Odin teleports behind the opponent and palm thrusts their back. Knocks the opponent away and causes a hard knockdown.
While under the effects of Sword Vent, Odin instead slams his sword down on top of the opponent, leaving them knocked down point blank.
Either of these throws can be followed up by pressing Style Action to summon your Support Attack before the throw, such that the throw hits them into the striker. With Sword Vent's throw, this works anywhere. However, the normal throw requires that Odin's back was near the wall so that he hits his opponent into the striker as it comes from the wall.
|
|
Dash Action
Dash Action Air Dash Air Dash
|
| Damage
|
Guard
|
Startup
|
Active
|
Recovery
|
Block Adv.
|
Hit Adv.
|
| -
|
N/A
|
-
|
-
|
-
|
-
|
-
|
Odin airdashes. A generic mobility tool. Costs .5 stocks of the Rider Gauge.
|
|
Rider Art
Rider Art Teleport Teleport
|
| Damage
|
Guard
|
Startup
|
Active
|
Recovery
|
Block Adv.
|
Hit Adv.
|
| -
|
N/A
|
-
|
-
|
-
|
-
|
-
|
Odin teleports almost instantly. This costs 1 stock of Rider Gauge to execute.
By inputting different directions along with Rider Art, Odin can control where he exits the teleport.
- Pressing 2, 6, or no direction will teleport behind the opponent.
- Pressing 8 will teleport into the air behind the opponent.
- Pressing 4 will teleport in front of the opponent.
This tool defines Odin's neutral presence. As long as he has just one stock of Rider Gauge, Odin can choose to be right behind the opponent whenever he wants. This is especially terrifying when used to force your opponent's attack to whiff harmlessly, whether as a reaction in neutral or to punish any string that has a small gap when blocked.
|
|
Style Action
Support Attack
|
| Damage
|
Guard
|
Startup
|
Active
|
Recovery
|
Block Adv.
|
Hit Adv.
|
| -
|
Y
|
-
|
-
|
-
|
-
|
-
|
By pressing Style Action, Odin can call his striker to launch an attack. This costs 2 stocks of the Rider Gauge, or 4 stocks when executed from hitstun.
Odin calls upon his Contract Monster, Goldphoenix, who swoops upward through the stage from behind Odin. An exceptionally quick striker that covers a lot of forward space. Goldphoenix is very combo friendly, and is Odin's primary means of removing red health from the opponent.
Under certain circumstances, this Support Attack can hit more than once. This requires the opponent to be hit by Goldphoenix as a juggle and/or while it's rising, late in its arc. Utilizing this property intentionally in combos can result in extremely high damage.
Goldphoenix's multi-hit properties also allow it to become a terrifying guard crusher while hitting the opponent's guard against the wall. Used this way, Goldphoenix will deal 90% or more of the Guard Gauge, potentially guardcrushing the opponent instantly.
|
|
Combos
- 5H > 5LLL
- 6HH > 4/6LHH
- 6HH > 2/8HHH
- Standard meterless link combos. Odin has two great link starters even without Sword Vent.
- These starters can also link into Rider Finale.
- 6HH > 4/6LH > Style Action (Support Attack) > 2/8HHH
- 6HH > 4/6LH > Style Action (Support Attack) > Climax Time > Rider Finale
- A sample combo using Goldphoenix to link strings together.
- Goldphoenix hitting is a common point for Climax Time to activate, and will comfortably combo into Rider Finale.
- 6HHH > Style Action (Support Attack) > 2/8HHH
- A basic Goldphoenix double-hit combo that works the same everywhere on the stage.
- Call Goldphoenix very late after 6HHH so that your opponent is very low to the ground.
- 5LLL > Style Action (Support Attack) > Rider Art > 2/8HHH
- 5LLL > Style Action (Support Attack) > Rider Art > Climax Time > Rider Finale
- More advanced combos using Goldphoenix to hit multiple times that need to be adjusted based on stage positioning.
- Midscreen and with plenty of space behind the opponent, call Goldphoenix early during 5LLL's animation. When done correctly, Goldphoenix will triple-hit.
- At the wall, call Goldphoenix late during 5LLL's recovery. When done correctly, Goldphoenix will double-hit.
- When comboing the opponent at the wall, Rider Art also becomes unnecessary, since you'll stay close to your opponent.
- (Sword Vent) [6HH > 5HHHH > RC] repeat xN > 6HH > 5HHHHH
- Sword Vent's RC loop.
- This loop combo is meter-positive, and Odin can loop it until Sword Vent runs out.
- (Sword Vent) 6HH > repeat xN
- Sword Vent's infinite combo. The timing is very difficult, so it's usually safer to RC loop unless you really need to save up some Rider Gauge.
- {5HH or 6HH} > RC > 5S (Sword Vent) > RC > 5HHHH > RC > 6HH > 5HHHHH
- A sample combo through Sword Vent activation. Knowing how to continue a combo while gaining Sword Vent can be useful in a pinch.
- The meter cost to activate Sword Vent this way is quite steep, requiring a total of 3 stocks of Rider Gauge. This is offset somewhat by Sword Vent's incredible meter gain.
- (Sword Vent) 5HHHH > RC > 6HH > (Sword Vent Expires) > 6HH > 5LLL
- A sample combo using the very last of Sword Vent's duration to prepare a followup.
- Although it's difficult to track when Sword Vent will run out, this combo is a small reward for your awareness of its timer.
- It's also possible to maintain Sword Vent past its expiration using RC, making this type of link a little more consistent.
Navigation
| General
|
|
|
Showa
|
| Kamen Rider
|
|
| Kamen Rider V3
|
|
| Kamen Rider Amazon
|
|
| Kamen Rider BLACK (RX)
|
|
|
Heisei Phase 1
|
| Kamen Rider Kuuga
|
|
| Kamen Rider Agito
|
|
| Kamen Rider Ryuki
|
|
| Kamen Rider 555
|
|
| Kamen Rider Blade
|
|
| Kamen Rider Hibiki
|
|
| Kamen Rider Kabuto
|
|
| Kamen Rider Den-O
|
|
| Kamen Rider Kiva
|
|
| Kamen Rider Decade
|
|
|
Heisei Phase 2
|
| Kamen Rider W
|
|
| Kamen Rider OOO
|
|
| Kamen Rider Fourze
|
|
| Kamen Rider Wizard
|
|

