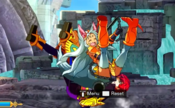
 Bisclavret
Profile
- EN Name: Type II Bisclavret
- JP Name: 第二型ビスクラヴレット
- Voice Actress: Shiori Izawa
- Element: Fire
- Health: 21500
Bisclavret was cursed by a wizard to forever be a wolf, but she's into it so it's cool.
Overview
Aggressive pressure character with explosive damage and a strong mixup game. Has a number of options for keeping the opponent where she wants them. Can control the direction her elemental attack moves with left or right. Her forward super jump has a lot of forward momentum and helps her close in on her opponent. She can also cling to the wall for an additional jump in the corner. Unfortunately, Million arthur's strong defensive mechanics hurt bisclavret arguably more than any other character, as she struggles to address rolls and
Strengths/Weaknesses
| Strengths |
Weaknesses
|
- Great mix-up and reset potential. the only character able to unconditionally combo off of their throw midscreen once you have the clean hit timing down
- easy bake air unblockable resets with 236D and j.236X.
- one of the only characters able to threaten air techs with a reset
- can set up unblockables with assist>5[D]
- instant overhead in j.D
|
- Poor neutral makes her gameplan hard to execute on
- stepdash+ stubby normals means she struggles to punish rolls, and can even by punished by them if she commits to a bad setup.
|
Recommended Support Knights
1 Mana
- A cheap projectile that allows easy pickups after j.Ds from weird heights. Confirms into IAD j.D at range.
- Good space control and acts as a cost effective combo extender after 5D.
- Gives bisclavret a cheap air combo ender that doesn't force a side switch. ex
j.B > j.C > j.Enide > 66 j.D > land 5A > 5C > 66
- Pairs well with Evaine extensions
2 Mana
- Useful both as a strong neutral tool and an easy combo extension.
- Amazing combo tool for Bisclavert. Leads into
IAD j.D > land 5A > etc and combos off of practically anything: a sour spot throw > 5[D], j.236X to prevent the side swap, 236D, and max range 2C.
- Great for lockdown and space control. Bisclavret can cover the gap in this assist's blockstun with 1/2/3D, providing so much blockstun Bisclavret can dash up and land a guard crush 5[D] on opponents who lack the resources to guard cancel.
3 Mana
Fun combo routes after 236D
Normal Moves
5A
5A
|
| Damage
|
Guard
|
Startup
|
Active
|
Recovery
|
Frame Adv
|
Starter Scaling
|
Combo Scaling
|
Element
|
| 500
|
-
|
7f
|
-
|
-
|
-4
|
-
|
-
|
-
|
Jump cancelable. Works as an anti-air since it hits pretty high up, but very short range horizontally
|
|
5AA
5AA
|
| Damage
|
Guard
|
Startup
|
Active
|
Recovery
|
Frame Adv
|
Starter Scaling
|
Combo Scaling
|
Element
|
| 1060
|
-
|
11f
|
-
|
-
|
-8
|
-
|
-
|
-
|
Bisclavret jumps into the air and does the same animation as j.A. Can chain into j.B for a fast overhead, but doing so will add landing recovery so you'll need to enchant boost cancel or use an assist to combo. If the j.B gets blocked Bis will be -2 at worst, you can delay the j.B cancel to make it look like you're going for the overhead, and then go low or throw.
|
|
5AAA
5AAA
|
| Damage
|
Guard
|
Startup
|
Active
|
Recovery
|
Frame Adv
|
Starter Scaling
|
Combo Scaling
|
Element
|
| 2446
|
-
|
15f
|
-
|
-
|
-13
|
-
|
-
|
-
|
Jump cancellable. There's a gap between 5AA and 5AAA. Useful if you think they're going to try to mash out of 5AA j.B.
|
|
5AAAA
5AAAA
|
| Damage
|
Guard
|
Startup
|
Active
|
Recovery
|
Frame Adv
|
Starter Scaling
|
Combo Scaling
|
Element
|
| 3766
|
-
|
16f
|
-
|
-
|
-15
|
-
|
-
|
-
|
There's a gap between the hammer and the kick.
|
|
5B
5B
|
| Damage
|
Guard
|
Startup
|
Active
|
Recovery
|
Frame Adv
|
Starter Scaling
|
Combo Scaling
|
Element
|
| 1400
|
-
|
11f
|
-
|
-
|
-7
|
-
|
-
|
-
|
|
|
|
5C
5C
|
| Damage
|
Guard
|
Startup
|
Active
|
Recovery
|
Frame Adv
|
Starter Scaling
|
Combo Scaling
|
Element
|
| 2500
|
-
|
16f
|
-
|
-
|
-9
|
-
|
-
|
-
|
This move can be cancelled into a forward dash or back dash on hit or block, and causes a ground bounce on counterhit. A normal hit will automatically floor the opponent and force a tech, making it pretty useless in combos, but Bisclavret can meaty after j.236 with it to keep up pressure. You can throw after 5C forward dash but it can be mashed out of. If you think that your opponent is going to mash you can backdash cancel it instead.
|
|
6C
6C
|
| Damage
|
Guard
|
Startup
|
Active
|
Recovery
|
Frame Adv
|
Starter Scaling
|
Combo Scaling
|
Element
|
| 1700
|
-
|
12f
|
-
|
-
|
-9
|
-
|
-
|
-
|
Jump cancellable. Decent anti-air, but not a great hitbox. Also works as a launcher after Magic Guild or Foible Elle assist.
|
|
2A
2A
|
| Damage
|
Guard
|
Startup
|
Active
|
Recovery
|
Frame Adv
|
Starter Scaling
|
Combo Scaling
|
Element
|
| 400
|
-
|
6f
|
-
|
-
|
-3
|
-
|
-
|
-
|
Low profiles. Be aware that if you 2A 5AA, you will do the third hit of Bisc's autocombo and be minus. If you want to go from a low to her j.B you'll only need to input 2A 5A j.B.
|
|
2B
2B
|
| Damage
|
Guard
|
Startup
|
Active
|
Recovery
|
Frame Adv
|
Starter Scaling
|
Combo Scaling
|
Element
|
| 1200
|
-
|
11f
|
-
|
-
|
-6
|
-
|
-
|
-
|
Decent range low poke that can low-profile some attacks.
|
|
2C
2C
|
| Damage
|
Guard
|
Startup
|
Active
|
Recovery
|
Frame Adv
|
Starter Scaling
|
Combo Scaling
|
Element
|
| 1500
|
-
|
14f
|
-
|
-
|
-15
|
-
|
-
|
-
|
Long-ranged sweep that can low profile some attacks.
|
|
j.A
j.A
|
| Damage
|
Guard
|
Startup
|
Active
|
Recovery
|
Frame Adv
|
Starter Scaling
|
Combo Scaling
|
Element
|
| 800
|
-
|
8f
|
-
|
-
|
-
|
-
|
-
|
-
|
Decent air-to-air that's more active than it looks.
|
|
j.B
j.B
|
| Damage
|
Guard
|
Startup
|
Active
|
Recovery
|
Frame Adv
|
Starter Scaling
|
Combo Scaling
|
Element
|
| 1300
|
-
|
10f
|
-
|
-
|
-
|
-
|
-
|
-
|
This is a good button. Powerful tool for both air-to-air and air-to-ground attacks, and also a key part of Bisclavret's ground pressure after 5aa. Can be cancelled into a j.236 or j.D for an easy air-to-air confirm. If you're hitting it after 5aa you'll need to call an assist or cancel into Enchant Boost to combo.
|
|
j.C
j.C
|
| Damage
|
Guard
|
Startup
|
Active
|
Recovery
|
Frame Adv
|
Starter Scaling
|
Combo Scaling
|
Element
|
| 1800
|
-
|
14f
|
-
|
-
|
-
|
-
|
-
|
-
|
Decent diagonal hitbox but you should probably be pressing j.B instead.
|
|
Elemental Attacks
5[D]
Home-Run Swing
5D
|
| Version
|
Damage
|
Guard
|
Startup
|
Active
|
Recovery
|
Frame Adv
|
Starter Scaling
|
Combo Scaling
|
Element
|
| Uncharged
|
4800
|
-
|
21f
|
-
|
-
|
-29
|
-
|
-
|
Fire
|
Can be held to become a guard break. Can be performed during ground throw.
|
| Charged
|
5600
|
-
|
-
|
-
|
-
|
N/A
|
-
|
-
|
Fire
|
Slow but causes guard crush and leads to a combo when blocked. Deals massive damage unblocked.
|
|
1/2/3D
Angry Earth
1/2/3D 1D 1D 2D 2D 3D 3D
|
| Damage
|
Guard
|
Startup
|
Active
|
Recovery
|
Frame Adv
|
Starter Scaling
|
Combo Scaling
|
Element
|
| 2800
|
-
|
62f
|
-
|
-
|
-
|
-
|
-
|
Fire
|
Bisclavret sets a spot on the ground that then explodes. Distance depends on if you use 1/2/3, with 1D being right in front of Bis and 3D being ~1 character length away from full-screen. Do note that the pillar does NOT disappear when Bisclavret is hit.
|
|
j.D
Burning Wheel
j.D
|
| Damage
|
Guard
|
Startup
|
Active
|
Recovery
|
Frame Adv
|
Starter Scaling
|
Combo Scaling
|
Element
|
| 2496
|
-
|
13f
|
-
|
-
|
-9
|
-
|
-
|
Fire
|
Massive, extremely active air attack that carries your previous air momentum forward. Because of this property it's possible for Bisclavret to super jump, airdash, and then fling herself across the entire screen. Use an assist to make it safe. This attack has an extremely good hitbox, which makes it hard to antiair. You can 5A to pick up after a hit. Hits overhead.
|
|
Throws
5/6B+C
Forward Throw
5/6B+C
|
| Damage
|
Guard
|
Startup
|
Active
|
Recovery
|
Frame Adv
|
Starter Scaling
|
Combo Scaling
|
Element
|
| 600
|
Throw
|
7f
|
-
|
-
|
-
|
-
|
-
|
Throw
|
You can press and hold 5D to combo after her throw. The timing for the "clean hit" that lets you get a full confirm is to press 5D right around when Bisc grabs her hammer off the ground. After a clean hit you can 236D into a combo for massive damage.
|
|
4B+C
Back Throw
4B+C
|
| Damage
|
Guard
|
Startup
|
Active
|
Recovery
|
Frame Adv
|
Starter Scaling
|
Combo Scaling
|
Element
|
| 600
|
Throw
|
7f
|
-
|
-
|
-
|
-
|
-
|
Throw
|
Same properties as her forward throw but tosses the opponent the other direction. Note that if your opponent is in the corner, it's better to back throw them so that 236D will drop them back in the corner.
|
|
j.B+C
Air Throw
j.B+C
|
| Damage
|
Guard
|
Startup
|
Active
|
Recovery
|
Frame Adv
|
Starter Scaling
|
Combo Scaling
|
Element
|
| 2800
|
Throw
|
5f
|
-
|
-
|
-
|
-
|
-
|
Throw
|
A quick option to scoop someone looking for a j.B or j.D. Can be cancelled into Enchant Boost for a full combo.
|
|
Special Moves
236A/B/C
Rapid Hunt
236A/B/C
|
| Version
|
Damage
|
Guard
|
Startup
|
Active
|
Recovery
|
Frame Adv
|
Starter Scaling
|
Combo Scaling
|
Element
|
| A
|
2600
|
-
|
15f
|
-
|
-
|
-3
|
-
|
-
|
-
|
| B
|
2740
|
-
|
16f
|
-
|
-
|
-1
|
-
|
-
|
-
|
There's a gap between the hits.
|
| C
|
2880
|
-
|
17f
|
-
|
-
|
-6
|
-
|
-
|
-
|
If you hold C, you'll only do one hit and be airborne to continue your pressure with jumping normals.
|
|
623A/B/C
Hammer Tornado
623A/B/C
|
| Version
|
Damage
|
Guard
|
Startup
|
Active
|
Recovery
|
Frame Adv
|
Starter Scaling
|
Combo Scaling
|
Element
|
| A
|
2400
|
-
|
9f
|
-
|
-
|
-21
|
-
|
-
|
-
|
| B
|
2200x2 (3410 Total)
|
-
|
10f
|
-
|
-
|
-14
|
-
|
-
|
-
|
| C
|
2000x3 (3980 Total)
|
-
|
10f
|
-
|
-
|
-16
|
-
|
-
|
-
|
All 3 versions have lower body invulnerability.
|
|
j.236A/B/C
Hungry Time
j.236A/B/C j.236A j.236A j.236B j.236B j.236C j.236C
|
| Version
|
Damage
|
Guard
|
Startup
|
Active
|
Recovery
|
Frame Adv
|
Starter Scaling
|
Combo Scaling
|
Element
|
| A
|
2696
|
-
|
17f
|
-
|
-
|
-
|
-
|
-
|
-
|
| B
|
2976
|
-
|
18f
|
-
|
-
|
-
|
-
|
-
|
-
|
| C
|
3256
|
-
|
20f
|
-
|
-
|
-
|
-
|
-
|
-
|
Grab that whiffs vs crouching, mostly combo fodder or for messing with your air momentum to hard bait an anti-air. Hits nearly full screen. Side switches upon landing.
|
|
236D
Chain Bomber
236D
|
| Damage
|
Guard
|
Startup
|
Active
|
Recovery
|
Frame Adv
|
Starter Scaling
|
Combo Scaling
|
Element
|
| 3600
|
-
|
10f
|
-
|
-
|
-
|
-
|
-
|
Fire
|
Air unblockable. Side switches on hit.
|
|
Million Skill
236XX
Strong Hammer
236XX
|
| Damage
|
Guard
|
Startup
|
Active
|
Recovery
|
Frame Adv
|
Starter Scaling
|
Combo Scaling
|
Element
|
| 6400 (8800)
|
-
|
-
|
-
|
-
|
-29
|
-
|
-
|
-
|
It has two attack types:
A)At point zero distance, she sends the opponent higher up.
B)At attack distance (where the edge of 5B/5C/2B/2C is), she smacks the opponent to the wall, like with the charged 5D, but it forces the opponent to wallslam on both corners.
|
|
623XX
Hammer Cyclone
623XX
|
| Damage
|
Guard
|
Startup
|
Active
|
Recovery
|
Frame Adv
|
Starter Scaling
|
Combo Scaling
|
Element
|
| 6060
|
-
|
-
|
-
|
-
|
-21
|
-
|
-
|
-
|
You can use left and right to steer during this super, either to back off and make it harder to punish or to make sure all the hits connect. You can link the last hit of this super into her Million Excalibur for massive damage.
|
|
Million Excalibur
Double Hammer Destruction
214XX
|
| Damage
|
Guard
|
Startup
|
Active
|
Recovery
|
Frame Adv
|
Starter Scaling
|
Combo Scaling
|
Element
|
| 10000
|
-
|
-
|
-
|
-
|
-25
|
-
|
-
|
-
|
Big damage and a long cutscene. The startup hitbox is pretty small, and it's not terribly quick, so it's not reliable as an all-in reversal.
|
|
Combos
Solo Combos
5AA > j.D > 5A > jc > j.B > jc > j.B > j.C > j.236C (5446)
- Bisclavret's most basic solo bnb. The j.236C can be cancelled into super for more damage.
- Use j.236A instead at higher hitstun decay. It's faster but deals slightly less damage.
2AA > 2B > 6C > 236D (4110)
- A quick side swap with a good knockdown.
- When backed against the wall 236D can be followed up with
5A > 5B > 5C > 66
- the
2A > 2B > 6C sequence can also route into 5D > assist > etc or even just jc into a basic air combo.
CH 5C > 5[D] > 5A > 5C > 66 (6670)
- Confirm into charged 5D for big damage. Can route into 236D or j.A after 5[D].
5A > 2B > 236C > 5A > 5C > 236XX (7732)
- A slightly more optimized way to route into a high air hit 5C via 236C. At a certain height, 5C will combo into a sweetspot 236XX.
- In the corner, sweet spot 236XX can be followed up with 5A > 236D to recorner the opponent and get oki. At certain distances from the wall, 236XX will not side switch
Support Knight Combos
5AA > j.B > assist > etc
- Finding an assist to use after 5AA > j.B both on block and hit is an important part of Bisclavert's assist loadout.
- Ex assists: Enide
66 > 5A > 5C > 66, Clone Elle, Foible Elle, Tor, Magic Guild
Throw > Sweet spot 5[D] > Tor > 9 > dl j.Enide > 66 j.D > land 5A > 5C > 66 (6550)
- Corners the opponent with good oki from midscreen if thrown towards the closest wall. A cheaper version exists with Evaine instead of Tor but it requires some precise delays.
- Throw 5D(charge) EB jD assist followups
- 5A 5B 236xx EB jD assist followups
Videos
Colors
Note: Colors 20 and 21 were pre-order exclusives for JP PSN and Amazon respectively. Unfortunately, they aren't selectable on Steam without the use of Cheat Engine.
External Links
| General
|
|
|
|
| Characters
|
|
|
|
| Fire
|
|
| Ice
|
|
| Wind
|
|
| No Element
|
|


