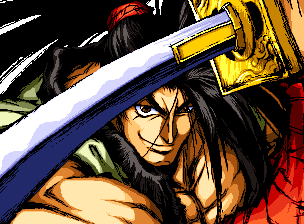
 覇王丸, Haohmaru
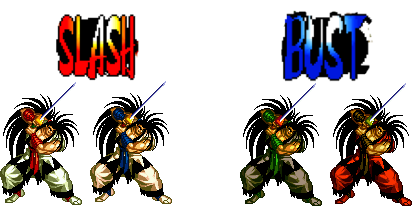 Colors
Introduction
Thanks to his training under Nicotine Kafuin, Haohmaru is a bona fide b-ball prodigy with a keen eye for three pointers and a propensity for slam dunks. Neither of these things really lend themselves to sword duels, but he makes it work anyways.
Haohmaru, the face of the Samurai Shodown franchise, appears once again with all the classic Haohmaru buttons, Haohmaru damage and Haohmaru simplicity you know him for. With a solid projectile in Senpuu Retsuzan and a great DP in Kogetsuzan, he's strong and very familiar, making him great to learn the game with if you're just getting started.
Slash lets Haohmaru control space with his air specials, which he can do from a backdash in true SNK fashion. His toolkit opens up some fairly basic yet rewarding combos, with even the shortest backhit string ending in Zankousen for huge damage. He gets pretty far on honest SamSho gameplay, even in a game that tends to reward far sillier strategies. Slash’s struggles are due purely to his lack of high-damage grime, but his funky space control and burst damage on big openings give him just enough spice to hang with the rest of the crowd.
Bust loses the good longer range neutral tools from his other Technique, instead becoming SamSho 3’s most infamous gorilla, gaining numerous moves that handily outshine Slash in almost every way. He has a simple front-hitting infinite, a dominant neutral game laden with mixups that easily lead to his infinite, and an invincible launcher that also leads into said infinite, because of course it does. If you want to not think and play the best character in the game, Bust is the way to go.
| Strengths |
Weaknesses
|
- Overall very easy to pick up and be effective with
- Slash has some of the best space control in the game
- Bust's best tools are also safe
- Bust only needs one hit to win
|
- Generally quite linear and simplistic
- Slash's only scary damage is off of back hits
- Bust requires knowing how to convert everything into death combos
- Bust won't make you any friends if you play him
|
Stats
| Damage taken
|
Rage rate
|
Rage duration
|
Throw startup
|
Deflect advantage
|
Deflect disadvantage modifier
|
| 105%
|
98.05%
|
4 sec
|
14f
|
+23
|
±0
|
Normal Moves
Far Slashes
5A
- (Properties) - Air unblockable, deflectable
- (Description) - A fairly standard poke with nice range. Doesn't hit very high up, though, and doesn't lead to much on hit, either.
|
5B
- (Properties) - Air unblockable, deflectable, cancelable
- (Description) - More or less Haohmaru's best button. A sword stab with great speed for its range. A strong tool for space control and zoning -- Bust gets the added benefit of comboing afterwards if they're not too far out.
|
5C
- (Properties) - Air unblockable, deflectable
- (Description) - The Big Haohmaru Slash. Actually pretty quick to start up and does the damage you'd expect from a heavy, but loooooooooooong recovery on hit/whiff. Doesn't quite have the range that it has in other games, and the non-existence of recoil canceling hurts this for zoning, but 5B suits those purposes better anyway. Nice for bullying opponents or finishing some combos if you can squeeze it in, though. It is a SamSho heavy slash.
|
2A
- (Properties) - Air unblockable, deflectable
- (Description) - Kind of like 5A but lower to the ground. Not bad, but not great, either.
|
2B
- (Properties) - Air unblockable, deflectable, cancelable
- (Description) - Basically 2A but slightly slower and with a special cancel. Not awful for poking with by any means, as it basically sacrifices 5B's range for slightly faster startup.
|
2C
- (Properties) - Air unblockable, deflectable
- (Description) - Big upward swing. Would be alright for anti-air if it weren't so slow. Bust can follow up using Hien.
|
Near Slashes
n.5A
- (Properties) - Air unblockable
- (Description) - A quick jab with the hilt of the sword. Quick, not deflectable and fairly safe.
|
n.5B
- (Properties) - Air unblockable, deflectable cancelable
- (Description) - Kind of looks like a mini-5C. Very useful in combos, especially for Bust as a restand off of Gou Ha. Just be wary of the point blank blind spot.
|
n.5C
- (Properties) - Air unblockable, deflectable
- (Description) - Big downward sword slash. A simple and effective punish tool, but not much else. Bust gets to turn this into Gatotsu for a huge damage combo starter.
|
n.2A
- (Properties) - Air unblockable
- (Description) - Basically a crouching n.5A. For whatever reason this has no pushback on block when the opponent is cornered. Feel free to abuse this on unsuspecting opponents too scared to mash out.
|
n.2B
- (Properties) - Air unblockable
- (Description) - Much like the far version, it's n.2A but a bit stronger, complete with lack of corner pushback on block. No cancels here, but the huge hitstun on back hit makes this a huge part of Haohmaru's combos. It's also active for quite a while so you can meaty with it. A late enough meaty can actually leave you plus enough to combo afterwards. Slash doesn't get much thanks to pushback, but Bust can link a Senpuuha and start the infinite off of it.
|
n.2C
- (Properties) - Air unblockable, deflectable
- (Description) - Exactly the same as 2C.
|
Overheads
5BC
- (Properties) - Hits high.
- (Description) - Pretty good as far as hopping overheads go. Slow to start up, but nice range and a really high hop that goes right over everything. Punishable on stand hit, but slightly plus on crouch hit.
|
u.5BC
- (Properties) - Hits high.
- (Description) - Similar to the armed version. Faster to start up, about even on crouch hit. Suuuuuuper punishable on stand hit.
|
Kicks
5D
- (Properties) - Air unblockable, cancelable
- (Description) - A little roundhouse kick. Actually has two hitboxes -- the first is quite high up, making it very useful for anti-air. The second hitbox can see some use in combos, but it's not very common.
|
6D
- (Properties) - Hits low. Air unblockable. Cancellable.
- (Description) - A low toe kick. Decent range, and the cancel window allows some neat combo possibility for both Techniques (Kogetsuzan, WFT, etc). You might even restand with this off of Gou Ha if you time it right.
|
2D
- (Properties) - Hits low. Air unblockable.
- (Description) - This move is really good. It's plus on block, and quite easily combos into itself and 623S. Basically the button you want to be pushing at close range.
|
3D
- (Properties) - Hits low. Air unblockable. Knocks down.
- (Description) - Sliding low kick. Knocks down on hit. Can be useful for catching people off guard at range.
|
Jumping Normals
j.A
- (Properties) - Air blockable
- (Description) - Quick horizontal slice in the air. Decent range, alright for air-to-air if you expect the opponent to push a button.
|
j.B
- (Properties) - Air blockable, deflectable (low height)
- (Description) - Much the same as j.A, but slightly stronger. Can be deflected if performed low enough to the ground.
|
j.C
- (Properties) - Air blockable
- (Description) - Big downward slash. Is terrible at hitting people at the same height as you in the air, but pretty nice for jumping in with.
|
j.D
- (Properties) - Air blockable
- (Description) - Quick jumping kick with a nice downward angle. Can cross up and thus lead to a back hit combo.
|
Dashing Normals
66A
- (Properties) - Air unblockable
- (Description) - A dashing punch with nice range. Safer than his other running normals on block and can be spaced for further safety. As with other similar 66A attacks, it has about a year of hitstun on back hit, making it an excellent cross-under anti-air.
|
66B
- (Properties) - Air unblockable, deflectable, cancelable
- (Description) - Dashing uppercut slash with deceptively huge horizontal reach. Nice angle for anti-airing, and naturally works as a cross-under. Slash's followups are limited to point blank Kogetsuzan or WFT, but this is the button that helps Bust keep his infinite going.
|
66C
- (Properties) - Unblockable, deflectable
- (Description) - Bigger and slower upward slash. Haohmaru doesn't really get a whole lot of use out of his unblockable, but it's nice to have.
|
66D
- (Properties) - Hits low, air unblockable
- (Description) - Running version of 3D. Much like 3D, good for catching people off guard in the neutral. Generally quite punishable if blocked.
|
Unarmed Normals
u.5S
- (Properties) - Air unblockable
- (Description) - Basically like 66A but standing still. Okay range, pretty good on hit, slightly unsafe on block.
|
u.2S
- (Properties) -
- (Description) - Same deal as u.5S but crouching.
|
uj.S
- (Properties) -
- (Description) - It's literally just u.2S but in the air. Not bad for an air-to-air, but those aren't super safe in this game so pick your spots.
|
u.66S
- (Properties) -
- (Description) - Running u.5S. So, uh, 66A?
|
Command Moves
「Gatotsu」- n.5C~C (Bust Only)
- (Properties) - Air unblockable, deflectable, cancelable
- (Description) - Target combo; Haohmaru follows up n.5C with 5B. Second hit only comes out if the first hit connects. Second hit can be cancelled into special moves, making this move devastating if you have a strong punish opportunity.
|
「Hien」 - 2C~C (Bust Only)
- (Properties) - Air unblockable, deflectable
- (Description) - Another target combo; Haohmaru follows up 2C with 5C. Much like Gatotsu, the second hit only comes out if the first connects. This hits like a freight train -- it'll most likely kill if you use it after a stun.
- A funny and altogether probably useless thing about this move is it has a cancel window, but only before the second hit connects. With a bit of fancy buffering, this gives Bust Haohmaru a bootleg 2C cancel. You have Gatotsu, so this is purely a swag strat.
|
Special Moves
Universal
- 「Senpuu Retsuzan」 - 236S
- (Properties) - Air blockable. Knockdown.
- (Description) - Haohmaru's classic tornado projectile. Slow to start up, but covers a good amount of space, has a nice long knockdown animation on hit, and is relatively safe. Neither technique really uses this too much -- Slash has much better zoning tools while Bust would much rather unga bunga his way into close range -- but you can't really go amiss if you're looking for something to do at further ranges.
- Bust Only: In exchange for doing less damage up front, Senpuu Retsuzan causes a juggle state in Bust. This can let him get pretty much any followup he wants, usually between j.C reset, Kogetsuzan, restand, or WFT.
|
- 「Kogetsuzan」 - 623S (also from dash)
- (Properties) - Knockdown. Air unblockable. Deflectable.
- (Description) - It's a Dragon Punch, alright. Mostly used in combos, but the light and medium versions both come with a good amount of invincibility (light moreso) for use as an anti-air or a reversal. The only problem is some thinner characters can make it miss when used at point blank range. As is SamSho 3.
- The dashing version has great invincibility all around and a ton of forward movement, making it useful as a situational whiff punisher or preemptive anti-air from further ranges. You might also want to swag out and use it as a cross-under anti-air.
|
Slash
- 「Resshinzan」 - 421S
- (Properties) - Hits high. Air unblockable. Knockdown.
- (Description) - Haohmaru flips forward, coming down with his sword, slamming it into the ground. This hits overhead, but its slow speed prevents it from really being used as a mixup tool, and Slash Haohmaru really doesn't want to be in the close range without a specific goal in mind, anyway. Normally knocks down on hit, but when it hits during later frames of the animation (i.e. during the slam, rather than midair), it will deal no damage, but instead cause the opponent to stumble backwards, giving you a chance to hit them for free. This is accomplished easiest when spaced far out, and is key in his back hit combos.
|
- 「Hishou Senpuu Retsuzan」 - j.236S
- (Properties) - Air blockable. Knockdown.
- (Description) - Haohmaru sends out a Senpuu Retsuzan but from the air. Button used determines the angle, with heavier versions going more horizontally -- can only be done from the peak of a jump or a backdash. Despite chicken blocking largely beating this, it's basically the crux of your entire neutral game in Slash -- cancelling a backdash into the C version of this move gives you one of the most irritating zoning tools in the game. Using this when backdashing or jumping to keep people out and generally frustrate them is one of the best options you can take in most situations. Even if you never fully connect with it, you're forcing the opponent through a jungle gym of projectiles, and any slip-up from them will give you all the time in the world to reposition. Abuse liberally.
|
- 「Hishou Resshinzan」 - j.214C
- (Properties) - Hits high. Air unblockable.
- (Description) - Essentially like the normal version of Resshinzan but performed from the air. Unlike Resshinzan, its hitbox only comes out when Haohmaru slams into the ground. On hit it causes the opponent to stumble like a late-hitting ground Resshinzan, allowing a followup. But the fact that it has to be performed from the peak of a jump (or a backdash) relegates it only to niche combos or massive punishes. Maybe you can use this to cover your backdashes if for whatever reason you don't want to throw tornadoes at them.
|
- 「Zankousen」 - 63214C
- (Properties) - Knockdown. Air unblockable.
- (Description) - The Stupid Slash. Relatively quick startup, big hitbox, HUGE recovery. While you're certainly not going to be using this much in the neutral (unless you have an insane read), this is your back hit combo ender of choice thanks to its beefy damage and how easily you can combo into it on backturned opponents.
|
- WFT「Tenha Fujinzan」 - 623623AB
- (Properties) - Air unblockable. Knockdown.
- (Description) - Yeah, it's a double DP motion. I suppose it makes sense.
This WFT is, unfortunately, a bit hard to use, as it has short range, low damage (for a WFT anyway), and tends to let opponents fall out midway through if you're not as close to them as possible. That being said, it's very quick, has a decent invulnerability window, and generally quite useful to Slash Haohmaru if you can get it off -- since many of this game's characters have far more threatening combo games in more places compared to him, being able to knock the opponent's weapon out of their hands is a huge boon for him. It can also be in round-ending chip situations, but even that is a gamble. Them's the SamSho breaks.
|
Bust
- 「Senpuu Ha」 - 236D
- (Properties) - Hits high.
- (Description) - Haohmaru fights dirty, flinging some pocket sand into his opponent's eyes. While not a projectile (in spite of its appearance), it is a very quick attack with good range and a generous active window, making it very effective in footsies and punishes. It deals no damage, but causes the opponent to stumble backwards on hit, giving you an opportunity to follow up for free. This naturally makes it the core of his front hit infinite combo. By the way, did we mention that it's an overhead?
- A couple of things to look out for, though. This move can be punished if it's blocked from too close range, but the risk/reward is forever in your favor because landing it wins the round right there. Due to not being a projectile, the hitbox also immediately goes away if you are hit, so you don't want to try fishing for trades with it either. Stick to using this in situations that don't involve jumping opponents and you're fine.
|
- 「Gou Ha」 - 623D (can be used unarmed)
- (Properties) - Knockdown. Air unblockable.
- (Description) - The revered God Shoulder makes its first appearance here, honed from years of street rules b-ball. It's ostensibly Bust Haohmaru's primary combo tool, comboing from a good number of his pokes or even a Senpuu Ha thanks to its lightning fast startup and great forward movement. When spaced, it sets up a juggle state on hit for an easy Kogetsuzan juggle, WFT, or potentially a restand for even more combos. This all sounds fine and dandy, but it really shines as a combo part when you get a back hit, as it sets up an extremely easy restand loop.
|
- 「Nagi Yaiba」 - 2146C
- (Properties) - Knockdown. Air unblockable.
- (Description) - This is a strange counter and proximity move all in one. Haohmaru holds his hands out, gaining a generous amount of upper body invincibility. If the opponent is close enough (through sticking out a hurtbox or otherwise), he'll counter with a completely invincible Kogetsuzan. The recovery afterwards whether the attack comes out or not is deceptively short, so punishing on reaction can be difficult. This move's absurd amount of invincibility lets it blow through all sorts of otherwise seemingly airtight pressure and setups.
- This move, much like Gou Ha, also sets the opponent up for a juggle state, giving you an easy Kogetsuzan, WFT or restand follow-up. The restand is almost always preferred here, as it's incredibly consistent and leads to his infinite.
|
- WFT「Tenha Dankuu Retsuzan」 - 641236CD
- (Properties) - Air unblockable. Knockdown.
- (Description) - Haohmaru launches the opponent into the air, following them into the skies before coming down with a slam dunk that has broken more than a few hoops in the past. Incredibly fast (albeit not invincible), combos in all the same situations a DP would, and deals a lot of damage. If not for the fact that he had infinites out the wazoo, this would be a really important part of Bust Haohmaru's gameplan. That being said, if you have it and know it will kill, you may as well use it for style points. It's a very satisfying move to land.
|
Strategy
While Haohmaru is generally able to play a fairly patient neutral game focused on using his pokes and movement to find openings for damage, how he goes about doing so differs greatly between Slash and Bust.
Okizeme
After landing 623B (usually after a 2D hit confirm), you can make a read on whether the opponent will try to back roll. If they do, you can circle step as they get up, which will place you in front of them when they wake up. Any well-timed attack from here will be unblockable, because SamSho 3.
Slash
With so much of Slash's neutral game focusing on backdash j.236C, which covers a great angle and travels full screen, Slash Haohmaru can initially be seen as a projectile zoner. And while he certainly can get a lot of mileage out of this particular playstyle, his zoning isn't especially damaging, so the main thing he really wants to do with his zoning is frustrate people into coming into his space with unsafe approach options. From here, you only need to call out one badly placed button with a circle step or dash under 66A to get a powerful back hit combo that can end the round, or at least bring you closer to doing so.
His mixup and okizeme options are lacking, of course, but with a reasonably strong reversal, an abusable 2D and an extremely consistent way to reset to neutral with backdash j.236S, Haohmaru has great ways to play defense and help him get back to the neutral game where he can continue whittling away at his opponent's patience.
Bust
While Slash wants to carefully manage space and frustrate people into coming to him, Bust wants to get the hell in, and by lord is he gonna make it hurt when he does.
For what he lacks in overall neutral options, he more than makes up for with the ability to just end the opponent's life in one touch. In the neutral, your goal is to find a window to catch them with Senpuu Ha or 66B, which at most spacings gives you an easy infinite that just ends the round right there. Though of course it won't catch airborne opponents, but you've got Kogetsuzan and Nagi Yaiba to anti-air bad jumps with with.
Up close, Bust gets to pressure people with his frankly unfair mixups -- 2D is still a very abusable low that can combo into 236D if your timing is good (it probably isn't, though), and still functions as a hard-to-see mixup if your timing isn't so good. Bust Haohmaru really doesn't have to work too hard to get hits in, but he is arguably the best in the game at making those hits count. If the opponent absolutely refuses to block low against your onslaught of 2D, just keep using it. Either they block low or get deleted for avoiding the overhead.
As if all of that wasn't enough, you also have some very powerful defensive options in Bust. Almost any gap in the opponent's offense is can be exploited by either Senpuu Ha or a Nagi Yaiba. If the opponent has an option that cancels on block into a slow but otherwise safe attack, such as Shizumaru's 5C into Kirisamejin cancel, Senpuu Ha will easily catch them out of the followup. It's even fast and long-ranged enough to punish a large chunk of the cast's heavy slashes on block, which is an incredible boon to have in this game. Nagi Yaiba's strengths are pretty self-explanatory, with its invincibility window on a successful "catch" being long enough to almost completely ignore even a Bust Genjuro card bounce setup. As is a tried and true saying in SamSho 3, abuse this as you see fit.
Combos
Universal
- 2D confirm combo: 2D 2D 2D 623B
- vs crouching Basara: using 2D more than twice will cause the 623B to whiff
- Being able to link out of a fairly abusable low kick is nice for Haohmaru to have, and lets him score a knockdown if he doesn't find himself in one of the situations where he can combo 2D into itself enough times to get a stun. You can use 623C instead of 623B for more damage, but the final hit of 623C has a propensity to whiff.
- Corner stun combo: 2D(x8)
- You need to be very close for this to work, so it's almost exclusively possible after a forward throw in the corner. Unless you play Basara on the side, you're not likely to land this
Slash
- Forward throw combo: f.throw, 63214C
- 2f link. Go get 'em, tiger.
- Back hit stun TOD: n.2B 5B xx 421A, 5C [stun] [circle step] n.2B 5B xx 63214C
- This is mainly what you'll be doing after most of your circle steps. The 5C will require a microwalk, but due to the ample hitstun on spaced 421A, this is easy. Simple and effective.
- Alternate back hit BnB: n.2B 5B xx 63214C
- When you aren't at the proper spacing for 421A, just cut the combo short to still keep a lot of damage on the table.
- Air Resshinzan conversion: j.214C 66B xx 623C/623623AB
- Sadly the most you'll get from a good Resshinzan, but it's pretty reliable as long as you remember to run very close for the 66B. You could also just do a 5C or Zankousen instead if that seems daunting.
- Cross-under anti-air stun combo: 66A n.2B n.2B 5C
- This is your most reliable (and most devastating) combo from a cross-under anti-air. Each n.2B requires a microwalk, but the timing isn't too strict. This stuns, so killing the opponent after landing this is easy.
- Back hit corner loop: n.2B [5B xx 421A]xN
- Mostly used from back throws if you put your opponent into the corner. Make sure to walk up between each rep. This combo is pretty easy. Feel free to spice it up with a Zankousen if it'll get you the kill.
Midscreen Resshinzan loop
- This combo is your best option off of a backthrow, since the throw distance puts you perfectly at the optimal distance that some characters with wider hitboxes require to get the Resshinzan stumble. The only issue with this is that the starters are all character specific, requiring different distances of microwalks and starters. All of these are listed off of a backthrow, but the combo can be started off of any stumbling Resshinzan.
- Basara, Genjuro, Haohmaru, & Rimururu: Throw, 2B xx 421A, 2B xx 421A...
- Ukyo & Shizumaru: Throw, microwalk forward, 2B xx 421A, 2B xx 421A... (NOTE: Shizumaru's microwalk is incredibly small, to the point where you can barely see it. Either grind this hard, or just stick to the non 421S combo.)
- Galford & Hanzo: Throw, 5B xx 421A, 2B xx 421A...
- Kyoshiro & Nakoruru: Throw, microwalk forward 5B xx 421A, 2B xx 421A... (NOTE: On Nakoruru, this combo can be ignored. You can just loop 5B xx 421C on Nakoruru with no problem.)
- Gaira: Throw, walk forward, n.2B 5B xx 421A, 2B xx 421A...
- Amakusa: Throw, microwalk backwards, 5B xx 421A, 2B xx 421A...
Bust
- Front hit loop: ...236D [66B xx 236D]xN
- The starters for this are endless. n.5C~C, 5B, n.5B and 236A all work. Make sure to slightly delay the cancel from 66B to 236D so you don't accidentally get God Shoulder.
- Front hit Gou Ha juggle: ...66B xx 623D 623C
- Probably your best bet to finish off a front-hitting infinite for maximum cool factor (you might even substitute a WFT for the DP), but it's possible to be too close and have the Kogetsuzan whiff, or be too far and have the Gou Ha whiff. Spacing this right is obviously important.
- Alternate front hit loop: ...236D [623D n.5B xx 236D]xN
- This combo is more proof of concept with the n.5B restand after a max distance Gou Ha. It's not a consistent loop due to requiring particular midscreen spacing and the timing varying between characters (Nakoruru and Kyoshiro are particularly problematic, and Zankuro seems outright impossible to hit with this restand).
- Nagi Yaiba follow-up: 2146C n.5B xx 236D, [66B xx 236D]xN
- I mean, you can follow-up Nagi Yaiba with 623S or WFT, but why would you when the restand is so easy?
- Cross-under anti-air ToD: 66A n.2B [microwalk] n.2B 5C [stun] 2C~C
- Remember that whole thing about how Hien deals a billion damage? This sequence kills even high defense characters.
- Corner back throw stun combo: b.throw n.5C 641236CD
- Yeah this stuns for whatever reason (no, cancelling Gatotsu into WFT does not stun). You could do a more consistent combo option instead of this, but you could also end careers with it.
- Corner front throw stun combo: f.throw 2C~C xx 641236CD
- Another hilarious career ender. The actual way to get this to come out is a bit tricky to explain. Due to Hien's odd cancel window, the second hit won't actually connect and will instead empty cancel into WFT. Thus the input is done as 2C641236C~CD. In essence, press 2C, do the WFT motion, then press C before pressing CD. Done right, the WFT will come out.
- Back hit infinite: [n.2B 5B 623D]xN
- n.2B is an easy restand from 623D from here. If your opponent is in the corner, you can throw in another microwalk n.2B. You can start this combo from a cross under 66B xx 236D, but the spacing might be finicky.
- Unreactable mixup "combo": 2D 236D
- Timing the link from 2D to 236D, while possible, is quite difficult. Probably about as difficult as switching your block from low to high trying to deal with this combo that is also a really stupid 50/50. Further screw with their timing by varying how many 2D reps you do. Or possibly delay the 236D. Or do 6D xx 236D instead and get an easier combo at the cost of higher commitment. Worth keeping in your back pocket.
- Situational max Rage ToD: cross-up j.C 2C~C
- Y'know. Just in case. Only kills low defense characters.
External Links

