 千両狂死郎, Senryo Kyoshiro
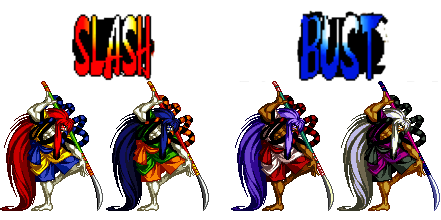 Colors
Introduction
One day, Kyoshiro had the bright idea of turning his kabuki theatre acting into a combat sport, so he got really swole. The frog is his workout buddy.
Kyoshiro is a good, honest man focused on good, honest space control. The problem with this is that he's so honest he has almost no mixups whatsoever. He does, thankfully, have great range on his buttons, several great specials and pokes, and he can control space very well. He is overall a solid mid tier character, and if you want to become a lone champion of footsies and aerial space control, read on.
Slash has the infamous Gama Jigoku, otherwise known as "The Frog", which beefs his combo damage and makes ground movement risky for the opponent. His DP is also one of the strongest anti-airs in the game, with quick startup, amazing range, and high speed. Kyoshiro can use this to essentially shut down ANY air movement options in the game and force them to wade through his projectiles. He plays the war of attrition in a game that otherwise favors offense and mixups, but at least he plays it pretty well for what he is.
Bust Kyoshiro, sadly, isn't as lucky as Slash and does not have one of the best anti-airs in the game or combo damage as afforded by The Frog. He instead gains Yamata no Orochi, a fast moving multi-hit fireball that will go through projectiles, cannot be reflected, and is plus on block. Yes, you read that right, plus on block. The rest of his specials are relatively the same as Slash, except retooled to control greater horizontal distance. This altered movelist is somewhat shaky in execution, but Kyoshiro’s never been one to let poor reviews stop the show.
| Strengths |
Weaknesses
|
- Strong space control and defensive tools
- Slash has an amazingly fast anti air and great positioning off of combos
- Bust has impeccable control of horizontal space and superior colors
|
- Extremely limited mixups and combos
- Slash has a tough time dealing damage when on the defensive
- Bust has a comparably weak anti air game and very low combo damage
|
Stats
| Damage taken
|
Rage rate
|
Rage duration
|
Throw startup
|
Deflect advantage
|
Deflect disadvantage modifier
|
| 105%
|
98.05%
|
3.5 sec
|
14f
|
+25
|
-8
|
Normal Moves
Far Slashes
5A
- (Properties) - Air unblockable. Deflectable.
- (Description) - A fast pole swipe. Good combination of range and speed, making it ideal to stop movement and work your way in.
|
5B
- (Properties) - Air unblockable. Deflectable.
- (Description) - A medium range stab. Slightly slower and slightly longer than 5A, making it more suited for counterpoking.
|
5C
- (Properties) - Air unblockable. Deflectable.
- (Description) - A standard long range heavy slash. Not very useful due to its comparably low damage and not having much more range than 5B or 2A. Even if it had better damage, you'd still have to contend with the blind spot if the opponent edges too close when you use it.
|
2A
- (Properties) - Air unblockable. Deflectable.
- (Description) - The God poke. It shares its animation and range with 2B, but recovers faster than even 5A. It also moves you slightly closer to the opponent on block, letting you approach while the opponent is cornered. Sadly it isn't a low, and has no cancel point, but don't let that stop you. Abuse, abuse, abuse.
|
2B
- (Properties) - Air unblockable. Deflectable
- (Description) - Crouching 5B. Essentially the same normal, only closer to the ground.
|
2C
- (Properties) - Cancellable (first hit). Air unblockable. Deflectable.
- (Description) - 5C, but better. It starts on a slower 2A, but continues into 5C without being plagued by its blindspot. The second hit can whiff at max range, so be sure to cancel for better damage and a knockdown. If you want to hit a heavy, hit this.
|
Near Slashes
n.5A
- (Properties) - Air unblockable.
- (Description) - A short smack. Nothing too remarkable.
|
n.5B
- (Properties) - Cancellable. Air unblockable. Deflectable.
- (Description) - Your main combo normal, letting you combo into any special move and WFT on back hit. It also comes with a very nice hitbox to swat opponents jumping around your head.
|
n.5C
- (Properties) - Air unblockable. Deflectable.
- (Description) - Useless normal. n.5B is faster and lets you combo for more damage than n.5C deals by itself.
|
n.2A
- (Properties) - Air unblockable.
- (Description) - Crouching n.5A but you're even on block instead of minus. Nothing to see here.
|
n.2B
- (Properties) - Air unblockable. Deflectable.
- (Description) - A useless button. Bad blindspot, bad damage, and non-cancellable. Avoid if you can.
|
n.2C
- (Properties) - Cancellable (first hit). Air unblockable. Deflectable.
- (Description) - Another useless and outclassed button. The first two hits have fast startup, but they don't combo into the last hit that does the most damage, completely shutting down its usefulness.
|
Overheads
5BC
- (Properties) - Hits high. Air unblockable.
- (Description) - A fairly good overhead compared to the rest of the cast even with its minus frames on standing hit/block. It has the same range as 2A or 5B, and carries Kyoshiro quite far. It has a blindspot up close, inhibiting its use as a mixup. Due to its forward movement and ability to hop over many lows, it can still be a good way to regain space during pressure.
|
u.5BC
- (Properties) - Hits high. Air unblockable.
- (Description) - Almost exactly the same as his armed 5BC, if not better. It sends him forward an incredibly large distance, and is safe on crouching hit.
|
Kicks
5D
- (Properties) - Air unblockable.
- (Description) - A standard kick. Hits twice, thats about it.
|
6D
- (Properties) - Hits low.
- (Description) - A standing low with a fairly quick startup animation. Important for your mixup game, as your only other low options are 2D, 3D, and Frog, so you need to mix them up accordingly.
|
2D
- (Properties) - Hits low.
- (Description) - A standard fast, low hitting 2D.
|
3D
- (Properties) - Hits low. Knockdown.
- (Description) - A decently fast sweep with alright range.
|
Jumping Normals
j.A
- (Properties) - Hits high.
- (Description) - Jumping version of n.5A.
|
j.B
- (Properties) - Hits high.
- (Description) - A great aerial normal. The angle it goes at makes it a go-to option for jump ins and controlling the space below you.
|
j.C
- (Properties) - Hits high.
- (Description) - Another strong air button. Great jump in, good damage. Can handily cross up.
|
j.D
- (Properties) - Hits high.
- (Description) - A straight forward kick. Your option for a quick, horizontal air to air.
|
Dashing Normals
66A
- (Properties) - Air unblockable. Deflectable.
- (Description) - A standard running attack that uses a faster version of n.5C's animation.
|
66B
- (Properties) - Air unblockable. Deflectable.
- (Description) - The same as 66A, except it hits twice.
|
66C
- (Properties) - Unblockable.
- (Description) - Kyoshiro's unblockable is fairly quick, and is important for his lackluster mixup game. It also looks like a fancier n.5C. Without a strong overhead, this is best used in place of one as a dashing mixup with dashing throw, run up n.5C, 66D, or 66C.
|
66D
- (Properties) - Hits low.
- (Description) - A running version of 3D.
|
Unarmed Normals
u.5S
- (Properties) - Air unblockable.
- (Description) - A very long range punch. Essentially 5B with your fists.
|
u.2S
- (Properties) - Air unblockable.
- (Description) - n.2A but you can do it anywhere on the screen.
|
uj.S
- (Properties) - Hits high.
- (Description) - j.A but it's all you have.
|
u.66S
- (Properties) - Air unblockable.
- (Description) - u.5S but you're running.
|
Command Moves
-「Chikemuri Kuruwa」- j.2A
- (Properties) - Knockdown.
- (Description) - A falling version of his Kaiten Kyokubu. Sadly, this doesn't hit overhead, which greatly hampers your mixup game. However, it can be great for punishing dashing normals, and you can use a reversal backdash j.2A to escape command grabs. It can also be done immediately after air blocking, making it an ideal reversal after chicken blocking. Must be done at the apex of your jump or later otherwise.
|
Special Moves
Universal
- 「Kyoshiro Enbu」 - 236236C
- (Properties) - Knockdown. Air unblockable. Funky.
- (Description) - The Boogie. Kyoshiro swings his flaming naginata twice, then stabs forward. While a fairly useless move for Slash, it's more important for Bust due to his kit lacking Frog -- it deals the same damage as Frog if all three hits connect, too. On front hit combos outside of the corner, the final hit will whiff. Save it for corner conversions or back hit strings.
|
- WFT「Aragotoshi Kyoshiro: Oni no Mai」 - 236236BC
- (Properties) - Hits low. Knockdown. Air blockable.
- (Description) - Kyoshiro gets a very unique WFT, to say the least. Kyoshiro sends out a fast, fullscreen projectile that will hit low and explodes on contact, leaving behind a lingering hitbox. Fairly strong by itself, but when in Desperation, it becomes a high reward zoning tool due to its relatively quick startup and large hitbox. Just be warned that it loses hard to jumps.
|
Slash
- 「Kaen Kyokubu」 - 236S (can be used unarmed)
- (Properties) - Air unblockable. Knockdown.
- (Description) - Kyoshiro leans forward and breathes a ball of fire in front of his face. Hilariously difficult to jump in on and will blow up pokes and fireballs alike. An amazing meaty due to being completely safe on block, and the heavy version chips like a champ. It can also be combo'd into if you really feel like not using frog for some particular reason. If they're in the corner, you have nearly no reason not to be doing this whenever you get a knockdown.
|
- 「Kaiten Kyokubu: Ten」 - 623S
- (Properties) - Air unblockable. Knockdown.
- (Description) - Kyoshiro spins and leaps into the air. Despite having no invulnerability to speak of, this move is without a doubt one of the best anti airs in the game. It has fast startup and movement speed, long range, and a great hitbox. Use this anytime someone gets in the air near you to force them back on the ground where they have to wade through your projectiles and pokes.
|
- 「Ootsunami」 - 214S (can be used unarmed)
- (Properties) - Hits low.
- (Description) - A fast, low hitting projectile. Outside of 5A, 2A, and 5B, this is your main ground control tool due to its speed and lack of commitment. Great to toss after hitting with Frog to chase rolls. Heavier versions increase projectile speed.
|
- 「Gama Jigoku」 - 641236AC
- (Properties) - Hits low. Knockdown.
- (Description) - Kyoshiro's most famous move, The Frog. Active as soon as the frog fully rises from the ground, it's a low hitgrab with huge range. Kyoshiro himself also hops up during the animation, allowing him to avoid low-hitting attacks and projectiles while retaliating. Despite the huge audio cue, it's deceptively tough to punish on whiff/block thanks to its quick recovery. A key part of your combo game due to its insane damage output, and it controls the horizontal space directly in front of you amazingly when paired with Ootsunami.
|
- 「Chobi Jishi」 - 63214S
- (Properties) - Knockdown. Air unblockable.
- (Description) - Kyoshiro pole vaults forward with his naginata, delivering a flaming kick. Heavier versions last longer and chip more, but start and recover slower. A fairly useless special move, as Kyoshiro has better chip damage, anti air, and whiff punish options. The only real use for it is that it can cross up several characters while crouching in the corner, which can be a helpful gimmick at times. Mainly exists to come out when you wanted Ootsunami.
|
Bust
- 「Kaen Kyokubu: Utage」 - 236S (can be used unarmed)
- (Properties) - Air unblockable. Knockdown.
- (Description) - Bust's version of Kaen Kyokubu functions mainly the same as in Slash, however instead of being a ball of fire its a long ranged spray of fire. It can control space well due to its quick startup, knockdown, and still being safe on block. It has a very bad blindspot in front of Kyoshiro, however, making it very dangerous up close. You naturally do not want to use this as a corner meaty, because they can just getup roll towards you and likely blow you up for it.
|
- 「Kaiten Kyokubu: Chi」 - 623S
- (Properties) - Air unblockable. Knockdown. Deflectable.
- (Description) - This version of Kaiten Kyokubu is no longer one of the best anti airs in the game. What it instead is a sliding, grounded version of the move that is by far his fastest long range punish. Heavier versions deal extra damage and travel farther before stopping. Its very fast recovery on whiff also lets it be used as a risky pseudo-command dash that beats a lot of grounded pokes clean. It still retains the strong hitbox of Slash equivalent's and can still function as an anti air, but not to the same effect. He bounces back on block, so punishes need to be long-ranged to match.
|
- 「Yamata no Orochi」 - 214214C (can be used unarmed)
- (Properties) - Air blockable. Knockdown.
- (Description) - Orochi is a fast, multi hitting projectile that carries the unique properties of going completely through other projectiles, and it cannot be reflected by any reflector. Along with this, due to its very good startup and recovery, if the opponent blocks it at close range you gain fairly good frame advantage. This characteristic lets it open up your game quite nicely. Naturally your meaty of choice in Bust.
|
- 「Chobi Jishi: Ranshin」 - 63214S
- (Properties) - Air unblockable. Knockdown.
- (Description) - The only difference between Slash and Bust's Chobi Jishi is that Bust's will slide him forward quickly, and will bounce back on block instead of hitting multiple times. Can be used to catch backdashes and punish from medium to long range easily. Due to its forward movement, it can actually cross up a few more characters than Slash's version. Really irritating to deal with if you don't see it coming.
|
Strategy
Universal
Kyoshiro's gameplan is rather unique in that instead of playing a crazy strong offense, he has to use his strong pokes and space control tools to play a more defensive game. Make use of 214S/214214C, 2A, 5B, 2C, j.B, and 623S to stifle the opponents movement and keep them from mounting an offense against you. Kyoshiro has no invincible reversal and not the best close normals. A loss of momentum will kill you, especially versus characters like Hanzo, Zankuro and Genjuro.
j.B and j.C are powerful jumping tools if you find you have no choice but to be in the air, and j.2A is a great counterattack after air blocking a jumpin. You really shouldn't be jumping, though. Keep your feet planted on the ground.
Kyoshiro's Stage Interactions
Kyoshiro’s stage has the largest chicken drop rate in the game. Chicken is thrown with a probability of 3/4 at time count 90, 5/8 at 80, and 1/2 at 70. One might think this would be helpful, and it is. It’s just not helpful for you as the Kyoshiro player. Because of Kyoshiro’s relatively poor mobility and how hard it is to keep the opponent from running circles around him if he can’t immediately threaten their space, they can often just grab the chicken before you have a chance to. Against stronger characters where one bad hit can snowball into you losing the round and you need to scrape together all the damage you can get, having them constantly heal while still shutting you down can make some of his bad matchups feel like horrible ones.
Slash
You already know Kyoshiro's ground control tools at this point, so be sure to familiarize yourself with his powerful anti-airs afforded by Slash Technique. 623S and 236S both have big long-lasting hitboxes that will happily blow up any jump that come near them.
While Kyoshiro has little in the way of combos, Slash's main BnB really hurts courtesy of The Frog. It confirms wonderfully off of your combo buttons, controls great horizontal space, and starts up fast. On hit it shoots the opponent fullscreen and allows you to easily force the opponent into the corner. Not only does this further shut down your opponents movement options allowing you to keep control of the match pace, but also lets you take full advantage of your 236S chip damage. This is completely safe extra damage that you should be abusing whenever you can.
Crouching Chobi Jishi Corner Crossups
Chobi Jishi, thanks to a whole mess of funny mechanical interactions, will cross up numerous crouchers if they're in the corner. The characters affected by this are as follows:
- Genjuro
- Galford
- Kyoshiro (63214A only)
- Rimururu
- Hanzo (left side of the stage only)
- Amakusa (63214A only)
Bust
Bust cannot take advantage of The Frog's damage or corner carry and plays an arguably much more fickle game as a result. He instead gains access to 623S and 63214S as very irritating tools to snipe the opponent's pokes or bad movement from surprising distances away. If you can keep your spacing consistent, you can abuse 623S to inch towards your opponent while stuffing their pokes. 63214S is functionally a more extreme version of his DP in this regard, catching backdashes from pretty much everywhere. Both options bounce backwards on block and demand a proactive ranged punish, which some characters may have trouble capitalizing on. Don't rely on it however. If you're up against someone who knows their punishes and is looking for them, you will die when these are blocked. Yamata no Orochi, on top of winning pretty much every fireball war by default, allows Kyoshiro to chase rolls and force his way in due to its priority and multiple hits.
Crouching Chobi Jishi: Ranshin Corner Crossups
Chobi Jishi: Ranshin is even funkier than Chobi Jishi, and crosses up a few more cornered crouchers as a result. Characters affected by this are as follows:
- Basara
- Genjuro
- Galford
- Kyoshiro (63214A only)
- Rimururu
- Nakoruru
- Hanzo (Left side of the stage only)
- Amakusa (63214A only)
Combos
Universal
- Back hit Desperation WFT TOD: n.5B xx 236236BC, n.5B xx 236236BC
- The universal version. Both techniques have their own spin on it, but this is a simple autopilot option if you're in Desperation.
Slash
- Back hit WFT TOD: n.5B xx 236236BC, j.C n.5B 641236AC
- To make sure the opponent can't mash out of the stun, make sure you run behind them as they're being knocked down. Will also work from the front via deep jump j.C, n.5B 641236AC, but is a bit tighter.
- Front hit BNB: n.5B/2C xx 641236AC
- This is your combo. Front hit, back hit, corner, midscreen. If you're too far for n.5B, use 2C. For damage, this is all you do without WFT.
- Situational DP combo: n.5B xx 623B
- Best used when your back is in the corner, as 623B resets to neutral and brings you both midscreen.
Bust
- Back hit WFT TOD: n.5B xx 236236BC, j.C n.5B 236236C
- To make sure the opponent can't mash out of the stun, make sure you run behind them as they're being knocked down. Will also work from the front via deep jump j.C, n.5B 236236C, but is a bit tighter.
- Front hit BNB: n.5B xx 623C
- This is your main combo. Doesn't hurt a lot, but Kyoshiro makes do.
- Alternate front hit BnB: 2C xx 236C
- If they're at range to get hit by this, they probably can't roll into the blind spot and punish you for it. If they're not at max range, you can try to gamble on 623C comboing.
- Corner and back hit BNB: n.5B xx 236236C
- Situational, but it looks super cool and does a bit more damage than the 623C combo. Slash can also do this, but come on just use the Frog.
External Links

